Introduction
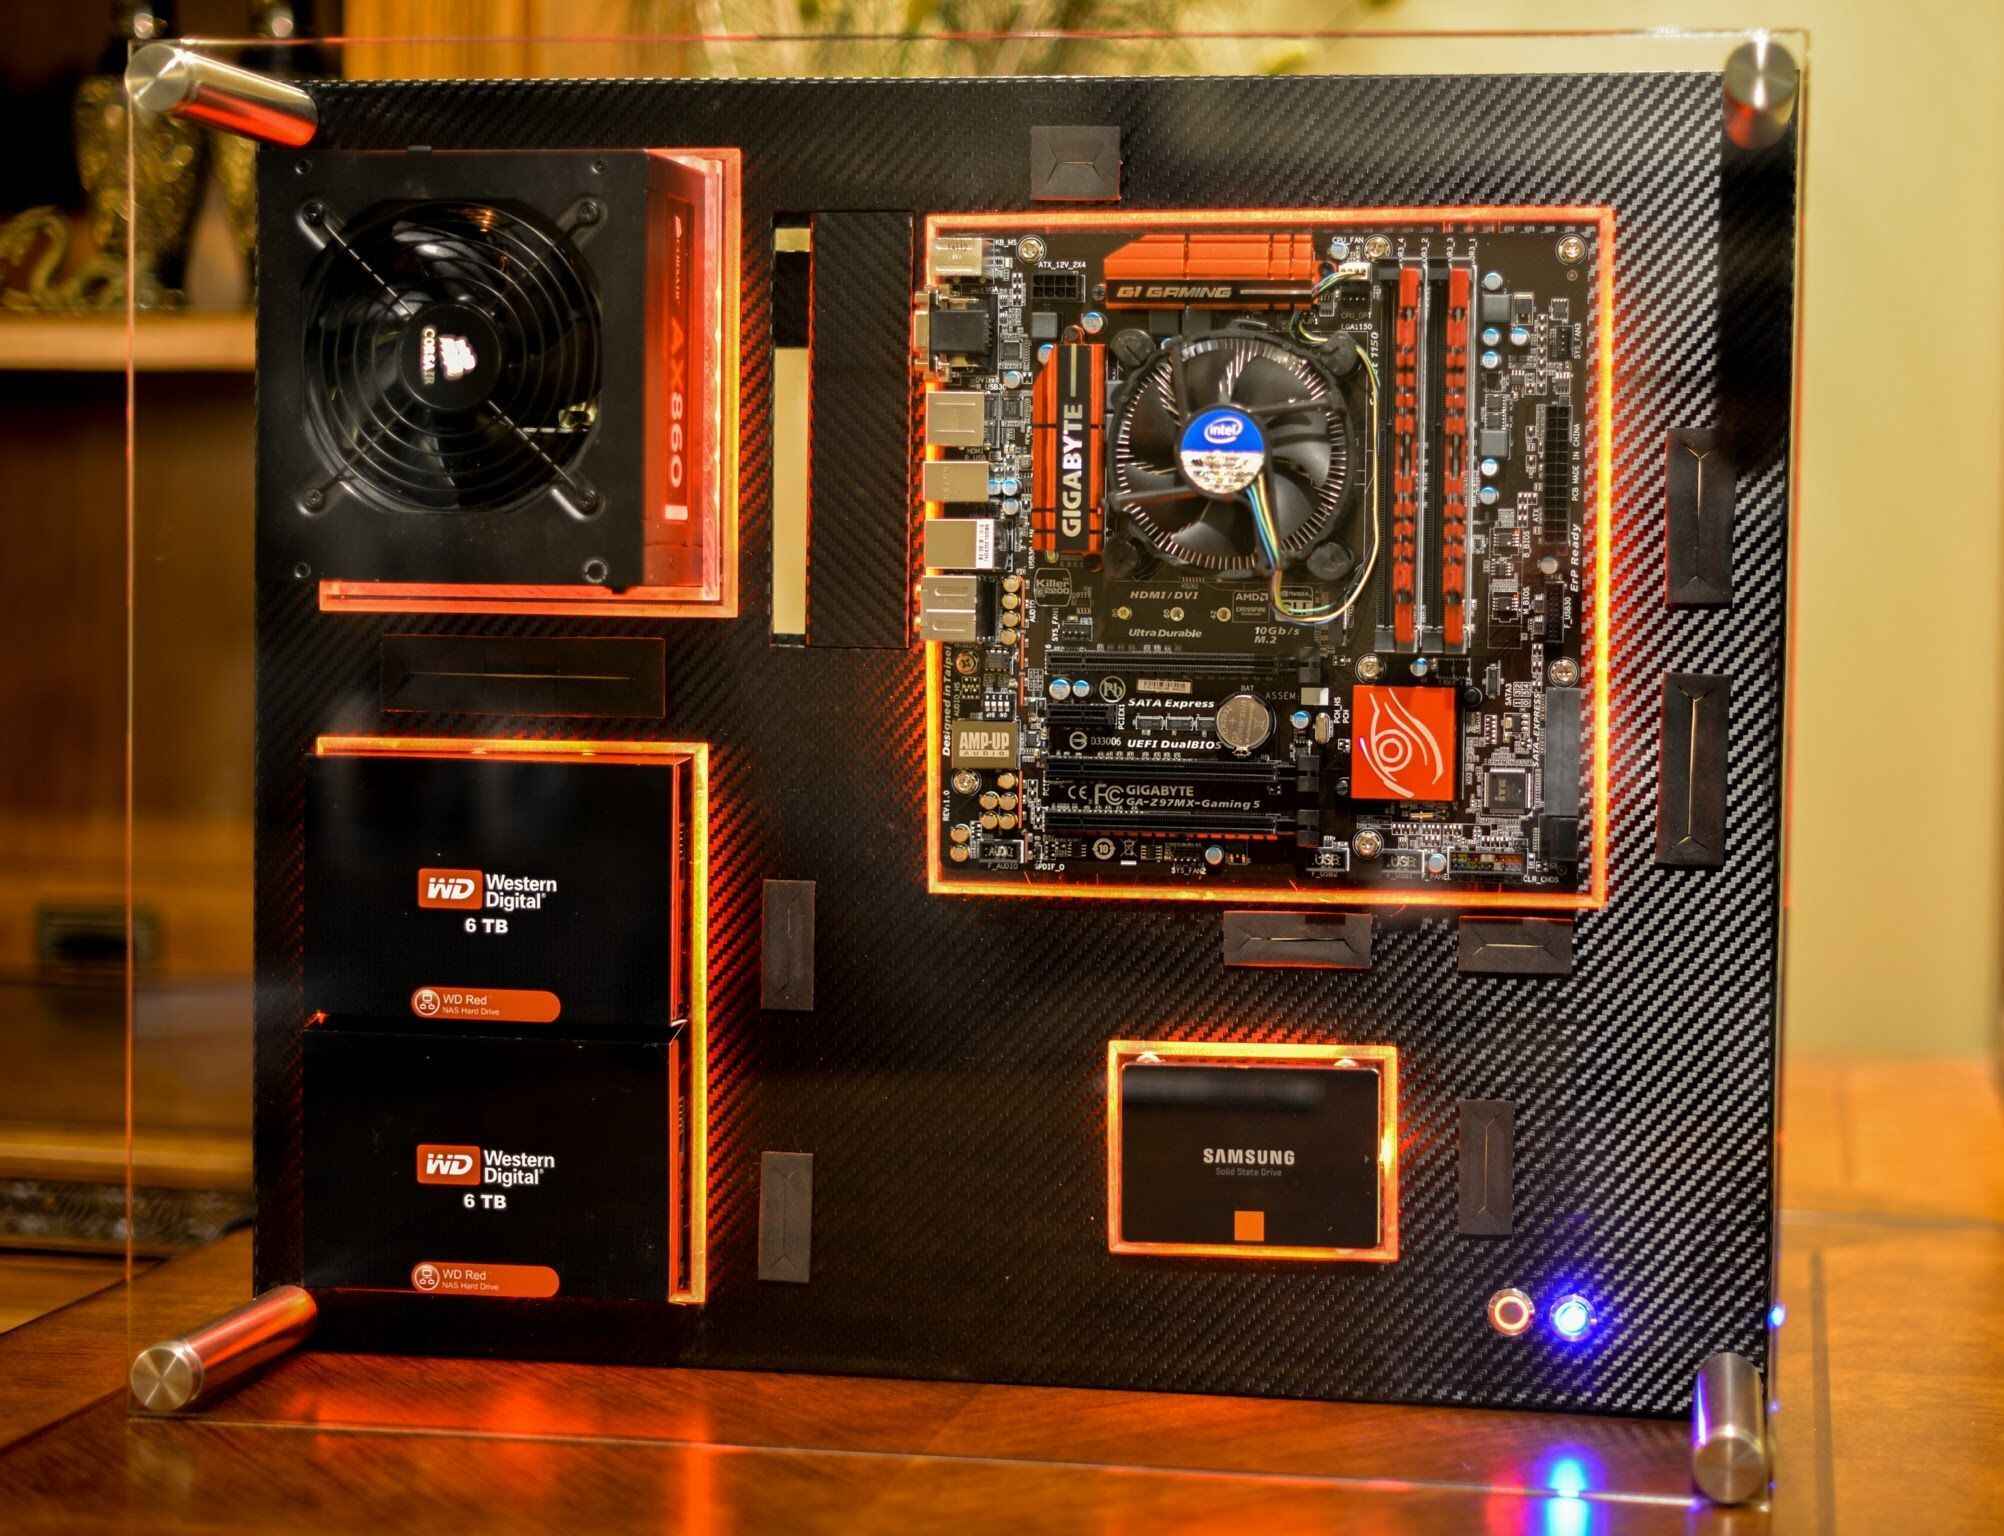
Have you ever considered taking your PC gaming experience to the next level by creating a custom wall-mounted PC case? Not only does it make for a unique and eye-catching display, but it also frees up desk space and provides better airflow for cooling your components.
Building a wall-mounted PC case may sound intimidating, but with the right planning and materials, it can be a fun and rewarding project. In this guide, we will take you through the step-by-step process of creating your own wall-mounted PC case.
Whether you are a seasoned PC builder or a beginner looking to expand your skills, this project will allow you to unleash your creativity and construct a functional and aesthetically pleasing piece of artwork.
Throughout this guide, we will provide detailed instructions and tips on selecting the right components, preparing the case, mounting the motherboard, installing the power supply, attaching the graphics card, connecting storage devices, installing cooling fans, handling wiring and cable management, securing the case to the wall, and testing and troubleshooting.
By the end of this guide, you will have all the knowledge and confidence to embark on your wall-mounted PC case journey. So, gather your tools, let your imagination run wild, and let’s get started on this exciting project!
Materials Needed
Before you start building your wall-mounted PC case, it’s important to gather all the necessary materials and tools. Here’s a list of what you’ll need:
- PC Components: You’ll need a motherboard, CPU, RAM, graphics card, storage devices (such as SSD or HDD), power supply, cooling fans, and any other components you want to include in your build. Make sure to choose components that are compatible with each other and suitable for your intended use.
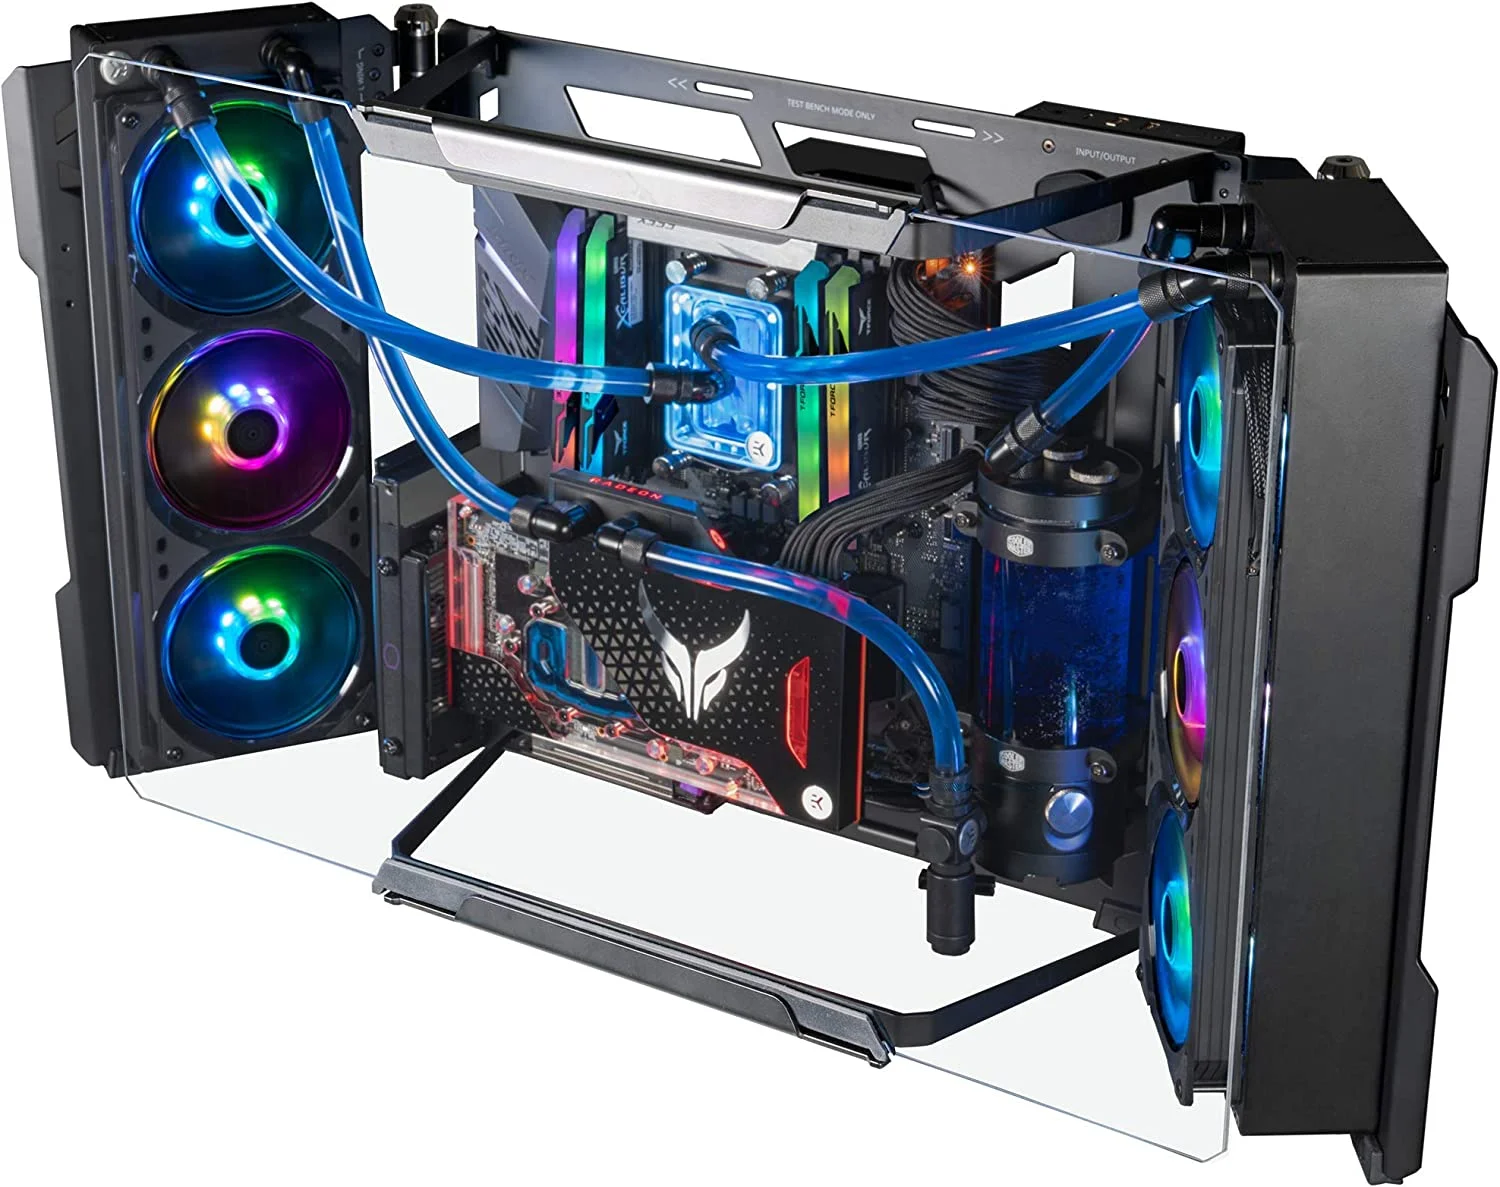
- PC Case: Look for a case that is designed for wall mounting. There are various options available, including open-air frames or cases with a glass panel. Consider the size, design, and airflow capabilities of the case.
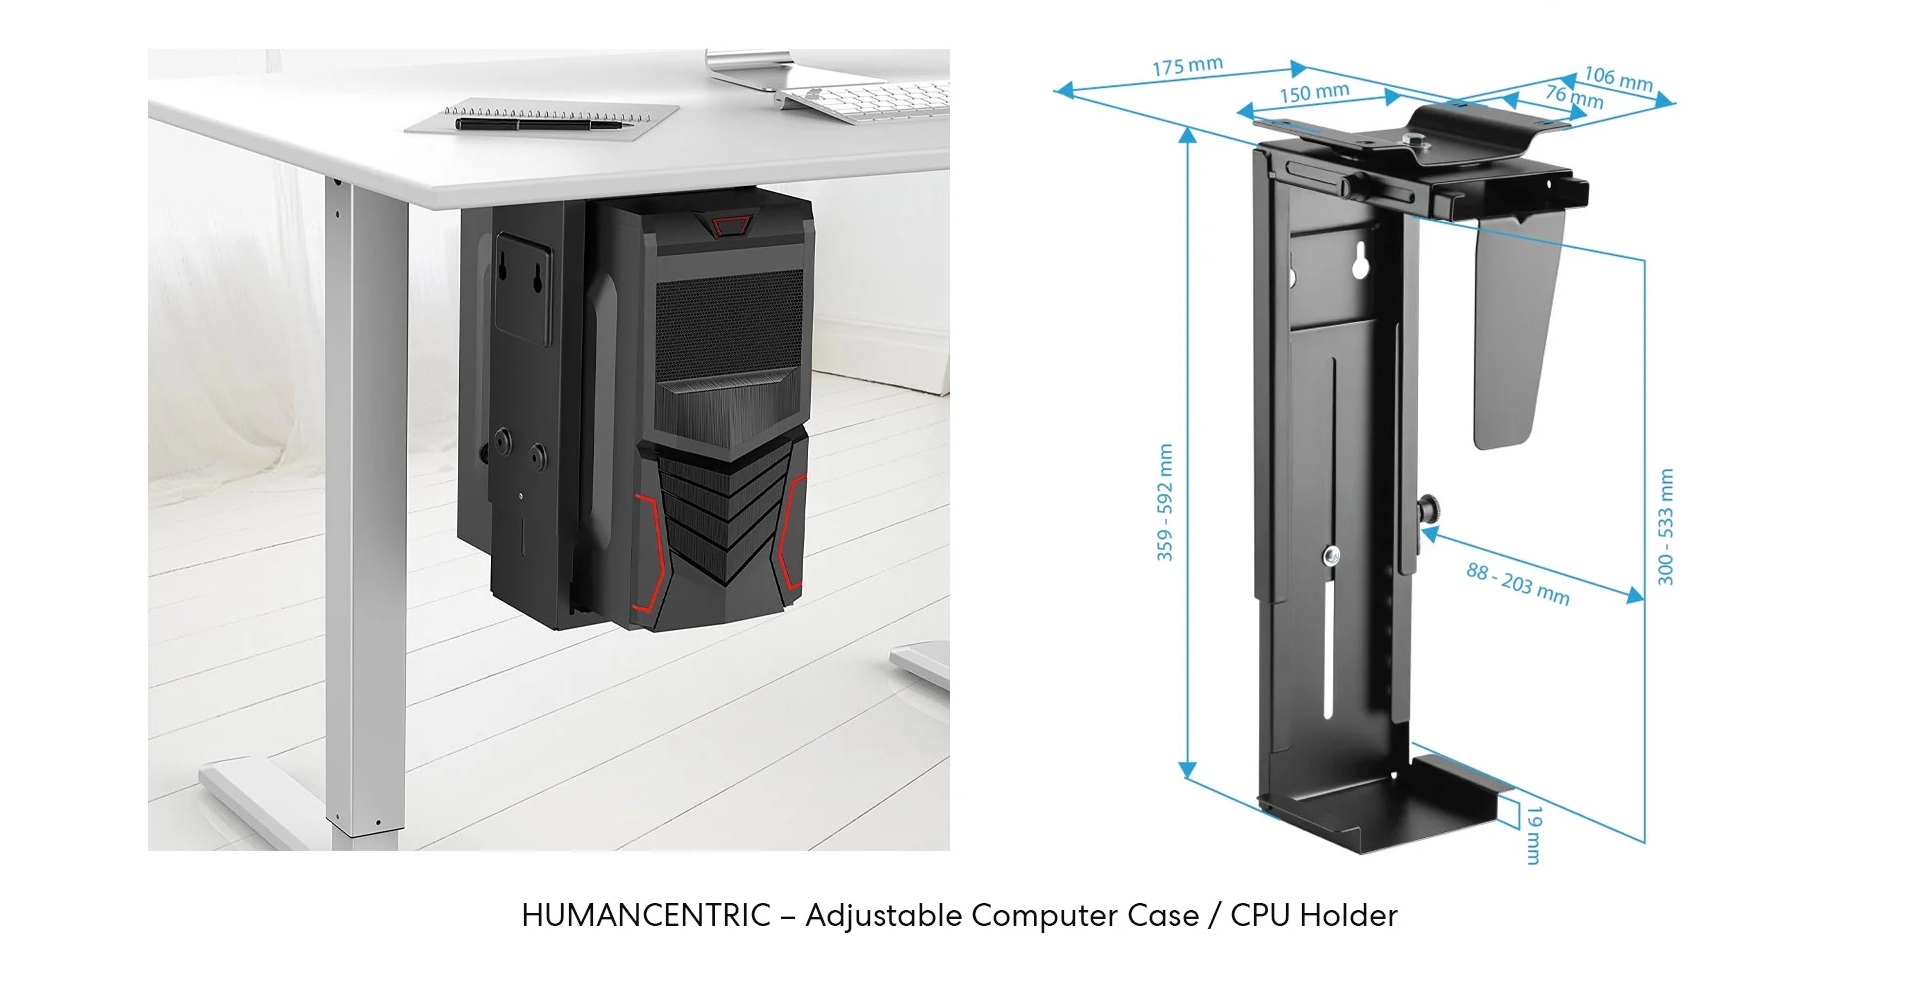
- Mounting Bracket/Wall Mount Kit: Depending on the case you choose, you may need a mounting bracket or a wall mount kit to securely attach the case to the wall. Make sure to select a sturdy and reliable option.
- Tools: You’ll need a set of screwdrivers, pliers, cable ties, and thermal paste for proper installation and cable management. Additionally, having a power drill and appropriate drill bits can be helpful for mounting the case on the wall.
- Accessories: Consider adding LED lighting strips or custom decals to enhance the aesthetics of your wall-mounted PC case. These accessories can add a unique touch to your build and make it truly stand out.
- Cables and Connectors: Ensure that you have all the necessary cables and connectors, including SATA cables, power cables, fan connectors, and data cables. Consider the length and quality of the cables to ensure a clean and organized setup.
- Miscellaneous: It’s always useful to have a clean and well-ventilated workspace, along with ziplock bags or organizers to store screws and small components. Additionally, a good quality surge protector or uninterrupted power supply (UPS) is recommended to protect your valuable components.
Make sure to research and choose high-quality components and materials that suit your requirements and budget. Having all the necessary materials at hand will make the assembly process smoother and more enjoyable.
Step 1: Planning the Design
Before diving into the physical construction of your wall-mounted PC case, it’s crucial to spend some time planning the design. This step will help you visualize the final product and make informed decisions throughout the building process.
Consider the following aspects when planning your design:
- Location: Determine the ideal location for your wall-mounted PC case. Choose an area that is easily accessible and provides sufficient airflow to keep your components cool. Also, consider the aesthetics and make sure the case will enhance the overall appearance of the room.
- Size and Dimensions: Measure the available space for the case on your wall and consider the dimensions of the components you intend to use. Ensure that the case will fit comfortably without obstructing any other objects or furniture.
- Layout and Orientation: Decide how you want to arrange the components within the case. Consider factors such as cable management, airflow, and accessibility for maintenance and upgrades. Think about the placement of the motherboard, power supply, graphics card, storage devices, and cooling fans.
- Aesthetics: Think about the visual appeal of your design. Will your case have a sleek and minimalist look, or will it feature vibrant LED lighting and custom decals? Consider your personal style and preferences, as well as the overall theme and decor of the room.
- Cable Management: Pay attention to cable routing and management. Plan how you will hide and organize cables to maintain a clean and professional-looking build. Consider using cable ties, velcro straps, or cable management channels to keep everything neat and tidy.
- Airflow and Cooling: Design your case to maximize airflow and cooling efficiency. Ensure that there is adequate space for fans, radiators, and ventilation holes in strategic locations. This will help prevent overheating and maintain the longevity of your components.
Take your time to sketch out your design ideas and create a rough blueprint. This will serve as a reference point throughout the construction process. You can also search for inspiration online or check out other wall-mounted PC case builds for ideas and practical tips.
By carefully planning the design, you’ll be able to create a functional and visually appealing wall-mounted PC case that perfectly suits your needs and preferences.
Step 2: Selecting the PC Components
Choosing the right components for your wall-mounted PC case is crucial to ensuring optimal performance and compatibility. Consider the following factors when selecting your components:
- Motherboard: Select a motherboard that fits your desired form factor, such as ATX, Micro-ATX, or Mini-ITX. Make sure it has all the necessary ports and features for your intended use.
- CPU: Choose a CPU that meets your performance needs and is compatible with the selected motherboard. Consider factors such as core count, clock speed, and power consumption.
- RAM: Determine the amount of RAM required for your applications and ensure compatibility with the motherboard. Consider the speed and timing specifications for optimal performance.
- Graphics Card: Select a graphics card based on your gaming or graphical rendering requirements. Consider factors such as VRAM, clock speed, and the necessary power connectors.
- Storage Devices: Decide on the type and capacity of storage devices to meet your storage needs. Consider using SSDs for faster boot times and HDDs for mass storage.
- Power Supply: Choose a power supply that provides sufficient wattage for your components and offers reliable performance. Ensure it has the necessary connectors and meets efficiency standards.
- Cooling Solution: Consider the cooling requirements of your components and select an appropriate cooling solution. This can include air cooling with fans or liquid cooling with a radiator and pump.
- Other Components: Don’t forget to consider other essential components such as cables, peripherals, and an operating system.
Research and compare different brands, models, and user reviews to make informed decisions. Take into account your budget and the specific requirements of your intended usage, whether it’s gaming, video editing, or general-purpose computing.
By selecting high-quality components that are compatible with each other and suitable for your needs, you’ll build a reliable and high-performing wall-mounted PC case that provides an exceptional computing experience.
Step 3: Preparing the Case
Now that you have your chosen components, it’s time to prepare the case for assembly. Follow these steps to ensure the case is ready before installing your components:
- Inspect the Case: Carefully examine the case for any defects or damage. Check if all the necessary accessories, such as screws and brackets, are included. If you notice any issues, contact the manufacturer or retailer for a replacement or assistance.
- Clean the Case: Before proceeding, clean any dust, debris, or fingerprints from the case. Use a microfiber cloth or gentle cleaning solution to ensure a clean and polished finish.
- Attach Mounting Bracket: If your case requires a mounting bracket, carefully attach it according to the manufacturer’s instructions. Ensure that it is securely fastened and positioned correctly for wall mounting.
- Prepare Cable Routing Holes: Identify the cable routing holes on the case. These openings allow you to pass cables from the back of the case to the front, keeping them organized and hidden. If needed, use a drill with a suitable drill bit to create additional cable routing holes.
- Install Standoffs: Depending on the case and motherboard size, you may need to install standoffs. These small metal posts elevate and secure the motherboard inside the case. Refer to the motherboard manual and screw in the appropriate standoffs at the designated locations.
- Mount Storage Devices: Install SSDs or HDDs into their designated slots, following the case instructions. If necessary, use screws or brackets provided to secure the storage devices in place.
- Prepare Cooling Solutions: If using air or liquid cooling, ensure that the necessary fan mounting points or radiator brackets are available in the case. Plan the layout and positioning of the cooling fans or radiator to optimize airflow within the case.
- Check and Secure Panel Fastenings: Double-check all panels, panels, and side panels to ensure they are aligned properly. Tighten any screws or fasteners to prevent movement or vibrations during operation.
By properly preparing the case, you’ll create a solid foundation for assembling your components. This step ensures that the case is clean, free from defects, and ready to house your components securely.
Step 4: Mounting the Motherboard
With the case prepared, it’s time to mount the motherboard, which will serve as the central hub for all your components. Follow these steps to ensure a secure and proper installation:
- Position the Motherboard: Carefully align the motherboard with the standoffs installed in the case. Ensure that the I/O ports at the back of the motherboard align with the corresponding openings on the case.
- Line up Screw Holes: Gently lower the motherboard onto the standoffs, making sure to line up the screw holes on the motherboard with the standoffs. Take care not to overtighten the screws to avoid damaging the motherboard.
- Screw in the Motherboard: Begin screwing in the screws from the center of the motherboard and work your way outwards. This sequence helps ensure even pressure distribution and prevents warping of the motherboard. Use the appropriate screwdriver and tighten the screws firmly but not excessively.
- Connect Internal Cables: Once the motherboard is securely mounted, connect the necessary internal cables. This includes the power supply cables, SATA cables for storage devices, front panel connectors, CPU power cable, and any other required cables as specified in the motherboard manual.
- Apply Thermal Paste: If installing an aftermarket CPU cooler, apply a small amount of thermal paste onto the CPU surface. This helps improve heat transfer between the CPU and the cooler. Follow the instructions provided with the CPU cooler for the proper application method.
- Install CPU Cooler: Carefully align the CPU cooler with the mounting brackets on the motherboard. Secure the cooler in place using the provided screws or clips. Make sure the cooler is seated evenly and firmly, ensuring good contact with the CPU.
- Connect CPU Cooler and Fan: Connect the CPU cooler fan to the appropriate header on the motherboard. Follow the fan and cooler manufacturer’s instructions for proper connection and any additional fan control settings.
Once the motherboard is mounted securely and all connections are made, take a moment to double-check all the connections and ensure everything is properly seated. This will help avoid any issues and ensure smooth operation when the PC is powered on.
Be gentle when handling the motherboard and avoid applying excessive pressure. Properly mounting the motherboard is essential for the stability and functionality of your wall-mounted PC case.
Step 5: Installing the Power Supply
The power supply is a vital component that provides electricity to all of your PC’s hardware. Follow these steps to effectively install the power supply in your wall-mounted PC case:
- Locate the Power Supply Mounting Area: Identify the designated area in the case where the power supply will be installed. This is usually located at the bottom or back of the case.
- Position the Power Supply: Place the power supply in the mounting area with the fan facing the correct direction. Ensure that the power supply is oriented correctly, aligning the screw holes with the corresponding holes in the case.
- Secure the Power Supply: Use the screws provided with the case or power supply to fasten the unit in place. Tighten the screws evenly to ensure a secure and stable connection.
- Connect Power Cables: Connect the appropriate power cables from the power supply to the motherboard, CPU, storage devices, and any other components that require power. Refer to the component manuals for the specific cable connections.
- Organize Cables: Proper cable management is essential to maintain an organized and clean interior. Use cable ties or Velcro straps to bundle and secure the power supply cables. Tuck any excess cables away to ensure good airflow and prevent interference with components.
- Check Power Supply Connections: Double-check all connections to ensure they are secure and properly seated. This includes the 24-pin ATX power connector, CPU power connector, SATA power connectors, PCIe power connectors, and any other necessary power connections.
When installing the power supply, ensure that the fan is facing the correct direction for optimal cooling. Most cases have a designated area or ventilation holes that allow the power supply fan to draw in cool air and expel hot air.
Properly securing and connecting the power supply ensures a stable power source for your PC components, preventing any potential power-related issues. Taking the time to organize and manage the power supply cables will improve airflow and help maintain a clean and efficient build.
Step 6: Attaching the Graphics Card
The graphics card is a crucial component for gaming and graphical-intensive tasks. Follow these steps to properly install and secure the graphics card in your wall-mounted PC case:
- Identify the PCIe Slot: Locate the appropriate PCIe slot on the motherboard where the graphics card will be installed. Refer to the motherboard manual to identify the correct slot.
- Prepare the Case: Ensure that there is enough space in the case and that any necessary brackets or connectors are properly installed or removed to accommodate the length and width of the graphics card.
- Align the Graphics Card: Carefully align the graphics card with the PCIe slot, holding it by the edges. Make sure the gold contacts on the bottom of the card are aligned with the slot.
- Secure the Graphics Card: Gently insert the graphics card into the PCIe slot, applying even pressure until it is fully seated. A clicking sound or visual confirmation of the retention mechanism engaging indicates that the card is properly installed.
- Attach Power Connectors: If your graphics card requires additional power, connect the necessary PCIe power cables from the power supply to the corresponding connectors on the graphics card. Refer to the card’s manual for specific instructions.
- Secure the Graphics Card: If your case has a bracket or backplate for securing the graphics card, use the provided screws or clips to secure the card in place. This will help prevent any excessive strain on the PCIe slot and keep the card stable.
- Connect Display Cables: Connect the appropriate display cables, such as HDMI or DisplayPort, from the graphics card to your monitor. Ensure a secure connection to enable video output from the card.
After completing these steps, power on your system and install the necessary graphics card drivers and software. This will ensure optimal performance and compatibility with your graphics card.
Properly attaching the graphics card is essential for smooth gaming and graphical performance. Pay attention to any specific instructions or requirements provided by the graphics card manufacturer to avoid any potential issues.
Step 7: Connecting Storage Devices
Storage devices are essential for storing and accessing data on your wall-mounted PC. Follow these steps to properly connect and configure your storage devices:
- Identify Storage Connectors: Locate the SATA ports on the motherboard and the corresponding connectors on your storage devices (SSD or HDD).
- Connect SATA Data Cables: Use SATA data cables to connect the SATA ports on the motherboard to the SATA connectors on your storage devices. Ensure a secure connection on both ends.
- Connect SATA Power Cables: Connect the SATA power cables from the power supply to the respective power connectors on your storage devices. Ensure a snug and secure connection.
- Install M.2 Storage (If Applicable): If you have an M.2 SSD, refer to the motherboard manual to identify the M.2 slot and the specific installation method required. Some M.2 drives may require securing with screws or clips.
- Set Boot Order (If Installing Operating System): If you are installing an operating system, access the BIOS settings and set the boot order to prioritize the storage device that contains the operating system installation.
- Configure RAID (If Desired): If you plan to configure a RAID array with multiple storage devices, refer to the motherboard manual and follow the instructions provided to set up the RAID configuration.
It’s important to ensure that all storage devices are properly connected and recognized by the system. This will ensure seamless data transfer, efficient operation, and a smooth computing experience.
By carefully connecting and configuring your storage devices, you’ll have a reliable and efficient storage solution for your wall-mounted PC. This will enable you to store and access your files with ease.
Step 8: Installing Cooling Fans
Proper cooling is crucial for maintaining optimal performance and longevity of your components. Follow these steps to install cooling fans in your wall-mounted PC case:
- Identify Fan Mounting Locations: Determine the available fan mounting locations in your case. Common areas include the front, top, and rear of the case.
- Choose Fan Configuration: Decide on the desired airflow configuration, such as intake or exhaust. Intake fans draw cool air into the case, while exhaust fans expel hot air from the case.
- Install Intake Fans: If you choose to install intake fans, position them at the front or bottom of the case to draw cool air in. Secure the fans in place using the provided screws or clips.
- Install Exhaust Fans: For exhaust fans, position them at the rear or top of the case to expel hot air. Secure the fans using the provided screws or clips.
- Connect Fan Cables: Connect the fan cables to the appropriate fan headers on the motherboard. Ensure a secure connection, following the alignment of the connector pins.
- Manage Fan Cables: Use cable ties or Velcro straps to bundle and manage the fan cables. Tuck any excess cables away to maintain a clean and unobstructed airflow path.
- Configure Fan Speed (If Applicable): Access the BIOS or use software to configure the fan speed settings if your motherboard supports fan control. Adjust the fan curves and speeds to optimize cooling performance.
The placement and configuration of cooling fans will depend on the specific layout and airflow characteristics of your case. It’s important to achieve a balance between intake and exhaust fans to maintain a steady flow of cool air and remove hot air efficiently.
By installing and configuring cooling fans correctly, you’ll ensure that your components operate at optimal temperatures, reducing the risk of overheating and improving the overall performance and stability of your wall-mounted PC.
Step 9: Wiring and Cable Management
Proper wiring and cable management are essential for creating a clean and organized interior in your wall-mounted PC case. Follow these steps to effectively manage the wiring and cables:
- Plan Cable Routing: Determine the optimal paths for routing cables from the components to the cable routing holes or designated areas in the case. Consider the length of the cables and the locations of the connectors.
- Use Cable Ties or Velcro Straps: Secure cables together using cable ties or Velcro straps. Group cables that run together to maintain a neat and organized appearance.
- Route Cables Carefully: Route cables behind the motherboard tray or through designated cable routing holes to keep them out of sight. Be mindful of any sharp edges or components that could damage cables, using cable management brackets or grommets if necessary.
- Connect Cables Neatly: Connect cables to their respective ports or headers on the motherboard and other components. Align the connectors properly and avoid tugging or straining the cables.
- Secure Excess Cables: Bundle and tuck away any excess cables to prevent interference with airflow or other components. Using cable ties or Velcro straps, secure the excess cables in designated areas or behind the motherboard tray.
- Test Cable Connections: Double-check all cable connections to ensure they are secure and properly seated. This minimizes the risk of loose connections that can cause performance issues or intermittent failures.
Well-managed cables not only enhance the aesthetics of your wall-mounted PC case but also improve airflow and facilitate component maintenance or upgrades in the future. Cable management reduces the risk of cable tangling, improves cooling efficiency, and allows for easier troubleshooting if needed.
Take your time to route and organize the cables properly, ensuring a clean and clutter-free interior. This will result in a professional-looking and well-functioning wall-mounted PC case.
Step 10: Securing the Case to the Wall
Once you’ve assembled and prepared your wall-mounted PC case, it’s time to secure it to the wall. Follow these steps to ensure a safe and secure installation:
- Select a Suitable Mounting Location: Choose a wall location that provides ample space, stability, and access to power outlets. Consider factors such as visibility, airflow, and aesthetics.
- Mark and Measure: Use a pencil or marker to mark the mounting holes on the wall. Ensure that the marks align with the mounting holes on the case or mounting bracket.
- Drill Pilot Holes: Use an appropriate drill bit to create pilot holes at the marked locations. The size of the drill bit should match the size of the screws or anchors you will be using.
- Attach Mounting Hardware: If your case requires mounting hardware, insert anchors or screw in the suitable screws into the pilot holes. Ensure that they are securely fastened and able to support the weight of the case.
- Align and Hang the Case: Carefully align the mounting holes on the case or mounting bracket with the respective screws or anchors on the wall. Slowly lift the case and hang it onto the screws or mount it onto the bracket.
- Double-Check Stability: Gently test the stability of the mounted case. Ensure that it is securely attached to the wall and does not wobble or shift. Make any necessary adjustments to the mounting hardware if needed.
- Verify Accessibility: Confirm that all necessary ports and connectors on the back of the case are easily accessible. Check that the power cable and other connections can be made without any obstructions.
It’s important to ensure that the case is securely mounted to the wall to prevent accidental falls or damage. Check the case regularly to ensure it remains secure and make any necessary adjustments or maintenance as needed.
By following these steps, you’ll have your wall-mounted PC case securely and safely installed, ready to showcase your build and provide a functional and visually appealing centerpiece to your setup.
Step 11: Testing and Troubleshooting
With your wall-mounted PC case fully assembled and installed, it’s time to put it to the test. Follow these steps to ensure that everything is working correctly and troubleshoot any potential issues:
- Power On the System: Connect the power cable to the power supply and plug it into a working outlet. Power on the system using the power button on the case or motherboard.
- Check for BIOS Screen: As the system boots up, check for the BIOS screen or the manufacturer’s logo. This indicates that the motherboard is functioning properly.
- Monitor Initialization: Ensure that your monitor or display is connected properly to the graphics card, and check if it receives a signal. If not, double-check the cable connections and try a different cable if possible.
- Check Component Functionality: Test each component individually to ensure they are functioning as intended. This includes the CPU, RAM, graphics card, storage devices, and any peripheral devices.
- Monitor Temperatures: Use software or BIOS utilities to monitor the temperatures of your components. Ensure that they are within acceptable limits, and monitor for any abnormalities or excessive heat.
- Run System Stress Tests: Use stress-testing software to put your system under heavy load and monitor for stability issues, overheating, or other anomalies. This will help ensure that your system can handle demanding tasks without any issues.
- Address Any Issues: If you encounter any issues or errors during testing, troubleshoot the problem thoroughly. Check the connections, drivers, and software updates, and consult online resources or manufacturer support if necessary.
- Perform Regular Maintenance: Once your system is up and running smoothly, make it a habit to perform regular maintenance. This includes cleaning dust from fans and components, updating drivers and software, and keeping your system secure with proper antivirus and firewall measures.
Testing your wall-mounted PC case and troubleshooting any issues ensures a stable and reliable system for your computing needs. Regular maintenance will help prolong the life of your components and ensure optimal performance over time.
If you encounter any persistent issues or difficulties during testing or troubleshooting, don’t hesitate to seek assistance from online communities, forums, or professional support resources. They can provide valuable insights and guidance to resolve any technical challenges you may encounter.
Conclusion
Congratulations, you have successfully completed the process of building and setting up your wall-mounted PC case! By following the step-by-step instructions outlined in this guide, you have created a unique and functional piece of hardware that showcases your PC components while saving desk space.
Throughout the process, you have learned how to plan the design, select suitable components, prepare the case, mount the motherboard, install the power supply, attach the graphics card, connect storage devices, install cooling fans, manage cables, secure the case to the wall, and finally, test and troubleshoot your system.
Remember that building a wall-mounted PC case is not just about functionality; it’s also an opportunity to showcase your creativity and style. You can personalize your case with LED lighting, custom decals, or other aesthetic enhancements to make it truly stand out.
As you enjoy your wall-mounted PC case, be sure to perform regular maintenance, keep your software and drivers up to date, and monitor the system’s temperatures to ensure optimal performance and longevity.
Whether you are a seasoned PC builder or a beginner, this project has provided you with valuable skills and knowledge that can be applied to future PC building endeavors. Embrace this experience as a stepping stone towards expanding your technical expertise.
Now it’s time to sit back, power on your wall-mounted PC case, and immerse yourself in the incredible gaming experience and productivity that your customized creation has to offer!


