Introduction
Welcome to the world of DIY projectors! In this guide, we will walk you through the process of making your very own projector right at home. Whether you want to enjoy movies on a big screen, showcase presentations, or simply have a fun DIY project, building your own projector can be a rewarding and exciting experience.
Ever wondered how those high-quality projectors work? Well, you’ll be surprised to learn that constructing one isn’t as complex as you might think. With a few readily available materials and a little bit of creativity, you can create a fully functional projector that brings your favorite movies and images to life. Plus, it’s a great way to impress your friends and family with your DIY skills!
Now, before we dive into the step-by-step process, let’s briefly discuss the materials you’ll need. Don’t worry; you won’t require any advanced technical knowledge or expensive tools. Most of the materials can be easily found in your own home or purchased at a local hardware store.
Without further ado, let’s gather the required materials and get ready to embark on an exciting DIY journey to create your very own home theater!
Materials Needed
Before you begin building your homemade projector, it’s important to make sure you have all the necessary materials. Most of these items can be found around your house or easily purchased at a local store. Here’s a list of what you’ll need:
- A shoebox or any sturdy cardboard box: This will serve as the main structure for your projector.
- A magnifying lens: Look for a lens with a focal length between 75mm and 100mm, which will help project a clear image onto your screen.
- A small, flat mirror: This will be used to redirect the light from the lens to the projection surface.
- A smartphone or tablet: You’ll need a device to play your videos or images to be projected.
- A sharp utility knife or scissors: These will be used to cut and shape the cardboard box.
- A ruler or measuring tape: To ensure precise measurements and cuts.
- A glue gun or adhesive tape: To secure the various components of your homemade projector.
- A dark, reflective surface: This can be a white wall, a piece of fabric, or even a projector screen if you have one available.
- A light source: You can use a desk lamp, LED flashlight, or even a smartphone flashlight as the light source for your projector.
Remember, you don’t have to spend a fortune on these materials. Feel free to get creative and use items you already have at home. Now that you have everything you need, let’s move on to the step-by-step process of creating your homemade projector!
Step 1: Gather the Materials
The first step in creating your homemade projector is to gather all the necessary materials. Having everything you need at hand will make the construction process smoother and more efficient.
Start by collecting a shoebox or any sturdy cardboard box that will serve as the foundation for your projector. Make sure it is large enough to accommodate your smartphone or tablet comfortably.
Next, locate a magnifying lens with a focal length between 75mm and 100mm. This lens will be responsible for projecting the image onto your screen. You can find magnifying lenses in hobby stores or online.
In addition, you’ll need a small, flat mirror. This mirror will redirect the light from the lens to the projection surface, ensuring an accurate and clear image. You can repurpose a small mirror from an old compact or purchase one from a craft or hardware store.
Don’t forget to gather your smartphone or tablet, as you’ll need it to play the videos or images you want to project. Make sure it’s fully charged and has enough memory to store the media files.
Grab a sharp utility knife or a pair of scissors to cut and shape the cardboard box. You’ll need this tool to create openings for the lens, mirror, and smartphone, ensuring they fit securely in place.
Measurements are crucial for a successful DIY projector, so keep a ruler or measuring tape nearby to ensure precise cuts and alignments.
You will also need a glue gun or adhesive tape to secure the various components of your projector. The glue gun allows for a strong bond, while adhesive tape can be suitable for temporary adjustments and modifications.
Choose a dark, reflective surface to serve as your projection screen. This can be a white wall, a piece of fabric, or even a dedicated projector screen if you have one available. Ensure the surface is clean and free of obstructions to maximize the image quality.
For the light source, you can utilize a desk lamp, an LED flashlight, or even the flashlight function on your smartphone. Experiment with different light sources to achieve the desired brightness and clarity for your projections.
If you want to add a personal touch to your DIY projector, consider using paint or decorative materials to customize its appearance. Get creative and make it uniquely yours.
With all the materials gathered, you’re now ready to move on to the next step: creating the box for your homemade projector.
Step 2: Create the Box
In this step, we will create the box that will serve as the main structure for your homemade projector. The box will hold all the components securely and provide stability for your projector.
Start by taking your cardboard box and remove any unnecessary flaps or lids. You want to create an open-face box that allows easy access to the interior.
Measure and mark the dimensions of your smartphone or tablet on one side of the box. This will be the opening where your device will fit snugly. Use a ruler or measuring tape to ensure accurate measurements.
With the dimensions marked, use a sharp utility knife or scissors to carefully cut out the opening. Take your time to make clean, straight cuts, as this will ensure a secure fit for your device.
Next, determine the placement for the magnifying lens. Measure the diameter of the lens and mark the center point on the opposite side of the box from the smartphone opening.
Using the measurements, carefully cut out a hole for the lens. Again, precision is key, so take your time to create a clean and accurate opening.
Now, on the same side as the lens hole, mark the position for the small mirror. The mirror should be placed diagonally across from the lens, reflecting the light from the lens onto the projection surface.
Cut out a small square or rectangular hole for the mirror to fit into. Make sure it is positioned securely and at the correct angle to redirect the light effectively.
Once you have cut out all the necessary openings, gently remove any excess cardboard or rough edges from the inside of the box. This will ensure a clean and smooth interior surface.
At this point, you can also decorate the exterior of the box to personalize your homemade projector. Use paint, markers, or other decorative materials to make it unique and reflective of your personality.
Finally, take a moment to ensure that all components fit properly in their designated openings. The smartphone or tablet should slide in easily and sit securely, while the lens and mirror should be positioned correctly for optimal projection.
With the box created and all the components in place, you’re now ready to move on to the next step: preparing the lens for projection.
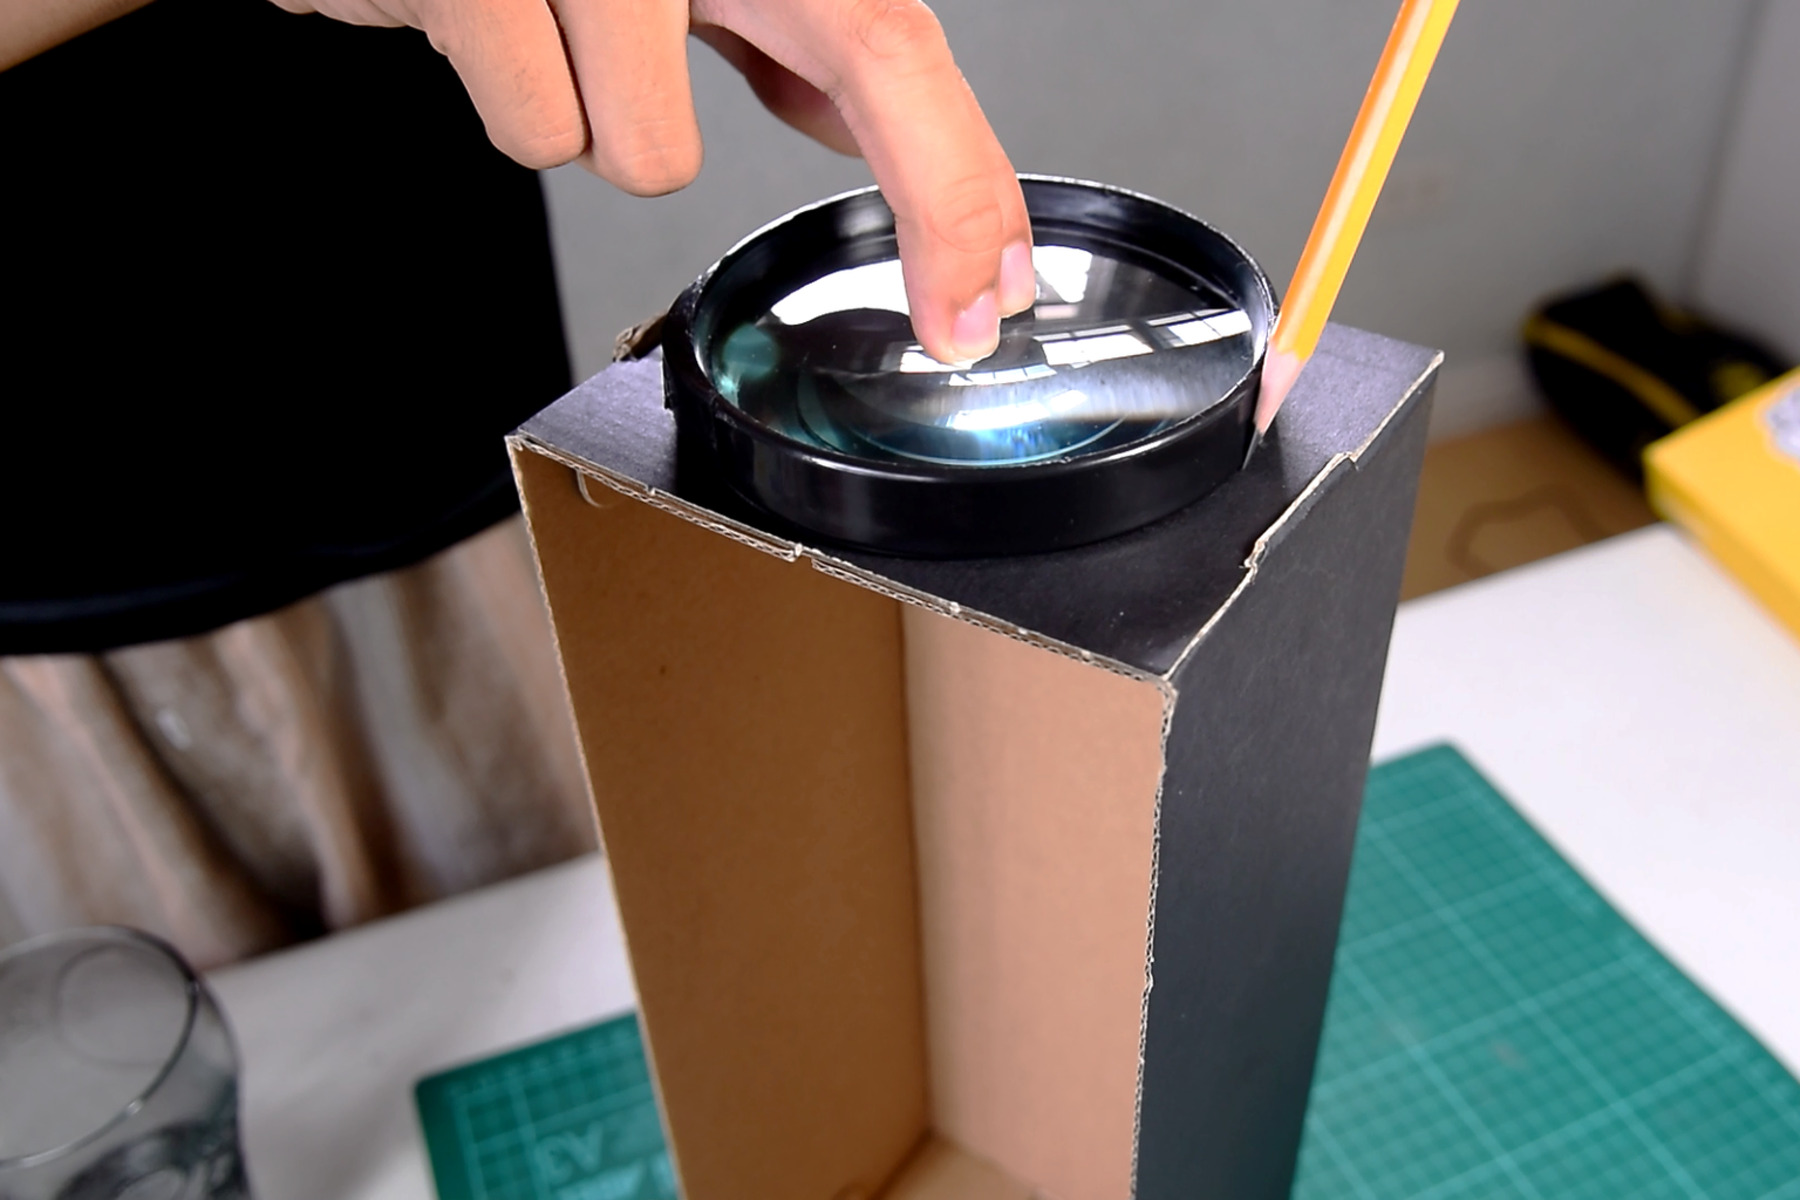
Step 3: Prepare the Lens
In this step, we will prepare the magnifying lens for optimal projection quality. Properly adjusting the lens is essential to ensure a clear and focused image on your homemade projector.
Start by cleaning the lens with a soft cloth to remove any fingerprints or dust particles. A clean lens will provide a sharper and more vibrant image.
Next, hold the lens up to the light and inspect it for scratches or damages that may affect the projection quality. If you notice any significant flaws, consider finding a replacement lens for the best results.
Once the lens is clean and in good condition, it’s time to position it in the designated opening on your projector box. Carefully place the lens into the hole, ensuring that it fits securely and covers the entire opening.
Adjusting the focal length of the lens is crucial for achieving a clear image projection. Start by placing a test object or printed image a few feet in front of the lens. Turn on the projector and adjust the distance between the lens and the object until the image appears sharp and in focus.
Depending on the lens and the size of your projected image, you may need to experiment with the distance to find the optimal focal length. Take your time and make small adjustments until you achieve the desired result.
It’s also important to note that the distance between the lens and the projection surface will impact the size of the projected image. Moving the lens closer to the surface will result in a smaller image, while pulling it farther away will enlarge the image.
Once you have found the ideal focal length and image size, secure the lens in place using adhesive tape or a glue gun. Ensure that the lens is fixed securely, but be careful not to obstruct the projection path or cause any damage to the lens.
With the lens properly prepared and positioned, you’re one step closer to enjoying your homemade projector. In the next step, we will create the projection surface to showcase your projected images and videos.
Step 4: Create the Projection Surface
In this step, we will create the projection surface where the images and videos from your homemade projector will be displayed. The quality of the projection surface can significantly impact the clarity and brightness of the projected images.
First, choose a suitable area to project your images. This can be a white wall, a piece of fabric, or even a dedicated projector screen if you have one available. Make sure the surface is clean and smooth to ensure the best possible projection quality.
If you’re using a wall, ensure that it is painted with a matte or semi-gloss finish. Avoid surfaces with glossy or reflective finishes, as they may cause unwanted glare and reduce image visibility.
Next, take measurements to determine the size you want your projected image to be. Consider the available space and the distance between your homemade projector and the projection surface.
Once you have the desired size, mark the dimensions on the chosen surface. Use a measuring tape or ruler to ensure accurate alignment and proportions.
If you’re projecting onto a wall, you can also create a temporary frame using painter’s tape. This helps define the boundaries of the projection area and gives it a more finished look.
If you prefer a more portable solution, you can use a piece of fabric or a projection screen. A white or light gray fabric works well for projection surfaces, as it reflects light evenly and enhances the image brightness.
Clip the fabric securely to a frame or hang it tautly using hooks or adhesive strips. Make sure there are no wrinkles or creases on the fabric, as they can cause distortions in the projected image.
For a DIY projection screen, you can use materials like a white bed sheet or a shower curtain. Simply hang the chosen material with even tension and ensure a smooth and flat surface.
Remember, it’s essential to have a dark environment when using your homemade projector for optimal image quality. Make sure the room is dimly lit or use blackout curtains to block out external light sources.
Once the projection surface is ready, position your homemade projector at an appropriate distance from the surface. Ensure that it’s stable and secure to avoid any accidental movements or shifting during projections.
With the projection surface in place, you’re now ready to move on to the next step: mounting the lens on your homemade projector.
Step 5: Mount the Lens
In this step, we will mount the lens onto your homemade projector to ensure it stays in place and properly projects images onto the projection surface. Mounting the lens securely is essential for achieving clear and focused projections.
Start by positioning your projector box in a stable and upright position. Ensure that the side with the lens hole is facing towards the projection surface.
Take the magnifying lens and gently insert it into the lens hole you created earlier. Make sure the lens fits snugly and covers the entire opening.
If necessary, you can use adhesive tape or a glue gun to secure the lens in place. Apply the adhesive around the edges of the lens, ensuring that it doesn’t obstruct the lens or impede the projection path.
Double-check that the lens is aligned and positioned correctly within the box. It should be centered and parallel to the projection surface for optimal image quality.
Once the lens is securely mounted, take a moment to test its functionality. Turn on your smartphone or tablet and play a video or image on the screen.
Hold the device up to the smartphone opening on the projector box, positioning it carefully so that the image is properly aligned with the lens.
Look through the lens and observe the projected image on the projection surface. Check for clarity, focus, and proper sizing. Make any necessary adjustments to the positioning of the device or the lens to achieve the desired image quality.
Remember, small adjustments can make a big difference in the projection quality, so take your time to find the best position for both the lens and the device.
Once you’re satisfied with the result, ensure that the lens and the device remain fixed in their positions. Check that there are no loose or wobbling components that may affect the projection quality.
With the lens securely mounted and aligned, your homemade projector is now ready for the next step: adding the light source.
Step 6: Add the Light Source
In this step, we will add the light source to your homemade projector, which will illuminate the images and videos for projection onto the surface. The choice of light source can greatly impact the brightness and clarity of your projected images.
Start by selecting a suitable light source for your projector. You have several options to choose from, depending on what you have available:
- If you have a desk lamp with an adjustable head, you can position it near the lens of your homemade projector. Adjust the lamp’s angle to ensure that the light shines directly onto the lens and project images onto the surface.
- Another option is to use an LED flashlight. Place it in a position that directs the light towards the lens and adjust the angle accordingly. This method provides a concentrated and focused light source.
- If using a smartphone or tablet as your light source, activate the flashlight function. Position the device in a way that the flashlight is pointing towards the lens, providing the necessary light for projection.
- You can also consider using a portable LED projector to serve as both the light source and the projection device. These projectors come with built-in lighting and projection capabilities, simplifying the setup process.
Once you’ve chosen your light source, position it on the same side of the lens, opposite the projection surface. Experiment with different angles and distances to achieve the desired brightness and image clarity.
Make sure that the light source is not obstructed by any objects or components within the box. This will ensure that the light is directed towards the lens and onto your projection surface.
Test the setup by turning on the light source and projecting an image or video onto the surface. Adjust the positioning of the light source as needed to achieve the desired brightness and image quality.
Keep in mind that the focus of the projected image may need to be readjusted after adding the light source. Make any necessary tweaks to the lens position or the distance between the lens and the projection surface to achieve clear and focused projections.
Once you’re satisfied with the brightness and clarity of the projected image, ensure that the light source remains steady and in the desired position. This will ensure consistent and stable projection throughout your viewing experience.
With the light source successfully integrated, your homemade projector is now ready for the next step: adjusting and fine-tuning the projection settings.
Step 7: Adjust and Fine-Tune
In this step, we will focus on adjusting and fine-tuning your homemade projector for optimal projection quality. Taking the time to fine-tune the settings will ensure that you get the best possible image and video projection.
Start by positioning yourself in front of the projection surface, where you will be viewing the projected images and videos. This will give you a clear perspective and help you make accurate adjustments.
Adjust the distance between your homemade projector and the projection surface if needed. Moving the projector closer will result in a smaller image, while moving it farther away will create a larger image. Find the distance that works best for your setting.
Next, adjust the focus of the image by moving the lens slightly back and forth. Aim for a sharp and clear image projection on the surface. Take your time to achieve the desired focus and clarity.
Also, experiment with the position and angle of the light source. Slight adjustments can significantly impact the brightness and uniformity of the projected image. Ensure that the light source is not obstructed and that it illuminates the entire projected area evenly.
While adjusting the settings, pay attention to the colors and brightness of the projected image. If necessary, modify the settings or display options on your smartphone or tablet to enhance the color accuracy and overall image quality.
Test different media files, such as videos and images, to see how they appear on the projection surface. Look for any pixelation, blurriness, or distortion, and make adjustments accordingly.
Consider the ambient lighting conditions in the room. Dimming the lights or creating a dark environment can enhance the contrast and overall visual impact of the projected image.
If you notice any issues or imperfections during the testing phase, make the necessary adjustments. This could involve fine-tuning the focus, adjusting the light source’s position, or even optimizing the media settings on your device.
Take your time to experiment with different settings until you achieve the desired projection quality. The beauty of a homemade projector is the ability to continually tweak and improve the setup.
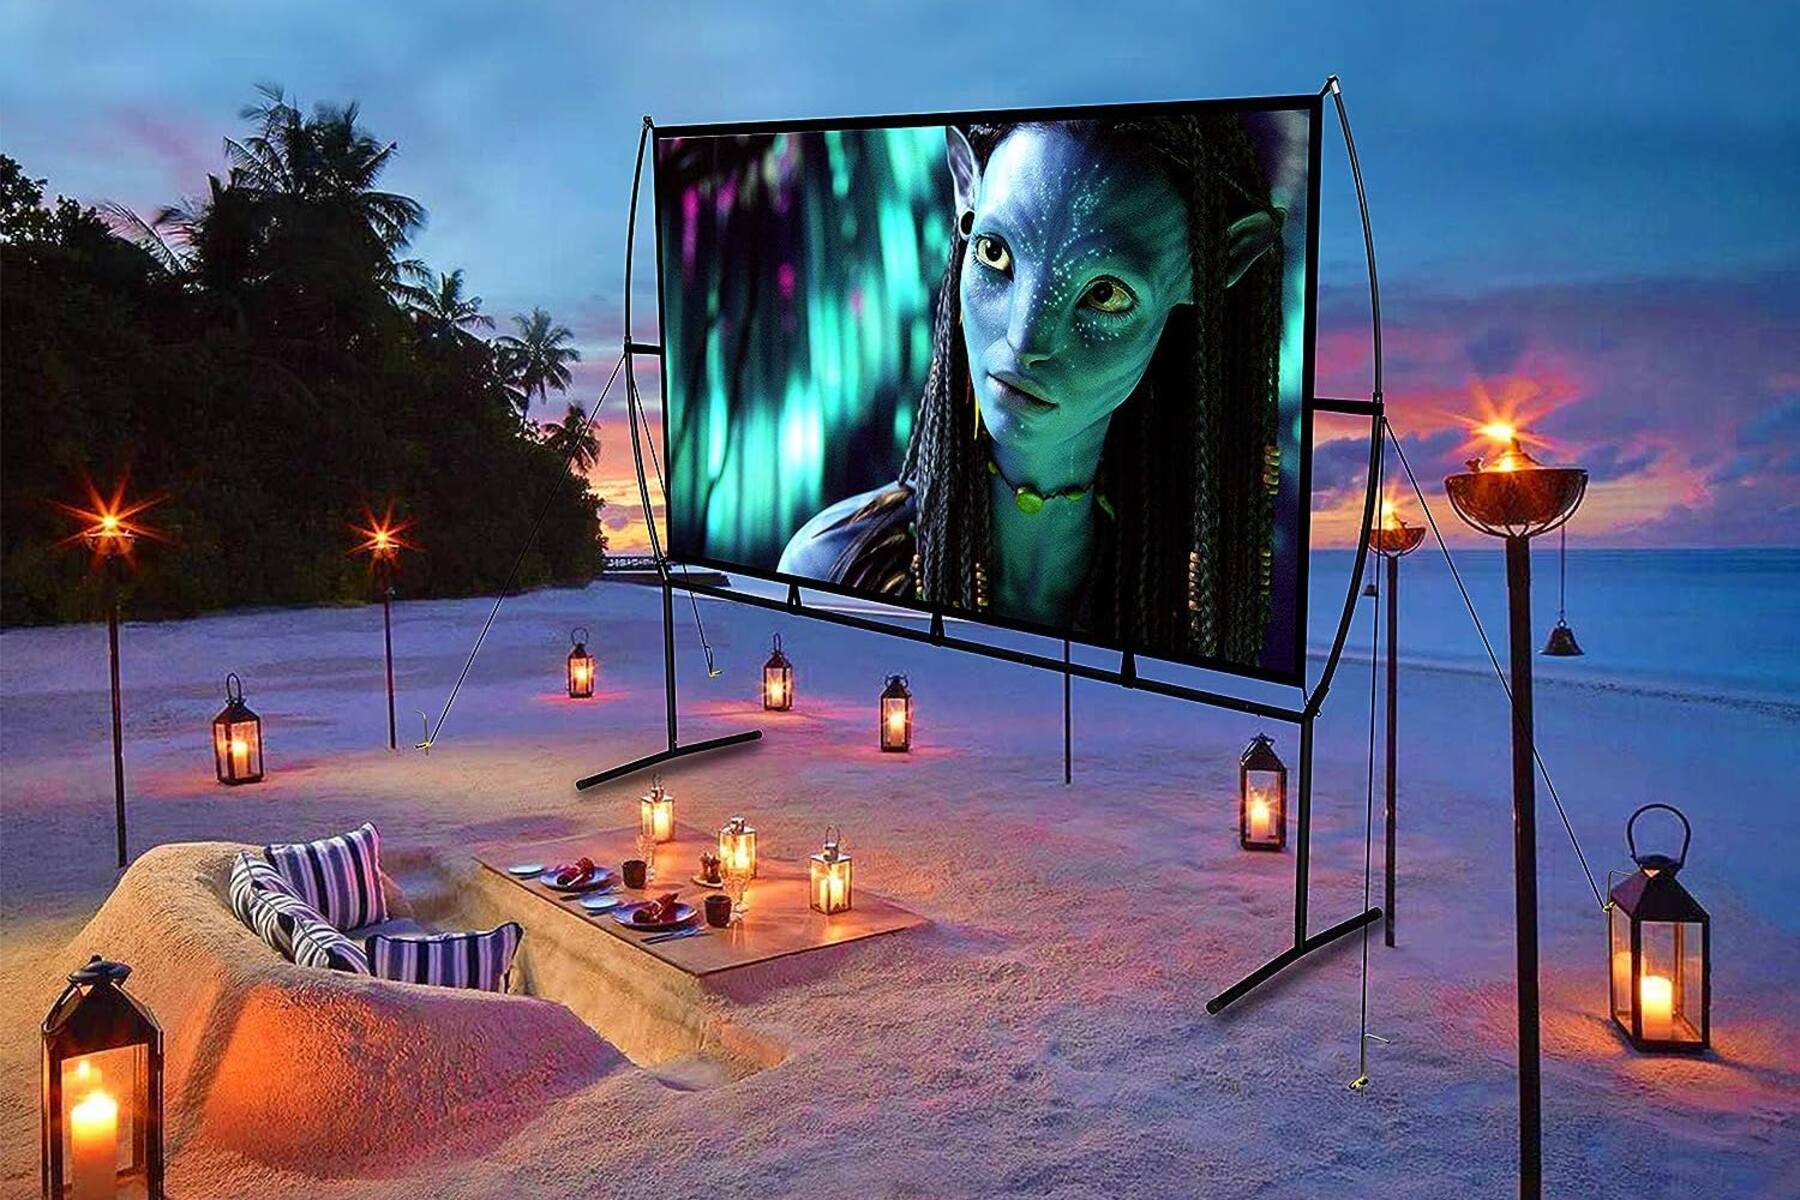
Once you’re satisfied with the adjustments and the overall projection quality, prepare to sit back, relax, and enjoy your homemade projector! It’s time to indulge in your favorite movies, videos, or images on the big screen in the comfort of your own home.
Congratulations! You have successfully completed the adjustment and fine-tuning process, bringing your homemade projector to life.
Step 8: Enjoy Your Homemade Projector!
Congratulations! You have reached the final step of creating your homemade projector. Now it’s time to sit back, relax, and enjoy the immersive experience of your DIY home theater.
Gather your friends, family, or loved ones and invite them to witness the magic of your homemade projector. Whether you’re watching movies, showcasing presentations, or sharing cherished memories, your homemade projector will bring your content to life on the big screen.
Ensure that the room is dimly lit or completely dark to maximize the contrast and visibility of the projected images. Create a cozy and comfortable seating arrangement, providing everyone with a great view.
Experiment with different media files and genres to fully explore the capabilities of your homemade projector. Immerse yourself in action-packed movies, indulge in heartwarming family photos, or transport yourself to far-off destinations through breathtaking travel footage.
Appreciate the effort and creativity that went into building your homemade projector. Take pride in the fact that you have created a unique and functional device that can rival commercially available projectors.
Remember to take breaks and give your homemade projector some rest after extended use to prevent overheating. This will help prolong its lifespan and ensure its longevity.
Feel free to share your DIY projector journey with others. Display your masterpiece proudly and inspire others to embark on their own creative projects. You never know who you might inspire with your ingenuity and resourcefulness.
Don’t forget to document your experience and share it on social media using the hashtag #HomemadeProjector. Let others see the incredible results you achieved and the enjoyment you derived from your DIY creation.
Lastly, continue to refine and improve your homemade projector even after you start using it. Look for ways to enhance the image quality, explore new projection techniques, and experiment with different setup variations.
With your homemade projector, the possibilities are endless. Embrace the joy of entertainment, education, and creativity brought forth by your own ingenuity. Sit back, relax, and have hours of endless fun with your very own homemade projector!
Conclusion
Congratulations on successfully creating your homemade projector! Through this DIY process, you have transformed ordinary materials into a remarkable device that brings your favorite movies, videos, and images to life on a big screen.
Building a homemade projector allows you to explore your creativity, enhance your DIY skills, and enjoy the immersive experience of a home theater without breaking the bank. It’s a testament to human ingenuity and resourcefulness.
Throughout the steps outlined in this guide, you have learned how to gather the necessary materials, create the box, prepare the lens, create the projection surface, mount the lens, add the light source, adjust and fine-tune the settings, and finally, enjoy the fruits of your labor.
Remember that this is just the beginning of your homemade projector journey. As you continue to use and enjoy your device, don’t hesitate to experiment with different settings, try new projection surfaces, and even expand your knowledge by exploring advanced techniques.
Share your experience with others and inspire them to embark on their own DIY projects. Your homemade projector showcases the power of creativity and resourcefulness, reminding us all that remarkable things can be achieved with a little ingenuity and effort.
Now, sit back, relax, and enjoy the fruits of your labor. Share memorable moments with loved ones, host movie nights, or embrace the joy of projecting your favorite content on the big screen.
Remember, the possibilities with your homemade projector are endless. Let your imagination run wild and explore new horizons with your unique creation.
Thank you for joining us on this DIY journey. We hope that you have found this guide helpful and that your homemade projector enhances your entertainment experiences for years to come.