Introduction
Have you ever come across a funny or captivating GIF on the internet and wondered how to create one yourself? With the advancement of technology, it has become easier than ever to make your own GIFs, even on your Android device. GIFs, which stands for Graphics Interchange Format, are short animated images that loop continuously and have become a popular form of visual communication in the digital age.
In this guide, we will walk you through the process of creating a GIF on Android. Whether you want to convert a video clip or transform a series of photos into a fun animation, we will provide you with all the necessary steps to unleash your creativity and share your customized GIFs with friends and family.
Why make a GIF on Android specifically? Well, Android devices offer a wide range of creative apps that can help you create and edit GIFs on the go. Furthermore, Android’s user-friendly interface and intuitive design make it accessible to users of all skill levels, whether you are a seasoned designer or a casual GIF enthusiast.
Ready to get started? Let’s dive into the step-by-step process of making a GIF on Android.
What is a GIF?
GIF, which stands for Graphics Interchange Format, is a popular file format used for creating and sharing short animated images. It was first introduced in the late 1980s by CompuServe, a widely used online service provider at the time. Unlike traditional image formats such as JPEG or PNG, GIFs can display a sequence of frames to create a brief, looping animation.
One of the key reasons behind the popularity of GIFs is their ability to convey emotions, reactions, and messages in a concise and engaging way. From expressing humor to showcasing a product’s features, GIFs have become a powerful tool for communication on various online platforms, including social media, messaging apps, and websites.
Creating a GIF involves converting a video clip or a series of images into an animated format. The looping nature of GIFs makes them ideal for capturing short moments or creating eye-catching visuals. With proper timing and creativity, GIFs can capture attention and elicit a strong emotional response from viewers.
Another advantage of GIFs is their compatibility. They can be easily shared and viewed on various devices and platforms, including smartphones, computers, and tablets. This widespread compatibility has contributed to the popularity and accessibility of GIFs across different online communities and social networks.
Over the years, GIFs have evolved, and new features have been added to enhance their visual appeal and functionality. Today, you can find animated GIFs with transparent backgrounds, advanced 3D effects, and even text overlays. These advancements have allowed users to create more dynamic and engaging GIFs to suit their specific needs and preferences.
Overall, GIFs have become a ubiquitous part of online culture, with millions of GIFs being shared and enjoyed every day. They serve as a universal language of visual communication, enabling users to express ideas, emotions, and reactions in a fun and engaging way. Now that we understand what a GIF is, let’s explore how to create one on your Android device.
Why make a GIF on Android?
Android devices offer a plethora of creative apps and user-friendly features that make it an ideal platform for creating GIFs. Whether you’re a social media enthusiast, a content creator, or simply someone who loves to express themselves through visual animations, here are a few reasons why making a GIF on Android is a great choice:
1. Wide range of GIF-making apps: Android users have access to a vast selection of GIF-making apps on the Google Play Store. These apps offer various features, from basic editing tools to advanced customization options, allowing you to create unique and personalized GIFs.
2. Convenient and portable: Android devices, such as smartphones and tablets, are portable and easy to carry around. This means you can create on-the-go, capturing spontaneous moments or transforming a video clip into a GIF wherever you are.
3. User-friendly interface: Android operating system provides a user-friendly interface that is intuitive and easy to navigate. Whether you are a beginner or an experienced creator, Android’s design allows you to quickly learn and master GIF-making apps.
4. Creative flexibility: Android devices offer a wide range of editing options and customization features that allow you to add filters, text, stickers, and other effects to your GIFs. This creative flexibility lets you personalize your animations and make them truly unique.
5. Easy sharing and compatibility: Android devices come equipped with various options for sharing your GIFs. From social media platforms to messaging apps, sharing your creations is effortless, enabling you to quickly share your GIFs with friends, family, and your online community.
6. Integration with other creative apps: Android devices enable seamless integration between different creative apps. This means you can combine images, videos, and GIFs created in different apps to enhance your final product and unleash your creativity.
With these advantages in mind, it’s clear why creating a GIF on Android is an excellent choice for those looking to express themselves visually and engage with others through animated content. Now, let’s move on to the step-by-step process of making a GIF on your Android device.
Step 1: Choose a GIF-making app
The first step in creating a GIF on Android is to choose a GIF-making app that suits your needs and preferences. With countless options available on the Google Play Store, it’s important to select an app that offers the features and functionalities you require.
Here are a few factors to consider when choosing a GIF-making app:
1. Features and editing options: Look for an app that provides a range of editing options such as trimming videos, adjusting playback speed, adding filters, text, stickers, and effects. Consider what features are essential for your creative process and choose an app that meets those requirements.
2. User interface and ease of use: Opt for an app with a user-friendly interface that allows for a smooth and intuitive user experience. The app should be easy to navigate and provide clear instructions for creating and customizing GIFs.
3. Compatibility and sharing options: Ensure that the app allows for easy sharing of your GIFs to various platforms, such as social media, messaging apps, or email. Look for compatibility with popular platforms to ensure your GIFs can be enjoyed by a wide audience.
4. Reviews and ratings: Take the time to read user reviews and ratings of different GIF-making apps. This will give you insights into the app’s performance, reliability, and overall user satisfaction. Choose an app with positive reviews and high ratings to increase the chances of a successful GIF-making experience.
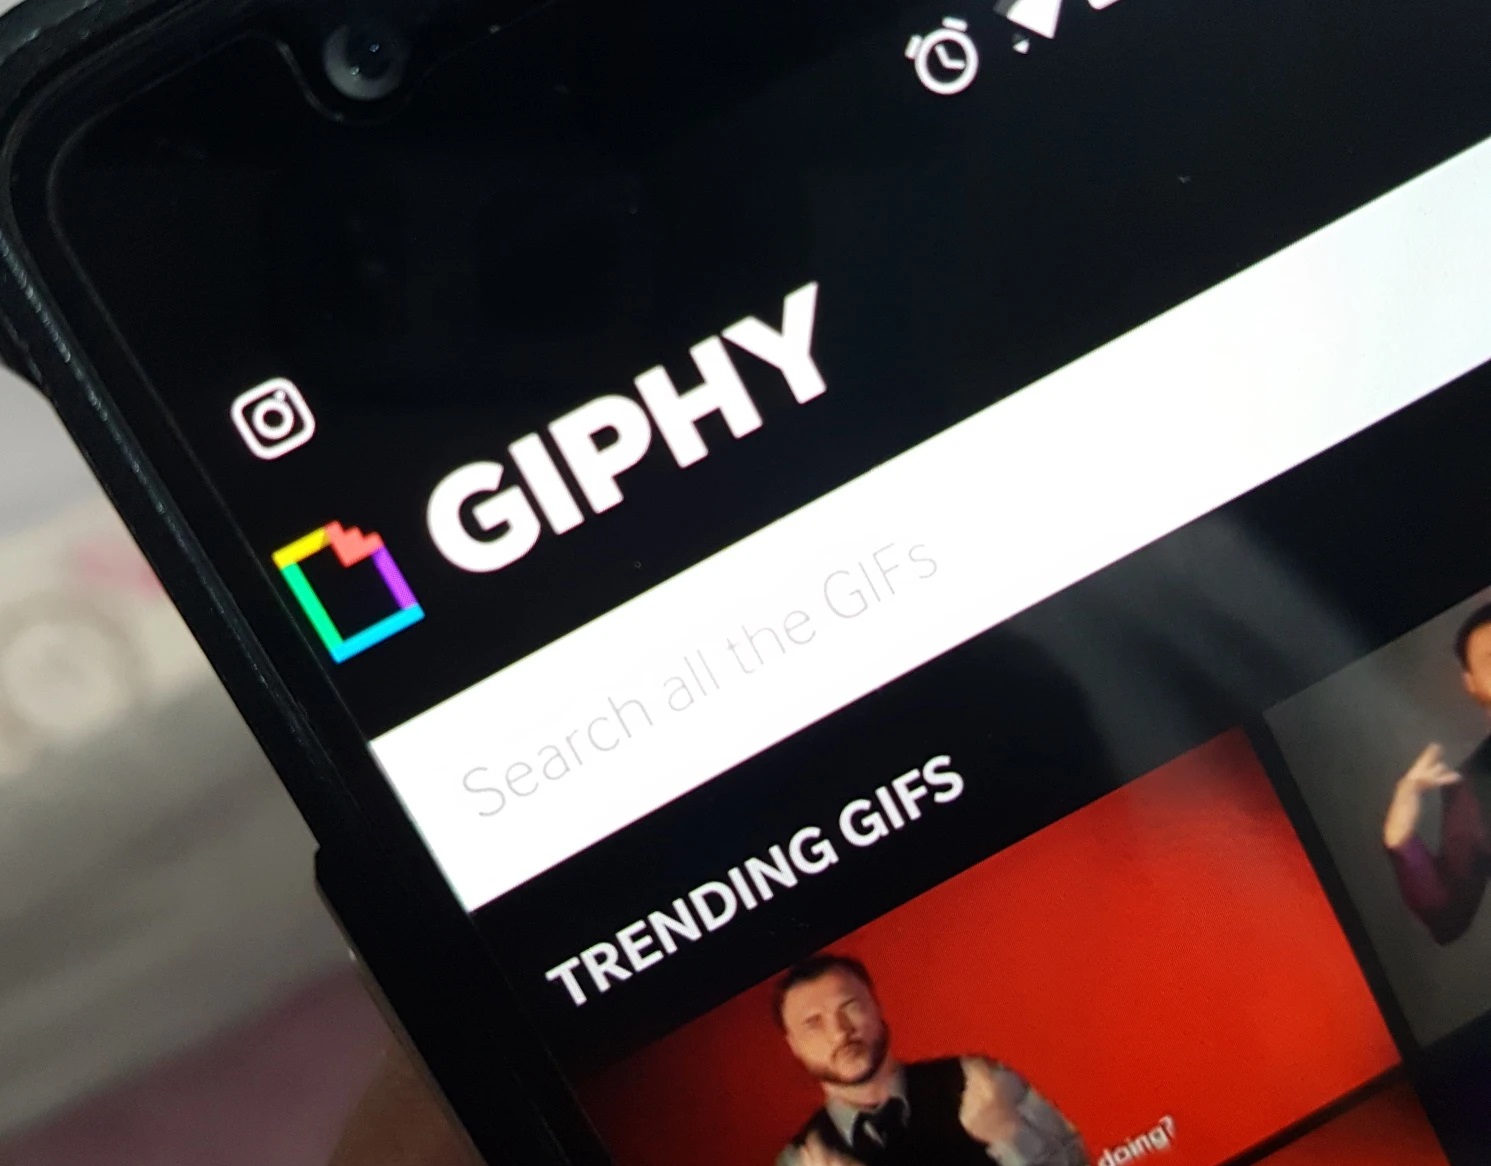
Popular GIF-making apps for Android include GIPHY, GIF Maker, ImgPlay, and Pixaloop. These apps offer a range of features and functionality to help you create and customize your GIFs according to your creative vision. Make sure to explore their features, read user reviews, and determine which app aligns best with your needs.
Once you have chosen the GIF-making app that suits your preferences, you are ready to move on to the next step: installing the app on your Android device.
Step 2: Install the app
After selecting a GIF-making app that suits your needs and preferences, the next step is to install the app on your Android device. Installing an app from the Google Play Store is a straightforward process that can be completed in just a few simple steps.
Here’s how to install a GIF-making app on your Android device:
1. Open the Google Play Store: On your Android device, locate and open the Google Play Store. This is the official app store for Android users.
2. Search for the app: Once you’re in the Play Store, use the search bar at the top of the screen to search for the GIF-making app you have selected. Type in the app’s name and tap on the search icon.
3. Select the app: From the search results, find the GIF-making app you want to install. Tap on the app to open its store page.
4. Check the app details: On the app’s store page, you will find information about the app, such as its features, size, and user reviews. Take a moment to review this information to ensure the app meets your requirements.
5. Install the app: If you’re satisfied with the app, tap the “Install” button on the app’s store page. The installation process will begin, and you may be prompted to grant certain permissions to the app.
6. Wait for the installation to complete: The app will download and install on your Android device. The installation time may vary depending on the app size and your internet connection speed. Once the installation is complete, you will see the app’s icon on your device’s home screen or app drawer.
7. Open the app: To start using the GIF-making app, tap on its icon. The app will open, and you’ll be ready to create your first GIF.
By following these steps, you can easily install a GIF-making app on your Android device. Once the app is installed, you can move on to the next step in creating your own GIF: opening the app and granting any necessary permissions.
Step 3: Open the app and grant necessary permissions
Now that you have installed the GIF-making app on your Android device, it’s time to open the app and grant any necessary permissions. Most apps require certain permissions to access your device’s camera, media files, or other features essential for creating GIFs.
Follow these steps to open the app and grant the necessary permissions:
1. Locate the app: Find the app’s icon on your device’s home screen or app drawer. Tap on the icon to open the GIF-making app.
2. Read the app’s instructions: Once the app is opened, take a moment to read any instructions, tips, or initial setup information presented to you. These instructions may provide valuable guidance on how to use the app effectively.
3. Grant permissions: When you start using the app for the first time, it may prompt you to grant certain permissions. These permissions could include accessing your media files, camera, or storage. Review the permissions requested by the app and tap on “Allow” or “Grant” to provide the necessary access.
4. Enable additional features: Some GIF-making apps may offer additional features or settings that enhance the GIF creation process. Take some time to explore the app’s settings or customization options to make the most out of your GIF-making experience.
5. Follow any setup or tutorial prompts: The app may guide you through a setup process or provide a tutorial to familiarize you with its features. Pay close attention to these prompts and follow the steps to ensure you get the most out of your app.
6. Familiarize yourself with the app’s interface: Take a moment to explore the user interface of the app. Identify the main features, navigation menus, and any tools or options available to you. This will help you navigate the app more efficiently and create your GIFs with ease.
By following these steps, you can open the GIF-making app on your Android device and grant any necessary permissions. Once you have completed this step, you are ready to move on to the next step of the process: selecting the video or image you want to convert into a GIF.
Step 4: Select the video or image you want to convert to a GIF
With the GIF-making app now open and the necessary permissions granted, it’s time to select the video or image that you want to convert into a GIF. This step involves choosing the media file that will serve as the source material for your animated creation.
Follow these steps to select the video or image for your GIF:
1. Explore the app’s options: Familiarize yourself with the app’s interface and look for the option to import or select media files. This feature may be represented by an icon, button, or menu item.
2. Choose from available sources: Most GIF-making apps offer multiple sources from which you can select your media file. These sources may include your device’s gallery, camera roll, or other storage locations. Select the appropriate source based on where your desired video or image is stored.
3. Navigate to the desired media file: Browse through the available files within the selected source to locate the video or image you want to convert into a GIF. Use the app’s browsing and navigation tools to find the file easily.
4. Select the video or image: Once you have located the desired media file, tap on it to select it for conversion. The app may preview the video or display the image to ensure you have chosen the correct file.
5. Adjust the selected portion (for videos): If you have chosen a video, the GIF-making app may provide options to trim or select a specific portion of the video for the GIF. This allows you to capture the exact moment or scene you want to include in your animated GIF.
6. Confirm your selection: After adjusting any necessary settings, such as the duration or specific frames, confirm your selection by tapping on a “Next” or “Confirm” button. This will initiate the conversion process.
By following these steps, you can effectively select the video or image that you want to convert into a GIF using your chosen GIF-making app. Now that you have chosen your media file, it’s time to move on to the next step: customizing your GIF to suit your desired style and preferences.
Step 5: Customize your GIF
Once you have selected the video or image to convert into a GIF, it’s time to unleash your creativity and customize your animated creation. This step involves using the features and tools provided by the GIF-making app to personalize your GIF according to your desired style and preferences.
Follow these steps to customize your GIF:
1. Editing tools: Explore the app’s editing tools and options to enhance your GIF. These tools may include adjusting brightness, contrast, or saturation, applying filters, or adding text and stickers to your animation. Experiment with different effects and settings to achieve the desired look and feel of your GIF.
2. Playback settings: Many GIF-making apps allow you to adjust the playback speed or loop settings of your animation. You can speed up or slow down the GIF’s playback to add emphasis or create a specific effect. Additionally, you can choose whether the GIF loops continuously or plays only once.
3. Effects and overlays: Some apps offer additional effects or overlays that can be applied to your GIF. These effects can include animations, overlays, or even the ability to create cinemagraphs, where only a specific portion of the image is animated. Experiment with these effects to add visual interest and uniqueness to your GIF.
4. Add text or captions: Consider adding text or captions to your GIF to convey a message, add context, or create humor. Most GIF-making apps provide options to add text in various font styles, sizes, and colors. Play around with text placement and design to ensure it complements your GIF effectively.
5. Preview and make adjustments: As you make customizations, preview your GIF to see how it looks and ensure it matches your desired outcome. Make any necessary adjustments to the settings, timing, or effects until you are satisfied with the final result.
6. Save or export your GIF: When you are happy with your customized GIF, use the app’s saving or exporting feature to save your animation to your device’s gallery or a designated folder. You may also have the option to directly share your GIF on various platforms, such as social media or messaging apps.
By following these steps, you can easily customize your GIF to suit your creative vision. Don’t be afraid to experiment and try different options to create a unique and visually appealing GIF. With the customization step complete, it’s time to move on to the final step: saving and sharing your GIF with others.
Step 6: Save and share your GIF
After customizing your GIF to perfection, it’s time to save and share your creation with others. This final step allows you to showcase your animated masterpiece and engage with your friends, family, or online community.
Follow these steps to save and share your GIF:
1. Save your GIF: Depending on the GIF-making app you are using, there will be an option to save your GIF to your device’s gallery or a designated folder. Tap on the “Save” or “Export” button to save your GIF. Choose an easily accessible location so you can find and share your GIF when needed.
2. Verify the saved GIF: After saving, locate the saved GIF in your device’s gallery or the designated folder. Open the GIF to ensure it was saved successfully and plays as intended. Check for any issues or glitches that may have occurred during the saving process.
3. Share your GIF: Once you have confirmed that your GIF is saved correctly, it’s time to share it with others. Tap on the “Share” button within the GIF-making app or use the sharing options provided by your device’s operating system. Choose the platform or app through which you want to share your GIF, such as social media, messaging apps, or email.
4. Add captions or descriptions: Consider adding captions or descriptions when sharing your GIF. This can help provide context or convey a message to your audience. Make use of hashtags or relevant tags to increase the visibility of your GIF and reach a wider audience.
5. Spread the word: Encourage your friends, followers, or online community to share your GIF. Engage with others by commenting on or responding to their reactions. This can help generate more visibility and interactions around your GIF.
6. Explore other sharing options: Don’t limit yourself to just one platform. Share your GIF on multiple platforms and across different online communities to maximize its exposure. This can include sharing on platforms such as Twitter, Instagram, Reddit, or even incorporating it into blog posts or websites.
By following these steps, you can efficiently save and share your GIF with others. Enjoy the satisfaction of sharing your creative work and delighting your audience with your personalized animated creation.
Conclusion
Congratulations! You have now learned how to create a GIF on your Android device. With the wide range of GIF-making apps available, the process has become easier and more accessible than ever. By following the step-by-step guide provided, you can now unleash your creativity and share your animated creations with the world.
From understanding what a GIF is and why creating one on Android is advantageous, to selecting the right GIF-making app, and customizing your GIF to reflect your unique style, each step has been designed to help you create engaging and visually appealing animations.
Remember, as you embark on your GIF-making journey, always explore the features and tools offered by the app you choose. The more you experiment and familiarize yourself with different options, the more your creativity will shine through in your GIFs.
Once you have completed your customized GIF, don’t forget to save and share it with others. Whether it’s through social media, messaging apps, or even integrating it into your blog or website, sharing your GIF allows you to connect with your audience and receive feedback and appreciation for your work.
Now, armed with the knowledge and skills to create GIFs on your Android device, it’s time to let your imagination run wild. Create captivating animations, express your emotions, and enjoy the process of bringing still images or videos to life with the power of GIFs.
So, what are you waiting for? Start capturing moments, transforming them into GIFs, and sharing your creativity with the world. Inspire others, evoke laughter, or simply bring a smile to someone’s face with your unique GIF creations. Happy GIF-making!