Introduction
Welcome to the world of virtual reality (VR) where you can immerse yourself in a whole new digital experience. VR headsets have gained immense popularity in recent years, allowing users to explore virtual worlds, play games, and watch movies like never before. However, you may be surprised to learn that you don’t need to spend a fortune to enjoy this exciting technology. With just a few materials and some creativity, you can make your very own cardboard VR headset at home.
In this step-by-step guide, we will walk you through the process of creating a cardboard VR headset that is not only cost-effective but also easy to assemble. Whether you’re a tech enthusiast, a DIY enthusiast, or simply curious about VR, this project is perfect for you. You’ll be amazed at how simple it is to construct your own headset and step into a world of virtual adventures.
Before we delve into the details, let’s take a quick look at the materials you’ll need for this DIY project. Don’t worry, you won’t need any specialized tools or expensive equipment. Most of the items can be found around the house or easily obtained from a local craft store. So, gather the following materials and let’s get started on creating your very own cardboard VR headset:
Materials Needed
Before you begin making your cardboard VR headset, make sure you have the following materials on hand:
- Cardboard sheets: You’ll need sturdy cardboard sheets to create the main structure of your headset. Look for cardboard that is at least 2mm thick for durability.
- VR headset template: Download and print a VR headset template from a reliable source. This will serve as a guide for cutting and assembling the cardboard pieces.
- Scissors: A pair of sharp scissors will be essential for cutting out the cardboard pieces accurately.
- Double-sided tape: Use double-sided tape to secure the cardboard pieces together. This will ensure a sturdy construction.
- Lenses: To experience VR, you’ll need a pair of lenses that can be easily attached to the headset. Look for lenses with a focal length between 40mm and 45mm for optimal viewing.
- Magnets: Magnets will help hold the front cover of the headset in place. Look for small, round magnets that are strong enough to keep the cover secure.
- Rubber bands: You’ll need rubber bands to hold your smartphone in place inside the headset. Make sure they are wide enough to securely hold your device.
- Marker or pen: Use a marker or pen to trace the template onto the cardboard and make any necessary markings.
- Smartphone: Finally, you’ll need a smartphone with VR capabilities. Most modern smartphones are compatible with VR applications.
With these materials ready, you’re now prepared to embark on the exciting journey of creating your own cardboard VR headset. Let’s move on to the next step: downloading and printing the VR headset template.
Step 1: Gather the Required Materials
Before you start constructing your cardboard VR headset, it’s essential to gather all the necessary materials. This will ensure a smooth and uninterrupted DIY process. Here’s a quick checklist of the materials you’ll need:
- Sturdy cardboard sheets: Look for cardboard that is at least 2mm thick for durability.
- VR headset template: Download and print a reliable VR headset template to guide you through the construction process.
- Scissors: Make sure you have a pair of sharp scissors for accurate cutting.
- Double-sided tape: This will be used to secure the cardboard pieces together.
- Lenses: Choose lenses with a focal length between 40mm and 45mm for optimal viewing.
- Magnets: Look for small, round magnets that are strong enough to hold the front cover of the headset in place.
- Rubber bands: You’ll need wide rubber bands to securely hold your smartphone inside the headset.
- Marker or pen: Use a marker or pen to trace the template onto the cardboard and make any necessary markings.
- Smartphone: Make sure you have a smartphone with VR capabilities to experience virtual reality.
Once you’ve gathered all the materials, you’ll be ready to proceed to the next steps of creating your very own cardboard VR headset. Remember to read through the instructions carefully and take your time to ensure a precise and well-constructed final product. Let’s move on to the next step: downloading and printing the VR headset template.
Step 2: Download and Print the VR Headset Template
Now that you have gathered all the necessary materials, it’s time to download and print the VR headset template. This template will serve as a guide for cutting and assembling the cardboard pieces to create your DIY VR headset.
There are several reliable sources online where you can find VR headset templates. Look for templates that are compatible with the type of smartphone you have, as different templates may be designed to accommodate specific phone sizes and configurations.
Once you have found a suitable template, download it and save it to your computer or mobile device. Ensure that you have a printer available, along with a sufficient supply of printer paper. It’s important to use a high-quality printer and paper to ensure accurate printing and easy tracing onto the cardboard.
After downloading the template, open it and preview it on your computer or mobile device. Take a few moments to familiarize yourself with the various parts and components of the VR headset. This will help you understand how the pieces will fit together during the assembly process.
When you’re ready, print the template using your printer. Make sure that the template is printed at its original size without any scaling or resizing. This will ensure that the measurements are accurate, and the pieces will align correctly when cut out.
Once the template is printed, you’re ready to move on to the next step: cutting out the template pieces from the cardboard. Grab your scissors and let’s get started!
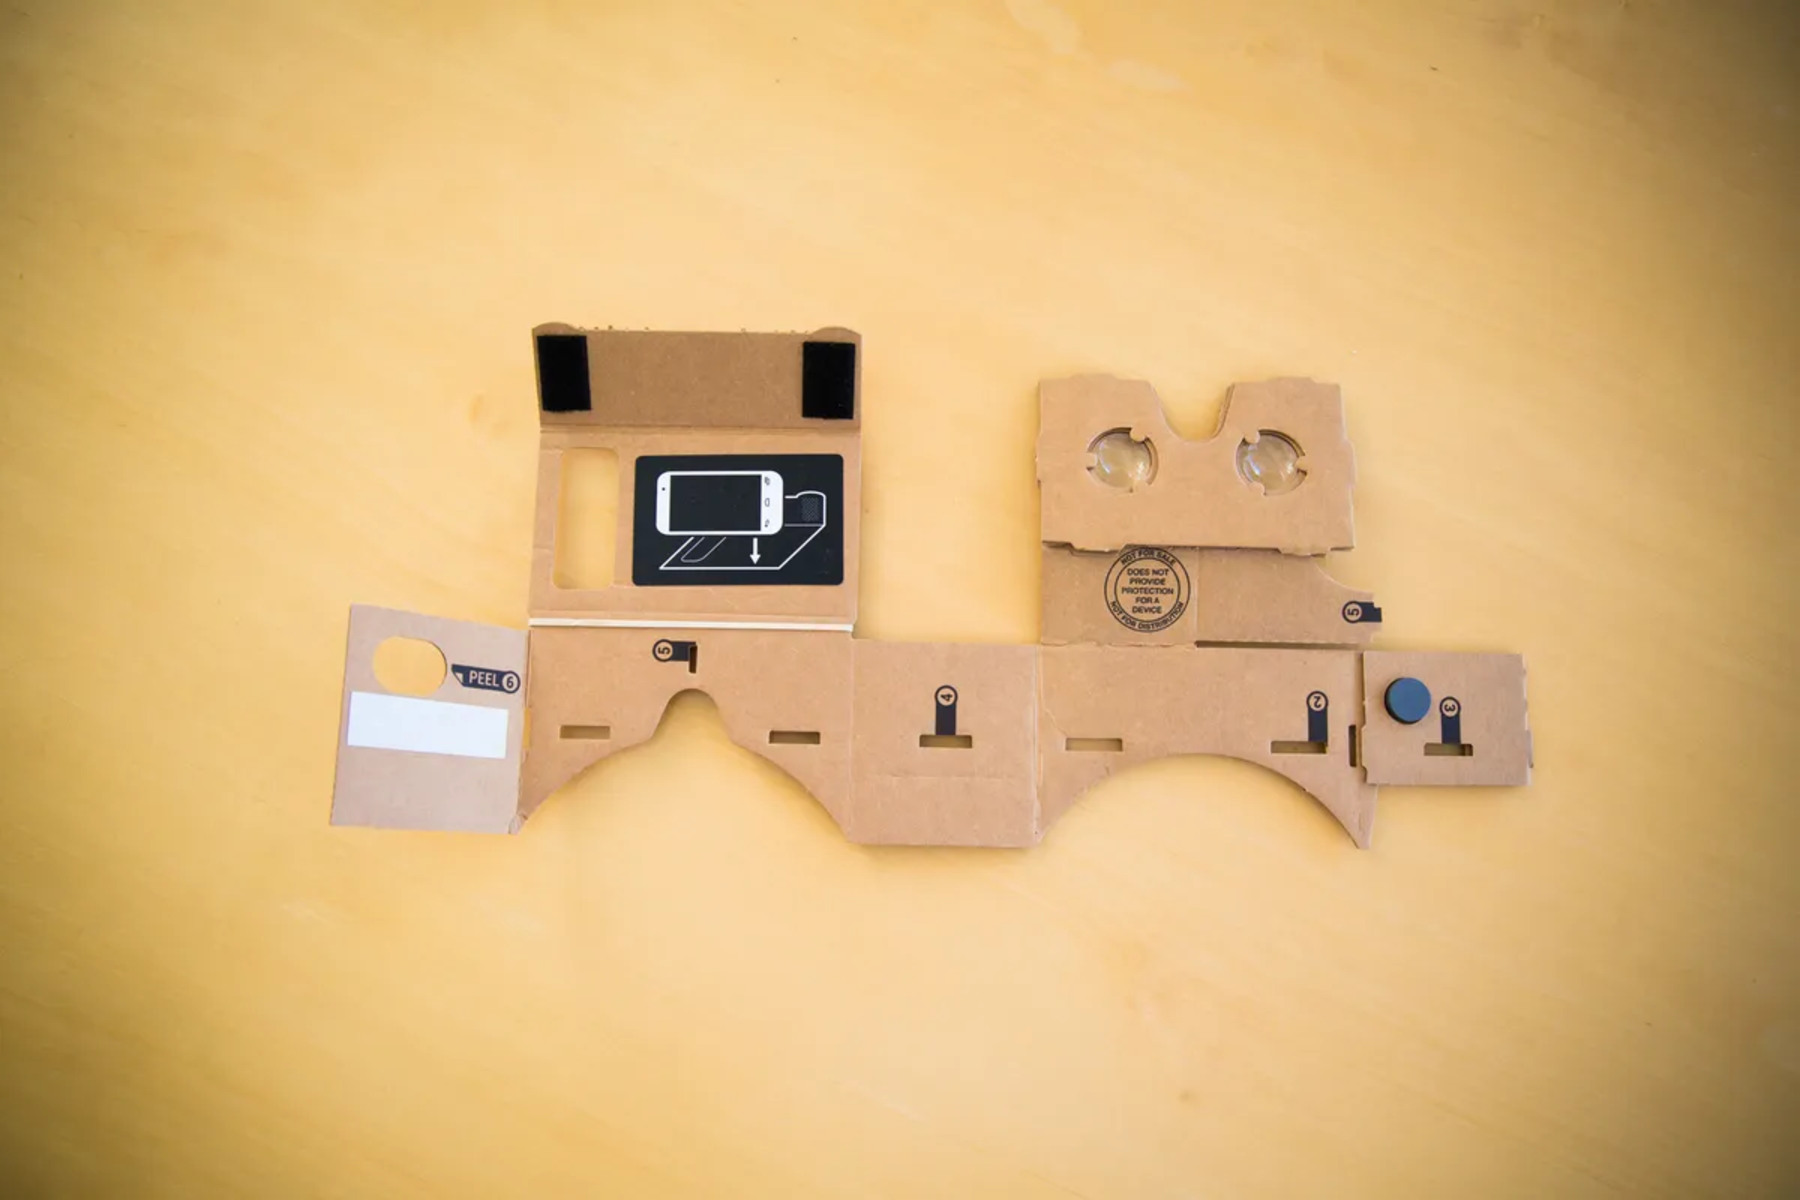
Step 3: Cut Out the Template
Now that you have the printed VR headset template, it’s time to start cutting out the necessary pieces from the cardboard. This step is crucial in creating the foundation of your cardboard VR headset.
Before you begin cutting, make sure you have a clean and flat workspace. Lay the printed template on a sturdy surface, ensuring that it is easily accessible and well-illuminated. Place the cardboard sheets nearby, as you’ll be tracing the template onto them.
Take your scissors and carefully cut around the outline of each piece on the printed template. Pay close attention to any intricate details or markings on the template. Ensure that your cuts are precise and clean, as this will affect the final appearance and functionality of your VR headset.
Once you have cut out the first piece, place it onto one of the cardboard sheets. Use a marker or pen to trace around the outline of the piece onto the cardboard. Repeat this process for each piece on the template, ensuring that you have a corresponding cardboard piece for each template piece.
After tracing all the pieces onto the cardboard, set aside the template and gather the scissors again. Carefully cut along the traced lines on the cardboard sheets to obtain the individual pieces required for assembling the VR headset.
As you cut out each piece, keep them organized and labeled to avoid any confusion during the assembly process. If necessary, use a marker or pen to write small identifiers on the back of each piece to indicate its purpose.
Once all the pieces have been cut out, take a moment to review them and ensure that they are free from any rough edges or stray cardboard pieces. Smooth out any imperfections using sandpaper or a file if needed.
Now that you have all the cardboard pieces ready, it’s time to move on to the exciting part: folding and assembling the pieces to form the structure of your VR headset. Let’s proceed to the next step and bring your DIY VR headset to life!
Step 4: Fold and Assemble the Cardboard Pieces
With all the cardboard pieces cut out, it’s time to start folding and assembling them to create the structure of your cardboard VR headset. This step will bring your DIY project one step closer to completion, so let’s get started!
Take the largest cardboard piece, which will form the main body of the VR headset. Fold along the designated fold lines as indicated on the template. Use a ruler or straight edge to ensure clean and accurate folds. This piece will serve as the foundation for the rest of the assembly.
Next, take the smaller cardboard pieces and begin assembling them onto the main body piece. Carefully follow the instructions provided in the template to ensure each piece is correctly positioned and aligned. Secure the pieces using double-sided tape or glue, making sure to press firmly to ensure a sturdy bond.
As you proceed with the assembly, pay close attention to the small tabs and slots on the cardboard pieces. These notches are designed to interlock and provide additional stability to the structure. Make sure to insert the tabs into the appropriate slots, creating a snug and secure fit.
Continue folding, overlapping, and attaching the remaining cardboard pieces according to the template instructions. Take your time to ensure that each piece is securely attached and aligned correctly, as this will directly affect the functionality and comfort of your VR headset.
As you progress through the assembly, periodically check that all the folds are crisp and the seams are tight. If any parts feel loose or wobbly, add additional tape or glue to reinforce the connections. The goal is to create a solid and stable structure that will securely hold your smartphone during use.
Once you have completed the assembly of all the cardboard pieces, give the headset a thorough inspection. Check for any loose or weak spots, and reinforce them with additional tape or glue if necessary. Ensure that all the folds and connections are secure, allowing the headset to retain its shape during use.
Now that the cardboard pieces are folded and assembled, you’re almost ready to experience VR with your homemade headset. But there are a few more steps to go. In the next step, we will learn how to attach the lenses and magnets to enhance your VR experience. Let’s move on to step 5!
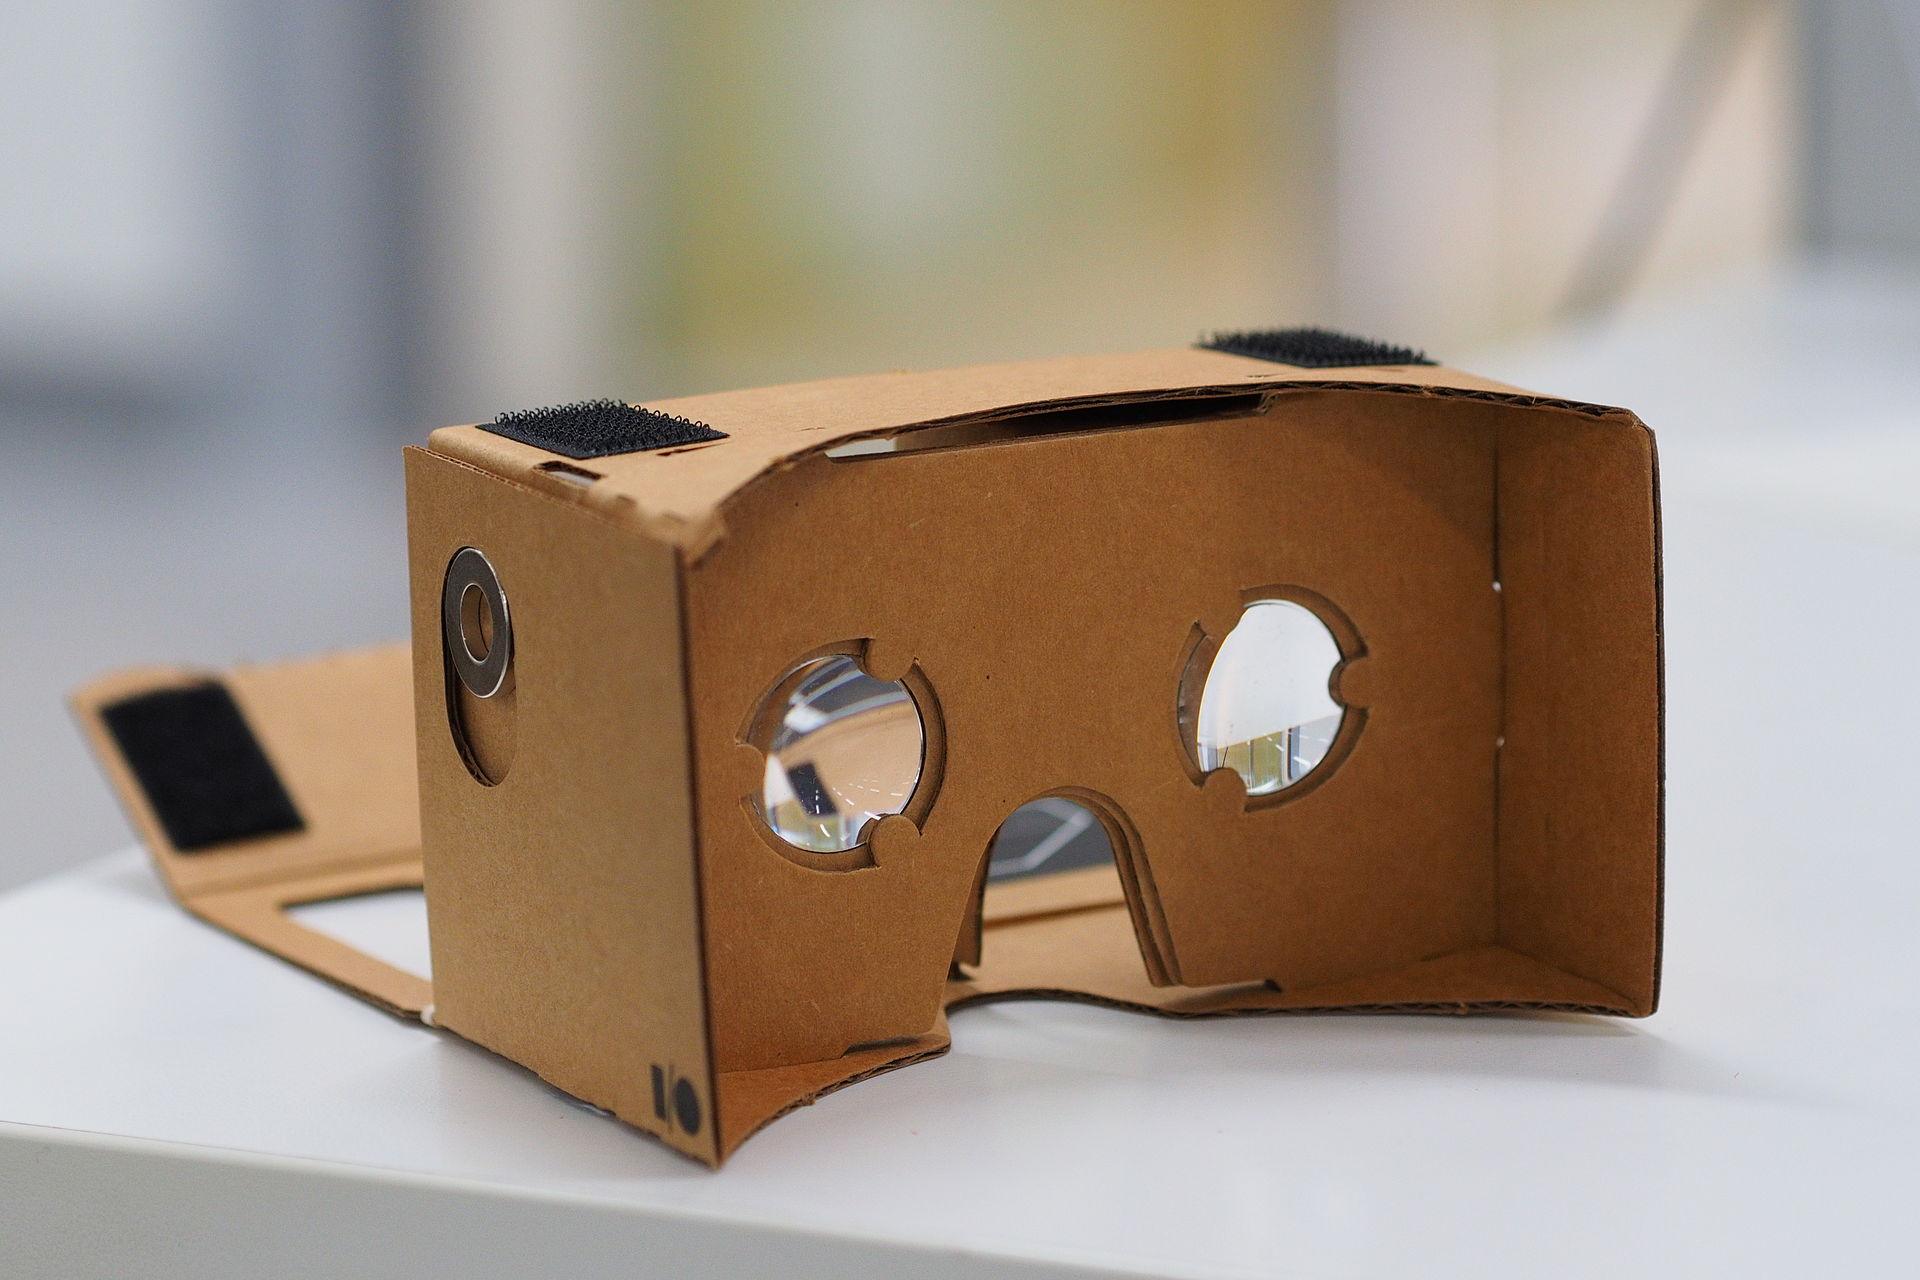
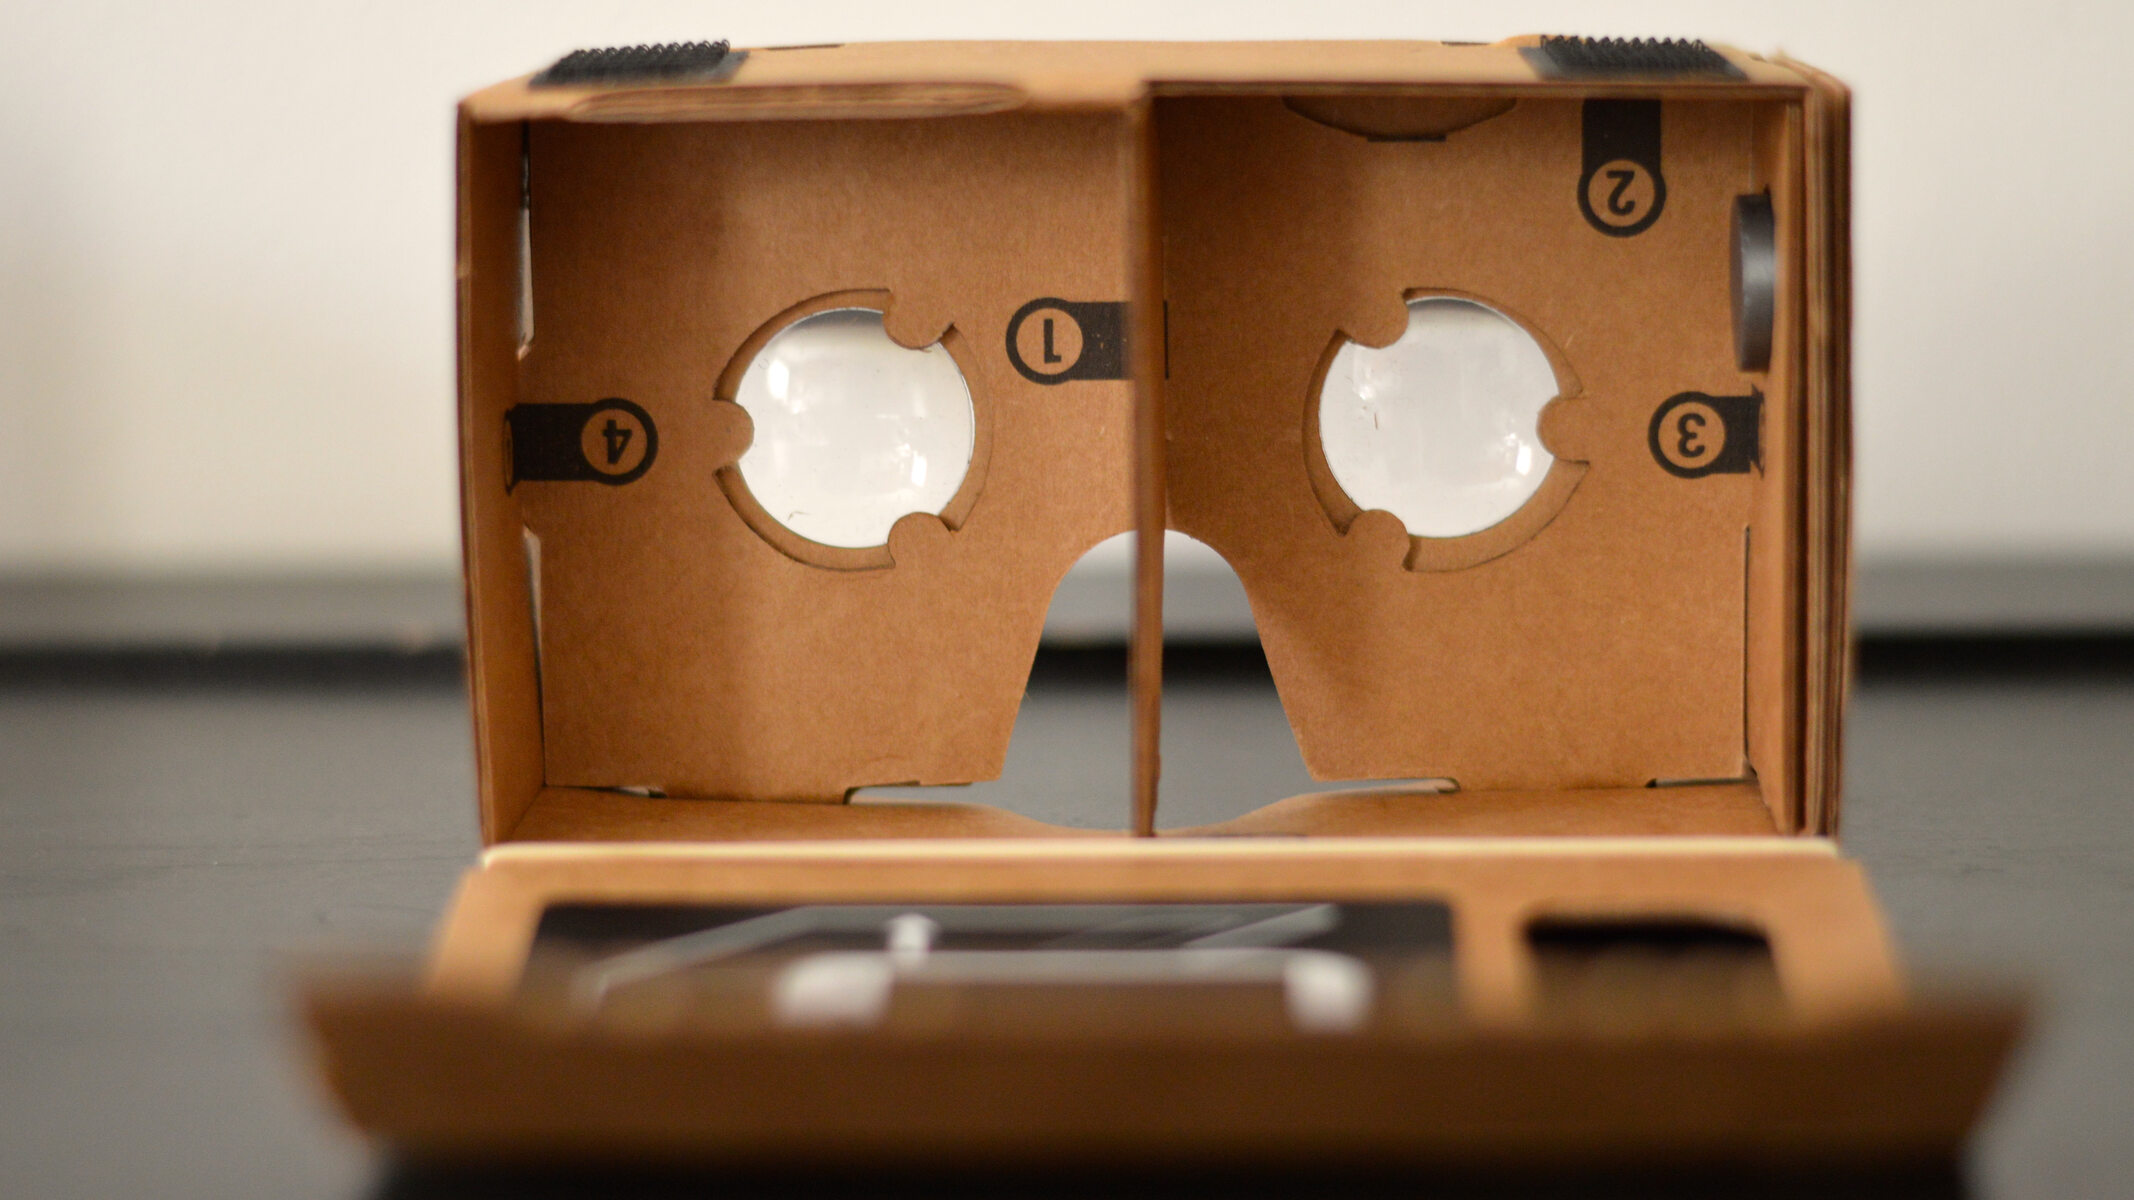
Step 5: Attach the Lenses and Magnets
With the cardboard pieces of your VR headset assembled, it’s time to take your virtual reality experience to the next level by attaching the lenses and magnets. These components are crucial for creating an immersive and enjoyable VR experience.
Start with the lenses. Take the lens holders included in your template or find appropriate lens holders that fit your headset design. Carefully place the lenses into the designated slots on the lens holders. Ensure that the lenses are positioned at the correct distance for optimal focus.
Once the lenses are securely in place, attach the lens holders to the front of the headset. Use double-sided tape or glue to fix them in position, making sure they are properly aligned with the cutouts or holes designed for them. Ensure that the lenses sit firmly and do not wobble or move around.
Next, it’s time to attach the magnets. The magnets are used to hold the front cover of the headset in place, providing easy access for inserting and removing your smartphone. Find the designated areas on the headset where the magnets will be placed.
Apply a small amount of adhesive to the back of each magnet, then position them on the headset. Make sure the magnets are aligned correctly and facing the right way to ensure a strong magnetic connection with the front cover.
Allow the adhesive to dry completely before proceeding. This will ensure that the magnets are securely attached and will not move or come loose during use.
Take a moment to test the magnetic connection by gently placing the front cover onto the headset. Ensure that the magnets hold the front cover in place securely. If necessary, adjust the positioning or strength of the magnets to achieve the desired result.
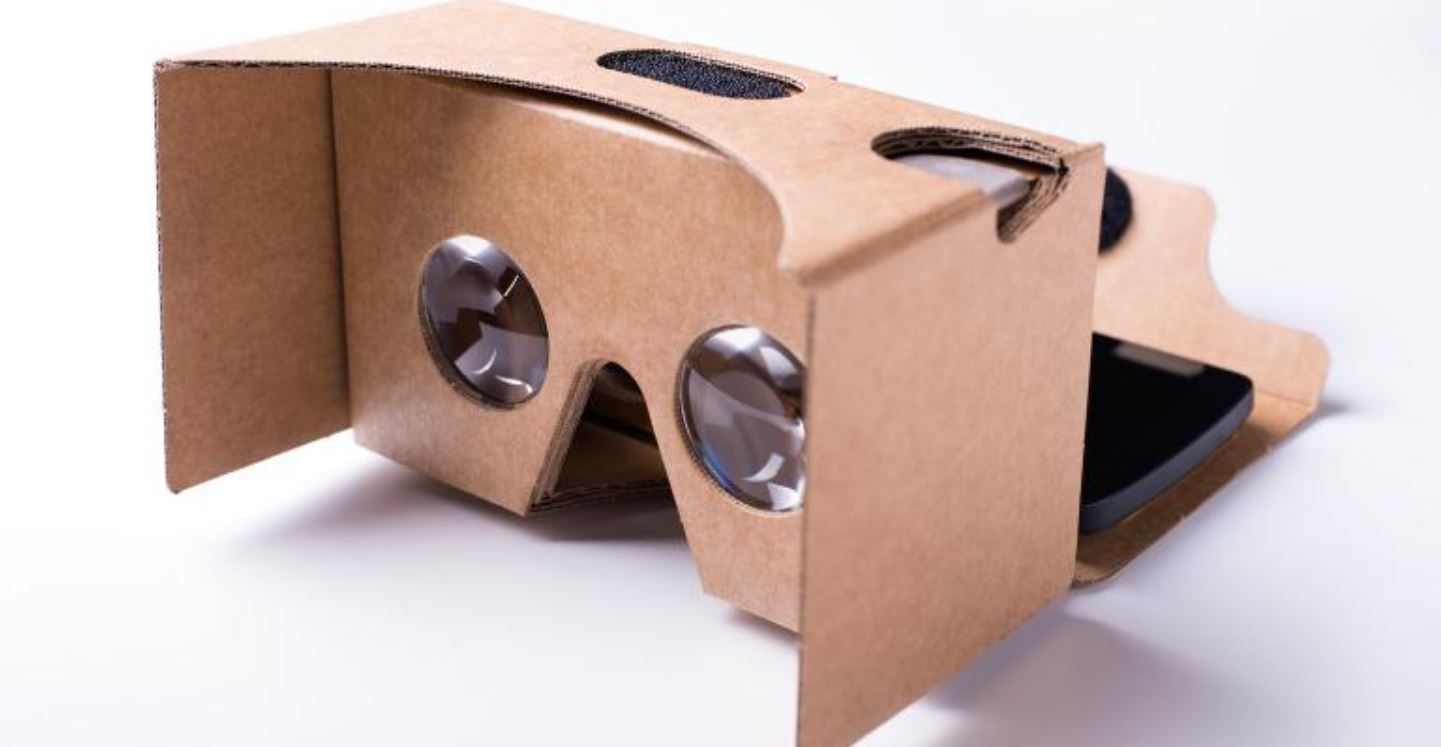
With the lenses and magnets successfully attached, your cardboard VR headset is nearing completion. The next step will guide you on how to insert your smartphone into the headset, bringing your virtual reality experience to life. Let’s move forward to step 6!
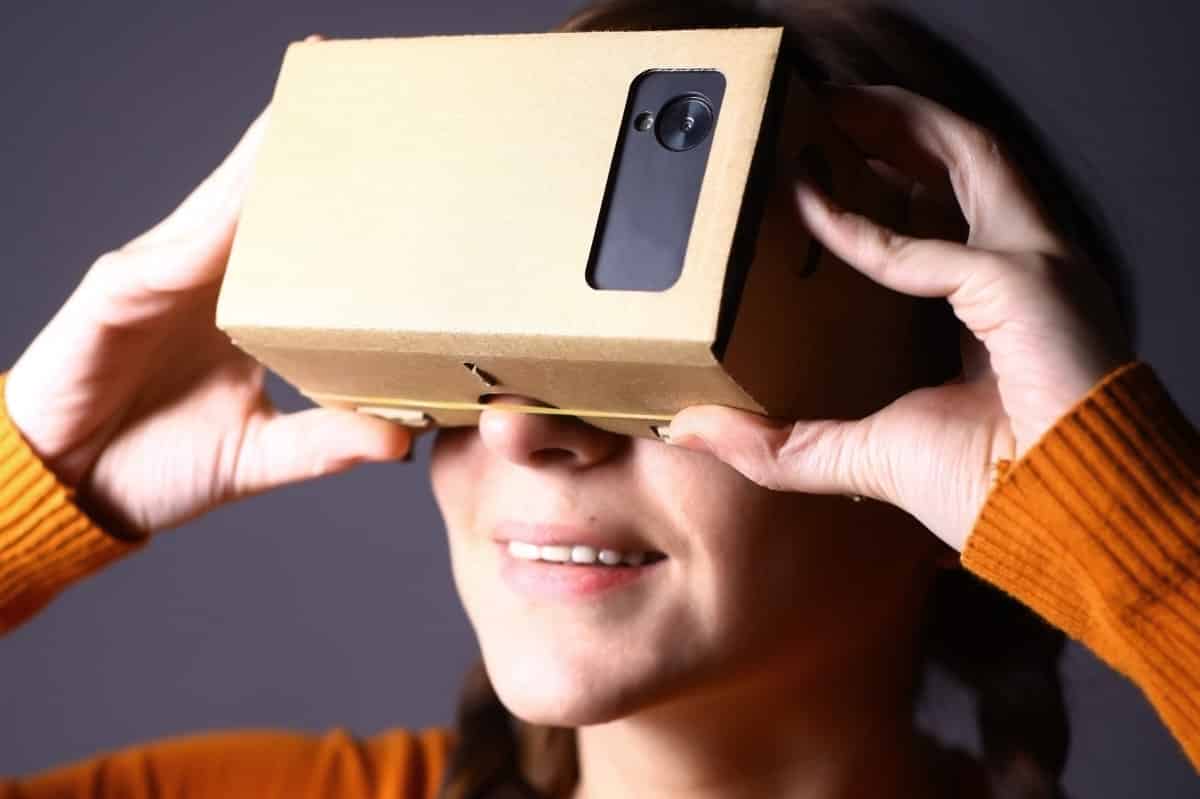
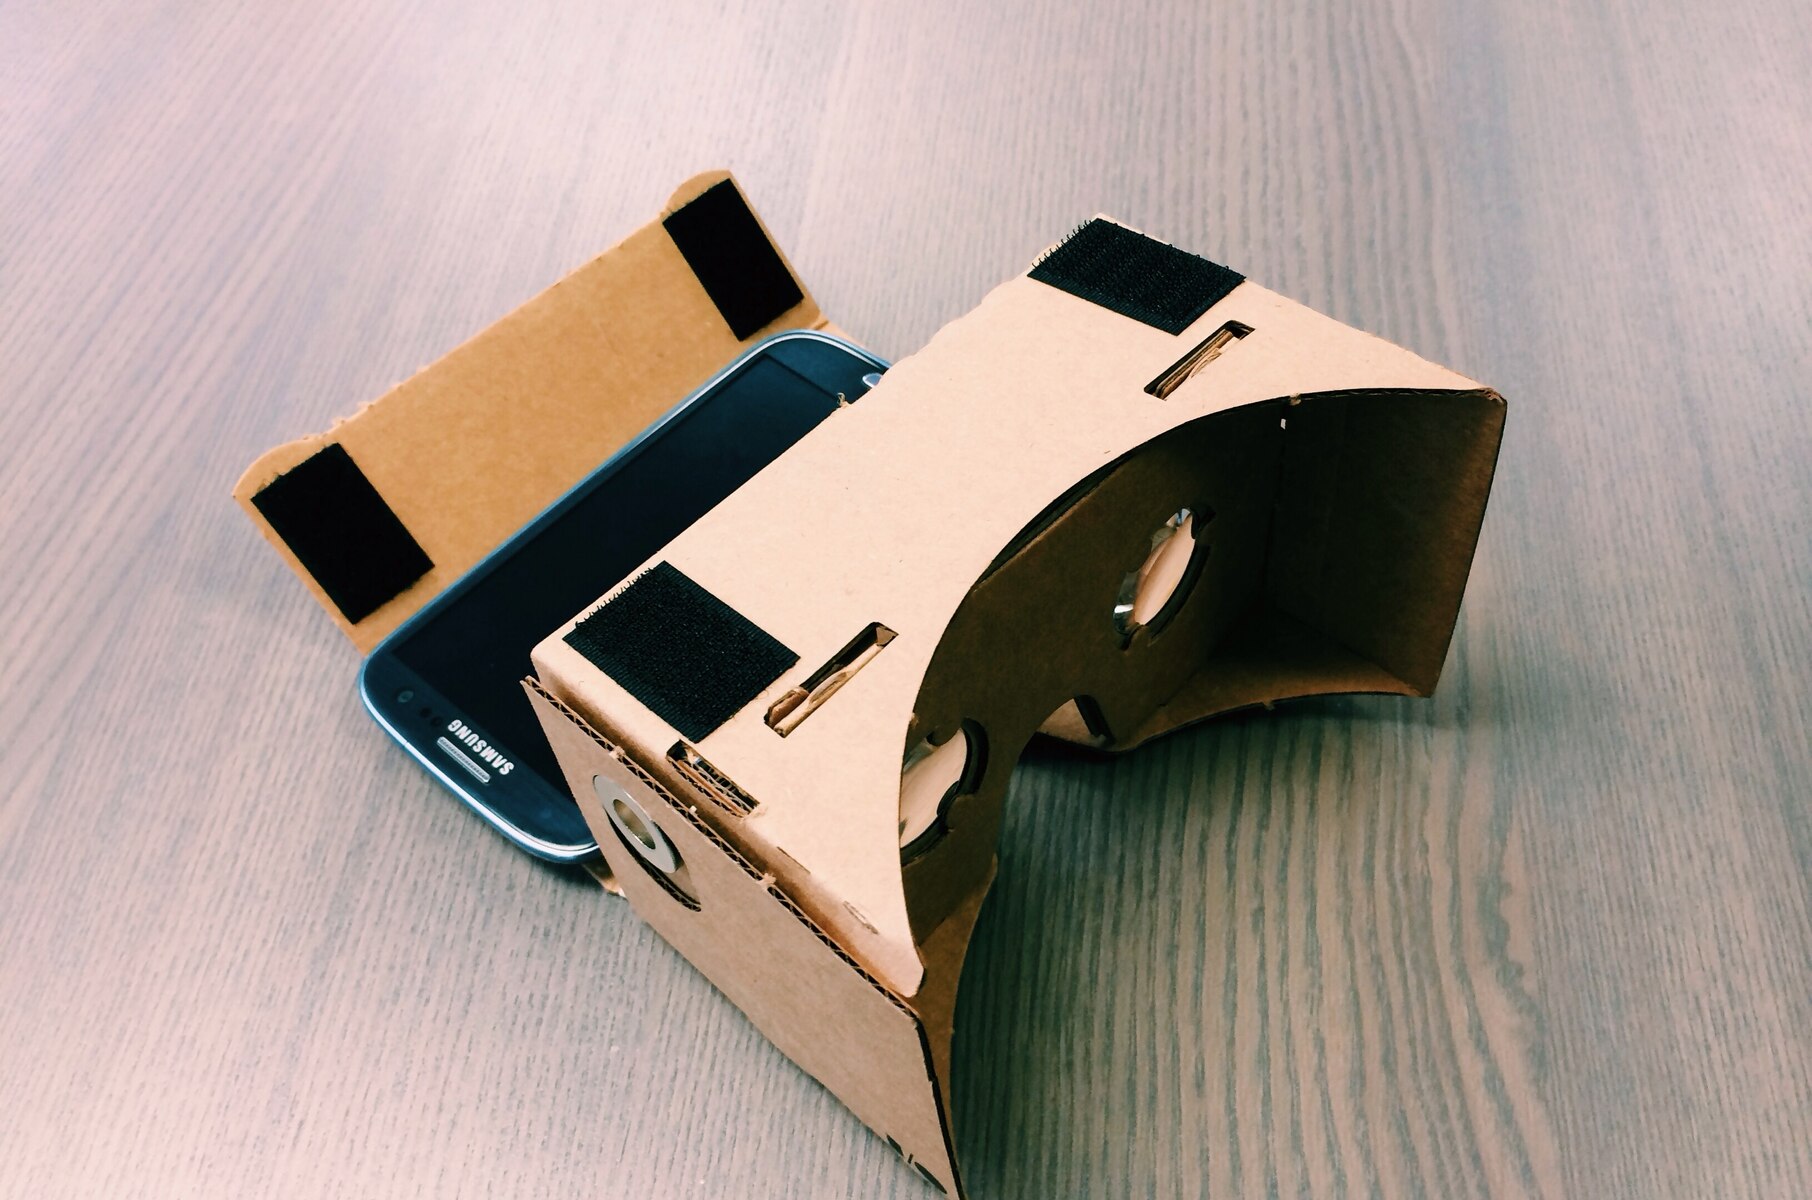
Step 6: Insert the Smartphone into the VR Headset
Now that your cardboard VR headset is almost complete, it’s time to insert your smartphone into the headset to enjoy the immersive world of virtual reality. Follow these simple instructions to ensure a secure and comfortable fit for your device.
Start by removing the front cover of the headset. This will allow you to easily insert your smartphone into the designated slot. Place the front cover aside temporarily.
Next, adjust the lenses if necessary. Most VR headsets have adjustable lenses to accommodate different eye distances or focus preferences. Use the lens adjustment mechanisms provided in your headset design to ensure optimal clarity and comfort.
Now, take your smartphone and ensure it is unlocked and ready for use. Orient the smartphone horizontally, with the screen facing away from you. Carefully slide the smartphone into the slot on the front of the headset, aligning it with the lenses.
Ensure that the smartphone is centered and positioned properly, with the screen aligned with the lenses. Use the rubber bands provided or alternative methods to secure the smartphone in place. Make sure the bands are tight enough to hold the phone securely, but not too tight as to damage the device.
Once the smartphone is securely in place, put the front cover of the headset back on. Align the cover with the magnets and ensure that they attach securely. This will prevent the cover from coming loose during use and provide a finished look to your VR headset.
Before you start using your VR headset, make sure that you have installed any necessary VR apps or games on your smartphone. These applications will allow you to fully immerse yourself in VR experiences and explore different virtual worlds.
Once you’re all set up and ready, put on your VR headset, adjust the straps to fit comfortably around your head, and start exploring the exciting realm of virtual reality. Get ready to embark on incredible adventures, play immersive games, and enjoy 360-degree videos right from the comfort of your DIY cardboard VR headset.
Remember to take breaks when needed and adjust the lenses and headset for optimal comfort. The possibilities are endless, so have fun and enjoy your virtual reality experience!
Step 7: Secure the Headset and Start Exploring VR
Now that you have successfully assembled your DIY cardboard VR headset and inserted your smartphone, it’s time to secure the headset and immerse yourself in the world of virtual reality. Follow these final steps to ensure a comfortable and enjoyable VR experience.
First, adjust the straps of the headset to fit securely and comfortably around your head. The straps should be snug but not too tight, allowing the headset to sit firmly in place without causing discomfort or pressure.
Make sure the lenses are aligned with your eyes for optimal viewing. Most headsets allow for adjustments to the distance between the lenses and your eyes. Experiment with the settings to find the best position for your visual comfort.
Double-check that the smartphone is still securely held in place inside the headset. Ensure that the rubber bands or other securing methods are tight enough to hold the phone securely, but not so tight as to cause any damage to the device.
If necessary, adjust the focus of the lenses to ensure a clear and sharp image. Some headsets have a focus adjustment mechanism that allows you to fine-tune the focus based on your individual eyesight and preference.
Once you have secured the headset and made all the necessary adjustments, it’s time to start exploring VR. Launch the VR app or game on your smartphone and experience a whole new world of virtual adventures. Dive into immersive 360-degree videos, explore new environments, or engage in thrilling virtual gameplay.
As you navigate through VR experiences, remember to take breaks when needed. Extended periods in virtual reality can cause eye strain or discomfort. If you start to feel any discomfort, remove the headset and take a short break before resuming your VR exploration.
When you’ve finished your VR session, remove your smartphone from the headset and store the cardboard VR headset in a safe and dry place. Proper storage will ensure its longevity and allow you to continue enjoying VR experiences for future use.
Congratulations! You have successfully created your very own cardboard VR headset and embarked on an exciting journey into the realm of virtual reality. Enjoy exploring new worlds, playing immersive games, and discovering the limitless possibilities of this emerging technology.
Conclusion
Congratulations on completing your DIY cardboard VR headset! You have successfully transformed a few simple materials into a gateway to the immersive world of virtual reality. Through the step-by-step process of gathering materials, downloading the template, cutting and assembling the cardboard pieces, attaching the lenses and magnets, inserting your smartphone, and securing the headset, you have created a cost-effective and fun way to explore virtual reality.
With your new VR headset, you have the power to teleport to different virtual environments, interact with fascinating characters, and engage in thrilling experiences without leaving your home. The possibilities for entertainment, education, and exploration are limitless.
Remember to take good care of your DIY cardboard VR headset to ensure its longevity. Store it in a safe and dry place when not in use and handle it with care to prevent any damage.
As technology continues to advance, VR experiences are becoming more accessible and diverse. Consider exploring different VR apps, games, and videos to fully enjoy the capabilities of your headset. Stay up to date with new developments in the VR world and continue to expand your virtual reality horizons.
Overall, the journey of creating your own cardboard VR headset is not only a great DIY project but also an excellent opportunity to dive into the exciting world of virtual reality. So go ahead, put on your headset, and let your imagination run wild as you explore the immersive wonders of VR!