Introduction
Welcome to the wonderful world of laser engraving! If you’re looking to add a personal touch to your plain mugs or create customized gifts, a laser engraver is the perfect tool for the job. Laser engraving technology allows you to etch intricate designs, names, and even photographs onto various surfaces, including ceramics like mugs.
By using a laser beam to remove the top layer of the material, laser engraving creates precise and permanent marks on your chosen object. This process not only adds a touch of elegance but also ensures that your design will last for years to come.
In this guide, we’ll walk you through the process of laser engraving a mug. Whether you’re a beginner or have some experience with engraving, we’ll cover everything you need to know to create stunning personalized mugs.
From choosing the right mug for laser engraving to preparing the engraver and implementing your design, we’ve got you covered. We’ll also share some tips on maintaining your laser engraver to ensure its longevity.
So, grab your favorite mug and let’s dive into the exciting world of laser engraving!
What is a laser engraver?
A laser engraver is a high-tech machine that uses laser technology to etch or cut various materials with precision and accuracy. It operates by emitting a powerful laser beam that vaporizes or melts the surface of the material, creating a permanent mark or cut. Laser engravers are commonly used for personalization, branding, and creating intricate designs on a wide range of objects, including mugs.
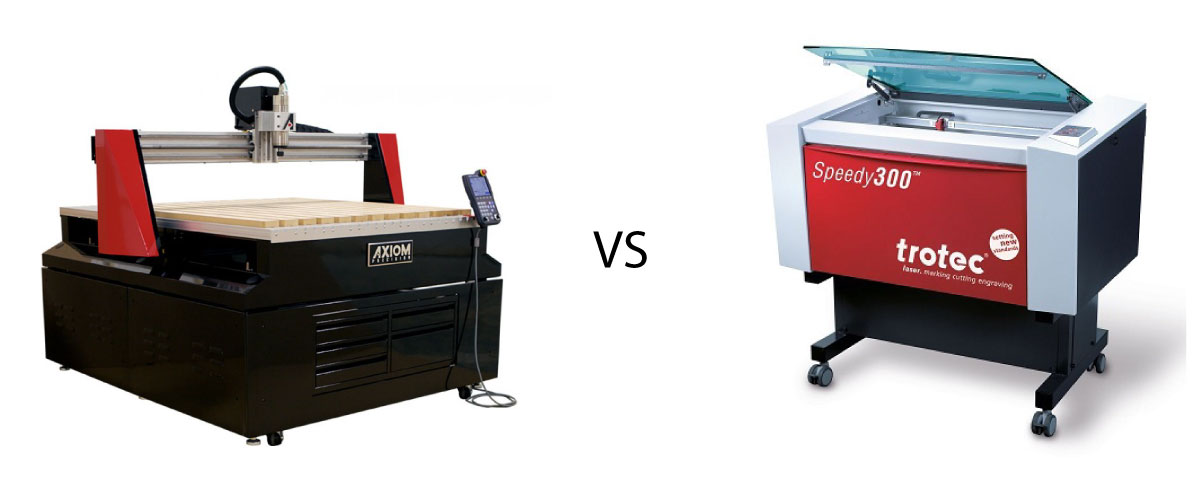
The main component of a laser engraver is the laser itself, which is usually a CO2 or fiber laser. CO2 lasers are commonly used for engraving non-metal materials like wood, glass, and plastics, while fiber lasers are more suitable for engraving metals. The laser beam is guided by a series of mirrors and focused onto the surface of the material using lenses. The intensity and speed of the laser beam can be controlled to achieve different depths of engraving or cutting.
One of the key advantages of laser engraving is its versatility. It allows for intricate and highly detailed designs to be engraved onto a variety of materials. When it comes to mugs, laser engraving can create stunning results by etching names, patterns, or even photographs directly onto the mug’s surface.
In addition to personalization and customization, laser engraving offers several other benefits. It is a non-contact process, meaning there is no physical force applied to the material, minimizing the risk of damaging or distorting it. Laser engraving also provides precise and consistent results, ensuring that each piece is identical. It is a fast and efficient process, making it ideal for both small-scale and large-scale production.
However, it is important to note that laser engraving does come with a few limitations. It may not be suitable for materials that are highly reflective or transparent, as the laser beam may not be absorbed or focused properly. Additionally, certain materials may release harmful fumes during the engraving process, so proper ventilation is crucial.
In the next sections, we will guide you through the process of laser engraving a mug, from choosing the right mug to designing and implementing your engraving. So let’s get started!
Choosing the right mug for laser engraving
When it comes to laser engraving a mug, selecting the right type of mug is essential to achieve the best results. Here are some factors to consider when choosing a mug for laser engraving:
- Material: Opt for mugs made of heat-resistant materials such as ceramic or stainless steel. These materials can withstand the laser engraving process without significant damage or warping.
- Surface: Look for a mug with a smooth and flat surface. Uneven or textured surfaces may result in inconsistent engraving or make it difficult to achieve fine details. Avoid mugs with handles that obstruct the engraving area, as they can limit the available space for your design.
- Color: Keep in mind that laser engraving removes the top layer of the material, revealing the color beneath. Choosing a mug with a contrasting color between the surface and the layer beneath can create a visually striking effect. For example, a white ceramic mug with a black layer beneath can produce sharp and eye-catching engravings.
- Coating: Some mugs come with a special coating or glaze. While these coatings can enhance the appearance, they may affect the engraving process. It’s recommended to choose mugs with a minimal coating or opt for uncoated mugs to ensure optimal engraving results.
- Size and shape: Consider the size and shape of the mug, keeping in mind the available space for engraving. Mugs with a wide and flat surface provide more room for designs, while tall and narrow mugs may have limited space. Choose a size and shape that complements your design and allows for comfortable handling.
Once you have identified the perfect mug for laser engraving, it’s time to move on to the next step: designing your engraving. In the following section, we will discuss the various options and considerations when creating your personalized design for the mug.
Designing your engraving
Designing your engraving is an exciting step in the process of laser engraving a mug. It allows you to personalize the mug and create a unique and meaningful design. Here are some tips to consider when designing your engraving:
- Consider the purpose: Think about the purpose of the mug and the message you want to convey. Are you creating a personalized gift for someone special? Are you designing a mug for a specific event or occasion? Understanding the purpose will help you determine the style, imagery, and text to incorporate into your design.
- Simplicity is key: Keep your design simple and clean for optimal visibility. Engraving on a smaller surface like a mug may require more attention to detail. Intricate designs or small text might not be easily recognizable once engraved. Focus on bold and recognizable elements that will stand out on the mug.
- Personalization: If you’re creating a personalized gift, consider incorporating the recipient’s name, initials, or a special date. This adds a personal touch and makes the mug even more meaningful. You can also include meaningful quotes, phrases, or symbols that hold significance for the recipient.
- Size and placement: Consider the size of your design in relation to the size of the mug. A design that is too large may not fit well or may wrap unevenly around the curved surface. Aim for a design that is proportionate to the mug and can be easily seen. Decide on the placement of the design, whether it’s centered, aligned to the side, or wrapped around the entire mug.
- Test the design: Before engraving the final design on the mug, it’s a good idea to do a test run on a similar material or a sample piece. This allows you to assess the clarity, legibility, and overall appearance of the design before committing to it on the actual mug.
Whether you choose to engrave a monogram, a special quote, a favorite image, or a combination of elements, the key is to create a design that resonates with you or the intended recipient. Once you have your design ready, it’s time to move on to preparing the laser engraver for the engraving process, which we will discuss in the next section.
Preparing the laser engraver
Before you can start engraving your design onto the mug, it’s important to properly prepare the laser engraver. Here are the steps to follow:
- Clean the engraving area: Ensure that the engraving area of the laser engraver is clean and free from any debris or residue. A clean surface will help achieve better engraving results and prevent any unwanted marks or blemishes on the mug.
- Set the focus: Adjust the focus of the laser engraver to match the thickness of the mug. This step is crucial to ensure that the laser beam is focused at the correct depth for optimal engraving results. Follow the manufacturer’s instructions for setting the focus, as it may vary depending on the specific model of the laser engraver.
- Secure the mug: Secure the mug in place within the laser engraver. Use clamps, fixtures, or other securing mechanisms to ensure that the mug remains in a fixed position during the engraving process. This will prevent any accidental movement or misalignment that could affect the quality of the engraving.
- Protective measures: Take necessary precautions to protect any areas of the mug that you don’t want to engrave. This can be done by covering those areas with masking tape or using a laser engraving template to shield them from the laser beam. Pay attention to the edges and handles of the mug, as they may need extra protection.
- Connect the engraver software: Connect the laser engraver to your computer and ensure that the engraving software is correctly installed and configured. Familiarize yourself with the software interface and controls, as you’ll need to use it to upload your design and adjust the engraving settings.
Once you have completed these preparation steps, you’re ready to move on to the next stage: positioning the mug in the laser engraver. We’ll cover this in detail in the upcoming section.
Positioning the mug in the laser engraver
Properly positioning the mug in the laser engraver is crucial to achieving accurate and precise engraving results. Follow these steps to ensure the mug is positioned correctly:
- Open the engraver: Open the laser engraver and ensure there is enough space to accommodate the size of the mug. Check that the engraving area is clear and free from any obstructions.
- Place the mug: Carefully place the mug in the designated engraving area. Ensure that the mug is centered and aligned with the laser’s focal point. It’s essential to position the mug accurately to avoid any misalignment or distortion of the design during the engraving process.
- Secure the mug: Once the mug is properly positioned, secure it in place using clamps or fixtures provided by the laser engraver. Make sure the mug is firmly held to prevent any movement or slippage during the engraving process.
- Check clearance: Ensure that there is sufficient clearance between the laser head and the surface of the mug. The laser head should not come into contact with the mug during engraving, as this can cause damage to the equipment or the engraved design.
- Adjust the engraving area: If necessary, adjust the engraving area to match the size and shape of the mug. Some laser engravers allow you to customize the engraving area by using adjustable platforms or trays. This ensures that the laser beam covers the entire surface of the mug.
Take your time when positioning the mug in the laser engraver to ensure accuracy and optimal results. It may be helpful to refer to any alignment guides or marks provided by the laser engraver to ensure proper placement. Once you’re satisfied with the positioning, you can move on to the next step: adjusting the laser engraver settings to achieve the desired engraving effect.
Adjusting the laser engraver settings
Adjusting the laser engraver settings is a crucial step to achieve the desired engraving effect on your mug. Here are the key settings to consider:
- Power: The power setting determines the intensity of the laser beam. Higher power settings result in deeper and darker engravings, while lower settings produce lighter and shallower marks. Adjust the power based on the material and desired effect, keeping in mind that different materials may require different power levels.
- Speed: The speed setting controls how quickly the laser head moves across the surface of the mug. Faster speeds result in lighter and more subtle engravings, while slower speeds produce deeper and more pronounced marks. Find the right balance between speed and power to achieve the desired engraving depth and clarity.
- Frequency: The frequency setting determines the number of laser pulses per second. Higher frequencies create smoother engraving lines, while lower frequencies result in more visible dot patterns. Experiment with different frequencies to achieve the desired texture and appearance in your engraving.
- DPI (Dots Per Inch): The DPI setting affects the resolution and level of detail in the engraving. Higher DPI values result in finer details and smoother curves, while lower settings may produce more pixelated or jagged lines. Consider the complexity of your design and the capabilities of your laser engraver when adjusting the DPI setting.
- Focus adjustment: Fine-tune the focus of the laser beam based on the thickness of the mug. Ensure that the laser is focused at the correct depth to achieve crisp and clear engraving results. Refer to the manufacturer’s instructions to make accurate focus adjustments.
It’s important to note that different laser engravers may have slightly different settings and terminology. Familiarize yourself with the user manual and control panel of your specific laser engraver to understand the available options and how to adjust them.
Once you have adjusted the settings to your desired specifications, it’s time to move forward and engrave the design onto the mug. We will discuss this process in detail in the next section.
Engraving the design onto the mug
With the laser engraver properly set up and the design finalized, it’s time to proceed with engraving the design onto the mug. Follow these steps to ensure a successful engraving process:
- Double-check the settings: Before starting the engraving, double-check that all the laser engraver settings, including power, speed, frequency, and focus, are precisely adjusted to your desired specifications. This step ensures that the engraving will be accurate and consistent.
- Start the engraving process: Initiate the engraving process by activating the laser engraver according to the manufacturer’s instructions. The machine will follow the design file and engrave the selected areas onto the mug’s surface. Stay close to the engraver to closely monitor the progress and ensure everything is running smoothly.
- Monitor the engraving: Keep a close eye on the engraving process, especially during the initial stages. Make sure the laser beam is creating the desired mark depth and clarity. If you notice any unexpected issues or inconsistencies, pause the engraving process and make necessary adjustments before continuing.
- Engraving time: The duration of the engraving process will depend on the complexity of the design, the selected settings, and the capabilities of the laser engraver. Be prepared for the engraving to take some time, especially if you’re aiming for detailed and intricate designs.
- After engraving: Once the engraving is complete, carefully remove the mug from the engraver, taking care not to smudge or damage the freshly engraved surface. Inspect the engraving to ensure it meets your expectations and matches the design you had in mind.
- Cleanup: After the engraving is done, clean the mug to remove any residual debris or smoke stains from the engraving process. Use a soft cloth or sponge and a mild cleaning solution to gently wipe away any leftover residue. Avoid using abrasive cleaners or scrubbing tools that could scratch or damage the engraved surface.
By following these steps and paying attention to detail, you can successfully engrave your design onto the mug and achieve the desired personalized effect. Once the mug is cleaned and dried, you can move on to adding any finishing touches, if desired, to further enhance the appearance of the engraved design.
Finishing touches
After the engraving process is complete, you have the option to add some finishing touches to further enhance the appearance of the engraved design. Here are a few ideas to consider:
- Color fill: If you want to add some color to your engraved design, consider using a specialized ceramic or glass paint to fill in the engraved areas. This can create a striking contrast and make your design stand out even more. Make sure to choose a paint that is suitable for the material of your mug and follow the manufacturer’s instructions for best results.
- Polishing: Depending on the material and finish of your mug, you may want to polish the engraved areas to give them a smooth and shiny appearance. Use a soft cloth or polishing pad to gently buff the engraved surface and remove any rough edges or residue from the engraving process.
- Personalized packaging: Consider presenting the engraved mug in personalized packaging to make it even more special. This can include customized gift boxes, wrapping paper, or even personalized tags or labels. Adding these little touches can elevate the overall gifting experience and show that you’ve put thought and effort into creating a unique present.
- Protective coating: If you want to ensure the longevity of the engraved design, you can apply a protective coating over the engraved areas. There are specialized ceramic or glass sealants available that can help protect the engraving from scratches and fading over time. Make sure to choose a coating that is compatible with the material of your mug and follow the instructions for application.
Remember that these finishing touches are optional and should be chosen based on your preferences and the intended use of the mug. It’s important to consider the durability and functionality of the finishes you apply to ensure that they will withstand regular use and washing.
Once you’ve added the finishing touches, your laser-engraved mug is ready to be enjoyed or gifted! With its personalized design and thoughtful details, it’s sure to make a lasting impression.
Maintaining your laser engraver
To ensure the longevity and optimal performance of your laser engraver, regular maintenance is essential. Here are some key maintenance tasks to keep in mind:
- Cleaning: Regularly clean the engraving area, lenses, mirrors, and any other components that come into contact with the material being engraved. Use a soft cloth or brush and a recommended cleaning solution to remove any dust, debris, or residue. Cleaning helps maintain the engraving quality and prevents buildup that may affect the accuracy of the laser beam.
- Alignment check: Periodically check and realign the laser beam if necessary. Over time, vibrations or other factors may cause the laser beam to be slightly misaligned, resulting in less precise engraving. Refer to the manufacturer’s instructions for guidance on how to perform alignment checks and adjustments.
- Lubrication: Depending on the specific model of your laser engraver, some components may require periodic lubrication to ensure smooth operation. Pay attention to the manufacturer’s recommendations regarding lubrication frequency and the type of lubricant to use. Proper lubrication helps prevent excessive wear and reduces friction within the machine.
- Replace worn parts: Over time, certain parts of the laser engraver may wear out and need replacement. This can include lenses, mirrors, belts, or other consumable components. Regularly inspect these parts and replace them as necessary to maintain the engraver’s performance and accuracy.
- Ventilation and air filtration: Ensure that the engraving area is properly ventilated to remove smoke, fumes, and odors generated during the engraving process. This is important for your safety and the longevity of the machine. Consider installing an air filtration system to further improve air quality and minimize the buildup of airborne particles.
- Software updates: Stay up to date with any software updates or firmware releases for your laser engraver. These updates may include performance improvements, bug fixes, or new features that enhance the functionality and reliability of the machine. Regularly check the manufacturer’s website or subscribe to their newsletters for updates.
By following these maintenance practices, you can ensure that your laser engraver remains in good working condition and continues to produce high-quality engravings. Regular maintenance not only extends the lifespan of the machine but also reduces the risk of malfunctions and costly repairs.
Remember to always refer to the manufacturer’s instructions and recommendations specific to your laser engraver model for the most accurate and effective maintenance procedures.
Conclusion
Congratulations! You have now learned the essentials of laser engraving a mug. By following the steps outlined in this guide, you can create personalized and unique mugs that make for memorable gifts or impressive additions to your own collection.
From choosing the right mug material and design, to preparing the laser engraver and adjusting the settings, every step is essential to achieve desired results. Take the time to select meaningful designs, properly position the mug in the engraver, and pay attention to the engraving process to ensure accuracy and precision.
Remember to experiment with different engraving settings, such as power, speed, frequency, and focus, to achieve the desired depth and clarity. And don’t forget the finishing touches, such as color fill or polishing, to further enhance the appearance of your engraved design.
Additionally, regular maintenance of your laser engraver is crucial to keep it in optimal condition. Cleaning, alignment checks, lubrication, and part replacements, when needed, will help prolong the lifespan of your machine and ensure consistent engraving results.
Now it’s time to put your newfound knowledge into practice and start creating stunning laser-engraved mugs. Whether you’re making personalized gifts for loved ones or adding a personal touch to your own kitchenware, laser engraving offers endless possibilities for creativity and customization.
So, gather your materials, fire up the laser engraver, and start making beautifully engraved mugs that will be cherished for years to come. Happy engraving!