Introduction
Welcome to this step-by-step guide on how to install Windows Server 2012 R2 on VMware Workstation. Whether you are a beginner or an experienced IT professional, this tutorial will provide you with the necessary instructions to successfully set up a virtual environment to run Windows Server 2012 R2.
Installing an operating system on a virtual machine allows you to create a safe and isolated environment for testing, development, or learning purposes. VMware Workstation is a popular virtualization software that enables you to create and manage virtual machines on your computer.
Windows Server 2012 R2 is a powerful server operating system that offers improved security, networking, and virtualization capabilities. By installing it on VMware Workstation, you can take advantage of its features without the need for dedicated hardware.
In this guide, we will walk you through the process of downloading the Windows Server 2012 R2 ISO file, creating a new virtual machine, configuring the virtual machine settings, installing the operating system, and finally, installing VMware Tools to enhance the virtual machine’s performance.
Whether you are setting up a lab environment, building a test environment, or studying for a certification exam, this tutorial will provide you with the knowledge and confidence to install Windows Server 2012 R2 on VMware Workstation.
Now, let’s dive into the step-by-step instructions and get started with the installation process!
Prerequisites for Installing Windows Server 2012 R2 on VMware Workstation
Before you begin the installation process, ensure that you have the following prerequisites in place:
- VMware Workstation: Make sure you have VMware Workstation installed on your computer. You can download the latest version of VMware Workstation from the official website and follow the installation instructions provided.
- System Requirements: Your computer must meet the minimum system requirements to run VMware Workstation and Windows Server 2012 R2. Check the VMware Workstation documentation and Microsoft’s documentation to ensure your computer meets the necessary hardware and software requirements.
- Windows Server 2012 R2 ISO File: Download the Windows Server 2012 R2 ISO file from the Microsoft website or obtain it from a trusted source.
- Activation Key: Ensure that you have a valid activation key for Windows Server 2012 R2. You will need this key during the installation process.
- Ample System Resources: Windows Server 2012 R2 requires a considerable amount of system resources to run smoothly. Make sure your computer has enough RAM, CPU, and disk space to accommodate the virtual machine.
- Internet Connection: An internet connection is recommended to download updates and VMware Tools during the installation process. It will also be useful for future updates and patches.
Having these prerequisites in place will ensure a smooth and successful installation of Windows Server 2012 R2 on VMware Workstation. Take the time to double-check each requirement to avoid any complications during the installation process. Once you have all the prerequisites ready, you can proceed to the next steps to begin the installation process.
Step 1: Downloading the Windows Server 2012 R2 ISO
The first step in installing Windows Server 2012 R2 on VMware Workstation is to download the Windows Server 2012 R2 ISO file. Follow these instructions to obtain the ISO file:
- Open a web browser on your computer and go to the official Microsoft website.
- Navigate to the downloads section of the website and search for Windows Server 2012 R2.
- Choose the edition of Windows Server 2012 R2 that you want to install. There are different editions available, depending on your requirements.
- Click on the download button to start the download process.
- Depending on your internet connection speed, the download may take some time. Be patient and let the download complete.
- Once the download is finished, verify the integrity of the ISO file by checking its hash value against the one provided on the Microsoft website.
Downloading the Windows Server 2012 R2 ISO file ensures that you have a legitimate and up-to-date installation media for the operating system. It is important to obtain the ISO file from a trusted source to avoid any security risks or compatibility issues.
Once you have successfully downloaded the Windows Server 2012 R2 ISO file, you are ready to proceed to the next step of creating a new virtual machine in VMware Workstation.
Step 2: Creating a New Virtual Machine in VMware Workstation
After downloading the Windows Server 2012 R2 ISO file, the next step is to create a new virtual machine in VMware Workstation. Follow these steps to create the virtual machine:
- Open VMware Workstation on your computer.
- Click on the “File” menu and select “New Virtual Machine.”
- In the New Virtual Machine Wizard, select “Typical” and click “Next. “
- Select “Installer disc image file (ISO)” and browse to the location where you downloaded the Windows Server 2012 R2 ISO file. Click “Next.”
- Enter a name for your virtual machine and choose a location to save it.
- Specify the maximum disk size for the virtual machine. It is recommended to allocate at least 20GB of disk space.
- Select the number of processor cores and the amount of RAM to allocate to the virtual machine. The recommended values are at least 2 cores and 4GB of RAM.
- Choose the network type for the virtual machine. The default setting should work for most scenarios.
- Review the summary of the virtual machine configuration and click “Finish” to create the virtual machine.
By following these steps, you will create a new virtual machine in VMware Workstation with the necessary settings to install Windows Server 2012 R2. Make sure to allocate sufficient resources to the virtual machine based on your system specifications and requirements.
With the virtual machine created, you are now ready to proceed to the next step, which involves configuring the virtual machine settings.
Step 3: Configuring the Virtual Machine Settings
After creating the virtual machine in VMware Workstation, the next step is to configure its settings before installing Windows Server 2012 R2. Follow these steps to configure the virtual machine settings:
- Select the virtual machine from the VMware Workstation library and click on “Edit virtual machine settings.”
- In the Hardware tab, you can modify various settings. Here are some important settings to consider:
- Memory: Adjust the allocated memory for the virtual machine. It is recommended to allocate at least 4GB of RAM for Windows Server 2012 R2.
- Processors: Configure the number of processors and processor cores to allocate to the virtual machine. You can adjust these settings based on your system specifications and requirements.
- Hard Disk: You can modify the size, add additional hard disks, or configure other storage options for the virtual machine if needed.
- Network Adapter: Check the network adapter settings and ensure that it is connected and configured correctly.
- Click on the “Options” tab and explore the settings available, such as power management, boot options, and advanced configurations. Adjust these settings as necessary.
- Review all the settings and make any additional changes required based on your specific needs.
- Click “OK” to save the virtual machine settings.
Configuring the virtual machine settings properly is crucial for ensuring optimal performance and resource allocation during the installation and operation of Windows Server 2012 R2. By allocating sufficient memory and adjusting other settings to match your system capabilities, you can create a stable and efficient virtual environment.
Once you have completed the configuration of the virtual machine settings, you are now ready to proceed with the installation of Windows Server 2012 R2 in the next step.
Step 4: Installing Windows Server 2012 R2
With the virtual machine settings configured, you are now ready to install Windows Server 2012 R2. Follow these steps to install the operating system:
- Start the virtual machine by selecting it from the VMware Workstation library and clicking on the “Power on” button.
- The virtual machine will boot from the Windows Server 2012 R2 ISO file. The setup process will begin.
- On the initial setup screen, select your preferred language settings and click “Next.”
- Click on the “Install Now” button to initiate the installation process.
- Enter your product key when prompted. This key should have been provided with your Windows Server 2012 R2 installation media.
- Read and accept the license terms and click “Next.”
- Select the type of installation you want to perform. You can choose between an Upgrade or Custom installation. For a clean installation, select “Custom.”
- Choose the disk partition where you want to install Windows Server 2012 R2. If needed, you can create or delete existing partitions.
- Follow the on-screen instructions to proceed with the installation. The installation process may take some time.
- Once the installation is complete, the virtual machine will reboot.
During the installation process, you may be prompted to configure certain settings, such as the administrator password and the server name. Follow the on-screen instructions and provide the necessary information.
After the virtual machine reboots, the initial setup of Windows Server 2012 R2 will continue. Just follow the instructions, provide the required information, and make any additional configurations as needed.
Once the installation and initial setup are complete, you will have a fully installed and operational Windows Server 2012 R2 on your VMware Workstation virtual machine. Now you can proceed to the next step of configuring Windows Server 2012 R2 to meet your specific requirements.
Step 5: Configuring Windows Server 2012 R2
After successfully installing Windows Server 2012 R2 on your virtual machine, it’s time to configure the operating system to meet your specific requirements. Follow these steps to configure Windows Server 2012 R2:
- Log in to Windows Server 2012 R2 using the administrator account credentials you set during the installation process.
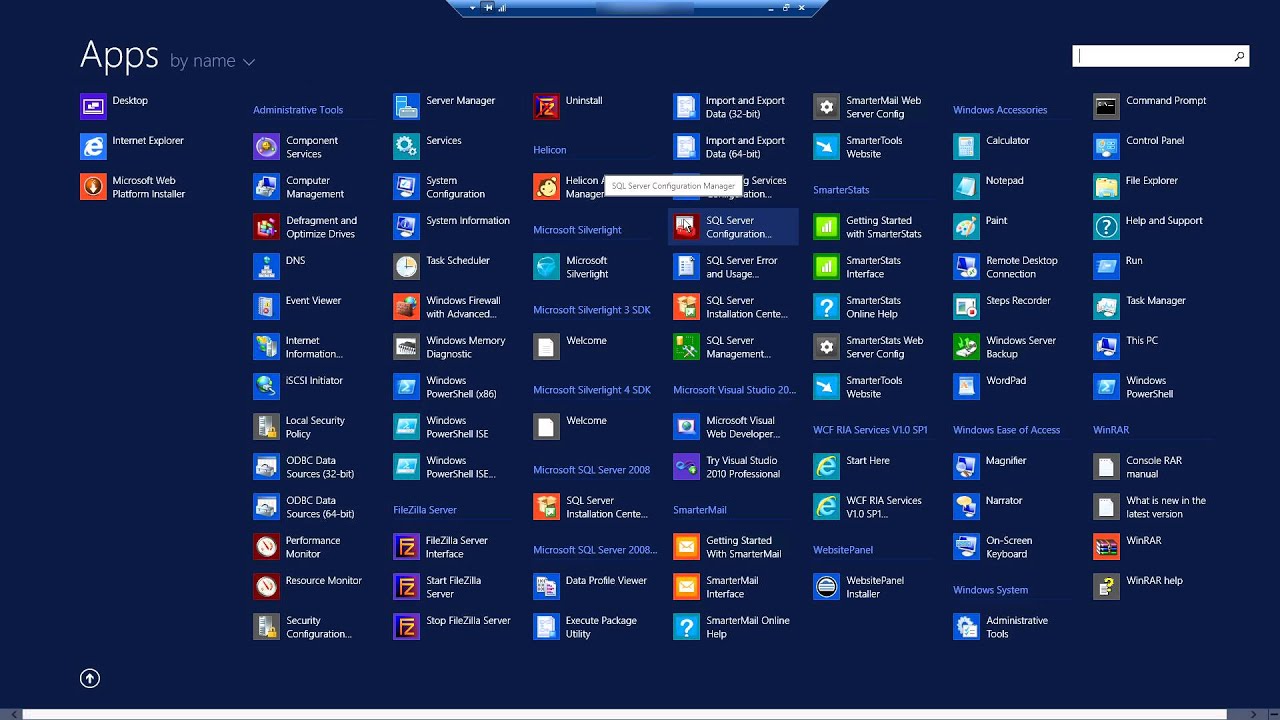
- Once logged in, you will be greeted with the Server Manager. This is the central management tool for Windows Server. Click on “Local Server” in the left pane to access basic configuration options.
- Review the server properties and click on “Computer name” to change the server’s name if desired. Click “OK” to save the changes.
- Next, click on “Change” next to “Workgroup” or “Domain” to join the server to a specific workgroup or domain.
- Configure networking settings by navigating to “Network and Sharing Center” and selecting “Change adapter settings.” Here, you can modify network settings, such as IP address configurations and DNS settings.
- Install and configure any necessary server roles and features using the “Add Roles and Features” wizard in the Server Manager. This allows you to customize your server’s functionality based on your specific needs.
- Enable or disable Windows Server features and roles, such as Remote Desktop or Active Directory, through the Server Manager or the respective control panel tools.
- Set up and configure security measures, such as Windows Firewall and Windows Defender, to protect your server from potential threats.
- Configure Windows Server Update Services (WSUS) to manage and install updates on the server. This helps ensure the server remains up-to-date with the latest security patches and improvements.
- Make any additional configurations and adjustments based on your specific requirements and overall IT environment.
Configuring Windows Server 2012 R2 allows you to tailor the server to your organization’s needs, optimize its performance, and secure it against potential threats. Take the time to carefully review and adjust the settings and configurations as necessary.
By following these steps, you will have successfully configured Windows Server 2012 R2 on your VMware Workstation virtual machine. Now you can move on to the next step of installing VMware Tools to improve the virtual machine’s performance and functionality.
Step 6: Installing VMware Tools on Windows Server 2012 R2
Installing VMware Tools is an important step in ensuring optimal performance and functionality for your Windows Server 2012 R2 virtual machine running on VMware Workstation. VMware Tools includes drivers, utilities, and other enhancements that improve integration between the virtual machine and the host system. Follow these steps to install VMware Tools:
- Start your virtual machine running Windows Server 2012 R2.
- In the VMware Workstation menu, click on “VM” and select “Install VMware Tools.”
- An ISO file containing the VMware Tools installation will be mounted to your virtual machine.
- Open Windows Explorer and navigate to the virtual CD/DVD drive that represents the mounted VMware Tools ISO.
- Double-click on the setup.exe or VMwareTools.exe file to launch the installation wizard.
- Follow the on-screen instructions to complete the installation. Accept the license agreement and choose the installation options as per your requirements.
- Once the installation is complete, restart your virtual machine to apply the changes.
After restarting, VMware Tools will be fully installed on your Windows Server 2012 R2 virtual machine.
VMware Tools provides a range of benefits, including improved graphics performance, mouse integration, clipboard sharing, time synchronization, and more. It is recommended to keep VMware Tools up to date by periodically checking for updates from the VMware website.
With VMware Tools installed, your Windows Server 2012 R2 virtual machine will have enhanced functionality and better integration with the VMware Workstation environment. You can now explore and utilize the full capabilities of your virtual machine.
Conclusion
Congratulations! You have successfully installed Windows Server 2012 R2 on VMware Workstation using this step-by-step guide. By following each of the outlined steps, you have created a virtual environment that allows you to run Windows Server 2012 R2 on your computer without the need for dedicated hardware.
Throughout the process, you learned how to download the Windows Server 2012 R2 ISO file, create a new virtual machine in VMware Workstation, configure the virtual machine settings, install the operating system, configure Windows Server 2012 R2, and install VMware Tools to enhance performance.
The flexibility of VMware Workstation combined with the powerful features of Windows Server 2012 R2 provides an excellent opportunity for testing, development, learning, and more. Whether you are setting up a lab environment, building a test environment, or studying for a certification exam, the skills and knowledge gained from this guide will serve you well.
Remember to periodically update your Windows Server 2012 R2 installation with the latest security patches and updates to ensure the stability and security of your virtual environment. Additionally, explore the wide range of features and capabilities offered by Windows Server 2012 R2 to maximize its potential and meet your specific needs.
Thank you for following along with this tutorial. We hope it has been informative and useful in guiding you through the installation of Windows Server 2012 R2 on VMware Workstation. Enjoy your virtual server environment and the possibilities it brings!