Introduction
Installing an SSD (Solid State Drive) on your motherboard is a great way to boost your computer’s performance and storage capacity. SSDs are known for their faster read and write speeds compared to traditional hard drives, resulting in quicker boot times and improved overall system responsiveness. Whether you’re a gamer, a content creator, or just an everyday computer user, upgrading to an SSD can make a noticeable difference in your computing experience.
In this guide, we will walk you through the step-by-step process of installing an SSD on your motherboard. We will cover everything from gathering the necessary tools and materials to installing the operating system on the SSD. Don’t worry if you’re not a computer expert – we’ll explain each step in detail and provide helpful tips along the way.
Before we begin, it’s important to note that every motherboard is slightly different, so the specific steps and locations mentioned in this guide may vary. We recommend consulting your motherboard’s manual for any specific instructions related to SSD installation.
So, if you’re ready to give your computer a speed boost and increase its storage capacity, let’s dive into the exciting world of SSD installation on your motherboard.
Step 1: Gather the necessary tools and materials
Before you start the installation process, you’ll need to ensure you have all the necessary tools and materials. Here’s a list of what you’ll need:
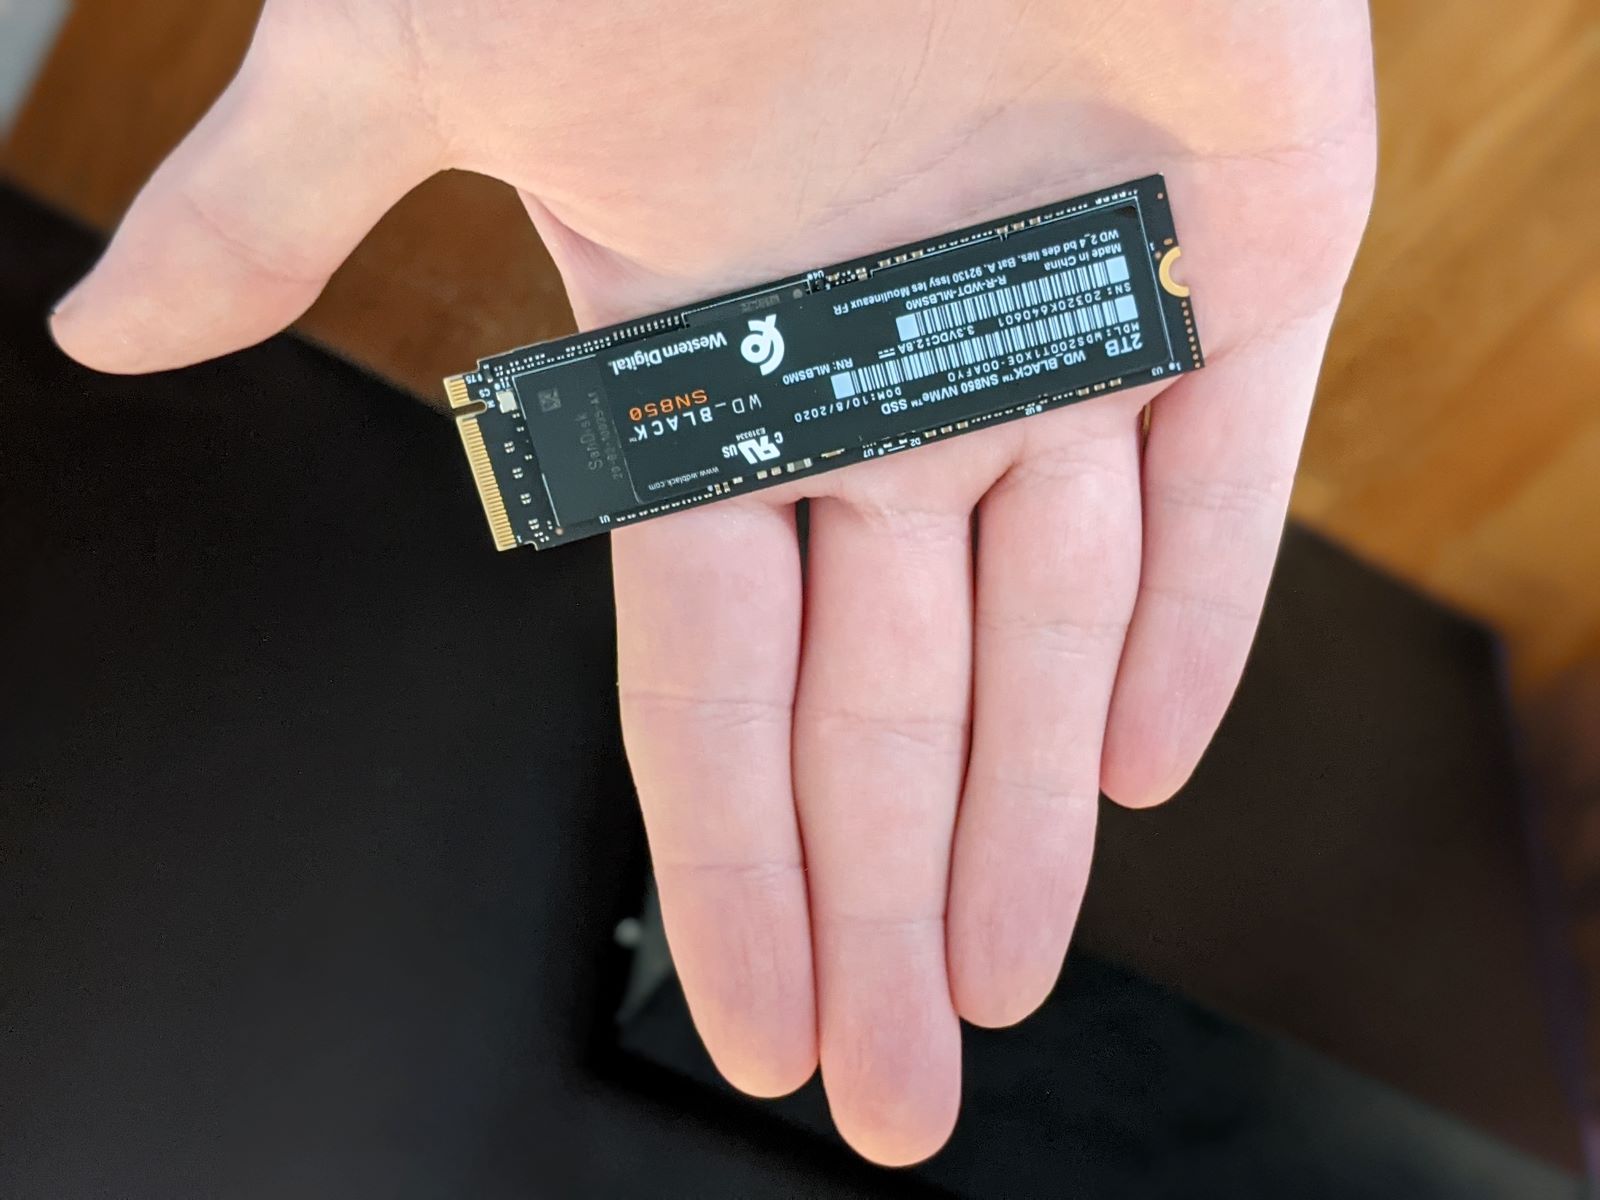
1. SSD: Make sure you have a compatible SSD that matches the interface of your motherboard. Most modern motherboards support SATA and M.2 SSDs, so check your motherboard’s specifications to determine which type is supported.
2. Screwdriver: Depending on your computer case, you may need a Phillips screwdriver or a hex screwdriver to open the case and secure the SSD onto the motherboard.
3. SATA cable: If you’re installing a SATA SSD, you’ll need a SATA cable to connect the SSD to the motherboard. Some motherboards may come with extra SATA cables, but if not, you can easily purchase one from a computer hardware store.
4. Mounting screws: These are typically included with your SSD or your computer case. They are used to securely fasten the SSD onto the motherboard.
5. Anti-static wrist strap (optional): If you want to take extra precautions to prevent static electricity damage, you can use an anti-static wrist strap. This helps to discharge any static electricity from your body, reducing the risk of damaging your motherboard or SSD.
It’s important to gather all these tools and materials before you start the installation process. This ensures a smooth and efficient workflow without having to pause and search for missing items.
Once you have everything ready, move on to the next step to power off and unplug your computer.
Step 2: Power off and unplug your computer
Before you begin working on your computer, it’s crucial to power off the system and unplug it from the electrical outlet. This step ensures your safety and prevents any potential damage to the computer components.
To power off your computer, follow these steps:
1. Save and close any open programs or files.
2. Click on the “Start” menu and select “Shut Down” or “Power Off”.
3. Wait for the operating system to shut down completely. You may see a message on your screen indicating that it is safe to turn off your computer.
4. Once the computer is powered off, locate the power cord at the rear of your computer’s case and unplug it from the electrical outlet. If you’re using a laptop, make sure to unplug the charger as well.
By disconnecting the power source, you’re preventing any electrical currents from running through the system. This ensures that you won’t accidentally short-circuit any components while working on your computer.
It’s important to note that some motherboards may have residual power even when the computer is turned off and unplugged. To completely discharge this residual power, hold down the power button on your computer for a few seconds. This action helps prevent any potential electrical discharge when handling delicate components.
Now that your computer is completely powered off and unplugged, you’re ready to move on to the next step – opening up your computer case.
Step 3: Open up your computer case
To install the SSD on your motherboard, you’ll need to open up your computer case. The process varies depending on the type of case you have, but here’s a general guide:
1. Place your computer on a stable surface and ensure that the power source is completely disconnected.
2. Look for screws or latches on the back or side of the computer case. These hold the side panel in place. Use a screwdriver or release the latches to remove the panel. Some cases may have a sliding mechanism, so be sure to check the case’s manual if you’re unsure.
3. Once the panel is removed, you’ll have access to the internal components of your computer. Take a moment to familiarize yourself with the layout and locate the storage bays, where your current hard drive may be installed.
4. Identify an available space to install the SSD. This could be a dedicated SSD bay or a vacant drive bay where you can remove a mounting bracket or adapter.
5. If there’s a mounting bracket or adapter in the chosen space, gently remove it by unscrewing any screws.
6. Now, you can prepare the slot for the SSD. In most cases, you’ll find a SATA connection point on the motherboard. Remove any protective covers and ensure the SATA ports are easily accessible.
Opening up your computer case requires a gentle touch, and it’s important to be mindful of any delicate components inside. Avoid touching any exposed circuitry, as static electricity can damage sensitive electronics.
Remember, each computer case may have a slightly different configuration, so consult your case’s manual if you encounter any difficulties or if you’re unsure about how to open it properly.
With your computer case open, you’re ready to move onto the next step: connecting the SSD to the motherboard using a SATA cable.
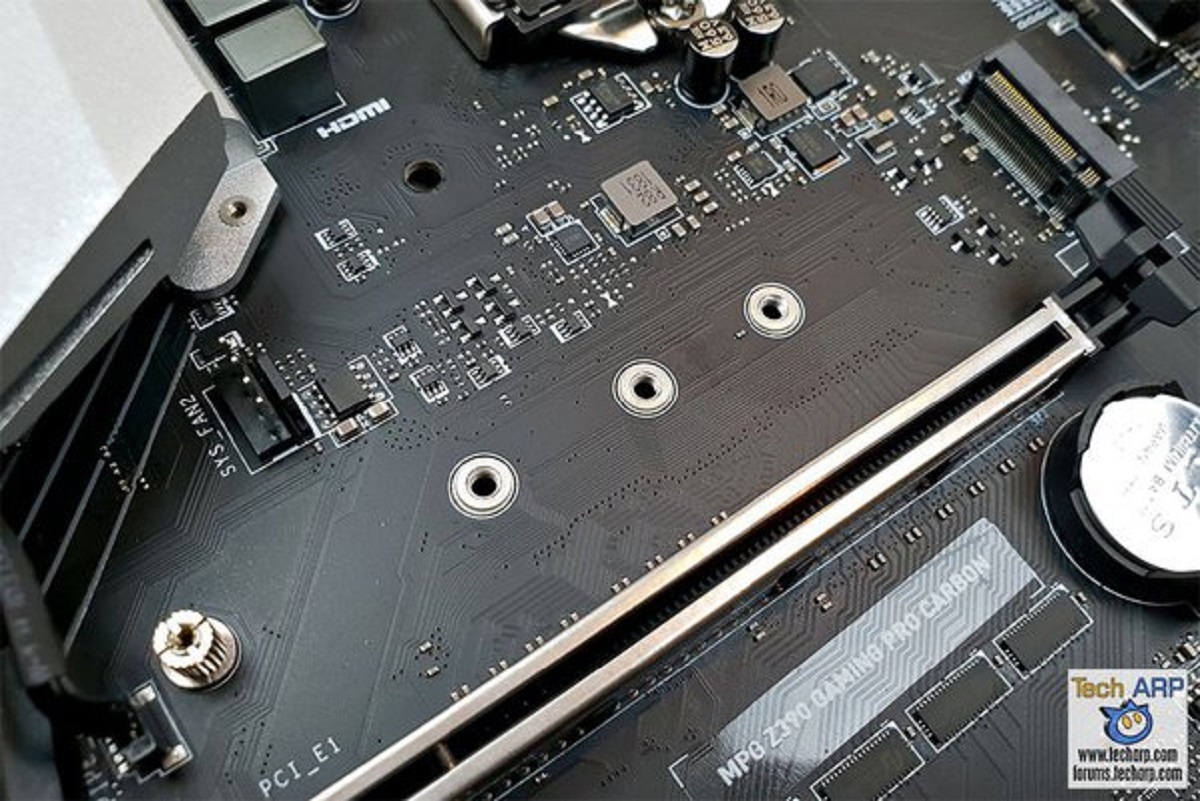
Step 4: Locate the SATA ports on your motherboard
Before connecting the SSD to your motherboard, you’ll need to locate the SATA ports. SATA (Serial ATA) ports are used to connect storage devices like hard drives and SSDs to the motherboard. They are usually located along the edge of the motherboard.
To locate the SATA ports on your motherboard, follow these steps:
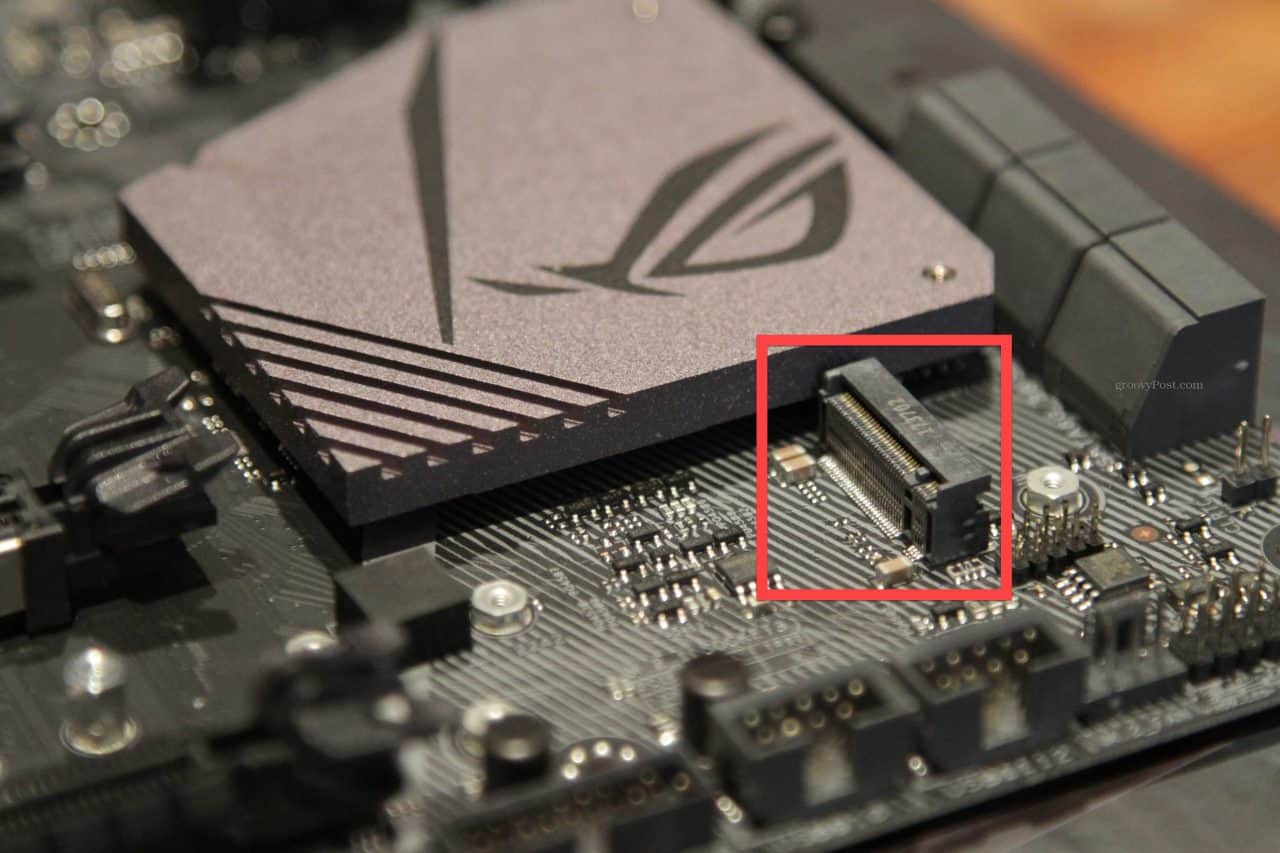
1. Take a close look at your motherboard’s layout. The SATA ports are typically rectangular in shape and have a row of metal pins inside. They may be labeled as “SATA” or “SATA 3” to indicate the version.
2. Depending on the motherboard model, there may be several SATA ports available. Commonly, motherboards have at least four SATA ports, but some high-end models can have more. Refer to your motherboard’s manual for specific details on the number and location of SATA ports.
3. In addition to the SATA ports, you may also find SATA power connectors on the motherboard. These are used to supply power to the connected storage devices.
Locating the SATA ports on your motherboard is an important step as it determines where you will connect the SSD. Take note of the port numbers and their locations relative to other components on the motherboard, as this will help you establish a smooth installation process.
If you’re having trouble finding the SATA ports or if your motherboard has a complex layout, it’s always recommended to consult the motherboard’s manual. The manual will provide you with detailed illustrations and explanations of the SATA ports’ exact location on your specific motherboard model.
Once you have successfully identified the SATA ports on your motherboard, you’re ready to move on to the next step: connecting the SSD to the motherboard using a SATA cable.
Step 5: Connect the SSD to the motherboard using a SATA cable
Now that you have located the SATA ports on your motherboard, it’s time to connect the SSD using a SATA cable. Follow these steps:
1. Take the SATA cable and connect one end to the SATA port on the motherboard. Ensure that the cable is securely inserted into the port and that it is aligned with the connectors.
2. Take the other end of the SATA cable and connect it to the corresponding SATA port on the SSD. Again, make sure the connection is secure and properly aligned.
3. If you have multiple SATA ports on your motherboard and are installing multiple SSDs, you can repeat this process for each SSD, connecting each one to a different SATA port.
4. Once the SSD is connected to the motherboard using the SATA cable, you can move on to the next step: securing the SSD onto the motherboard.
It’s important to handle the SATA cable with care and ensure a firm connection. If the cable doesn’t fit smoothly into the SATA ports, double-check the orientation of the connectors and try again. Avoid using excessive force, as it can damage the ports or the cable.
Additionally, make sure that the SATA cable is long enough to reach the SSD without any tension or strain. If the cable is too short or there is a tight bend, it can put stress on the connections and affect the performance of the SSD.
With the SSD connected to the motherboard, you’re one step closer to completing the installation process. Next, we’ll cover how to securely mount the SSD onto the motherboard using screws.
Step 6: Secure the SSD on the motherboard using screws
Once you have connected the SSD to the motherboard, it’s important to securely mount it in place using screws. This ensures that the SSD remains stable and doesn’t move around during operation. Follow these steps to secure the SSD:
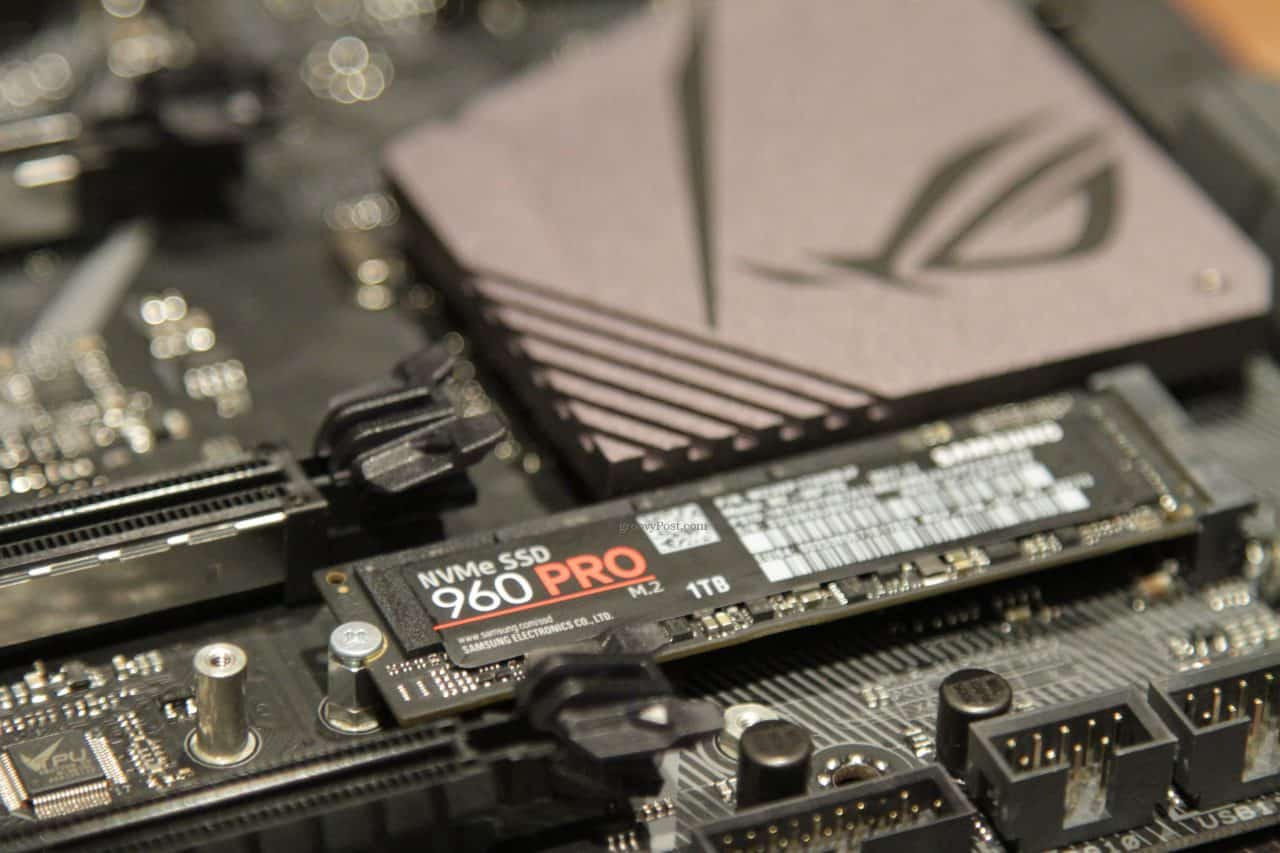
1. Locate the screw holes on your motherboard or the mounting bracket provided with your case. These holes are typically located near the SATA ports or within the storage bay where the SSD will be installed.
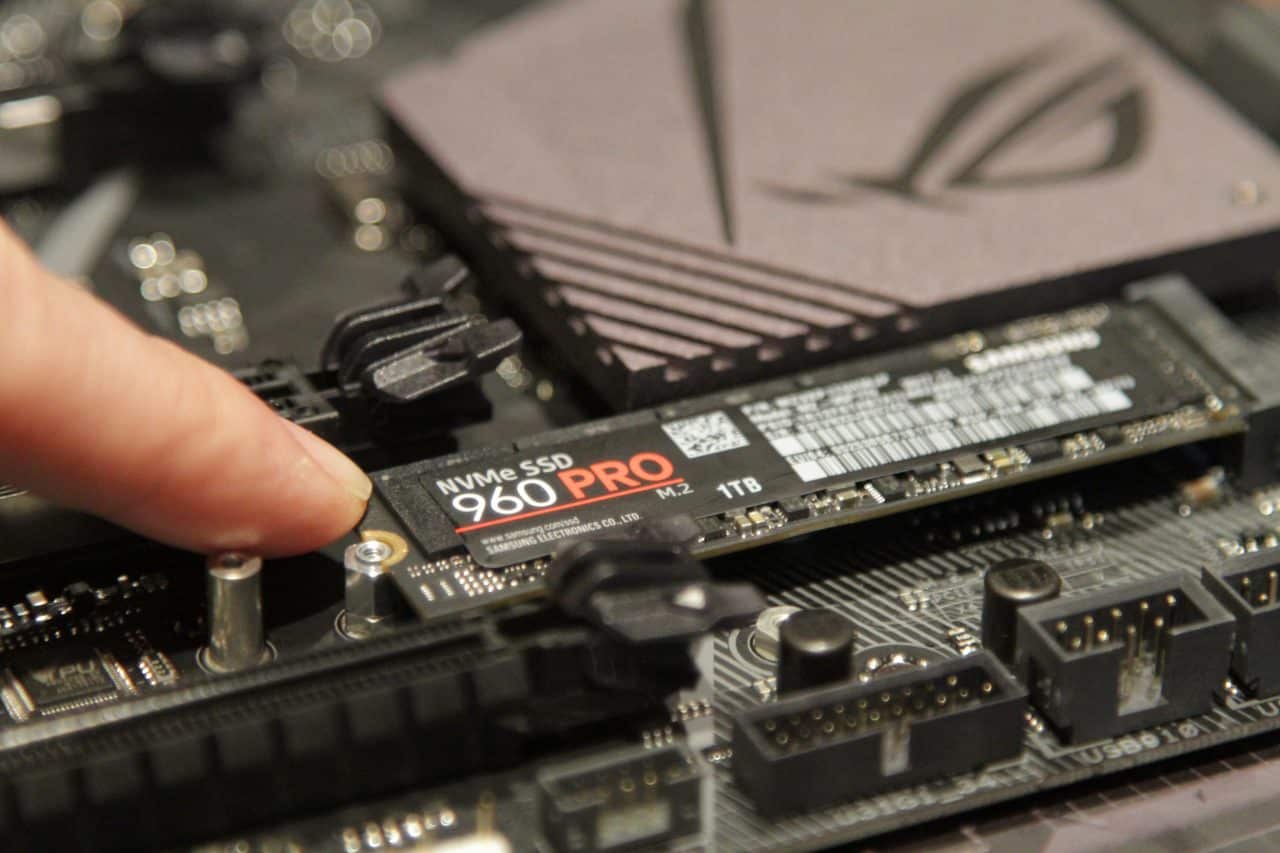
2. Take the screws that came with your SSD or your computer case and align them with the screw holes on the SSD and the motherboard. Gently tighten the screws using a screwdriver or a suitable tool until they are snug.
3. Make sure not to overtighten the screws, as this can damage the SSD or the motherboard. Use a moderate amount of force, enough to secure the SSD firmly in place without putting excessive pressure on the components.
4. Double-check that the SSD is properly aligned and seated in the slot. Ensure that there is no tension on the SATA cable or any other connections.
Securing the SSD onto the motherboard is an essential step in the installation process, as it prevents any accidental movement or disconnection of the SSD during use. Properly mounted SSDs also aid in preventing damage to the SSD or other components due to vibrations.
If your case does not have dedicated screw holes for the SSD, you may need to use an adapter or mounting bracket to fit the SSD securely into a drive bay. Consult your case’s manual or manufacturer’s instructions to determine the appropriate mounting method.
With the SSD securely mounted, you’re almost done with the installation process. The next step is to close the computer case so that you can proceed with powering on the computer and entering the BIOS settings.
Step 7: Close the computer case
After securely mounting the SSD onto the motherboard, it’s time to close the computer case. Properly sealing the case ensures that all components are protected and that there is no risk of damage or interference during operation. Follow these steps to close the computer case:
1. Take the side panel or cover that you previously removed to access the internals of the computer.
2. Align the panel with the case and gently push it into place. Make sure the panel fits snugly and that all the edges are aligned properly.
3. If your case uses screws or latches to secure the side panel, insert the screws or engage the latches until they are securely fastened. Be careful not to overtighten the screws, as this may strip the threads or damage the case.
4. Once the side panel is properly secured, visually inspect the case to ensure that there are no loose cables or obstructions that may interfere with proper airflow or operation.
By closing the computer case, you are not only protecting the internal components from dust and potential damage, but you are also promoting optimal airflow within the case for efficient cooling. Proper cable management plays a vital role in maintaining a clean and organized case, reducing the risk of any tangled cables obstructing cooling fans or other components.
Take your time to ensure that all the latches or screws are tightly secured and that there are no gaps in the case. This helps maintain a tidy and sturdy setup.
With the computer case closed, you’re ready to move on to the next step: powering on your computer and entering the BIOS settings to verify the SSD installation.
Step 8: Power on your computer and enter BIOS settings
Now that you have closed the computer case, it’s time to power on your computer and enter the BIOS settings. The BIOS (Basic Input/Output System) allows you to configure various hardware settings, including recognizing the newly installed SSD. Follow these steps to enter the BIOS settings:
1. Connect the power cable of your computer back to the electrical outlet, ensuring a secure connection.
2. Press the power button to turn on your computer. Depending on your system configuration, you may see a manufacturer’s logo or a black screen with text before the operating system loads.
3. During the startup process, pay attention to any prompt that appears on the screen, usually with instructions such as “Press [Key] to enter setup” or “Press [Key] to access BIOS”. The specific key varies depending on your system’s manufacturer, but commonly used keys include Del, F2, F10, or Esc. Press the indicated key immediately to enter the BIOS settings.
4. Once you enter the BIOS settings, navigate through the menus using the arrow keys on your keyboard. Look for options related to storage devices or SATA configuration.
5. Verify that the newly installed SSD is detected by the BIOS. The SSD should be listed as a connected device, showing its model name and capacity.
6. If the SSD is not detected, double-check the connections and make sure the SATA cable is securely connected to both the SSD and the motherboard. Ensure that the power cable for the SSD is also properly connected.
7. If necessary, consult your motherboard’s manual or the manufacturer’s website for specific instructions on configuring SATA devices in the BIOS.
Remember to make any necessary changes or configurations in the BIOS settings cautiously, as incorrect settings can lead to system instability or failure to boot.
By entering the BIOS settings and confirming that the SSD is recognized, you have successfully completed the verification step. The next step is to install the operating system on the SSD.
Once you have finished verifying the SSD installation in the BIOS settings, you can proceed to the next step: installing the operating system on the SSD.
Step 9: Verify the SSD installation in BIOS
Verifying the SSD installation in the BIOS is an important step to ensure that the system recognizes the newly installed SSD correctly. This allows you to confirm that the SSD is properly connected and can be utilized for storing data. Follow these steps to verify the SSD installation in the BIOS:
1. Power on your computer and wait for the system to start up. Depending on your computer’s configuration, you may see a manufacturer’s logo or a black screen with text.
2. During the startup process, look for the key or combination of keys to access the BIOS settings. Commonly used keys include Del, F2, F10, or Esc. Press the indicated key(s) immediately to enter the BIOS settings.
3. Once in the BIOS settings, navigate through the menus using the arrow keys on your keyboard. Look for a section labeled “Storage,” “SATA Configuration,” or similar.
4. Within the storage or SATA configuration section, you should see a list of connected storage devices. The SSD should be listed, displaying its model name, capacity, and other details. Verify that the SSD is detected and recognized by the system.
5. If the SSD is not listed or is marked as “Not Detected,” it could indicate that there is an issue with the connection. Double-check the SATA cable and power cable connections to ensure they are properly secured.
6. If the SSD is properly detected in the BIOS, you can proceed to the next step: installing the operating system on the SSD.
Verifying the SSD installation in the BIOS is crucial to ensure that the system can successfully detect and utilize the SSD for storing data. If the SSD is not recognized, it may require rechecking the physical connections or consulting the motherboard’s manual for further troubleshooting steps.
By confirming the SSD’s presence in the BIOS and ensuring that it is properly recognized, you are one step closer to harnessing the performance benefits of your new SSD.
Continue to the next step: installing the operating system on the SSD.
Step 10: Install the operating system on the SSD
Now that you have verified the SSD installation in the BIOS, it’s time to install the operating system on the SSD. This step allows you to take full advantage of the SSD’s speed and storage capacity. Follow these steps to install the operating system on the SSD:
1. Power on your computer and insert the installation media for your operating system. This can be a USB drive, DVD, or any other media containing the installation files.
2. Restart your computer and enter the BIOS settings again by pressing the appropriate key(s) during startup.
3. In the BIOS settings, navigate to the “Boot” or “Boot Priority” section. Make sure the SSD is set as the primary boot device, ensuring that the computer boots from the operating system installation media inserted in the previous step.
4. Save the changes made in the BIOS settings and exit. Your computer will restart, and the operating system installation process will begin.
5. Follow the on-screen prompts to select your language, keyboard layout, and other preferences.
6. When prompted to choose the installation location or disk, select the SSD as the destination for the operating system installation. Ensure that you deselect any other drives to prevent accidentally installing the operating system on the wrong drive.
7. Proceed with the installation process according to the instructions provided by the operating system installer. This may involve selecting installation options, entering a product key, and creating a username and password.
8. Once the installation is complete, the computer will restart. Make sure to remove the installation media before the restart to prevent the system from booting back into the installation process.
9. After the restart, your operating system should now be installed on the SSD. Enjoy the improved performance and faster boot times that the SSD brings.
Installing the operating system on the SSD ensures that you fully utilize its capabilities and enjoy the benefits of improved speed and responsiveness. Be sure to regularly back up your data and keep your operating system up to date for optimal performance.
Congratulations! With the operating system successfully installed on the SSD, your computer is now ready to deliver enhanced performance and storage capabilities.
Conclusion
Installing an SSD on your motherboard is a worthwhile investment that can greatly enhance your computer’s performance and storage capacity. The process may seem daunting at first, but by following the steps outlined in this guide, you can successfully install an SSD and enjoy its benefits.
We began by gathering the necessary tools and materials, including the SSD, screwdriver, SATA cable, mounting screws, and optionally an anti-static wrist strap. Then, we powered off and unplugged the computer before opening up the case.
After locating the SATA ports on the motherboard, we connected the SSD using a SATA cable, ensuring a secure connection. We then secured the SSD onto the motherboard using screws, taking care not to overtighten them.
Closing the computer case protected the components and ensured proper airflow. We then proceeded to power on the computer and entered the BIOS settings to verify the SSD installation. This step ensured that the system recognized the SSD as a connected device.
Finally, we installed the operating system on the SSD, enabling us to take full advantage of its speed and storage capacity. With the operating system successfully installed, we can enjoy improved performance, faster boot times, and a seamless computing experience.
Remember to regularly back up your data and keep your operating system up to date for optimal performance and security.
By following these steps, you have successfully installed an SSD on your motherboard. Congratulations on upgrading your computer and unlocking its full potential!
Thank you for using this installation guide, and happy computing!