Introduction
Welcome to this step-by-step guide on how to install an SSD in your desktop computer. Upgrading your hard drive to a solid-state drive (SSD) can significantly improve the performance and speed of your computer, allowing you to enjoy faster boot times, quicker file transfers, and enhanced overall responsiveness.
In this tutorial, we will walk you through the process of installing an SSD in your desktop computer, ensuring that you have all the necessary tools and materials, conducting proper backups to safeguard your data, and seamlessly transferring your operating system and files.
With the increasing availability and affordability of SSDs, upgrading your desktop computer with this high-performance storage solution has become a popular option for both casual users and professionals. Whether you’re a gamer looking to reduce load times or a professional needing faster rendering speeds, installing an SSD will greatly enhance your computer’s capabilities.
Before we dive into the installation process, it’s important to note that every computer model may vary slightly, so it’s always a good idea to consult your computer’s manufacturer’s manual or support website for specific instructions and compatibility. Additionally, we recommend taking the necessary precautions, such as grounding yourself to prevent static electricity discharge, when working on your computer’s internal components.
Now, let’s get started on this exciting journey to improve your desktop’s performance by installing an SSD!
Step 1: Gather the necessary tools and materials
To properly install an SSD in your desktop, you will need a few essential tools and materials. By gathering everything beforehand, you’ll be able to complete the installation smoothly and efficiently. Here’s a list of what you’ll need:
- SSD: Of course, you’ll need the SSD itself. Ensure that you choose an SSD that is compatible with your desktop’s motherboard and has sufficient storage capacity for your needs.
- Screwdriver: Most desktop computers typically require a Phillips screwdriver for removing the case and securing the SSD. Check your computer’s manual to determine the appropriate size.
- Data and power cables: Depending on your computer’s setup, you may need SATA cables for connecting the SSD to the motherboard. If your SSD requires power, ensure you have the necessary power cables as well.
- External storage device: It’s crucial to back up your existing data before installing the SSD. An external hard drive or cloud storage can be used to safely store your files and ensure nothing is lost during the process.
- Antistatic wrist strap: To prevent any damage from static electricity, it’s highly recommended to use an antistatic wrist strap while working on your desktop’s internal components.
Once you have gathered all these tools and materials, you’ll be well-prepared to move on to the next step: preparing your desktop for the installation process.
Step 2: Prepare your desktop
Before you begin installing the SSD, it’s crucial to prepare your desktop for the process to ensure a smooth and hassle-free installation. Follow these steps to prepare your desktop:
- Shut down and unplug your computer: Make sure your computer is completely powered off and disconnected from the power source before proceeding. This will prevent any electrical mishaps and safeguard your computer’s components.
- Ground yourself: To prevent static electricity from damaging your computer’s sensitive electronics, it’s essential to ground yourself. You can do this by touching a grounded metal surface or wearing an antistatic wrist strap.
- Open the computer case: Remove the screws from the side panel of your desktop case. This will allow you to access the internal components of your computer. Consult your computer’s manual if you’re unsure how to open the case.
- Locate the hard drive bay: Identify the area inside the case where your existing hard drive is installed. This is typically a small rectangular enclosure or a dedicated mounting bracket.
- Identify the cables: Take note of the cables connected to your existing hard drive, such as the SATA and power cables. You will need to disconnect these cables to replace the hard drive with the SSD.
- Remove the existing hard drive: Carefully unplug the SATA and power cables connected to the existing hard drive. Gently slide out the hard drive from its bay or bracket. Keep the screws and cables in a safe place as you may need them later.
Once you have prepared your desktop by shutting it down, grounding yourself, and removing the existing hard drive, you are now ready to proceed to the next step: choosing the right SSD for your computer.
Step 3: Choose the right SSD
Choosing the right SSD for your desktop is an important step to ensure compatibility and optimal performance. Here are some factors to consider when selecting an SSD:
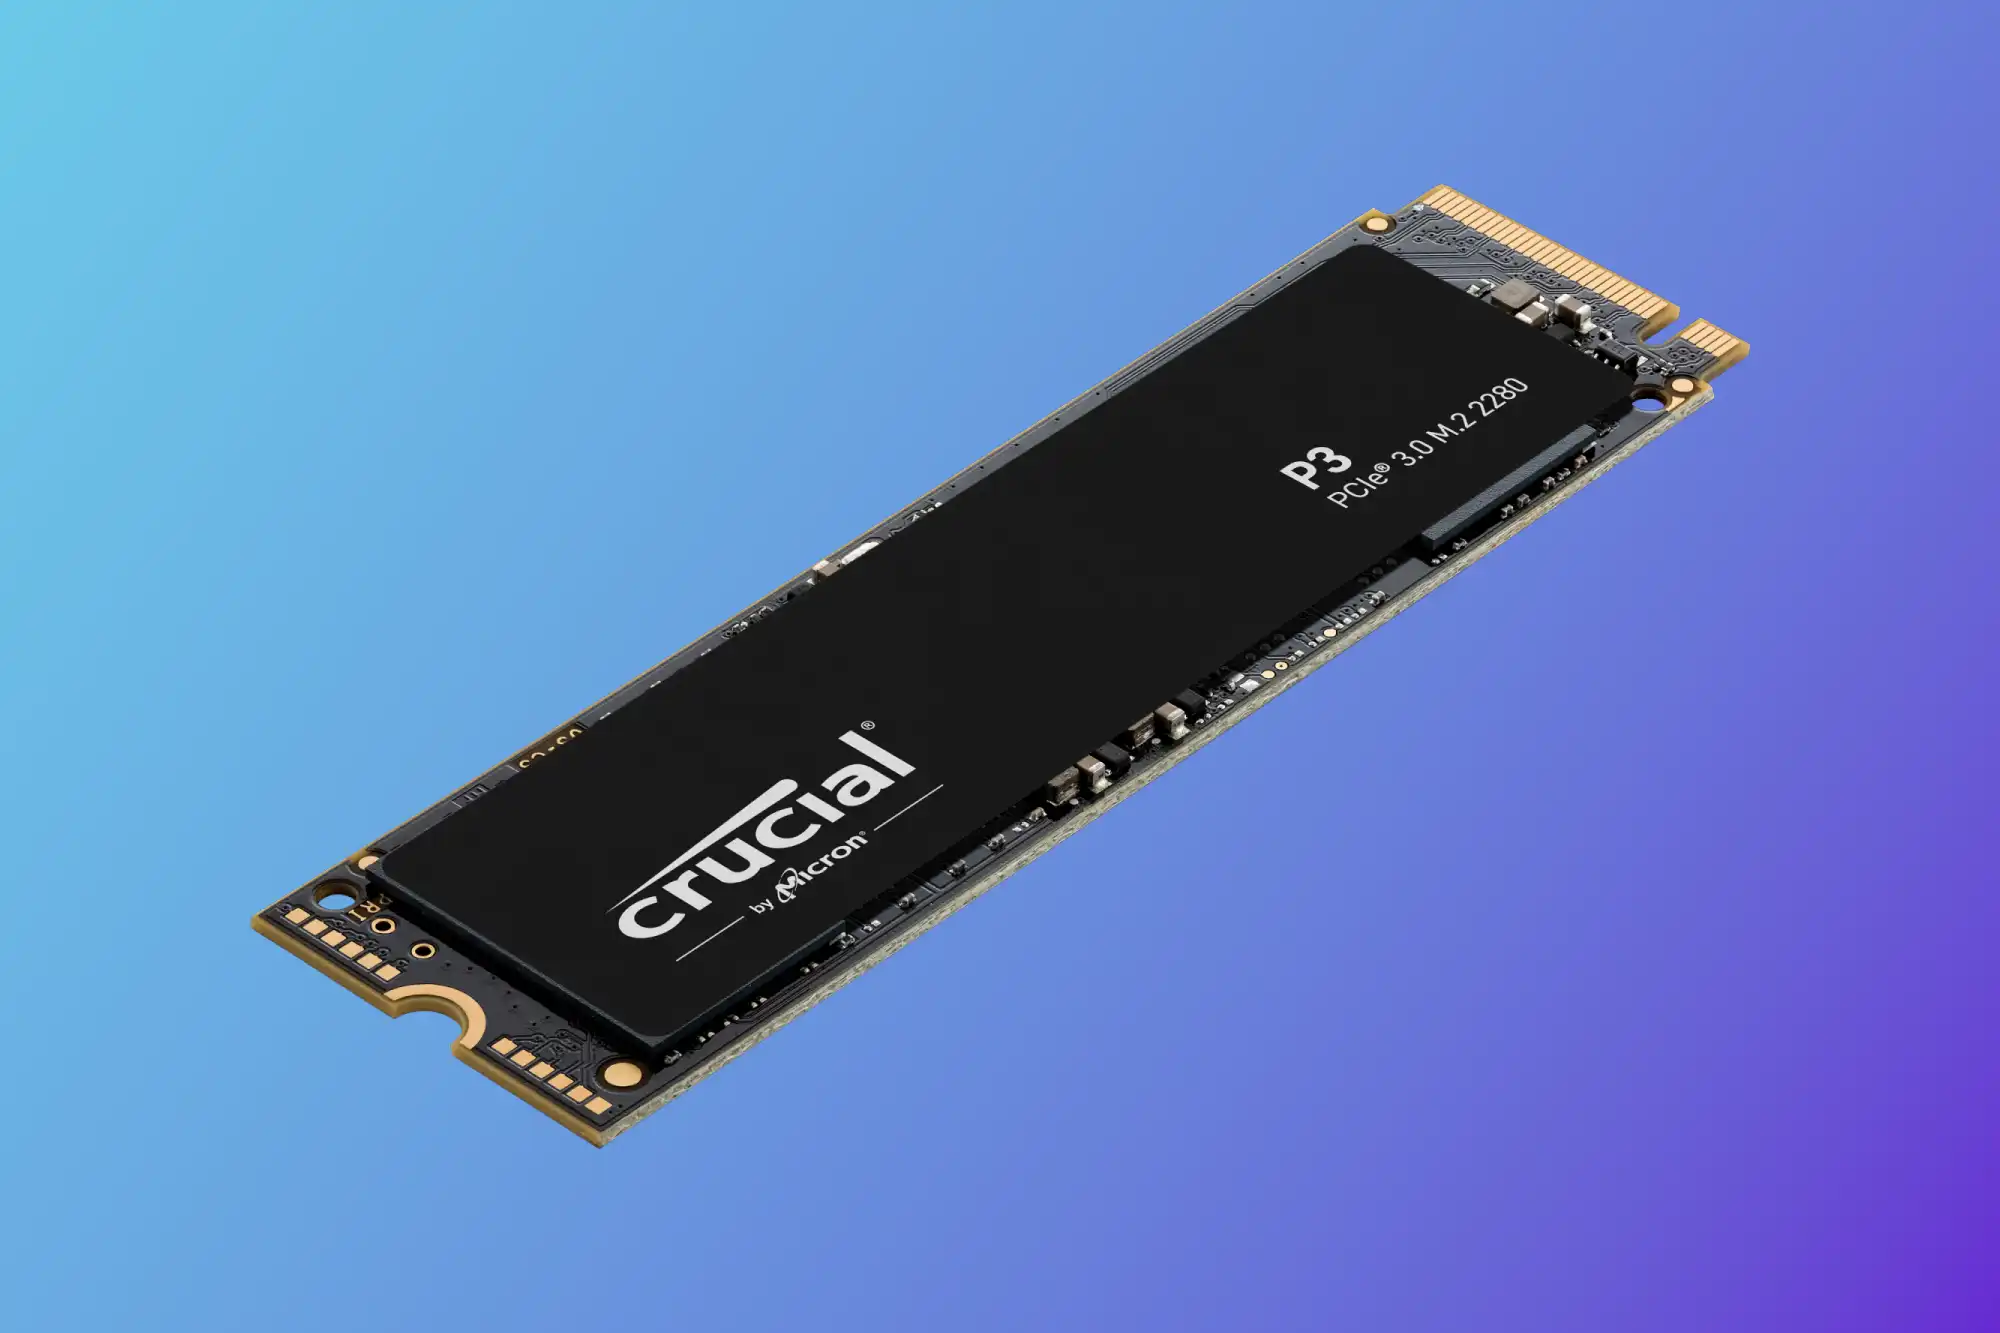
- Form Factor: SSDs come in different form factors, such as 2.5-inch, M.2, and PCIe. Check the form factor supported by your desktop’s motherboard to ensure the SSD will fit properly.
- Capacity: Determine how much storage space you require for your needs. SSDs are available in a range of capacities, from a few hundred gigabytes to multiple terabytes. Consider your usage patterns and the types of files you’ll be storing to choose an appropriate capacity.
- Interface: SSDs use different interfaces, such as SATA, PCIe, or NVMe. Make sure your desktop supports the interface of the SSD you plan to purchase. PCIe and NVMe interfaces offer faster speeds compared to SATA, so if your motherboard supports them, consider opting for these options.
- Speed: Look for SSDs with faster read and write speeds for optimal performance. Higher speeds will result in quicker boot times, file transfers, and overall system responsiveness.
- Budget: Consider your budget when choosing an SSD, as prices can vary depending on the brand, capacity, and features. Compare different options to find a balance between performance and cost.
- Brand and Warranty: Research reputable brands known for their reliability and customer support. Check the warranty offered by the manufacturer to ensure you are protected in case of any hardware failures.
By considering these factors and making an informed decision, you can choose an SSD that best suits your desktop’s requirements. Once you’ve selected an SSD, you’re ready to move on to the next step: backing up your data before the installation process.
Step 4: Backup your data
Prior to installing the SSD, it is crucial to back up your data to prevent any loss or corruption during the installation process. Follow these steps to ensure a secure backup of your files:
- Choose a backup method: Determine the method you will use to back up your data. You can either opt for an external storage device, such as an external hard drive or USB flash drive, or utilize cloud storage solutions like Google Drive or Dropbox.
- Select important files: Identify the files that are critical to you, such as documents, photos, videos, and any other personal or professional files. It’s a good practice to create a checklist to ensure that you don’t miss any files during the backup process.
- Transfer files to the backup medium: Copy and transfer your selected files to the external storage device or upload them to your chosen cloud storage platform. Make sure to create a separate folder or organize the files in a way that makes retrieval easier later on.
- Verify the backup: After transferring your files, double-check the backup to ensure that all your important data has been successfully copied. This step is crucial as it guarantees that you have a safety net in case anything goes wrong during the SSD installation.
- Perform a test restore: For an extra layer of assurance, consider performing a test restore from your backup device or cloud storage. This will verify that your files are intact and accessible, allowing you to proceed with peace of mind.
Remember, backing up your data is a crucial step that should not be skipped. It protects your valuable files and allows for a seamless transition to the new SSD. Once you have successfully backed up your data, you can confidently move on to the next step: installing the SSD in your desktop.
Step 5: Install the SSD
Now that you have backed up your data, it’s time to install the SSD into your desktop. Follow these steps to ensure a successful installation:
- Locate an available drive bay: Identify an available drive bay in your desktop case where you can install the SSD. Depending on the case design, this could be a dedicated SSD slot or a standard 3.5-inch or 2.5-inch drive bay. Refer to your computer’s manual if you’re unsure.
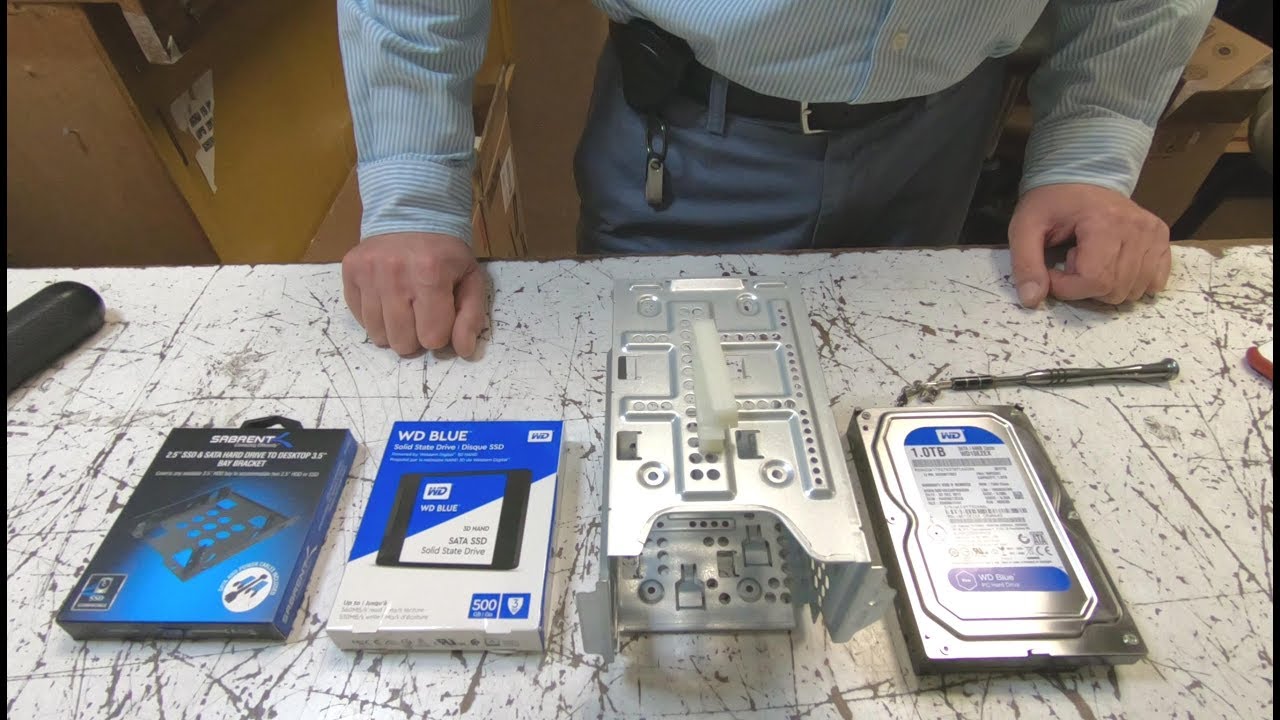
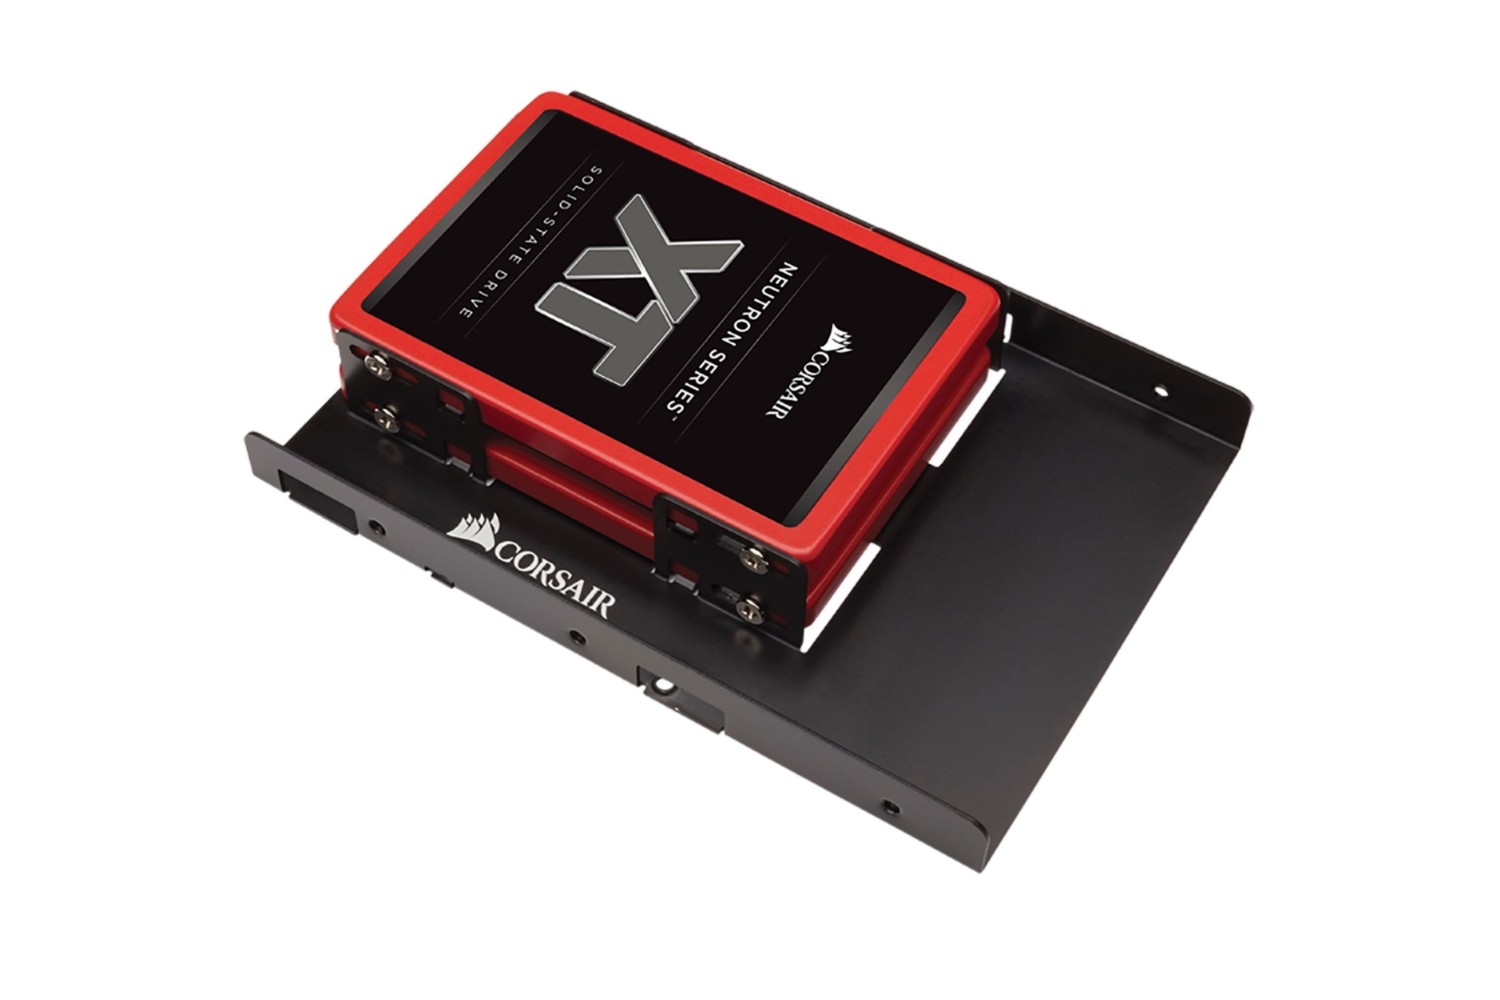
- Prepare the SSD: If your SSD does not come with pre-installed brackets or adapters, you may need to attach them to the drive. Follow the manufacturer’s instructions to properly mount the SSD in the appropriate brackets or adapters.
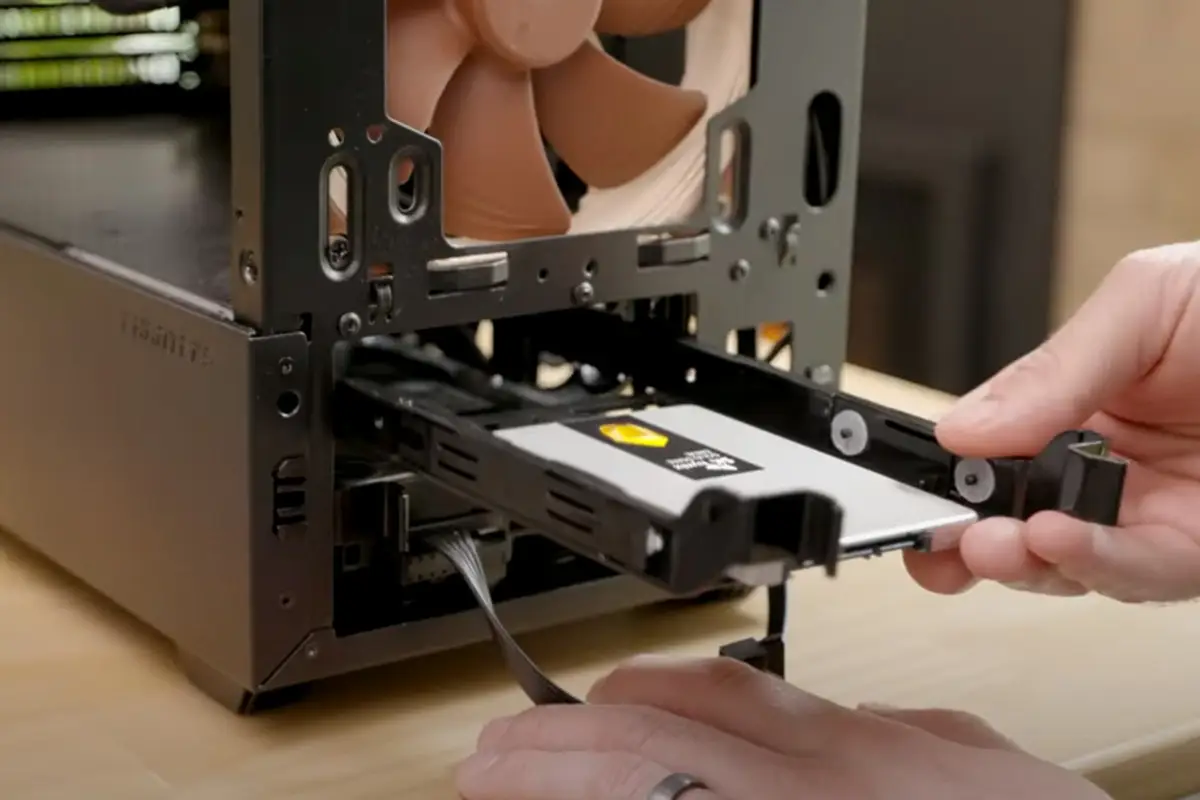
- Insert the SSD: Carefully insert the SSD into the drive bay, ensuring that it aligns with the connectors and screw holes. Gently push until the SSD is fully seated in the bay. It should fit snugly without any excessive force.
- Secure the SSD: Once the SSD is inserted, use screws to secure it in place. Depending on the case or bracket design, you may need to use screws to secure the SSD in the drive bay or brackets. Tighten the screws securely, but be careful not to overtighten and damage the SSD or the case.
- Check the connections: Inspect the connectors on the SSD to ensure they are properly aligned with the corresponding connectors in the drive bay. The SATA and power connectors should be fully inserted and securely connected.
By following these steps, you can successfully install the SSD into your desktop. Once the SSD is properly installed, you’re ready to move on to the next step: connecting the SSD to the motherboard.
Step 6: Connect the SSD to the motherboard
Now that you have installed the SSD in the drive bay, the next step is to connect it to the motherboard in your desktop computer. Follow these steps to ensure a proper connection:
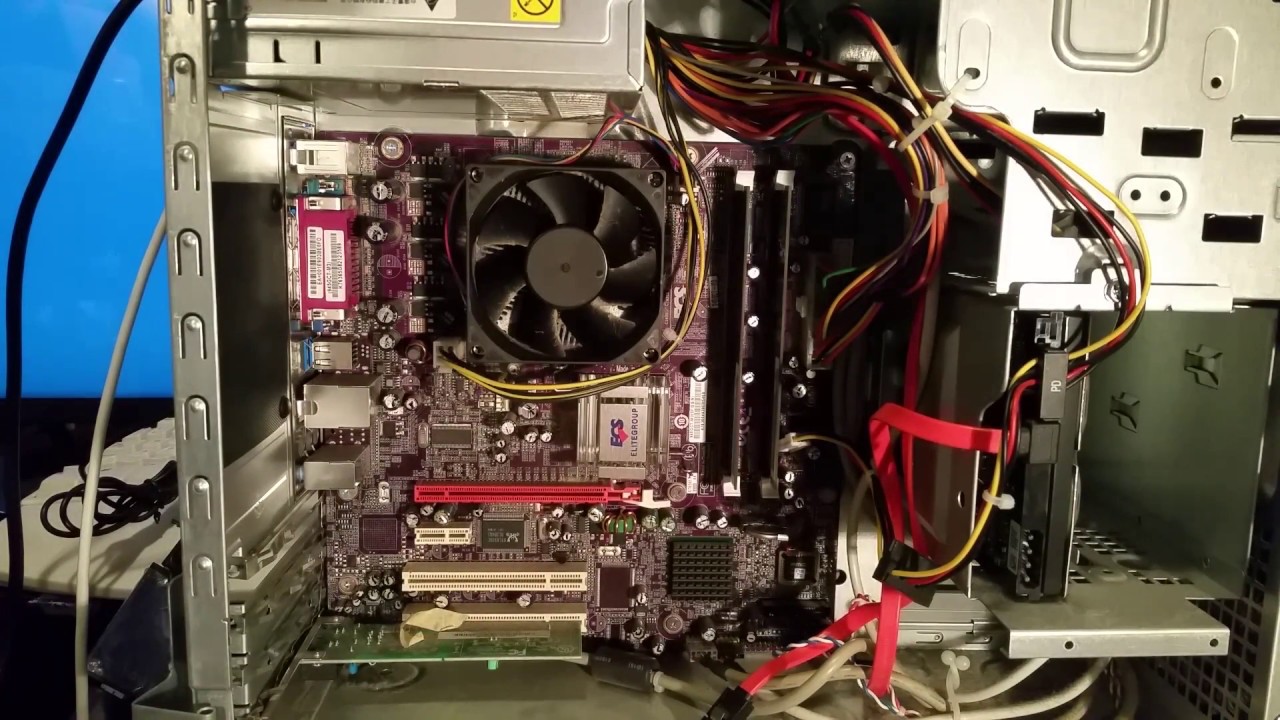
- Locate the SATA connector on the motherboard: Look for the SATA connectors on the motherboard. These are usually rectangular and have several slots for connecting the SATA cables.
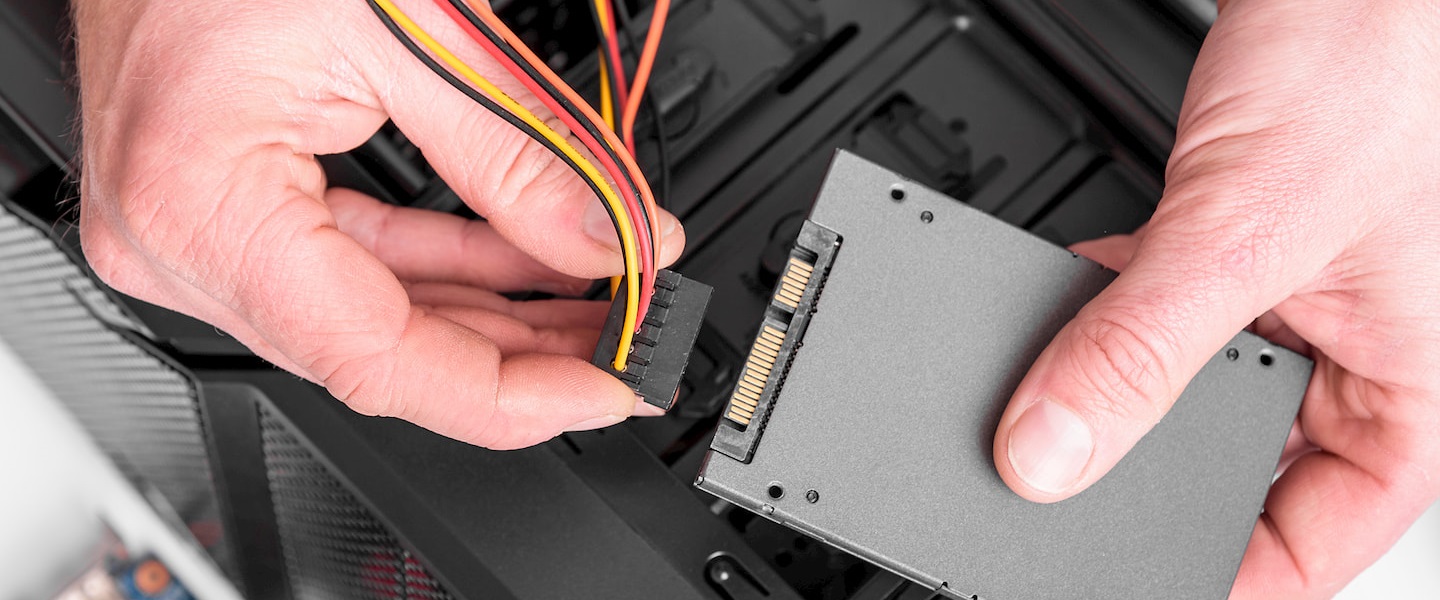
- Connect the SATA data cable: Take a SATA data cable and connect one end to the SATA connector on the SSD. Align the connector properly and gently push it into place until it is fully inserted. Make sure it is firmly connected and not loose.
- Connect the SATA power cable: Take a SATA power cable and connect one end to the power port on the SSD. Align the connector properly and push it in until it is securely connected. The power cable will provide power to the SSD, allowing it to function.
- Secure the cables: Ensure that the SATA data and power cables are properly routed and do not obstruct any other components or fans in the case. You can use zip ties or cable management solutions to secure and organize the cables for better airflow and aesthetics.
- Double-check the connections: Once the cables are connected, visually inspect the connections to make sure they are secure. Give them a gentle tug to ensure they are firmly attached to the SSD and the motherboard.
By properly connecting the SSD to the motherboard, you ensure that it can communicate with the rest of the system and receive the necessary power. Once the SSD is securely connected, you’re ready to move on to the next step: securing the SSD in the desktop case.
Step 7: Secure the SSD in the desktop case
With the SSD connected to the motherboard, the next step is to secure it in the desktop case. This ensures that the SSD remains in place and prevents any potential movement or damage. Follow these steps to securely fasten the SSD:
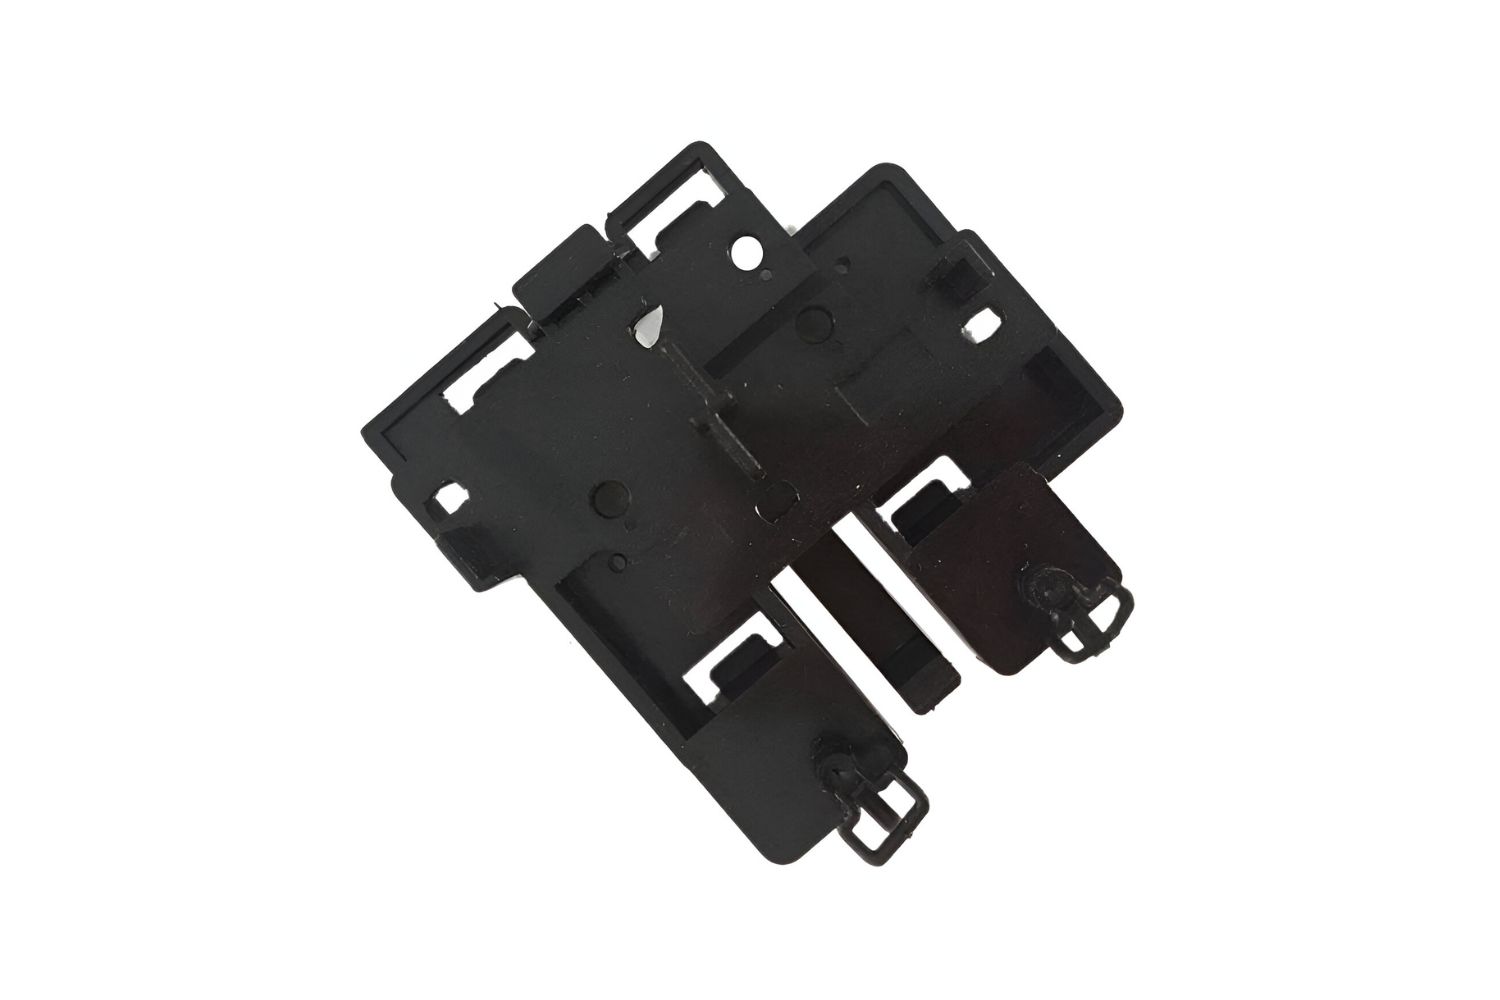
- Identify mounting options: Depending on your desktop case, there may be specific mounting options available for securing the SSD. These could include dedicated SSD trays, brackets, or slots.
- Position the SSD: Place the SSD in the designated mounting area, aligning it with the available mounting holes or slots. Ensure that it fits snugly and aligns properly with the connectors at the back of the case.
- Attach screws: Using the appropriate screws, fasten the SSD to the mounting area or bracket. Take care not to overtighten the screws, as it may damage the SSD or the case. Refer to your case’s manual for specific screw sizes and locations.
- Confirm stability: Gently wiggle and check the SSD to ensure that it is securely attached and does not have any excessive movement. It should be firmly positioned without any loose connections or rattling.
Securing the SSD in the desktop case is essential to maintain its stability, protect it from unnecessary vibrations, and ensure its longevity. Once the SSD is securely fastened, you’re ready to move on to the next step: connecting the power and data cables to the SSD.
Step 8: Connect power and data cables to the SSD
Now that you have secured the SSD in the desktop case, it’s time to connect the necessary power and data cables. These connections are crucial for the SSD to receive power and communicate with the motherboard. Follow these steps to properly connect the cables:
- Locate the SATA power cable: Identify the SATA power cable from your power supply unit (PSU). It has a distinct L-shaped connector with multiple SATA power ports.
- Connect the SATA power cable to the SSD: Take the SATA power cable and align the L-shaped connector with the corresponding port on the SSD. Gently push it in until it is securely connected. Ensure that the connection is tight and the cable is not loose.
- Locate the SATA data cable: Retrieve a SATA data cable, which is usually a flat, narrow cable with two straight connectors on each end.
- Connect the SATA data cable to the SSD: Take one end of the SATA data cable and connect it to the SATA data port on the SSD. Align the connectors properly and gently push them together until they are fully connected. Ensure a snug fit.
- Connect the other end of the SATA data cable: Take the opposite end of the SATA data cable and connect it to one of the available SATA connectors on the motherboard. Align the connectors properly and gently push them together until they are fully connected.
- Tidy up the cables: Organize and manage the power and data cables to ensure they are neatly arranged and don’t obstruct any other components or airflow within the case. You can use cable ties or other cable management solutions to keep everything in place.
By connecting the power and data cables to the SSD, you provide it with the necessary power and enable it to communicate with the rest of the system. Once the cables are properly connected, you’re ready to proceed to the next step: configuring the BIOS settings.
Step 9: Configure the BIOS settings
After connecting the power and data cables to the SSD, the next step is to configure the BIOS settings to recognize the new storage device. Follow these steps to properly configure the BIOS:
- Restart your computer: Save any unsaved work and restart your computer. As it boots up, be ready to access the BIOS settings. The specific key to enter the BIOS may vary depending on your computer’s manufacturer, commonly indicated on the startup screen.
- Enter the BIOS: Once you identify the key, press it repeatedly until the BIOS setup utility appears. It usually requires pressing a key like F2, F10, or Delete. Refer to your computer’s manual for more specific instructions.
- Navigate to the Boot menu: In the BIOS settings, find the Boot menu or a similar section that controls the boot order or device priority. This determines the order in which devices are checked for bootable operating systems.
- Adjust the boot order: Ensure that the SSD is listed as a bootable device or set it as the primary boot device. Move it to the top of the boot order list to prioritize booting from the SSD. This ensures that your operating system will load from the SSD upon startup.
- Save and exit: Once you have adjusted the boot order settings, save the changes and exit the BIOS. Your computer will restart using the newly configured settings.
Configuring the BIOS settings and prioritizing the SSD allows your computer to recognize it as the main boot device, ensuring that you benefit from the improved performance of the SSD. Once you have successfully configured the BIOS, you’re ready for the next step: installing the operating system on the SSD.
Step 10: Install the operating system on the SSD
With the BIOS settings configured, it’s time to install the operating system (OS) onto the newly installed SSD. Follow these steps to complete the OS installation:
- Obtain the OS installation media: If you have a physical copy of the OS, insert the installation disc into the appropriate drive. Alternatively, if you have a digital copy, create a bootable USB drive with the OS installation files.
- Restart your computer: Restart your computer and enter the BIOS once again. Set the boot priority to prioritize the installation media, such as the CD/DVD drive or the USB drive, depending on the installation method you’re using.
- Follow the on-screen prompts: Once the computer boots from the installation media, follow the on-screen prompts to begin the OS installation. Select your language, accept the license agreement, and choose the installation destination as your SSD.
- Format and partition the SSD: During the installation process, you will have the option to format and partition the SSD. Choose the appropriate settings based on your preferences and needs. It’s recommended to use the entire SSD as a single partition for optimal performance.
- Complete the OS installation: Allow the OS installation process to complete. This may take some time depending on the size of the OS and the speed of your computer. Follow the remaining on-screen instructions, such as setting up user accounts and customizing settings.
- Restart your computer: Once the OS installation is complete, restart your computer. Ensure that the SSD is still set as the primary boot device in the BIOS settings.
By installing the operating system on the SSD, you will benefit from its fast boot times and improved performance. After completing this step, you’re ready for the next and final step: transferring data from the old drive to the SSD.
Step 11: Transfer data from the old drive to the SSD
After successfully installing the operating system on the SSD, the final step is to transfer your data from the old drive to the SSD. Follow these steps to complete the data transfer process:
- Connect the old drive (if applicable): If you have kept your old drive connected to your desktop, leave it connected for now. If not, you can reconnect it temporarily.
- Identify the data you want to transfer: Determine which files and folders you want to transfer from the old drive to the SSD. This can include documents, photos, videos, music, and any other personal files.
- Copy and paste method: The simplest way to transfer data is by using the copy and paste method. Open both the old drive and the SSD in File Explorer (Windows) or Finder (Mac) and navigate to the desired files/folders. Copy the files/folders from the old drive and paste them into the corresponding location on the SSD.
- Migration software: Alternatively, you can use migration software that helps in transferring the entire operating system and data from the old drive to the SSD. Various software options are available, such as Clonezilla, EaseUS Todo Backup, or Samsung Data Migration (for Samsung SSDs).
- Verify data transfer completion: Once the data transfer is complete, double-check the SSD to ensure that all the transferred files and folders are intact and accessible.
- Remove the old drive (optional): If you have successfully transferred all your data to the SSD, you may choose to remove the old drive from your desktop. Keep in mind that this step is optional and dependent on your personal preferences and storage requirements.
By transferring your data from the old drive to the SSD, you can now enjoy the improved performance of your desktop with faster access to your files. Take some time to organize your files and verify that everything has transferred successfully. With this final step complete, you have successfully installed and set up your SSD in your desktop computer.
Conclusion
Congratulations! You have successfully completed the process of installing an SSD in your desktop computer. By following these step-by-step instructions, you have unlocked a world of improved performance, faster boot times, and enhanced overall responsiveness.
Throughout this guide, you learned how to gather the necessary tools and materials, prepare your desktop, choose the right SSD, backup your data, install the SSD, connect it to the motherboard, secure it in the case, configure the BIOS settings, install the operating system, and transfer your data from the old drive to the new SSD.
By upgrading to an SSD, you have transformed your desktop computer into a more powerful and agile machine. You will enjoy faster file transfers, reduced loading times, and a smoother computing experience. Whether you’re a gamer, a creative professional, or simply a regular computer user, this SSD installation will significantly enhance your productivity and enjoyment.
Remember, every computer model is unique, so it’s important to consult your computer’s manual or support website for specific instructions and compatibility. Take the necessary safety precautions, such as grounding yourself to prevent static electricity discharge, while working on internal components.
Now that you have completed the installation of the SSD, take some time to explore and experience the improved performance of your desktop computer. Enjoy the increased speed, responsiveness, and efficiency that the SSD brings to your computing experience.
Thank you for following this guide, and we hope that your new SSD enhances your overall desktop experience for years to come!