Introduction
Welcome to our guide on how to install a side case fan! If you’re looking to improve airflow and cooling efficiency in your computer system, adding a side case fan can be a great solution. Proper cooling is essential to maintain optimal performance and prevent overheating, especially during intense gaming sessions or resource-intensive tasks.
In this step-by-step tutorial, we will walk you through the process of installing a side case fan for your computer. Whether you are a beginner or have some experience with computer hardware, this guide will provide you with the knowledge and instructions needed to successfully install a side case fan.
Before we dive in, let’s briefly discuss the importance of proper cooling in a computer system. When your computer is running, it generates heat that can damage sensitive components if not dissipated effectively. The fans in your computer help circulate air and remove heat, ensuring that your system maintains a stable temperature. By adding a side case fan, you can enhance air circulation, lower temperatures, and contribute to a quieter and more efficient computing experience.
Now that you understand the importance of proper cooling, let’s move on to the tools and materials you will need for this installation.
Required Tools and Materials
Before you begin the installation process, make sure you have the following tools and materials on hand:
- Screwdriver (Phillips or flathead, depending on your case)
- Side case fan (make sure to choose the appropriate size for your case)
- Mounting screws (usually included with the fan)
- Anti-static wrist strap (optional but recommended)
- Clean cloth or compressed air canister (to remove any dust or debris)
It’s essential to have the correct tools and materials to ensure a smooth and successful installation. The screwdriver will be used to remove the side panel of your computer case and secure the side case fan in place. Additionally, it’s crucial to choose the right size fan for your case to guarantee compatibility and proper airflow.
If you’re concerned about static electricity potentially damaging your computer components, wearing an anti-static wrist strap is a good precautionary measure. This strap will help to discharge any static electricity and protect delicate hardware.
Before you begin the installation process, it’s also a good idea to clean any dust or debris that may have accumulated in your case. Using a clean cloth or compressed air canister, gently remove any dirt or particles from the inside of your computer case. This will help optimize airflow and prevent any obstructions that could impede the cooling process.
With all the necessary tools and materials ready, let’s move on to the next step: choosing the right size fan for your case.
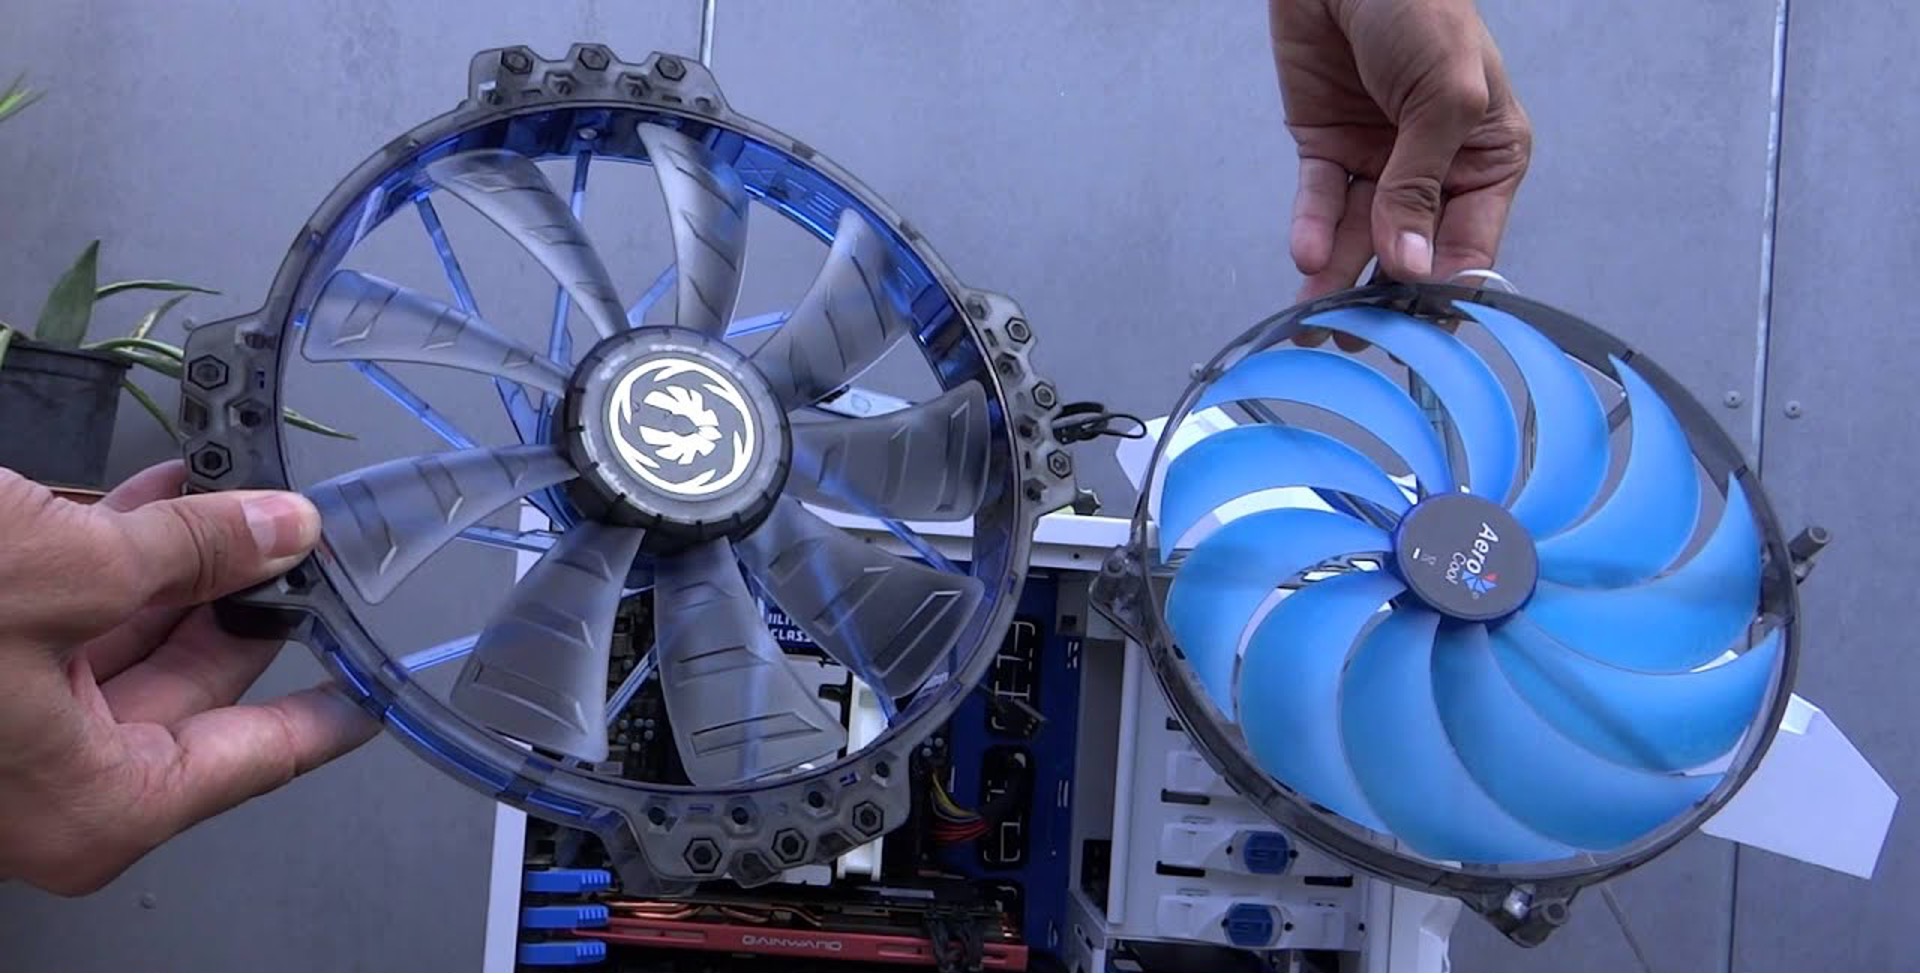
Step 1: Choose the Right Fan Size
The first step in installing a side case fan is to determine the appropriate fan size for your computer case. Choosing the right size fan is crucial to ensure compatibility and maximum airflow. Most side case fans come in standard sizes, such as 80mm, 120mm, or 140mm.
To determine the correct fan size for your case, you can refer to the manufacturer’s specifications or measure the existing fan (if available). If you don’t have a fan installed, you can measure the available space on the side panel where the fan will be mounted.
A fan that is too small may not provide sufficient airflow, while a fan that is too large may not fit properly or obstruct other components. Generally, a larger fan will generate more airflow at lower RPM, resulting in quieter operation. However, always ensure that your case can accommodate the size you choose.
Once you have determined the appropriate fan size, you can proceed to the next step: determining the ideal placement for the fan.
Step 2: Determine the Ideal Placement
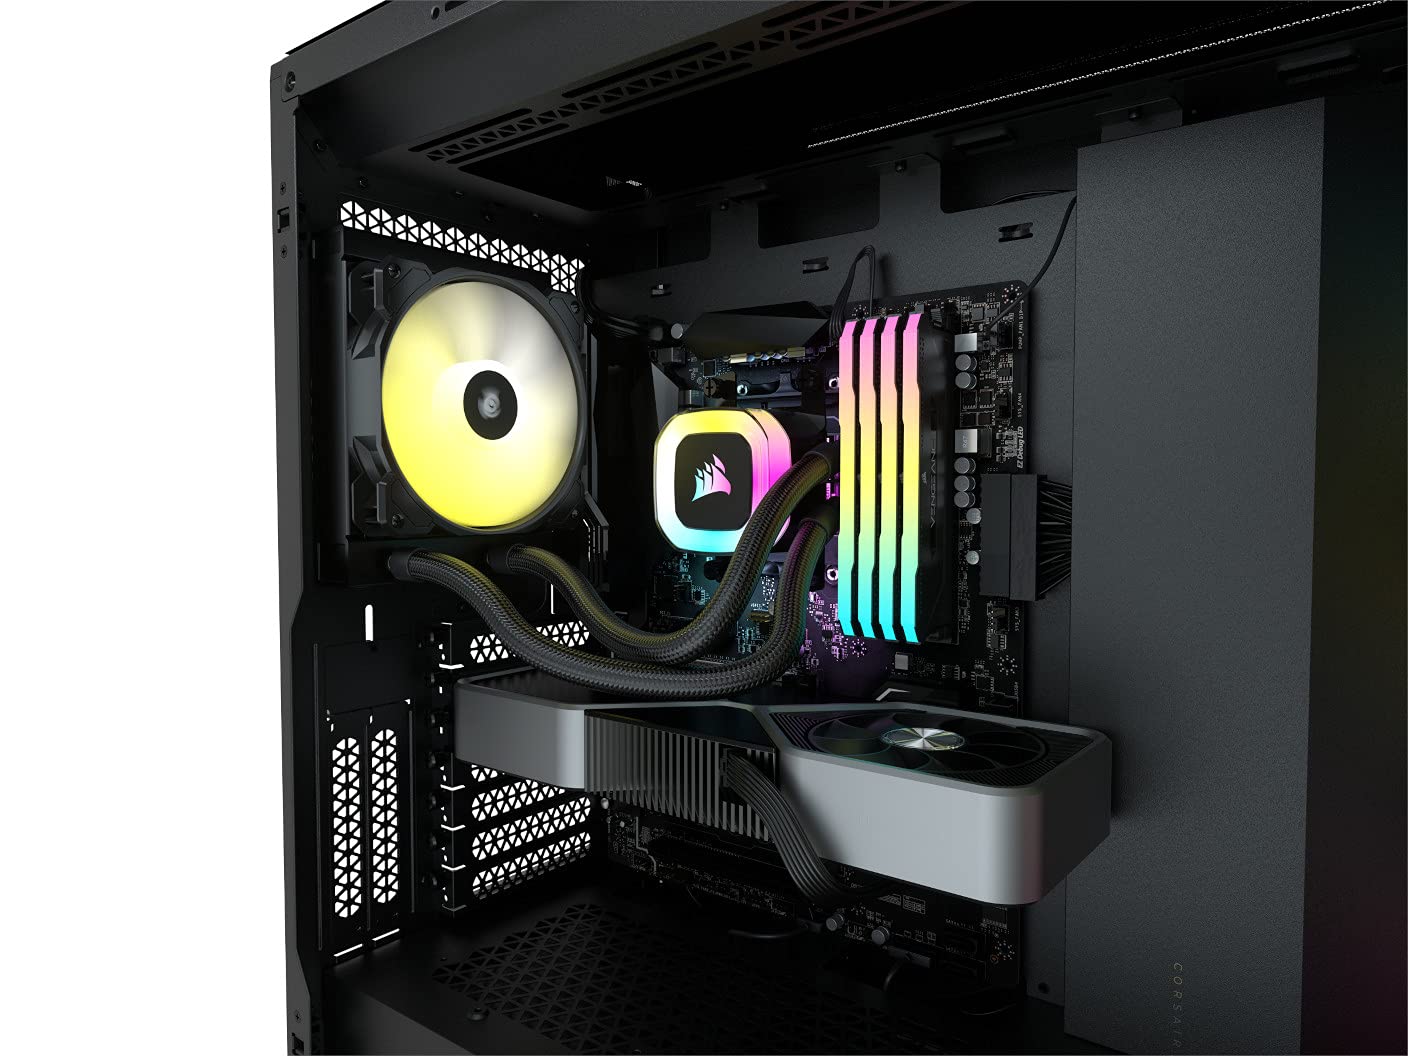
After selecting the appropriate size fan for your computer case, the next step is to determine the ideal placement for the side case fan. The placement will depend on various factors such as the available space, existing fan configurations, and the specific needs of your system.
Typically, the side case fan is positioned near the CPU or GPU to provide direct cooling to these heat-generating components. This helps dissipate the heat efficiently and improve overall system performance. Additionally, the side panel often has ventilation holes or a mesh design to facilitate airflow, making it an ideal location for installing a fan.
Before finalizing the placement, consider the direction of airflow. Most fans have arrows indicating the direction of airflow, usually from the front to the back of the case. It’s essential to position the side case fan so that it aligns with the overall airflow pattern in your system.
If you already have existing fans installed in your case, ensure that the placement of the side case fan does not obstruct or interfere with their operation. Maintaining a balanced airflow is crucial in keeping your system cool and preventing any hotspots.
Take into account any cable management considerations as well. Make sure there is sufficient space for the fan’s power cable to reach the power supply without putting strain on the connectors or other cables.
Once you have determined the ideal placement for the side case fan, you can proceed to the next step: removing the side panel.
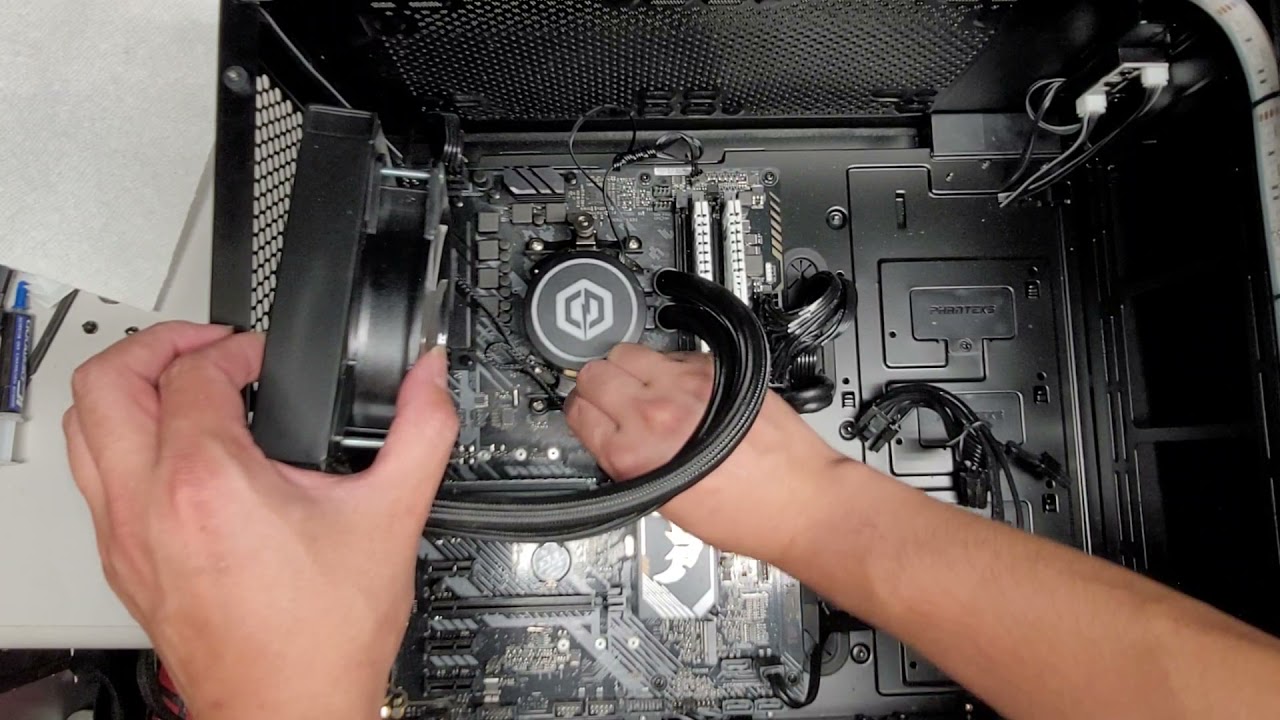
Step 3: Remove the Side Panel
Now that you have determined the ideal placement for the side case fan, it’s time to remove the side panel of your computer case. The side panel is typically secured with screws, latches, or clips, depending on the case model.
Start by locating the screws or latches that hold the side panel in place. In most cases, these will be located along the back edge of the case. Use a screwdriver or release the latches to loosen and remove the screws or latches.
Once the screws or latches are removed, gently slide or lift the side panel away from the case. Be careful not to force or bend the panel to avoid any damage. Some cases may have a thumbscrew or handle that makes removing the panel easier.
With the side panel removed, you will have clear access to the inside of your case. Take this opportunity to inspect and clean the interior, removing any dust or debris that may have accumulated. This will ensure optimal airflow and prevent any obstructions that could affect the performance of the side case fan.
Set the side panel aside in a safe place, as you will need to reattach it once the fan is installed. Now, you’re ready to move on to the next step: preparing the fan for installation.
Step 4: Prepare the Fan
With the side panel removed, it’s time to prepare the side case fan for installation. Before mounting the fan onto the side panel, there are a few important steps to follow.
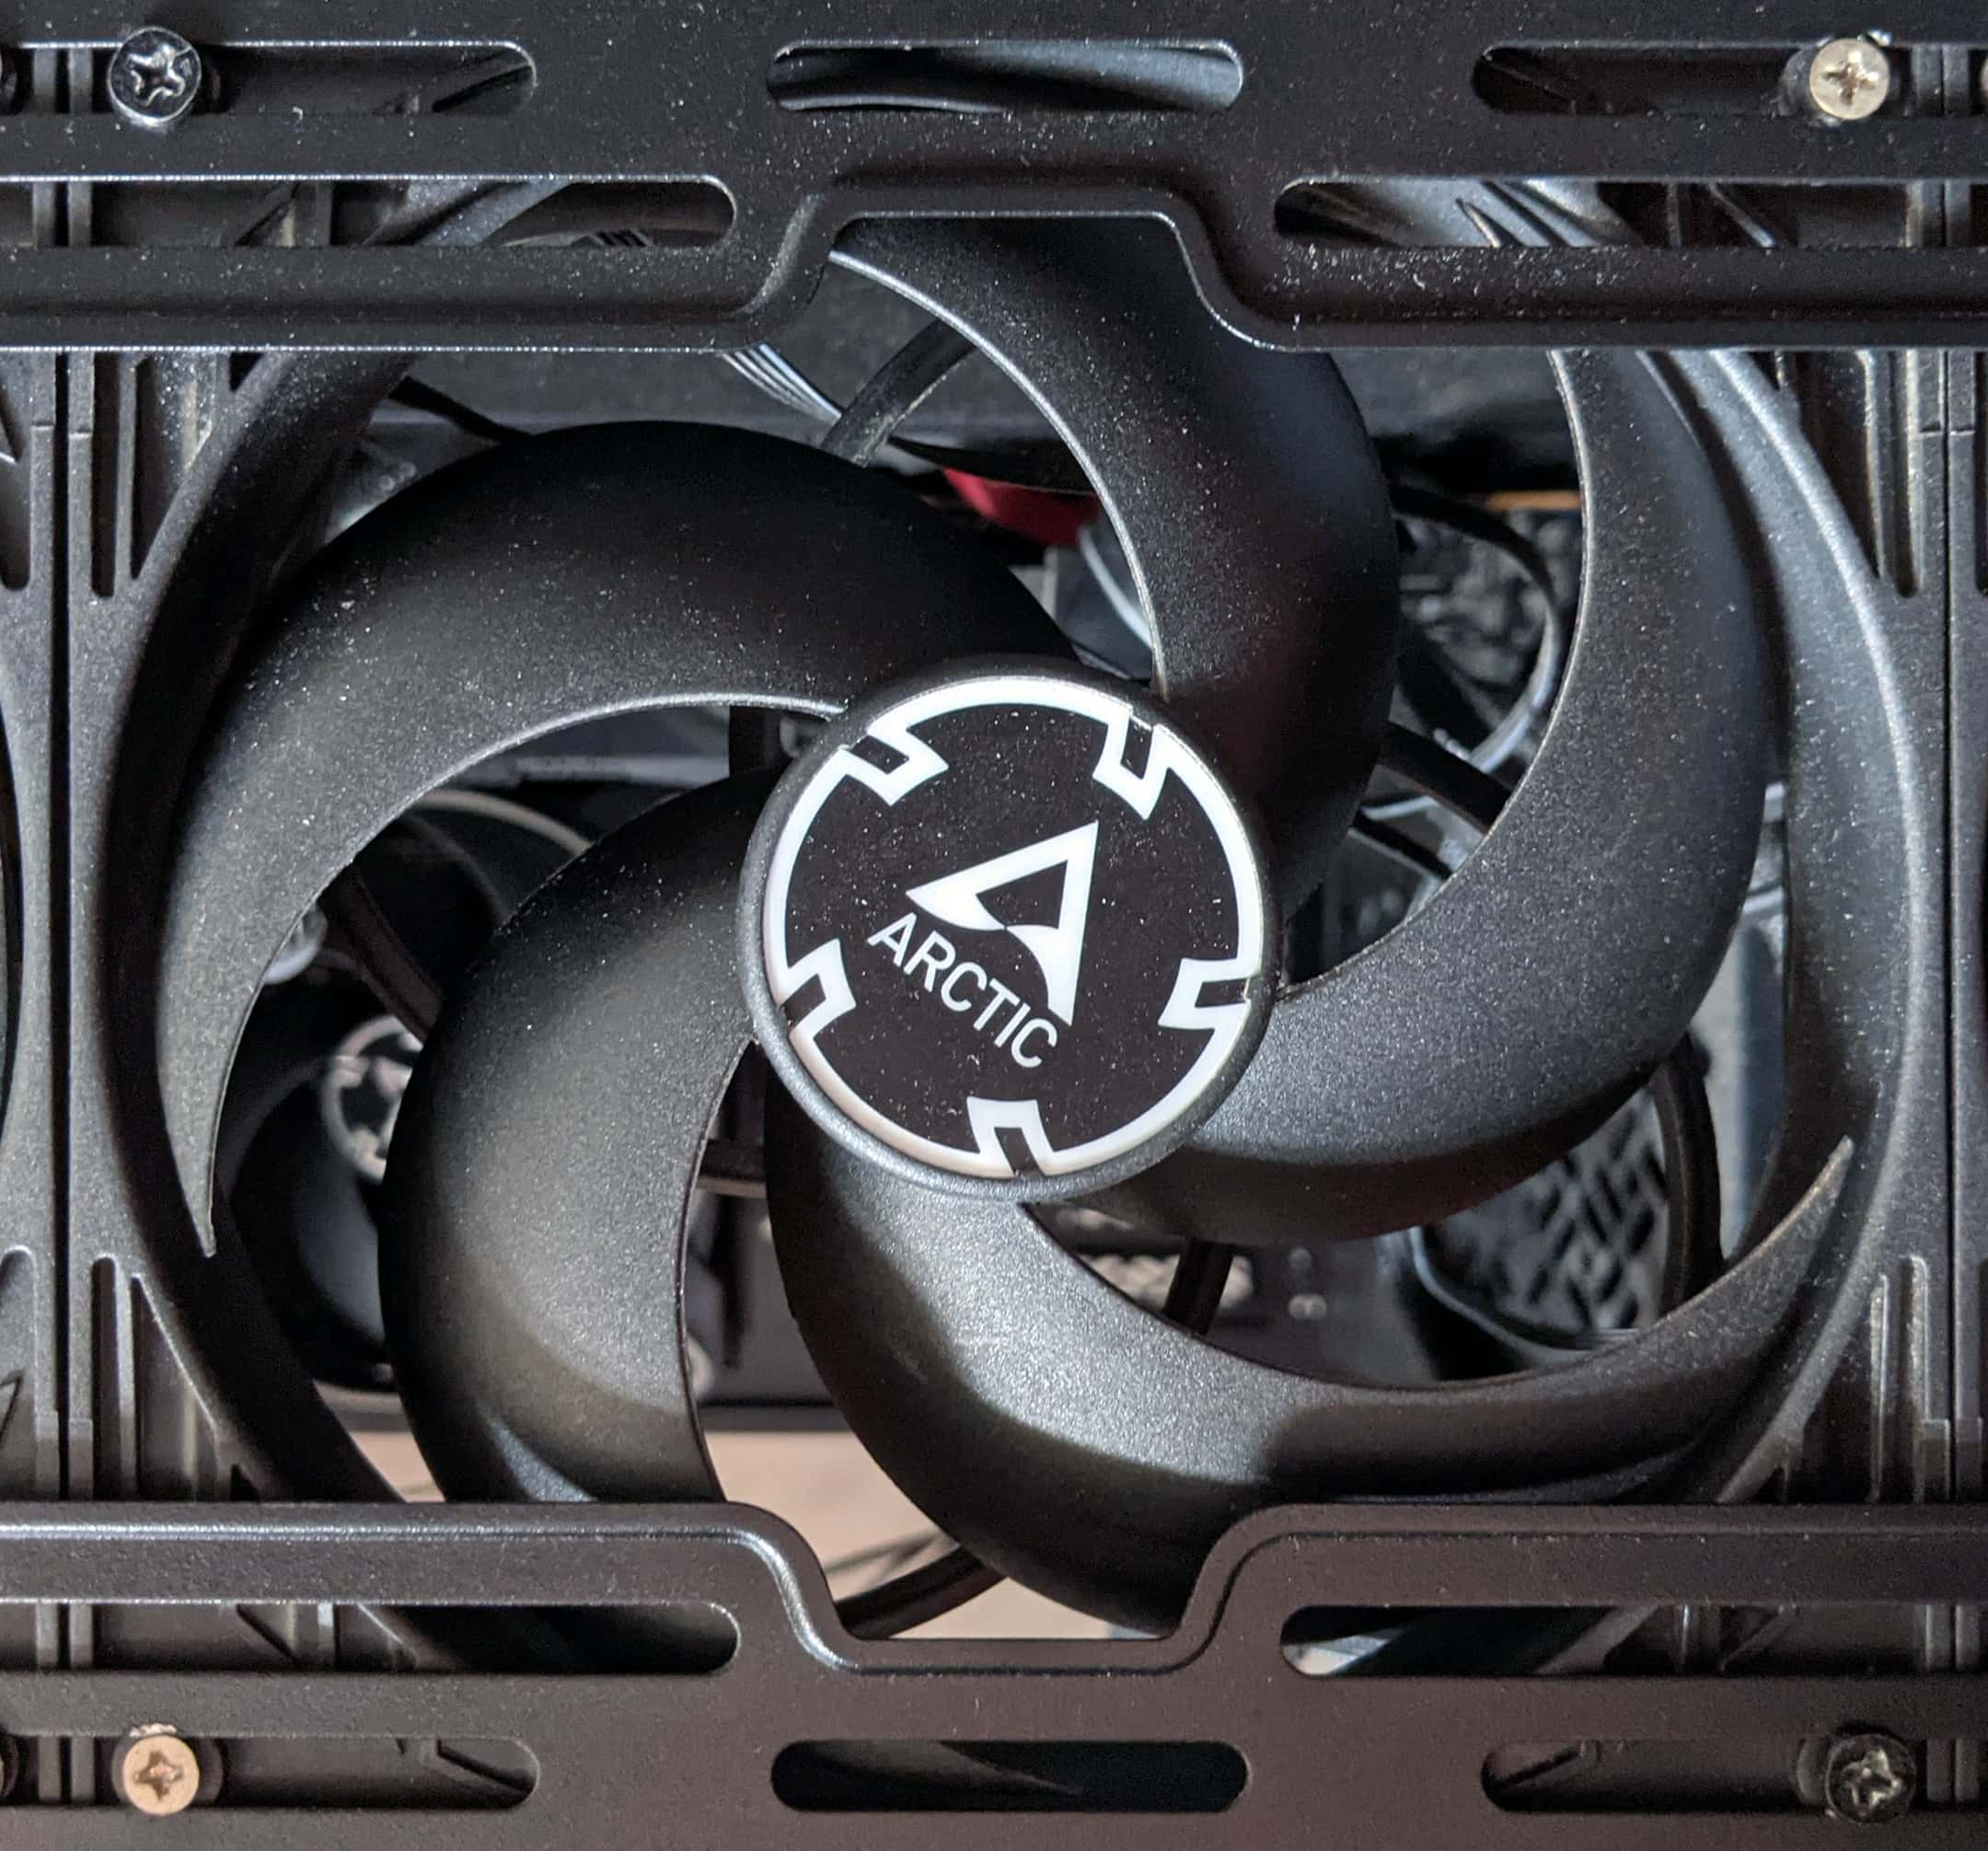
First, inspect the fan to ensure there are no visible damages or defects. Check the fan blades, frame, and any wires or connectors for any signs of damage. If you notice any issues, it’s best to replace the fan before proceeding with the installation.
Next, locate the mounting holes on the fan. These holes will be used to secure the fan to the side panel. Most fans come with pre-drilled holes or rubber mounts for easy installation.
If your fan comes with rubber mounts, attach them to the mounting holes. These mounts help reduce vibration and noise caused by the fan’s operation. Simply push the rubber mounts into the mounting holes until they are securely in place.
If your fan doesn’t come with rubber mounts, you can use the provided mounting screws to attach the fan to the side panel directly. Insert the screws through the fan’s mounting holes and align them with the corresponding holes on the side panel.
Before tightening the screws, ensure the fan is aligned properly, with the fan blades facing the correct direction. This direction is usually indicated by an arrow on the fan’s frame, pointing towards the side panel. Aligning the fan in the right orientation will ensure proper airflow and cooling effectiveness.
Once the fan is aligned correctly, tighten the mounting screws or rubber mounts until the fan is securely attached to the side panel. Avoid over-tightening to prevent any damage to the fan or side panel.
With the fan properly prepared, you are now ready to move on to the next step: mounting the fan onto the side panel of your computer case.
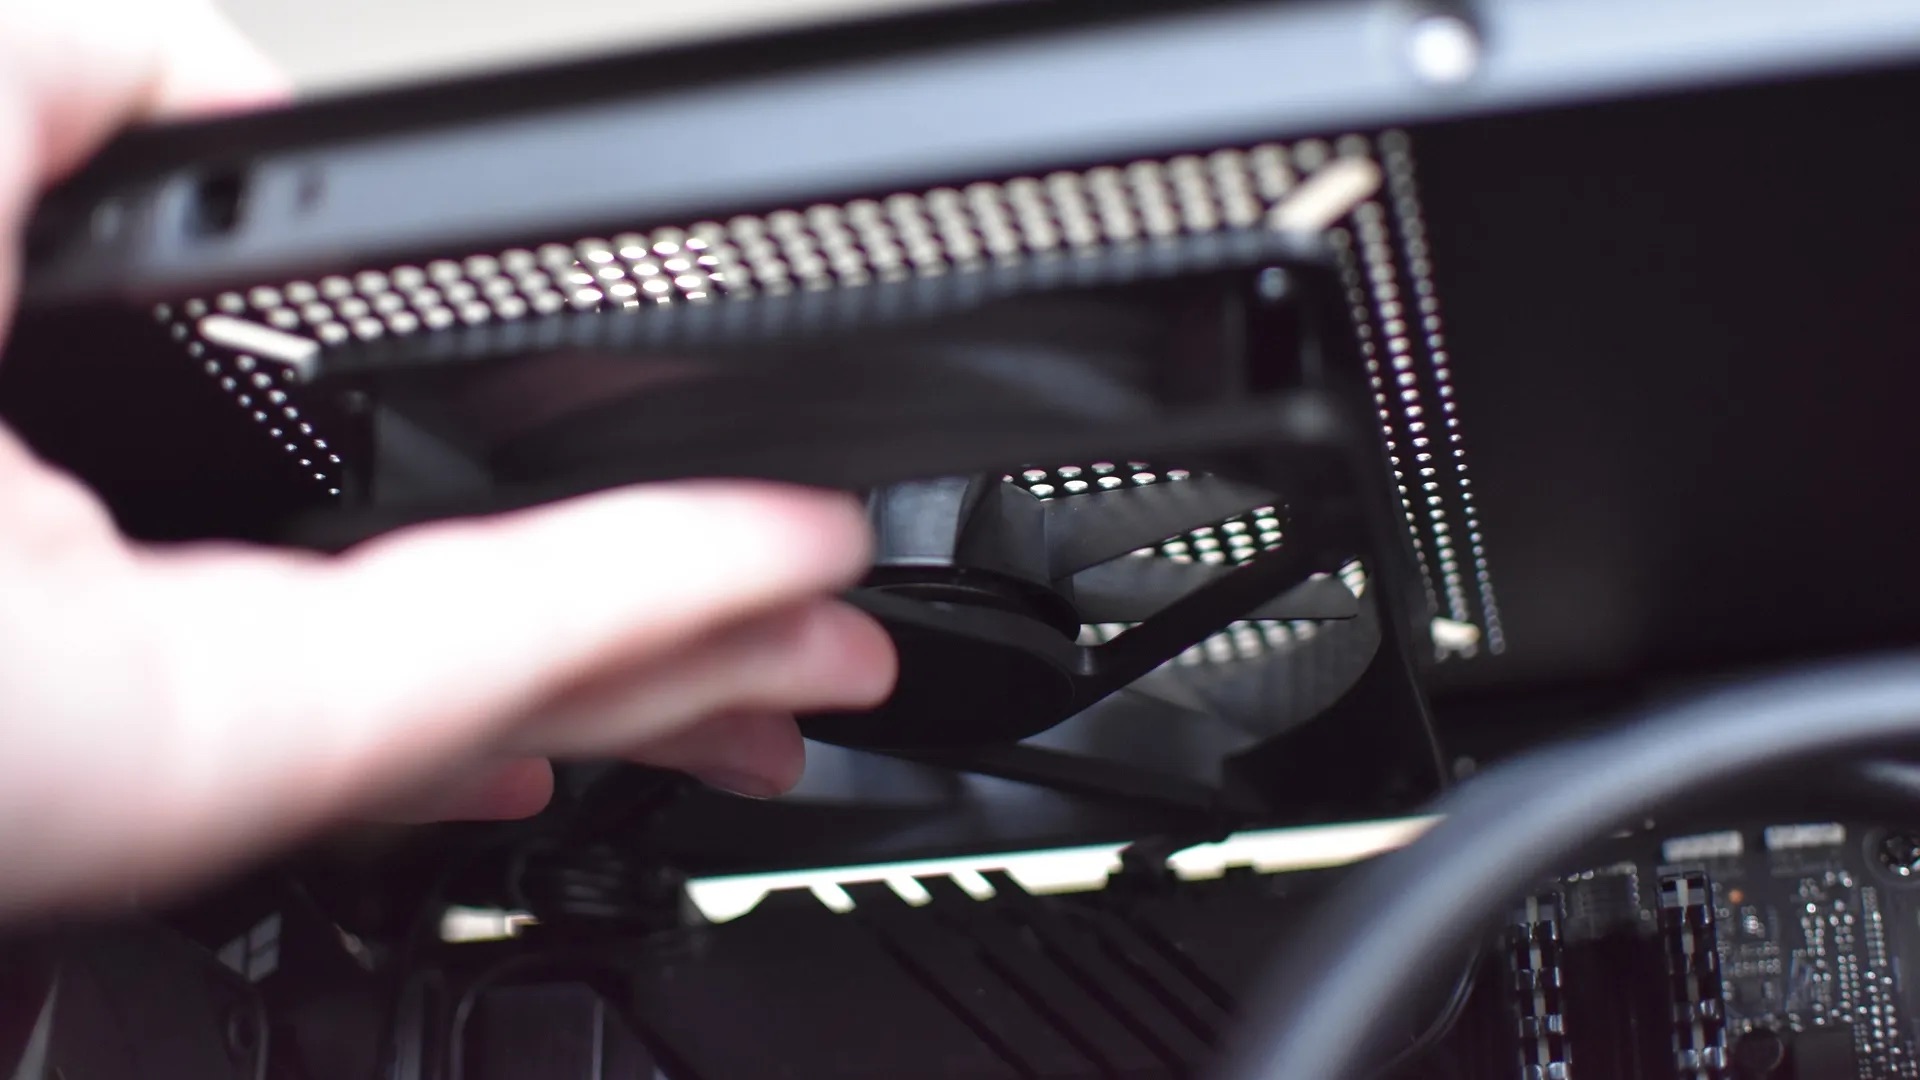
Step 5: Mount the Fan
Now that you have prepared the side case fan, it’s time to mount it onto the side panel of your computer case. Follow these steps to ensure a secure and proper installation.
1. Take the side panel that you removed earlier and locate the appropriate mounting area. This is usually a designated spot with holes or grooves to accommodate the fan. Double-check that the fan placement aligns with the ventilation holes or mesh on the side panel for optimal airflow.
2. Carefully position the fan onto the side panel, ensuring that the mounting holes or rubber mounts on the fan align with the corresponding holes or grooves on the side panel.
3. If using rubber mounts, gently push them through the mounting holes on the side panel until they are securely in place. Ensure that the fan is held firmly, but not overly tight, to prevent any unnecessary strain or damage.
4. If using mounting screws, insert them through the fan’s mounting holes and align them with the corresponding holes or grooves on the side panel. Carefully tighten the screws using a screwdriver or your fingers, ensuring that the fan is securely fastened to the side panel. Again, remember not to overtighten.
5. Once the fan is mounted, give it a gentle shake or push to ensure it is securely in place. You should not feel any movement or wobbling.
6. Take a moment to check that the fan blades are still properly aligned and facing the correct direction for airflow. If necessary, adjust the fan’s position or orientation before proceeding.
Congratulations! You have successfully mounted the side case fan onto the side panel of your computer case. Your next step will be to connect the fan to the power supply, so let’s move on to Step 6.
Step 6: Connect the Fan to the Power Supply
With the side case fan securely mounted onto the side panel, the next step is to connect it to the power supply of your computer. This connection will provide the necessary electrical power for the fan to operate.
1. Locate the power connector on the side case fan. This connector is usually a small, three or four-pin plug located near the fan’s frame.
2. Locate the corresponding fan header on the motherboard or the power supply. This header is typically labeled “SYS_FAN” or “CHA_FAN” and may be color-coded to match the connector on the fan.
3. Align the pins on the fan connector with the holes on the fan header, ensuring that the notch or guide on the connector matches the guide on the header. This will prevent you from inserting the connector the wrong way.
4. Gently push the fan connector into the fan header until it is fully seated. You should hear a click or feel a firm connection.
5. Once connected, check the fan cable to ensure it is neatly and securely routed to avoid any interference with other components or cables inside the case. Use cable ties or clips to manage the cables if necessary.
6. Double-check that the fan is receiving power by starting your computer and accessing the BIOS or monitoring software. Look for the fan’s speed or RPM reading, which should indicate that it is functioning correctly. If the fan is not spinning or the RPM reading is zero, double-check the connection or consult your motherboard’s manual for any specific settings required.
By following these steps, you have successfully connected the side case fan to the power supply of your computer. The final step is to close the side panel, so let’s move on to Step 7.
Step 7: Close the Side Panel
After connecting the side case fan to the power supply, it’s time to close the side panel of your computer case. This step will secure the fan in place and ensure that the airflow is directed properly.
1. Carefully align the side panel with the edges of the case. Ensure that any cables or connectors inside the case are not being pinched or obstructed by the panel.
2. Gently slide or push the side panel back into position. Make sure it sits flush against the case and aligns properly with any screw holes or latches.
3. If your case uses screws to secure the side panel, insert the screws back into their respective holes and tighten them using a screwdriver. Start with the top or bottom screws first, if applicable, and then move to the remaining screws.
4. If your case uses latches or clips, engage them by snapping the side panel securely into place. You may need to apply a bit of pressure to ensure a tight fit.
5. Once the side panel is closed and secured, give it a gentle shake or push to ensure that it is stable and properly aligned. You should not feel any movement or hear any rattling noises.
6. Finally, take a moment to visually inspect the case to ensure that the side panel is properly closed and that no gaps or openings remain. This will help maintain optimal airflow and prevent dust from entering the case.
Congratulations! You have successfully closed the side panel, completing the installation of the side case fan. The final step is to test the fan and ensure it is functioning correctly, so let’s move on to Step 8.
Step 8: Test the Fan
Now that you have completed the installation of the side case fan, it’s essential to test its functionality to ensure proper operation and confirm that it is effectively cooling your system.
1. Power on your computer and listen for any abnormal noises coming from the fan. A properly functioning fan should operate quietly without any grinding, rattling, or vibrating sounds. If you notice any unusual noises, double-check the fan’s mounting and connections.
2. Access your computer’s BIOS or use monitoring software to check the fan speed and temperature readings. Depending on your setup, you may be able to adjust the fan speed settings in the BIOS to optimize performance and noise levels.
3. Monitor the temperatures of your CPU, GPU, and other components while your system is under load. Use software like HWMonitor or SpeedFan to track temperature readings. Ensure that the fan is providing adequate cooling and that the temperatures remain within safe limits.
4. If you are using fan control software or motherboard utilities, you can further customize the fan curve and speed settings to best suit your needs. This can help optimize the cooling performance and reduce noise levels based on your preferences.
5. Regularly inspect the fan for any dust or debris accumulation. Over time, dust can build up on the fan blades and hinder its performance. Use compressed air or a soft brush to clean the fan periodically to maintain optimal airflow.
By testing the fan and monitoring its performance, you can ensure that it is functioning correctly and effectively aiding in cooling your computer system. Regular maintenance and monitoring will help maximize the lifespan and effectiveness of the fan.
With the fan successfully tested and your system running at optimal temperatures, you can now enjoy improved airflow and cooling capabilities for your computer.
Conclusion
Congratulations! You have successfully learned how to install a side case fan for your computer. By following the steps outlined in this guide, you have enhanced the airflow and cooling efficiency of your system, resulting in improved performance and stability.
We started by discussing the importance of proper cooling in a computer system and why adding a side case fan can be beneficial. Then, we went through the necessary tools and materials required for the installation, ensuring you have everything you need to complete the process.
We then walked you through the step-by-step process, covering essential steps such as choosing the right fan size, determining the ideal placement, and removing the side panel. We also provided detailed instructions for preparing the fan, mounting it onto the side panel, connecting it to the power supply, and finally, closing the side panel.
Once the installation was complete, we emphasized the importance of testing the fan to ensure proper functionality and monitoring its performance. By regularly monitoring the fan’s operation and maintaining cleanliness, you can ensure optimal cooling efficiency.
With the side case fan successfully installed, you can now experience improved airflow, reduced temperatures, and an overall enhanced computing experience. Whether you are a gamer, video editor, or simply a power user, proper cooling is essential for the long-term health and performance of your system.
Remember to periodically clean the fan to remove any dust or debris that may accumulate over time. Keeping the fan clean will help maintain optimal airflow and prevent performance issues.
Thank you for following our guide on how to install a side case fan. We hope this tutorial has provided you with the knowledge and confidence to successfully install a side case fan and optimize the cooling capabilities of your computer.
Happy computing!