Introduction
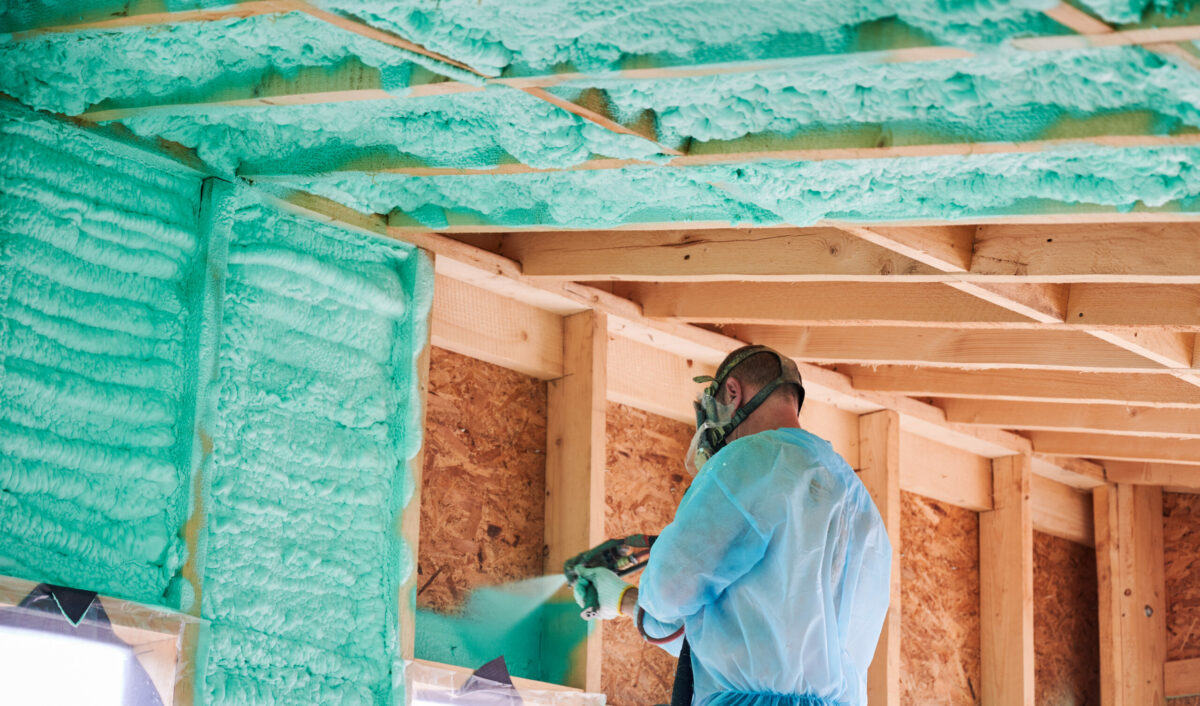
Welcome to our comprehensive guide on how to install noise cancelling foam. If you’re tired of dealing with unwanted noise in your home or office, then installing noise cancelling foam can be an effective solution to create a quieter environment. Whether you want to minimize outside noise, reduce echoes in a room, or optimize the acoustics in a recording studio, noise cancelling foam can help absorb and dampen sound waves.
In this step-by-step tutorial, we will walk you through the process of installing noise cancelling foam to achieve maximum soundproofing results. We will cover everything you need to know, from gathering the necessary materials to properly applying and securing the foam in place.
Before we dive into the installation process, let’s take a moment to understand how noise cancelling foam works. This type of foam, also known as acoustic foam or soundproofing foam, is designed to absorb sound waves by converting them into heat energy. The unique shape and structure of the foam help to disrupt and dissipate sound vibrations, reducing their intensity and preventing them from bouncing off surfaces and creating echoes.
Keep in mind that noise cancelling foam is not only useful for soundproofing rooms. It can also improve the quality of audio recordings by reducing background noise and echo within a space. This makes it a popular choice for content creators, musicians, podcasters, and anyone who wants to achieve professional-level sound quality.
Now that we have a basic understanding of noise cancelling foam and its benefits, let’s move on to the step-by-step installation process. With the right materials and techniques, you’ll be able to transform your space into a more peaceful and acoustically pleasing environment.
Step 1: Gather the necessary materials
Before you begin the installation process, it’s important to gather all the necessary materials. Having everything you need at hand will ensure a smooth and efficient installation. Here’s a list of the essential materials you’ll need:
- Noise cancelling foam panels: Measure the areas you plan to cover with foam and purchase enough panels to cover those spaces. Choose foam panels that are specifically designed for noise reduction.
- Measuring tape: To accurately measure the dimensions of the installation areas.
- Marker or pen: To mark the measurements on the foam panels for cutting.
- Safety glasses and gloves: It’s important to wear protective gear when working with foam adhesive to avoid any potential skin or eye irritation.
- Foam adhesive: Look for a high-quality adhesive that is specifically designed for use with foam. Ensure that it’s suitable for your project and will provide a long-lasting bond.
- Cutting tools: Depending on the thickness of the foam, you may need a utility knife, scissors, or an electric foam cutter to cut it to the desired size and shape.
- Clean cloth or sponge: This will come in handy for cleaning the surfaces where you’ll be applying the foam.
- Painter’s tape: Using painter’s tape can help hold the foam panels in place during the installation process.
- Ladder or step stool: If you’ll be installing the foam on high ceilings or walls, make sure you have a secure and stable means of accessing those areas.
By gathering all these materials beforehand, you’ll be fully prepared to start the installation process without any delays or interruptions.
Step 2: Prepare the installation area
Preparing the installation area is an important step that will ensure proper adhesion and optimal results. Follow these steps to prepare the space before installing the noise cancelling foam:
- Clean the surfaces: Use a clean cloth or sponge to wipe down the surfaces where you’ll be installing the foam. Remove any dust, dirt, or debris that could hinder the adhesive’s bond. Ensure the surfaces are dry before proceeding.
- Measure and mark: Use a measuring tape to determine the dimensions of the areas where you plan to install the foam. Mark these measurements on the surfaces using a marker or pen. This will serve as a guide when cutting the foam panels.
- Protect sensitive areas: If there are any vents, electrical outlets, or other sensitive areas within the installation zone, use painter’s tape to cover and protect them. This will prevent any adhesive or foam residue from interfering with their functionality.
- Plan the layout: Before applying the adhesive, plan the layout of the foam panels. Consider the aesthetic appeal and functionality of the space. Determine the pattern and arrangement in which you’ll install the foam. This will help you visualize the final look and ensure a balanced distribution throughout the area.
By properly preparing the installation area, you’ll create a clean and smooth surface that promotes effective adhesion and a professional finish. Taking the time to plan and measure will also help you achieve a cohesive and visually pleasing result.
Step 3: Measure and cut the foam
Once you have prepared the installation area, it’s time to measure and cut the noise cancelling foam panels to fit your desired dimensions. Follow these steps for accurate cutting:
- Measure the space: Use a measuring tape to measure the height and width of the area where you’ll be installing the foam. It’s important to measure precisely to ensure an exact fit.
- Transfer measurements: Transfer the measurements onto the foam panels. Use a marker or pen to mark the cutting lines on the foam. Be sure to mark on the backside of the panel to avoid any visible marks on the front surface.
- Double-check and re-measure: Before cutting the foam, double-check your measurements to ensure accuracy. Confirm that your marks align with the dimensions of the space.
- Choose the cutting tool: Depending on the thickness of the foam, select the appropriate cutting tool. For thinner foam panels, scissors or a utility knife may be sufficient. For thicker foam, consider using an electric foam cutter for clean and precise cuts.
- Cut along the marked lines: Carefully and steadily cut along the marked lines. Take your time to maintain straight cuts and avoid jagged edges. Follow safety precautions, such as wearing safety glasses and gloves, for protection.
Remember, it’s always better to cut the foam panels slightly larger than your measurements, as you can trim them down later if needed. It’s easier to trim the foam than to add more material if the panels are too small.
Take caution when cutting the foam to avoid any mistakes or uneven edges. Measure twice, cut once, and always err on the side of caution by cutting less rather than more to ensure a snug fit.
Step 4: Apply adhesive to the foam
Now that you have cut the noise cancelling foam panels to the desired size and shape, it’s time to apply adhesive to the backside of the foam panels. Follow these steps to ensure proper adhesion:
- Select a suitable adhesive: Choose a high-quality adhesive that is specifically designed for use with foam. Read the manufacturer’s instructions to ensure that the adhesive is compatible with your foam panels and will provide a strong and durable bond.
- Prepare the adhesive: Follow the instructions provided by the adhesive manufacturer to prepare the adhesive for application. This may involve mixing components or allowing the adhesive to reach a specific temperature, so be sure to read and follow the instructions carefully.
- Apply the adhesive: Using a spatula or a recommended applicator, apply an even layer of adhesive to the backside of the foam panel. Be sure to cover the entire surface evenly, paying extra attention to the edges and corners.
- Spread the adhesive: Use the spatula or applicator to spread the adhesive evenly over the foam’s surface. Aim for a consistent layer that is not too thin or too thick. This will ensure proper adhesion without excess adhesive seeping through the foam.
It’s important to work quickly but efficiently when applying the adhesive, as some adhesives may have a limited working time before they start to dry. Avoid applying too much adhesive, as it can make the foam panel heavy and increase the risk of it sliding or falling during installation.
Remember to follow any specific instructions provided by the adhesive manufacturer regarding application techniques, drying times, and safety precautions. This will help ensure a successful installation and long-lasting adhesion of the foam panels.
Step 5: Install the foam onto the desired surface
Now that you have applied adhesive to the backside of the noise cancelling foam panels, it’s time to install the panels onto the desired surface. Follow these steps for a successful installation:
- Align the foam: Carefully align the foam panel with the marked lines on the surface where you intend to install it. Take your time to ensure proper alignment for a neat and professional-looking finish.
- Press the foam: Once aligned, firmly press the foam panel against the surface. Apply even pressure to ensure good contact between the adhesive and the surface. This will help create a strong bond and prevent any air pockets or gaps.
- Smooth out wrinkles or bubbles: If you notice any wrinkles or bubbles in the foam, gently smooth them out using your hands or a flat tool like a ruler. Work from the center towards the edges to push out any trapped air and create a flat, even surface.
- Use painter’s tape (optional): If needed, use painter’s tape to temporarily hold the foam panel in place while the adhesive sets. This can be especially helpful for large or vertical installations where gravity may cause the foam to slide or droop.
Repeat these steps for each foam panel you are installing, ensuring proper alignment and even pressure on each one. Take your time to achieve a seamless and professional result.
It’s important to note that some adhesives may require a specific amount of time to set before the foam panels are secure. Refer to the instructions provided by the adhesive manufacturer and allow sufficient drying time before proceeding with the installation process.
By following these steps, you’ll successfully install the noise cancelling foam panels onto the desired surface, creating a soundproof and aesthetically pleasing environment.
Step 6: Press and secure the foam in place
After installing the noise cancelling foam panels onto the desired surface, the next crucial step is to press and secure the foam in place. This will ensure proper adhesion and maximize the effectiveness of the foam in reducing noise. Follow these steps to complete this step:
- Press the foam panels: Using your hands or a smooth, flat tool, firmly press down on the foam panels to ensure they are securely attached to the surface. Apply even pressure across the entire panel to eliminate any potential air gaps between the foam and the surface.
- Check for proper contact: Inspect the foam panels to ensure there are no areas where the adhesive has not fully made contact with the surface. Pay attention to the edges and corners, as these areas are prone to lift if not properly secured.
- Secure with painter’s tape: If needed, use painter’s tape to hold the foam panels in place while the adhesive fully sets. This is particularly useful for vertical installations or larger panels that may be at risk of slipping or shifting before the adhesive cures.
- Smooth out any imperfections: Take a final look at the installed foam panels. If you notice any wrinkles, bubbles, or uneven areas, gently smooth them out by applying pressure and adjusting the foam as needed. This will result in a smooth and uniform appearance.
It’s important to follow any specific instructions provided by the adhesive manufacturer regarding drying times and curing processes. Allow sufficient time for the adhesive to fully set and create a strong bond between the foam and the surface.
By pressing and securing the foam panels in place, you’ll ensure that they remain firmly attached and provide optimal noise reduction benefits. Additionally, a properly secured foam installation will have a neat and professional appearance.
Step 7: Repeat the installation process for other areas
If you have multiple areas or surfaces where you want to install noise cancelling foam, it’s important to repeat the installation process for each of them. Follow these steps to ensure consistency and a cohesive look throughout your space:
- Prepare the next installation area: Before moving on to the next area, make sure to clean the surface and measure the dimensions accurately. Repeat the steps outlined in the previous sections to prepare the installation area.
- Cut the foam panels: Measure, mark, and cut the noise cancelling foam panels to fit the dimensions of the new area you’re working on. Take care to achieve precise cuts to ensure a proper fit.
- Apply adhesive: Apply adhesive to the backside of the foam panels, following the manufacturer’s instructions and guidelines. Ensure an even and consistent layer of adhesive to promote strong adhesion.
- Install and secure the foam: Align the foam panels with the marked lines on the surface, press them firmly in place, and secure them if needed. Check for proper contact and smooth out any imperfections.
Repeat these steps for each additional area where you want to install noise cancelling foam. Take your time and pay attention to detail to create a cohesive and effective soundproofing solution.
Keep in mind that the installation process may vary slightly depending on the specific requirements of each area. Adjust the steps as necessary, but always prioritize proper preparation, precise cutting, and secure adhesion for optimal results.
By repeating the installation process for each area, you’ll be able to create a consistent and effective noise cancelling environment throughout your space.
Step 8: Allow the adhesive to dry and set
After completing the installation of the noise cancelling foam panels, it’s crucial to allow the adhesive to properly dry and set. This final step ensures that the foam remains securely attached to the surface for long-lasting performance. Follow these guidelines to achieve the best results:
- Refer to the adhesive manufacturer’s instructions: Different adhesives have varying drying times and curing processes. Consult the instructions provided by the adhesive manufacturer for specific guidelines on drying times and curing methods.
- Avoid disturbing the panels: While the adhesive is drying, avoid touching or disturbing the foam panels to allow the adhesive to set undisturbed. This will help ensure a strong and durable bond between the foam and the surface.
- Provide adequate ventilation: Ensure the installation area is well-ventilated to support the drying process. Opening windows or using fans can help facilitate air circulation, which aids in the drying of the adhesive.
- Be patient: Allow sufficient time for the adhesive to fully dry and set. Rushing this step may result in the foam panels not adhering properly or coming loose over time. Patience will ensure a reliable and effective installation.
The drying time can vary depending on factors such as humidity, temperature, and the specific adhesive used. It’s essential to allow ample time for the adhesive to set, even if the surface feels dry to the touch.
Once the adhesive has fully dried and set, you can confidently enjoy the benefits of your installed noise cancelling foam. It will effectively reduce unwanted noise, enhance acoustics, and provide a more peaceful and comfortable environment.
By following these guidelines and giving the adhesive adequate time to dry and set, you’ll ensure a successful installation that withstands the test of time.
Conclusion
Installing noise cancelling foam can greatly improve the acoustics and create a quieter environment in your space. By following the step-by-step guide outlined in this article, you can successfully install noise cancelling foam and enjoy the benefits of reduced noise levels and improved sound quality.
Throughout the installation process, it’s important to gather all the necessary materials, including noise cancelling foam panels, adhesive, cutting tools, and safety gear. Properly preparing the installation area, measuring and cutting the foam panels accurately, and applying adhesive in a consistent and even manner are crucial for a successful installation.
Ensure that the foam panels are securely pressed and firmly attached to the desired surface, taking care to smooth out any wrinkles or bubbles. Repeat the installation process for each area where you want to install the foam, paying attention to the alignment and consistency of the installation.
Allow sufficient time for the adhesive to dry and set, following the manufacturer’s instructions and advice. Avoid disturbing the foam panels while the adhesive is setting, and provide proper ventilation to support the drying process.
Once the adhesive has completely dried, you can enjoy the benefits of your installed noise cancelling foam. Whether you’re looking to minimize outside noise, reduce echoes in a room, or optimize the acoustics in a recording studio, noise cancelling foam can make a significant difference.
Remember, a well-installed and properly secured noise cancelling foam installation not only enhances the soundproofing of your space but also adds a professional and aesthetically pleasing touch. So, take your time, follow the steps outlined in this guide, and enjoy the improved sound quality and tranquility in your environment.