Introduction
Welcome to this guide on how to get HDMI to play on your Dell Ultrabook. If you’re looking to connect your Ultrabook to an external HDMI display or TV, we’ve got you covered. HDMI (High-Definition Multimedia Interface) is a standard cable connection that allows you to transmit high-quality audio and video between devices. While Dell Ultrabooks offer excellent portability and performance, connecting them to an HDMI display may require a few steps to ensure a seamless and enjoyable experience.
In this article, we will walk you through the necessary steps to get HDMI to play on your Dell Ultrabook. We will cover topics such as checking compatibility, updating drivers and firmware, connecting the HDMI cable, adjusting display settings, configuring audio settings, and troubleshooting common problems. Whether you’re using your Dell Ultrabook for work, entertainment, or both, having the ability to connect it to an external display can greatly enhance your overall computing experience.
Before we begin, it’s important to note that the steps outlined in this guide are specific to Dell Ultrabooks. While some general principles may apply to other laptop brands, we recommend consulting your device’s user manual or manufacturer’s website for specific instructions. Now, let’s dive into the process of getting HDMI to play on your Dell Ultrabook and enjoy the benefits of a larger screen and improved audio quality.
Check the Compatibility
Before attempting to connect your Dell Ultrabook to an HDMI display, it’s important to ensure that both your laptop and the external device are compatible with HDMI. Here are a few steps to check for compatibility:
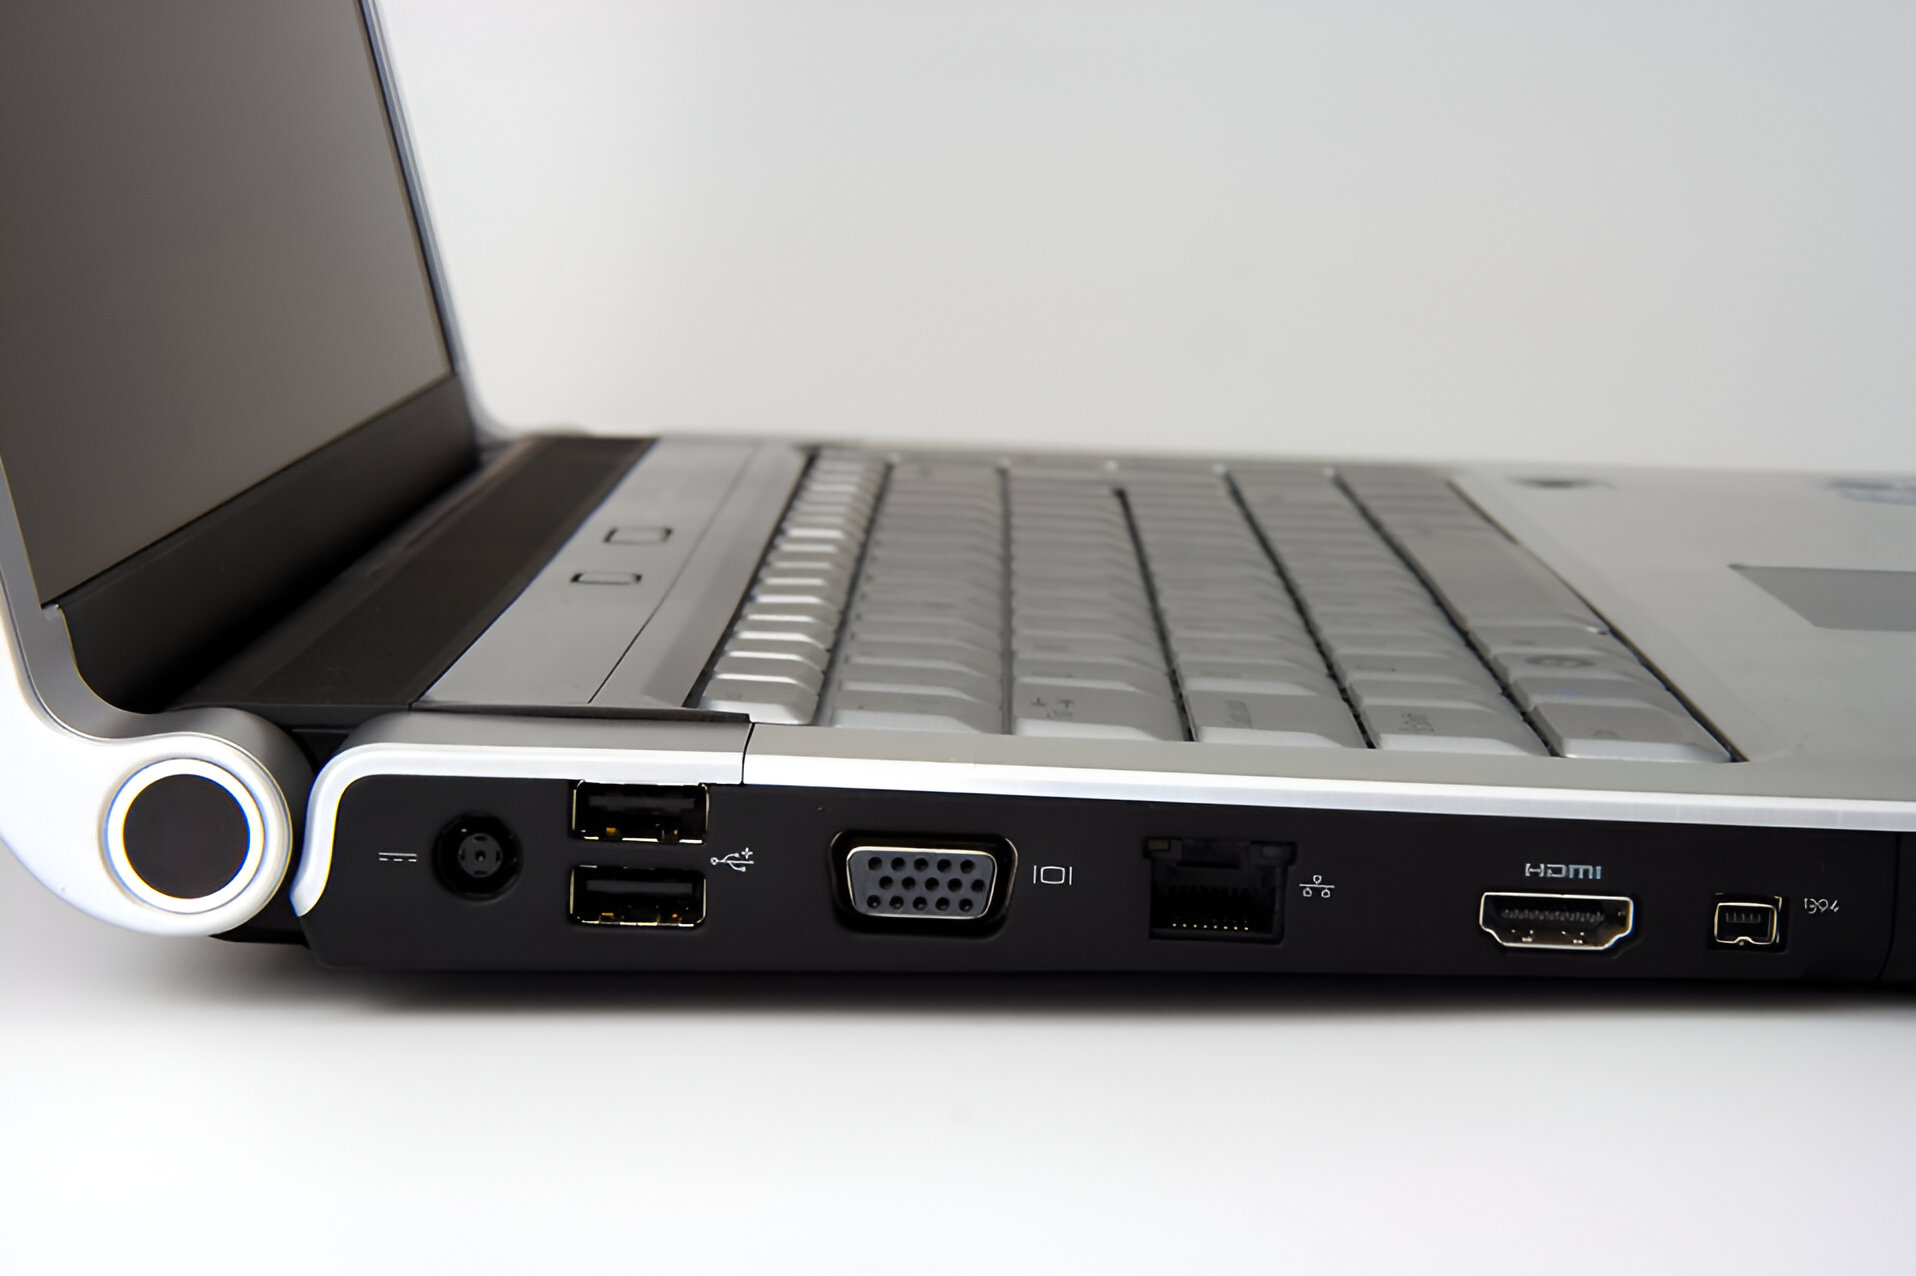
- Verify HDMI port: Look for an HDMI port on your Dell Ultrabook. It is typically labeled as “HDMI” and may have the HDMI logo next to it. If your laptop doesn’t have an HDMI port, you may need to use an HDMI adapter or docking station that is compatible with your specific model.
- Check display compatibility: Ensure that your external HDMI display or TV is also HDMI compatible. Look for an HDMI port on the back or side of the display. If your display doesn’t have an HDMI port, you may need to use an HDMI to VGA or HDMI to DisplayPort adapter, depending on the available ports on your monitor.
- Review HDMI version: HDMI technology has evolved over the years, and different versions have been released. Check the HDMI version of your Dell Ultrabook and the external display to ensure they are compatible. Higher HDMI versions support greater bandwidth and features. It is recommended to use the latest HDMI version to take advantage of the best audio and video quality.
- Consider supported resolutions: Check the supported resolutions of both your Dell Ultrabook and the HDMI display. Ensure that they are compatible to avoid any display or resolution issues. Higher resolution displays may require a laptop with a compatible graphics card or HDMI output capabilities.
By checking the compatibility between your Dell Ultrabook and the HDMI display, you can avoid any potential issues and ensure a smooth connection. If you are unsure about any of the compatibility factors, refer to the user manuals of your devices or contact the manufacturers for further assistance.
Update Drivers and Firmware
In order to ensure optimal performance and compatibility when connecting your Dell Ultrabook to an HDMI display, it’s important to keep your drivers and firmware up to date. Here are the steps to update drivers and firmware:
- Visit the Dell Support website: Go to the official Dell Support website (www.dell.com/support) and navigate to the Drivers & Downloads section.
- Detect your product: Enter the Service Tag or select your Dell Ultrabook model from the available options. This will help identify the specific drivers and firmware updates available for your device.
- Download and install updates: Once you have identified the necessary updates for your Dell Ultrabook, download them and follow the on-screen instructions to install them. Pay special attention to updates related to graphics drivers and HDMI output capabilities.
- Restart your Ultrabook: After installing the updates, it’s a good practice to restart your Dell Ultrabook to ensure that the changes take effect.
- Check for firmware updates: In addition to drivers, it’s also important to check for any firmware updates for your Dell Ultrabook. Firmware updates can provide enhancements for HDMI connectivity and address any known issues. Refer to the Dell Support website for instructions on how to update your Ultrabook’s firmware.
Updating your drivers and firmware is crucial to ensure compatibility with HDMI and to take advantage of the latest features and improvements. It can also help resolve any issues that may arise during the connection process. Regularly checking for updates is a good practice to maintain the performance and stability of your Dell Ultrabook.
Connect HDMI Cable to Dell Ultrabook
Now that you have ensured compatibility and updated your drivers and firmware, it’s time to connect the HDMI cable to your Dell Ultrabook. Follow these steps:
- Locate the HDMI port: Look for the HDMI port on your Dell Ultrabook. It is usually located on the side or back of the device and will be labeled as “HDMI”.
- Prepare the HDMI cable: Take one end of the HDMI cable and insert it into the HDMI port of your Dell Ultrabook. Ensure a secure connection by gently pushing the cable in until it clicks into place.
- Connect to the external display: On the other end of the HDMI cable, connect it to the HDMI input port on your external display or TV. Make sure it is securely plugged in.
- Switch the display input: On your external display, use the remote control or buttons to switch the input to HDMI. This may be labeled as “HDMI 1”, “HDMI 2”, or similar, depending on the available input ports.
- Configure display settings: Once the HDMI connection is established, your Dell Ultrabook should automatically detect the external display. However, you may need to adjust the display settings to ensure the desired resolution and orientation. Right-click on the desktop and select “Display Settings” or access the display settings through the Control Panel or System Preferences.
By following these steps, you should successfully connect your Dell Ultrabook to an external display via HDMI. The HDMI cable allows for high-quality audio and video transmission, providing you with a larger screen and enhanced multimedia experience. Please note that some Dell Ultrabook models may require additional settings adjustments, so refer to the user manual or Dell Support website for specific instructions.
Adjust Display Settings
Once you have successfully connected your Dell Ultrabook to an external display through HDMI, it’s important to adjust the display settings to ensure the best viewing experience. Follow these steps to adjust the display settings:
- Right-click on the desktop: To access the display settings, right-click on an empty area of the desktop, and select “Display Settings” from the context menu. Alternatively, you can also access the display settings through the Control Panel or System Preferences, depending on your operating system.
- Identify displays: On the Display Settings page, you will see a representation of your Dell Ultrabook display and the connected HDMI display. If the HDMI display is not visible, click on the “Detect” button to search for it.
- Choose display mode: Select the HDMI display from the dropdown menu labeled “Display”. You can choose to duplicate the display, extend the display, or use only the HDMI display as the primary display. Select the desired option that suits your needs.
- Adjust resolution and orientation: Click on the dropdown menu labeled “Resolution” and choose the optimal resolution for your HDMI display. This information can usually be found in the user manual or on the manufacturer’s website. Additionally, you can adjust the screen orientation (landscape or portrait) by selecting the appropriate option from the dropdown menu.
- Apply settings: After making the necessary adjustments, click on the “Apply” button to apply the new display settings. If the changes appear satisfactory, click on “OK” to confirm the settings.
By adjusting the display settings, you can optimize the visual output and ensure that the content is displayed correctly on the HDMI display. If you encounter any issues or if the display settings do not apply correctly, make sure that your drivers and firmware are up to date, and consult the Dell Support website for further assistance.
Configure Audio Settings
Once you have connected your Dell Ultrabook to an HDMI display, it’s important to configure the audio settings to ensure that the audio is properly played through the HDMI connection. Follow these steps to configure the audio settings:
- Right-click on the volume icon: Located in the taskbar of your Dell Ultrabook, right-click on the volume icon and select “Playback devices” from the context menu. This will open the Sound settings window.
- Select HDMI as the default playback device: In the Sound settings window, you will see a list of playback devices. Look for the HDMI device in the list and select it. Click on the “Set Default” button to make it the default playback device. This ensures that the audio is properly routed through the HDMI connection.
- Configure audio properties: After selecting the HDMI device as the default playback device, click on the “Properties” button to access its audio properties. Here, you can adjust the audio format, sample rate, and other settings to optimize the audio output.
- Test the audio: To confirm that the audio is playing through the HDMI connection, click on the “Test” button in the audio properties. This will play a test sound through the HDMI device. Make sure you have the HDMI display or TV connected and turned on to hear the audio.
- Apply the settings: Once you have made the necessary adjustments, click on the “Apply” button to save the changes. If the audio plays correctly through the HDMI connection, click on “OK” to confirm the settings.
By configuring the audio settings, you can ensure that the audio is properly played through the HDMI connection, providing you with a synchronized audio and video experience. If you encounter any issues with audio playback or if the settings do not apply correctly, make sure that your drivers and firmware are up to date, and refer to the Dell Support website for further guidance.
Troubleshoot Common Problems
While connecting your Dell Ultrabook to an HDMI display is usually a straightforward process, it’s not uncommon to encounter some common problems. Here are a few troubleshooting steps to help you resolve these issues:
- No audio or video: If you have connected everything correctly but there is no audio or video output on the HDMI display, double-check that the HDMI cable is securely plugged in on both ends. Ensure that the HDMI input on the display is set to the correct channel. Additionally, make sure that the audio is set to play through the HDMI device in the audio settings of your Dell Ultrabook.
- Poor video quality: If the video quality on the HDMI display is poor or blurry, check the display settings on your Dell Ultrabook. Ensure that the resolution is set to the optimal value for the HDMI display. If the issue persists, try updating your graphics card drivers or using a different HDMI cable.
- Audio and video out of sync: If the audio and video are not synchronized, it could be due to a delay in audio processing. To fix this, try adjusting the audio settings on your Dell Ultrabook or the HDMI display. Some displays may have a setting to adjust audio delay or synchronization.
- Unsupported resolution: If the HDMI display doesn’t support the resolution set on your Dell Ultrabook, you may encounter issues such as distorted or fuzzy images. In this case, try setting the resolution to a lower value that is supported by both devices.
- Driver or firmware issues: If you experience persistent problems with HDMI connectivity, it may be helpful to update your graphics card drivers, audio drivers, and firmware. Visit the Dell Support website to download and install the latest updates for your Dell Ultrabook.
- Hardware compatibility: In some cases, certain HDMI displays or cables may not be fully compatible with your Dell Ultrabook. If you are still experiencing issues after trying the above steps, try using a different HDMI cable or connecting to a different HDMI display to determine if the problem lies with the hardware.
If you have tried the troubleshooting steps above and are still encountering problems with HDMI connectivity, it’s recommended to reach out to Dell customer support for further assistance. They can provide you with specific guidance based on your Ultrabook model and help resolve any persistent issues you may be experiencing.
Conclusion
Connecting your Dell Ultrabook to an HDMI display can greatly expand its capabilities and enhance your overall computing experience. By following the steps outlined in this guide, you should be able to successfully get HDMI to play on your Dell Ultrabook.
We started by checking the compatibility between your Ultrabook and the HDMI display, ensuring that both devices have the necessary ports and support the HDMI standard. Then, we discussed the importance of updating drivers and firmware to optimize performance and compatibility.
Next, we covered the steps to physically connect the HDMI cable to your Dell Ultrabook, and how to adjust the display and audio settings to ensure the best visual and audio experience. We also provided troubleshooting tips to help you overcome common problems that may arise during the HDMI connection process.
Remember, it’s crucial to refer to the user manual or consult the Dell Support website for specific instructions that may be applicable to your Dell Ultrabook model. This will ensure that you have the latest and most accurate information tailored to your device.
By following these guidelines, you can take full advantage of the HDMI capabilities of your Dell Ultrabook, enjoying high-quality video and audio on a larger external display. Whether you’re using it for work presentations, multimedia entertainment, or gaming, connecting to an HDMI display opens up new possibilities for productivity and entertainment.
If you encounter any persistent issues or require further assistance, don’t hesitate to reach out to Dell customer support. They are well-equipped to address any concerns or provide additional guidance tailored to your specific needs.
Now, go ahead and enjoy the benefits of HDMI connectivity on your Dell Ultrabook!