Introduction
Welcome to the world of 3D scanning with the Sense 3D Scanner! In this article, we will delve into the various techniques and tips that will help you achieve extreme detail with this powerful scanning tool. Whether you are a professional designer, a hobbyist, or simply curious about the capabilities of 3D scanning technology, this guide will provide you with the knowledge and insights to make the most out of the Sense 3D Scanner.
The Sense 3D Scanner is a cutting-edge device that allows you to capture real-world objects and convert them into digital 3D models. It uses advanced depth-sensing technology to create a detailed 3D representation of the scanned object. With this scanner, you can easily transform physical objects into virtual models that can be used for a wide range of applications including prototyping, animation, gaming, and much more.
Before we delve into the details, it’s important to have a basic understanding of how 3D scanning works. The Sense 3D Scanner emits infrared light onto the object and measures the time it takes for the light to bounce back. By collecting thousands of depth measurements, it creates a point cloud, which is essentially a collection of 3D coordinates that represent the object’s surface. This point cloud is then used to generate a 3D mesh, which is a collection of interconnected triangles that form a solid model of the object.
When it comes to achieving extreme detail with the Sense 3D Scanner, there are several factors that come into play. The positioning of the scanner, lighting conditions, and the nature of the object being scanned all play crucial roles in obtaining high-quality results. Additionally, understanding the intricacies of the scanning software and utilizing the right scanning techniques will greatly contribute to the level of detail you can achieve.
Throughout this article, we will explore the various steps involved in the 3D scanning process and provide you with practical tips and techniques to maximize the level of detail in your scanned models. We will cover everything from preparing the scene for scanning to enhancing the scanned models, as well as common pitfalls to avoid. By the end of this guide, you will have a solid foundation to create stunning, highly detailed 3D scans with the Sense 3D Scanner.
What is the Sense 3D Scanner?
The Sense 3D Scanner is a revolutionary device that allows you to capture the physical world in stunning detail and convert it into digital 3D models. Developed by the leading 3D technology company, 3D Systems, the Sense 3D Scanner has set new standards in the field of 3D scanning, making it accessible and user-friendly for both professionals and enthusiasts alike.
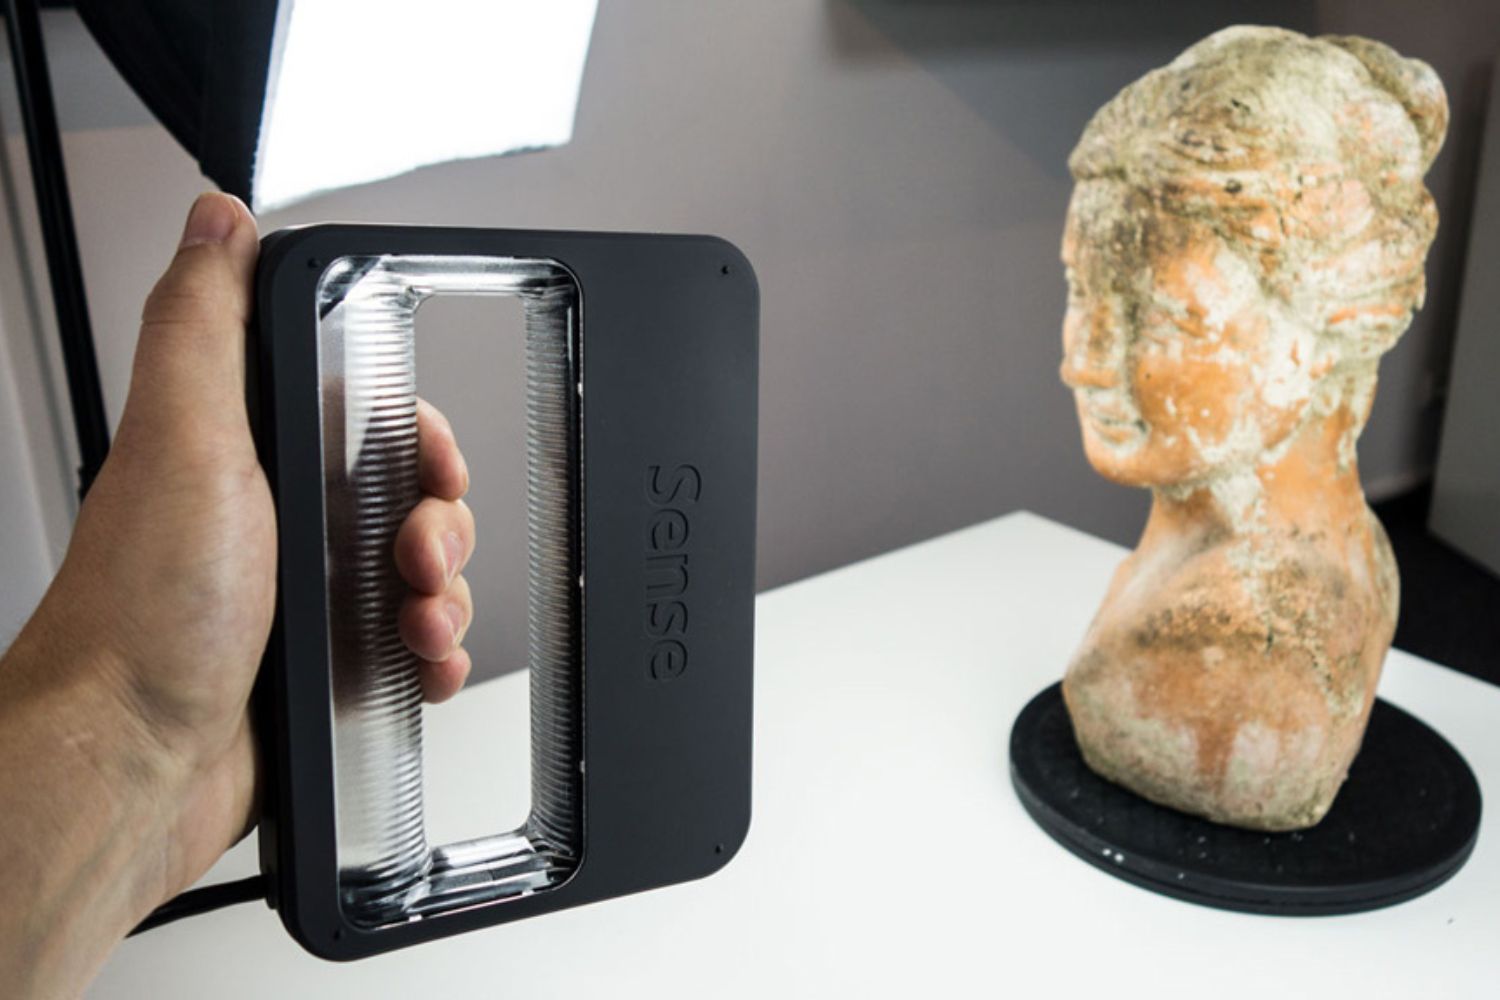
The Sense 3D Scanner is a handheld device that utilizes advanced depth-sensing technology to capture the geometry and texture of objects. By emitting and detecting infrared light, it calculates the time it takes for the light to return, creating a depth map of the object’s surfaces. This depth map is then transformed into a digital three-dimensional representation, allowing you to explore, manipulate, and even print physical objects in the digital realm.
One of the standout features of the Sense 3D Scanner is its ease of use. With its intuitive design and plug-and-play functionality, you can start scanning objects right out of the box. Simply connect the scanner to your computer, launch the scanning software, and you’re ready to go. Its lightweight and portable design make it perfect for scanning objects on the go, whether you are in a studio, museum, or out in the field.
When it comes to compatibility, the Sense 3D Scanner offers great flexibility. It works seamlessly with Windows-based computers and is compatible with popular 3D modeling software, such as Autodesk’s Meshmixer and 3D Systems’ own Geomagic software. This allows you to easily integrate the scanned models into your existing workflow, whether you are a professional designer, architect, or animator.
Aside from its technical capabilities, the Sense 3D Scanner also puts a strong emphasis on user experience. The scanning software provides a simple and intuitive interface, making it easy to navigate and control the scanning process. It offers real-time feedback on the scanning progress, allowing you to adjust and refine your technique as you go. Additionally, the software provides advanced editing tools that enable you to clean up and enhance the scanned models, ensuring high-quality results.
Overall, the Sense 3D Scanner is a game-changer in the world of 3D scanning. It offers an affordable, user-friendly solution for capturing real-world objects and converting them into digital models. Whether you’re a hobbyist looking to explore the possibilities of 3D scanning or a professional seeking a reliable tool for your design process, the Sense 3D Scanner is a powerful and versatile device that will take your creations to new heights.
Understanding the Basics of 3D Scanning
3D scanning is a cutting-edge technology that allows you to capture the physical world and convert it into a digital format. It has become an essential tool in various industries, including design, manufacturing, archaeology, and healthcare. Understanding the basics of 3D scanning is crucial to harness the full potential of this technology and achieve accurate and detailed results.
The process of 3D scanning involves using a device, such as the Sense 3D Scanner, to capture the geometry and texture of an object. This is done by emitting and detecting light, usually in the form of laser or infrared, and measuring the time it takes for the light to bounce back. By collecting thousands or even millions of these measurements, the scanner creates a point cloud, which is a digital representation of the object’s surfaces.
Once the point cloud is generated, it can be converted into a 3D mesh, which is a collection of interconnected triangles that form a solid model of the object. This mesh can then be refined, cleaned up, and optimized using specialized software, resulting in a high-quality digital model that can be used for various purposes, from visualization and animation to prototyping and manufacturing.
When it comes to achieving accurate and detailed 3D scans, several factors come into play. The first is the positioning of the scanner in relation to the object. It’s essential to ensure that the scanner has a clear line of sight to all surfaces of the object. Taking multiple scans from different angles can help capture all sides of the object and create a more complete and detailed model.
Lighting conditions also play a significant role in 3D scanning. Ensuring consistent and even lighting across the object’s surfaces helps capture accurate texture information and minimizes shadows or reflections that could affect the quality of the scan. Using diffused lighting or setting up a controlled environment can greatly improve the overall scanning results.
Another essential factor to consider is the size and complexity of the object being scanned. Different scanning techniques and settings may be required for small objects with intricate details compared to large objects with smoother surfaces. Understanding the capabilities of the scanner and adapting the scanning parameters accordingly can ensure optimal results.
It’s worth noting that 3D scanning technology is continually evolving, and different scanners may have unique features and capabilities. Therefore, it’s important to familiarize yourself with the specific scanning device you are using and refer to the manufacturer’s documentation and guidelines for best practices.
Now that you have a grasp of the basics of 3D scanning, we can dive into the specific techniques and tips for achieving extreme detail with the Sense 3D Scanner in the following sections. By understanding the fundamentals and applying the right scanning techniques, you will be able to capture stunning and highly detailed 3D models that can bring your creative visions to life.
Preparing the Scene for Scanning
In order to achieve accurate and detailed 3D scans with the Sense 3D Scanner, it is crucial to properly prepare the scanning scene. By taking the necessary steps to optimize the environment, you can minimize potential issues and capture high-quality scans. Here are some tips for preparing the scene for scanning:
Clear the area: Start by clearing the area of any objects or clutter that are not part of the scan. This includes removing unnecessary items, such as tools, decorations, or personal belongings, that could interfere with the scanning process or cast unwanted shadows.
Choose an appropriate background: Selecting the right background for your scans can significantly improve the quality of the results. Ideally, choose a background that provides contrast with the object being scanned, as this will help the software distinguish between the object and the background. A plain, neutral-colored background is often a good choice.
Consider lighting conditions: Proper lighting is crucial for achieving accurate and detailed scans. Avoid strong direct light sources, as they can create harsh shadows and reflections on the object’s surfaces. Instead, aim for diffused lighting or set up a controlled lighting environment to ensure even lighting across the object. Experiment with different lighting setups to find the best conditions for your specific scanning needs.
Fix unstable objects: Ensure that the object you are scanning is stable and fixed in place. Unstable or moving objects can introduce motion blur or cause alignment issues in the scans. Use pedestals, clamps, or other supportive tools to secure the object and minimize any potential movement during the scanning process.
Consider the object’s size and complexity: The size and complexity of the object being scanned will also impact the scanning process. For small objects with intricate details, you may need to adjust the scanning parameters to capture finer details accurately. Larger objects may require multiple scans from different angles to ensure complete coverage and avoid missing any important information.
Clean the object: Before scanning, make sure the object is clean and free of any dust, dirt, or smudges that could affect the quality of the scans. Use compressed air or a soft cloth to remove any particles that may be present on the surfaces. Keeping the object clean will help capture accurate texture information and enhance the overall quality of the scans.
By following these preparation guidelines, you can create an optimal scanning environment that will improve the quality and accuracy of your 3D scans. Taking the time to properly set up the scene will save you time and effort in post-processing, resulting in highly detailed and realistic digital models with the Sense 3D Scanner.
Setting Up the Sense 3D Scanner Software
The Sense 3D Scanner software is a crucial component of the scanning process, as it allows you to control the scanner, capture the scans, and perform necessary post-processing tasks. Setting up the software correctly will ensure smooth operation and optimal results. Here’s a step-by-step guide on how to set up the Sense 3D Scanner software:
1. Install the software: Start by downloading the latest version of the Sense 3D Scanner software from the official 3D Systems website. Follow the installation instructions provided with the software to complete the installation process. Ensure that your computer meets the system requirements for running the software.
2. Connect the scanner: Connect the Sense 3D Scanner to your computer using the provided USB cable. Ensure that the scanner is securely connected and powered on. If prompted, install any required drivers or software updates that are necessary for the scanner to communicate with your computer.
3. Launch the software: Once the scanner is connected, launch the Sense 3D Scanner software on your computer. The software should automatically detect the connected scanner and display the scanning interface on the screen. If the scanner is not recognized, ensure that you have installed the correct drivers and that the scanner is properly connected.
4. Calibrate the scanner: Before starting your first scan, it is important to calibrate the scanner to ensure accurate measurements. Follow the on-screen instructions provided by the software to perform the calibration process. This typically involves holding the scanner at different angles and distances from the reference object. Once the calibration is complete, the software will display a confirmation message.
5. Familiarize yourself with the software: Take the time to explore the various options and features available in the Sense 3D Scanner software. Familiarize yourself with the scanning interface, which typically includes tools for controlling the scanning process, adjusting scanning parameters, and previewing the scans in real-time. Pay attention to settings such as resolution, color saturation, and exposure, as they can significantly impact the quality of the scans.
6. Configure scanning parameters: Depending on the object and desired output, you may need to adjust the scanning parameters to achieve optimal results. Experiment with different settings such as scan resolution, scan area, and point cloud density to find the right balance between scan speed and detail. Keep in mind that higher resolution and density settings will result in more precise and detailed scans but may take longer to capture.
7. Practice scanning techniques: Finally, it’s time to put the software and scanner to use. Practice different scanning techniques, such as moving the scanner around the object, varying the distance from the object, and capturing scans from different angles. Experiment with different lighting setups and object positions to find the optimal conditions for your specific scanning needs.
By following these steps and familiarizing yourself with the Sense 3D Scanner software, you will be well-equipped to achieve excellent results and maximize the potential of your scanning endeavors. Remember to refer to the software documentation and online resources provided by 3D Systems for additional guidance and troubleshooting.
Scanning Techniques for Maximum Detail
To achieve maximum detail with the Sense 3D Scanner, it’s important to master the scanning techniques that will help you capture accurate and highly detailed scans. By following these techniques, you can improve the quality of your scans and capture intricate details with precision. Here are some tips to consider:
1. Stable scanning position: Maintain a stable position while scanning the object. Minimize unnecessary movements or shaking of the scanner to prevent motion blur or misalignment in the scans. Using a tripod or holding the scanner steadily with both hands can help achieve better stability.
2. Slow scanning speed: Avoid scanning too quickly. Moving the scanner too fast can result in scans that lack detail or accuracy. Take your time and scan at a slow and consistent speed, allowing the scanner enough time to capture all the necessary data for a detailed representation. Patience and a steady hand will yield better results.
3. Overlap scans: When scanning larger objects or complex shapes, it’s recommended to overlap your scans. By capturing multiple scans from different angles, you ensure that all the surfaces of the object are captured and that no details are missed. Be mindful of the overlap, and try to maintain consistency in the distance and angle of each scan.
4. Vary the scanning angles: Experiment with scanning the object from different angles and viewpoints. By scanning from multiple angles, you can capture different perspectives and details that may not be visible from a single viewpoint. Additionally, scanning from different angles reduces the chance of shadows or occlusions affecting the scan.
5. Optimize lighting conditions: Proper lighting is crucial for capturing maximum detail. Avoid strong direct lighting as it can create harsh shadows or glare on the object. Use diffused lighting to ensure even illumination across the object’s surfaces. Examine the object under different lighting conditions to find the optimal setup that highlights the desired details without casting unwanted shadows.
6. Experiment with different resolutions: Adjust the scan resolution settings to balance detail and scan speed. Higher resolutions result in more precise scans, capturing fine details, but may take longer to process. Lower resolutions are suitable for larger objects or when speed is a priority. Experiment with different resolution settings to find the balance that suits your specific scanning needs.
7. Maintain consistent distance: Try to maintain a consistent distance between the scanner and the object throughout the scanning process. This helps ensure that the scanner captures data accurately and consistently. If necessary, use markers or guides to maintain a consistent distance.
8. Clean the object between scans: For the highest level of detail, clean the object between scans to remove any dust, dirt, or smudges. Use a soft brush or compressed air to gently clean the surfaces. This reduces the likelihood of capturing unwanted artifacts or imperfections in the scan.
9. Scan in sections: For large or complex objects, consider scanning in smaller sections and then aligning them in post-processing. This allows you to capture more detail and ensures that the scanner can capture all the necessary data without overwhelming the processing capabilities.
By applying these scanning techniques, you can enhance the level of detail in your scans and achieve highly accurate and realistic 3D models with the Sense 3D Scanner. Remember to practice and experiment with different settings and approaches to find what works best for your specific scanning projects.
Tips for Scanning Small Objects
Scanning small objects with the Sense 3D Scanner requires attention to detail and specific techniques to capture the intricate features accurately. Here are some tips to help you achieve optimal results when scanning small objects:
1. Use a small scan area: Adjust the scan area in the software settings to focus on a smaller region around the object. This allows the scanner to capture more detail within the limited space, increasing the accuracy and resolution of the scan.
2. Increase scan resolution: Increase the scan resolution to capture finer details. Higher resolutions result in more precise scans, allowing you to capture intricate features and textures accurately. Keep in mind that higher resolutions may require more processing time and memory.
3. Get closer to the object: Position the scanner closer to the object to capture intricate details. The closer you are, the better the scanner can capture the small features. However, be careful not to obstruct the scanner’s line of sight or cast unwanted shadows on the object.
4. Use markers for alignment: When scanning small objects, it can be challenging to align multiple scans accurately. To overcome this, use markers or reference points on the object. These markers help in aligning multiple scans and ensure the details are captured from all angles.
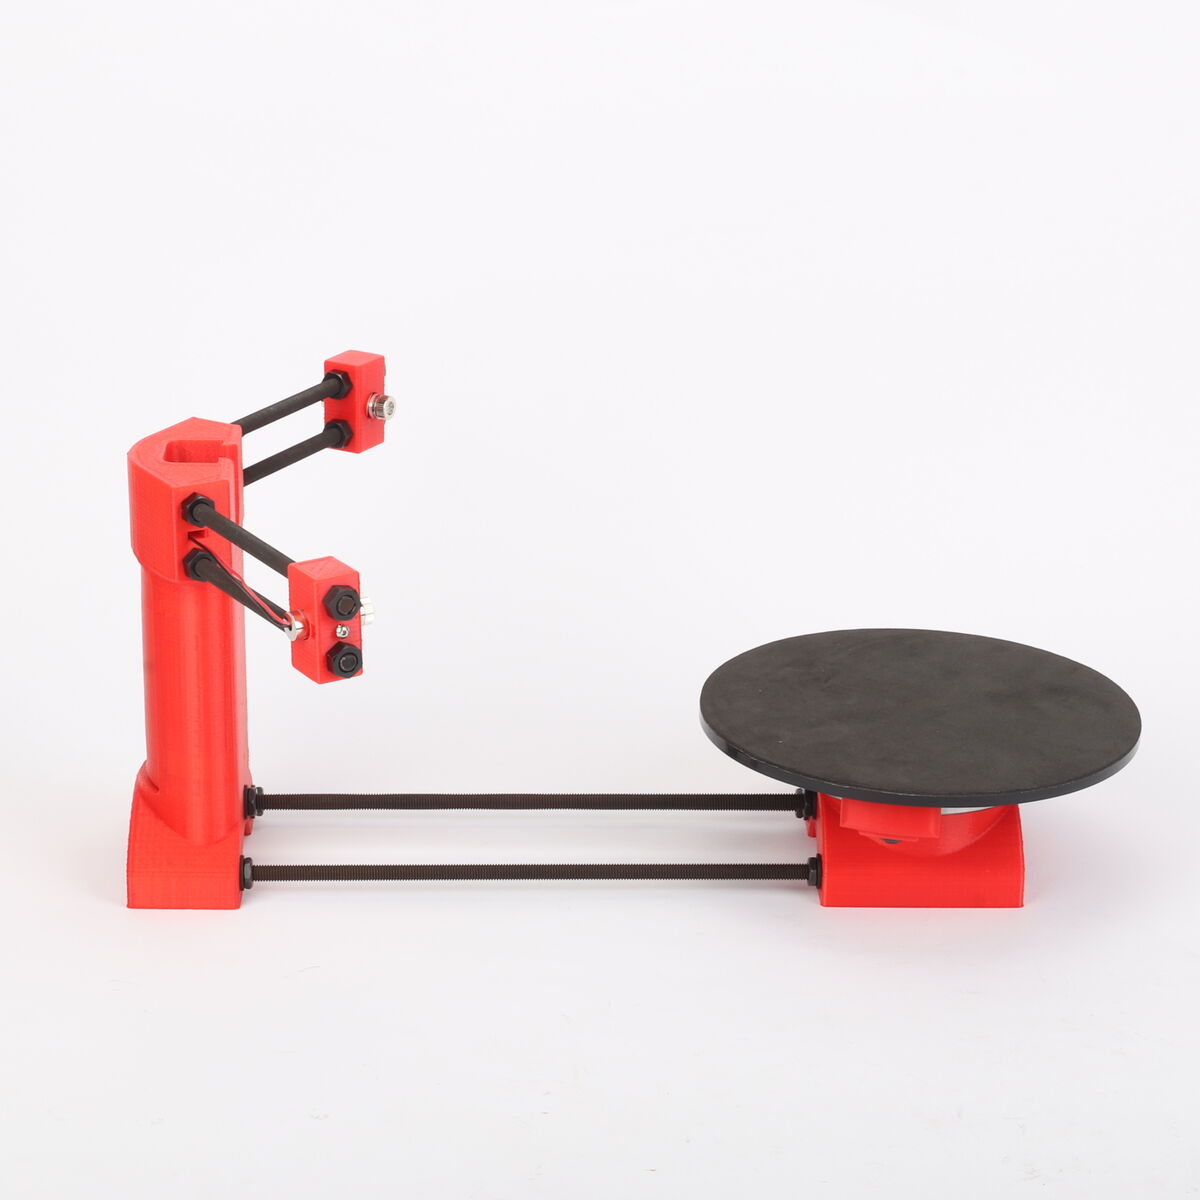
5. Consider using a turntable: Using a turntable can simplify the scanning process for small objects. Place the object on the turntable, and slowly rotate it while capturing scans from different angles. This eliminates the need for manual rotation and helps create more complete and accurate scans.
6. Use diffused lighting: Diffused lighting helps minimize shadows and evenly illuminates small objects. Position diffused light sources around the object to ensure consistent lighting across all surfaces. This allows the scanner to capture the smallest details and textures accurately.
7. Experiment with different angles: Try scanning the small object from different angles to capture all the details. By scanning from multiple viewpoints, you can capture intricate features that may be hidden from a single angle. It’s best to rotate the object or move the scanner around it to capture the best possible scans.
8. Clean the object: Small objects can easily accumulate dust or debris, which can affect the quality of the scan. Clean the object before scanning by using a soft brush or compressed air to remove any particles. This ensures that you capture the object’s true details without any interference.
9. Use post-processing software: Utilize post-processing software to refine and enhance the scanned data. These tools allow you to align multiple scans, remove any artifacts or noise, and optimize the final result. Take advantage of the editing tools provided by the software to further enhance the appearance and accuracy of the small object’s scan.
By following these tips, you can maximize the level of detail and accuracy when scanning small objects with the Sense 3D Scanner. Remember to adjust the settings, experiment with different techniques, and use post-processing tools to refine the scans for the best possible results.
Tips for Scanning Large Objects
Scanning large objects with the Sense 3D Scanner requires careful planning and specific techniques to capture the details accurately. Here are some tips to help you achieve optimal results when scanning large objects:
1. Plan your scanning strategy: Before scanning, plan your approach for capturing the large object. Break down the object into smaller sections or scan it in separate passes to ensure complete coverage and to manage processing requirements effectively.
2. Increase the scan area: Adjust the scan area in the software settings to cover a larger region around the object. This allows the scanner to capture more of the object’s surface and ensures that no details are missed during the scanning process.
3. Use lower scan resolution: Lower the scan resolution to help manage the size of the data captured. Large objects can generate massive amounts of data, which might be challenging to process. Reducing the resolution allows for faster scanning and processing while still capturing the necessary details adequately.
4. Use a tripod or scanning rig: Stability is crucial when scanning large objects. Use a tripod or a scanning rig to securely position the scanner and prevent any unwanted movement that could lead to misaligned or blurry scans. This allows for consistent and accurate scans.
5. Capture multiple scans from different angles: Take multiple scans of the large object from different angles to capture all the necessary details. Varying the scanning angles helps in obtaining a more complete representation of the object and compensates for any shadows or occlusions that may occur in a single scan.
6. Utilize natural features or markers: Large objects often have distinctive features that can serve as reference points during the scanning process. Utilize these natural features or add markers to the object to aid in alignment when merging multiple scans into a cohesive model.
7. Divide scanning into manageable sections: Instead of scanning the entire large object in a single pass, divide it into smaller sections for more manageable scanning and processing. This approach prevents overwhelming the software and minimizes the chance of incomplete or lower-quality scans.
8. Optimize lighting conditions: Adequate lighting is crucial when scanning large objects. Ensure that the object is evenly illuminated to capture accurate details. Use diffused lighting sources or set up a controlled lighting environment to minimize shadows and ensure uniform lighting across the entire object.
9. Utilize post-processing software: Take advantage of post-processing software to align and merge the scans of the large object. These tools allow you to stitch together multiple scans, remove any outliers or noise, and refine the final result. Use the editing features available to optimize the appearance of the scanned model and enhance any areas that require additional detail or correction.
By employing these tips for scanning large objects with the Sense 3D Scanner, you can efficiently capture and create highly detailed and accurate 3D models. Remember to plan your scanning strategy, optimize the lighting conditions, divide the scanning process, and use post-processing software to refine your scans for the best possible results.
Enhancing the Scanned Models
After capturing the initial scans with the Sense 3D Scanner, you have the opportunity to further enhance and refine the scanned models to achieve a higher level of detail and realism. Here are some tips and techniques to help you enhance the quality of your scanned models:
1. Clean up the mesh: Use mesh editing software to clean up any artifacts or imperfections in the scanned model. Smooth out rough areas, remove unwanted noise or outliers, and fill in any holes or gaps that may have occurred during the scanning process. This step helps to create a more polished and visually appealing final model.
2. Retopologize the mesh: If necessary, consider retopologizing your mesh to optimize the model’s topology. This involves creating a new mesh with optimized edge flows and topology, which can improve the model’s geometry and make it easier to work with for subsequent processes such as texturing or animation.
3. Texture mapping: Apply textures to your model to enhance its realism and visual appeal. You can either project the captured textures onto the mesh or use painting tools to create custom textures. Ensure that the textures are appropriately sized and aligned with the geometry of the model for a seamless and accurate representation.
4. Use normal and displacement maps: Generate and apply normal maps or displacement maps to add extra detail to the model’s surface. These maps simulate finer details, such as bumps, wrinkles, or surface variations, by manipulating the shading of the model. This can significantly enhance the overall level of detail without adding unnecessary geometry.
5. Apply materials: Assign appropriate materials to your scanned model to simulate different surfaces or materials accurately. You can use pre-existing material libraries or create custom materials that match the real-world appearance of the object. Texturing and material application play a crucial role in creating a realistic representation of the scanned object.
6. Merge or align multiple scans: If you scanned a large object in sections, ensure that the individual scans are accurately aligned and merged together to create a seamless final model. Use alignment tools in your software or manual alignment techniques to align the scans based on reference points. This step guarantees that all the captured details are properly integrated into the final model.
7. Optimize geometry: If the scanned model has a high polygon count or unnecessary complexity, consider optimizing the geometry. Reduce the polygon count while preserving the essential details to improve the model’s performance and make it more suitable for various applications such as real-time rendering or 3D printing.
8. Test various render and visualization options: Experiment with different rendering and visualization techniques to showcase your scanned model in the best possible way. Adjust lighting, shadows, and material properties to achieve the desired look and feel. Use rendering software or game engines to explore various lighting and rendering options that enhance the overall appearance of the scanned model.
By employing these techniques to enhance your scanned models, you can take your 3D scans to the next level. These post-processing steps allow you to refine the models, add details, improve geometry and materials, and create visually stunning representations of the objects captured with the Sense 3D Scanner.
Avoiding Common Pitfalls
While using the Sense 3D Scanner, it’s important to be aware of common pitfalls that can impact the quality and accuracy of your scans. By understanding and avoiding these pitfalls, you can ensure better results and save time in the scanning process. Here are some common pitfalls to watch out for:
1. Insufficient lighting: Inadequate lighting can lead to poor scan quality, shadows, and inaccuracies in capturing the object’s details. Ensure that the scanning scene is well-lit, with diffused lighting to minimize shadows and provide even illumination across the object’s surfaces.
2. Reflective or transparent surfaces: Reflective or transparent surfaces can pose challenges when scanning. These surfaces can cause glare, reflections, or have limited data capture. Consider using anti-glare sprays or placing a matte object nearby to reduce reflections. For transparent objects, use a background that provides contrast to help improve the scan quality.
3. Unstable scanning position or movement: Maintaining a stable scanning position is essential to capture accurate and detailed scans. Avoid unnecessary movements, shaking, or vibrations during the scanning process. Use a tripod or other stabilizing methods to keep the scanner steady and minimize potential motion blur.
4. Insufficient overlap: When scanning objects or large scenes, it’s important to have sufficient overlap between individual scans. Inadequate overlap can result in gaps or misalignments in the final model. Ensure that each scan has enough overlap with adjacent scans to accurately capture all areas of the object or scene.
5. Ignoring scanning boundaries: The Sense 3D Scanner has specific limitations in terms of the size and distance it can effectively capture. Be mindful of the scanner’s scanning boundaries and avoid trying to capture objects or scenes that exceed these limitations. This will help in maintaining scan quality and accuracy.
6. Not cleaning the object: Dirt, dust, or smudges on the object’s surfaces can degrade scan quality and introduce unwanted artifacts. Clean the object thoroughly before scanning using a soft brush or compressed air to remove any unwanted particles. This will help capture the true details of the object without interference.
7. Inappropriate scan resolution: Choosing the wrong scan resolution can result in scans that are either too low in detail or too resource-intensive to process efficiently. Adjust the scan resolution based on the complexity and size of the object being scanned, ensuring a balance between detail and performance.
8. Neglecting calibration: Proper calibration is essential for accurate scans. Neglecting the calibration process can result in distorted or misaligned scans. Make sure to perform the calibration routine as instructed by the scanner’s software before starting each scanning session.
9. Rushing the scanning process: Scanning requires patience and attention to detail. Rushing through the scanning process can lead to missed details, misalignments, or errors. Take your time, ensure proper positioning, and carefully capture the necessary scans to achieve the best possible results.
By keeping these common pitfalls in mind and taking the necessary precautions, you can avoid the potential issues that may arise during the scanning process with the Sense 3D Scanner. This will help you achieve more accurate, detailed, and visually appealing scans of your desired objects or scenes.
Conclusion
The Sense 3D Scanner is a powerful tool that allows you to capture the physical world and transform it into digital 3D models with remarkable detail. By understanding the basics of 3D scanning, preparing the scene, utilizing the software effectively, and applying specific scanning techniques, you can achieve exceptional results with the Sense 3D Scanner.
Whether you are scanning small objects or large scenes, following the recommended tips and techniques will help you capture the intricate details and textures accurately. Remember to optimize lighting conditions, maintain stability during scanning, and experiment with different angles and resolutions to capture the best possible scans.
After capturing the scans, enhancing the models through post-processing techniques further refines the final results. Cleaning up the mesh, applying textures, retopologizing, and optimizing the geometry are some of the steps you can take to enhance the visual quality and accuracy of the scanned models.
Lastly, it’s important to be aware of common pitfalls and avoid them to ensure a successful scanning process. Pay attention to lighting, scan overlap, stability, reflective surfaces, and other factors that can impact scan quality. By being mindful of these potential issues, you can overcome challenges and improve the overall quality of your scans.
With diligent practice, experimentation, and attention to detail, you can harness the power of the Sense 3D Scanner to create highly detailed and realistic digital models. From professional designers and artists to hobbyists and enthusiasts, the possibilities that the Sense 3D Scanner presents are endless.
So, embrace the world of 3D scanning, let your creativity soar, and unlock new opportunities for design, visualization, prototyping, and more with the Sense 3D Scanner.