Introduction
Welcome to the world of 3D scanning! With advancements in technology, it has become easier than ever to capture real-world objects and turn them into digital 3D models. One such device that has gained popularity is the Sense 3D Scanner.
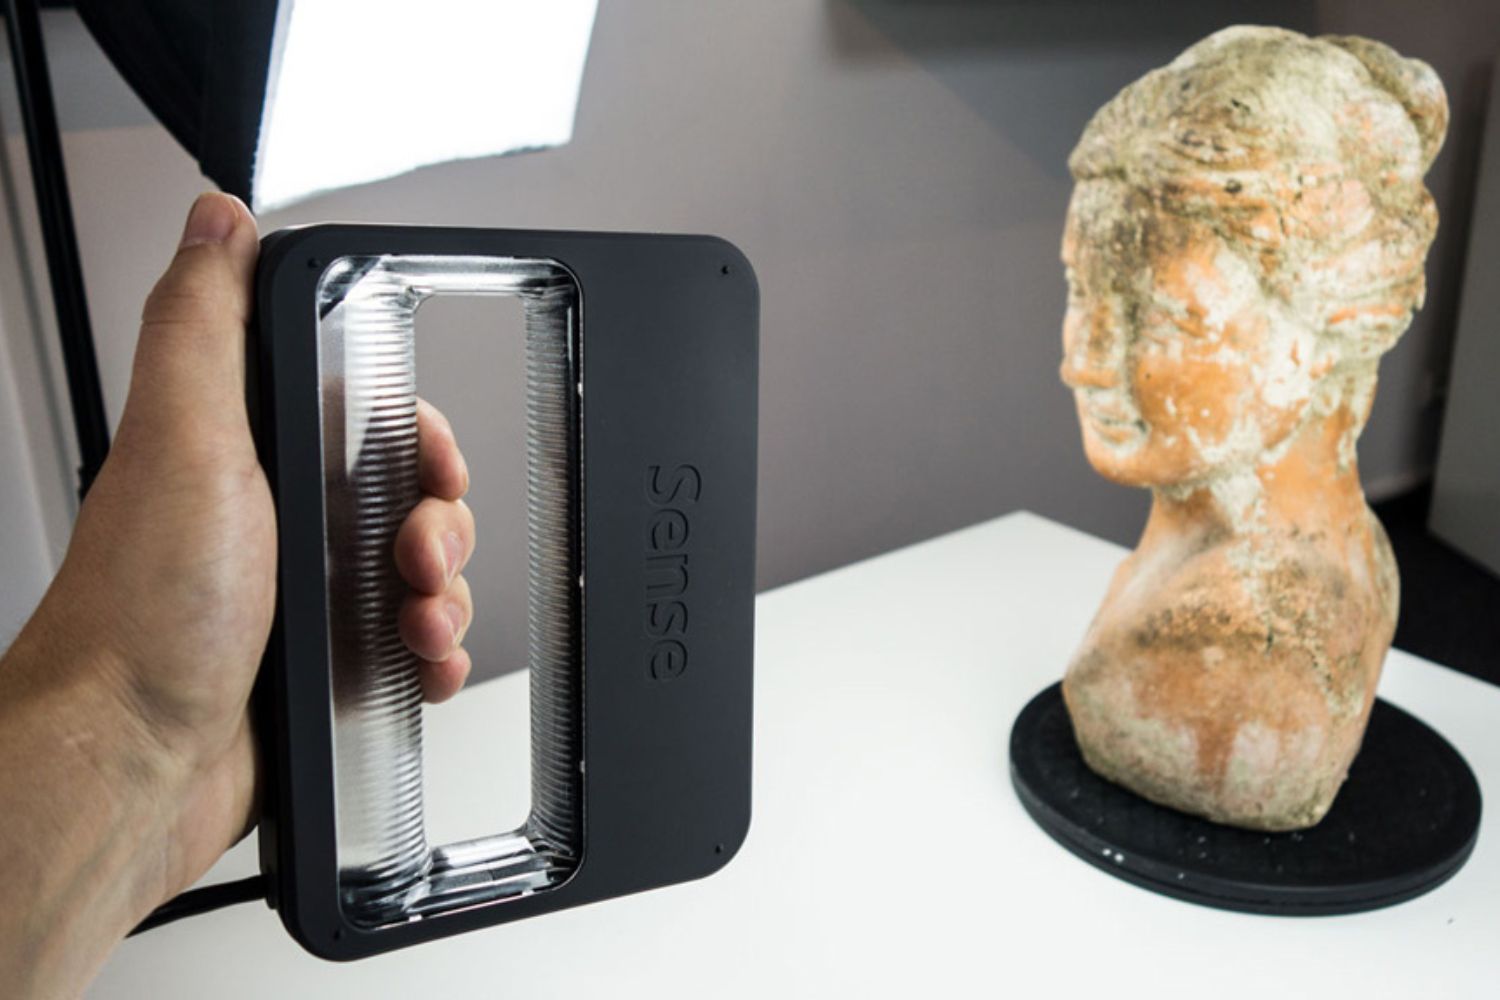
The Sense 3D Scanner is a compact and portable scanner that allows you to capture high-quality 3D scans of objects and environments. Whether you are a hobbyist, designer, artist, or architect, the Sense 3D Scanner can open up a whole new realm of possibilities for your creative projects.
By using a combination of infrared depth sensors and cameras, the Sense 3D Scanner can accurately capture the shape, texture, and details of the objects you scan. This means that you can scan anything from simple everyday items to more complex shapes with intricate details.
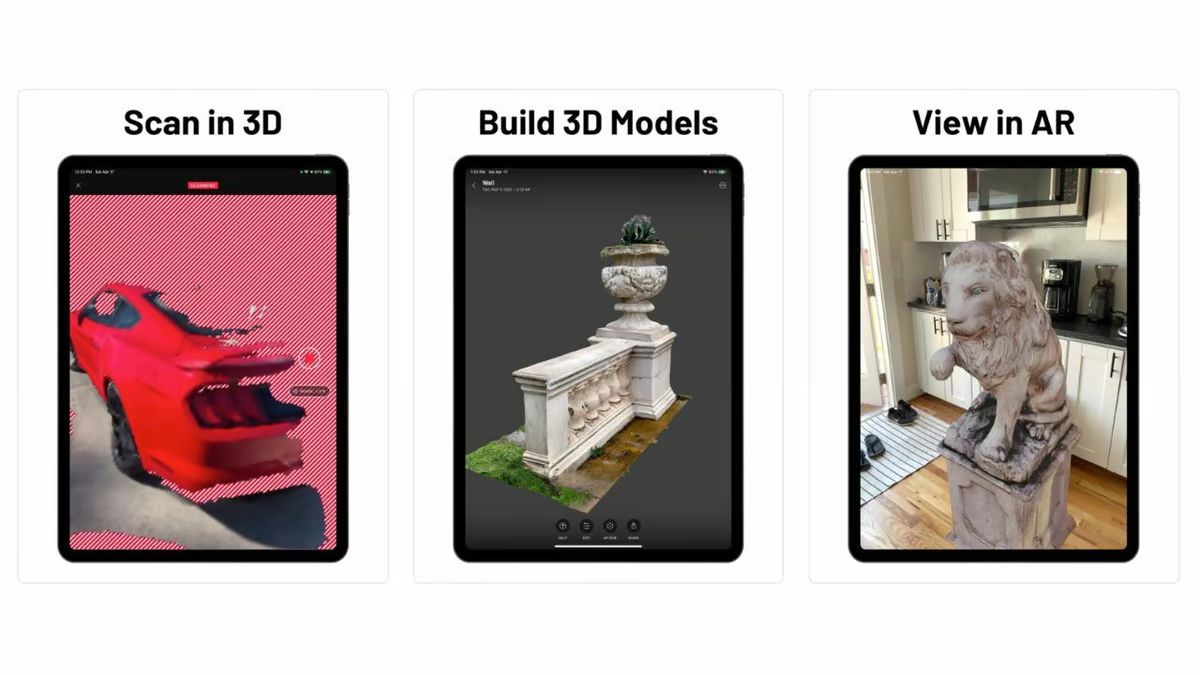
Not only does the Sense 3D Scanner allow you to capture 3D scans, but it also provides you with the tools to edit, enhance, and refine your scans. This gives you the ability to manipulate and customize your scanned objects, whether it’s for 3D printing, virtual reality, or architectural visualization.
In this guide, we will walk you through the process of using the Sense 3D Scanner, from unboxing and setup to scanning techniques and post-processing. Whether you are a beginner or have some experience with 3D scanning, this guide will provide you with the necessary information to get started.
So, let’s dive in and discover the exciting world of 3D scanning with the Sense 3D Scanner!
Getting Started
Before you start using the Sense 3D Scanner, there are a few things you need to know and prepare. This section will guide you through the initial steps of unboxing the device, setting it up, and installing the necessary software.
1. Unboxing and Setup:
When you receive the Sense 3D Scanner, carefully unbox it and check the contents. Make sure that all the components are present and in good condition. The basic components of the scanner typically include the scanner itself, a USB cable, and any necessary power adapters.
Once you have checked the contents, find a suitable location to set up the scanner. Ensure that it has enough space to move around and position the objects you want to scan.
2. Installing the Sense 3D Software:
The next step is to install the Sense 3D software on your computer. The software is compatible with both Windows and Mac operating systems. Visit the manufacturer’s website to download the latest version of the software.
Follow the installation instructions and run the software once it is installed. Make sure to connect your Sense 3D Scanner to your computer using the provided USB cable.
3. Calibrating the Scanner:
Before you start scanning, it is important to calibrate the scanner to ensure accurate and reliable results. The calibration process may vary slightly depending on the software version you are using, but it typically involves following on-screen instructions to scan a calibration card or pattern.
Once the calibration is complete, you are ready to start scanning objects in 3D using the Sense 3D Scanner. In the next sections, we will explore the different scanning techniques, object positioning, scanner settings, and much more.
So, now that you have set up your Sense 3D Scanner and installed the necessary software, it’s time to unleash your creativity and start capturing amazing 3D scans!
Unboxing and Setup
When you receive your Sense 3D Scanner, the first step is to unbox and set it up properly. This section will guide you through the process of unboxing the device and preparing it for use.
1. Unboxing:
Start by carefully unboxing the Sense 3D Scanner. Remove all the components from the packaging and ensure that everything is in good condition. The basic components typically include the scanner itself, a USB cable, and any necessary power adapters or batteries.
2. Setting Up the Scanner:
Find a suitable location to set up the Sense 3D Scanner. It is recommended to choose a well-lit area with enough space to move around and position objects for scanning.
3. Connecting the Scanner:
Once you have chosen the setup location, connect the Sense 3D Scanner to your computer using the provided USB cable. Make sure to use a USB port that is compatible with the scanner’s requirements.
4. Powering On the Scanner:
If your Sense 3D Scanner requires external power, connect it to a power source using the provided power adapter or batteries. Follow the manufacturer’s instructions to ensure proper power connection.
5. Installing the Software:
Visit the manufacturer’s website and download the latest version of the Sense 3D software. Install the software on your computer following the provided instructions. This software is essential for operating the scanner and processing the scanned data.
6. Testing the Scanner:
Once the software is successfully installed, launch it and ensure that it recognizes the connected Sense 3D Scanner. Follow any additional setup prompts or calibration steps that the software may require.
7. Updating Firmware (if necessary):
If there are any available firmware updates for the Sense 3D Scanner, download and install them. Firmware updates often include improvements and bug fixes to enhance the scanner’s performance.
And there you have it! You have successfully unboxed and set up your Sense 3D Scanner. Now it’s time to explore the exciting world of 3D scanning and start capturing stunning digital models!
Installing the Sense 3D Software
Once you have set up your Sense 3D Scanner, the next step is to install the Sense 3D software on your computer. This software allows you to control the scanner and process the captured 3D scans. Follow the steps below to install the software:
1. Visit the Manufacturer’s Website:
Go to the official website of the Sense 3D Scanner manufacturer. Look for the software download page, usually located in the support or downloads section.
2. Download the Software:
Click on the download link for the Sense 3D software. Make sure to choose the version that is compatible with your operating system (Windows or Mac).
3. Run the Installer:
Once the download is complete, locate the installer file in your computer’s downloads folder or the chosen destination. Double-click on the file to run the installer.
4. Follow the Installation Steps:
Follow the on-screen instructions provided by the installer. This may include accepting the software license agreement, choosing the installation location, and selecting additional options or components.
5. Connect the Scanner:
During the installation process, you may be prompted to connect your Sense 3D Scanner to your computer. Use the provided USB cable to connect the scanner to an available USB port on your computer.
6. Complete the Installation:
Once the installation is complete, you can launch the Sense 3D software from your computer’s applications or programs menu. Make sure the scanner is connected to your computer before launching the software.
7. Software Registration (if required):
In some cases, you may be required to register the software with your personal or company information. Follow the instructions provided by the software to complete the registration process.
And that’s it! You have successfully installed the Sense 3D software on your computer. You are now ready to use the software to control your scanner and process your 3D scans. In the next sections, we will explore how to calibrate the scanner, adjust the scanner settings, and perform the scanning process.
Calibrating the Scanner
Before you start capturing 3D scans with your Sense 3D Scanner, it is important to calibrate the scanner. Calibration ensures accurate and precise measurements, resulting in high-quality scans. Follow the steps below to calibrate your scanner:
1. Launch the Sense 3D Software:
Make sure the Sense 3D software is installed on your computer and launch it. Ensure that the scanner is connected to your computer via the USB cable.
2. Connect the Calibration Card:
Locate the calibration card that came with your Sense 3D Scanner. Connect it to your scanner according to the instructions provided by the software. The card often has a QR code or patterns that help the software calibrate the scanner.
3. Position the Scanner:
Move the scanner around the calibration card, ensuring that it captures the entire surface of the card. Hold the scanner in a stable position, keeping it perpendicular to the card, and avoid movement during the calibration process.
4. Follow the On-Screen Instructions:
The Sense 3D software will guide you through the calibration process with on-screen instructions. It may ask you to move the scanner to different angles or positions to capture the necessary data for calibration.
5. Complete the Calibration:
Once you have followed the on-screen instructions and captured the required data, the calibration process will be complete. The software will analyze the captured information and calibrate the scanner accordingly.
6. Test the Calibration:
After calibration, it is a good practice to test the scanner’s accuracy by scanning a known object with clearly defined dimensions. Compare the scanned object with its actual dimensions to ensure that the scanner is providing accurate measurements.
It’s important to note that calibration may need to be repeated periodically or when significant environmental changes occur, such as changes in lighting conditions or operating at different altitudes.
By following these calibration steps, you can ensure that your Sense 3D Scanner is accurately capturing the geometry of the objects you scan. This will result in more precise and detailed 3D scans for your projects. Now that your scanner is calibrated, you are ready to explore different scanning techniques and capture stunning 3D models!
Scanning Technique
Mastering the scanning technique is crucial when using the Sense 3D Scanner to capture accurate and detailed 3D scans. In this section, we will explore some essential tips and techniques to help you achieve optimal results:
1. Positioning the Object:
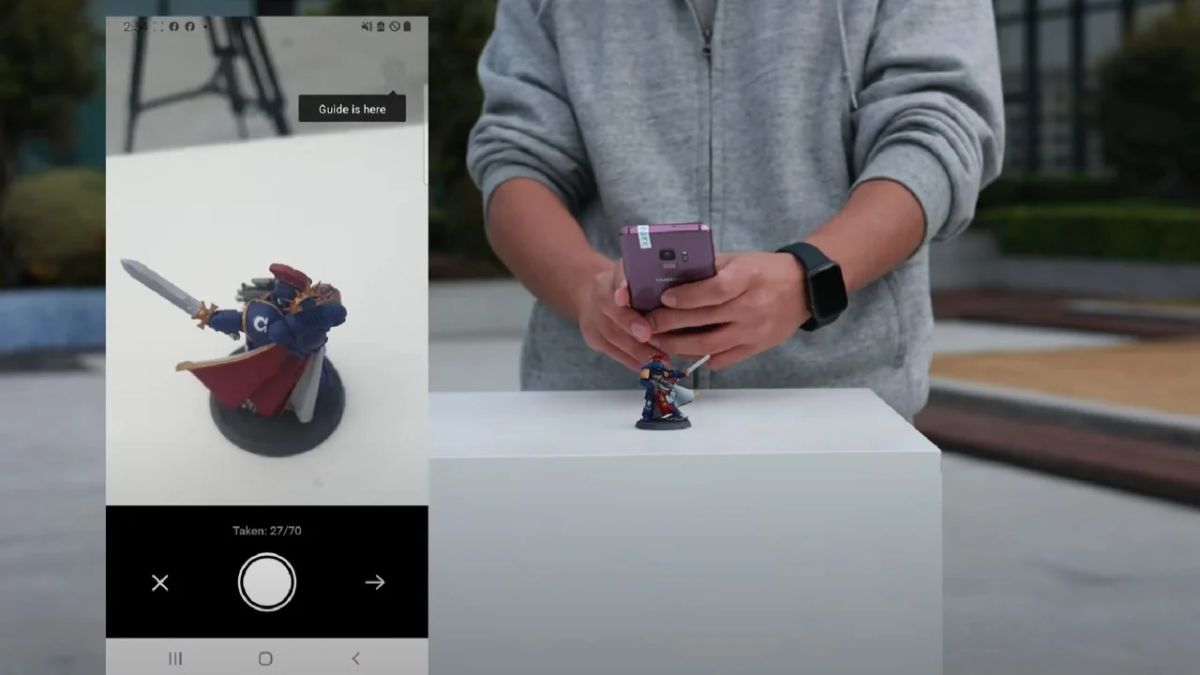
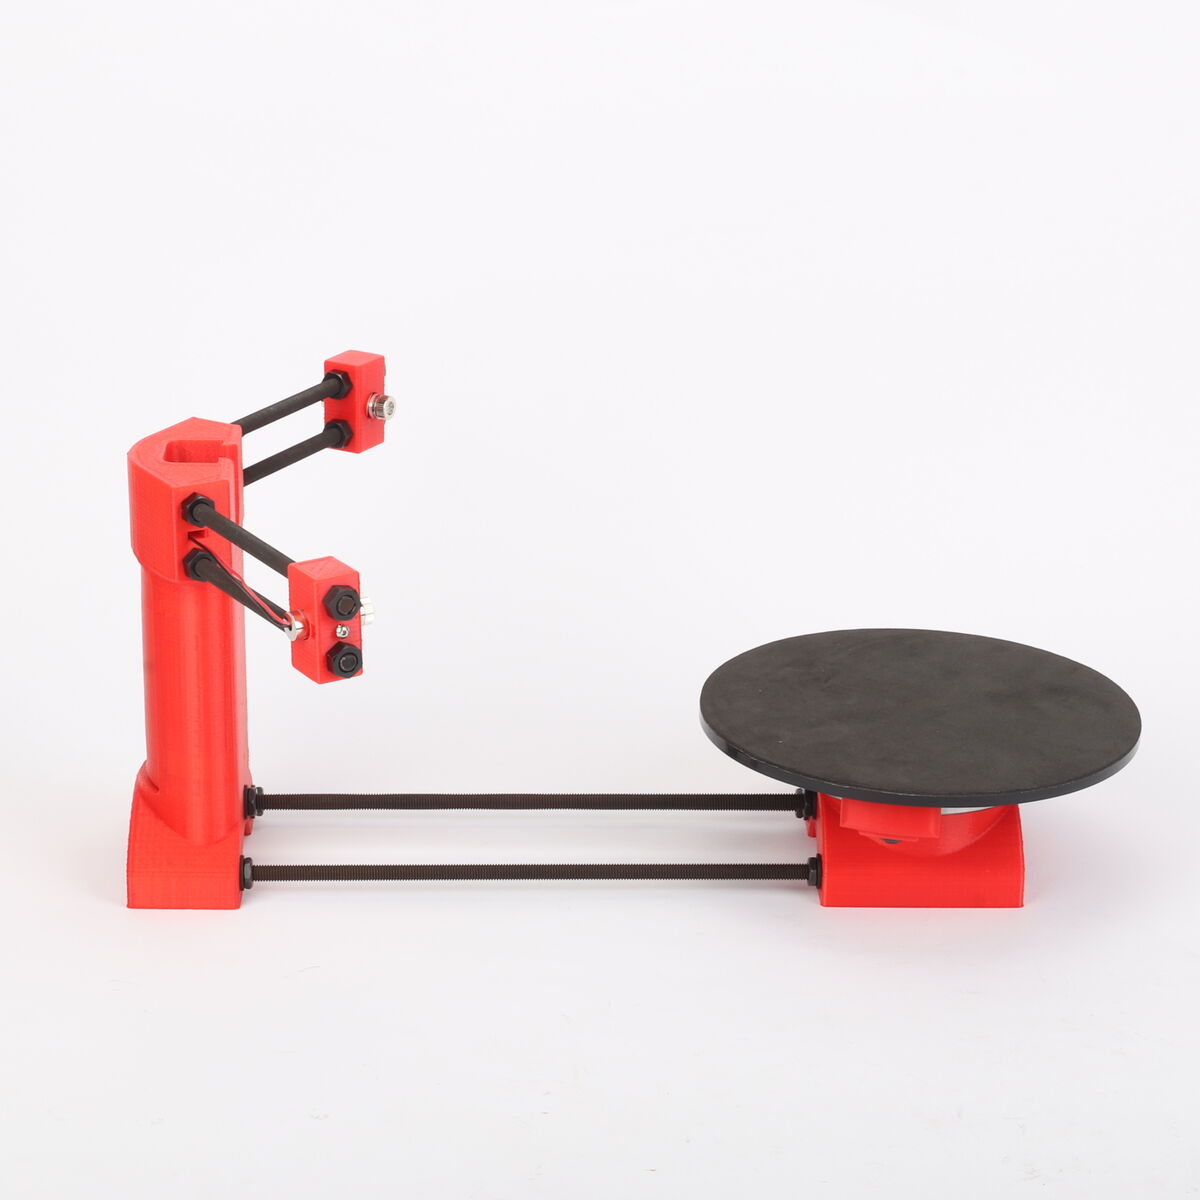
Place the object you want to scan on a stable surface in a well-lit environment. Ensure that the object is in full view of the scanner, and there are no obstructions blocking its line of sight. If needed, use a turntable or rotating platform to capture the object from different angles.
2. Adjusting the Scanner Settings:
The Sense 3D software provides various settings that allow you to customize the scanning process. Experiment with the settings to find the optimal configuration for different objects and environments. Adjust settings such as scan area, resolution, and scan speed to achieve the desired level of detail and accuracy.
3. Scanning Process:
Hold the scanner at a consistent distance from the object to ensure uniform data capture. Move the scanner slowly and steadily around the object, keeping it perpendicular to the surface. Avoid abrupt movements or tilting the scanner, as it can result in distorted scans.
4. Overlapping Scans:
To capture the entire object, make multiple passes around it, ensuring sufficient overlap between each scan. Overlapping scans enable the software to align and merge the individual scans into a complete 3D model. Pay attention to the alignment of each scan to ensure a seamless final result.
5. Surface Texture:
If you want to capture the texture of the object’s surface along with its shape, make sure the object has enough texture for the scanner to capture. Objects with reflective or transparent surfaces may require additional techniques, such as using a mattifying spray or applying a coating with texture to improve scanning accuracy.
6. Scanning Large Objects:
For large objects or environments, it may be necessary to divide the scan into sections. Capture scans of each section individually, ensuring good overlap between neighboring scans. Once all sections are scanned, use the software’s alignment tools to merge the sections into a complete 3D model.
Remember, practice makes perfect when it comes to scanning technique. Experiment with different objects, lighting conditions, and settings to refine your approach and achieve the best results. With time and experience, you will develop a sense of what works best in each scanning scenario.
Now that you have learned some key scanning techniques, it’s time to apply them and start capturing stunning 3D scans with your Sense 3D Scanner!
Positioning the Object
Properly positioning the object you want to scan is critical for achieving accurate and detailed 3D scans with the Sense 3D Scanner. In this section, we will explore some important considerations and techniques for positioning the object effectively:
1. Stable Surface:
Place the object on a stable, level surface. This ensures that it remains stationary during the scanning process, minimizing any unwanted movement or vibrations that could affect the scan quality. If needed, use clamps or stands to secure the object in place.
2. Lighting Conditions:
Ensure that the object is well-lit to provide sufficient contrast and detail for the scanner to capture. Avoid harsh shadows or direct light sources that can wash out the object’s features. Experiment with different lighting positions and angles to find the best setup for your specific object.
3. Clear Field of View:
Make sure there are no obstructions between the scanner and the object. Clear any clutter or objects that may interfere with the scanning process. Additionally, ensure that there is ample space around the object, allowing the scanner to capture the entire object from all angles.
4. Multiple Angles:
It is important to capture the object from various angles to ensure a comprehensive scan. Move around the object and position the scanner to capture different sides, edges, and details. This multi-angle approach helps obtain a more accurate and complete representation of the object in the resulting 3D model.
5. Accommodate Size and Shape:
Consider the size and shape of the object when positioning it for scanning. For small objects, place them closer to the scanner to capture finer details. For larger objects, you may need to move the scanner farther away to capture the entire object. Adjust the scanner’s distance and settings accordingly to ensure accurate scans.
6. Consider Reflective and Transparent Surfaces:
Objects with reflective or transparent surfaces can present challenges during scanning. To overcome this, consider using a mattifying spray or applying a thin coating with texture to enhance scan data capture. Experiment with different materials and techniques to improve the scanning accuracy of such surfaces.
Remember to take your time and experiment with different approaches to find the best positioning for each object you scan. It may take some trial and error to achieve optimal results, but the effort is worth it when you are able to capture detailed and accurate 3D scans.
Now that you have learned important techniques for positioning the object, you are one step closer to capturing amazing 3D models with your Sense 3D Scanner!
Adjusting the Scanner Settings
Adjusting the scanner settings is an important step in achieving optimal results when using the Sense 3D Scanner. Fine-tuning the settings allows you to customize the scanning process according to your specific needs and the object you are scanning. In this section, we will explore some key scanner settings that you can adjust:
1. Scan Resolution:
The scan resolution determines the level of detail captured by the scanner. Higher resolutions capture more detailed scans but may require more processing power and time. Lower resolutions are faster but result in less detailed scans. Consider the level of detail you require for your project and adjust the resolution accordingly.
2. Scan Area:
The scan area setting determines the size of the scanned area. You can adjust the scan area to focus on specific regions of the object or to capture a larger area. Consider the size and complexity of the object and set the scan area accordingly to ensure that all desired details are captured.
3. Scan Speed:
The scan speed setting controls the rate at which the scanner captures data. A slower scan speed allows the scanner to capture more data points, resulting in a more accurate scan. However, slower speeds will take longer to complete. Adjust the scan speed based on the object’s complexity and the desired level of accuracy and efficiency.
4. Texture Capture:
The Sense 3D Scanner can capture surface textures in addition to geometry. You can choose whether to capture texture information during the scanning process. If you want to preserve the surface appearance of the object in the final 3D model, enable the texture capture setting. Disabling texture capture may result in faster scans if surface appearance is not crucial.
5. Alignment Options:
The software offers various alignment options to assist in merging multiple scans or sections of an object. Experiment with different alignment techniques, such as feature matching or manual alignment, to ensure precise alignment of the scans for a seamless final model.
6. Exposure and Gain:
For challenging lighting conditions, the Sense 3D software provides exposure and gain settings. These settings allow you to adjust the camera’s sensitivity to light and exposure levels. Fine-tune these settings to optimize scan quality and capture the desired level of detail, especially when dealing with objects in low-light environments.
It’s important to note that every scanning scenario is unique, and the optimal settings can vary. Therefore, it is recommended to experiment with different settings and configurations to find the best setup for each scanning project.
By adjusting the scanner settings to suit your specific needs, you can ensure that you capture the most accurate and detailed 3D scans possible with the Sense 3D Scanner.
Now that you have an understanding of the key scanner settings, it’s time to put this knowledge into practice and start scanning amazing 3D models!
Scanning Process
The scanning process is the heart of using the Sense 3D Scanner to capture 3D models of objects. It involves capturing the geometry and texture of the object using the scanner’s sensors and software. In this section, we will guide you through the steps of the scanning process:
1. Prepare the Scanner:
Ensure that the Sense 3D software is launched on your computer, and the scanner is properly connected via the USB cable. Make sure the object you want to scan is positioned correctly and the scanning environment is set up as desired.
2. Plan Your Scanning Path:
Before you start scanning, think about the path or trajectory you will take around the object. It’s essential to plan your scanning path to ensure good coverage and minimize the number of scans needed. Consider capturing the object from multiple angles to capture its complete geometry.
3. Start Scanning:
Hold the Sense 3D Scanner at a comfortable distance from the object, making sure it is perpendicular to the surface. Begin the scanning process by pressing the scan button in the Sense 3D software or a physical button on the scanner, depending on the model.
4. Move Slowly and Steadily:
While scanning, move the scanner around the object slowly and steadily. Ensure that you maintain a consistent distance from the object and keep the scanner perpendicular to the surface. Avoid sudden movements or tilting of the scanner, as it can result in distorted scans.
5. Overlap Scans:
To capture the entire object, make multiple passes around it while ensuring sufficient overlap between each scan. Overlapping scans allow the software to align and merge them into a complete 3D model. Pay attention to aligning each scan with the previous ones to ensure a seamless final result.
6. Capture Texture (if desired):
If you want to capture the object’s texture, ensure that the texture capture setting is enabled in the Sense 3D software. The scanner can capture the color and texture of the object’s surface along with its geometry, providing a more realistic representation in the final 3D model.
7. Review and Adjust:
After each scan or set of scans, review the captured data on the computer screen. Check for any areas that may have been missed or require additional scans. Make any necessary adjustments in the scanning technique or settings based on the initial scan results.
8. Complete the Scanning Process:
Continue scanning until you have captured all the desired angles and details of the object. Remember to take breaks if needed to avoid fatigue or subtle changes in scanning technique that can affect the consistency of the scans.
With practice and experience, you will become more efficient and adept at the scanning process. You will learn how to optimize your scanning path, adjust settings on the fly, and capture accurate and detailed 3D models with your Sense 3D Scanner.
Now that you have learned the scanning process, it’s time to put your skills to use and start creating stunning 3D scans of objects!
Exporting and Saving Scans
Once you have successfully captured 3D scans with your Sense 3D Scanner, the next step is to export and save the scans in a format that can be used for further processing or sharing. In this section, we will explore the options and steps to export and save your scans:
1. Selecting the Export Format:
The Sense 3D software offers various export formats, including OBJ, PLY, and STL. Consider the intended use of the scans and the compatibility with other software or platforms when choosing the export format. OBJ is a commonly used format that preserves both geometric and textural information.
2. Adjusting Export Settings:
Before exporting the scans, you may have the option to adjust the export settings. These settings can include the level of detail or resolution of the exported file. Higher settings result in larger file sizes but provide more precise scans.
3. Export the Scanned Data:
Once you have selected the export format and adjusted the settings, proceed to export the scanned data. In the Sense 3D software, look for the export or save option and choose the desired destination on your computer.
4. Naming and Organizing the Scans:
When saving the scans, provide a descriptive name that helps you identify the object or project associated with the scan. Consider organizing your scanned data into folders or categories for easy access and management.
5. Choose Post-processing Options (if applicable):
If you plan to further process or refine your scans in other software, consider enabling additional options during the export process. Some software may offer options for smoothing, decimation, or other transformations to optimize the scans for specific applications.
6. Backup and Storage:
It is essential to create backups of your scanned data to avoid any loss due to hardware failure or accidental deletion. Consider storing the files on cloud storage or external hard drives to ensure the safety and accessibility of your valuable 3D scans.
7. Sharing the Scans:
If you want to share your scans with others, you can consider various options. You can directly send the exported file to others, share it through cloud storage or file-sharing platforms, or even upload it to online 3D sharing platforms for wider accessibility and community engagement.
Remember to keep track of the file formats and software compatibility if you plan to use or share the scans in different software or with others who may not have the same software as you.
With the ability to export and save your scans in compatible formats, you have the freedom to use and share your 3D models for a wide range of applications, including 3D printing, visualization, virtual reality, and more.
Now that you have learned how to export and save your scans, take the next step and explore the possibilities of using your 3D models in various ways!
Editing and Enhancing Scans
After capturing 3D scans with your Sense 3D Scanner, you may want to further refine and enhance the scans to achieve the desired level of quality or to prepare them for specific applications. In this section, we will explore some common techniques and tools for editing and enhancing your scans:
1. Mesh Cleaning and Repair:
Upon inspection, you may notice that the scanned mesh contains imperfections, such as holes, noise, or overlapping geometry. Use mesh cleaning and repair tools in specialized software, such as MeshLab or Meshmixer, to remove unwanted artifacts and improve the overall geometry of the scan.
2. Mesh Simplification:
If the scan contains an excessive amount of detail or has a high polygon count, you can simplify the mesh to create a lighter and more manageable model. Mesh simplification reduces the number of polygons while preserving the overall shape and important details of the object.
3. Texture Editing:
If you have captured texture information along with the geometry, you can use image editing software like Photoshop or GIMP to enhance and refine the textures. This includes adjusting colors, brightness, contrast, and eliminating any artifacts or imperfections in the captured texture.
4. Sculpting and Refinement:
If you have scans of organic or artistic objects, you may want to perform sculpting or refinement to enhance the shape or details. Software like Blender or ZBrush allows you to sculpt, manipulate, and refine the scanned mesh to achieve desired aesthetics or improvements.
5. UV Unwrapping and Texture Mapping:
If you intend to apply custom textures or materials to your 3D model, you can unwrap the geometry’s UV mapping and generate texture coordinates. This allows you to efficiently apply images or textures onto the surface of the model, enhancing its visual appearance.
6. Color Correction:
Adjusting the color and lighting of your scans can significantly enhance their visual appeal. Use color correction tools in image editing software to fine-tune the colors, shadows, and highlights of the captured texture, providing a more realistic representation of the object.
7. Post-processing Effects:
Explore various post-processing effects, such as adding ambient occlusion, reflections, or other shaders, to enhance the visual quality of your 3D scans. These effects can be applied in 3D rendering software or game engines to achieve a more polished and realistic appearance.
Remember, the extent of editing and enhancements you apply to your scans depends on your specific objectives and the intended use of the final 3D models. Ensure you strike a balance between improving the quality and maintaining the integrity of the original scan.
Through editing and enhancing your scans, you can transform them into refined and visually appealing 3D models that meet your creative requirements. Experiment with different techniques and tools to unleash your creativity and take your scans to the next level.
Now that you have learned about editing and enhancing scans, it’s time to dive into the world of post-processing and unlock the full potential of your 3D scans!
Troubleshooting Common Issues
While using the Sense 3D Scanner, you may encounter certain common issues that can affect the scanning process or the quality of your 3D scans. Understanding how to troubleshoot these issues can help you overcome challenges and obtain better results. In this section, we will discuss some common issues and their potential solutions:
1. Tracking and Registration Errors:
If you experience tracking or registration errors, where the software fails to accurately align or merge the scanned data, try the following steps:
– Ensure proper lighting conditions by adjusting the intensity and direction of light.
– Move the scanner at a slower and more consistent speed to capture accurate data points.
– Check if the scanner and object surfaces are clean to prevent any interference during scanning.
– Calibrate the scanner if necessary to ensure accurate measurements and data capture.
2. Missing or Incomplete Scans:
If certain parts of the object are missing or the scans appear incomplete, consider the following solutions:
– Increase the scan overlap to ensure more comprehensive coverage of the object during scanning.
– Adjust the scan resolution or distance from the object to ensure proper data capture of small or intricate details.
– Verify that the object remains stable during the scanning process to avoid any movement that may result in incomplete scans.
3. Reflections or Glare:
In case of reflections or glare on the object’s surface, you can try the following measures:
– Change the lighting setup to minimize reflections or use diffused lighting sources to reduce harsh glare.
– Apply anti-glare sprays or coatings on reflective surfaces to make them more scanner-friendly.
– Adjust the scanner angle or position to avoid direct light reflection on the object’s surface.
4. Noise or Artifacts:
If your scans contain noise or artifacts, you can attempt the following solutions:
– Set up a clean and clutter-free scanning environment to avoid any unwanted objects or elements in the scan.
– Ensure that the object’s surface is clean and free from dust or debris that may influence the scan quality.
– Adjust the scanner settings such as exposure or gain to optimize data capture in challenging lighting conditions.
5. USB Connectivity Issues:
If you encounter connectivity issues with the USB connection between the scanner and the computer, try these troubleshooting steps:
– Ensure that the USB cable is securely connected to both the scanner and the computer.
– Try using a different USB port on your computer to rule out any potential port-related issues.
– Check if the USB drivers for the scanner are up to date and compatible with your operating system.
If you continue to experience difficulties even after attempting these troubleshooting steps, consider consulting the Sense 3D Scanner’s user manual or contacting the manufacturer’s customer support for additional guidance and assistance.
By familiarizing yourself with these common issues and their solutions, you can optimize your scanning process and achieve better results with the Sense 3D Scanner.
Now that you’re equipped with troubleshooting knowledge, you can confidently tackle challenges and overcome obstacles for a smoother scanning experience!
Conclusion
Congratulations! You have reached the end of our guide on using the Sense 3D Scanner. Throughout this guide, you have learned about the unboxing and setup process, installing the necessary software, calibrating the scanner, scanning techniques, adjusting scanner settings, exporting and saving scans, editing and enhancing scans, troubleshooting common issues, and much more.
The Sense 3D Scanner opens up a world of possibilities for capturing real-world objects and turning them into digital 3D models. Whether you are a hobbyist, designer, artist, or architect, this portable and versatile scanner can unlock new creative opportunities for your projects.
Remember to approach your scanning process with patience and practice to achieve the best results. Experiment with different techniques, adjust settings, and embrace the iterative nature of the scanning process to refine your skills and capture stunning 3D models.
Additionally, continue to explore post-processing techniques and software tools to further enhance and refine your scans. From cleaning and repairing meshes to texturing and sculpting, there are endless opportunities to bring your scanned objects to life with creativity and attention to detail.
If you encounter any challenges or issues during the scanning process, don’t be discouraged. Troubleshoot the common problems we discussed and seek guidance from the Sense 3D Scanner’s user manual or manufacturer’s support channels. With time and experience, you will become more proficient and knowledgeable in using the scanner effectively.
Now that you have a solid understanding of the Sense 3D Scanner and its capabilities, it’s time to put your knowledge into practice and embark on your 3D scanning journey. Capture unique objects, create detailed models, and let your imagination soar as you explore the limitless possibilities of this exciting technology.
Good luck, and have fun exploring the world of 3D scanning with your Sense 3D Scanner!