Introduction
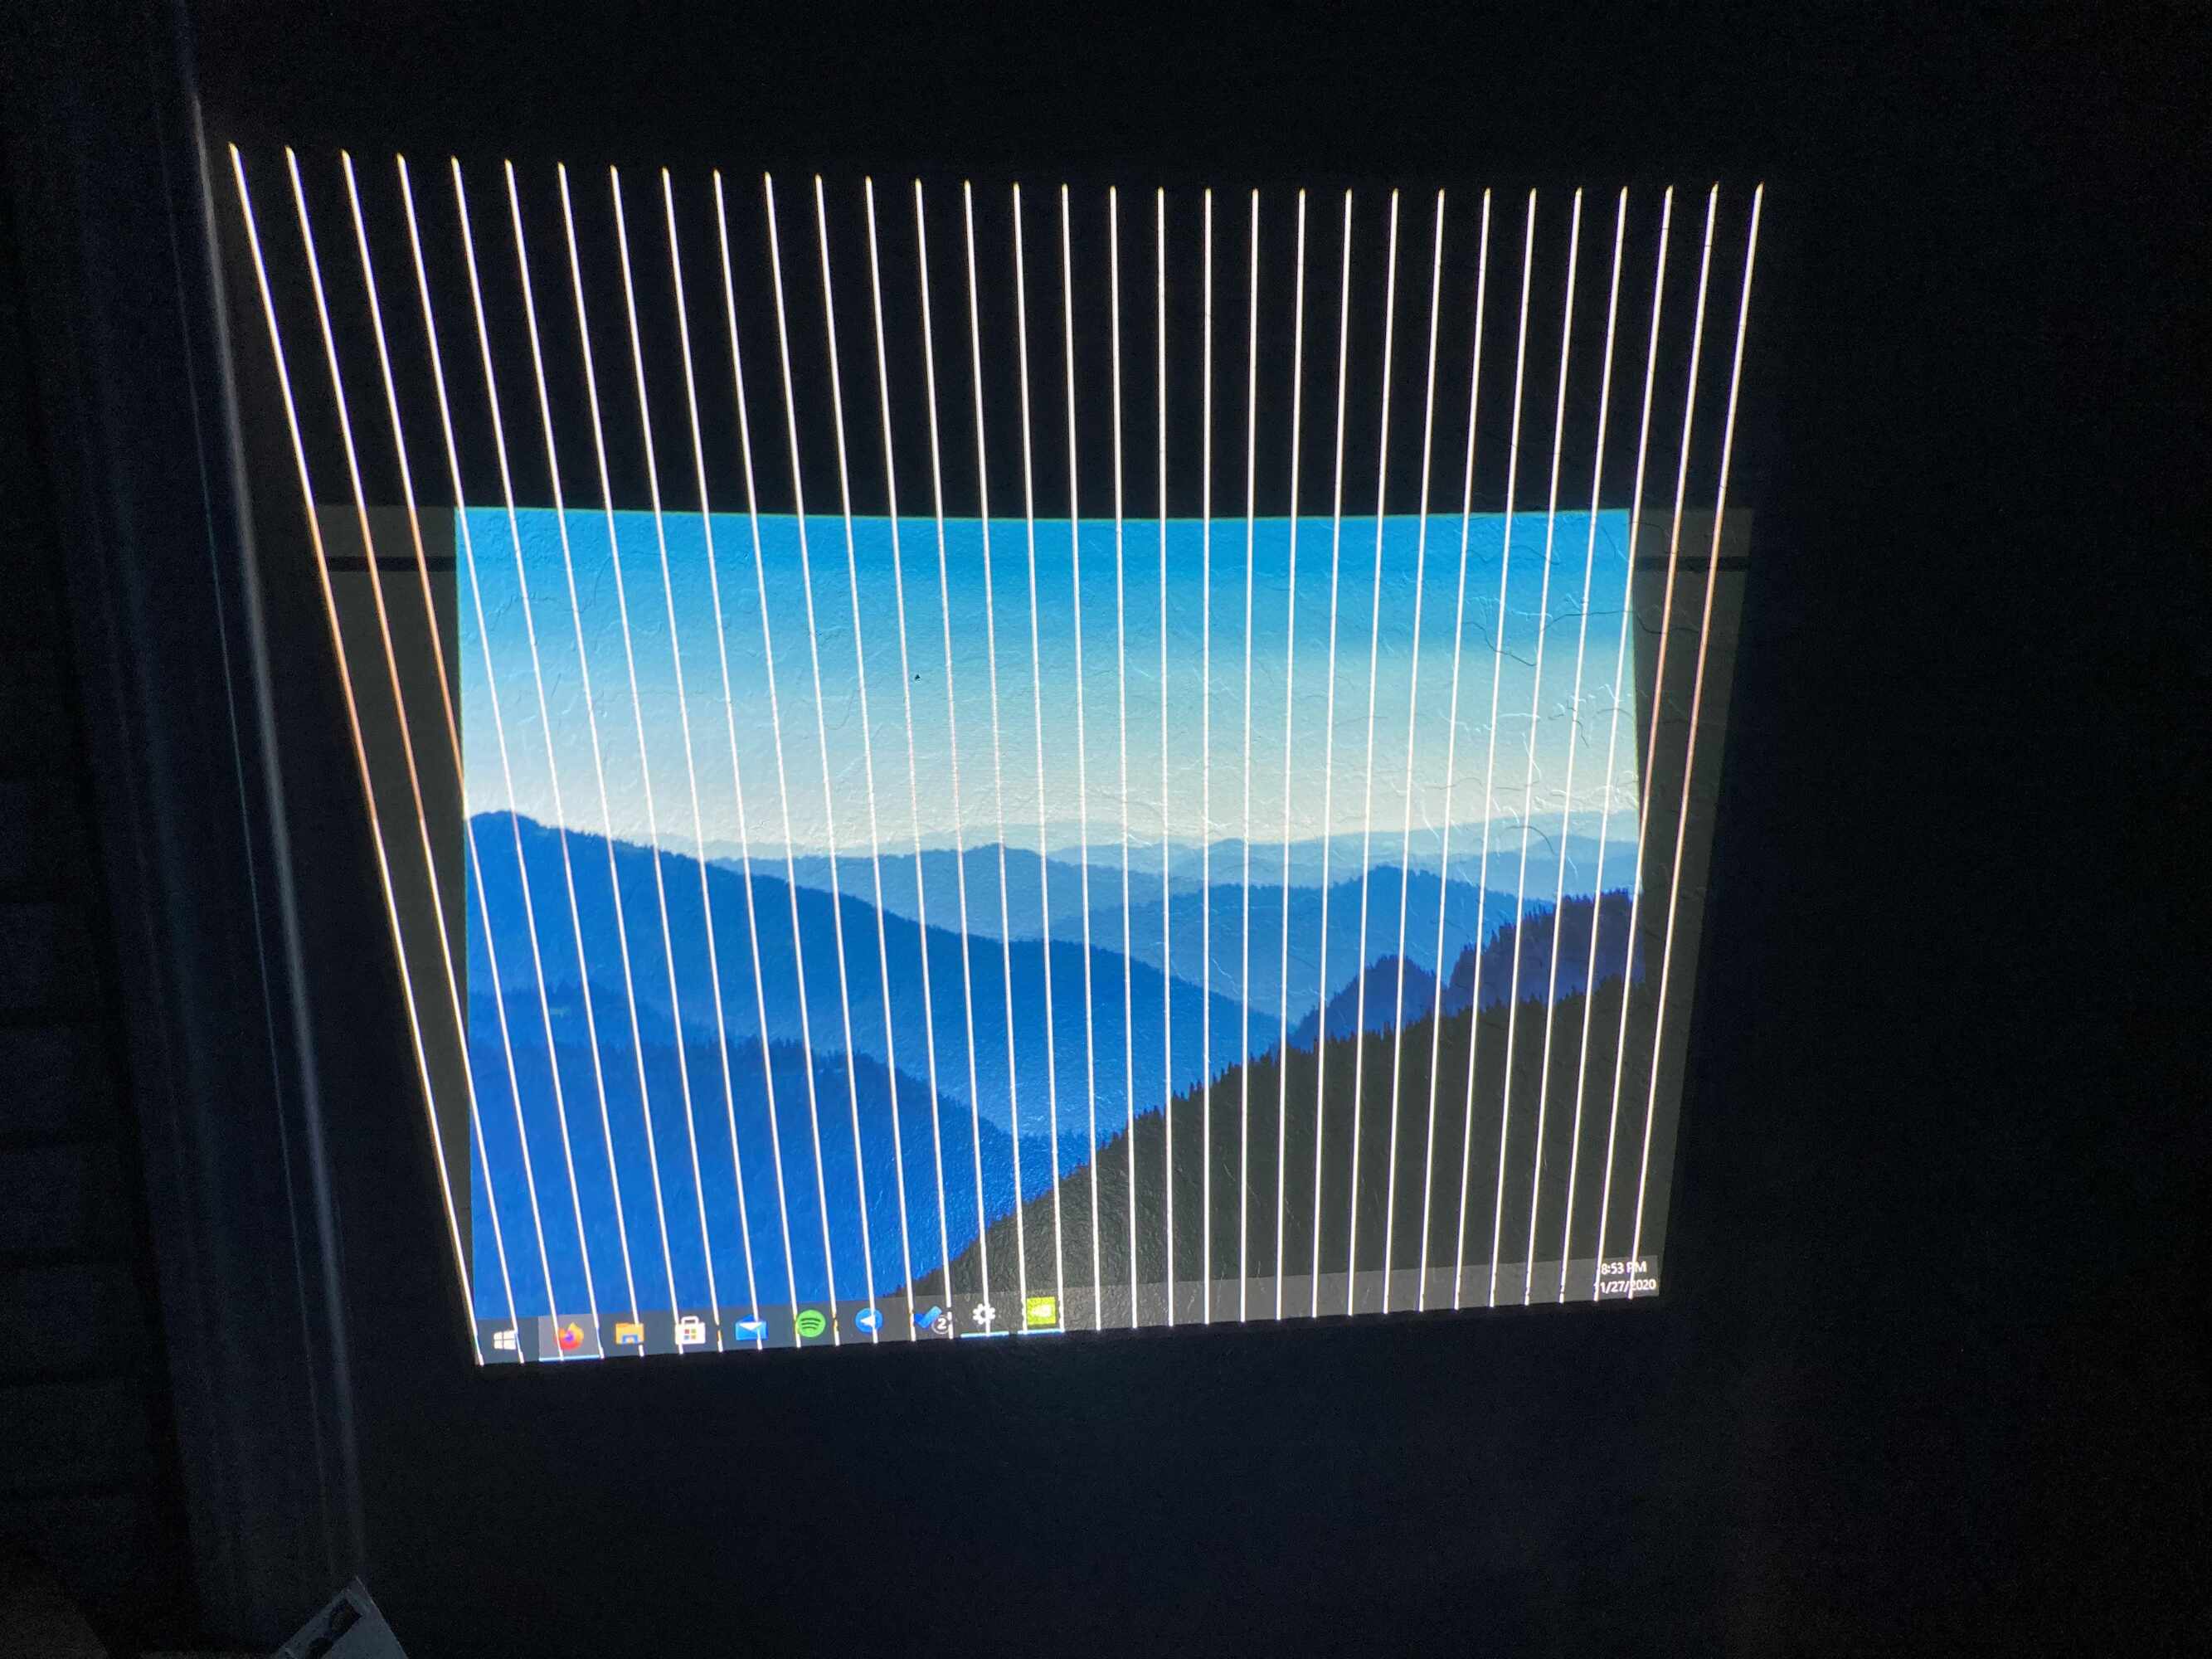
Projectors are a popular choice for presentations, movie nights, and gaming sessions. However, it can be frustrating when horizontal lines appear on the projected image, compromising the viewing experience. These lines can be distracting and may even make the content on the screen unreadable.
In this article, we will explore the common reasons why horizontal lines occur on projectors and provide step-by-step solutions to fix this issue. Whether you’re a business professional relying on a projector for a crucial presentation or a movie enthusiast seeking high-quality visuals, these troubleshooting tips will come in handy.
Before we dive into the solutions, it’s important to understand the causes behind the horizontal lines. Several factors can contribute to this problem, including faulty connections, incorrect resolution settings, projector misalignment, and even dirty lenses. By pinpointing the root cause, you can quickly resolve the issue and get back to enjoying clear and uninterrupted projections.
So, if you’re facing the frustrating problem of horizontal lines on your projector, don’t worry. With our comprehensive guide, you’ll be able to troubleshoot and fix this issue on your own without the need for technical expertise. Let’s get started on restoring the crisp and seamless visual experience you desire.
Reasons for Horizontal Lines on a Projector
Horizontal lines on a projector can be caused by various factors. Understanding the reasons behind this issue is crucial for effectively troubleshooting and resolving the problem. Here are the most common causes:
- Loose or Faulty Connections: One of the primary culprits behind horizontal lines is loose or faulty connections between the projector and the video source. A loose VGA or HDMI cable can result in a poor signal transmission, leading to the appearance of horizontal lines on the projected image.
- Incorrect Resolution Settings: Using an incompatible resolution for your projector can cause horizontal lines. If the resolution of the source material doesn’t match the native resolution supported by the projector, it can lead to scaling issues and distortions on the screen.
- Projector Misalignment: Improper projector placement or misalignment can cause horizontal lines. If the projector is tilted or positioned at an angle, it can distort the image and result in horizontal lines appearing on the screen.
- Dirty Projector Lens: A dirty or smudged lens can affect the image quality and cause horizontal lines. Dust, fingerprints, or other debris on the lens can obstruct the light passing through, resulting in distorted projections.
- Troubleshooting the Signal Source: Sometimes, the issue may not lie with the projector itself but with the signal source. Problems with the DVD player, laptop, gaming console, or any other device connected to the projector can potentially lead to horizontal lines on the projected image.
- Outdated Projector Firmware: Just like any other electronic device, projectors rely on firmware to function optimally. Outdated firmware can lead to various issues, including horizontal lines. Updating the projector firmware can often resolve these issues.
By understanding the primary reasons behind the occurrence of horizontal lines on a projector, you can better identify and address the specific cause in your situation. In the following sections, we will discuss step-by-step solutions to fix each of these issues, allowing you to enjoy a smooth and uninterrupted projection experience.
Checking the Connections
When encountering horizontal lines on a projector, it’s essential to examine the connections between the projector and the video source. A loose or faulty connection can disrupt the signal transmission and result in distorted images. Follow these steps to ensure proper connectivity:
- Inspect the Cables: Start by examining all the cables connected to your projector. Check if they are securely plugged in and not damaged. Ensure that the VGA or HDMI cable is tightly connected to both the projector and the video source.
- Try Different Cables: If you suspect a faulty cable, try using a different cable to connect the projector to the video source. This will help determine whether the issue lies with the cable itself.
- Test Different Ports: If your projector has multiple input ports, try connecting the video source to a different port. Sometimes, a particular input port may be causing the horizontal lines, and switching to another port can address the issue.
- Check for Bent Pins: Inspect the pins on the VGA or HDMI connectors for any signs of damage or bending. Bent pins can disrupt the signal transmission and cause distorted images. If you notice any bent pins, use a small tool to carefully straighten them.
- Restart and Reconnect: Sometimes, a simple restart can fix connectivity issues. Turn off both the projector and the video source, unplug all the cables, and then reconnect them, ensuring a secure connection. Power on the devices and check if the horizontal lines are resolved.
By thoroughly checking the connections and ensuring everything is properly plugged in, you can eliminate loose connection issues as a possible cause of horizontal lines on your projector. If the problem persists, proceed to the next troubleshooting steps.
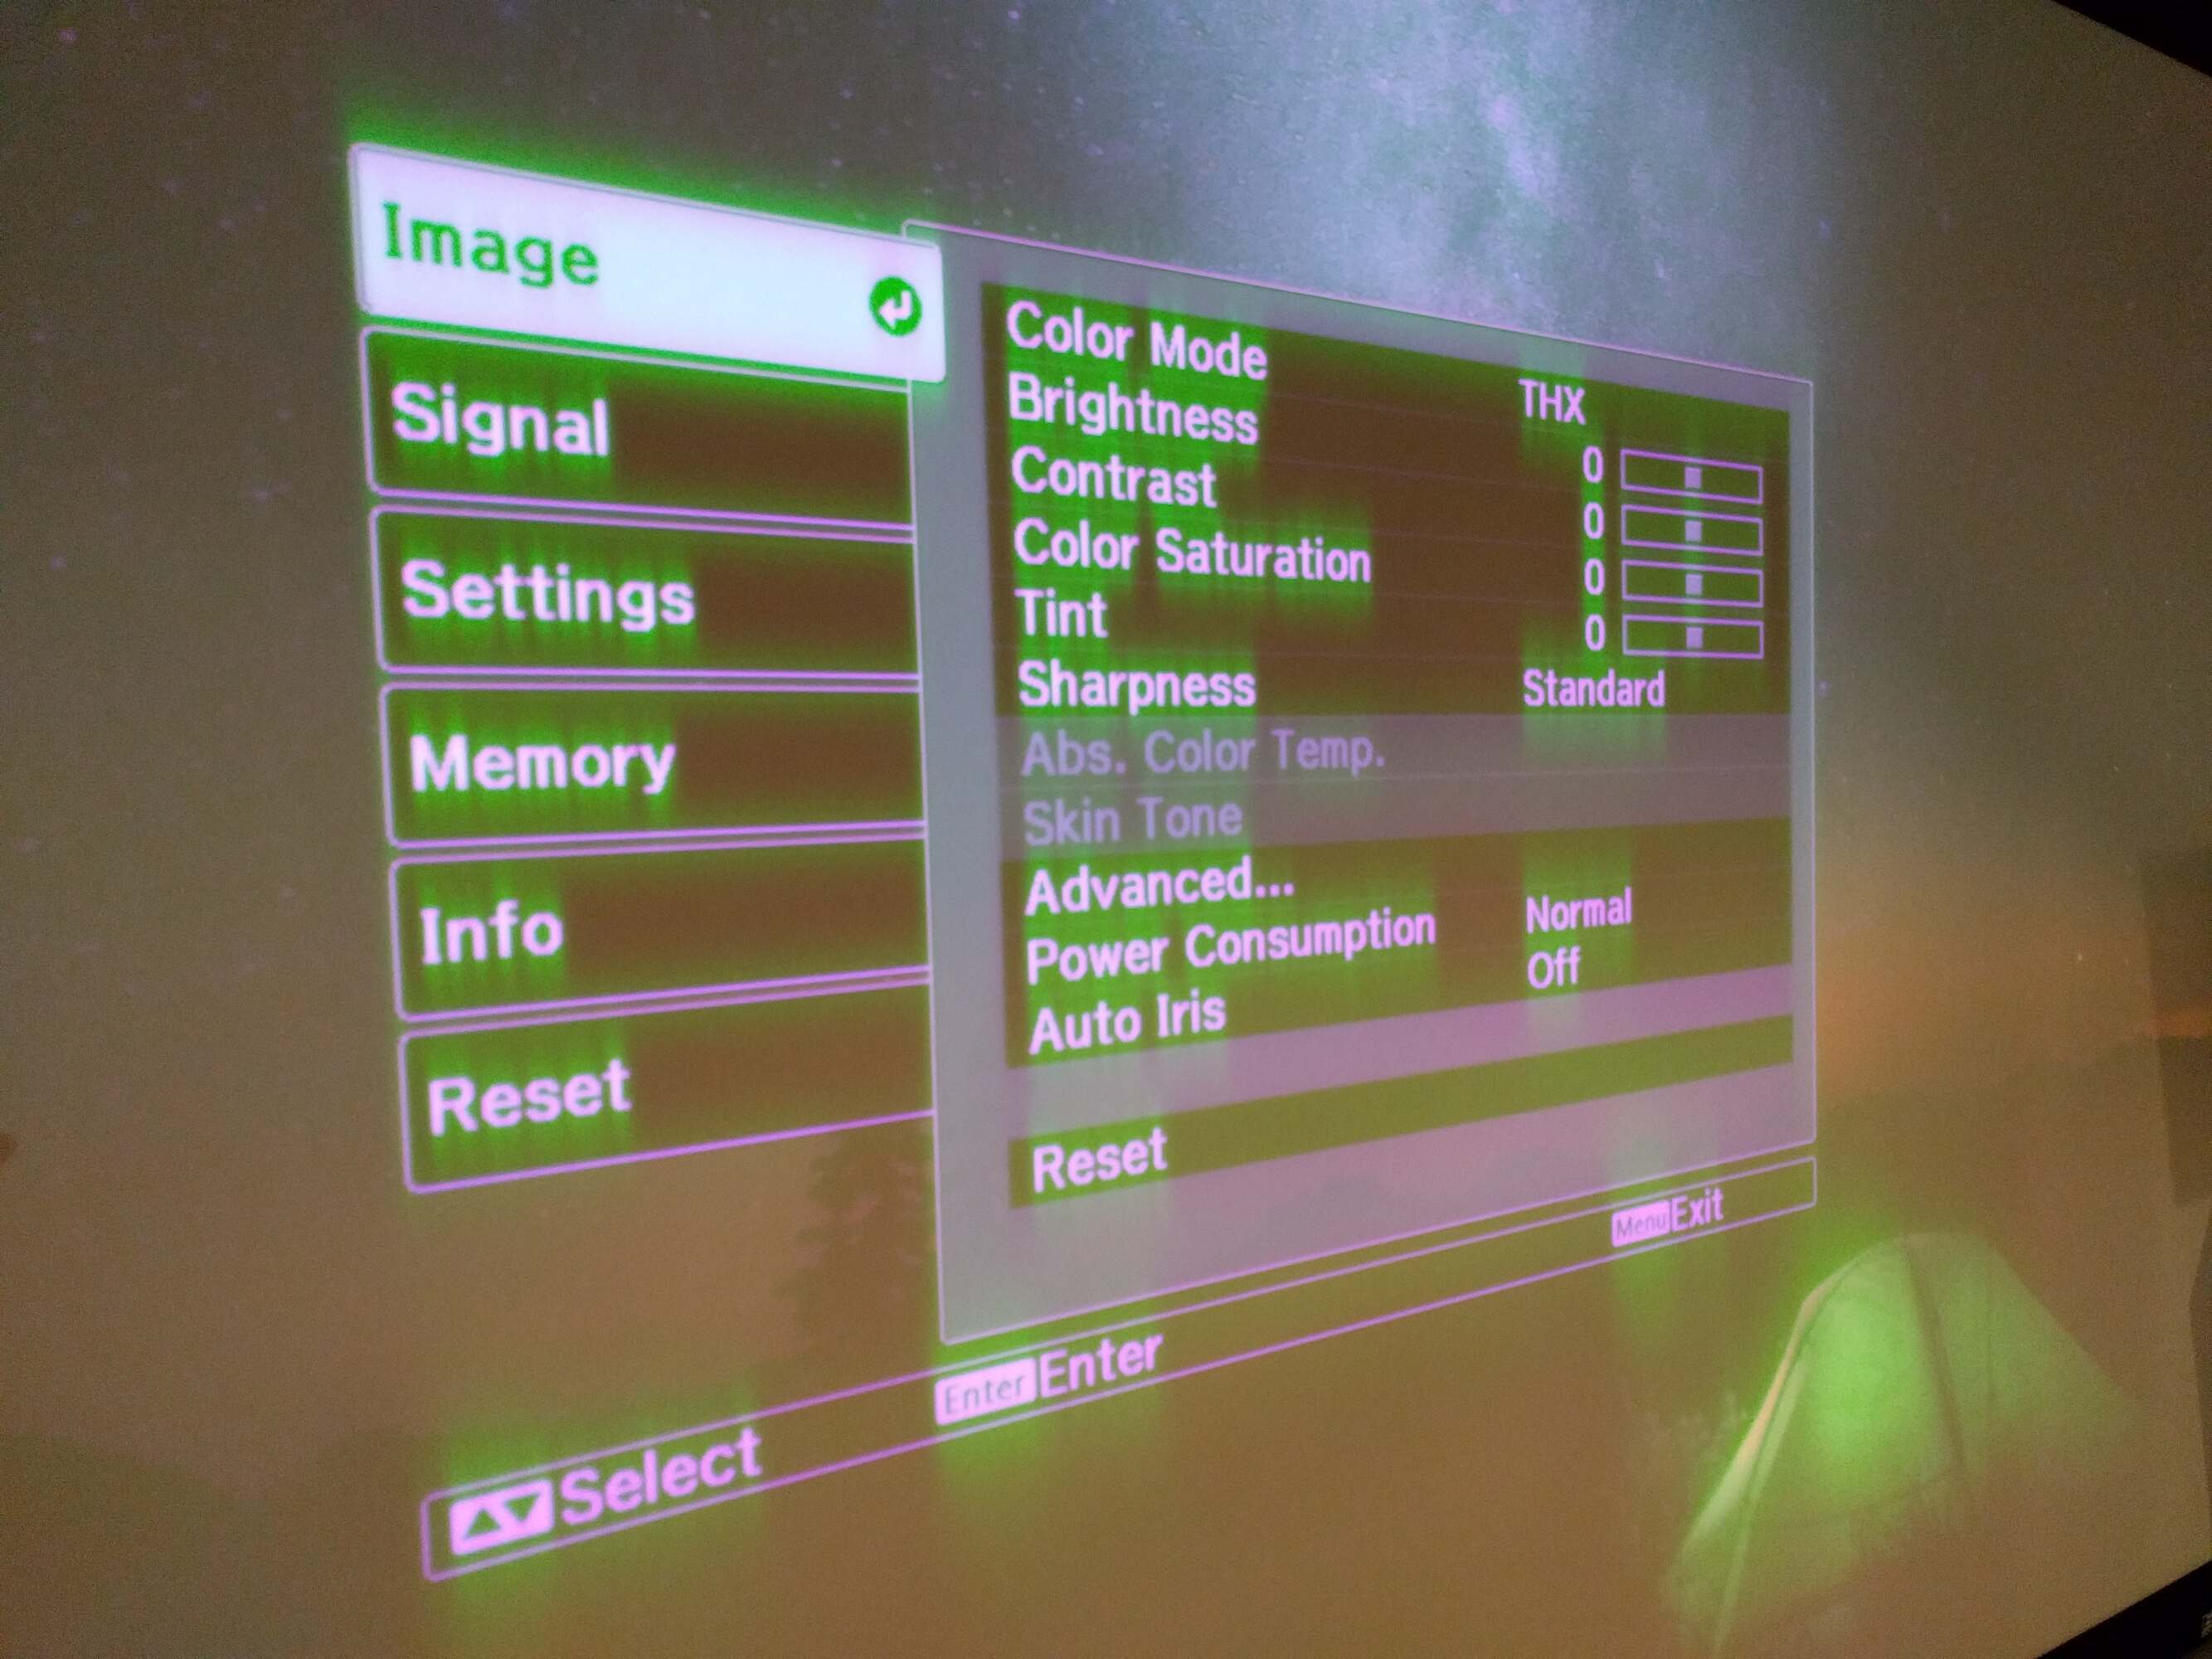
Adjusting the Resolution
Incorrect resolution settings can often cause horizontal lines on a projector. If the resolution of the source material does not match the native resolution supported by the projector, it can lead to scaling issues and distorted images. Follow these steps to adjust the resolution:
- Access the Display Settings: On the device connected to the projector (e.g., computer, laptop, or DVD player), access the display settings. This can typically be done through the operating system or display control panel.
- Check the Native Resolution: Look for the native resolution specification of your projector. This information can usually be found in the projector’s user manual or on the manufacturer’s website. Ensure that the resolution settings on the connected device match the native resolution.
- Try Different Resolutions: If the native resolution setting does not resolve the issue, experiment with different resolutions to find the optimal one for your projector. You may need to adjust the resolution higher or lower to achieve the best image quality without horizontal lines.
- Restart the Projector: After making resolution adjustments, restart the projector to apply the changes. This step is necessary for the projector to recognize and adapt to the new resolution settings.
By adjusting the resolution settings to match the native resolution of your projector, you can often eliminate horizontal lines caused by scaling issues. However, if this does not resolve the problem, proceed to the next troubleshooting steps.
Resetting the Projector
If you’re still experiencing horizontal lines on your projector after adjusting the resolution, resetting the projector settings may help resolve the issue. Resetting the projector will restore it to its default factory settings and can potentially eliminate any software-related problems. Follow these steps to reset the projector:
- Access the Projector Menu: Using the projector remote or control panel, navigate to the menu options.
- Find the Reset Option: Look for the “Reset” or “Factory Reset” option in the menu. The location of this option may vary depending on the projector model.
- Select the Reset Option: Once you’ve located the reset option, select it to initiate the reset process. Confirm if prompted.
- Follow the On-Screen Instructions: The projector may display on-screen instructions for the reset process. Follow the prompts, if any, to complete the reset.
- Allow the Projector to Reset: After initiating the reset, the projector will reboot and restore its default settings. This process may take a few minutes.
- Test the Projector: After the reset process is complete, test the projector by projecting an image. Check if the horizontal lines have disappeared. If they persist, proceed to the next troubleshooting steps.
Resetting the projector can often resolve software-related issues that may be causing the horizontal lines. However, if the problem persists, try the next troubleshooting steps to ensure a comprehensive approach to fixing the issue.
Adjusting the Keystone Correction
Another factor that can cause horizontal lines on a projector is improper keystone correction. Keystone correction is a feature that compensates for the distortion caused by projecting an image onto a surface at an angle. If the keystone correction is not properly adjusted, it can result in the appearance of horizontal lines on the projected image. Follow these steps to adjust the keystone correction:
- Access the Keystone Correction Menu: Using the projector remote or control panel, navigate to the keystone correction menu.
- Choose the Keystone Correction Option: Look for the “Keystone Correction” or “Keystone” option in the menu. Select it to access the keystone correction settings.
- Adjust the Keystone Correction: Depending on your projector model, you may have manual or automatic keystone correction options. If manual, use the arrow keys or navigation buttons to adjust the keystone correction until the horizontal lines disappear.
- Test the Projector: Once you have made the desired keystone correction adjustments, test the projector by projecting an image. Check if the horizontal lines are no longer visible. If they persist, try the next troubleshooting steps.
Properly adjusting the keystone correction can eliminate the distortion that causes horizontal lines on the projected image. However, if the problem persists, there may be other factors contributing to the issue. Let’s explore the next troubleshooting steps to further address the problem.
Cleaning the Projector Lens
Over time, dust, fingerprints, and other debris can accumulate on the projector lens, affecting the image quality and causing horizontal lines. Cleaning the projector lens is a simple yet effective step in troubleshooting this issue. Follow these steps to clean the projector lens:
- Power Off the Projector: Before cleaning the lens, turn off the projector and unplug it from the power source. This step ensures your safety and prevents any accidental damage to the device.
- Allow the Projector to Cool Down: Wait for the projector to cool down before proceeding with the cleaning process. The lens can become hot during operation, and cleaning it while it’s still hot can cause damage.
- Remove Dust and Debris: Use a can of compressed air or a soft brush to gently remove any loose dust or debris from the surface of the lens. Be careful not to apply too much pressure or scratch the lens.
- Clean with Lens Cleaning Solution: Apply a small amount of lens cleaning solution to a clean, lint-free microfiber cloth. Gently wipe the lens in a circular motion to remove any smudges, fingerprints, or stubborn dirt. Avoid using excessive force, as it can damage the lens.
- Dry the Lens: After cleaning, use a dry section of the cloth to gently remove any excess cleaning solution from the lens. Ensure that the lens is completely dry before powering on the projector.
- Test the Projector: Once the lens is clean and dry, power on the projector and project an image to check if the horizontal lines have disappeared. If they persist, proceed to the next troubleshooting steps.
Regularly cleaning the projector lens can improve image quality and prevent horizontal lines caused by smudges or dust. However, if cleaning the lens does not resolve the issue, it’s essential to explore other potential causes and solutions.
Troubleshooting the Signal Source
Horizontal lines on a projector can sometimes be caused by issues with the signal source rather than the projector itself. Problems with the DVD player, laptop, gaming console, or any other device connected to the projector can lead to distorted images. To troubleshoot the signal source, follow these steps:
- Check the Video Cable: Ensure that the video cable connecting the signal source to the projector is securely connected and not damaged. Try using a different cable if necessary, as a faulty cable can cause signal issues and result in horizontal lines on the projected image.
- Switch Signal Sources: Connect a different device to the projector using the same cable and port. If the horizontal lines disappear when using a different device, it indicates that the original signal source is causing the issue.
- Update Device Drivers: If using a computer or laptop as the signal source, make sure that the graphics drivers are up to date. Outdated or incompatible drivers can lead to compatibility issues and visual distortions.
- Try a Different Output Port: If the signal source has multiple output ports, such as HDMI, VGA, or DisplayPort, try connecting to a different output port on the device and see if the horizontal lines persist. This will help determine if a specific port is causing the issue.
- Restart and Reset the Signal Source: Power off the signal source device and unplug it from the power source. Wait a few moments, then plug it back in and power it on. Sometimes, a simple restart can resolve signal-related issues.
By troubleshooting the signal source, you can identify and address any issues that may be causing the horizontal lines on the projector. If the problem still persists, there are a few additional troubleshooting steps to explore.
Updating the Projector Firmware
Outdated firmware can sometimes cause issues with projectors, including horizontal lines on the projected image. Manufacturers regularly release firmware updates to address bugs, improve performance, and enhance compatibility. To update the projector firmware, follow these steps:
- Check for Firmware Updates: Visit the manufacturer’s website or refer to the projector’s user manual to find information on firmware updates. Look for any available updates specific to your projector model.
- Download the Firmware: If a firmware update is available, download it from the manufacturer’s website. Make sure to download the correct firmware version for your specific projector model.
- Connect a USB Drive: Format a USB drive in a compatible file system, such as FAT32. Copy the downloaded firmware file onto the USB drive.
- Power off the Projector: Ensure that the projector is turned off and that there are no ongoing operations before proceeding with the firmware update.
- Connect the USB Drive: Insert the USB drive into the projector’s USB port. Some projectors may have a specific USB port designated for firmware updates, so refer to the user manual for guidance.
- Access the Firmware Update Menu: Turn on the projector and navigate to the firmware update menu. This menu option is usually found in the projector settings or system settings.
- Initiate the Firmware Update: Select the firmware update option and follow the on-screen instructions to initiate the firmware update process. Be patient and avoid interrupting the update.
- Wait for the Update to Complete: The projector will automatically update its firmware from the USB drive. Allow the process to complete without turning off the projector or removing the USB drive.
- Restart the Projector: After the firmware update is complete, restart the projector to apply the updated firmware. Check if the horizontal lines issue has been resolved.
Updating the projector firmware can often resolve software-related issues that may be causing horizontal lines. If the problem persists even after updating the firmware, it’s important to explore other troubleshooting options to identify the underlying cause.
Contacting Manufacturer Support
If you have tried all the previous troubleshooting steps and are still experiencing horizontal lines on your projector, it may be time to reach out to the manufacturer’s support team for assistance. They are equipped with the knowledge and expertise to help you resolve the issue. Follow these steps to contact manufacturer support:
- Refer to the User Manual: Consult the user manual that came with your projector for contact information and support options provided by the manufacturer. They may have specific instructions or preferred methods for reaching out.
- Visit the Manufacturer’s Website: Navigate to the manufacturer’s official website and look for a “Support” or “Contact” section. Here, you should find information on how to reach their support team, whether through phone, email, or live chat.
- Provide Detailed Information: When contacting the manufacturer’s support team, provide them with detailed information about the problem you are experiencing. Share the troubleshooting steps you have already taken to minimize repetition.
- Follow the Support Team’s Guidance: The support team may ask you to perform additional troubleshooting steps or provide specific instructions tailored to your projector model. Follow their guidance and provide any requested information or documentation.
- Warranty Information: If your projector is still under warranty, inform the support team. They can provide guidance on warranty coverage and potential repair or replacement options.
- Document your Communication: Keep a record of your communication with the manufacturer’s support team, including date, time, and any instructions or recommendations provided. This documentation may be useful if further escalation becomes necessary.
Contacting the manufacturer’s support team is often the best course of action when all troubleshooting efforts have been exhausted. They have the expertise to provide you with personalized assistance and guide you towards a resolution for your specific projector model and issue.
Conclusion
Dealing with horizontal lines on a projector can be frustrating, but by following the troubleshooting steps outlined in this article, you can effectively address the issue. From checking the connections and adjusting the resolution to resetting the projector and cleaning the lens, these steps cover a wide range of potential causes and solutions. If the problem persists, troubleshooting the signal source, updating the projector firmware, and contacting manufacturer support can help you explore further options.
Remember to approach the troubleshooting process systematically and document the steps you have taken. This will help you track your progress and provide useful information to manufacturer support if needed. Additionally, it’s important to refer to the user manual and manufacturer’s instructions specific to your projector model for accurate guidance.
By following these troubleshooting steps, you can quickly identify and resolve the issue causing the horizontal lines, restoring your projector to its optimal performance. Enjoy the crisp and uninterrupted projections for your presentations, movie nights, and gaming sessions!