Introduction
Smart TVs have become an integral part of our daily lives, providing us with endless entertainment options right in our living rooms. However, accidents happen, and one common issue that many smart TV owners face is a cracked screen. Whether it’s due to a clumsy mishap or a random act of misfortune, a cracked TV screen can be frustrating and disappointing.
When faced with a cracked smart TV screen, many people assume that their only option is to replace the entire television. However, the good news is that there are potential solutions to fix a cracked screen, depending on the severity of the damage. In this article, we will explore different options for fixing a cracked smart TV screen and help you determine the best course of action.
Before diving into the repair options, it’s important to understand why the screen has cracked in the first place. Sometimes, the cause of the crack is apparent, such as accidental impact or mishandling. Other times, the crack may develop spontaneously due to a manufacturing defect or extreme temperature changes. Assessing the cause of the crack can help you make an informed decision on how to proceed with the repair.
It’s important to note that not all cracked screens can be repaired. Severe damage or multiple cracks may render the TV irreparable, requiring a replacement. However, if the damage is minimal and limited to a single crack, there is a possibility of fixing it. Let’s explore the different repair options available to you.
Why is the screen cracked?
Understanding the reasons behind a cracked smart TV screen can help you prevent similar occurrences in the future and determine the best approach to fix the issue. Here are some common causes of cracked TV screens:
1. Accidental impact: One of the most common reasons for a cracked screen is accidental impact. This can happen when the TV is bumped, knocked over, or if something falls onto it. Even a small amount of force can lead to a crack, especially if the screen is made of glass.
2. Mishandling during transportation: If you recently moved your TV or had it delivered, rough handling during transportation can cause the screen to crack. Proper packaging and care should be taken when moving or shipping a TV to avoid damage.
3. Manufacturing defects: In some cases, the crack may be the result of a manufacturing defect. This can include weak points in the screen’s structure or problems with the bonding materials. If you notice a crack shortly after purchasing the TV, it’s worth checking if the manufacturer offers warranty coverage for such defects.
4. Temperature changes: Extreme temperature changes can put stress on the TV screen and potentially cause it to crack. For example, leaving a smart TV that generates heat close to a cold window or exposing it to direct sunlight for long periods can lead to thermal stress and eventual cracking.
5. Internal pressure or stress: Sometimes, internal pressure or stress can cause the screen to crack. This can happen due to improper installation or if the TV is subject to vibrations or excessive movement. It’s essential to ensure that the TV is securely mounted or placed on a stable surface.
It’s worth noting that the severity of the crack may vary based on the cause. Minor cracks may be more easily repairable, while extensive or multiple fractures may require a complete screen replacement. Assessing the cause of the crack can give you insights into whether it was a result of external factors or internal issues and help you make an informed decision on the best course of action for repairing or replacing the screen.
Assess the damage
Before proceeding with any repair attempts, it’s crucial to assess the extent of the damage to your cracked smart TV screen. This assessment will help you determine the feasibility of repairing the screen and whether it’s worth the effort and cost. Here are some steps to help you assess the damage:
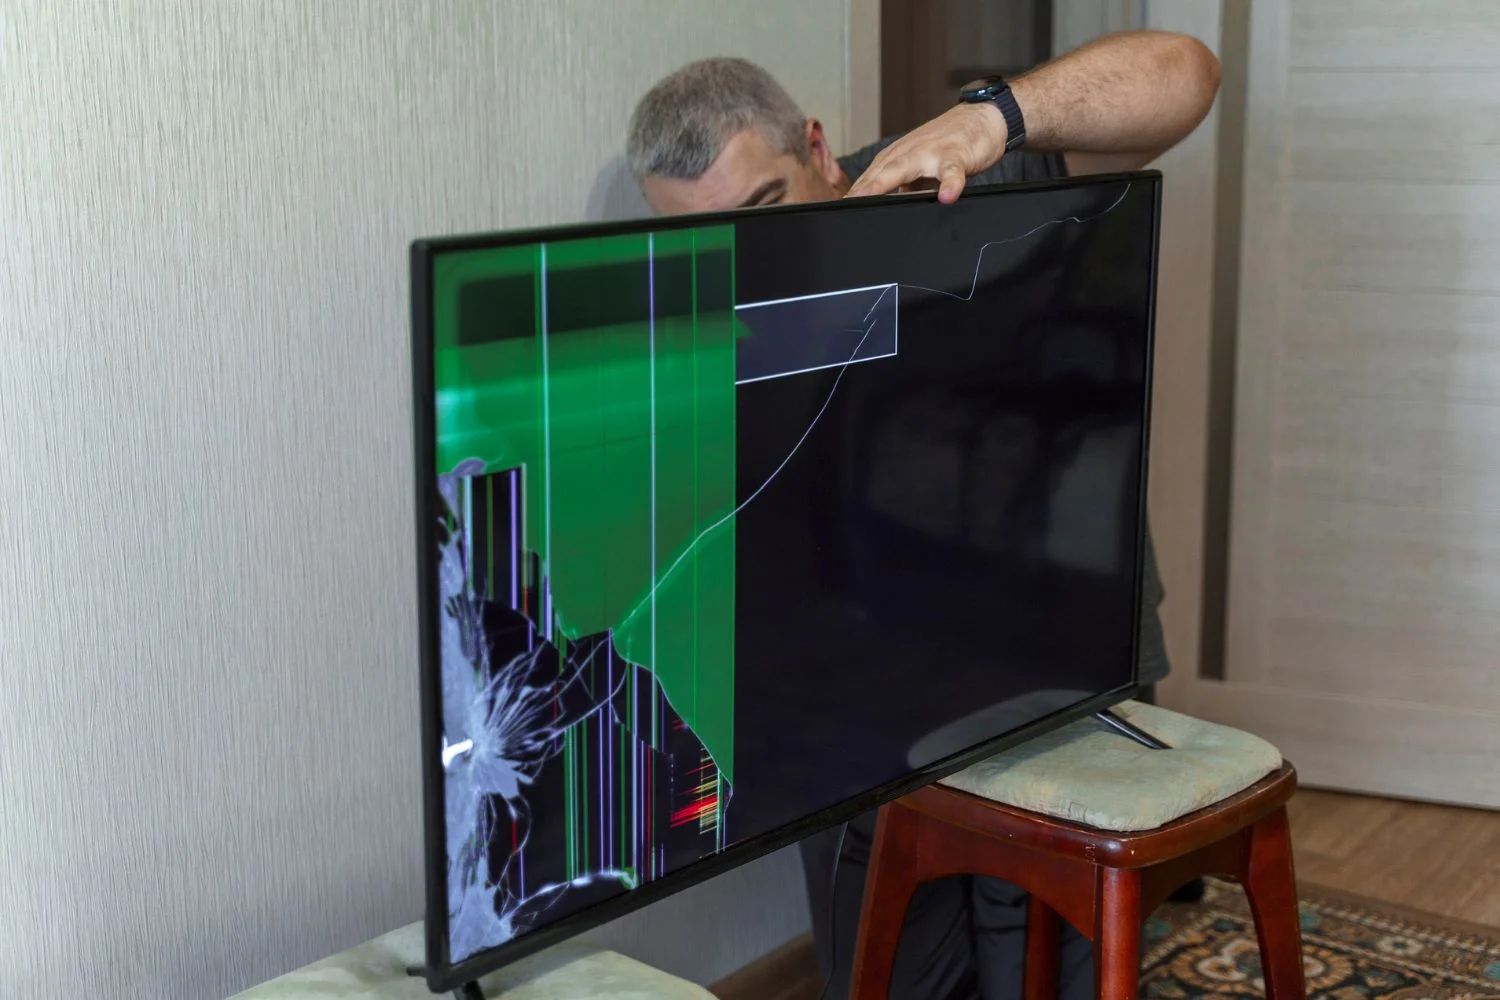
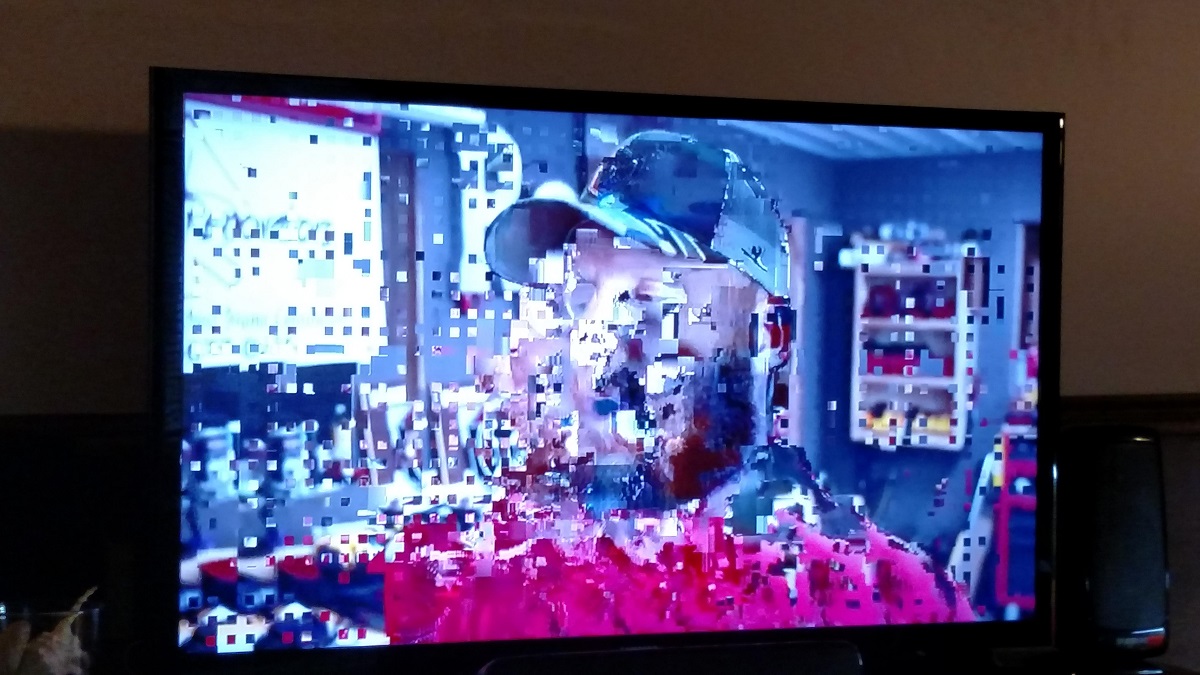
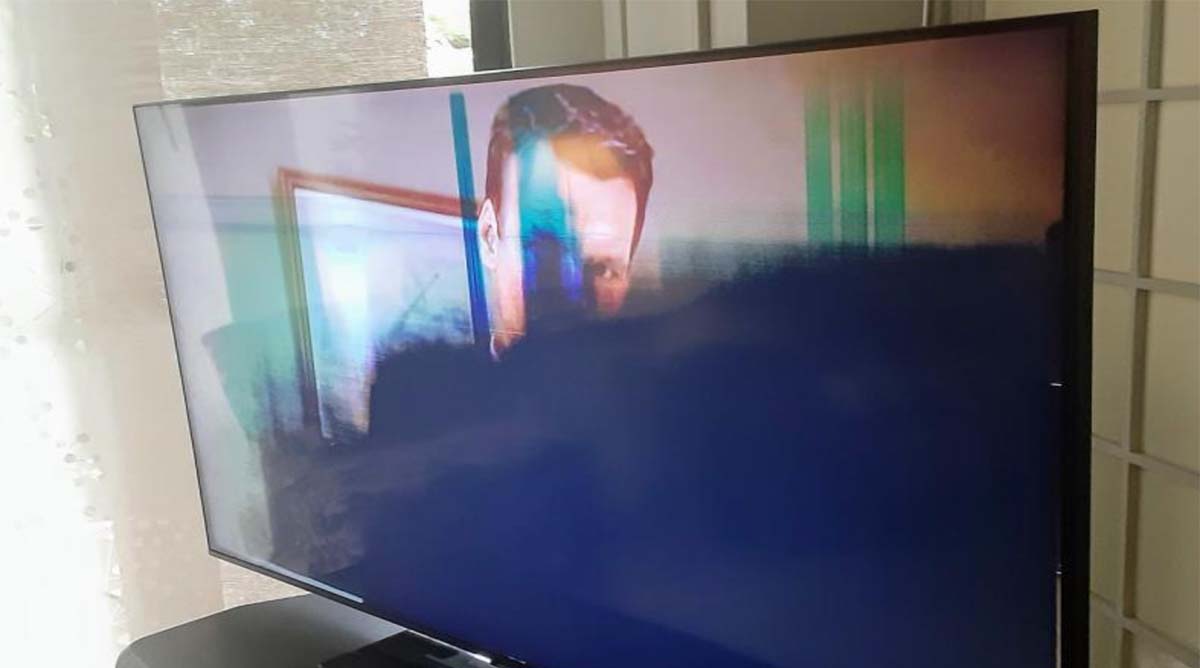
1. Examine the crack: Carefully inspect the crack on your TV screen. Note the size, location, and shape of the crack. Is it a single straight line or a spiderweb-like pattern? Measure the length of the crack to determine its magnitude.
2. Check for further damage: In addition to the visible crack, check if there are any underlying issues or secondary damages. Look for discoloration, distortion, flickering, or dead pixels. These issues may indicate more extensive damage beyond just the visible crack.
3. Test the functionality: Turn on your smart TV and assess if it is fully functional despite the crack. Pay attention to any issues with the display, such as flickering, distorted colors, or areas of the screen that are completely unresponsive. If the TV functions normally other than the cracked screen, it may be worth considering repair options.
4. Consider your budget: Assess your budget and determine how much you’re willing to invest in repairing the cracked TV screen. Consider the cost of repairs compared to the price of a new TV. If the repair costs approach or exceed the price of a new TV, it may be more cost-effective to replace the entire unit.
Based on the severity of the damage and your budget constraints, you can then make an informed decision on the best course of action. It’s important to keep in mind that not all cracked screens can be repaired, especially severe damage or extensive fractures. However, minor cracks or single-line fractures may still be salvageable with the right approach.
Now that we’ve assessed the damage, let’s explore the different repair options available to fix your cracked smart TV screen.
Can the screen be repaired?
When faced with a cracked smart TV screen, one of the first questions that comes to mind is whether it can be repaired. The answer to this question depends on several factors, including the severity of the damage and the specific circumstances. Let’s delve into the possibilities:
1. Severity of the damage: The severity of the crack plays a significant role in determining whether the screen can be repaired. Minor cracks or single-line fractures may be more easily fixable compared to extensive or multiple fractures. If the crack is minimal and does not affect the functionality of the TV, there is a higher chance of successful repair.
2. Type of TV screen: The type of screen your smart TV has can also impact repairability. Most smart TVs today use either LCD or LED screens. LCD screens are made up of layers and can often be repaired by replacing the damaged layer. LED screens, on the other hand, are more complex and may require a complete screen replacement.
3. Warranty coverage: If your smart TV is still under warranty, you may be able to get the screen repaired or replaced by contacting the manufacturer. However, it’s important to note that warranties typically do not cover accidental damage, so it’s best to check the terms and conditions of your warranty.
4. Cost of repair: Consider the cost of repairing the cracked screen compared to the price of purchasing a new TV. If the repair cost is relatively low and within your budget, it may be worth attempting a repair. However, if the repair costs approach or exceed the price of a new TV, replacing the entire unit may be a more practical option.
5. Professional expertise: Repairing a cracked smart TV screen can be a complex task that requires technical knowledge and expertise. If you are not confident in your repair skills, it may be best to seek the assistance of a professional technician who specializes in TV repairs. They will have the necessary tools, experience, and knowledge to evaluate the damage and determine if a repair is possible.
It’s important to note that not all cracked screens can be repaired, and in some cases, the best solution may be to replace the entire TV. Assess the severity of the damage, consider the repair costs, and weigh them against the benefits of repair. In the next sections, we will explore different options for fixing a cracked smart TV screen, including contacting the manufacturer, seeking professional repair services, or attempting DIY repairs.
Option 1: Contact the manufacturer
If your smart TV is still under warranty or if the crack on the screen appears to be a result of a manufacturing defect, contacting the manufacturer is a viable option. Here’s how you can go about it:
1. Check your warranty: Review the terms and conditions of your smart TV’s warranty to see if it covers screen repairs or replacements. Most warranties, however, do not cover accidental damages. If the crack is a result of a manufacturing defect, you may be eligible for a free repair or replacement.
2. Gather necessary information: Before reaching out to the manufacturer, gather important details about your smart TV, such as the model number, serial number, and purchase date. This information will assist the manufacturer in verifying your warranty status and providing appropriate assistance.
3. Contact customer support: Look up the manufacturer’s customer support contact information on their website or in the documentation that came with your smart TV. Call or email their customer support team to initiate a warranty claim and explain the situation, including the crack on your TV screen.
4. Follow their instructions: The manufacturer’s customer support team will guide you through the warranty claim process. They may request additional information, ask for pictures of the cracked screen, or direct you to an authorized service center for assessment. Follow their instructions carefully to ensure a smooth and efficient resolution.
5. Assess the outcome: Once the manufacturer evaluates your warranty claim, they will provide a resolution, which may include repairing the screen, replacing the TV, or offering a refund or discount on a new purchase. Take into consideration the cost of shipping the TV and the duration of the repair process when assessing the outcome of contacting the manufacturer.
By contacting the manufacturer, you can leverage your warranty coverage and explore the possibility of having your cracked smart TV screen repaired or replaced. Keep in mind that the warranty coverage varies, and accidental damages may not be covered. If your warranty claim is unsuccessful or your TV is not under warranty, there are other options to consider, such as seeking professional repair services or attempting DIY repairs, which we will explore in the following sections.
Option 2: Professional repair services
If contacting the manufacturer is not an option or if your smart TV is no longer under warranty, seeking professional repair services can be a viable solution for fixing a cracked screen. Here’s what you need to know about this option:
1. Research reputable repair shops: Look for reputable TV repair shops in your area that specialize in smart TV repairs. Read reviews, check their experience, and ensure that they have expertise in repairing cracked screens. This will help you find a reliable and skilled technician for the job.
2. Get a price estimate: Contact the repair shops and describe the issue, providing them with as much detail about the crack on your smart TV screen as possible. Request a price estimate for the repair, keeping in mind that the cost can vary depending on the severity of the damage, the type of TV screen, and the specific repair techniques required.
3. Consider the cost-benefit analysis: Assess the cost of the repair and compare it to the price of a new TV. If the repair cost is significantly lower than purchasing a new TV and your smart TV has additional features or sentimental value, getting it professionally repaired may be a worthwhile investment.
4. Expert assessment and repair: Take your smart TV to the chosen repair shop for an expert assessment. The technician will thoroughly examine the cracked screen, evaluate the damage, and provide you with an accurate diagnosis. If they determine that the screen is repairable, they will proceed with the necessary repairs using specialized tools and techniques.
5. Warranty on repairs: Inquire about the warranty on repair services provided by the technicians. A reputable repair shop should offer a warranty on the repaired screen, ensuring that you have recourse if any issues arise shortly after the repair.
Professional repair services can be a reliable option for fixing a cracked smart TV screen, particularly if the screen is repairable and the cost is reasonable. It is essential, however, to choose a reputable repair shop that has experience with smart TV repairs and offers warranties on their services. In the next section, we will explore the possibility of DIY repairs for those who are comfortable taking on the task themselves.
Option 3: DIY repairs
If you’re a hands-on person and feel confident in your technical abilities, attempting a DIY repair for your cracked smart TV screen may be a cost-effective option. However, it’s important to note that DIY repairs come with risks, and it’s essential to proceed with caution and proper research. Here are the basic steps involved in DIY repairs:
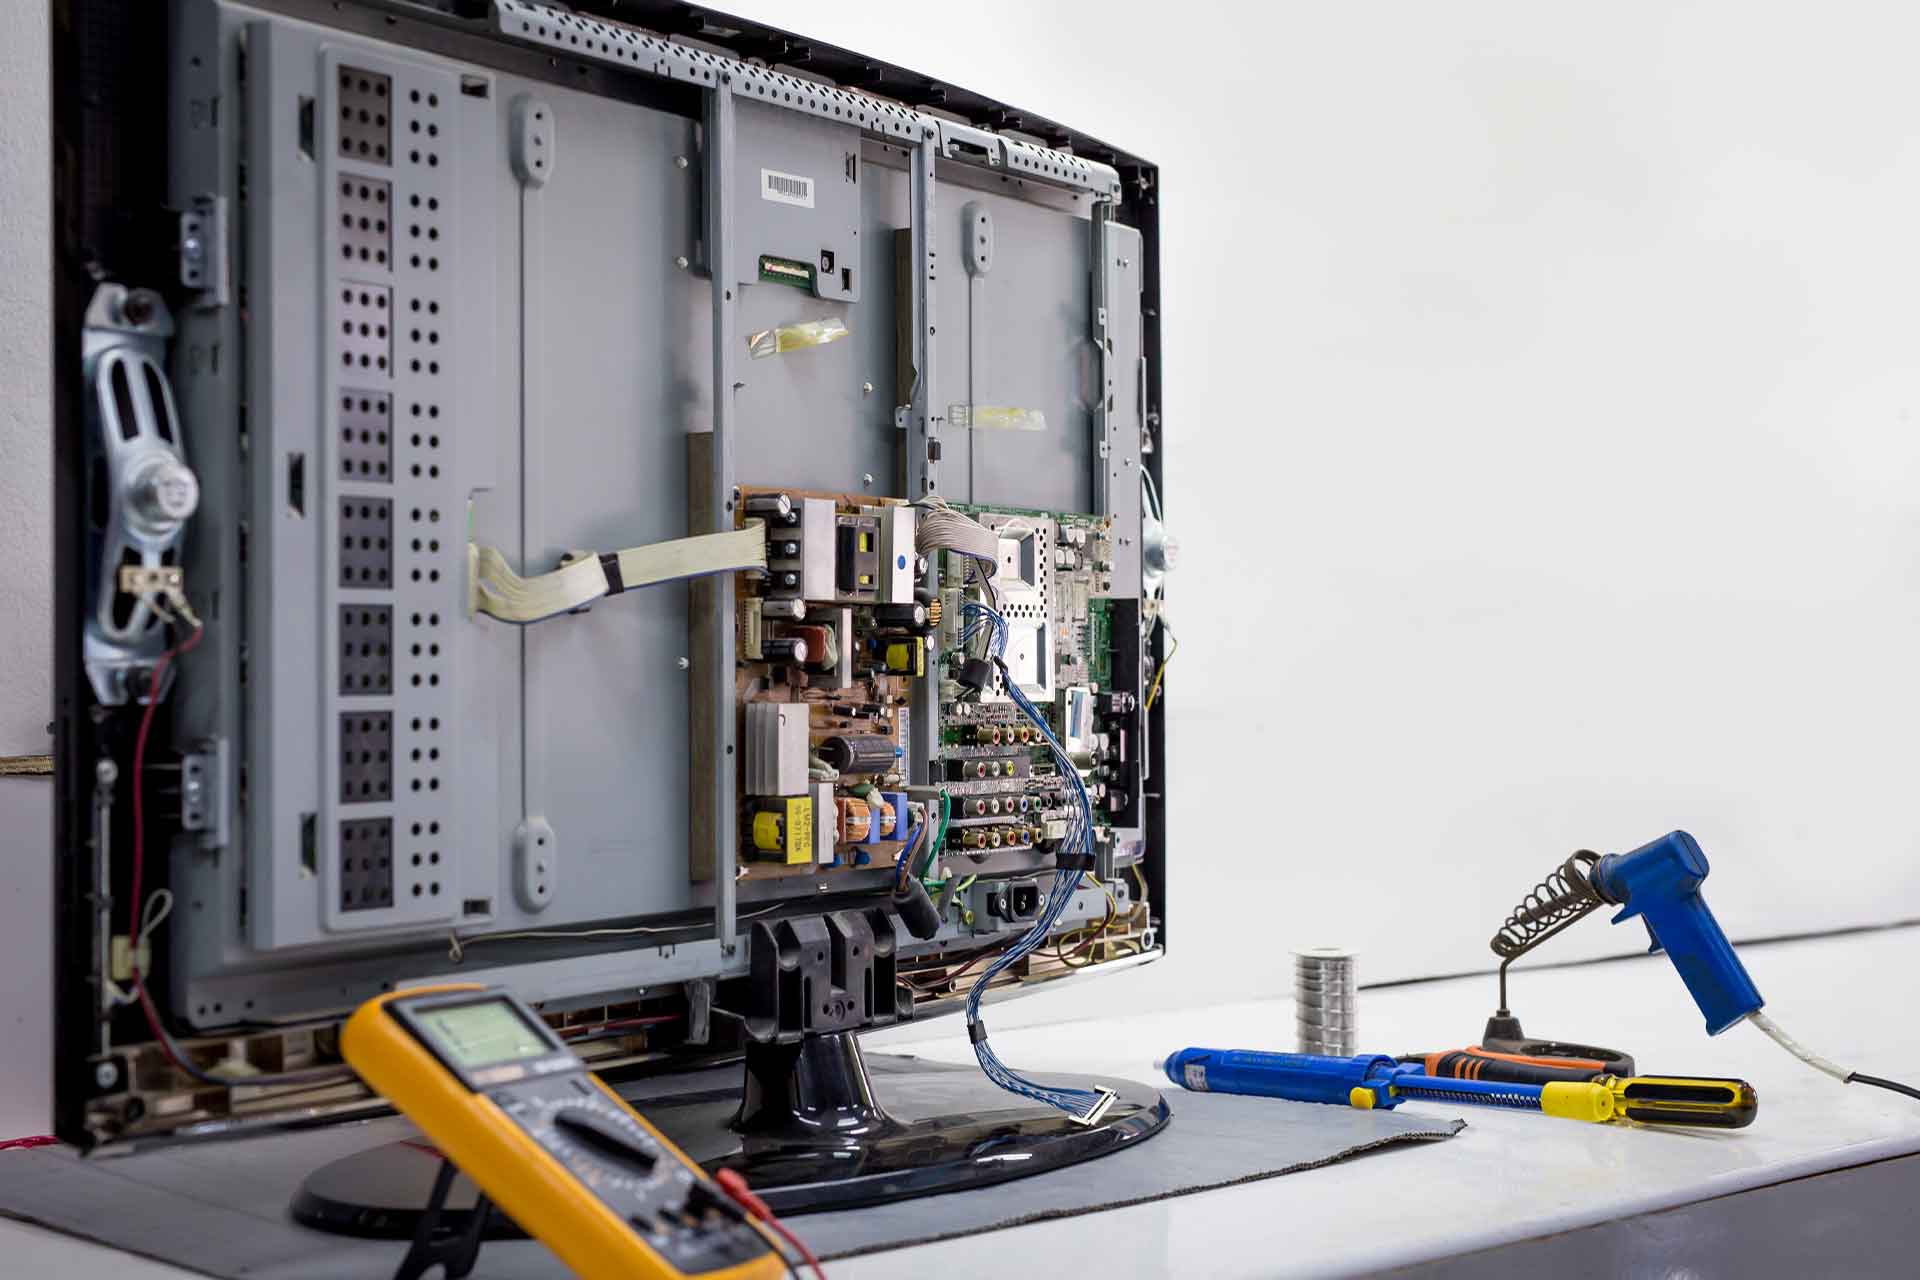
1. Gather your tools: Before you begin the DIY repair, gather the necessary tools and materials. This typically includes a screwdriver set, adhesive suitable for your type of TV screen, cleaning supplies, and protective gloves.
2. Disassemble the TV: Carefully disassemble the TV following the manufacturer’s instructions or online tutorials specific to your TV model. Ensure that you unplug the TV and work on a clean, static-free surface to avoid damaging sensitive components.
3. Assess the crack: Take a close look at the crack on your smart TV screen. Determine whether the damage is primarily on the surface or if it extends deeper into the layers of the screen. This assessment will help you determine the appropriate repair method.
4. Apply adhesive: If the crack is minor and only on the surface of the screen, you can attempt to repair it by carefully applying an adhesive that is compatible with your TV screen type. Follow the adhesive manufacturer’s instructions and take necessary precautions to avoid any further damage during the application process.
5. Reassemble the TV: Once the adhesive has dried and the crack has been repaired, reassemble the TV in the reverse order of disassembly. Take your time with this step to ensure that all components are properly aligned and secured.
It’s important to note that DIY repairs may not always be successful, especially for more severe or complex screen damages. Additionally, DIY repairs can void any existing warranties or support from the manufacturer. Therefore, it’s essential to weigh the risks and benefits before attempting a DIY repair.
If you are unsure about your DIY repair capabilities or if the crack on your smart TV screen is extensive, it’s best to seek professional assistance or explore other options, such as contacting the manufacturer or professional repair services. Keep in mind that the safety of both yourself and your TV should be a top priority when considering any repair attempts.
Regardless of the repair option you choose, it’s crucial to carefully consider the cost, the feasibility of the repair, and the potential risks involved. By doing so, you can make an informed decision that suits your budget, skills, and the overall condition of your smart TV.
Step 1: Gather your tools
Before embarking on a DIY repair for your cracked smart TV screen, it’s important to gather the necessary tools and equipment. Having the right tools will make the repair process smoother and more efficient. Here are some essential tools you will likely need:
- Screwdriver set: A set of screwdrivers with various sizes and types is necessary to disassemble the TV. Different TV models may have different types of screws, so having a versatile screwdriver set is essential.
- Adhesive: Depending on the type of TV screen and the severity of the crack, you will need an appropriate adhesive to repair the crack. Ensure that you choose an adhesive that is specifically designed for your TV screen type.
- Cleaning supplies: Before making any repairs, it’s important to clean the screen to ensure a smooth and effective repair. Microfiber cloths, cleaning solution, and compressed air can be used to remove dust, fingerprints, and other debris from the screen.
- Protective gloves: Working with delicate electronics and adhesives may require the use of protective gloves. These gloves can help prevent damage to the screen and protect your hands from adhesive or other potentially harmful substances.
Additional tools may be required depending on the specific repair process and the TV model. It’s always a good idea to consult online resources, user manuals, and repair guides specific to your TV model to ensure that you have all the necessary tools.
When gathering your tools, it’s crucial to prioritize safety. Ensure that the TV is unplugged and disconnected from any power source before starting any repairs. Take necessary precautions to prevent static electricity discharge during the repair process.
It’s also worth mentioning that using the correct tools and following proper repair techniques is vital to avoid causing further damage to the TV. If you are not confident in your technical skills or do not have experience working with electronics, it may be best to seek professional assistance or consider other repair options.
Once you have gathered all the necessary tools and equipment, you can move on to the next step in the DIY repair process, which is disassembling the TV. This step will allow you to access the cracked screen and assess the damage more closely.
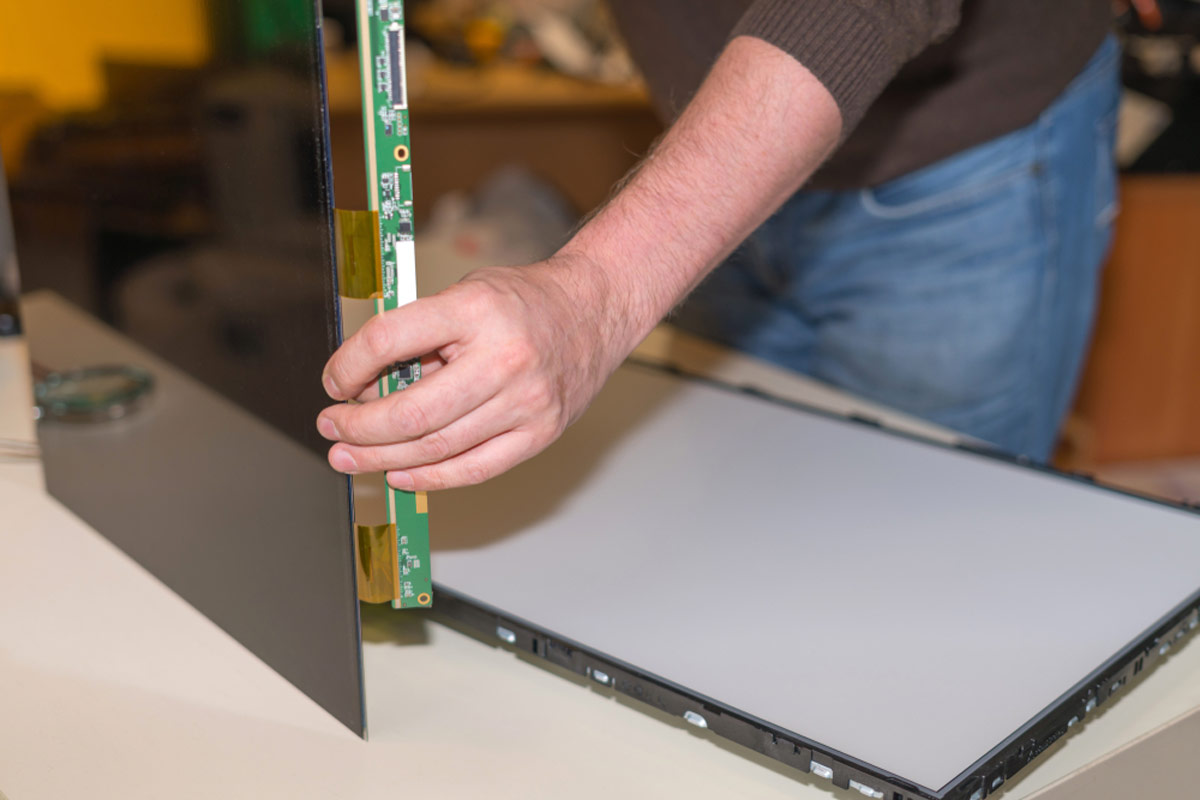
Step 2: Disassemble the TV
Now that you have gathered the necessary tools, it’s time to begin the process of disassembling your smart TV. Disassembling the TV will allow you to access the cracked screen and proceed with the repair. Here are some key steps to follow when disassembling the TV:
- Unplug the TV: Before starting any disassembly, ensure that the TV is completely powered off and unplugged from the power source. This will help prevent any electrical hazards during the repair process.
- Prepare a clean workspace: Find a clean and well-lit workspace where you can comfortably work on disassembling the TV. Use a soft cloth or an anti-static mat to protect the screen and prevent any scratches or damage.
- Refer to the user manual or online resources: Consult the user manual that came with your TV or search for online resources specific to your TV model. These resources will provide step-by-step instructions on how to disassemble your particular TV model.
- Remove the back cover: Depending on the TV model, you may need to remove the back cover to access the internal components. This is usually done by unscrewing the screws that hold the back cover in place. Use the appropriate screwdriver from your set to carefully remove the screws.
- Disconnect cables and components: Inside the TV, you will find various cables and components connected to the main board. Disconnect these cables and components carefully, ensuring that you remember their original positions for reassembly later. Take pictures or make notes if necessary.
- Remove the bezel or frame: Once the back cover is removed and the cables are disconnected, you can proceed to remove the bezel or frame surrounding the screen. This is typically held in place by screws or clips. Carefully remove them using the appropriate tools.
As you disassemble the TV, it’s important to work slowly and carefully, taking note of the location and orientation of each component and cable. It may be helpful to keep screws and small parts organized in separate containers or labeled bags to avoid confusion during reassembly.
If you encounter any difficulties during the disassembly process or feel uncertain about proceeding further, it’s best to consult with a professional technician or refer to additional resources specific to your TV model. Improper disassembly can cause damage to the TV or void existing warranties.
Once the TV is successfully disassembled, you can proceed to the next step, which involves assessing the crack on the screen and determining the best approach for repair.
Step 3: Assess the crack
After you have disassembled your smart TV, the next step in the DIY repair process is to assess the crack on the screen. This assessment will help you determine the severity of the damage and the best approach for repair. Here’s how to assess the crack:
- Inspect the crack: Carefully examine the crack on the screen. Note its size, shape, and location. Is it a single straight line or a complex, spiderweb-like pattern? Is the crack only on the outer glass or also affecting the underlying layers? Take note of any other visible damages, such as discoloration or distortion.
- Measure the crack: Use a ruler or measuring tape to measure the length of the crack. This will give you an idea of the size and extent of the damage.
- Check for additional damages: While assessing the crack, also look for any additional damages to the screen or internal components. Look for dead pixels, flickering areas, or any abnormalities in the display that may have been caused by the crack.
- Determine repair feasibility: Based on the severity and extent of the crack, determine whether it is feasible to repair it yourself. Minor cracks that are limited to the outer glass layer may be more easily fixable, while deeper or more extensive damages may require professional intervention or even screen replacement.
It’s important to note that not all cracks can be repaired successfully, especially if they are extensively damaged or affect the functionality of the screen. Assessing the crack will help you make an informed decision on whether to proceed with the repair or explore alternative options such as seeking professional repair services or contacting the manufacturer.
If you are unsure about the extent of the damage or feel uncomfortable making the repair yourself, it’s always wise to seek the advice of a professional technician who can assess the crack more accurately and provide guidance on the best course of action.
Once you have assessed the crack on your smart TV screen, you can move on to the next step, which involves determining the appropriate repair method and procuring the necessary materials.
Step 4: Apply adhesive
After assessing the crack on your smart TV screen, if you have determined that it is feasible to repair it yourself, the next step in the DIY repair process is to apply adhesive to the crack. Applying adhesive can help hold the cracked parts together and restore the integrity of the screen. Follow these steps to apply adhesive carefully:
- Choose the right adhesive: Select an adhesive specifically designed for your TV screen type. Look for adhesives that are recommended for repairing glass or LCD screens. Consider consulting with a professional or referring to manufacturer instructions if you are unsure about the adhesive to use.
- Clean the cracked area: Before applying adhesive, clean the cracked area of the screen. Use a microfiber cloth and a suitable cleaning solution to carefully remove any dust, fingerprints, or debris on and around the crack. Ensure that the area is dry before proceeding.
- Apply a thin layer of adhesive: Apply a thin layer of adhesive along the crack using a small brush or applicator. Be precise and make sure the adhesive is applied evenly along the entire length of the crack. Avoid applying excess adhesive as it may seep into the screen and cause further damage.
- Close the gap: Gently press the cracked parts of the screen together to close the gap. Apply light pressure and hold the parts in place for the recommended time specified by the adhesive manufacturer. This will allow the adhesive to bond and hold the cracked parts together.
- Wipe off excess adhesive: After the adhesive has dried, wipe off any excess adhesive surrounding the crack using a clean cloth or cotton swab. Be careful not to disturb the repaired area while removing the excess adhesive.
It’s important to note that the success of the repair largely depends on the severity of the crack and the type of adhesive used. While applying adhesive can help stabilize the cracked parts, it may not completely eliminate the visibility of the crack. Additionally, deeper or more extensive damages may require professional intervention or screen replacement.
If you are unsure about your adhesive application skills or if the crack is severe, it’s recommended to seek the assistance of a professional technician who can assess the situation and advise on the best course of action.
Once the adhesive has dried and excess adhesive has been removed, you can proceed to the final step of the repair process, which involves reassembling your smart TV and testing its functionality.
Step 5: Reassemble the TV
After successfully repairing the cracked screen of your smart TV, it’s time to reassemble the TV and restore it to its original condition. Follow these steps to reassemble your TV:
- Refer to the user manual or documentation: Check the user manual or any documentation specific to your TV model for reassembly instructions. This will ensure that you follow the manufacturer’s recommended steps and avoid any potential issues.
- Start with the bezel or frame: Begin by attaching the bezel or frame back onto the screen. Align it properly and use the screws or clips provided to secure it in place. Take caution not to overtighten the screws, as it may damage the frame or screen.
- Reconnect cables and components: Reconnect any cables or components that were disconnected during the disassembly process. Refer to the pictures or notes you took to ensure that everything is correctly connected. Pay attention to the orientation of cables and the proper alignment of connectors.
- Secure the back cover: Carefully put the back cover back onto the TV and use the appropriate screws to secure it. Ensure that all screws are tightened properly but not excessively, as overtightening may damage the TV casing.
- Double-check connections and alignment: Before powering on the TV, double-check all connections and ensure that everything is properly aligned. This will prevent any potential issues such as loose cables or misaligned components that may affect the functionality of the TV.
Throughout the reassembly process, handle the TV with care to avoid putting excessive pressure on the screen or any delicate parts. Take your time and be patient, as rushing the reassembly could lead to mistakes or further damage to the TV.
Once the TV is fully reassembled, it’s time to test its functionality. Plug the power cord back in and turn on the TV. Check if the screen displays properly, and verify that all functions, including sound and input sources, are working correctly.
If you notice any issues or abnormalities in the display or functionality of the TV, double-check the connections and ensure that everything is properly assembled. If the issues persist, it may be necessary to seek professional assistance or evaluate alternative solutions.
By successfully reassembling your smart TV, you have completed the DIY repair process. Take pride in your accomplishment and enjoy your restored TV.
Conclusion
Dealing with a cracked smart TV screen can be a frustrating experience, but thankfully, there are options available to address the issue. Whether you choose to contact the manufacturer, seek professional repair services, or attempt a DIY repair, the decision ultimately depends on the severity of the damage, your technical skills, and your budget.
If your TV is still under warranty, reaching out to the manufacturer is a logical first step. They can assess the situation and determine if the repair falls under warranty coverage. However, if your warranty has expired or accidental damage is not covered, professional repair services may be a suitable alternative. Skilled technicians can evaluate the damage and perform the necessary repairs or recommend screen replacement if required.
For those who are confident in their technical abilities, attempting a DIY repair can be a cost-effective solution. By gathering the necessary tools, carefully disassembling the TV, assessing the crack, applying adhesive, and reassembling the TV, it is possible to restore the functionality of the screen. However, it’s important to note that DIY repairs carry risks, and it’s crucial to proceed with caution and research extensively before undertaking such repairs.
In the end, you must weigh the cost of repairing the cracked smart TV screen against the price of a new TV. Consider factors such as the extent of the damage, the feasibility of repair, and the importance of additional features or sentimental value of your existing TV. If the cost of repair approaches or exceeds the price of a new TV, it may be more practical to consider a replacement.
Remember to prioritize safety throughout the repair process, unplugging the TV and following proper electrical precautions. If you are unsure or uncomfortable with any aspect of the repair, it’s always wise to seek professional assistance to avoid further damage to your TV.
By being informed about the available options and making an educated decision based on your circumstances, you can take the necessary steps to address the issue of a cracked smart TV screen. Whether you choose to contact the manufacturer, opt for professional repair services, or embark on a DIY repair, restoring your TV to its former glory is within reach.