Introduction
Drone mapping has emerged as an innovative and highly efficient method for capturing detailed aerial data. With the advancements in technology, drones equipped with high-resolution cameras and GPS capabilities have revolutionized the field of mapping and surveying. This powerful tool allows professionals in various industries to obtain accurate and up-to-date spatial information for their projects.
Drone mapping involves the use of unmanned aerial vehicles (UAVs) to capture aerial imagery, which is then processed through photogrammetry software to create highly detailed maps, 3D models, and orthomosaics. These maps can be used for a wide range of applications, including land surveying, construction planning, environmental mapping, agriculture, and more.
The benefits of drone mapping are plentiful. Firstly, it provides a cost-effective and time-efficient alternative to traditional methods of mapping. Drones can cover large areas in a short amount of time, eliminating the need for ground-based surveying methods that are time-consuming and labor-intensive.
Secondly, drone mapping allows for the collection of highly accurate and detailed data. With the ability to capture high-resolution images from various angles and altitudes, drones can provide a level of detail that was previously unattainable. This data can be used to create precise maps, measure distances and surfaces, and analyze terrain.
Furthermore, drone mapping offers improved safety for mapping professionals. By replacing the need for humans to physically traverse difficult or hazardous terrains, such as steep slopes or unstable structures, drones greatly reduce the risk of accidents and injuries.
In addition to its practical benefits, drone mapping also opens up new possibilities for innovation and creativity. The ability to capture aerial imagery from unique perspectives allows for out-of-the-box thinking in various industries. For example, in the field of architecture, drone mapping can be used to create immersive 3D models of buildings, aiding in visualizing designs and identifying potential construction issues.
To engage in drone mapping, you will need specific equipment and a solid understanding of the various steps involved in the process. In the following sections, we will explore the necessary equipment, pre-flight planning, image capturing techniques, post-processing methods, and common challenges faced in drone mapping. By the end of this guide, you will have a comprehensive understanding of how to effectively conduct drone mapping projects and leverage this invaluable technology in your professional endeavors.
What is Drone Mapping?
Drone mapping, also known as aerial mapping or UAV mapping, is the process of creating detailed maps, 3D models, and orthomosaics using unmanned aerial vehicles (UAVs) equipped with high-resolution cameras and GPS technology. It involves capturing aerial imagery from various altitudes and angles, processing the data through photogrammetry software, and generating accurate and precise maps that can be used for a wide range of applications.
Unlike traditional mapping methods that rely on ground-based surveying techniques, drone mapping offers several advantages. Firstly, drones can cover vast areas in a significantly shorter amount of time, enabling professionals to collect data and create maps more efficiently. This efficiency is particularly beneficial for large-scale projects such as land surveying, infrastructure planning, or environmental mapping.
One of the key benefits of drone mapping is its ability to capture highly detailed and accurate spatial data. Drones equipped with high-resolution cameras can capture images with pixel-level detail, providing a level of precision that was previously unattainable with traditional mapping methods. By capturing multiple overlapping images of an area, photogrammetry software can generate accurate 3D models and orthomosaics, which are essentially stitched together images that eliminate distortions caused by perspective and terrain.
The use of GPS technology in drone mapping also contributes to the accuracy of the generated maps. GPS allows for precise geolocation of each image, which can be used to accurately align and stitch the images together. This geolocation data also enables professionals to accurately measure distances, areas, and volumes, making it an invaluable tool for numerous industries.
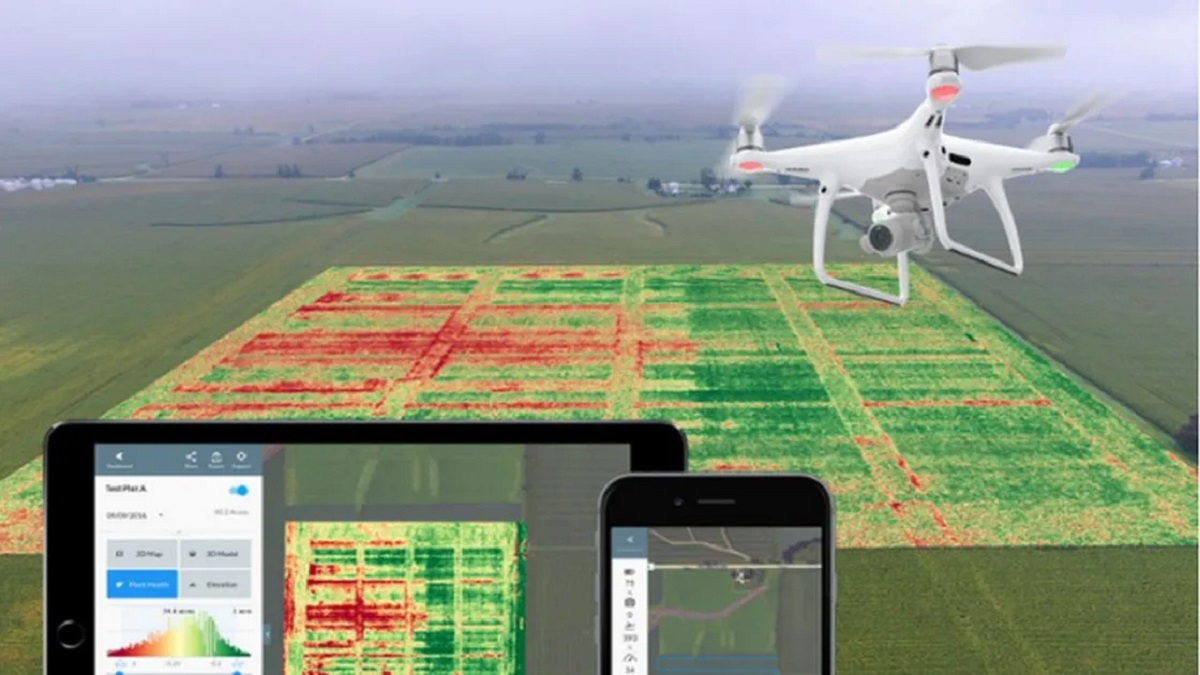
Drone mapping has a wide range of applications across various industries. In agriculture, for example, drones can be used to monitor crop health, identify areas of stress or disease, and optimize irrigation and fertilization efforts. In construction, drones can provide up-to-date site mapping, assist in monitoring progress, and identify potential design or construction issues. In environmental management, drones can aid in conducting land surveys, assessing vegetation health, and mapping natural resources.
Overall, drone mapping offers professionals a powerful and efficient tool for capturing accurate and detailed spatial data. By harnessing the capabilities of UAVs and advanced software, drone mapping has transformed the field of mapping and surveying, providing valuable insights for a wide range of industries. In the following sections, we will delve deeper into the process of drone mapping, discussing the necessary equipment, pre-flight planning, image capturing techniques, post-processing methods, and common challenges faced in the field.
Benefits of Drone Mapping
Drone mapping has numerous benefits that make it a valuable tool in various industries. As technology continues to advance, the advantages of using drones for mapping and surveying become increasingly evident. Here are some of the key benefits of drone mapping:
1. Cost and Time Efficiency: One of the primary benefits of drone mapping is its cost-effectiveness and time efficiency. Drones can cover large areas in a fraction of the time it takes for traditional mapping methods. This means significant cost savings for projects that require extensive data collection and mapping.
2. High-Quality and Detailed Data: Drones equipped with high-resolution cameras can capture aerial imagery with pixel-level detail. This level of detail allows for accurate measurements, 3D modeling, and orthomosaic creation. The data collected through drone mapping is highly accurate and detailed, providing professionals with valuable insights for better decision-making.
3. Safety and Risk Mitigation: Using drones for mapping eliminates the need for humans to physically traverse hazardous terrains or work at heights. This reduces the risk of accidents and injuries, making drone mapping a safer option. Drones can access hard-to-reach areas and capture data from challenging locations, minimizing the need for dangerous on-site activities.
4. Flexibility and Versatility: Drones provide the flexibility to adapt to various mapping and surveying needs. They can capture aerial imagery from different altitudes, angles, and perspectives, allowing for a comprehensive view of the area being mapped. Drones can also be equipped with various sensors, such as thermal cameras or multispectral sensors, to capture specialized data for specific applications.
5. Real-Time Monitoring and Updates: Drone mapping allows for real-time monitoring and updates of projects. Professionals can quickly assess the progress of a construction site, track changes in vegetation health, or monitor the development of an area. Real-time data enables efficient decision-making and timely interventions when necessary.
6. Environmental Impact: Drone mapping is environmentally friendly compared to traditional mapping methods. Drones are powered by electricity, reducing the carbon footprint associated with aerial mapping. They also have a smaller physical footprint and do not require the use of heavy machinery or ground vehicles, minimizing disturbance to the environment.
7. Accessibility and Repeatability: Drones can access areas that are otherwise difficult to reach, such as remote or inaccessible locations. This accessibility allows for mapping projects in diverse environments, including rugged terrains, forests, or bodies of water. Additionally, drone mapping can be repeated at different time intervals to monitor changes over time or compare data collected during different seasons.
These benefits make drone mapping a valuable tool for professionals in industries such as construction, agriculture, environmental management, infrastructure planning, and more. By harnessing the power of drones and advanced mapping software, professionals can achieve accurate data, reduce costs and risks, and improve overall project outcomes.
Equipment Needed for Drone Mapping
Drone mapping requires specific equipment to capture high-quality aerial imagery and collect accurate data. Here are the essential components you will need to conduct successful drone mapping projects:
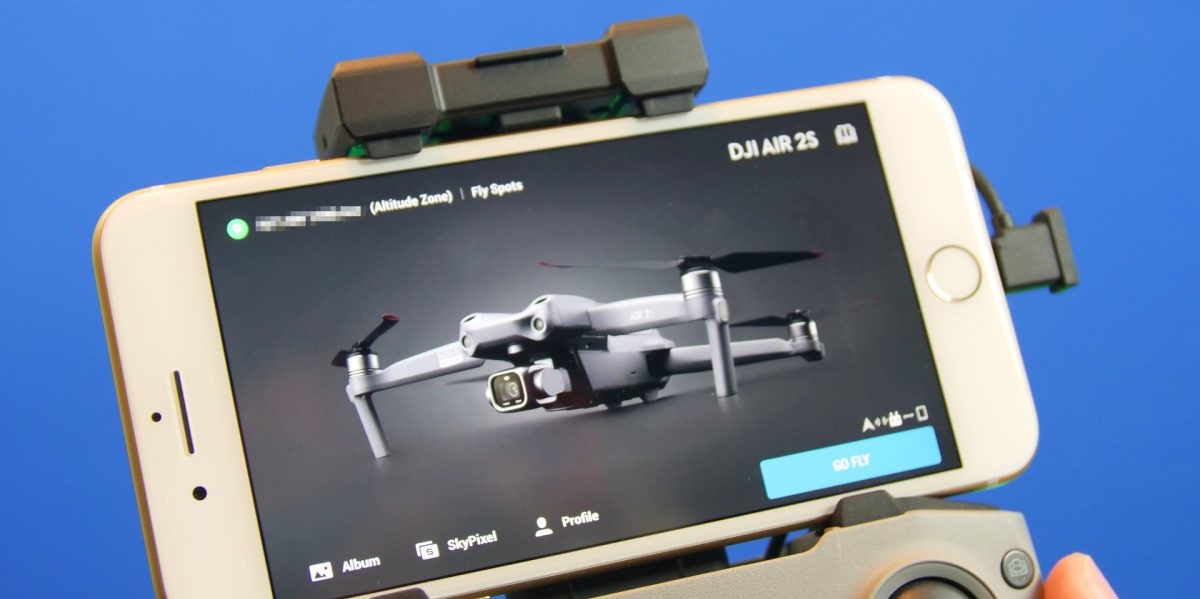
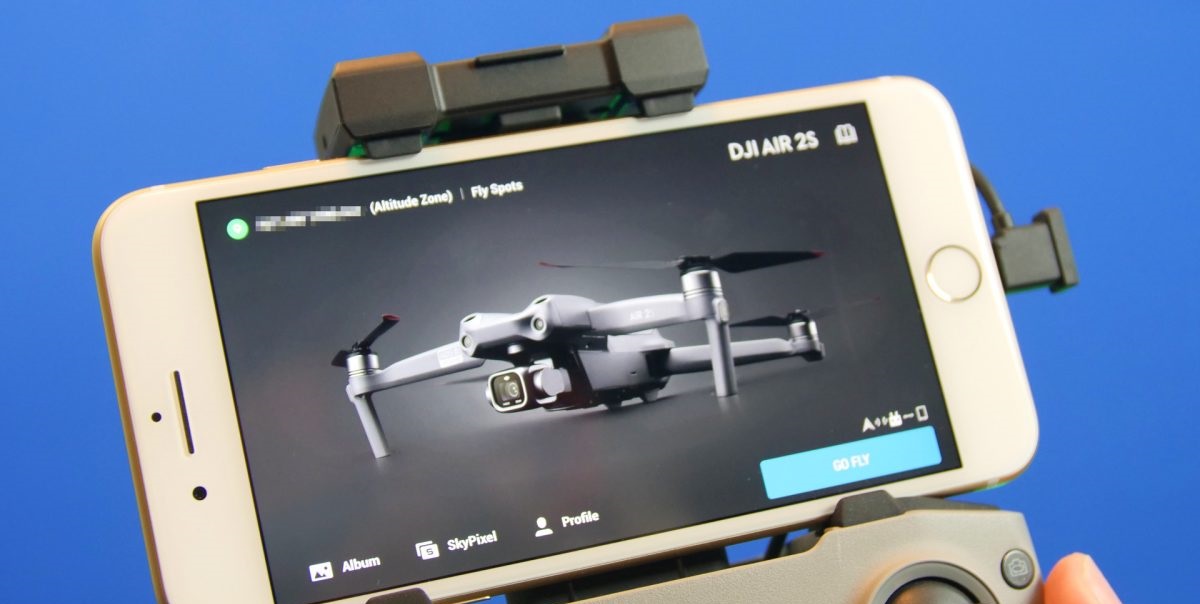
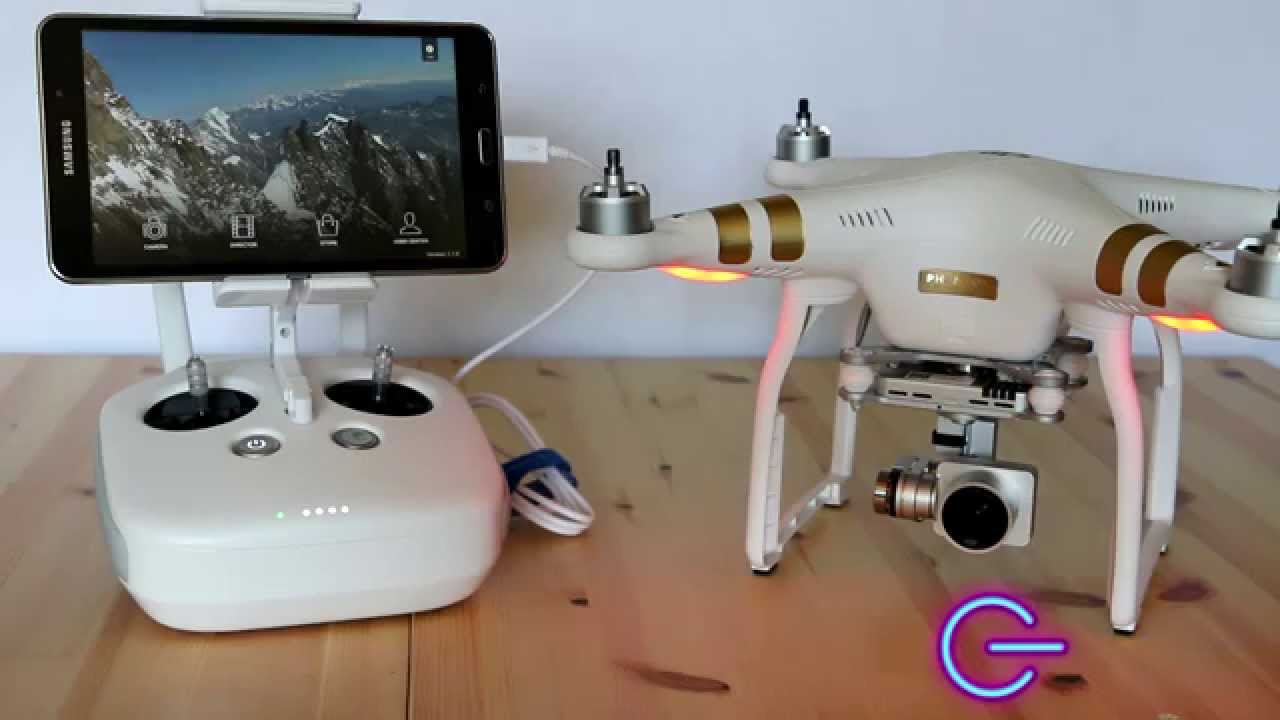
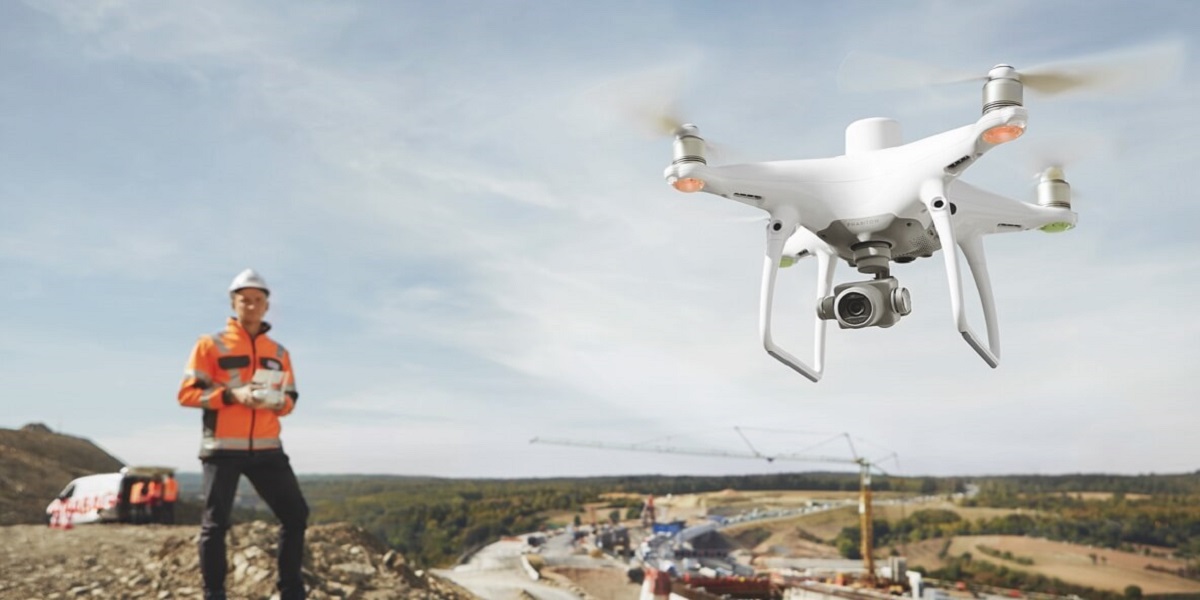
1. Drone: The heart of your drone mapping setup is, of course, the drone itself. Choose a drone that is capable of capturing high-resolution images and has a stable flight performance. Look for features such as GPS positioning, gimbal stabilization, and obstacle avoidance for optimal results. Popular options for drone mapping include models like DJI Phantom 4 Pro, DJI Mavic 2 Pro, or the DJI Inspire 2.
2. Camera: The camera plays a critical role in capturing high-quality imagery. Opt for a camera that has a high resolution and adjustable settings to meet your specific mapping needs. Ensure that the camera is compatible with the drone you are using and has the ability to capture RAW images for post-processing flexibility. Popular camera options include the Sony RX100 series, the Hasselblad L1D-20c on the DJI Mavic 2 Pro, or the Zenmuse X5S on the DJI Inspire 2.
3. Memory Cards: Invest in high-capacity and high-speed memory cards to ensure that you can capture a sufficient amount of data during each flight. Look for memory cards that have fast write speeds and ample storage capacity to handle the large image files produced by the drone’s camera.
4. Batteries: Having spare batteries is essential to extend your flight time and capture more data in a single mapping session. Ensure that you have enough fully charged batteries to cover the area you plan to map accurately. DJI and other drone manufacturers provide additional battery options specifically designed for their drones.
5. Ground Control Points (GCPs): Ground Control Points are strategically placed markers on the ground that have known GPS coordinates. These points serve as reference markers for accurately geolocating and scaling your aerial imagery. GCPs are essential for achieving high accuracy in your final maps and can be physical markers or targets that can be easily identified from the air.
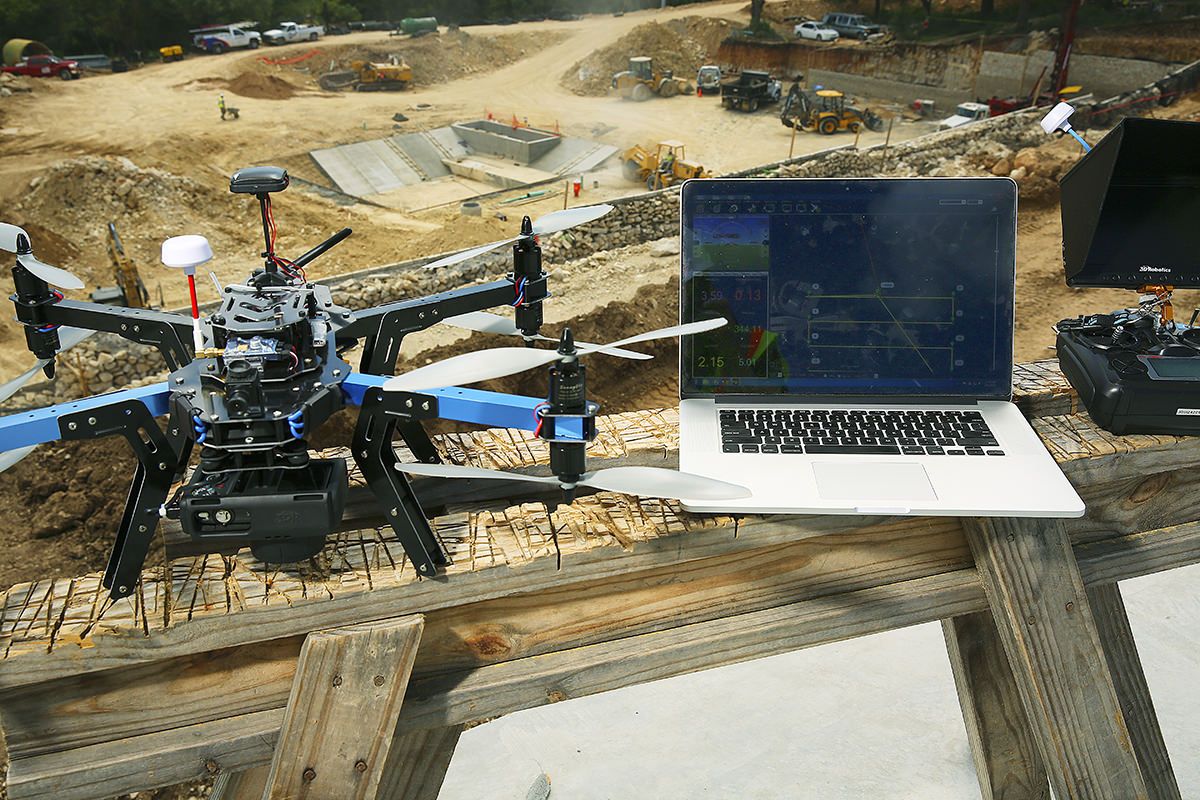
6. Ground Station: A ground station is a software or application that allows you to plan and execute your mapping flights. It provides features like waypoint planning, live monitoring of drone status, and automated flight routes. Popular ground station options include DJI Ground Station Pro, Pix4D Capture, or DroneDeploy.
7. Photogrammetry Software: To process your captured aerial imagery and generate maps, 3D models, and orthomosaics, you will need photogrammetry software. Some popular options are Pix4D, Agisoft Metashape, or DroneDeploy. These software tools utilize the images captured by your drone, analyze them, and generate accurate and detailed maps and models.
8. Computer: A capable computer is necessary for storing and processing the large image files generated by your drone. Look for a computer with sufficient storage capacity, processing power, and memory to handle the processing requirements of your chosen photogrammetry software.
By having these essential equipment components, you will be well-equipped to capture high-quality aerial imagery and collect accurate data for your drone mapping projects. Make sure to choose the right drone, camera, and software tools that are compatible with each other and meet your specific mapping needs.
Choosing the Right Drone for Mapping
Choosing the right drone for mapping is crucial to ensure the success and effectiveness of your mapping projects. Not all drones are created equal, and selecting the appropriate drone for mapping requires careful consideration of several key factors. Here are some factors to consider when choosing a drone for mapping:
1. Camera Quality: The quality of the camera is of utmost importance when it comes to drone mapping. Look for a drone that is equipped with a high-resolution camera capable of capturing detailed and sharp images. A camera with adjustable settings, such as aperture and shutter speed, provides flexibility in different lighting conditions and allows for better control over image quality.
2. Stability and Positioning: Choose a drone with a stable flight performance, as image quality can be compromised if the drone is prone to vibrations or shaking during flight. Additionally, GPS positioning is crucial for accurate geolocation of the captured images. Drones with GPS capabilities provide precise location data, allowing for more accurate mapping results.
3. Battery Life: Consider the battery life of the drone, as it determines the amount of time you can spend in the air capturing data. Longer battery life allows for longer flights, reducing the need to land and swap batteries frequently. This is particularly important when mapping large areas or conducting complex mapping missions.
4. Obstacle Avoidance: Having obstacle avoidance sensors can be beneficial, especially when mapping in complex or confined environments. These sensors help prevent collisions with obstacles such as trees, buildings, or power lines, ensuring the safety of the drone and the mapping mission.
5. Payload Capacity: Consider the payload capacity of the drone if you plan to use additional equipment or sensors during your mapping operations. Some drones have the ability to carry extra payloads, such as multispectral sensors or thermal cameras, allowing for more specialized data collection for agriculture or environmental mapping purposes.
6. Software Compatibility: Ensure that the drone you choose is compatible with the mapping software you plan to use for processing the captured images. Different drones have varying levels of compatibility with different software, so it’s essential to check the specifications and requirements of both the drone and software before making a decision.
7. Flight Control Options: Consider the flight control options available for the drone, such as manual control, autonomous flight modes, or waypoint planning capabilities. Having versatile flight control options can enhance the efficiency and precision of your mapping missions.
8. Budget: Finally, consider your budget when choosing a drone for mapping. Set a budget range and look for drones that offer the features and capabilities that meet your mapping requirements while staying within your budget limitations.
By carefully considering these factors, you can select the right drone that aligns with your mapping needs and requirements. Remember, the choice of drone is a crucial investment that will have a significant impact on the success of your mapping projects, so take the time to research and choose wisely.
Pre-flight Planning
Proper pre-flight planning is essential for a successful drone mapping mission. Taking the time to plan your flight helps ensure the safety of your equipment and the accuracy of your data collection. Here are some key steps to consider during the pre-flight planning process:
1. Define Objectives: Clearly define the objectives of your mapping mission. Determine the specific areas you need to map, the level of detail required, and the type of data you aim to collect. This will help guide your flight planning and ensure you capture the necessary information.
2. Check Regulatory Requirements: Understand and comply with the regulatory requirements for drone operations in your area. Familiarize yourself with any restrictions or permits needed for flying in certain locations. Adhere to local laws and regulations to ensure a safe and legal flight.
3. Conduct Site Survey: Before your flight, conduct a thorough site survey of the mapping area. Identify any potential obstacles, such as power lines, trees, or buildings, that could pose a risk during flight. Assess the terrain and plan your flight path accordingly to ensure optimal coverage and safety.
4. Check Weather Conditions: Check the weather forecast before your flight. Avoid flying in adverse weather conditions such as strong winds, rain, or low visibility. Ensure the weather conditions are suitable for safe and accurate mapping operations.
5. Develop a Flight Plan: Develop a detailed flight plan that outlines the specific routes and altitudes for your drone. Use flight planning software or apps to create waypoints or paths that cover the entire mapping area effectively. Consider the overlap requirements based on the specifications of your mapping software for optimal image accuracy.
6. Verify Equipment Readiness: Before taking off, verify that all your equipment is in good working condition. Check the batteries, propellers, and camera to ensure they are securely attached and functioning correctly. Calibrate the drone’s compass and IMU if necessary, and update the firmware to the latest version for optimal performance.
7. Notify Others about Your Flight: If you are operating in an area where other people may be present, notify them about your drone flight to ensure their safety and minimize any concerns. It is important to be courteous and considerate of others when flying your drone.
8. Create a Safety Checklist: Develop a pre-flight safety checklist to ensure you don’t overlook any critical steps or safety precautions. Include items such as checking airspace restrictions, taking note of emergency contact numbers, managing battery levels, and verifying the safe landing of the drone.
9. Consider Backup Measures: Plan for backup measures in case of unexpected issues during the flight. This can include carrying spare batteries, additional memory cards, and a backup drone if available. Having contingency plans in place helps mitigate potential disruptions to your mapping mission.
By following these pre-flight planning steps, you can ensure a safe and effective drone mapping mission. Proper planning sets the foundation for accurate data collection, minimizes risks, and maximizes the chances of a successful mapping outcome.
Understanding Photogrammetry
Photogrammetry is a fundamental concept in drone mapping. It is the science of obtaining precise three-dimensional measurements and models from two-dimensional images. By analyzing the geometry, scale, and orientation of overlapping images, photogrammetry software can accurately reconstruct the shape and position of objects in the real world. Understanding the principles of photogrammetry is crucial for generating accurate maps, 3D models, and orthomosaics from your drone mapping data.
Photogrammetry relies on the concept of triangulation, which involves using multiple images of the same object or scene taken from different positions to determine its spatial coordinates. The key steps in the photogrammetry process are as follows:
1. Image Acquisition: Capturing a series of overlapping images of the mapping area is the first step in photogrammetry. Drones equipped with high-resolution cameras are used to capture these images from various altitudes and angles. It is important to maintain consistent image overlap and ensure that key features on the ground are visible in multiple images.
2. Image Orientation: Once the images are captured, the process of image orientation begins. Image orientation involves determining the camera positions and orientations relative to known reference points. This process allows for the precise alignment and positioning of the captured images in three-dimensional space.
3. Feature Extraction: After the images are oriented, photogrammetry software analyzes the images to identify identifiable features, such as distinct points on the ground or objects. These features, known as tie points or keypoints, are used as reference points for accurate reconstruction of the scene.
4. Point Cloud Generation: The software then uses the identified tie points to create a point cloud, which is a digital representation of the three-dimensional coordinates of the objects or terrain in the mapping area. The point cloud is a dense collection of points that represents the shape and position of the objects based on the captured images.
5. Surface Reconstruction: From the point cloud, the software reconstructs the surfaces of the objects or terrain. This involves connecting the points to create polygonal surfaces, which form the basis of the 3D model. The more tie points and overlapping images used, the more accurate and detailed the surface reconstruction will be.
6. Orthomosaic Generation: An orthomosaic is a highly detailed and geographically accurate 2D map or image produced by stitching together the individual images captured during the mapping process. It eliminates distortion caused by perspective and terrain, resulting in an accurate representation of the mapping area.
7. Data Analysis and Outputs: Once the photogrammetry process is completed, the resulting maps, 3D models, and orthomosaics can be used for various purposes. They can be analyzed to measure distances, areas, or volumes, perform change detection, assist in planning and design, or provide visual representations for presentations or reports.
Understanding the principles of photogrammetry is crucial for effectively utilizing drone mapping data. Familiarize yourself with the process and the capabilities of photogrammetry software to maximize the accuracy and usability of your drone mapping outputs.
Capturing High-Quality Aerial Images
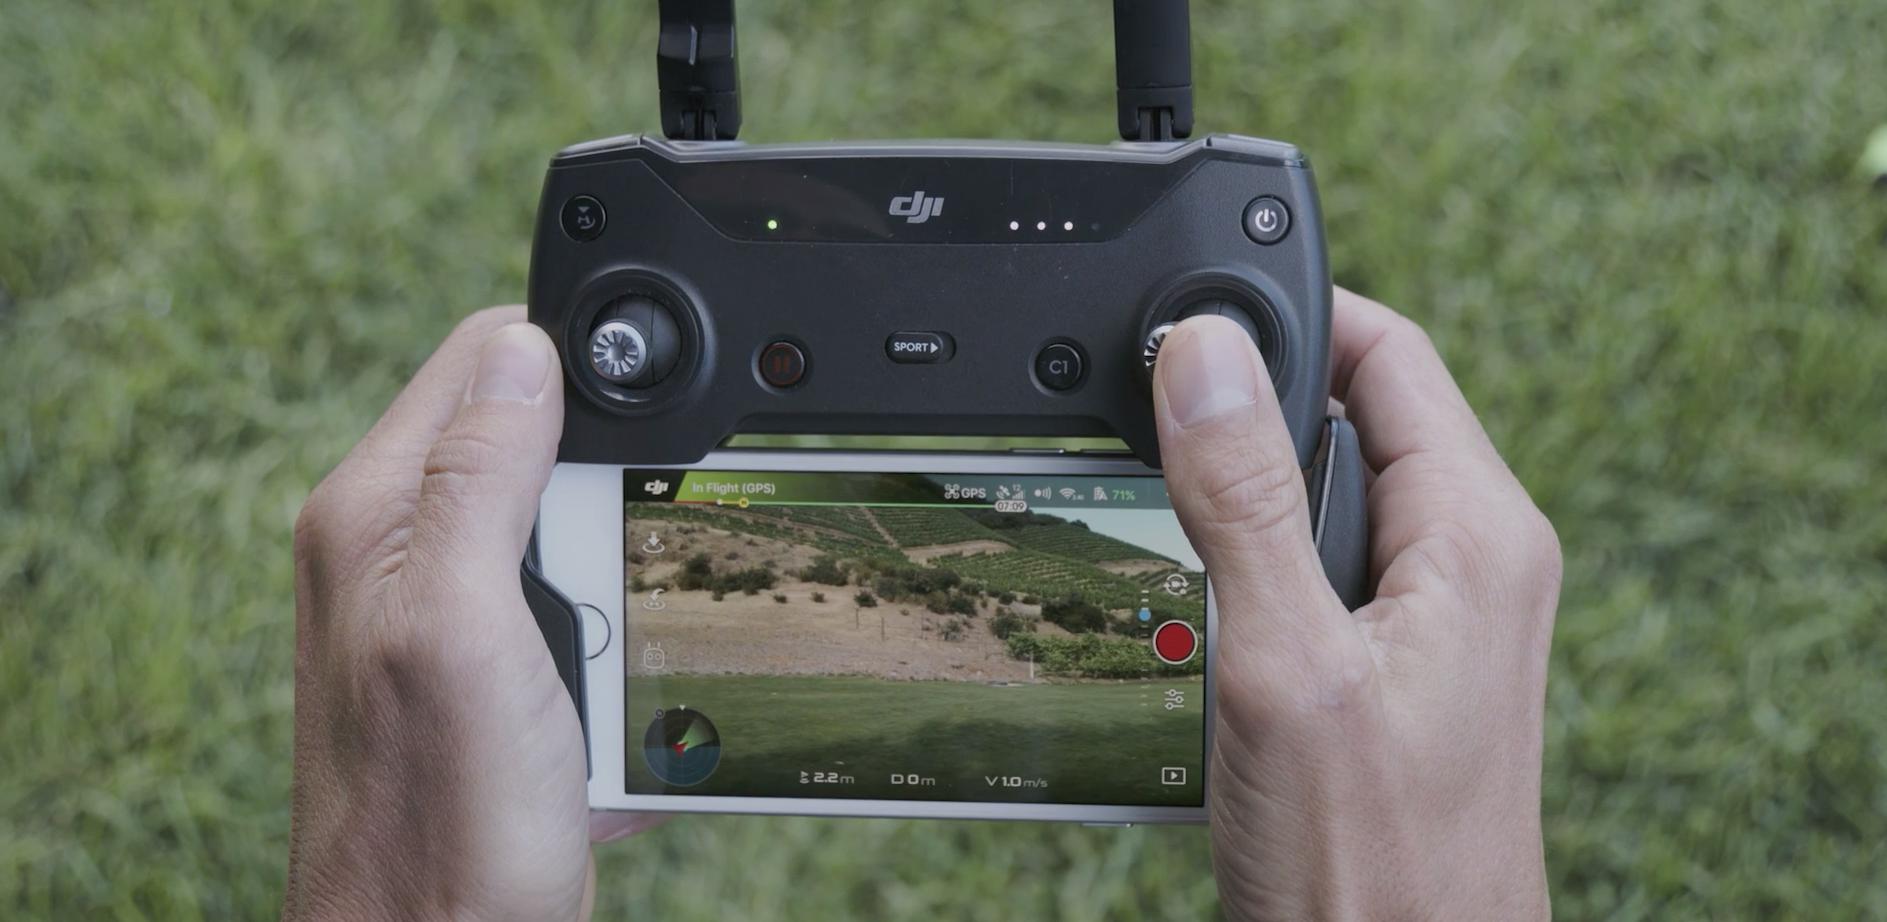
Capturing high-quality aerial images is a crucial step in drone mapping. The quality of the images you capture directly impacts the accuracy and detail of the final maps, 3D models, and orthomosaics. To ensure the best possible results, follow these key considerations when capturing aerial images for your drone mapping project:
1. Plan Your Flight: Before taking off, plan your flight path based on the area you want to capture. Consider the area coverage, altitude, and overlap requirements specified by your mapping software. Determine the best flight path and waypoints to ensure sufficient image overlap for accurate image reconstruction.
2. Set the Camera Parameters: Adjust your camera settings to achieve the desired image quality. Set the appropriate ISO, shutter speed, aperture, and white balance based on the lighting conditions and desired image sharpness. Shooting in RAW format allows for better post-processing flexibility.
3. Fly in Optimal Lighting Conditions: Aim to fly during optimal lighting conditions to capture well-exposed and clear images. Avoid flying during harsh midday sunlight, which can create harsh shadows and washed-out images. Early morning or late afternoon when the light is softer and produces better contrast is often ideal.
4. Maintain Consistent Altitude: Fly at a consistent altitude throughout your mission. This ensures consistent ground resolution and minimizes distortion caused by varying altitudes. Additionally, maintaining a consistent altitude helps with overlap calculations and improves the accuracy of the resulting maps.
5. Follow Overlap Guidelines: Achieve the required overlap between images, typically recommended to be around 70-80% in both lateral and frontal overlap. This ensures sufficient overlap for accurate reconstruction and helps the photogrammetry software identify key features for precise geolocation and map generation.
6. Maintain a Stable Flight: Fly the drone in a stable manner to capture sharp and focused images. Minimize vibrations and sudden movements by smoothly controlling the throttle, pitch, and yaw. Utilize the drone’s stabilization features, such as gimbal stabilization, to reduce camera shake and ensure clear and stable images.
7. Avoid Motion Blur: Prevent motion blur by maintaining an appropriate shutter speed based on the speed and movement of the drone. A faster shutter speed is required for faster-moving drones or in windy conditions to freeze the motion and capture sharp images. Experiment with different shutter speeds to find the optimal setting for your specific circumstances.
8. Use Manual Focus: Use manual focus to ensure crisp and focused images. Autofocus systems may struggle to keep up with the rapidly changing distances during drone flight, resulting in inconsistent focus. Manually adjusting the focus based on the distance and desired sharpness will lead to clearer and more accurate images.
9. Capture Overhead and Angled Views: Capture images from both overhead and angled perspectives to provide a comprehensive view of the mapping area. Overhead images help with accurate orthomosaic generation, while angled images contribute to 3D modeling and capturing more details from different angles.
10. Check Image Quality: Regularly review the captured images during the flight or once back on the ground. Ensure that the images are properly exposed, sharp, and free of any artifacts or distortions. Reviewing the images can help identify any issues or adjustments needed for subsequent flights.
Capturing high-quality aerial images is a crucial step in successful drone mapping. By following these considerations and refining your techniques through practice, you can ensure that the images you capture are clear, detailed, and accurately represent the mapping area.
Using Ground Control Points
Ground control points (GCPs) are essential elements in drone mapping that serve as reference markers to enhance the accuracy and precision of your mapping outputs. These strategically placed markers on the ground have known GPS coordinates, which are used to geolocate and scale the aerial imagery captured by the drone. Utilizing GCPs can significantly improve the accuracy and reliability of your final maps, 3D models, and orthomosaics. Here’s how you can effectively use GCPs in your drone mapping projects:
1. Selecting GCP Locations: Choose GCP locations that are spread evenly across the mapping area and represent a diverse range of terrain features. Ideally, select GCPs in areas that are easily recognizable in the drone imagery and have stable and identifiable features like concrete pads, survey markers, or distinct natural features.
2. Determining GCP Coordinates: Accurately determine the GPS coordinates of each GCP using a high-precision GPS receiver or survey-grade equipment. The coordinates should be recorded in a compatible format such as WGS84 (World Geodetic System 1984) to ensure compatibility with the mapping software and accurate geolocation of the aerial imagery.
3. Placing GCPs: Position the GCPs on the ground in a visible and stable manner. Secure them flat on the ground to minimize the risk of them being moved or disturbed during the mapping process. Use measuring tools or surveying techniques to ensure the proper placement and precision of the GCPs based on their known coordinates.
4. Capturing GCPs in Drone Imagery: When you fly your drone to capture aerial imagery, ensure that you intentionally capture images of the GCPs from various altitudes and angles. Include multiple images of each GCP to facilitate accurate identification and extraction of their precise locations during the photogrammetry process. Take care to capture the GCPs in different lighting conditions to enhance their visibility and recognition in the imagery.
5. Manually Identifying GCPs: In the photogrammetry software, manually identify and mark the GCPs in the captured imagery using the known GPS coordinates. Use the software’s tools or features to precisely mark the positions of the GCPs. This step enables the software to determine the relationships between the GCPs and reconstruct the accurate spatial dimensions and scale of the mapping area.
6. Georeferencing and Scaling: Georeference the aerial imagery by aligning it with the known positions of the GCPs. The software uses the identified GCPs to compute the necessary transformations to match the real-world coordinates of the features visible in the imagery. Scaling is also achieved by utilizing the GCPs and their known dimensions to adjust the image’s scale and accurately measure distances, areas, or volumes in the final mapping outputs.
7. Verification and Quality Assurance: Verify the accuracy of the georeferenced imagery by comparing it with other reference data sources, such as existing maps or ground survey measurements, if available. Conduct quality assurance checks to ensure that the GCPs have been correctly identified and that their positions align accurately with their known GPS coordinates.
Using ground control points enhances the accuracy and reliability of your drone mapping results. By incorporating GCPs into your mapping workflow, you can achieve precise geolocation, accurate scaling, and improved spatial accuracy in your final maps, 3D models, and orthomosaics.
Post-processing and Data Analysis
Post-processing and data analysis are critical steps in drone mapping that involve the processing of captured aerial imagery to generate accurate maps, orthomosaics, and 3D models. This phase allows you to extract valuable insights and measurements from your data to support decision-making and further analysis. Here are the key steps involved in post-processing and data analysis for drone mapping:
1. Importing and Organizing Data: Start by importing all the captured imagery and associated metadata into your chosen photogrammetry software. Organize the data by creating projects or folders to keep track of the images captured during specific flights or mapping areas.
2. Image Calibration and Alignment: The software uses the captured imagery and the identified ground control points (GCPs) to calibrate and align the images accurately. This process corrects any distortions and ensures that the imagery is correctly geolocated and scaled.
3. Point Cloud Generation: In this step, the software analyzes the calibrated images to generate a point cloud. The point cloud is a dense collection of three-dimensional coordinates that represents the surfaces and objects in the mapping area. This step forms the foundation for further analysis and reconstruction.
4. Surface Reconstruction: From the point cloud, the software reconstructs the surfaces of the objects or terrain in the mapping area. It connects the points to create polygonal surfaces, which form the basis of the 3D model. The resulting surface reconstruction provides a detailed representation of the topography and structures.
5. Orthomosaic Generation: The orthomosaic is a georeferenced, high-resolution 2D map or image created by stitching together the individual images captured during the mapping mission. This process eliminates distortions caused by perspective and terrain, resulting in an accurate representation of the mapping area. The orthomosaic serves as a valuable visual resource and can be used for measurements, analysis, and comparison.
6. Data Analysis: Once you have the orthomosaic, 3D model, or other mapping outputs, you can begin analyzing the data for insights and measurements. You can measure distances, areas, and volumes accurately using the software’s measurement tools. Analyze patterns, identify changes over time, identify features of interest, and extract valuable information for your specific project requirements.
7. Exporting and Sharing: After conducting thorough data analysis, export the desired mapping outputs in the required file formats. These files can include georeferenced orthomosaics, point clouds, mesh files, or 3D models. Share the data with clients, team members, or stakeholders for further collaboration, evaluation, or integration into other software platforms.
8. Iterative Process: Post-processing and data analysis are often an iterative process. You may need to fine-tune parameters, revisit the data, or conduct additional analysis to achieve the desired results. Iterate through the steps as necessary to refine and improve the accuracy and quality of your mapping outputs.
Effective post-processing and data analysis are essential for deriving valuable insights and measurements from your drone mapping data. By following these steps and utilizing the capabilities of your chosen software, you can generate accurate maps, orthomosaics, and 3D models and extract meaningful information to support your project goals.
Common Challenges and Troubleshooting Tips
Drone mapping can encounter a variety of challenges that can affect the quality and accuracy of your mapping results. Being aware of these challenges and having troubleshooting strategies in place can help mitigate issues and ensure successful drone mapping projects. Here are some common challenges you may encounter and tips to overcome them:
1. Inconsistent Lighting Conditions: Changing light conditions can impact the quality and consistency of your aerial imagery. To overcome this, try to schedule your flights during optimal lighting conditions such as early morning or late afternoon when the light is softer and produces better contrast. Ensure that your camera settings are adjusted accordingly to maintain the desired image quality.
2. Wind and Weather Conditions: Strong winds or adverse weather conditions can affect the stability and safety of your drone during flight. Check the weather forecast before each flight and avoid flying in unfavorable conditions. Ensure that your drone’s firmware is up to date, as manufacturers often release updates that improve flight performance in various weather conditions.
3. GPS Interference: GPS signals can be subject to interference from nearby structures or electromagnetic sources. To minimize GPS interference, fly in areas with clear line-of-sight to the sky and avoid flying near large metal structures or areas with significant electromagnetic activity. Ensure that your drone’s GPS system is calibrated and functioning properly before each flight.
4. Image Blurriness and Distortion: Blurry or distorted images can result from various factors, such as inadequate focus, improper camera settings, or vibrations during flight. Ensure that your camera is properly focused and that the settings, such as shutter speed and aperture, are appropriate for the lighting conditions. Minimize vibrations by flying smoothly and utilizing the drone’s stabilization features.
5. Lack of Image Overlap: Insufficient image overlap can result in incomplete or inaccurate mapping outputs. Ensure that you plan your flights with sufficient overlap between images, typically around 70-80% in both lateral and frontal overlap. Adjust flight altitude or flight path if necessary to achieve the desired overlap for optimal mapping accuracy.
6. GCP Placement Accuracy: Accurate placement of ground control points (GCPs) is crucial for precise geolocation and scaling of your mapping outputs. Ensure that the GCPs are correctly positioned and securely placed on the ground. Double-check their known GPS coordinates and verify their accuracy during the post-processing phase.
7. Software Errors and Compatibility: Photogrammetry software may encounter errors or compatibility issues that can affect the post-processing and analysis of your mapping data. Stay up to date with software updates and bug fixes provided by the software provider. Be aware of the recommended hardware and software specifications to ensure compatibility and optimal performance.
8. Data Storage and Organization: Drone mapping projects can generate large amounts of data that need to be stored and organized efficiently. Have a system in place to manage and back up your mapping data regularly. Employ proper naming conventions and folder structures to keep your data organized and easily accessible for future reference and analysis.
By being aware of these common challenges and implementing troubleshooting tips, you can overcome obstacles and ensure the success of your drone mapping projects. Continuous learning, practice, and adapting to different situations will ultimately enhance your skills and improve the quality of your mapping results.
Applications of Drone Mapping
Drone mapping has a wide range of applications across various industries, revolutionizing the way professionals gather, analyze, and visualize spatial data. The advanced capabilities of drones, coupled with powerful mapping software, have opened up new possibilities for innovative solutions. Here are some key applications of drone mapping:
1. Land Surveying and Mapping: Drone mapping is extensively used in land surveying and mapping projects. Drones can quickly and accurately capture topographic data, generate detailed maps, and create 3D terrain models. This technology enables professionals to conduct land surveys more efficiently, aiding in urban planning, infrastructure development, and land management activities.
2. Construction and Architecture: In the construction industry, drone mapping allows for real-time progress monitoring, site analysis, and accurate measurements. Architects can use drone-captured aerial imagery to create 3D models of buildings, aiding in visualization, design evaluation, and identifying potential construction issues before they arise.
3. Environmental Monitoring and Management: Drones equipped with specialized sensors, such as multispectral or thermal cameras, are valuable tools for environmental monitoring and management. They can be used to assess vegetation health, monitor wildlife habitats, detect changes in the environment, and aid in land reclamation efforts.
4. Agriculture and Precision Farming: Drone mapping is widely embraced in the agriculture industry for precision farming practices. Drones can capture detailed images of crops, enabling farmers to monitor plant health, identify pest infestations, optimize irrigation and fertilization, and evaluate crop yield potential. This data-driven approach helps improve efficiency, reduce costs, and minimize environmental impact.
5. Natural Resource Management: The mapping capabilities of drones are invaluable in natural resource management. They can assist in mapping and monitoring forests, assessing flora and fauna diversity, identifying invasive species, and managing water bodies. This information aids in making informed decisions regarding conservation and sustainable resource management.
6. Emergency Response and Disaster Management: Drone mapping plays a crucial role in emergency response and disaster management situations. Drones can rapidly assess the extent of damage, map disaster-stricken areas, and assist in search and rescue operations. Real-time data captured by drones helps response teams make informed decisions and allocate resources effectively.
7. Infrastructure Inspections: Traditional infrastructure inspections, such as bridges, pipelines, or power lines, often require manual inspection or manned aerial surveys. Drone mapping offers a safer and cost-effective alternative by capturing high-resolution imagery and generating 3D models of the infrastructure. This aids in identifying structural issues, planning maintenance, and ensuring public safety.
8. Cultural Heritage Preservation: Drones are increasingly utilized in cultural heritage preservation efforts. They can capture highly detailed imagery of historical sites, monuments, and archaeological excavations. This data can be used for documentation, analysis, and virtual reconstructions, aiding in the preservation and dissemination of cultural heritage.
These are just a few examples of the broad range of applications for drone mapping. The flexibility, efficiency, and accuracy of drone technology continue to revolutionize various industries, enabling professionals to access valuable spatial data and gain new insights for their projects.
Conclusion
Drone mapping has become an indispensable tool for professionals in a wide range of industries. The ability to capture high-resolution aerial imagery, coupled with advanced photogrammetry software, has revolutionized the way we collect, analyze, and utilize spatial data. Through careful planning, accurate data collection, and post-processing techniques, drone mapping offers unparalleled advantages in terms of efficiency, accuracy, and cost-effectiveness.
The benefits of drone mapping are evident in various applications, from land surveying and construction to environmental management and emergency response. Professionals can obtain highly accurate and detailed maps, 3D models, and orthomosaics for better decision-making, improved project outcomes, and enhanced resource management.
However, drone mapping also presents its fair share of challenges, including weather conditions, lighting variations, and the need for proper equipment and software. Understanding these challenges and implementing troubleshooting strategies can help ensure the successful completion of drone mapping projects.
As drone technology continues to advance, so too will the capabilities and applications of drone mapping. It is crucial to stay updated with the latest tools, regulations, and best practices in order to fully harness the potential of drone mapping and achieve optimal results in your projects.
In conclusion, drone mapping offers a transformative solution for professionals in numerous industries. By leveraging the power of drones, high-quality cameras, and advanced mapping software, professionals can capture accurate, detailed, and georeferenced data. This, in turn, enables informed decision-making, efficient resource allocation, and sustainable project management. Embracing drone mapping technology allows us to unlock new possibilities, improve our understanding of the world around us, and pave the way towards a more data-driven and innovative future.