Introduction
Welcome to the world of 3D printing! If you’ve ever wanted to bring your digital designs to life, a 3D scanner can be a game-changer. With a 3D scanner, you can capture the physical form of an object, create a digital model, and then 3D print it. This technology has revolutionized various industries, from engineering and medicine to arts and crafts.
A 3D scanner is a device that uses advanced sensors and software to capture the geometry of an object in three dimensions. It allows you to accurately digitize real-world objects and transform them into editable digital files. Whether you want to replicate an existing object, reverse-engineer a product, or create custom-made designs, a 3D scanner can save you time and effort compared to designing from scratch.
So, how does a 3D scanner actually work? By using a combination of technologies such as lasers, structured light patterns, or photogrammetry, the scanner captures multiple data points from the object’s surface. These data points are then processed by specialized software to create a precise 3D model. This digital model can be further edited, optimized, and prepared for 3D printing.
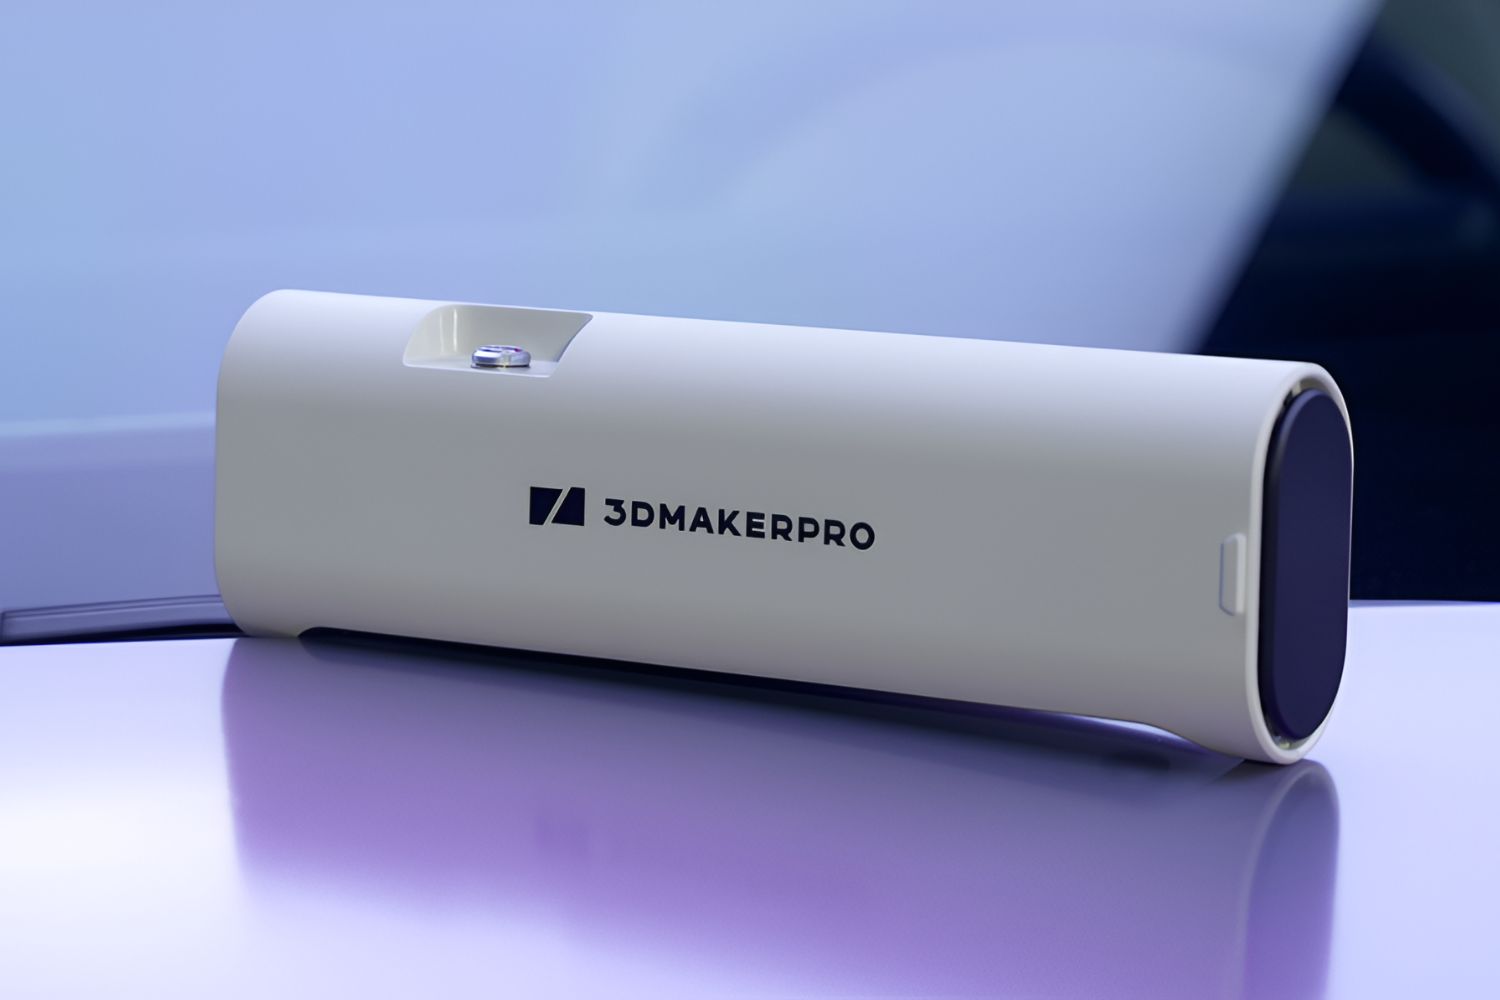
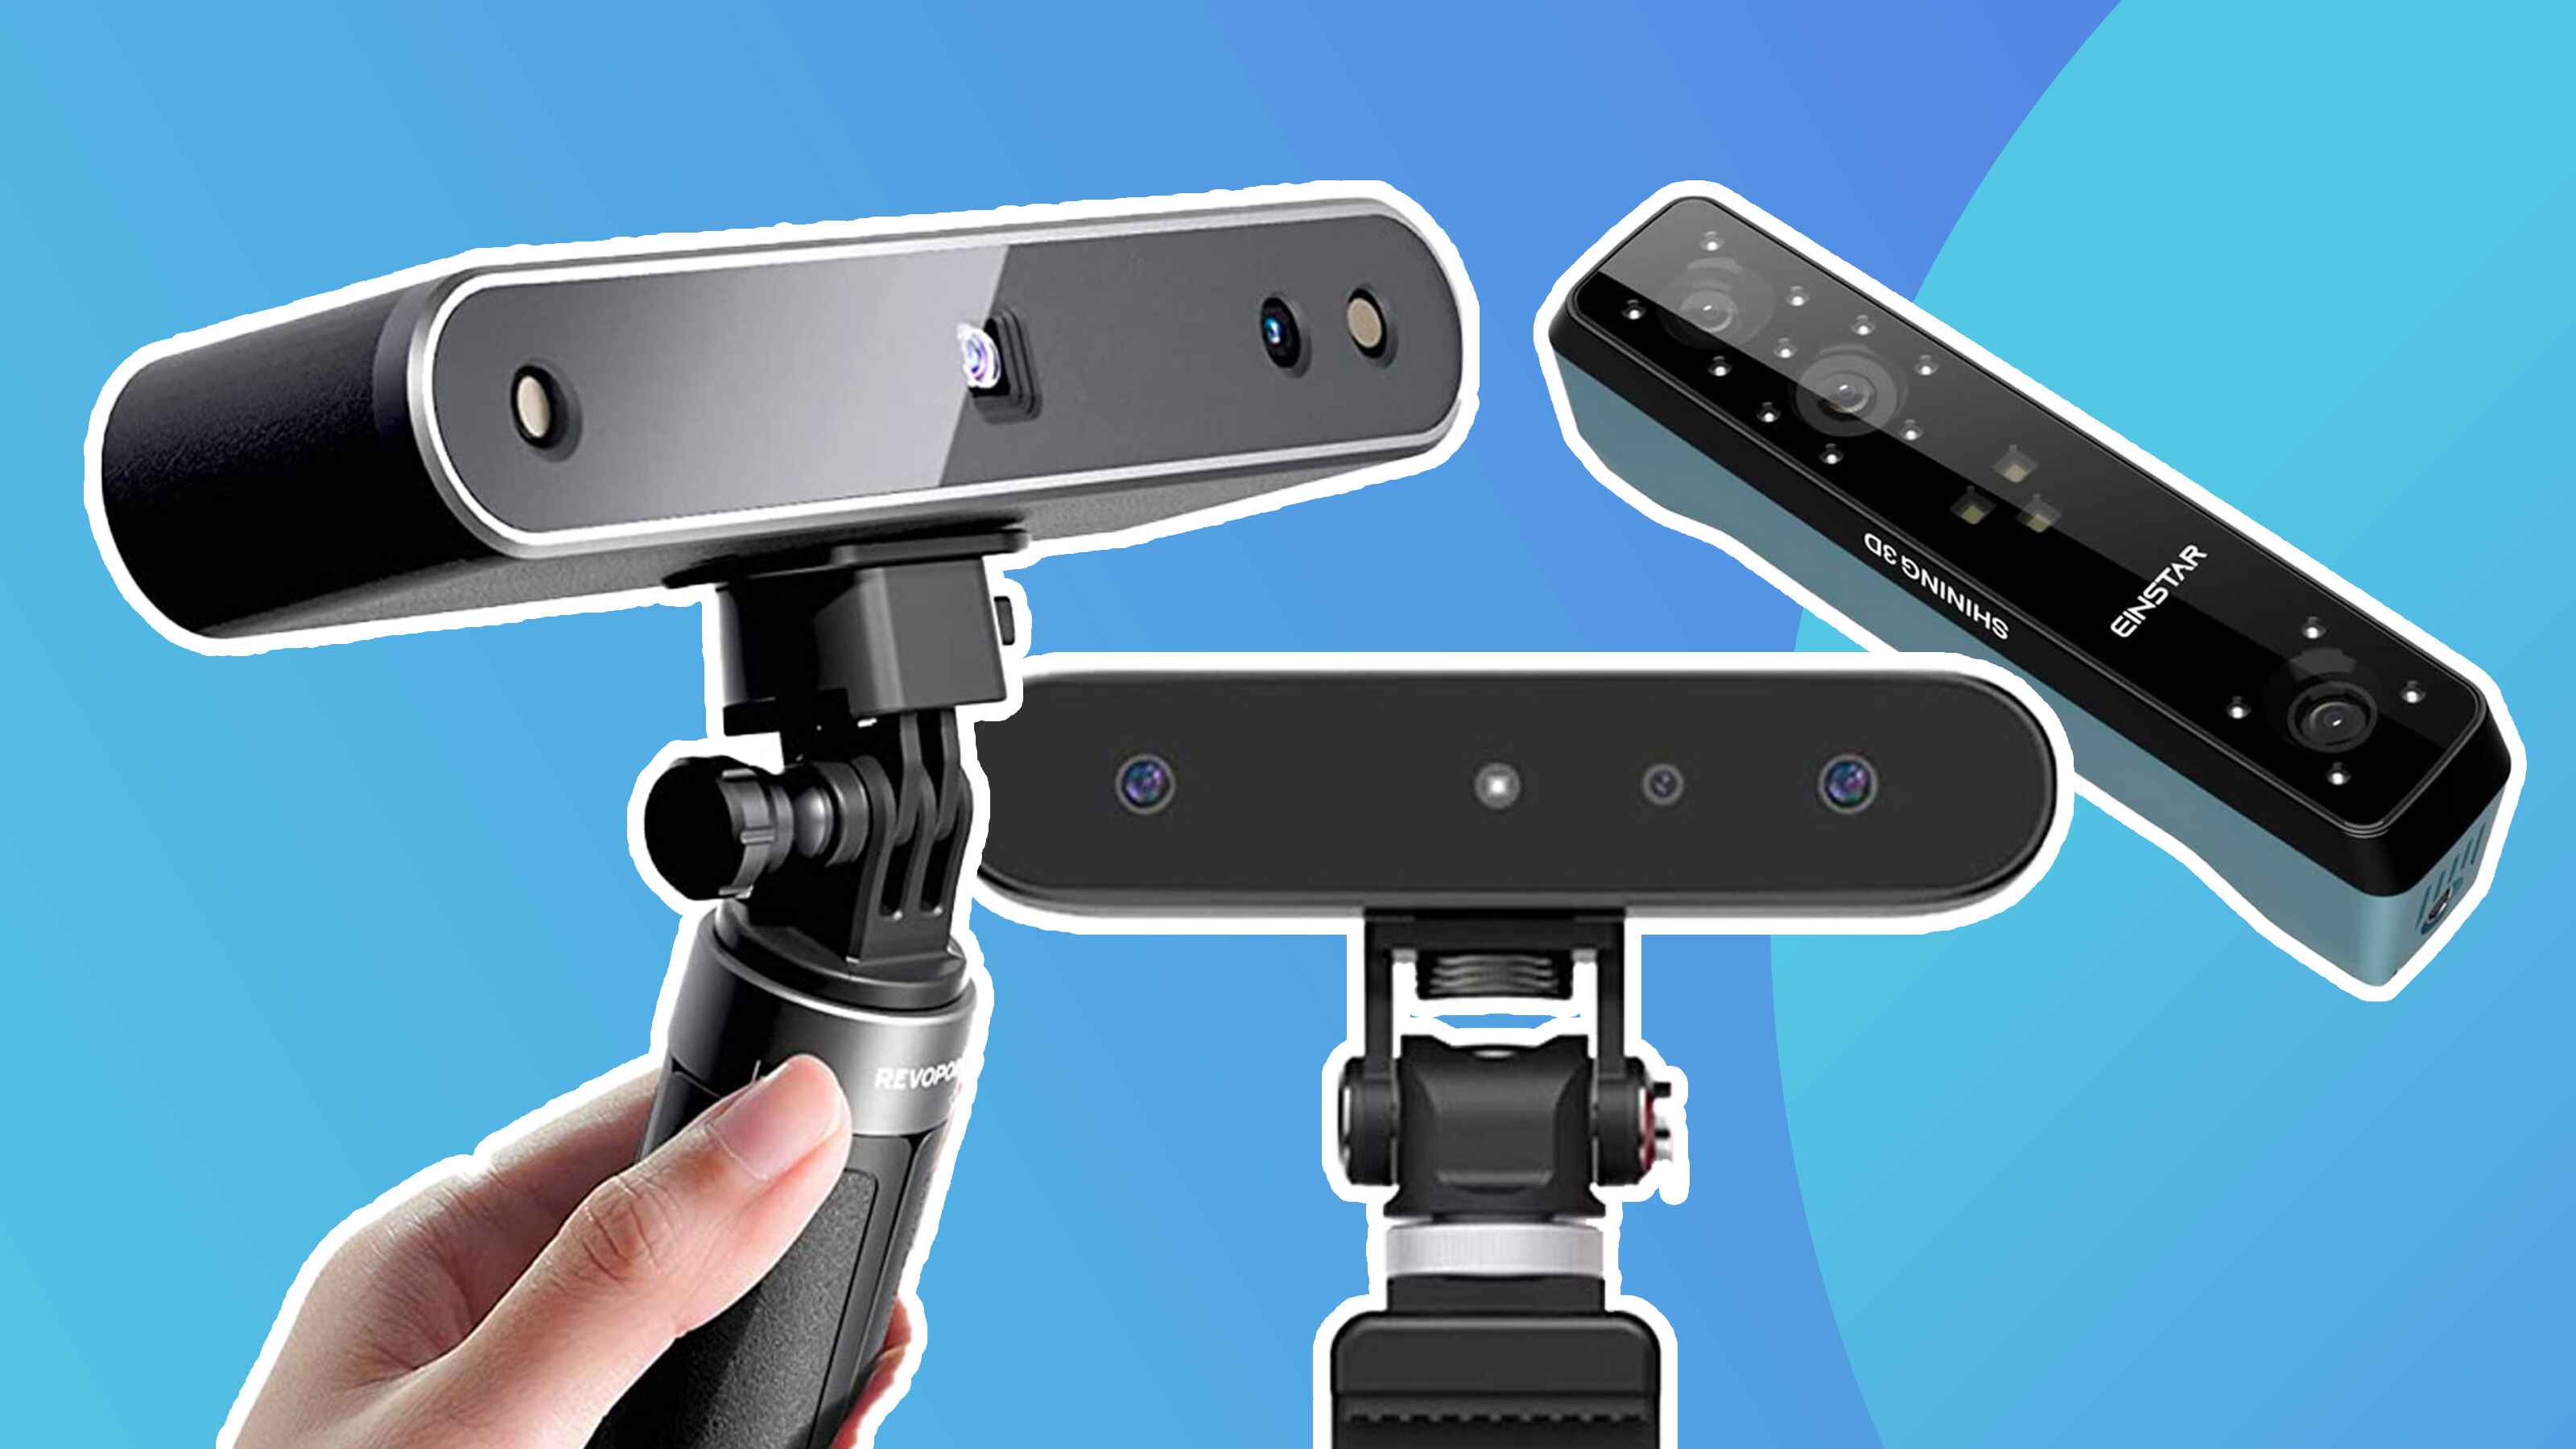
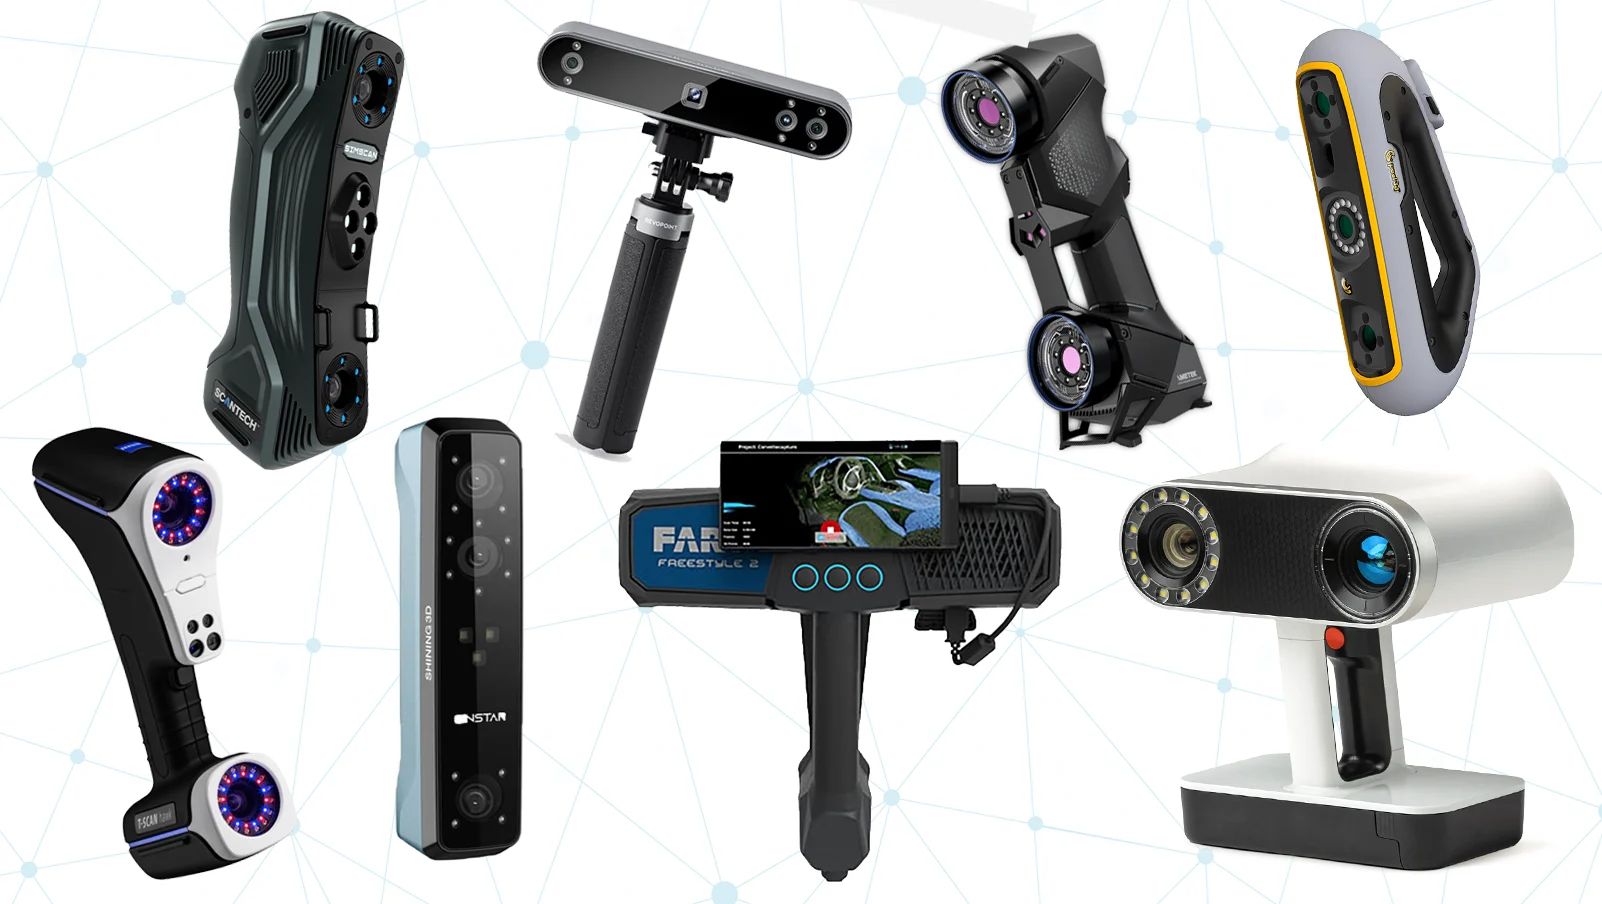
Choosing the right 3D scanner for your project is crucial to achieving accurate results. Factors to consider include the size and complexity of the objects you plan to scan, the level of detail required, and your budget. There are various types of 3D scanners available, from handheld devices suitable for small objects to high-end scanners capable of capturing large industrial objects.
Before you start scanning, it’s essential to prepare the object properly. This typically involves cleaning and removing any dirt, dust, or reflections that could interfere with the scanning process. Additionally, positioning the object in a well-lit environment with minimal background distractions can greatly improve the scan quality.
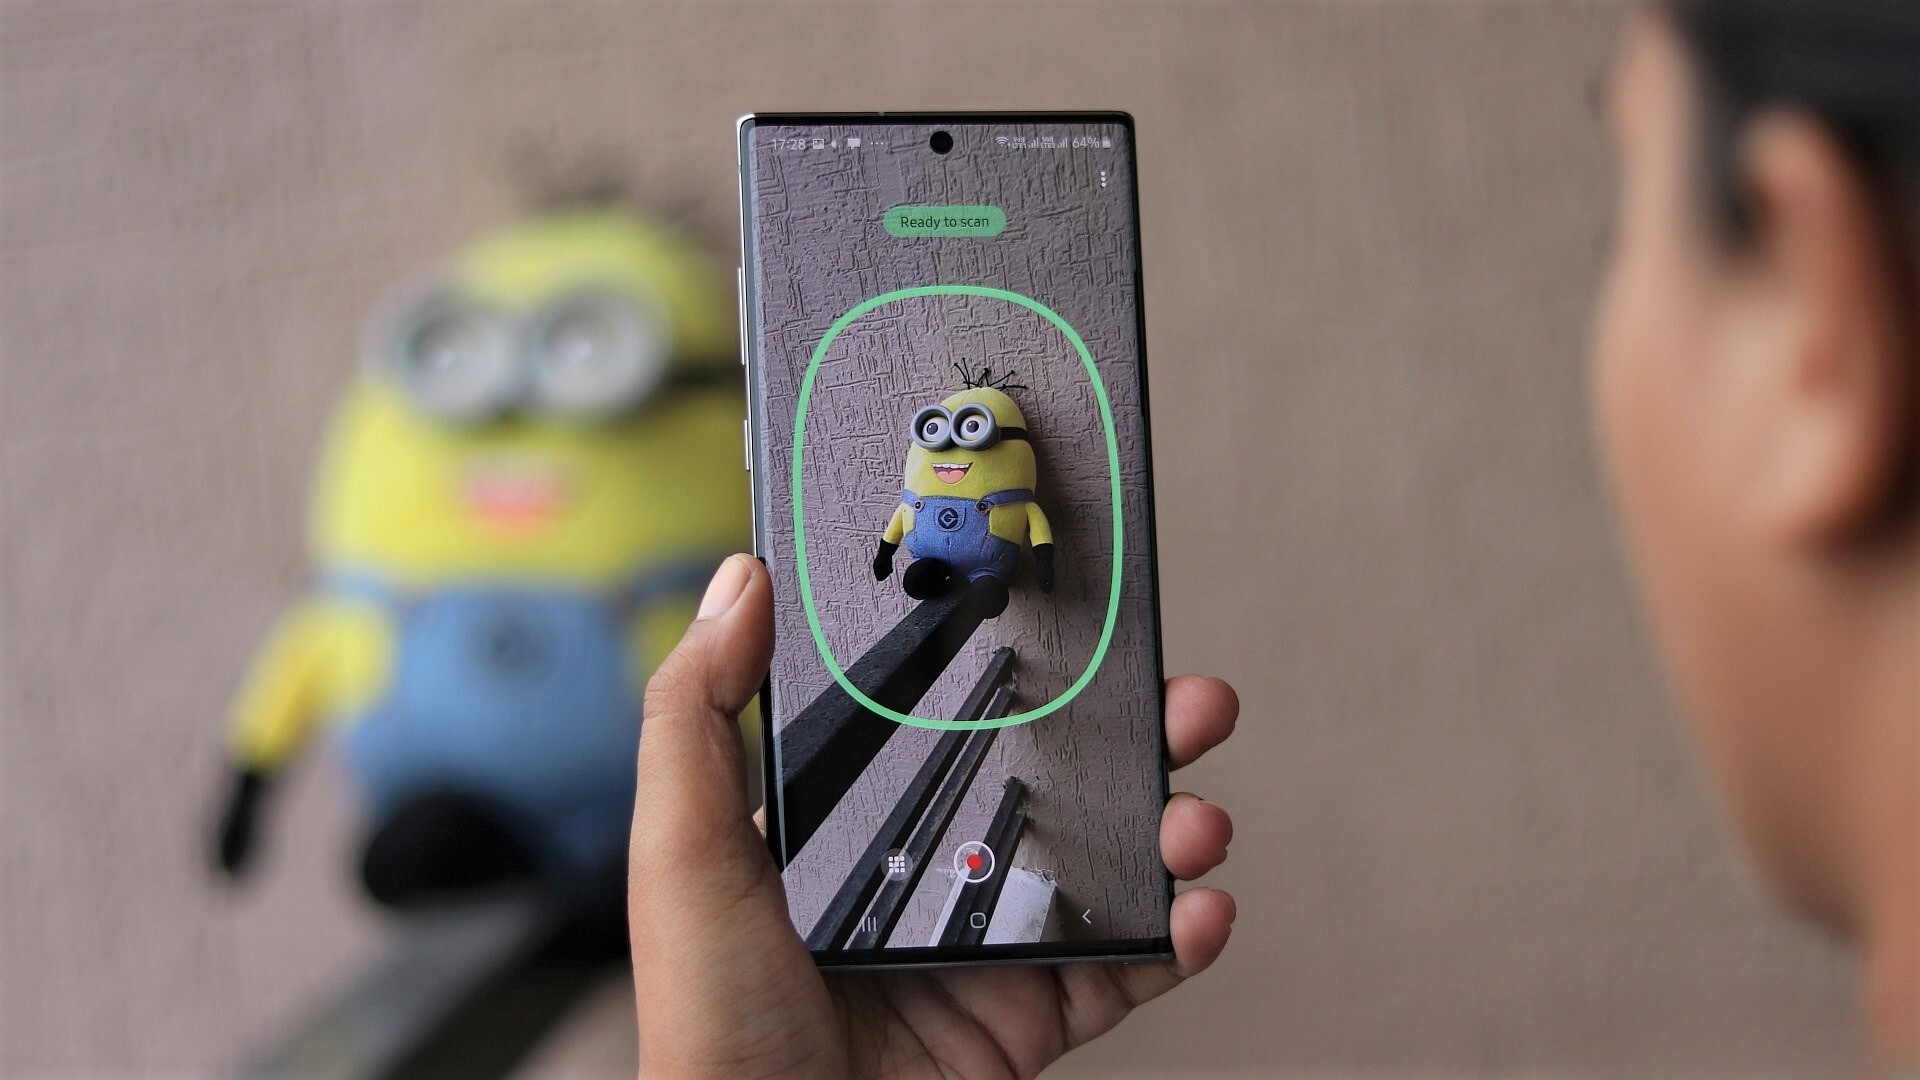
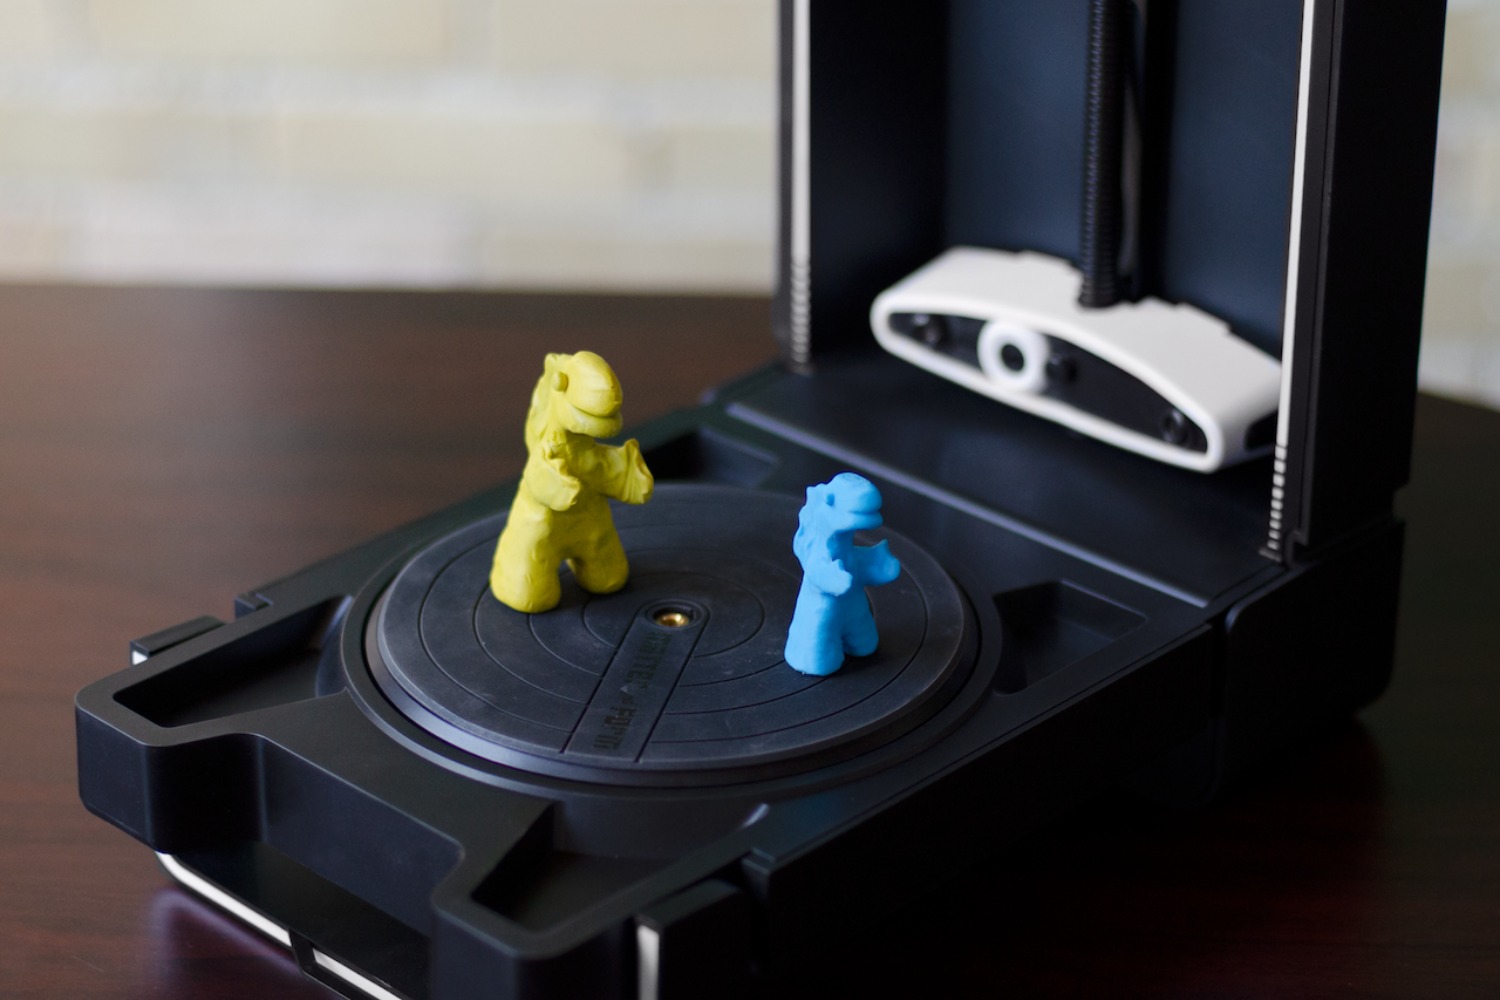
Once the object is prepared, it’s time to begin the 3D scanning process. Depending on the type of scanner you’re using, you may need to move around the object with the scanner or place the object on a rotating turntable for automatic scanning. The goal is to capture multiple viewpoints to ensure complete coverage of the object’s surface.
After capturing the 3D scan, it’s time to clean up and edit the digital model. This step involves removing any unwanted artifacts or imperfections and refining the geometry to ensure a high-quality final print. Specialized software can help you edit and manipulate the 3D model, allowing you to make adjustments such as smoothing surfaces, filling gaps, or combining multiple scans into a single model.
Once you are satisfied with your edited 3D scan, it’s time to export the model in a file format compatible with your 3D printing software. Common file formats for 3D printing include STL, OBJ, and STEP. Make sure to consider factors like file size and compatibility with your specific 3D printing software and printer.
What is a 3D Scanner?
A 3D scanner is a device that captures the physical shape and appearance of an object to create a digital 3D model. It allows you to transform real-world objects into computerized representations that can be used for a variety of purposes, including 3D printing, computer-aided design (CAD), virtual reality, and more.
Think of a 3D scanner as a digital camera, but instead of capturing 2D images, it collects three-dimensional data points to create a virtual model. The scanner uses various technologies such as lasers, structured light patterns, or photogrammetry to capture the geometry and texture of the object’s surface.
One of the key benefits of using a 3D scanner is the ability to quickly and accurately capture complex shapes and intricate details. Traditional methods of creating a digital model, such as manual measurement and CAD modeling, can be time-consuming and prone to human error. With a 3D scanner, you can capture the object’s dimensions and surface features with precision and replicate it digitally.
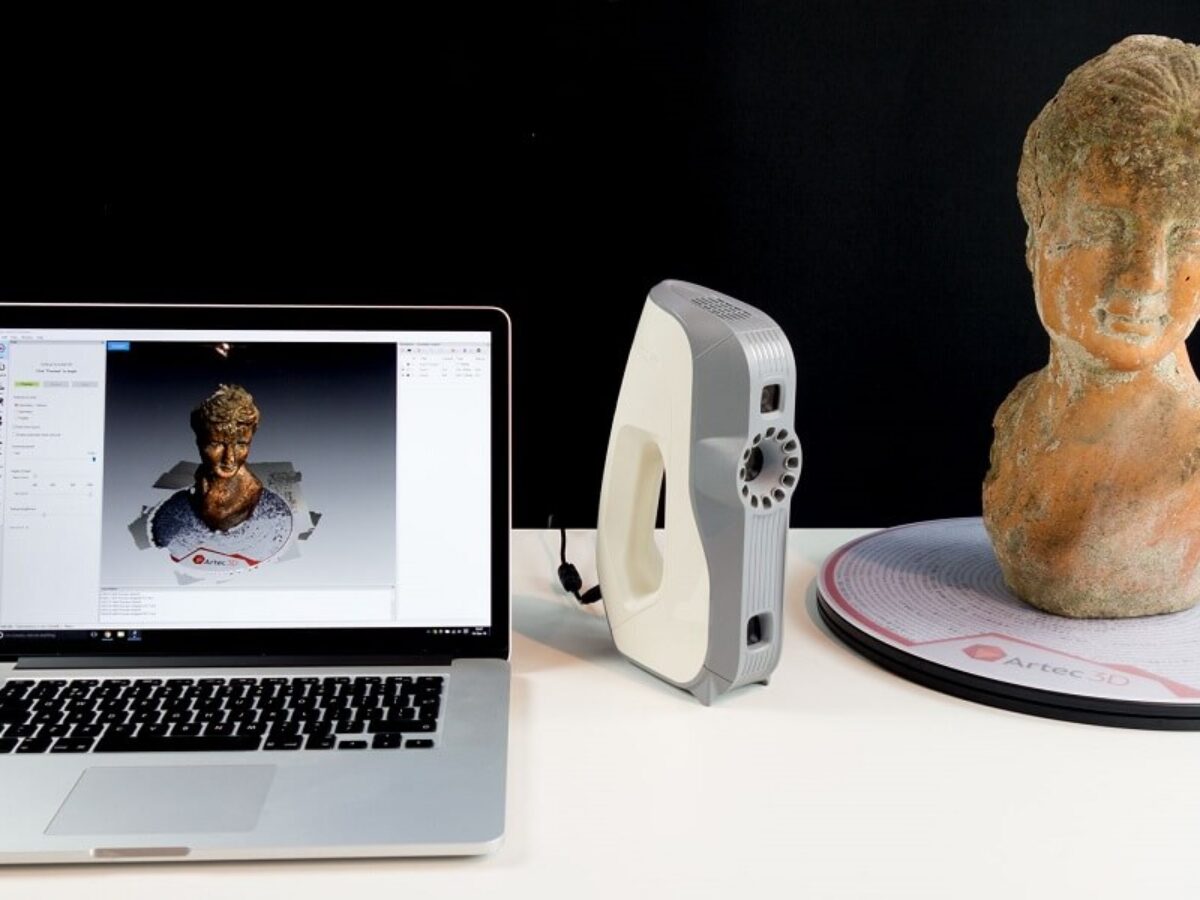
There are different types of 3D scanners available, each with its own strengths and limitations. Handheld scanners are portable devices that allow you to move around the object and capture data from various angles. These are ideal for scanning small to medium-sized objects or objects with intricate details, such as sculptures or jewelry.
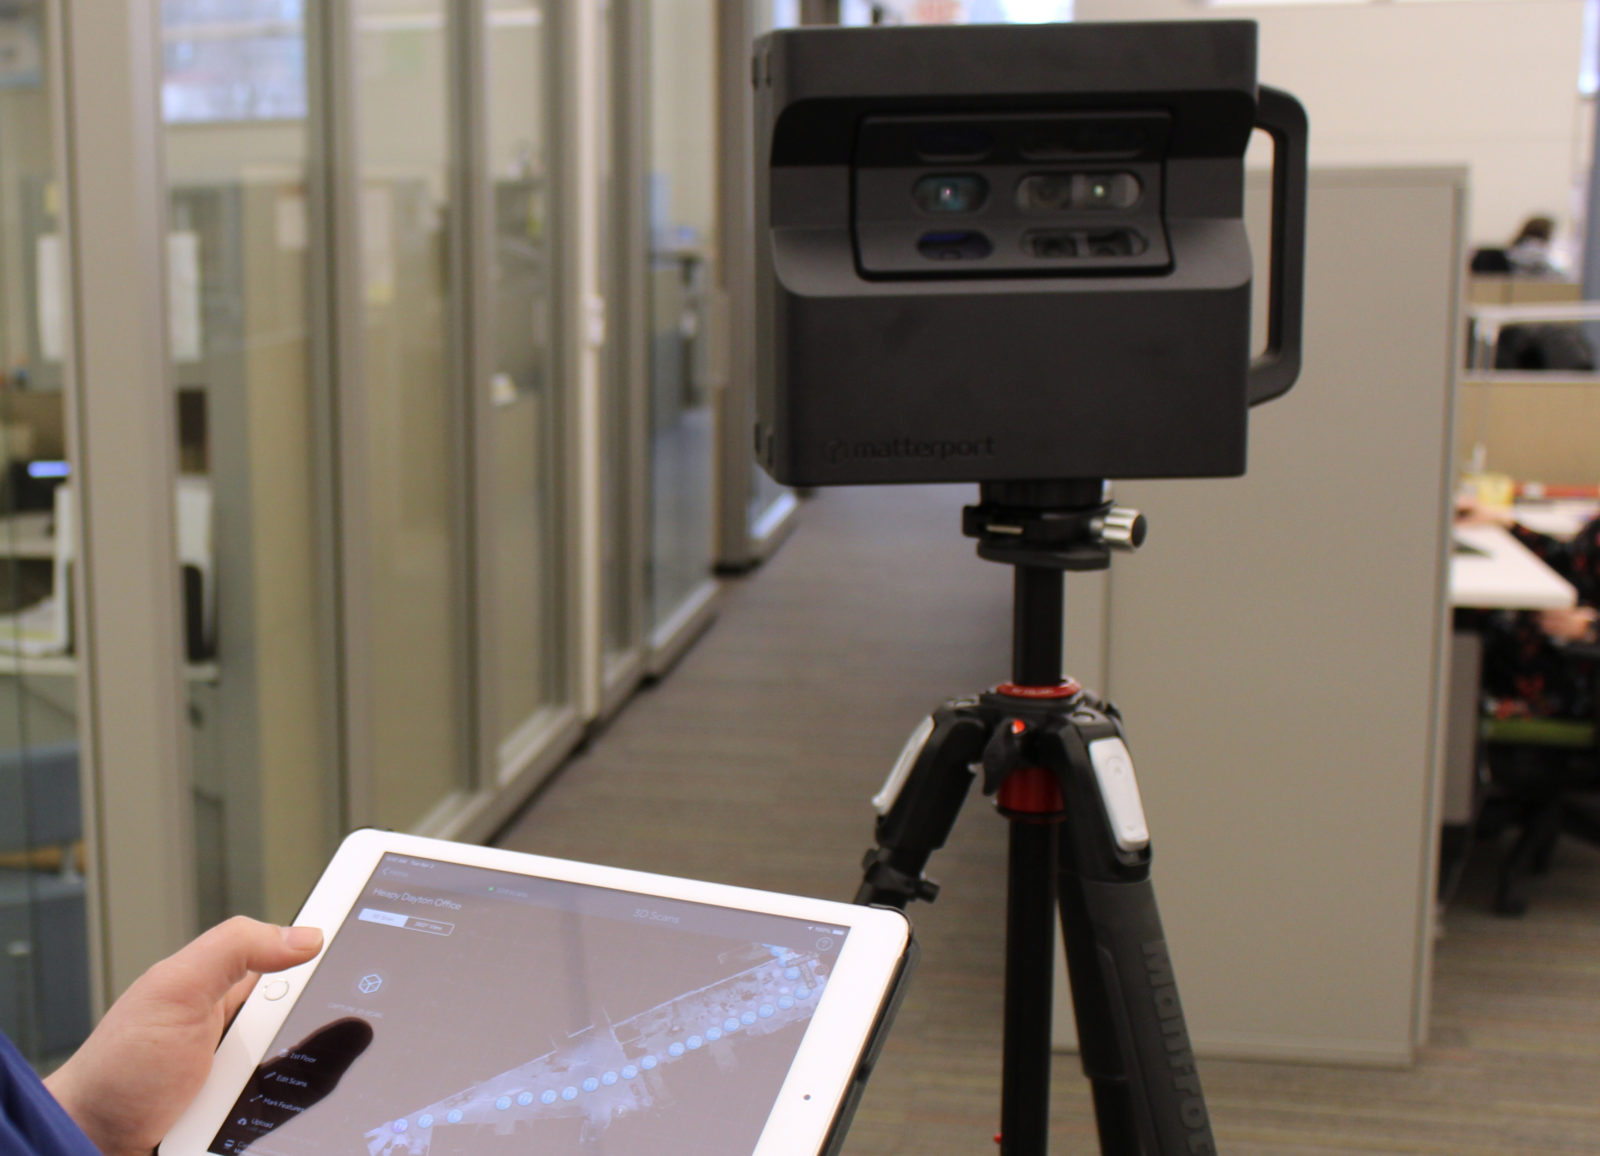
Alternatively, there are stationary or tabletop scanners that require the object to be placed on a rotating turntable for scanning. These scanners are better suited for larger objects or those that need to be captured in high detail.
Furthermore, some 3D scanners employ contact-based methods where the scanner physically touches the object’s surface to capture data. These scanners are useful for objects with complex geometries or delicate materials that may be difficult to scan using non-contact methods.
With the growing popularity of 3D printing, 3D scanners have become an essential tool for creating printable models. By scanning an existing object or creating a digital model from scratch, you can unleash your creativity and produce personalized and unique designs that can be brought to life through 3D printing.
In industries like medicine, architecture, and engineering, 3D scanners are used for a range of applications, such as creating custom prosthetics, capturing accurate measurements for building renovations, or reverse-engineering products for analysis and improvement.
How Does a 3D Scanner Work?
A 3D scanner works by capturing the shape, geometry, and appearance of an object using various technologies. These technologies include laser scanning, structured light scanning, and photogrammetry. Each method has its own unique approach, but they all aim to collect data points that make up the three-dimensional representation of the object.
Laser scanning is one of the most common techniques used in 3D scanning. It involves emitting laser beams onto the object’s surface and measuring the time it takes for the beams to bounce back to the scanner. By analyzing the reflected light, the scanner can calculate the distance between the object and the scanner, creating a point cloud that represents the object’s surface.
Structured light scanning, on the other hand, uses a projector that projects a pattern of light onto the object. The scanner then captures the distortion of the projected pattern caused by the object’s shape. By analyzing these distortions, the scanner can determine the object’s surface geometry. This method is often used for capturing fine details and textures, making it suitable for scanning objects with intricate designs.
Photogrammetry is a technique that utilizes multiple photographs of an object taken from different angles. The scanner software analyzes the images and uses the known camera positions to triangulate the object’s 3D coordinates. This method is particularly useful for capturing large objects or environments and can be performed using specialized camera rigs or even smartphones.
Regardless of the scanning technology used, the data acquired by the scanner is then processed by specialized software. This software aligns and merges the data points to create a complete and coherent three-dimensional representation of the object. This representation is often referred to as a point cloud, which is a collection of thousands or even millions of individual data points.
Once the point cloud is generated, additional steps can be taken to refine the scan and enhance the quality of the model. These steps may include removing any noise or outliers from the data, filling in gaps or missing areas, and smoothing the overall surface. This is typically done using software tools specifically designed for 3D scanning and editing.
After the necessary adjustments have been made, the final 3D model can be exported in various file formats such as .STL or .OBJ, which are compatible with 3D printing software and other digital design tools. The exported model contains all the necessary information to recreate the object in a virtual environment or to physically reproduce it using a 3D printer.
Overall, a 3D scanner is a powerful tool that combines hardware and software to capture real-world objects and convert them into digital representations. From capturing precise measurements to creating lifelike visualizations, 3D scanners play a crucial role in industries where accuracy, efficiency, and creativity are paramount.
Choosing the Right 3D Scanner for Your Project
When it comes to choosing a 3D scanner for your project, it’s important to consider several factors to ensure you select the right tool for the job. The following are some key considerations to keep in mind when making your decision:
1. Object Size and Complexity:
Consider the size and complexity of the objects you plan to scan. Some handheld scanners are suitable for smaller objects with intricate details, while larger stationary scanners are better suited for bigger objects or those with complex geometries.
2. Level of Detail:
Determine the level of detail you require in your scans. Some scanners have higher resolutions, allowing for more precise and accurate captures, while others may have lower resolutions but can still produce satisfactory results for certain applications.
3. Scanning Speed:
Consider the scanning speed of the device. This is especially important if you have a large number of objects to scan or if time is a crucial factor for your project. Some scanners can capture scans quickly, while others might require more time for each scan.
4. Portability:
Decide if portability is a requirement for your project. Handheld scanners offer the advantage of being lightweight and portable, allowing you to easily scan objects in various locations. Stationary scanners, on the other hand, may be more suitable for dedicated scanning setups.
5. Budget:
Consider your budgetary constraints. 3D scanners can range in price from affordable consumer-grade models to high-end professional scanners. Take into account your budget and prioritize the features that are essential for your specific project.
6. Software Compatibility:
Ensure that the scanner’s software is compatible with the operating system and other software tools you plan to use. This includes compatibility with your 3D modeling software, 3D printing software, and any other tools you may need to process and edit your scans.
7. Support and Training:
Check if the manufacturer or vendor offers adequate support and training materials. Having access to tutorials, user manuals, and technical support can be invaluable, especially if you are new to using 3D scanning technology.
8. Reviews and Recommendations:
Read customer reviews and seek recommendations from professionals or online communities in the field. Real-world experiences and insights from others can help you make an informed decision and avoid potential pitfalls.
By carefully considering these factors, you can determine which 3D scanner best meets the requirements of your project. Remember, selecting the right scanner will contribute to the quality and accuracy of your scans and ultimately lead to successful outcomes.
Preparing Your Object for 3D Scanning
Before you start the 3D scanning process, it’s crucial to properly prepare your object to ensure accurate and high-quality results. Here are some essential steps to follow when preparing your object for 3D scanning:
1. Clean the Object:
Thoroughly clean your object to remove any dirt, dust, or debris that could interfere with the scanning process. Use a soft brush or compressed air to gently remove particles from the surface. A clean object ensures that the scanner can accurately capture its geometry without any obstructions or imperfections.
2. Remove Reflective or Shiny Surfaces:
If your object has reflective or shiny surfaces, they can cause unwanted reflections or distortions in the scan. To prevent this, consider using a matte spray or applying a non-reflective powder to the surfaces. This helps to diffuse any light and makes the object easier to scan.
3. Use Markers or Targets (Optional):
In some cases, especially when scanning complex objects or for registration purposes, placing markers or targets on the object can help the 3D scanner align multiple scans accurately. These markers provide reference points for the software to stitch together multiple scans, ensuring a more complete and coherent 3D model.
4. Position and Secure the Object:
Position the object in a stable and secure manner for scanning. If necessary, use mounting or clamping devices to hold the object firmly in place. This prevents any movement or shifting during the scanning process, which could result in distorted or misaligned scans.
5. Optimal Lighting Conditions:
Ensure that your scanning environment has adequate and consistent lighting. Well-distributed diffuse lighting is ideal for capturing accurate scans. Avoid direct sources of light that can create shadows or harsh reflections on the object’s surface. Inconsistent lighting conditions can affect the quality and accuracy of the scan results.
6. Minimize Background Distractions:
When arranging your scanning setup, make sure to minimize background distractions that could interfere with the scanning process. Remove any unnecessary objects or clutter that might be captured unintentionally. A clean and unobstructed background helps the scanner focus solely on the object of interest.
7. Consider Texture Targets (If Necessary):
If the object you are scanning has a texture or pattern that is crucial for your project, consider using a texture target. Texture targets provide additional information to the software, enabling it to accurately capture and reproduce the fine details of the object’s texture in the 3D model.
By following these preparation steps, you can optimize the scanning process and ensure more accurate and reliable results. Properly preparing your object eliminates potential scanning issues and enhances the overall quality of the final 3D model.
Scanning Your Object
Now that you’ve prepared your object, it’s time to start the 3D scanning process. Follow these steps to ensure a successful scan:
1. Set Up the Scanning Equipment:
Ensure that the 3D scanner is set up correctly and is functioning properly. Connect the scanner to your computer and ensure that the necessary software is installed and ready to use. Familiarize yourself with the scanner’s user manual and operating instructions for optimal performance.
2. Choose the Scanning Technique:
Select the appropriate scanning technique based on the type and size of the object. If you’re using a handheld scanner, you may need to move around the object to capture scans from different angles. Alternatively, if you’re using a tabletop scanner, place the object on the turntable and adjust the scanner’s position accordingly.
3. Start the Scanning Process:
When you’re ready, initiate the scanning process according to the instructions provided by the scanner or software. This may involve pressing a button on the scanner or triggering the capture from the software interface. Ensure that the object is well-positioned and stable before starting the scan.
4. Capture Multiple Views:
To get a complete and accurate scan, it’s essential to capture multiple views of the object. Make sure to move around the object or rotate the turntable to capture scans from different angles. This ensures that all aspects of the object’s surface are captured in the scans and helps in creating a detailed 3D model.
5. Maintain Consistency:
Keep the scanning conditions consistent throughout the process. Maintain the same lighting setup and distance from the object to ensure consistent results. Avoid touching the object or the scanner during the scanning process to prevent inadvertent distortions or errors in the scans.
6. Monitor the Scans:
Monitor the scanning process and check that the scans are being captured accurately. Use the scanner’s live preview or the software interface to visualize the scans in real-time. If necessary, make any adjustments to the scanner position or settings to ensure optimal results.
7. Review the Scans:
Once you have completed the scans, review the captured data to ensure that all areas of the object have been adequately captured. Check for any missing spots or incomplete scans. It may be necessary to re-scan specific areas or adjust the scanning technique to capture any missed details.
By following these steps, you can effectively scan your object and collect the necessary data to create a digital replica. Remember to exercise patience and practice to develop your scanning skills, as it may take some trial and error to achieve the best possible results. Take the time to understand your specific scanner’s capabilities and experiment with different scanning techniques to optimize your results.
Cleaning Up and Editing Your 3D Scan
After you’ve completed the 3D scanning process, it’s time to clean up and edit your 3D scan to create a refined and printable model. Cleaning up your scan involves removing any unwanted artifacts, filling gaps, and refining the overall geometry. Follow these steps to achieve a high-quality 3D model:
1. Remove Noise and Artifacts:
Inspect your 3D scan and identify any areas with noise, artifacts, or unwanted details. These can include specks, holes, or inconsistencies in the scan data. Use dedicated software tools to remove these imperfections and ensure a clean and smooth surface.
2. Fill Holes and Patch Gaps:
If your scan has holes or gaps in the geometry, use tools in your editing software to fill these areas. The software will analyze the surrounding geometry and fill in the missing data to create a complete surface. Take care to ensure that the filling is accurate and matches the overall shape of the object.
3. Smooth Surface and Refine Geometry:
To create a more aesthetically pleasing model, you can smooth the surface and refine the geometry of your scan. Use tools available in your editing software to remove any sharp edges, bumps, or jagged features. This will result in a cleaner and more visually appealing 3D model.
4. Merge Multiple Scans (If Applicable):
If you’ve captured multiple scans of your object from different angles, you may need to align and merge these scans together. This process helps to create a more complete and accurate representation of your object. Use specialized software tools to align the scans and eliminate any misalignments or inconsistencies.
5. Optimize Polygon Count (Polycount):
When editing your 3D scan, consider optimizing the polygon count to strike a balance between file size and detail. Simplify the geometry if necessary by reducing the number of polygons or using decimation tools. This can help improve the performance and manageability of your 3D model.
6. Check Accuracy and Scale:
Verify the accuracy and scale of your 3D model by comparing it to the original object or using reference measurements. Ensure that the dimensions of the model match your intended design. Make any adjustments as needed to achieve the desired size and scale of your final print.
7. Save and Export as Print-Ready File:
Once you are satisfied with the cleaned-up and edited 3D scan, save and export it as a print-ready file format, such as .STL or .OBJ. Ensure that the file is compatible with your chosen 3D printing software and printer. Consider file size limitations and ensure the proper scale and orientation of the model.
By following these steps, you can refine and optimize your 3D scan to create a printable model that accurately represents your object. Editing your scan allows you to enhance the visual appeal and functionality of the final print, ensuring a successful 3D printing experience. Experiment with different editing techniques and software tools to achieve the best possible results for your specific project.
Exporting Your 3D Scan
Once you have cleaned up and edited your 3D scan to your satisfaction, it’s time to export it in a file format that is compatible with your 3D printing software. Exporting your 3D scan allows you to transfer the digital representation of your object to the 3D printing software where you can further prepare it for printing. Follow these steps to export your 3D scan:
1. Choose the Right File Format:
Select a file format that is suitable for 3D printing. The most commonly used file formats include STL (Standard Tessellation Language), OBJ (Wavefront Object), and STEP (Standard for the Exchange of Product Data). Make sure to check the compatibility of the chosen file format with your 3D printing software and printer.
2. Optimize the File Size:
Consider the size of your exported file. Depending on the complexity and level of detail of the scan, the file size can be quite large. To optimize the file size, you can use software tools to reduce the polygon count, simplify the geometry, or remove unnecessary data points while maintaining an acceptable level of detail for your intended print.
3. Scale and Rotate the Model:
Ensure that the scale and orientation of your 3D scan are correct before exporting. Check the dimensions of your original object and compare it to the digital model to ensure accuracy. If necessary, make any scaling adjustments to achieve the desired size for your print. Additionally, ensure that the orientation of the model is suitable for printing, taking into account any overhangs or support structures that may be necessary.
4. Confirm Compatibility with 3D Printing Software:
Make sure that the exported file is compatible with your chosen 3D printing software. Some software may have specific requirements or limitations when it comes to file formats or other parameters. Check the documentation or support resources provided by the software to ensure proper compatibility.
5. Save and Store Backups:
Before exporting, it is a good practice to save a backup copy of your original cleaned-up 3D scan. This allows you to go back to the original file if any issues arise during the printing process. Additionally, consider storing backups in multiple locations to prevent data loss.
6. Verify Exported Model:
After exporting, take a moment to verify the exported model in your chosen 3D printing software. Open the file and review the visual representation of the model to ensure that all the details and modifications you made during the editing process are retained.
7. Transfer to 3D Printing Software:
Finally, transfer the exported file to your 3D printing software. Import the file into the software and use the features provided to further prepare the model for printing. This may include tasks such as adding supports, adjusting infill settings, or optimizing print orientation.
By following these steps, you can successfully export your 3D scan and ensure that it is ready for further processing in your 3D printing software. Take the time to double-check the file format, scale, and orientation to avoid any unexpected issues during the printing process. With a properly exported model, you can proceed confidently to the next steps of preparing and printing your object.
Preparing Your 3D Printer
Before you can begin the 3D printing process, it’s essential to properly prepare your 3D printer to ensure successful and smooth operation. Taking the time to prepare your printer and understand its capabilities will help you achieve the best possible results. Follow these steps to prepare your 3D printer:
1. Read the User Manual:
Start by thoroughly reading the user manual provided by the manufacturer. This will familiarize you with the specific instructions and recommendations for setting up and preparing your printer. Pay close attention to any safety precautions and maintenance guidelines.
2. Assemble the Printer (If Required):
If your 3D printer requires assembly, carefully follow the instructions provided in the manual to put it together. Double-check that all components are securely attached and properly aligned. Take the time to understand how each part functions and interacts with the printing process.
3. Level the Print Bed:
One critical step in preparing your printer is to level the print bed. A level bed ensures that the first layer of your print adheres properly, leading to improved overall print quality. Most 3D printers come with a bed leveling feature that guides you through the process. Follow the instructions carefully to achieve a level surface.
4. Load Filament:
If using a filament-based 3D printer, load the filament into the printer’s extruder. Follow the manufacturer’s instructions to ensure proper filament insertion. This typically involves inserting the filament spool onto the holder, feeding it through the extruder assembly, and confirming that it reaches the nozzle smoothly.
5. Calibrate Printer Settings:
Access the printer’s settings menu or interface to calibrate and adjust specific parameters. This may include settings such as print speed, temperature, layer height, and extrusion flow rate. Consult the user manual or online resources for recommended settings based on your filament type and desired print quality.
6. Preheat the Printer (If Required):
If your printer requires preheating, turn on the preheating function and wait for the printer to reach the recommended temperature. Preheating is essential to ensure that the filament melts consistently and flows smoothly during the printing process.
7. Prepare the Build Surface:
Prepare the build surface to ensure proper adhesion. Some printers have a built-in or detachable build plate, while others may require additional surface treatments. Apply adhesive agents like adhesive sprays, painter’s tape, or specialized 3D printer bed adhesives to enhance print bed adhesion. Ensure the surface is clean and free from debris.
8. Level and Check Nozzle Height:
Check the nozzle height to ensure proper clearance between the nozzle and the build surface. Most printers provide manual or automated options for adjusting the nozzle height. Make sure there is an adequate gap to prevent the nozzle from scraping against the build surface while allowing proper filament extrusion during printing.
9. Test Print:
To verify that your printer is properly set up and calibrated, it’s a good idea to perform a test print. Choose a simple test file or a calibration model to check for issues such as print bed adhesion, over/under-extrusion, layer adhesion, and overall print quality. This test print will help you identify any adjustments that may be required before starting your actual print.
By following these steps, you can effectively prepare your 3D printer for a successful printing experience. Taking the time to properly set up and calibrate your printer will result in better print quality, reduced printing errors, and a smoother overall printing process.
Importing Your 3D Scan into the 3D Printing Software
After you have exported your 3D scan as a print-ready file, the next step is to import it into your chosen 3D printing software. This software will allow you to further prepare and optimize your 3D model for the printing process. Follow these steps to import your 3D scan:
1. Launch the 3D Printing Software:
Open your 3D printing software on your computer. Ensure that the software is installed correctly and up to date. Familiarize yourself with the software’s interface and tools if you’re new to the software.
2. Open a New Print Project:
Create a new print project or choose an existing project if you’ve previously used the software. This step will provide you with a workspace to import and manipulate your 3D scan.
3. Locate the Import Function:
Look for the import or open file function in the software. The exact location of this function may vary depending on the software you’re using, but it is typically found in the file or project menu. Click on the import function to proceed.
4. Select Your 3D Scan File:
Navigate to the location where you saved your exported 3D scan file. Choose the file and click on the open button. The software will then begin the process of importing the file into your workspace.
5. Review and Adjust Position:
Once imported, your 3D scan will appear in the software’s workspace. Take a moment to review the position and orientation of the model. It is important to ensure it is correctly aligned and positioned for printing. Use the software’s tools to rotate, scale, or move the model if necessary to achieve your desired orientation.
6. Inspect and Repair the Model:
Inspect the imported 3D scan for any potential issues or errors. Examine the model for missing or disconnected parts, non-manifold geometry, or inverted normals. Fix these issues using the software’s repair tools, such as automatic repair functions or manually adjusting the model’s geometry.
7. Set Print Parameters:
Configure the print parameters to match the requirements of your specific printer and filament. Set parameters such as layer height, print speed, infill density, and support structures. These settings will vary depending on the complexity of your scan and the desired print quality. Review the printer’s manual or consult online resources for optimal settings.
8. Slice the Model:
Slicing is the process of converting the 3D model into a series of 2D layers that the printer can understand. Use the slicing function in the software to generate the G-code, which provides instructions for the printer’s movements and extrusion. Adjust parameters such as layer thickness, infill pattern, and print speed to optimize the slicing process.
9. Save or Export the Sliced File:
Once the slicing is complete, save or export the sliced model as a G-code file or any format that is compatible with your specific printer. This file contains all the necessary instructions for the printer to produce your 3D object layer by layer.
By following these steps, you can successfully import your 3D scan into the 3D printing software, prepare it for printing, and generate the necessary instructions for your 3D printer. Take the time to familiarize yourself with the software’s features and customize the settings to achieve the best possible print quality for your specific project.
Adjusting the Scale and Orientation of Your 3D Print
Before you start the actual 3D printing process, it’s important to adjust the scale and orientation of your 3D model to ensure the desired results. This step allows you to optimize the size, fit, and orientation of your print. Follow these steps to adjust the scale and orientation of your 3D print:
1. Evaluate the Desired Size:
Determine the desired size of your 3D print. Consider the intended purpose and specifications of your project. Decide whether you need an exact replica of the scanned object or if resizing is necessary to meet specific requirements.
2. Measure the Original Object:
If accuracy is crucial, measure the original object using calipers or other measuring tools. Compare the measurements with the dimensions of the 3D model in your 3D printing software to ensure they match. This step helps to verify that the scale of your model is accurate.
3. Adjust the Scale:
In your 3D printing software, use the scaling function to adjust the size of the model. Increase or decrease the scale by a percentage or input specific measurements to achieve the desired size. Ensure that you maintain the aspect ratio to avoid distorting the model.
4. Consider Print Constraints:
Take into account the limitations and constraints of your 3D printer. Evaluate the build volume of your printer to ensure that your resized model will fit within its dimensions. If your print exceeds the build volume, you may need to further downscale or split the model into smaller parts for printing.
5. Optimize Print Orientation:
Consider the optimal orientation for your 3D print. Depending on your model’s geometry and support requirements, you may need to adjust the orientation to achieve the best print quality and minimize the need for extensive support structures. Experiment with different orientations to find the most suitable one.
6. Generate Support Structures (If Needed):
If your 3D print requires support structures, enable the support generation function in your 3D printing software. The software will automatically generate support structures under overhangs and areas where the model cannot be printed directly. Adjust the settings for the support structures to optimize their density and ease of removal.
7. Preview and Evaluate the Print Setup:
Using the preview or slice preview function in your 3D printing software, inspect the print setup to ensure the adjusted scale and orientation are as intended. Evaluate the placement of support structures, check the layer-by-layer preview, and identify any potential issues before proceeding with the print.
8. Save or Export the Print File:
Once you’re satisfied with the adjusted scale and orientation, save or export the print file in the appropriate format for your 3D printer. Common formats include G-code or machine-specific formats. This file contains the instructions necessary for your printer to produce your 3D object.
By following these steps, you can effectively adjust the scale and orientation of your 3D print to achieve the desired size, fit, and print quality. Take the time to experiment and find the best settings for your specific project, considering both the capabilities of your 3D printer and the requirements of your design.
Slicing and Generating G-Code
Once you have adjusted the scale and orientation of your 3D model, the next step in the 3D printing process is to slice the model and generate the G-code. Slicing is the process of converting the 3D model into a series of 2D layers that the 3D printer can understand, while G-code provides instructions for the printer’s movements and extrusion. Follow these steps to slice your model and generate the G-code:
1. Open Your Slicing Software:
Launch your chosen slicing software on your computer. Ensure that the software is installed correctly and up to date. Familiarize yourself with the software’s interface and tools if you’re new to using it.
2. Import Your Adjusted Model:
Import the 3D model that you adjusted in the previous steps into your slicing software. Use the file import function to locate and load the adjusted model file into the software’s workspace.
3. Configure Print Settings:
Configure the print settings in your slicing software to match the requirements of your specific 3D printer and filament. Adjust parameters such as layer height, print speed, infill density, support structures, and print temperature. Refer to your printer’s manual or consult online resources for optimal settings based on your specific requirements and filament type.
4. Set Slicing Parameters:
Adjust the slicing parameters based on your preference and the desired print quality. These parameters include the layer thickness, shell thickness, infill density, print speed, and support type. Make any necessary modifications to achieve the desired level of detail, strength, and speed for your print.
5. Preview Sliced Layers:
Use the slicing software’s preview function to examine the sliced layers of your model. This feature allows you to visualize how the model will be printed layer by layer. Inspect the preview to ensure that there are no missing or incorrectly sliced sections. Identify any potential issues, such as overhangs or gaps, and make adjustments as needed.
6. Generate the G-code:
Once you’re satisfied with the slicing settings and preview, proceed to generate the G-code. This process converts the sliced model data into a text-based file that contains the instructions for your 3D printer. Click on the “Generate G-code” or similar function in your slicing software to start the process.
7. Save or Export the G-code File:
After generating the G-code, save or export the file in the appropriate format for your 3D printer. This file contains all the necessary instructions for the printer to produce your 3D object layer by layer. Preferably, save the G-code file onto an SD card or transfer it to your 3D printer directly from the slicing software.
8. Double-check the G-code Settings:
Before initiating the print, double-check the G-code settings in your slicing software. Review the print volume, layer thickness, speed, and other parameters to ensure they match your desired print specifications. This step ensures that the printer will execute the print according to your preferences.
By following these steps, you can effectively slice your 3D model and generate the necessary G-code instructions for your 3D printer. Take the time to experiment with different slicing parameters and preview the sliced layers to fine-tune the settings and achieve the best possible print quality for your specific project.
3D Printing Your Object
After the slicing process is complete and you have generated the G-code, you are ready to start 3D printing your object. This exciting step brings your digital design to life in physical form. Follow these steps to ensure a successful 3D printing process:
1. Prepare Your 3D Printer:
Make sure your 3D printer is properly set up and ready for operation. Ensure that the print bed is clean and level, and that the appropriate filament is loaded and ready to use. Double-check all connections, safety measures, and any other printer-specific requirements.
2. Load the G-code File:
Transfer the previously generated G-code file to your 3D printer. Depending on your printer, you may use an SD card, USB connection, or other methods to transfer the file. Consult your printer’s manual for specific instructions on loading the G-code.
3. Start the Print Job:
Initiate the print job on your 3D printer. Depending on your printer’s interface, this may involve navigating through the menu or pressing the appropriate buttons. Ensure that the printer is securely positioned and that all safety precautions are taken.
4. Monitor the Print:
Monitor the progress of the print as it begins. Pay attention to the initial layers to ensure proper bed adhesion and filament extrusion. Keep an eye out for any potential issues such as warping, stringing, or layer shifting. Address any problems as soon as they arise to prevent further issues.
5. Maintain Ideal Printing Conditions:
Throughout the printing process, maintain the ideal printing conditions for optimal results. Keep the printing area well-ventilated if required and avoid touching or disturbing the printer while it is in operation. Ensure that the printer’s temperature remains consistent, especially if printing with temperature-sensitive filaments.
6. Remove Supports (If Applicable):
If your model has support structures generated during the slicing process, carefully remove them once the print is complete. Use appropriate tools, such as pliers or cutting implements, to detach the supports without damaging the print. Take care not to apply excessive force that could damage the printed object.
7. Post-Process the Print (Optional):
After the print job is finished and any supports are removed, you may choose to post-process the print. This can involve sanding rough surfaces, painting or applying other finishes, or assembling multiple printed parts together. Post-processing allows you to enhance the appearance and functionality of your finished print.
8. Clean and Maintain Your Printer:
Once the print has concluded and any post-processing tasks are complete, clean and maintain your 3D printer. This includes cleaning the print bed, removing any residual filament or debris, and performing routine maintenance as recommended by the printer’s manufacturer. Proper maintenance ensures that your printer remains in good working condition for future prints.
By following these steps, you can successfully 3D print your object. Keep in mind that each print may have unique settings and requirements, so it’s important to fine-tune and experiment based on the specific needs of your design and 3D printer. With time and experience, you’ll become adept at achieving high-quality prints that bring your digital creations to life.
Troubleshooting Tips
Although 3D printing can be a rewarding process, it may occasionally present challenges. Here are some troubleshooting tips to help you overcome common issues and achieve successful prints:
1. Poor Bed Adhesion:
If your print doesn’t adhere well to the print bed, try cleaning the bed surface or applying an adhesive solution like glue stick, hairspray, or specialized 3D printing adhesives. Leveling the bed accurately and adjusting the initial layer height can also improve bed adhesion.
2. Warping:
Warping occurs when the corners or edges of your print lift or curl. To mitigate warping, ensure that the print bed is heated to the appropriate temperature for the filament being used. Consider using a brim or raft as an extra anchor for improved stability during the print.
3. Stringing and Blobbing:
If you notice unwanted stringing or blobs of filament between different parts of your print, adjust the retraction settings in your slicing software. Increasing the retraction distance and speed can help reduce stringing. Additionally, check the print temperature to ensure it is within the recommended range for the filament type being used.
4. Layer Shifting:
Layer shifting occurs when the layers of your print are misaligned, resulting in a skewed or distorted model. Verify that the print bed is secure and level. Check that the stepper motors are operating smoothly and that the belts and pulleys are properly tensioned. Additionally, ensure that the print head does not encounter any obstructions during the print.
5. Inconsistent Extrusion:
If you observe inconsistent extrusion or gaps in your print, ensure that the nozzle is not clogged. Clean it carefully using tools like tweezers or a nozzle cleaning needle. Check the extruder tension and filament feed mechanism to ensure that filament is being fed consistently without slipping or under extruding.
6. Layer Delamination:
Layer delamination refers to the separation of layers in your print. This can be caused by insufficient layer bonding. Optimize the print temperature to ensure proper fusion between layers. Adjusting settings such as print speed and layer cooling can also help improve layer adhesion.
7. Printing Too Slow or Too Fast:
If your print is taking too long or the print quality is compromised due to high printing speed, consider reducing the print speed. Conversely, if you want to speed up the print, make sure the printer can handle faster speeds without introducing print defects such as poor layer adhesion or ringing artifacts.
8. Filament Jamming:
In the event of filament jamming or clogging, check that the filament path is clear and free of any obstructions. Ensure the filament diameter setting in your slicer matches the actual filament diameter. Adjust the print temperature to avoid overheating the filament, which can lead to jams.
Remember, troubleshooting 3D printing issues may require a bit of patience and experimentation. Each printer and filament combination may have unique characteristics and requirements. By familiarizing yourself with the specific capabilities and limitations of your equipment, referring to troubleshooting guides and online resources, and keeping a systematic approach, you’ll be well-equipped to address challenges and achieve successful prints.
Conclusion
3D scanning and 3D printing offer exciting possibilities, allowing you to bring your digital designs to life and explore new realms of creativity and innovation. With the right tools, knowledge, and troubleshooting skills, you can overcome challenges and produce high-quality 3D prints that meet your specific requirements.
Throughout this guide, we have discussed the process of creating a 3D print with a 3D scanner in detail. From understanding the concept of 3D scanning to preparing your object, scanning it accurately, editing the scan, and finally exporting it for 3D printing, each step plays a crucial role in achieving successful results. We’ve also covered important considerations such as choosing the right 3D scanner for your project, adjusting the scale and orientation of your print, and troubleshooting common issues that may arise during the printing process.
Remember, 3D printing is an ever-evolving technology, and there is always more to learn and explore. As you gain experience and knowledge, you’ll develop your own techniques and strategies for achieving optimal results. Stay curious, keep experimenting, and continue to expand your skills in the fascinating world of 3D printing.
With the ability to transform digital designs into tangible objects, 3D printing opens up endless possibilities in various fields, including engineering, medicine, art, and personal projects. Whether you’re creating prototypes, customizing designs, or turning your creative ideas into reality, the combination of 3D scanning and 3D printing empowers you to bring your visions to life with precision and accuracy.
So, dive into the world of 3D printing, unleash your creativity, and embrace the limitless possibilities that await you. With the right tools, techniques, and knowledge, you have the power to create incredible 3D prints that will amaze and inspire others.