Introduction
Welcome to this step-by-step guide on how to connect your Roku device to Wi-Fi. Roku is a popular streaming device that allows you to enjoy a wide range of entertainment options right at your fingertips. Whether you want to stream movies, TV shows, music, or even play games, a stable Wi-Fi connection is essential for seamless viewing.
Setting up and connecting your Roku device to Wi-Fi may seem like a daunting task, especially if you’re new to streaming devices or technology in general. However, with the help of this guide, we will walk you through the process and make it as simple as possible.
Before we dive into the steps, let’s take a quick look at what you’ll need. To connect your Roku device to Wi-Fi, you’ll need the following:
- A Roku streaming device (such as Roku Express, Roku Streaming Stick, or Roku Ultra)
- A TV with an HDMI input
- A stable internet connection
- Your Wi-Fi network name and password
Once you have these prerequisites ready, you can proceed with the step-by-step instructions provided in the following sections. Don’t worry if you encounter any difficulties along the way – we’ll be here to guide you through each step.
By the end of this guide, you’ll have your Roku device successfully connected to Wi-Fi, ready to stream your favorite content. So, without further delay, let’s get started on setting up your Roku device and connecting it to Wi-Fi.
Step 1: Setting up your Roku device
Before you can connect your Roku device to Wi-Fi, you’ll need to set it up properly. Follow these simple steps to get started:
- Connect your Roku device to power: Plug the power adapter into an electrical outlet and connect it to your Roku streaming device. Make sure it’s firmly connected.
- Connect your Roku device to your TV: Using an HDMI cable (not included with your Roku device), connect one end to the HDMI port on your Roku device and the other end to an available HDMI port on your TV.
- Turn on your TV and select the correct HDMI input: Use your TV remote to turn on the TV and then select the HDMI input that corresponds to the port you connected the Roku device to. You should see the Roku startup screen.
- Select your language: On the Roku startup screen, choose your preferred language using the arrow keys on your Roku remote and press the OK button.
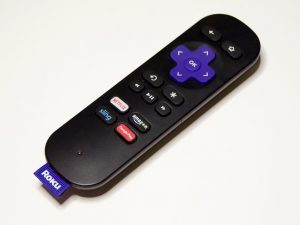
- Connect your Roku remote to your device: The on-screen instructions will guide you through the process of pairing your Roku remote with your Roku device. Follow the prompts to complete the setup.
Once you have successfully completed these steps, your Roku device will be set up and ready for the next steps to connect it to Wi-Fi. Keep your Roku remote handy, as you will need it for the remaining steps.
Now that you have your Roku device set up, let’s move on to the next step: finding the Roku settings menu.
Step 2: Finding the Roku settings menu
Once you have set up your Roku device, it’s time to navigate to the settings menu. Follow these simple steps to find the Roku settings menu:
- Make sure you are on the Roku home screen: Press the home button on your Roku remote to go back to the home screen. This is where you will start your search for the settings menu.
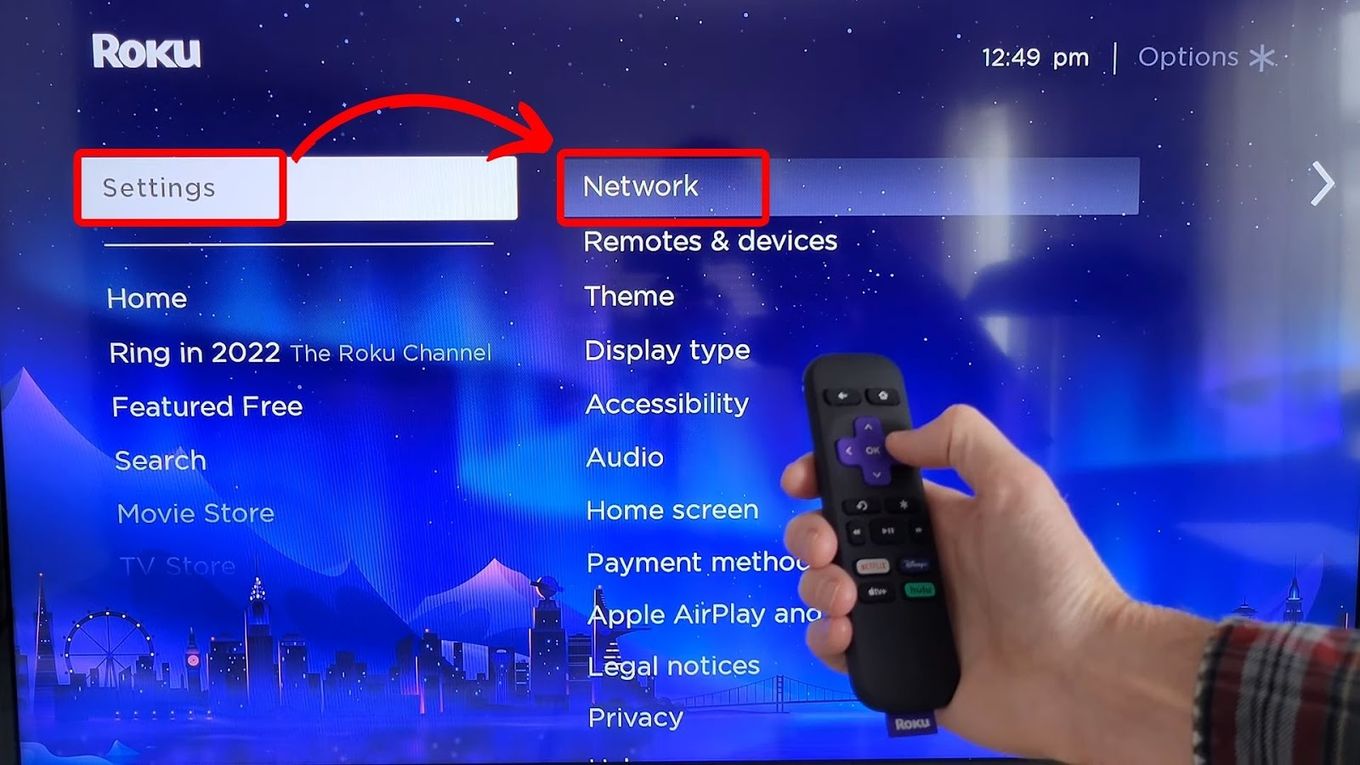
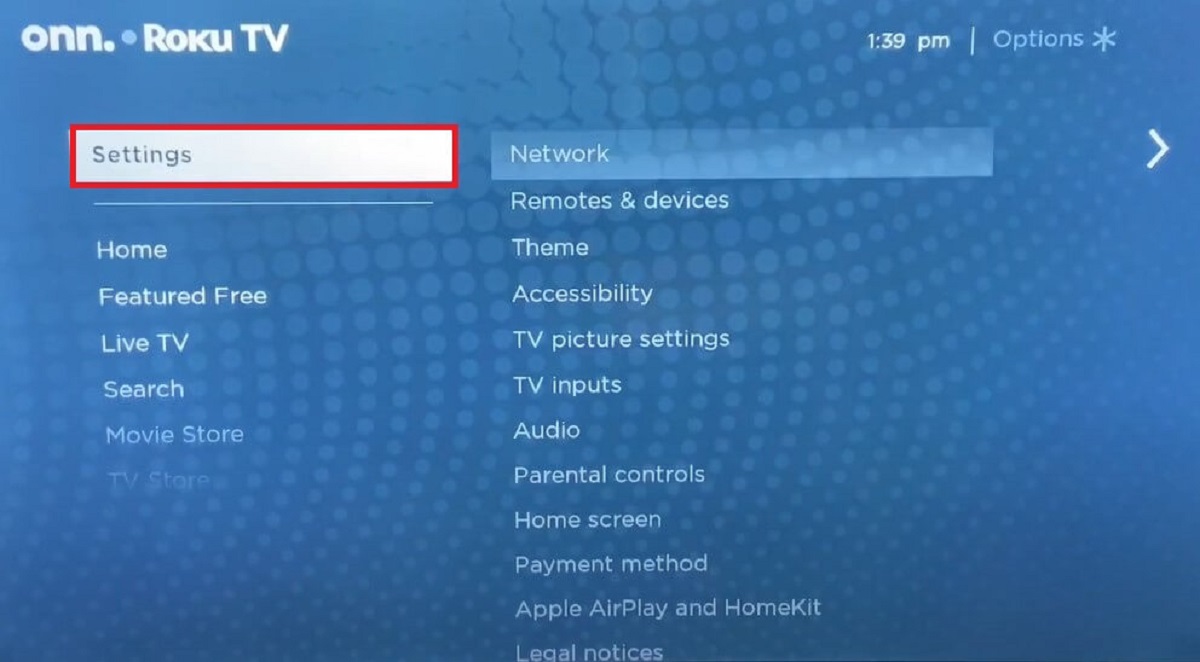
- Navigate to the settings menu: Use the arrow keys on your Roku remote to navigate to the left side of the screen. Keep scrolling until you find the settings option. It is represented by a gear icon or a similar symbol.
- Select the settings menu: Once you have highlighted the settings option, press the OK button on your remote to enter the settings menu.
After following these steps, you should now be inside the Roku settings menu. You will see a variety of options and settings that you can explore. The settings menu allows you to personalize your Roku device and manage various features and preferences.
Now that you’ve successfully found the settings menu, you’re ready to proceed to the next step: accessing the network settings.
Step 3: Accessing the Network settings
Now that you’re in the Roku settings menu, it’s time to access the network settings to connect your Roku device to Wi-Fi. Here’s how you can do it:
- Select the “Network” option: Using the arrow keys on your Roku remote, scroll through the settings menu and select the “Network” option. It is usually located towards the top of the menu. Press the OK button to enter the network settings.
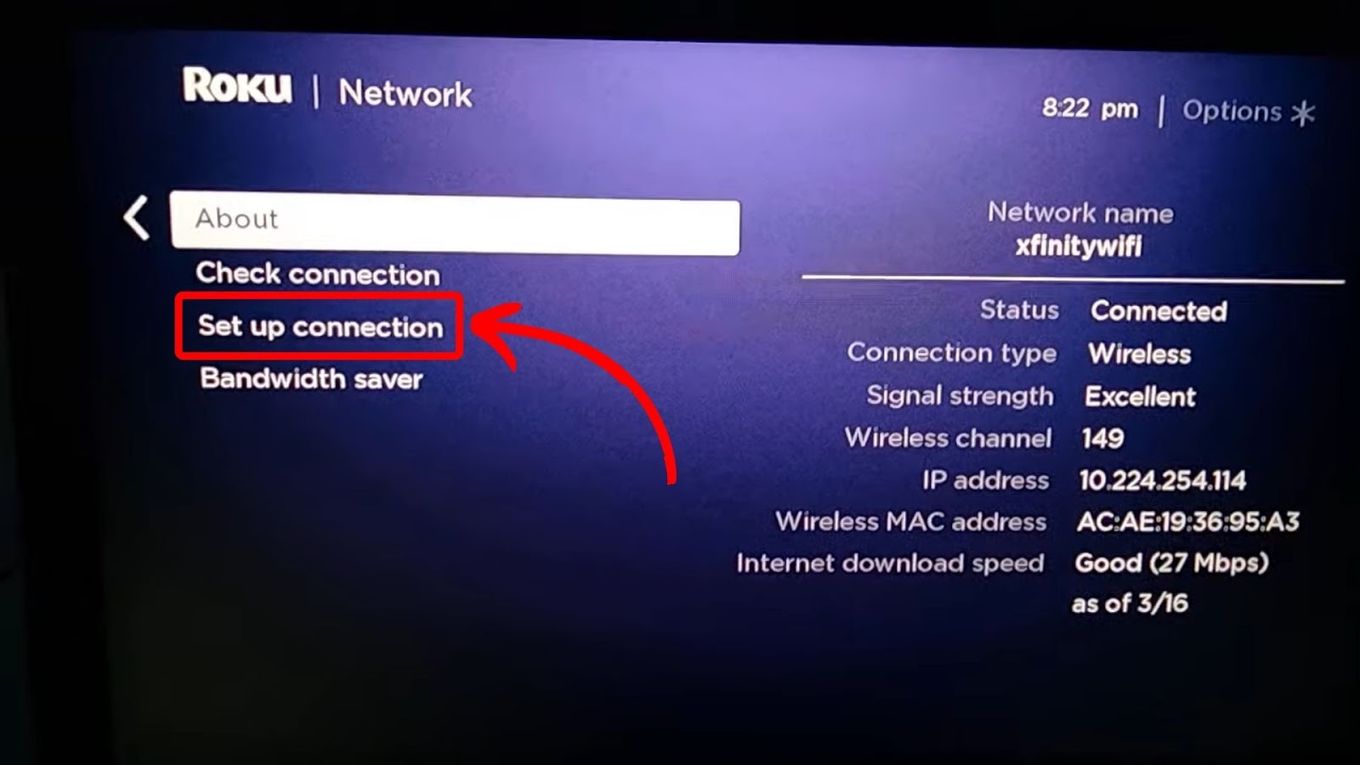
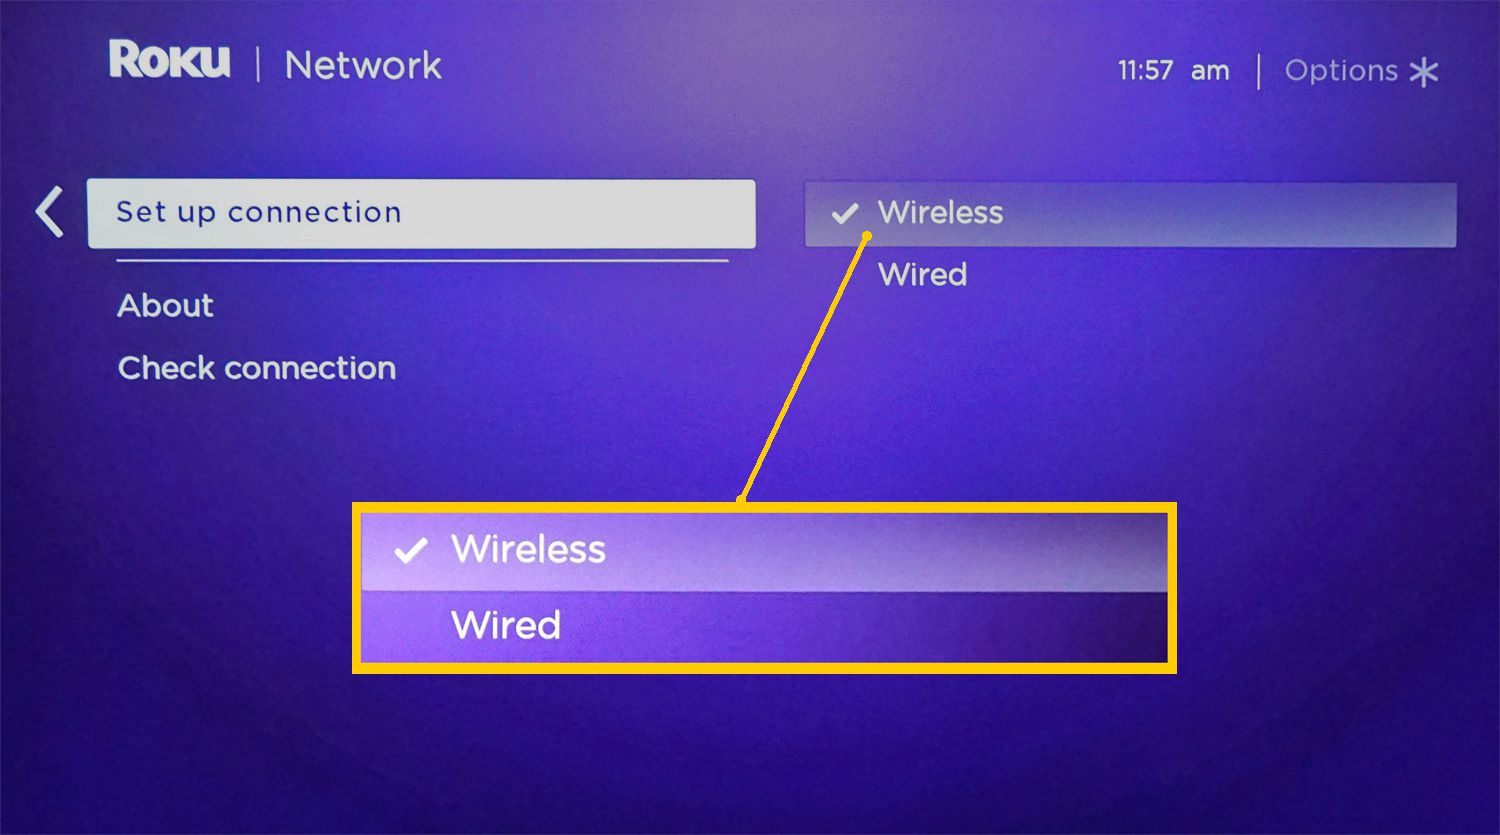
- Choose “Set up connection”: In the network settings menu, you will see different options related to network connectivity. Look for the option that says “Set up connection” or something similar. Use your remote to select it and press OK.
By following these steps, you will now be in the network settings, where you can configure and choose your Wi-Fi network for your Roku device.
Now that you have accessed the network settings, let’s move on to the next step: selecting your Wi-Fi network.
Step 4: Selecting your WiFi network
After accessing the network settings in your Roku device, it’s time to select your WiFi network. Here’s how you can do it:
- Choose “Wireless”: In the network settings menu, you will usually find two options: “Wireless” and “Wired”. Since we’re connecting through WiFi, select the “Wireless” option using your Roku remote and press OK.
- Scan for available networks: Your Roku device will now start scanning for available WiFi networks in your area. This process may take a few seconds. Once the scan is complete, you will see a list of available networks on your screen.
- Select your WiFi network: Using the arrow keys on your remote, scroll through the list of WiFi networks and highlight the network you want to connect to. Make sure you select the correct network name (SSID) for your WiFi network.
By following these steps, you have successfully selected your WiFi network on your Roku device. Now, let’s move on to the next step: entering your WiFi password.
Step 5: Entering your WiFi password
Now that you have selected your WiFi network, it’s time to enter your WiFi password to establish a connection. Follow these steps:
- Highlight the password field: Once you have selected your WiFi network, move the cursor to the password field using the arrow keys on your Roku remote. The password field is usually marked as “Password” or “Enter WiFi Password”.
- Enter your WiFi password: Using the alphanumeric keys on your Roku remote, enter your WiFi password carefully. Pay attention to capitalization, special characters, and any spaces or dashes. The characters you type will appear as asterisks (*) on the screen for security purposes.
- Confirm and submit: Once you have entered your WiFi password, double-check to ensure it is accurate. Then, navigate to the “Connect” or “Submit” button and press OK on your remote to confirm the password and initiate the connection process.
By following these steps, you have successfully entered your WiFi password into your Roku device. Your Roku device will now attempt to connect to your WiFi network with the provided credentials.
Now, let’s move on to the final step: connecting to WiFi.
Step 6: Connecting to WiFi
After entering your WiFi password, your Roku device will attempt to connect to your WiFi network. Here’s how you can complete the connection process:
- Wait for the connection to establish: Once you have submitted the WiFi password, your Roku device will take a moment to establish a connection with your WiFi network. During this time, a connection message or progress bar may appear on the screen.
- Successful connection: If the connection is successful, your Roku device will display a confirmation message on the screen. This message may state that your Roku device is connected to the network or that it is updating software. This indicates that your Roku device is now connected to WiFi.
- Failed connection: In some cases, if the WiFi password is incorrect or the connection cannot be established, your Roku device will display an error message. If this happens, double-check your WiFi password and repeat steps 5 and 6.
Once your Roku device is successfully connected to WiFi, you can begin streaming your favorite content and exploring the wide range of entertainment options available.
With the completion of this final step, congratulations! You have successfully connected your Roku device to WiFi. Enjoy a seamless streaming experience and take full advantage of your Roku device’s features.
Conclusion
Connecting your Roku device to WiFi is a crucial step in enjoying the full functionality and entertainment options that Roku has to offer. By following the step-by-step instructions outlined in this guide, you should now have your Roku device successfully connected to your WiFi network.
Throughout this guide, we covered everything from setting up your Roku device, finding the settings menu, accessing the network settings, selecting your WiFi network, entering your WiFi password, and finally, connecting to WiFi. Each step was designed to be easy to follow, ensuring that even those new to streaming devices can successfully connect their Roku device to WiFi.
Remember, a stable WiFi connection is essential for smooth streaming and uninterrupted entertainment. If you ever need to change your WiFi network or face any connectivity issues in the future, you can revisit this guide for a refresher on the steps.
Now that your Roku device is connected to WiFi, you can explore the wide range of content available through various streaming channels. Watch your favorite movies, binge-watch TV shows, listen to music, play games, and much more.
We hope that this guide has been helpful and that you can now enjoy the endless entertainment possibilities with your Roku device. If you have any further questions or encounter any difficulties, don’t hesitate to consult the official Roku support website or reach out to their customer support team for assistance.
Thank you for choosing Roku, and happy streaming!