Introduction
When it comes to troubleshooting network issues or configuring network settings, knowing your computer’s IP address can be essential. An IP address, or Internet Protocol address, is a unique numerical identifier that allows devices to communicate with each other over a network. By checking your computer’s IP address, you can gain valuable information about its network connection.
In this article, we will guide you through the process of checking the IP address on your computer using different operating systems, such as Windows, Mac, and Linux. Whether you’re a tech-savvy professional or a casual user, this step-by-step guide will help you easily locate your computer’s IP address.
Understanding your computer’s IP address is not only useful for troubleshooting network issues but can also come in handy for various tasks, such as setting up port forwarding, configuring network devices, or accessing your computer remotely. With that in mind, let’s dive into the different methods of checking your IP address on various operating systems.
Step 1: Open the Command Prompt
To check your IP address on a Windows, Mac, or Linux computer, you’ll need to access the Command Prompt or Terminal, depending on the operating system you’re using. In this step, we’ll show you how to open the Command Prompt on different operating systems.
Windows: On a Windows computer, you can open the Command Prompt by pressing the “Windows key + R” to open the Run dialog box. Then, type “cmd” and hit Enter or click OK. Alternatively, you can search for “Command Prompt” in the Start menu and click on it to open.
Mac: If you’re using a Mac, you can open the Terminal by going to the Applications folder, then Utilities, and finally, opening Terminal. Another quick way to open Terminal is by using the Spotlight search. Simply press “Command + Space” to open Spotlight, type “Terminal,” and click on the Terminal app.
Linux: Linux users can generally access the Terminal by pressing “Ctrl + Alt + T” on the keyboard. This shortcut should open the Terminal window. However, please note that there can be variations depending on the Linux distribution you’re using. So, refer to your distribution’s documentation if these shortcuts don’t work.
Once you’ve successfully opened the Command Prompt or Terminal, you’re ready to move on to the next step and check your IP address. Make sure to follow the instructions specific to your operating system in the upcoming steps.
Step 2: Enter the Command
Now that you have the Command Prompt or Terminal open, it’s time to enter a specific command that will display your computer’s IP address. The command you need to enter can vary depending on the operating system you’re using.
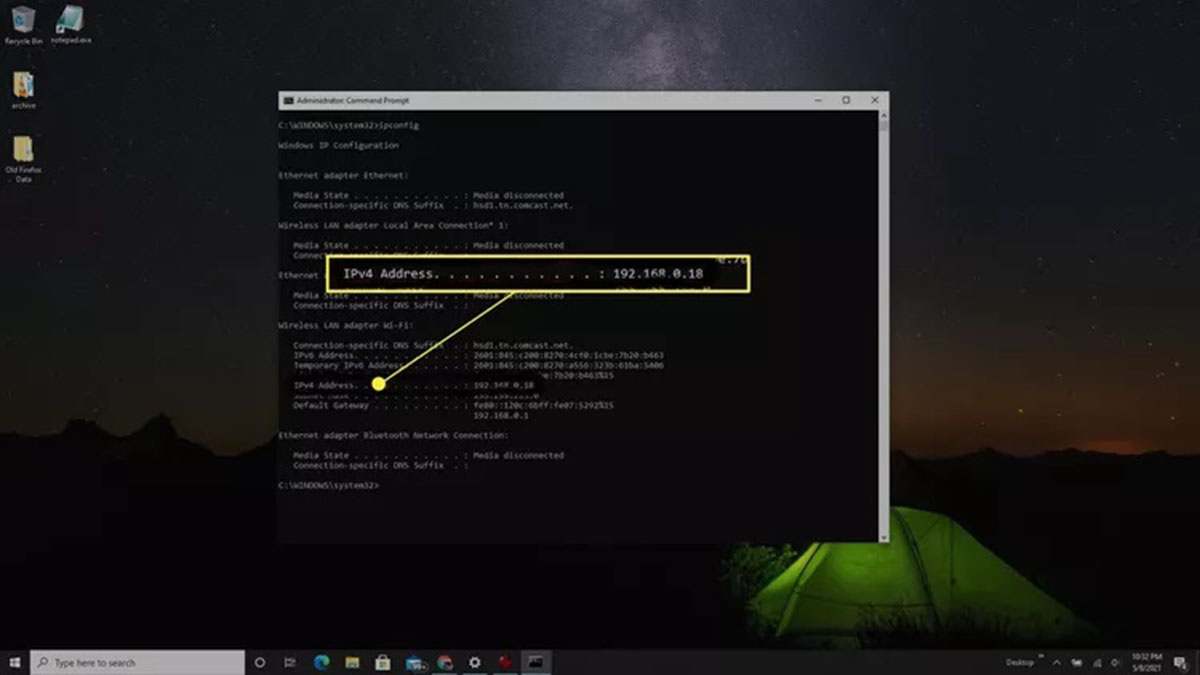
Windows: In the Command Prompt window, type the command “ipconfig” and press Enter. This command will display a list of network interfaces and their corresponding IP addresses. Look for the “IPv4 Address” under the network interface you’re currently using to access the internet.
Mac: In the Terminal window, type the command “ifconfig” and press Enter. This command will display a list of network interfaces along with their IP addresses. Look for the “inet” or “inet6” address under the network interface you’re currently using.
Linux: In the Terminal window, type the command “ifconfig” or “ip addr show” and press Enter. These commands will display a list of network interfaces and their IP addresses. Look for the “inet” or “inet6” address under the network interface you’re currently using.
After entering the command, the Command Prompt or Terminal will process the command and display the output containing your computer’s IP address. Take note of the IP address shown as you will need it for the next step.
Now that you’ve successfully entered the command, let’s move on to the next step and locate your IP address on different operating systems.
Step 3: Locate the IP Address
After entering the command in the Command Prompt or Terminal, you will see the output that includes your computer’s IP address. In this step, we will guide you on how to locate your IP address based on the operating system you’re using.
Windows: In the Command Prompt window, locate the network interface that you’re currently using to access the internet. Under that interface, look for the “IPv4 Address” field. The IP address next to it represents your computer’s IP address.
Mac: In the Terminal window, find the network interface you’re currently using, which can vary based on your network configuration. Look for the “inet” or “inet6” address listed under that interface. The IP address displayed represents your computer’s IP address.
Linux: In the Terminal window, look for the network interface you’re currently using, which can be identified by its name, such as “eth0” or “wlan0”. Under that interface, locate the “inet” or “inet6” address. The IP address shown is your computer’s IP address.
Take note of your computer’s IP address as you may need it for various networking tasks or troubleshooting purposes. You can also use this information to verify if your computer is configured correctly on the network.
Now that you have successfully located your computer’s IP address, let’s move on to the next step and learn how to check the IP address on specific operating systems like Windows, Mac, and Linux.
Step 4: Check IP Address on Windows
If you’re using a Windows computer, there are additional methods you can use to check your IP address. In this step, we will explore these alternative methods that can come in handy in different scenarios.
Method 1: Using the Network and Sharing Center: One way to check your IP address on Windows is through the Network and Sharing Center. To do this, right-click on the network icon in the system tray and select “Open Network and Sharing Center” from the context menu. In the Network and Sharing Center window, click on the active network connection. A new window will open, displaying various network details including your IP address.
Method 2: Using the Settings App: Another method is to use the Settings app. Simply open the Start menu, click on the “Settings” gear icon, and then select “Network & Internet.” Under the “Status” tab, click on “View your network properties.” Here, you will find your IP address listed under the IPv4 Address or IPv6 Address section.
Method 3: Using Command Prompt or PowerShell: You can also check your IP address using the Command Prompt or PowerShell. Open either of these tools and type the command “ipconfig” to display your IP address. You can look for the “IPv4 Address” under the relevant network interface to find your IP address.
With these alternate methods, you now have multiple ways to check your IP address on a Windows computer. Choose the method that suits your preference or the situation you’re in.
In the next step, we will explore how to check the IP address on a Mac computer.
Step 5: Check IP Address on Mac
If you’re using a Mac computer, there are various methods to check your IP address. In this step, we will explore these different methods to help you locate your IP address on a Mac.
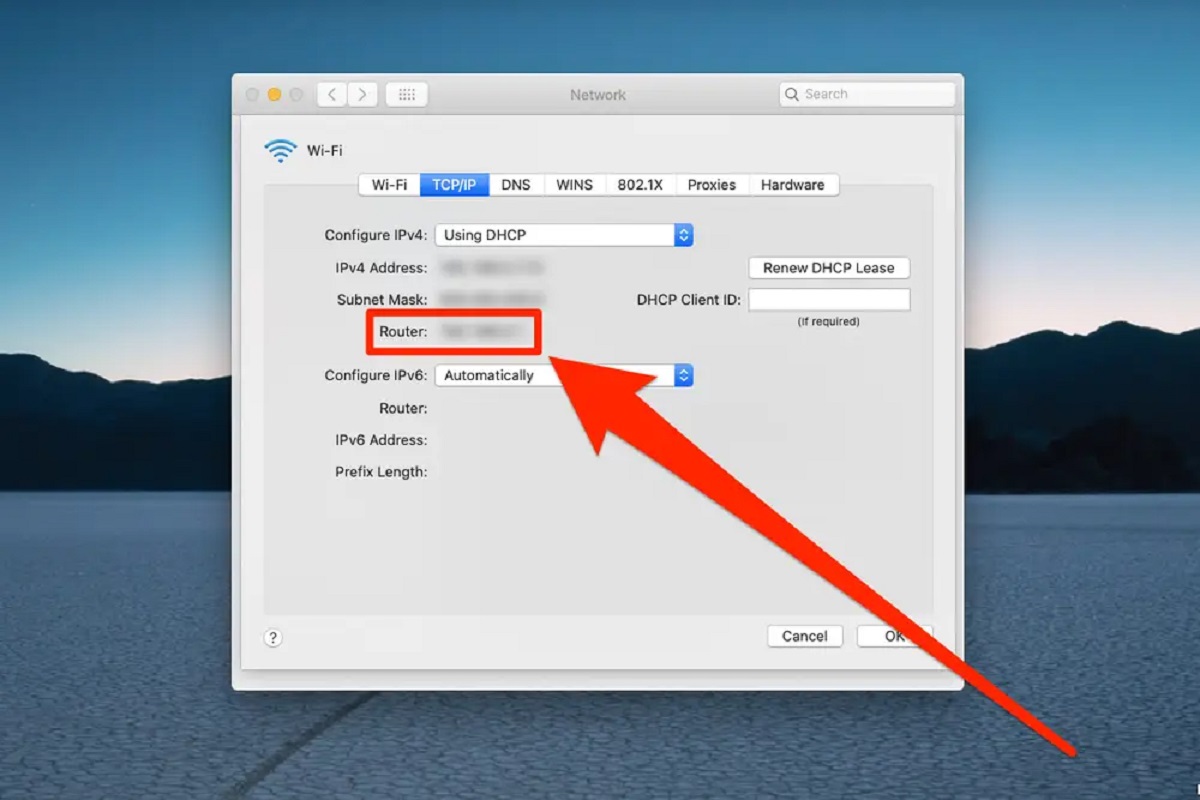
Method 1: Using System Preferences: One way to check your IP address on a Mac is through the System Preferences. Click on the Apple menu in the top-left corner of the screen and select “System Preferences.” In the System Preferences window, click on the “Network” icon. On the left-hand side, select the network connection you’re currently using, such as Wi-Fi or Ethernet. Your IP address will be displayed on the right-hand side of the window.
Method 2: Using Network Utility: Another method is to use the Network Utility tool. Go to the “Applications” folder, then open the “Utilities” folder, and launch “Network Utility.” In the Network Utility window, click on the “Info” tab and select the network interface you’re using. Your IP address will be displayed next to the “IP address” field.
Method 3: Using Terminal: You can also check your IP address on a Mac using the Terminal. Open the Terminal application (can be found in the “Utilities” folder within the “Applications” folder). Type the command “ifconfig” and press Enter. Look for the “inet” or “inet6” address under the network interface you’re currently using. Your IP address will be displayed next to it.
By utilizing these different methods, you can easily check your IP address on a Mac computer. Choose the method that suits your preferences or the situation you’re dealing with.
In the next step, we will explore how to check the IP address on a Linux computer.
Step 6: Check IP Address on Linux
Checking your IP address on a Linux computer can be done using various command-line tools. In this step, we will explore different commands that can help you locate your IP address on a Linux system.
Method 1: Using the ifconfig Command: The ifconfig command is commonly used to display network interface information on Linux systems. Open the Terminal and type “ifconfig” followed by Enter. Look for the network interface you’re currently using, such as eth0 or wlan0. Under that interface, you will find the “inet” or “inet6” address, which represents your IP address.
Method 2: Using the ip Command: Another command-line tool you can use to check your IP address on Linux is the ip command. Open the Terminal and type “ip addr show” followed by Enter. This command will display detailed information about all network interfaces. Look for the network interface you’re currently using and locate the “inet” or “inet6” address, which indicates your IP address.
Method 3: Using the hostname Command: The hostname command can also provide you with your IP address. Open the Terminal and type “hostname -I” followed by Enter. The -I option will display all IP addresses associated with your hostname, including your computer’s IP address.
By utilizing these command-line tools, you can easily check your IP address on a Linux computer. Choose the method that you’re most comfortable with or try them all to ensure accurate results.
Now that you know how to check your IP address on different operating systems, you can confidently troubleshoot network issues or configure your network settings as needed.
Conclusion
Checking your IP address is an important step in troubleshooting network issues, configuring network settings, or accessing your computer remotely. In this article, we have guided you through the process of checking your IP address on different operating systems, including Windows, Mac, and Linux.
We started by opening the Command Prompt or Terminal and entering the appropriate command to display the IP address. Then, we located the IP address based on the output shown in the Command Prompt or Terminal. We also provided additional methods for checking the IP address on Windows and explored different methods for checking the IP address on Mac and Linux systems.
By following the step-by-step instructions and using the respective methods for your operating system, you can easily locate your computer’s IP address. This information can be useful for various tasks such as troubleshooting network problems, configuring network devices, or setting up remote access to your computer.
Remember, having knowledge of your IP address gives you valuable insight into your network connection, allowing you to make necessary adjustments or carry out troubleshooting with confidence.
Now that you have a clear understanding of how to check your IP address on different operating systems, you can apply this knowledge to effectively manage your network and maintain a stable and secure network connection.
So go ahead, check your IP address, and empower yourself with the information you need to keep your network running smoothly.


