Introduction
Welcome to this guide on how to charge a power bank with a capacity of 2200mAh. Power banks have become an essential accessory for our modern lives, offering a convenient way to recharge our devices on the go. With their compact size and portable nature, power banks allow us to stay connected and powered up no matter where we are.
When it comes to charging a power bank, it is important to follow the correct steps to ensure efficient and safe charging. In this article, we will take you through a step-by-step process on how to charge a power bank of 2200mAh capacity. Whether you are a first-time power bank user or simply need a refresher, this guide will help you make the most of your power bank’s charging capabilities.
Before diving into the charging process, let’s briefly discuss what a power bank is. A power bank, also known as a portable charger, is a device that stores electrical energy and later releases it to charge other devices. It typically features a battery, charging circuitry, and one or more USB ports for connecting devices.
Now that we have an understanding of what a power bank is, let’s move on to the step-by-step instructions to charge a power bank with a capacity of 2200mAh. By following these guidelines, you will be able to charge your power bank effectively and ensure that it is ready to provide a reliable power source for your devices when you need it the most.
Step 1: Gather the necessary equipment
Before you begin charging your power bank, it is essential to gather the necessary equipment. This ensures that you have everything you need to complete the charging process smoothly. Here are the items you will need:
- A power source: This can be a wall adapter, computer USB port, or a USB charger.
- A USB cable: Make sure you have a compatible USB cable that can connect your power bank to the power source.
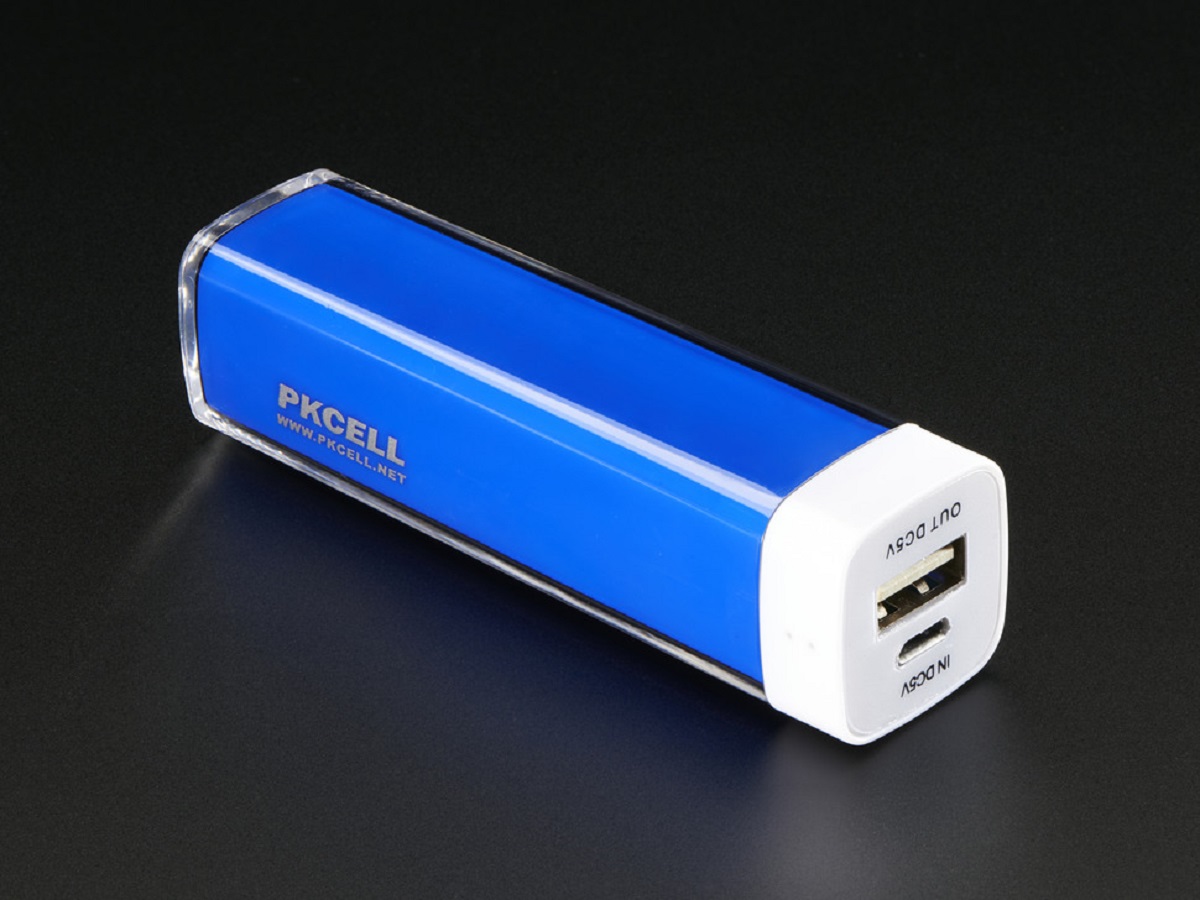
- Your power bank: Of course, you will need the power bank with a capacity of 2200mAh that you want to charge.
Ensure that all the equipment is in good condition and functioning properly. If any component is damaged or not working correctly, it may affect the charging process or even cause damage to your power bank or other devices. It’s always better to be safe and use equipment that is in optimal condition.
Properly inspect the USB cable for any frayed wires or visible damage. A damaged cable can lead to inefficient or interrupted charging. If you notice any issues with the cable, it is recommended to replace it with a new one that is compatible with your power bank and power source.
Once you have gathered all the necessary equipment, you are ready to move on to the next step: checking the charge level of your power bank.
Step 2: Check the power bank’s charge level
Before you start charging your power bank, it is important to check its current charge level. This step will give you an idea of how much charging your power bank needs and how long it might take to reach a full charge.
Most power banks come with LED indicators that display the charge level. These indicators can be in the form of lights or a digital display. Check your power bank’s user manual to understand how to interpret the LED indicators.
If your power bank has a light-based indicator, it may have different colors or blinking patterns to indicate different charge levels. For example, a blue light might indicate a high charge, while a red light might indicate a low charge.
If your power bank has a digital display, it will show the remaining battery percentage or the current charge level in a numerical format. This makes it easy to determine the exact charge level of your power bank.
Once you have identified the charge level of your power bank, you will have a better understanding of how much charging it needs. If the charge level is already high, you may not need to charge it for an extended period. However, if the charge level is low, you will need to allocate more time for charging.
Checking the charge level of your power bank is essential as it allows you to plan your charging process more effectively. It ensures that you don’t overcharge or undercharge your power bank, maximizing its lifespan and performance.
Now that you are aware of your power bank’s charge level, you can proceed to the next step: connecting the power bank to a power source.
Step 3: Connect the power bank to a power source
Now that you have determined the charge level of your power bank, it’s time to connect it to a power source for charging. Follow these steps to ensure a proper connection:
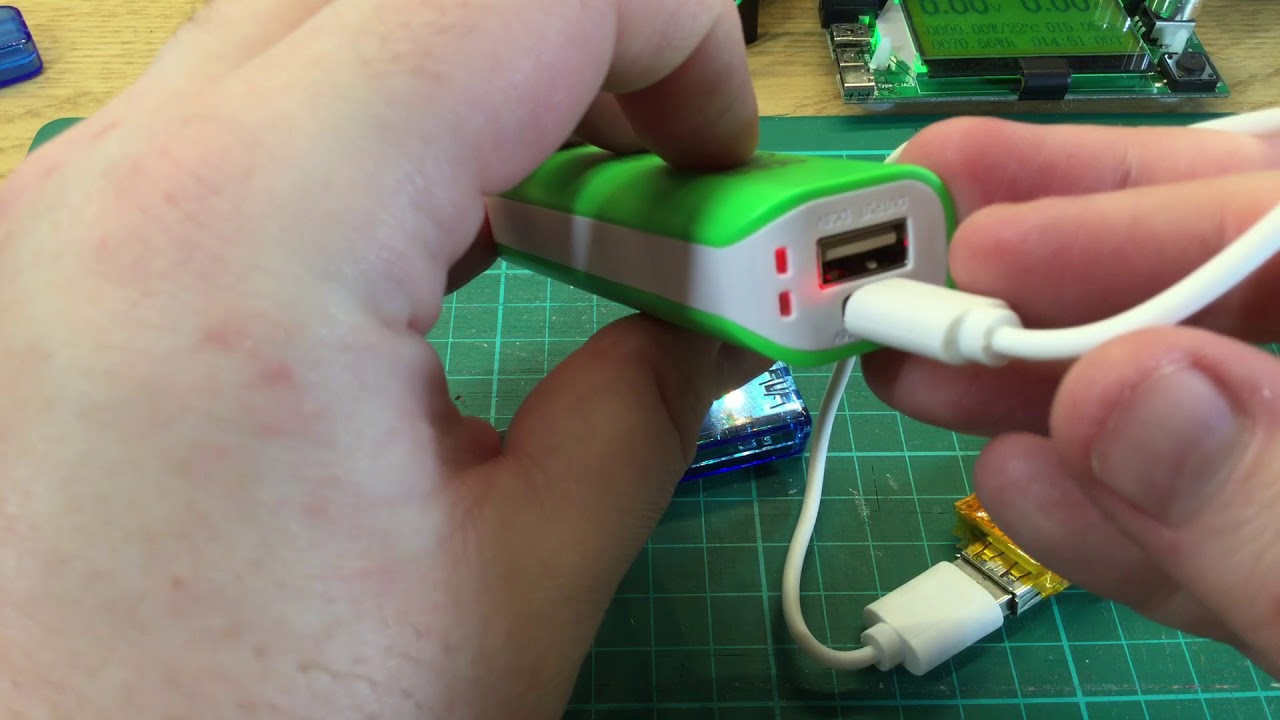
- Locate the USB port on your power bank. This is where you will connect the USB cable.
- Connect one end of the USB cable to the USB port on your power bank. Make sure it fits securely and snugly.
- Next, plug the other end of the USB cable into the power source. This can be a wall adapter, computer USB port, or USB charger.
- Ensure that the power source is working correctly and providing a stable power supply.
Once you have successfully connected the power bank to the power source, the charging process will begin. The power bank will draw power from the source and start replenishing its battery capacity.
It’s important to use a reliable power source that provides sufficient power output for your power bank’s requirements. Using low-quality or incompatible chargers can lead to slow charging, overheating, or even damage to your power bank.
While your power bank is connected to the power source, it is advisable to place it on a stable surface to avoid accidental disconnections or falls. This will ensure a steady charging process without any interruptions.
Keep in mind that the charging time will vary depending on factors such as the capacity of your power bank, the current charge level, and the power output of the source. Typically, it can take a few hours to fully charge a 2200mAh power bank.
Now that your power bank is connected to the power source, you are ready to move on to the next step: monitoring the charging progress.
Step 4: Monitor the charging progress
As your power bank is being charged, it’s important to monitor the progress to ensure everything is going smoothly. Here are some tips for effectively monitoring the charging process:
- Pay attention to the LED indicators on your power bank. The lights may blink, change colors, or indicate the charge level in some other way. Refer to your power bank’s user manual to understand the specific indications.
- Keep an eye on the charging time. While the exact time may vary, a 2200mAh power bank typically takes a few hours to fully charge, depending on the power output of the source and the current charge level.
- Make sure the power bank remains connected to the power source securely. Avoid moving or jiggling the power bank too much, as this can cause the connection to become loose and interrupt the charging process.
- During the charging process, avoid exposing the power bank to extreme temperatures. High or low temperatures can affect the charging efficiency and overall performance of the power bank.
- If you notice any unusual behavior, such as excessive heat or a lack of progress in the charging process, disconnect the power bank from the power source immediately. This could indicate a potential issue with the power bank or the charging process.
It is recommended to periodically check the charge level indicator to gauge the progress. This will give you an idea of how much longer the charging process will take. Patience is key, as charging times can vary depending on various factors.
Remember to be mindful of safety precautions and follow the specific guidelines provided by the manufacturer of your power bank. Each power bank may have unique features and requirements for the charging process.
Now that you are monitoring the charging progress and ensuring everything is going smoothly, you can move on to the final step: disconnecting the power bank once it is fully charged.
Step 5: Disconnect the power bank once fully charged
Once your power bank has reached a full charge, it is important to disconnect it from the power source to prevent overcharging. Follow these steps to safely disconnect your power bank:
- Check the LED indicators or the display on your power bank to confirm that it is fully charged. The indicators may stop blinking, change color, or show 100% charge.
- Unplug the USB cable from the power source. Ensure that you pull it out gently and avoid yanking or applying excessive force.
- Disconnect the USB cable from the power bank. Again, be careful and do this step gently to avoid damaging the cable or the power bank.
By disconnecting the power bank once it is fully charged, you not only prevent overcharging but also conserve energy and extend the overall lifespan of the power bank.
After disconnecting the power bank, take a moment to inspect it for any signs of damage or overheating. If you notice anything unusual, such as a swollen battery or a burning smell, stop using the power bank and consult the manufacturer for assistance.
It is always a good practice to let your power bank rest for a few minutes after charging before using it or storing it. This allows the internal components to cool down and ensures optimal performance when you need to use it again in the future.
Now that your power bank is fully charged and safely disconnected, you can move on to the final step: properly storing the power bank when it is not in use.
Step 6: Properly store the power bank when not in use
When you are not using your power bank, it is crucial to store it properly to maintain its performance and prolong its lifespan. Here are some guidelines for storing your power bank:
- Ensure the power bank is fully charged before storing it. This helps to preserve the battery’s capacity during the storage period.
- Find a cool and dry place to store the power bank. Extreme temperatures and excessive humidity can negatively impact the battery life and overall functionality of the power bank.
- Avoid exposing the power bank to direct sunlight or placing it near any sources of heat. Heat can shorten the lifespan of the battery and potentially cause damage.
- Keep the power bank away from water or any liquid substances. Accidental exposure to moisture can lead to corrosion or internal damage.
- If possible, store the power bank in a protective case or sleeve to prevent scratches, dust accumulation, or accidental impacts. This helps to maintain the physical condition and integrity of the power bank.
- Periodically check the power bank’s charge level during storage. If it has been a prolonged period without use, it is recommended to recharge the power bank every three to six months to prevent a deep discharge that can harm the battery.
By following these guidelines, you can ensure that your power bank remains in optimal condition for future use. Proper storage helps to preserve the battery life, keeps the power bank safe from damage, and ensures reliable performance when you need it again.
If you plan to store the power bank for an extended period, remember to charge it before use, as the battery’s charge may have naturally drained over time. This ensures that you have sufficient power when you next need to rely on the power bank.
With these steps in mind, you are well-equipped to charge your 2200mAh power bank, monitor the charging process, and store it properly when not in use. Following these guidelines will help you maintain a reliable power source for your devices whenever you are on the go.
Conclusion
Charging your power bank with a capacity of 2200mAh doesn’t have to be a complicated process. By following the step-by-step instructions outlined in this guide, you can ensure a safe and efficient charging experience.
We started by gathering the necessary equipment, including a power source, USB cable, and of course, your power bank. Checking the charge level of the power bank gave us an idea of how much charging it needed. Connecting the power bank to a reliable power source allowed the charging process to begin.
Monitoring the charging progress ensures that everything goes smoothly and allows you to address any issues promptly. Finally, once your power bank is fully charged, it is important to disconnect it from the power source to avoid overcharging.
Properly storing your power bank when not in use ensures its longevity and reliable performance for future use. By following the storage guidelines, you can maintain the power bank’s battery capacity and protect it from damage.
Remember, each power bank may have unique features and requirements, so it is essential to consult the user manual for specific instructions provided by the manufacturer.
With this guide, you are now equipped with the knowledge to charge your power bank effectively and keep it in optimal condition. Whether you’re traveling, working remotely, or enjoying outdoor activities, your power bank will be ready to provide a reliable power source for your devices when you need it most.