Introduction
If you own a Samsung tablet, there may be times when you need to adjust the time. Whether it’s due to traveling to a different time zone or simply wanting to keep your device’s clock accurate, changing the time on a Samsung tablet is a straightforward process. In this article, we will guide you through the steps to change the time on your Samsung tablet.
Having the correct time on your tablet is essential for various reasons. It ensures that your alarms, reminders, and calendar events are set accurately, making it easier for you to manage your schedule. Additionally, having the correct time is crucial for apps, such as banking and navigation, that require accurate time information to function properly.
With the increasing importance of technology in our lives, it’s essential to know how to make simple adjustments like changing the time on our devices. Fortunately, Samsung tablets come with an intuitive and user-friendly interface that makes changing the time a breeze. Whether you have a Samsung Galaxy Tab S, Tab A, or any other model, the steps to change the time will generally be the same.
In the following sections, we will guide you through the step-by-step process of changing the time on your Samsung tablet. So, let’s get started and make sure your tablet’s clock is always accurate!
Step 1: Accessing the Settings
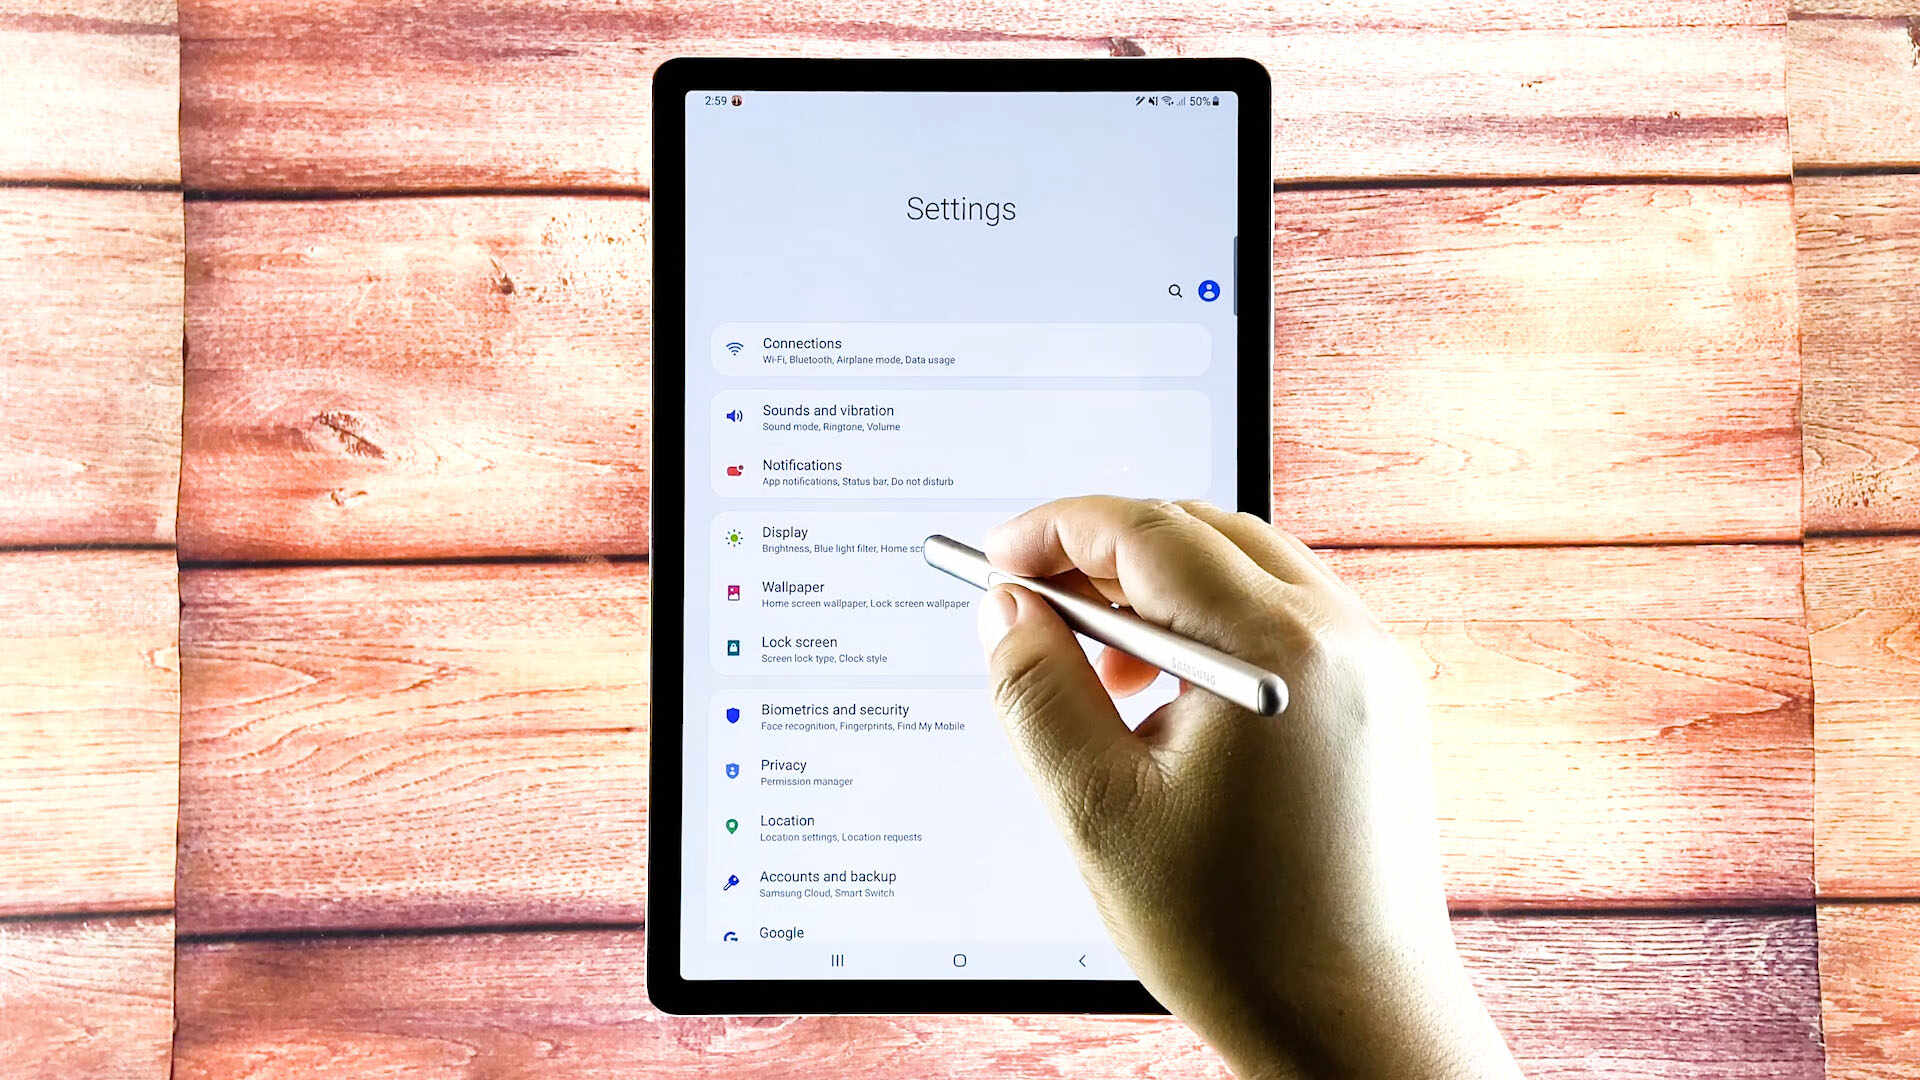
To change the time on your Samsung tablet, you need to access the device’s settings. The settings menu allows you to customize various aspects of your tablet, including the date and time settings. Here’s how you can access the settings:
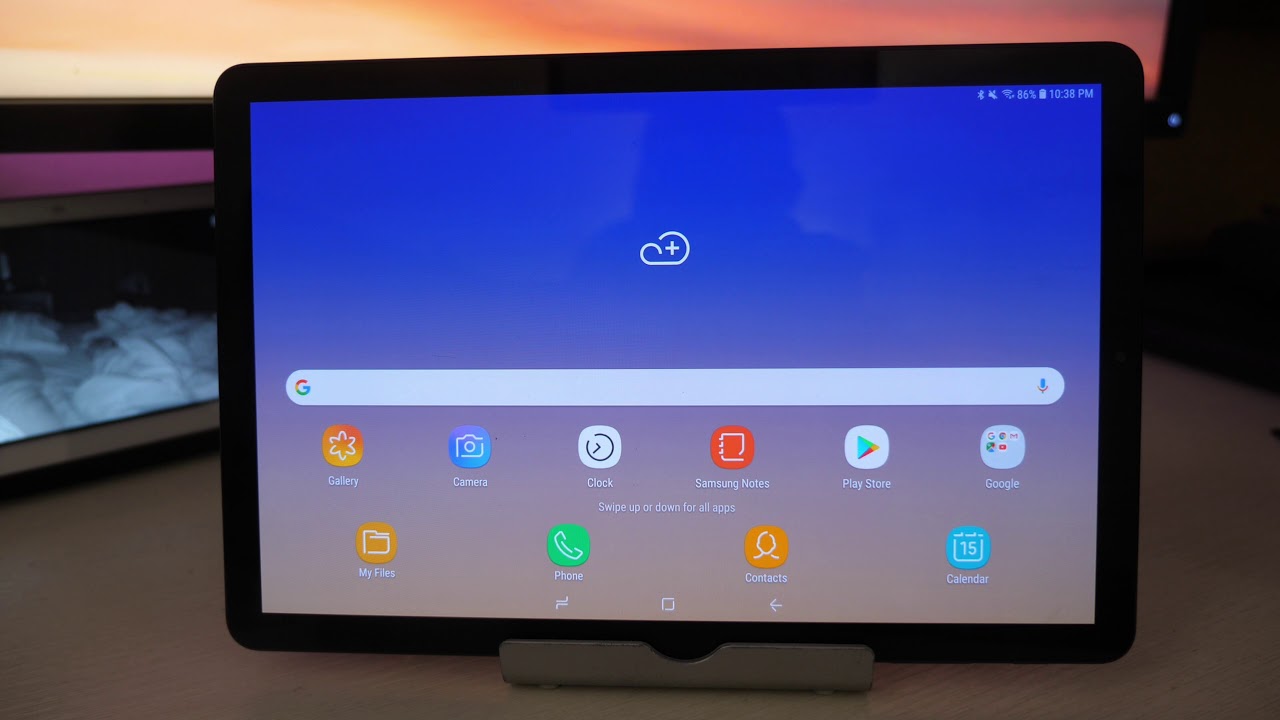
1. Start by unlocking your Samsung tablet and navigating to the home screen. You can do this by pressing the home button or swiping up from the bottom of the screen, depending on the model of your tablet.
2. Once you’re on the home screen, swipe down from the top of the screen to reveal the notification panel. This is where you can access various quick settings and notifications.
3. In the top-right corner of the notification panel, you will find an icon that looks like a gear or a cog. This is the settings icon. Tap on it to open the settings menu.
4. Alternatively, you can also access the settings menu by tapping on the apps icon on the home screen, which is usually represented by a grid of squares. From the apps menu, locate and tap the settings app to open it.
5. Once you’re in the settings menu, scroll down until you find the “General management” option. Tap on it to access additional settings related to your tablet.
6. In the “General management” menu, look for the “Date and time” option. This is where you can make changes to the time settings on your Samsung tablet.
Now that you have successfully accessed the settings menu on your Samsung tablet, you’re ready to proceed to the next step. In the following sections, we will guide you through adjusting the time manually, enabling automatic date and time, selecting the correct time zone, and checking the time accuracy. It’s important to note that the steps might vary slightly depending on the model and version of your Samsung tablet, but the general process remains the same.
Step 2: Locating the Date and Time option
After accessing the settings menu on your Samsung tablet, the next step is to locate the “Date and time” option. This option allows you to manage and customize the time settings on your device. Here’s how you can find it:
1. In the settings menu, scroll down until you find the “General management” option. Tap on it to access additional settings related to your tablet.
2. Within the “General management” menu, scroll down again until you locate the “Date and time” option. It is usually listed under the “System” or “Device” section of the settings menu.
3. Tap on “Date and time” to enter the date and time settings menu on your Samsung tablet.
By accessing the “Date and time” settings, you have gained control over the time management of your Samsung tablet. In the next step, we will guide you through adjusting the time manually. Whether you want to set a specific time or synchronize it automatically with a time server, the following steps will help you ensure an accurate time display on your tablet.
It’s important to note that the location of the “Date and time” option may vary slightly depending on the model and version of your Samsung tablet. However, Samsung devices generally maintain a consistent layout and organization of settings, allowing for easy navigation and accessibility.
Step 3: Adjusting the time manually
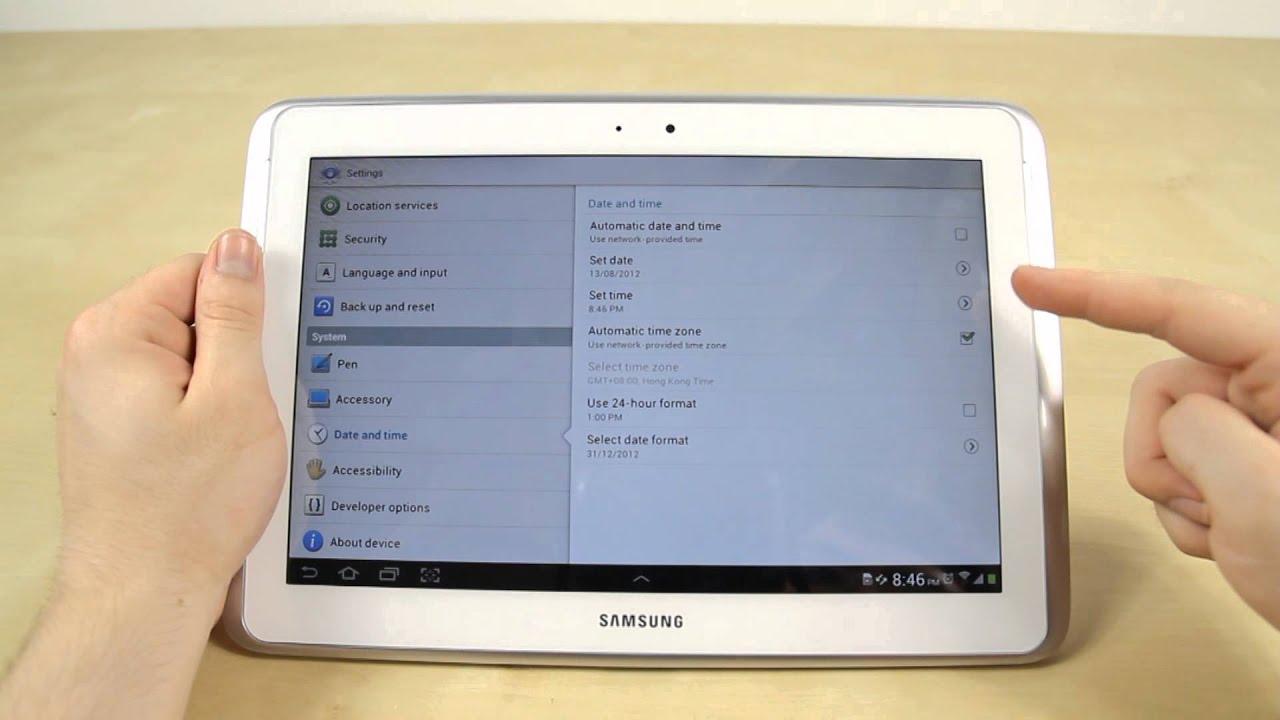
Once you have located the “Date and time” option in the settings menu of your Samsung tablet, you can proceed to adjust the time manually. Manual adjustment gives you the flexibility to set the time according to your preference. Here’s how you can do it:
1. In the “Date and time” settings menu, look for the option that allows you to set the time manually. It may be labeled as “Set time,” “Set time manually,” or something similar.
2. Tap on the manual time settings option to enter the time adjustment screen.
3. Depending on the interface of your Samsung tablet, you may be presented with a digital clock or a wheel selector. Use the provided interface to adjust the hours, minutes, and, if applicable, the seconds to the desired time.
4. Once you have set the correct time, tap the “OK” or “Save” button to confirm the changes.
Your Samsung tablet will update the time display to reflect the adjusted time you have manually set. Double-check to ensure that the time is accurate by comparing it to an external time source or your own knowledge of the correct time.
By adjusting the time manually, you have taken control over the time display on your Samsung tablet. This can be particularly useful when travelling to a different time zone or if the automatic time synchronization is not available or accurate.
In the next step, we will guide you through enabling automatic date and time, allowing your Samsung tablet to synchronize the time with a network time server. This ensures that your tablet’s clock is always accurate without manual intervention.
Remember, the manual time adjustment process may slightly vary depending on the model and version of your Samsung tablet. However, the general concept remains the same, allowing for easy customization and adaptation to your specific preferences.
Step 4: Enabling Automatic date and time
To ensure that the time on your Samsung tablet is always accurate without the need for manual adjustments, you can enable the automatic date and time feature. This feature allows your device to synchronize with a network time server and update the time automatically. Here’s how you can enable it:
1. In the “Date and time” settings menu, look for the option that allows you to enable automatic date and time. It may be labeled as “Automatic date and time” or “Use network-provided time.”
2. Tap on the automatic date and time option to toggle it on. You may need to slide a switch or check a box to enable this feature.
3. Once enabled, your Samsung tablet will connect to a network time server and synchronize the time automatically. It may take a few moments for the synchronization process to complete.
4. Verify that the time displayed on your tablet is accurate by comparing it to an external time source or your own knowledge of the correct time.
By enabling automatic date and time, you can ensure that your Samsung tablet’s clock remains accurate even when you change time zones or during daylight saving time transitions. This feature eliminates the need for manual adjustments and guarantees that your tablet is always displaying the correct time.
In the next step, we will guide you through selecting the correct time zone on your Samsung tablet. This is crucial to ensure that the time is aligned with the specific location you are in. Let’s proceed to the next step to make sure your tablet’s time zone settings are accurate!
Remember, the process of enabling automatic date and time may differ slightly depending on the model and version of your Samsung tablet. However, the general steps remain the same, allowing for a seamless and convenient user experience.
Step 5: Selecting the correct time zone
Having the correct time zone selected on your Samsung tablet is crucial to ensure that the displayed time accurately reflects your current location. The time zone determines the offset from Coordinated Universal Time (UTC) and helps your device adjust for daylight saving time changes automatically. Follow these steps to select the correct time zone:
1. In the “Date and time” settings menu, locate the option that allows you to set the time zone. It may be labeled as “Time zone” or “Select time zone.”
2. Tap on the time zone option to open the available time zone list.
3. Scroll through the list or use the search function to find the correct time zone for your location. You can search by country, city, or GMT offset.
4. Once you have identified the correct time zone, tap on it to select it. Your Samsung tablet will automatically adjust the time based on the chosen time zone.
5. Verify that the time displayed on your tablet is accurate for your current location, taking the time zone into account.
By selecting the correct time zone, you ensure that your Samsung tablet displays the local time accurately. This is particularly important when traveling or if you reside in an area that observes daylight saving time changes. By having the time zone properly set, you can rely on your tablet to automatically adjust the time without manual intervention.
In the next step, we will guide you through checking the time accuracy to ensure that your Samsung tablet’s clock is displaying the precise and up-to-date time. Let’s proceed to the final step!
Please note that the process of selecting the time zone may vary slightly depending on the model and version of your Samsung tablet. However, the steps outlined here will generally apply to most Samsung tablet models, making it easy for you to set the correct time zone.
Step 6: Checking the time accuracy
After adjusting the time settings, whether manually or through automatic synchronization, it’s essential to verify the accuracy of the displayed time on your Samsung tablet. Performing this step ensures that your tablet’s clock is reliable and aligned with the correct time. Here’s how you can check the time accuracy:
1. Take note of the displayed time on your Samsung tablet. This should reflect the recently adjusted time or the time synchronized through automatic settings.
2. Compare the displayed time with an external time source, such as a reliable clock, watch, or a timekeeping service accessed through the internet. You can use services like worldtime.com or time.is to validate the accuracy of your tablet’s clock.
3. Pay attention to any differences between the displayed time on your Samsung tablet and the reference time source. If there is a notable discrepancy, it may indicate that further adjustments or troubleshooting are necessary.
4. If the time displayed on your tablet differs from the reference time source, consider repeating the time adjustment steps mentioned earlier in this article. Double-check that you have correctly set the time, enabled automatic synchronization, and selected the correct time zone.
5. If the time discrepancy persists, you may try rebooting your Samsung tablet. Sometimes, a simple reboot can resolve minor time-related issues and ensure accurate time display.
By performing regular checks on the time accuracy of your Samsung tablet, you can ensure that your device remains reliable for time-dependent activities, such as appointments, reminders, and time-sensitive applications.
Now that you have checked the time accuracy on your Samsung tablet, you can rest assured that your device’s clock is displaying the correct time. Whether you are at home, traveling, or using your tablet for work, maintaining accurate time settings enhances your overall user experience.
It’s important to note that the time accuracy check process is a troubleshooting step and may not be required on a regular basis. However, periodic verification of the displayed time can help identify and address any time-related issues effectively.
Conclusion
In this article, we have explained the step-by-step process of changing the time on your Samsung tablet. By following these steps, you can easily adjust the time, enable automatic synchronization, select the correct time zone, and ensure the accuracy of your tablet’s clock.
Having the correct time on your Samsung tablet is essential for managing your schedule, using time-sensitive applications, and staying on track with appointments and reminders. Whether you are traveling or simply want to keep your device’s clock accurate, being able to change the time on your tablet is a valuable skill.
We started by accessing the settings menu on your Samsung tablet, where you can find the “Date and time” option. From there, you can adjust the time manually or enable automatic date and time synchronization. Additionally, selecting the correct time zone ensures that your tablet’s clock reflects the local time accurately.
Lastly, we emphasized the importance of checking the time accuracy to verify that your tablet is displaying the correct time. By comparing it with an external time source and troubleshooting any discrepancies, you can ensure that your tablet remains reliable for time-dependent activities.
Remember, the exact steps may vary slightly depending on the model and version of your Samsung tablet, but the overall process remains the same. By familiarizing yourself with these steps, you can confidently adjust and manage the time settings on your Samsung tablet.
Now that you have successfully mastered the process of changing the time on your Samsung tablet, you can enjoy the convenience of an accurate clock no matter where you are. Keep your tablet’s time settings up to date, and you’ll never have to worry about missing an appointment or being out of sync with the world around you.
Stay punctual, stay organized, and make the most of your Samsung tablet with the correct time settings!