Introduction
Changing the passcode on your Apple Watch is a crucial step in ensuring the security of your device. Whether you want to update your passcode for personal reasons or you suspect that someone may know your current passcode, it’s essential to know how to change it.
The passcode on your Apple Watch acts as a barrier between unauthorized access and the sensitive information stored on your device. By regularly changing your passcode, you can add an extra layer of security and minimize the risk of someone gaining unauthorized access to your data.
In this article, we will guide you through the process of changing the passcode on your Apple Watch, ensuring that your device remains secure and your privacy intact. Whether you have forgotten your passcode and need to reset it or simply want to update it, the following steps will help you achieve that effortlessly.
Now, let’s dive into the step-by-step instructions on how to change the passcode on your Apple Watch.
Step 1: Open the Settings App
To begin, navigate to your Apple Watch’s home screen by pressing the Digital Crown—the circular button on the side of your watch. This will display your apps in a grid layout.
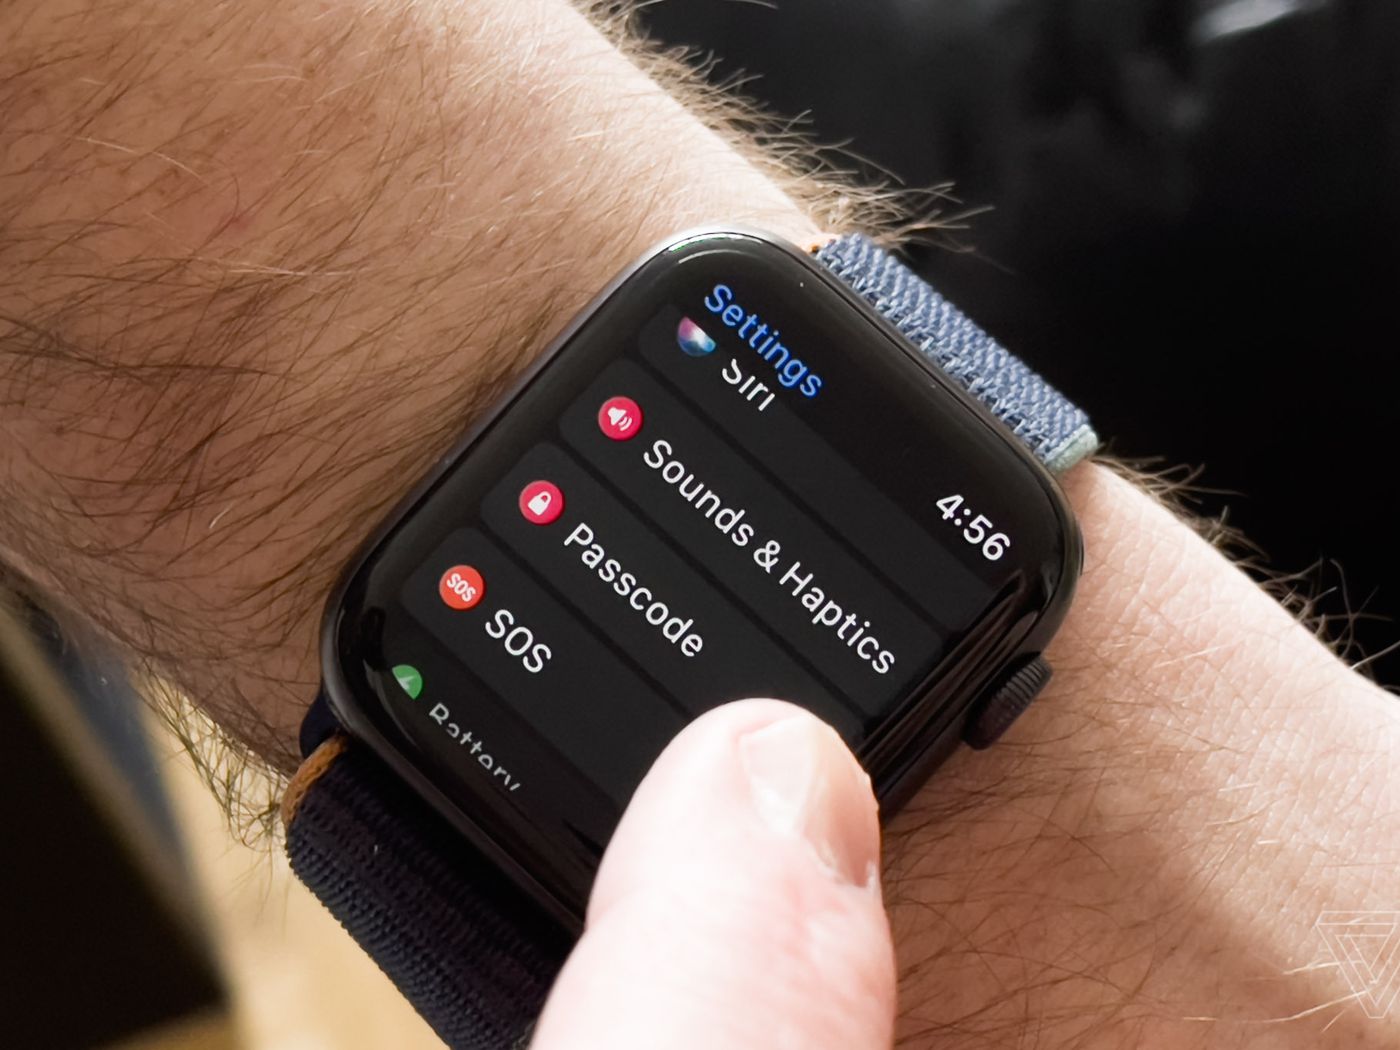
Once you’re on the home screen, locate and tap on the “Settings” app. It is represented by an icon that looks like a gear, similar to the settings icon on your iPhone.
If you can’t find the Settings app on your Apple Watch’s home screen, you can use the “Siri” feature to open it. Simply lift your wrist and say, “Hey Siri, open Settings.”
Upon tapping the Settings app, the screen will transition, and you will be taken to the settings menu, where you can customize various aspects of your Apple Watch’s functionality.
Now that you have successfully opened the Settings app, you are one step closer to changing the passcode on your Apple Watch. In the next step, we will guide you through the process of accessing the passcode settings.
Step 2: Scroll down and tap on “Passcode”
Once you have opened the Settings app on your Apple Watch, it’s time to navigate to the passcode settings. To do this, swipe your finger upwards on the screen or rotate the Digital Crown to scroll down.
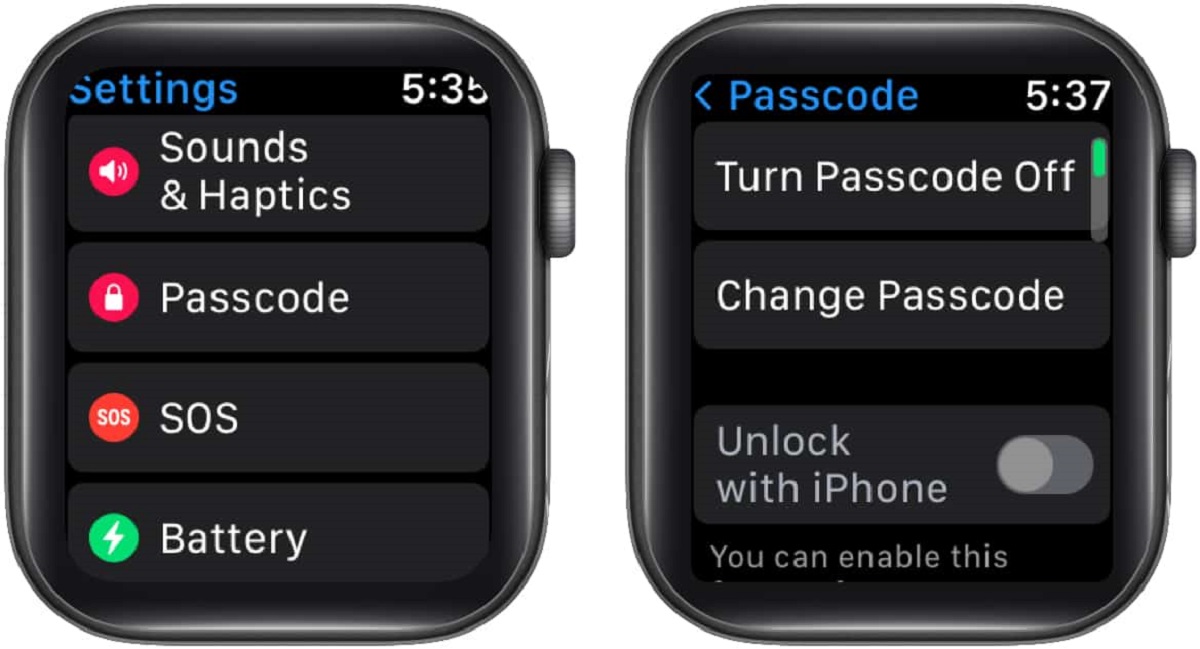
Keep scrolling until you find the option labeled “Passcode.” It should be located towards the middle of the settings menu. When you see it, tap on it to access the passcode settings.
The Passcode settings menu is where you can manage and customize your Apple Watch’s passcode. From here, you can change your passcode, enable or disable features like “Wrist Detection” and “Unlock with iPhone,” and even select how quickly your watch locks itself when not in use.
By tapping on the “Passcode” option, you will be directed to a screen where you can enter your current passcode to make changes. If you have forgotten your current passcode, don’t worry—we’ll address that scenario in a later step.
With the “Passcode” option now selected, you’re ready to move on to the next step and begin the process of changing your Apple Watch’s passcode.
Step 3: Tap on “Change Passcode”
Now that you have accessed the passcode settings on your Apple Watch, the next step is to tap on the option labeled “Change Passcode.”
Upon tapping “Change Passcode,” you will be prompted to enter your current passcode. This step is necessary for security purposes, as it verifies that you are the authorized user making changes to the passcode.
If you have forgotten your current passcode, don’t worry. We will address that scenario in a later step. For now, assuming you remember your current passcode, enter it on the screen that appears after tapping “Change Passcode.”
Once you have entered your current passcode, tap “OK” or “Continue” to proceed.
At this point, you are one step closer to changing your Apple Watch’s passcode. In the next step, we’ll guide you through the process of choosing a new passcode.
Now that you have successfully tapped on “Change Passcode” and entered your current passcode, you’re ready to move on to the next step and create a new passcode for your Apple Watch.
Step 4: Enter your current passcode
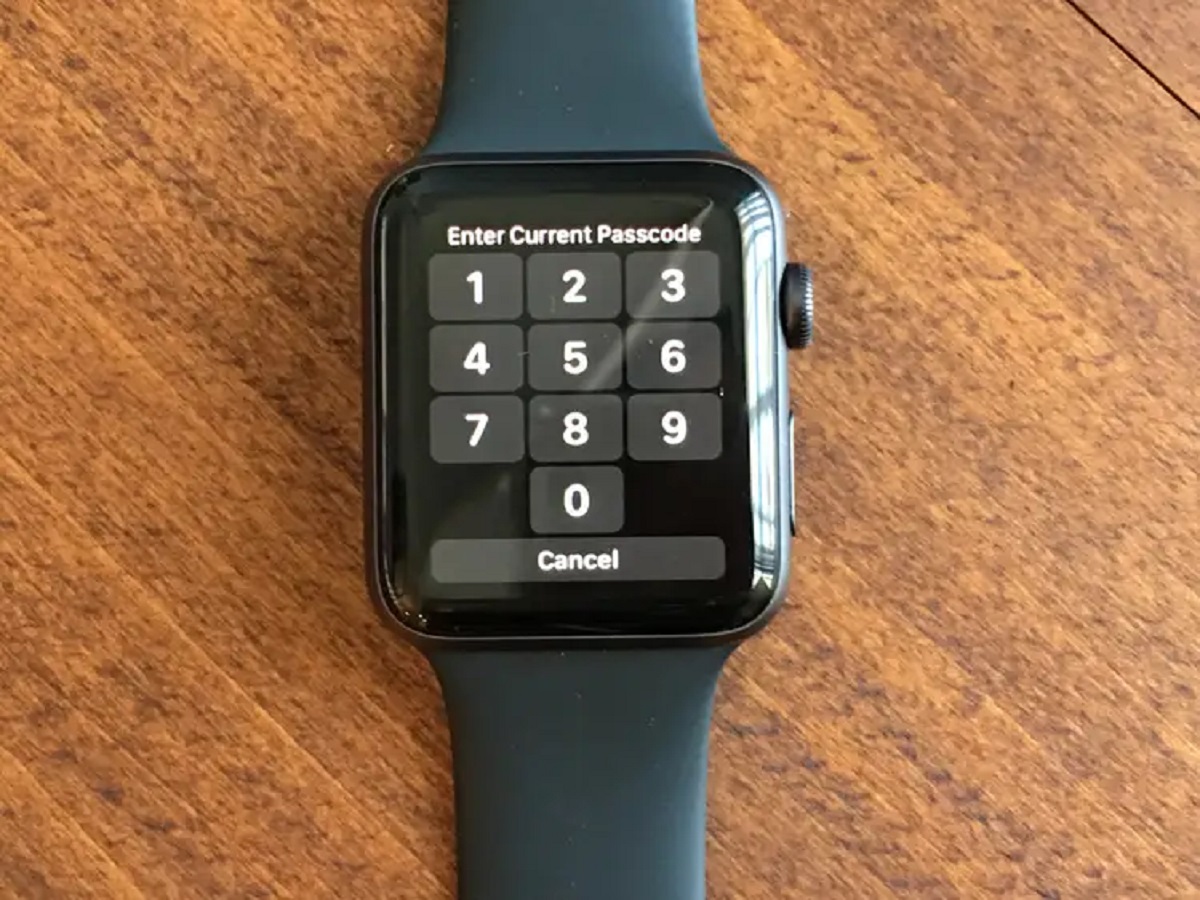
After tapping on “Change Passcode” in the previous step, you will be prompted to enter your current passcode. This serves as a security measure to ensure that only authorized users can make changes to the passcode settings.
In the text box that appears on the screen, enter your current passcode using the keypad. Take your time and enter it carefully to avoid any mistakes. If you make a mistake, you can tap the delete button to remove the incorrect digits.
Once you have entered your current passcode correctly, tap “OK” or “Continue” depending on the prompt that appears on the screen. This will validate your current passcode and allow you to proceed with changing it.
If you have forgotten your current passcode and cannot access your Apple Watch, don’t panic—we have a solution for that. Simply continue following these steps, and we will guide you through the process of resetting your passcode.
Now that you have successfully entered your current passcode, it’s time to move on to the next step and choose a new passcode for your Apple Watch.
Step 5: Choose a new passcode
Now that you have validated your current passcode, it’s time to select a new passcode for your Apple Watch. This step allows you to enhance the security of your device by choosing a unique combination.
On the screen that follows entering your current passcode, you will see a keypad. Here, you can enter your desired new passcode. Take a moment to think of a combination that is easy for you to remember but difficult for others to guess.
Apple Watch passcodes can be numeric, consisting of four to six digits, or alphanumeric, consisting of a combination of numbers and letters. You can choose whichever option you prefer and feel most comfortable with.
Enter your new passcode using the keypad provided. Remember to enter it carefully, confirming that it matches your intended choice. Take a moment to reconfirm the passcode to ensure accuracy.
Keep in mind that using a longer passcode or an alphanumeric combination increases the security of your Apple Watch. This makes it more difficult for unauthorized users to guess or bypass your passcode.
Once you have entered your new passcode to your satisfaction, tap “OK” or “Continue” to proceed to the next step.
With your new passcode chosen, you’re almost there! In the next step, we will confirm your new passcode to ensure that it has been correctly set.
Step 6: Confirm your new passcode
After selecting a new passcode for your Apple Watch in the previous step, it’s important to confirm that you entered it correctly. This step ensures that your new passcode is set up accurately before finalizing the change.
On the screen that follows entering your new passcode, you will be prompted to enter it again. This is a crucial step to confirm that you didn’t accidentally mistype or misremember your new passcode.
Using the keypad provided, enter your new passcode exactly as you did before. Take your time and double-check each digit to ensure accuracy. If you notice any mistakes, you can tap the delete button to remove the incorrect digits.
Once you have entered your new passcode correctly, tap “OK” or “Continue” to confirm the change. Your Apple Watch will process the new passcode and save it as the new security measure for your device.
With the confirmation of your new passcode, you have successfully updated the security settings of your Apple Watch. From now on, this new passcode will be required to unlock your device and access the features and data stored within it.
It’s important to remember your new passcode or store it in a secure place where you can easily retrieve it if needed. Avoid sharing your passcode with others to maintain the privacy and security of your Apple Watch.
Now that your new passcode has been confirmed, you’re ready to complete the process. In the next step, we will finalize the passcode change and conclude the setup.
Step 7: Done! Your passcode has been changed
Congratulations! You have successfully changed the passcode on your Apple Watch. Your device is now secured with a new, unique passcode that adds an extra layer of protection to your personal information and data.
From this point forward, you will need to use your new passcode to unlock your Apple Watch and access its features. Remember to keep your new passcode confidential and avoid sharing it with anyone to maintain the integrity of your device’s security.
With your passcode changed, you can now feel confident knowing that your Apple Watch is well-protected against unauthorized access. This is particularly important if you use your Apple Watch to store sensitive information or link it with accounts containing personal or financial data.
If you ever feel the need to change your passcode again in the future, simply follow these steps. Updating your passcode regularly is a great practice to ensure the ongoing security of your Apple Watch.
Now that you have completed the passcode change process, feel free to explore other settings and features available on your Apple Watch. Customize it to your liking and enjoy the seamless experience it offers.
Thank you for following this guide to change the passcode on your Apple Watch. We hope this tutorial has been helpful and will enable you to enjoy a safer and more secure Apple Watch experience.
Remember that your passcode is your first line of defense against unauthorized access to your device, so it’s essential to choose a strong and memorable code. Stay vigilant, keep your devices updated, and enjoy all the amazing features your Apple Watch has to offer!
Conclusion
Changing the passcode on your Apple Watch is a simple yet important step in ensuring the security of your device and protecting your personal information. By following the step-by-step instructions provided in this guide, you can confidently change your passcode and enjoy peace of mind knowing that your Apple Watch is well-protected.
Remember, regularly changing your passcode adds an extra layer of security to your Apple Watch. It is recommended to update your passcode periodically to minimize the risk of unauthorized access to your device and the sensitive data it holds.
In addition to changing your passcode, it’s also important to keep your Apple Watch software up to date. Apple releases regular updates to address security vulnerabilities and improve the overall performance of your device. Keeping your Apple Watch updated ensures that you have the latest security patches and features.
Lastly, always remember to keep your passcode confidential. Sharing your passcode with others compromises the security of your device and puts your personal information at risk.
We hope this guide has provided you with the information you needed to successfully change the passcode on your Apple Watch. By implementing these security measures, you can enjoy a safe and secure Apple Watch experience, knowing that your device and personal data are protected.
Thank you for choosing Apple Watch and taking the necessary steps to ensure its security. Enjoy exploring the features and capabilities of your device, and stay tuned for more helpful guides to enhance your Apple Watch experience.