Introduction
Welcome to the world of Logitech mice, where precision and customization meet. Logitech is renowned for its high-quality computer peripherals, and their mice are no exception. One of the key features that sets Logitech mice apart is the ability to adjust the DPI (dots per inch) settings to suit your personal preference and needs.
DPI refers to the sensitivity of your mouse. Higher DPI settings make the cursor move faster, while lower DPI settings make it move slower. Whether you’re a casual user or a hardcore gamer, being able to fine-tune your mouse’s DPI can greatly enhance your overall experience.
But how do you change DPI on a Logitech mouse? Don’t worry – it’s a straightforward process that can be done with ease. In this guide, we’ll walk you through the steps to change DPI on a Logitech mouse so that you can tailor your mouse’s sensitivity to your liking.
Before we dive in, it’s important to note that the instructions provided in this guide are specific to Logitech mice that are compatible with Logitech G HUB, their proprietary software. If you haven’t already, make sure to install Logitech G HUB on your computer to gain access to a wide range of customization options for your mouse.
Now, let’s get started on the journey of transforming your Logitech mouse’s DPI settings to suit your preferences and optimize your productivity and gaming performance.
Step 1: Install Logitech G HUB
The first step in changing the DPI on your Logitech mouse is to install the Logitech G HUB software. This software provides a user-friendly interface that allows you to customize various settings on your Logitech mouse, including the DPI settings.
To install Logitech G HUB, follow these simple steps:
- Go to the official Logitech website (www.logitech.com) and navigate to the “Support” or “Downloads” section.
- Find the Logitech G HUB software and click on the download link.
- Once the download is complete, locate the file on your computer and double-click on it to start the installation process.
- Follow the on-screen prompts to install Logitech G HUB. You may need to accept the terms and conditions and choose the installation location.
- Once the installation is complete, you can launch Logitech G HUB to begin customizing your Logitech mouse.
Note that Logitech G HUB is compatible with both Windows and macOS operating systems, so make sure to download the version that matches your computer’s operating system.
Once you have Logitech G HUB installed on your computer, you’re ready to move on to the next step and start customizing your Logitech mouse’s DPI settings.
Step 2: Connect Your Logitech Mouse
Before you can change the DPI settings on your Logitech mouse using Logitech G HUB, you need to make sure that your mouse is properly connected to your computer. Follow these steps to connect your Logitech mouse:
- Ensure that your Logitech mouse is powered on. Some mice have an on/off switch, so make sure it is in the “on” position.
- Using the USB cable provided, connect your Logitech mouse to an available USB port on your computer. If your mouse connects wirelessly, follow the manufacturer’s instructions for pairing it with your computer.
- Your computer should automatically detect the Logitech mouse and install any necessary drivers. If prompted, follow the on-screen instructions to complete the driver installation.
- Wait for a moment to allow your computer to recognize and establish a connection with the Logitech mouse.
- Once the connection is established, you can proceed to the next step of opening Logitech G HUB.
It’s important to note that some Logitech mice come with specialized features, such as adjustable weight or additional programmable buttons. If your Logitech mouse has these additional features, refer to the manufacturer’s documentation or the Logitech G HUB software for instructions on how to utilize them.
With your Logitech mouse successfully connected to your computer, you’re now ready to delve into the customization options offered by Logitech G HUB and explore the possibilities of adjusting the DPI settings to suit your needs.
Step 3: Open Logitech G HUB Software
Now that you have Logitech G HUB installed on your computer and your Logitech mouse connected, it’s time to open the software and access the customization options. Follow these steps to open Logitech G HUB:
- Locate the Logitech G HUB icon on your desktop or search for it in the Windows Start menu or macOS Applications folder.
- Double-click on the Logitech G HUB icon to launch the software.
- After a brief loading period, the Logitech G HUB interface will appear on your screen.
- If prompted, log in with your Logitech account or create a new account. This step may be necessary to access certain advanced features or sync your settings across multiple devices.
Once you have successfully opened Logitech G HUB, you’ll gain access to a wealth of customization options for your Logitech mouse, including DPI settings, button assignments, lighting effects, and more. The user interface is designed to be intuitive and user-friendly, ensuring that you can easily navigate through the various settings and make adjustments according to your preferences.
Take a moment to familiarize yourself with the Logitech G HUB interface, as it will be your gateway to changing the DPI settings on your Logitech mouse. Now that you’re ready to take control, let’s proceed to the next step and access the mouse settings within Logitech G HUB.
Step 4: Access Mouse Settings
With Logitech G HUB software open on your computer, you’re now ready to access the mouse settings and make changes to the DPI. Follow these steps to access the mouse settings:
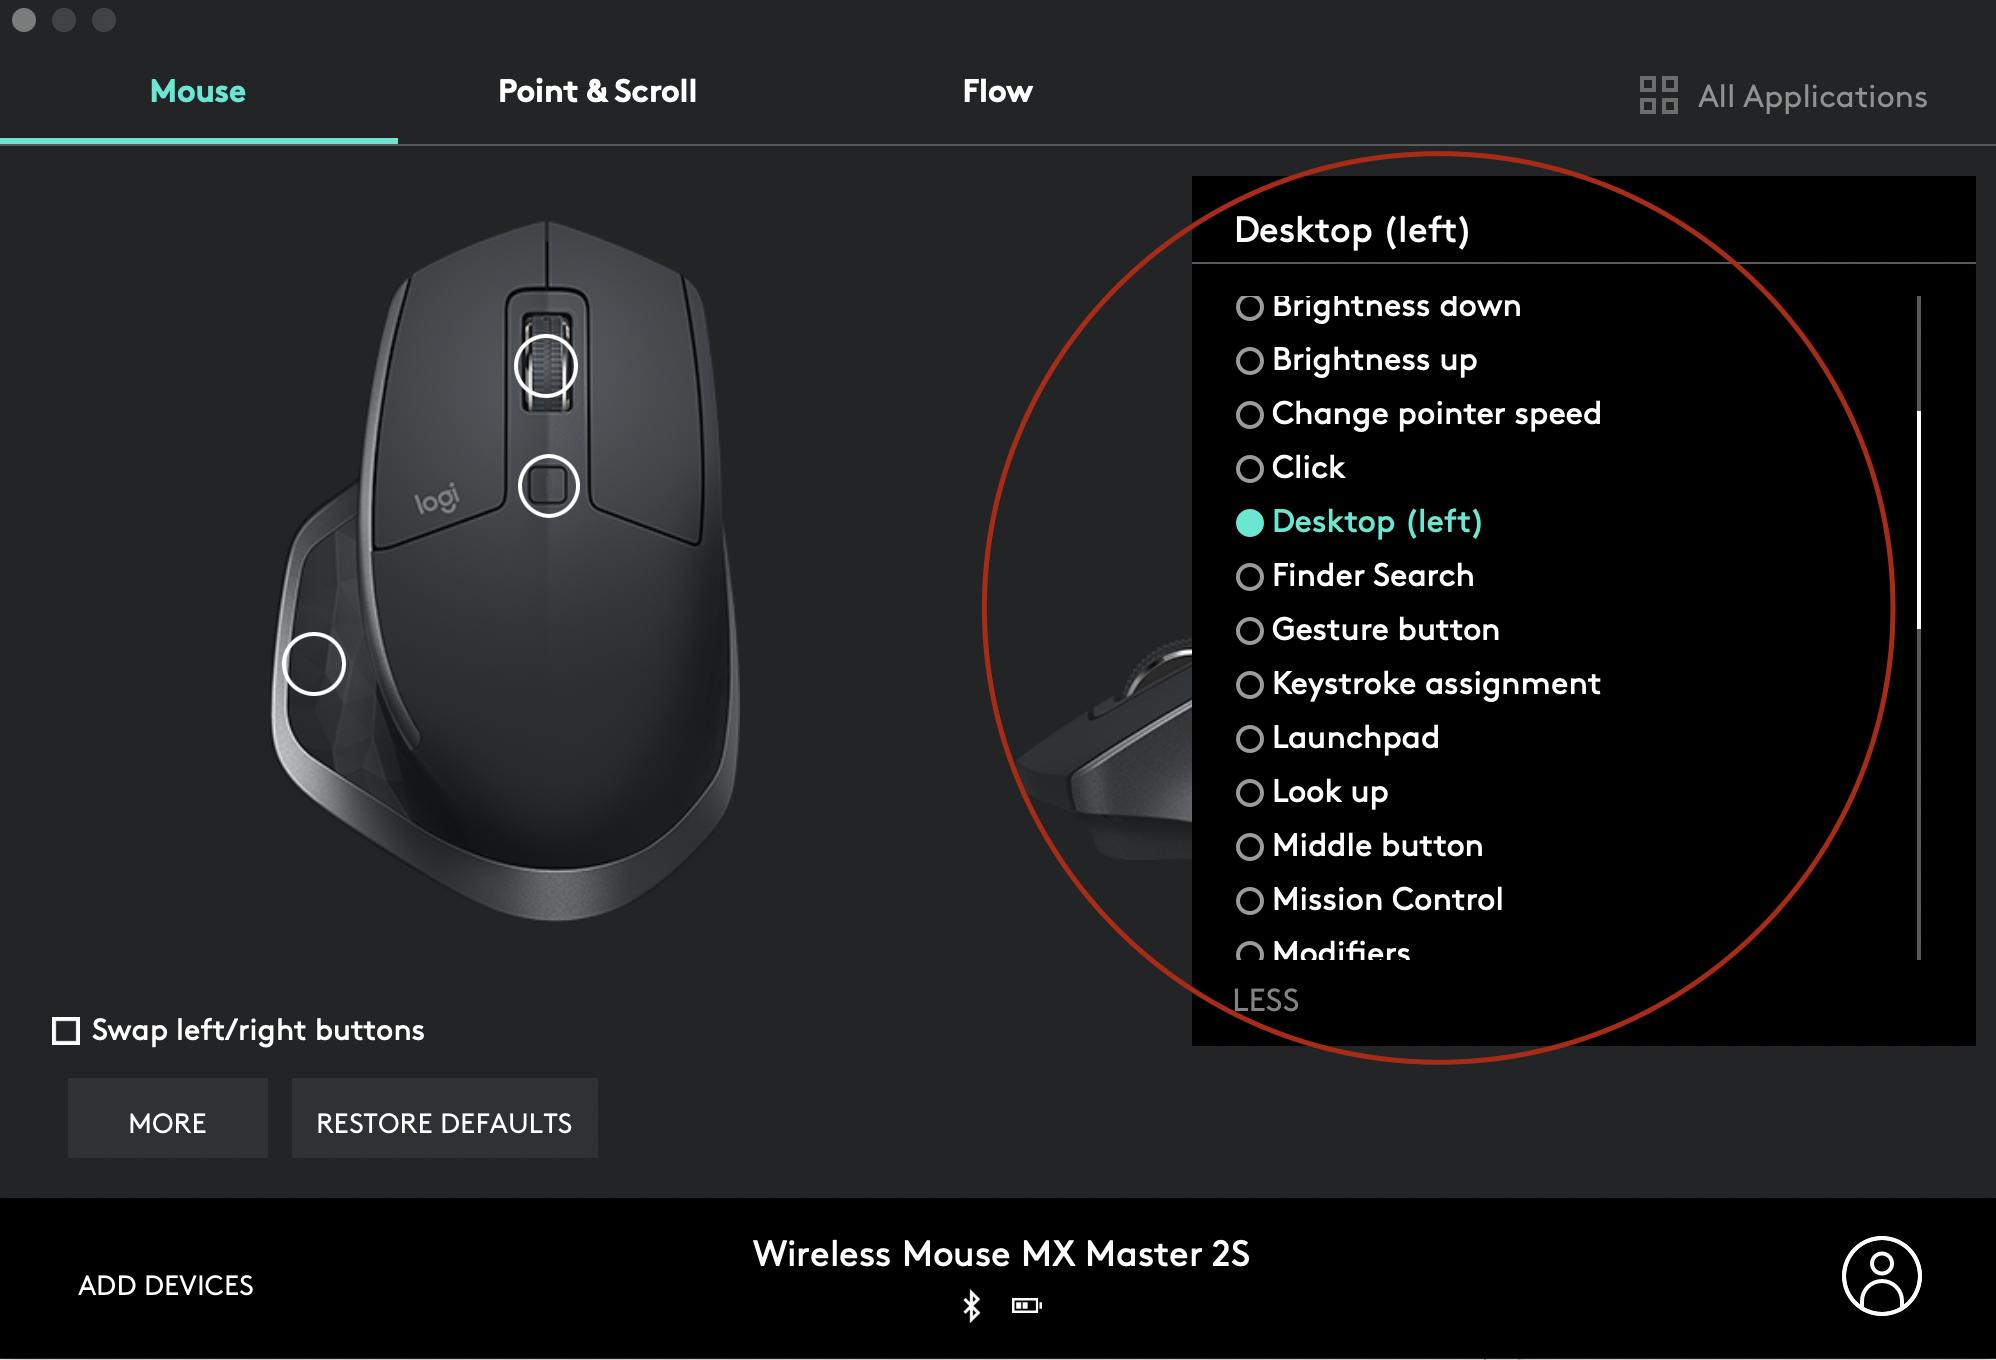
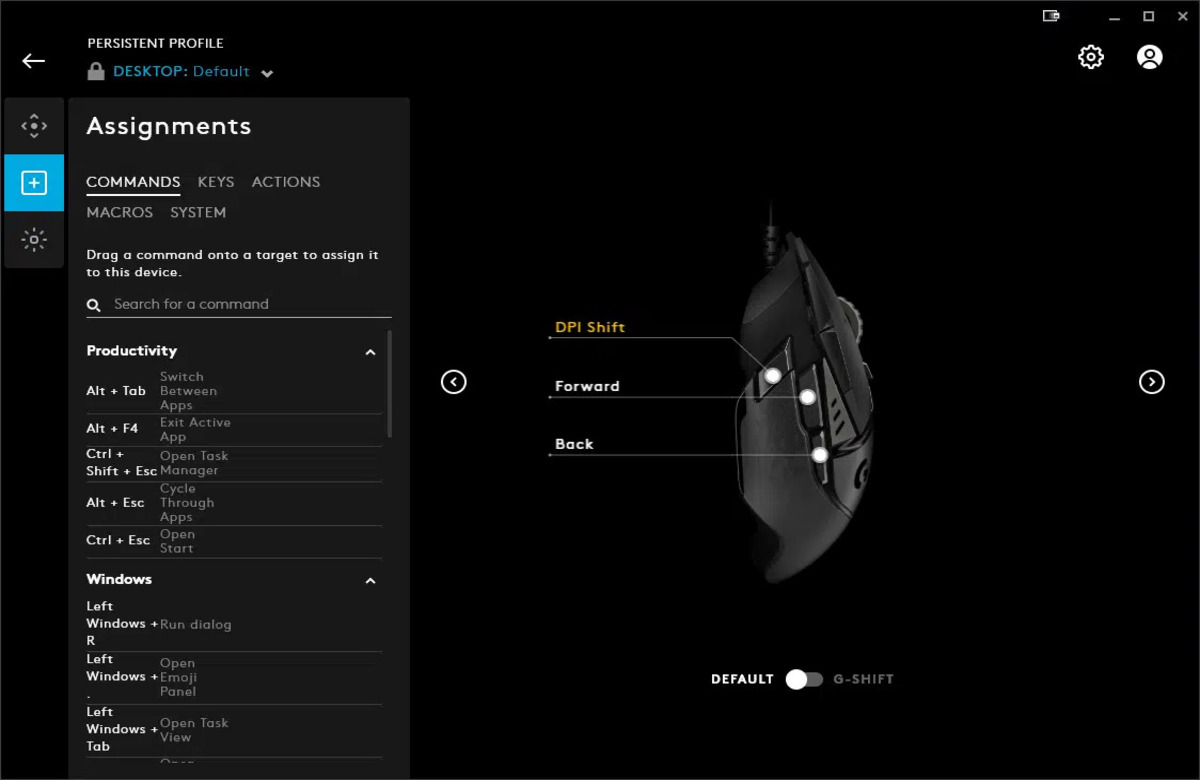
- Within the Logitech G HUB interface, locate and click on the “Mouse” or “Devices” tab. This tab may vary slightly depending on the version of Logitech G HUB you are using.
- You will see a list of Logitech devices connected to your computer. Find your Logitech mouse and click on its name to select it.
- After selecting your mouse, you should see a variety of customization options specific to your Logitech mouse model.
- Look for the “DPI settings” or “Sensitivity” option within the mouse settings. Click on it to access the DPI adjustment options.
The mouse settings menu may also offer additional options, such as configuring the mouse buttons, adjusting scroll speed, or customizing lighting effects. Feel free to explore these settings and make any desired changes to further personalize your Logitech mouse.
Please note that the exact location and naming of the DPI settings may differ slightly depending on the mouse model and version of Logitech G HUB. If you’re unable to locate the DPI settings, refer to the manufacturer’s documentation or support resources for your specific Logitech mouse model.
Now that you’ve accessed the mouse settings, it’s time to move on to the next step and adjust the DPI settings according to your preference.
Step 5: Adjust DPI Settings
Now that you have accessed the mouse settings within Logitech G HUB, it’s time to adjust the DPI settings of your Logitech mouse. Follow these steps to customize the DPI according to your needs:
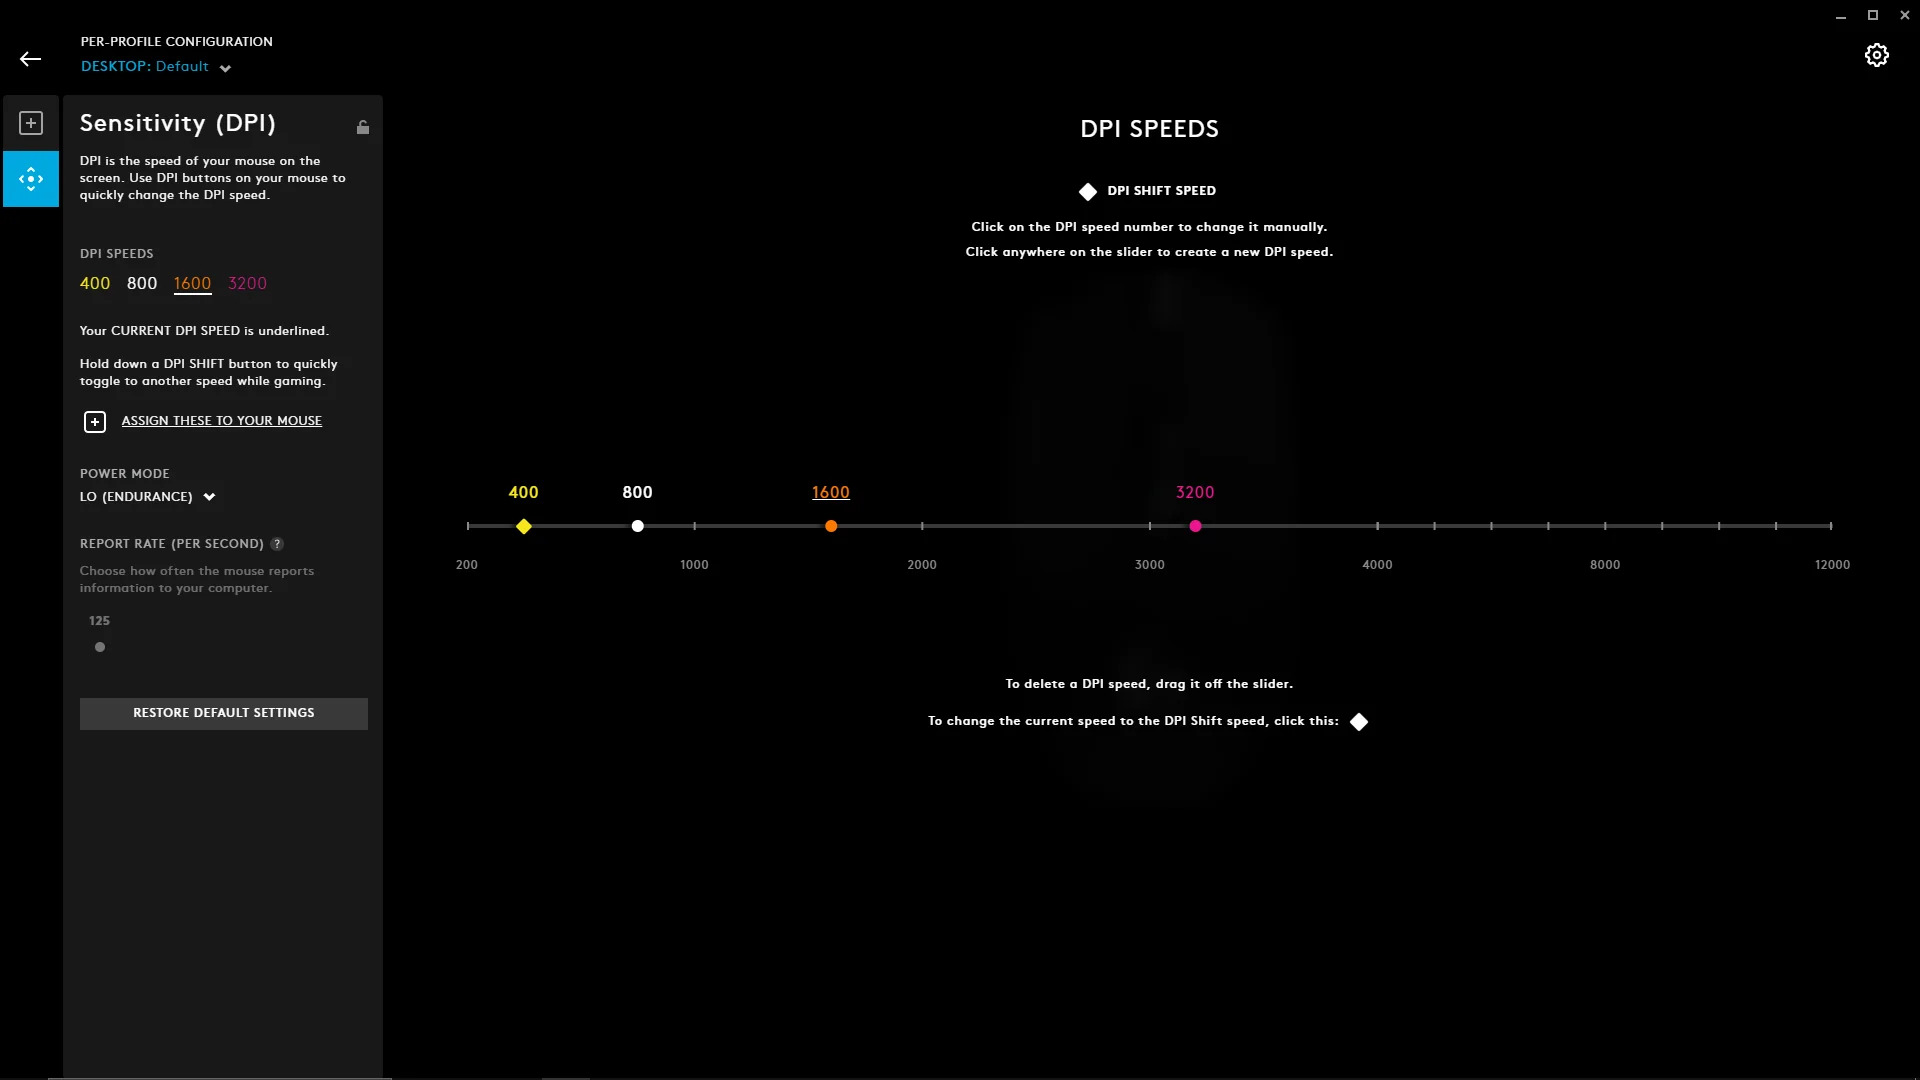
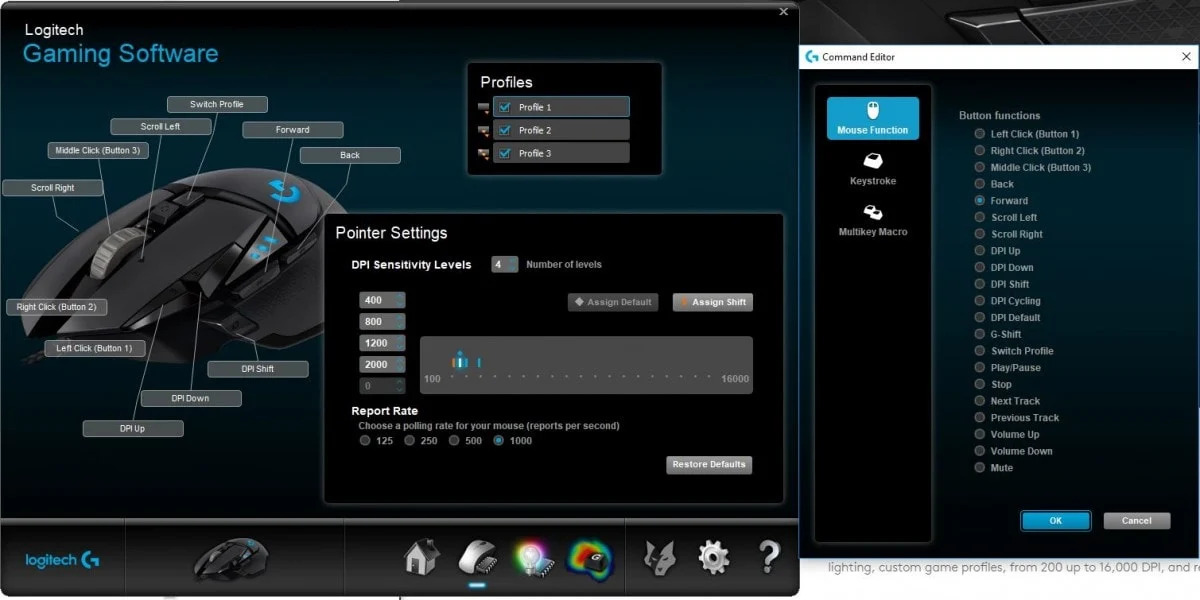
- Within the mouse settings, locate the DPI adjustment options or sensitivity sliders.
- Depending on your Logitech mouse model and software version, you may have different options for adjusting the DPI. You might see individual sliders for each DPI level or a single slider to adjust the overall DPI range.
- Drag the slider(s) or adjust the values to increase or decrease the DPI settings. As you make changes, you can see the new DPI value reflected in real-time on the screen.
- Experiment with different DPI settings until you find the sensitivity that feels comfortable for you. Higher DPI values result in faster cursor movements, while lower DPI values provide more precise control.
- Some Logitech mice allow you to save different DPI profiles, which can be handy if you use your mouse for different activities or gaming genres. If applicable, create and save multiple DPI profiles for easy switching.
- Once you’re satisfied with your DPI adjustments, click the “Apply” or “Save” button to finalize the changes.
Remember that everyone has different preferences when it comes to DPI settings, so feel free to experiment and find the sensitivity that suits your needs best. It may take some trial and error to get it just right, but the flexibility to adjust the DPI settings is one of the key benefits of using a Logitech mouse.
Now that you have successfully adjusted the DPI settings, it’s time to move on to the final step of testing and saving your changes.
Step 6: Test and Save Changes
After adjusting the DPI settings of your Logitech mouse, it’s essential to test and ensure that the changes meet your expectations. Follow these steps to test and save your DPI changes:
- With Logitech G HUB still open, navigate to your preferred software or application where you want to test the new DPI settings.
- Move your Logitech mouse and observe how the cursor or crosshair moves on the screen.
- If the cursor movement feels too fast or too slow, go back to the mouse settings in Logitech G HUB and make further adjustments to the DPI values as needed.
- Repeat the testing process, making small incremental changes to find the DPI settings that provide optimal control and comfort.
- Once you’re satisfied with the new DPI settings, click the “Apply” or “Save” button in Logitech G HUB to save the changes to your Logitech mouse’s onboard memory.
Saving the changes to the mouse’s onboard memory ensures that your custom DPI settings will be retained even if you use the mouse on a different computer or without Logitech G HUB software.
Now that you have successfully tested and saved your DPI changes, you can enjoy the enhanced precision and control provided by the adjusted DPI settings on your Logitech mouse.
Remember that you can always go back to Logitech G HUB and make further adjustments to the DPI settings or explore other customization options to optimize your Logitech mouse’s performance to suit your specific needs.
With your newly customized DPI settings, you’re ready to dive into your favorite activities – whether it’s gaming, graphic design, or everyday computer use – with greater precision and responsiveness.
Conclusion
Changing the DPI settings on your Logitech mouse can greatly enhance your overall computing experience. With the ability to customize the sensitivity of your mouse, you can achieve precise cursor movements and improved control in various tasks, such as gaming, graphic design, or regular computer use.
In this guide, we walked you through the step-by-step process of changing DPI on a Logitech mouse using the Logitech G HUB software. We covered everything from installing Logitech G HUB to accessing the mouse settings, adjusting the DPI values, and testing the changes to ensure a comfortable and personalized user experience.
Remember that finding the perfect DPI setting is a personal preference, and it may take some trial and error to discover the sensitivity that feels right for you. Logitech G HUB provides a user-friendly interface that allows you to fine-tune the DPI settings and explore other customization options to optimize your Logitech mouse’s performance.
Whether you’re a professional gamer, a digital artist, or simply a computer enthusiast, having the ability to adjust the DPI of your Logitech mouse puts you in control of your computing experience. The precision and responsiveness offered by Logitech mice, coupled with the customization options available through Logitech G HUB, can help you achieve higher productivity and elevate your gaming and creative pursuits.
So, take a few moments to experiment with the DPI settings, discover your preferred sensitivity, and unleash the full potential of your Logitech mouse. Enjoy the enhanced precision and control, and make your computing experience truly your own.