Introduction
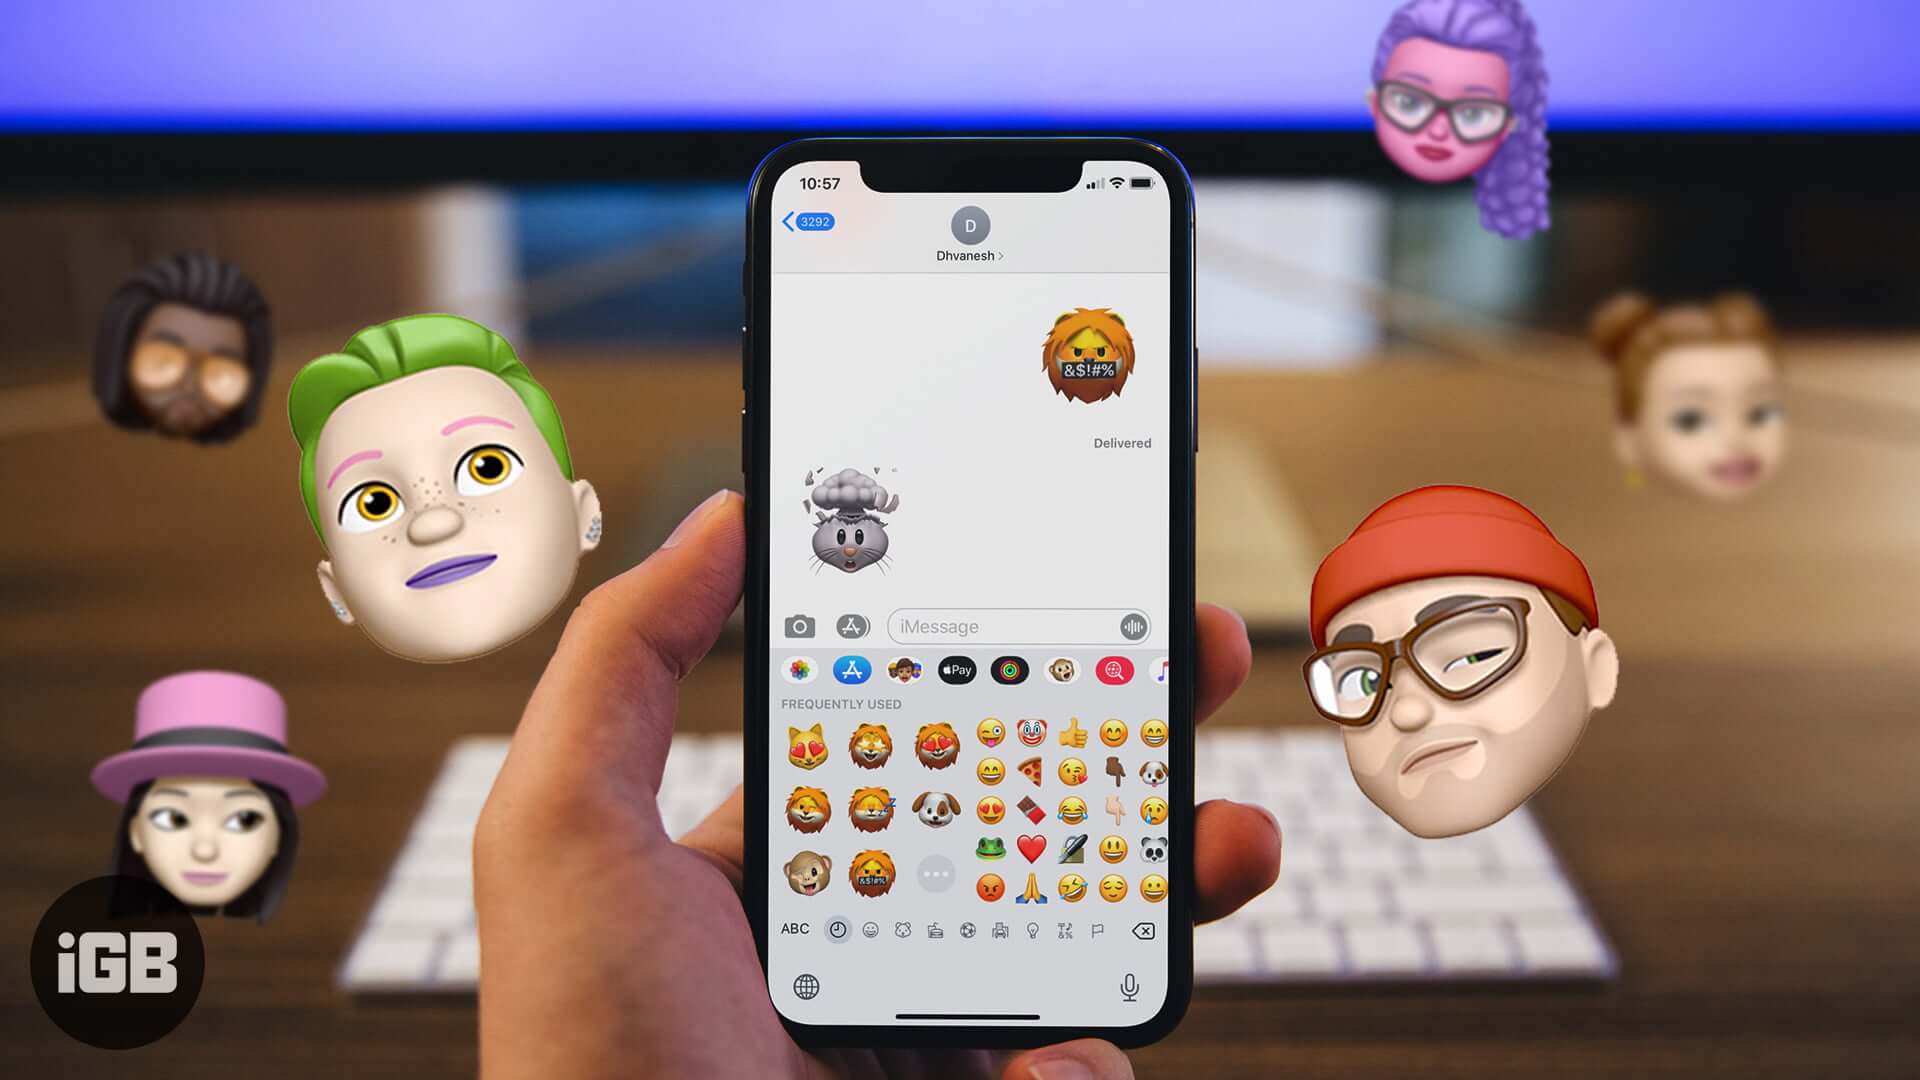
Have you ever wanted to add a GIF keyboard to your iPhone to express yourself with animated images in your messages? Look no further – we have the perfect guide for you! GIF keyboards have become increasingly popular, allowing users to spice up their conversations with funny and exciting animations.
In this article, we will walk you through the step-by-step process of adding a GIF keyboard to your iPhone. With just a few simple steps, you’ll be able to access a vast collection of GIFs and easily share them with your friends and family.
Whether you want to convey your excitement, show your support, or simply bring some humor to your messages, having a GIF keyboard at your fingertips can add a touch of fun and creativity to your conversations. Once you’ve added a GIF keyboard to your iPhone, you’ll have access to countless GIFs for every occasion.
We understand that finding the right GIF keyboard might seem daunting at first, but fear not! We will guide you through the process and recommend popular GIF keyboard apps that you can easily download from the App Store. These apps provide a wide range of GIFs and even allow you to search for specific categories or keywords to find the perfect GIF for any situation.
So, if you’re ready to bring your messages to life with animated GIFs, let’s get started with the step-by-step guide to adding a GIF keyboard to your iPhone!
Step 1: Open the App Store
The first step towards adding a GIF keyboard to your iPhone is to open the App Store. The App Store is where you can find a wide variety of applications, including GIF keyboard apps.
To open the App Store, simply locate the App Store icon on your iPhone’s home screen. The icon is represented by a blue “A” on a white background. Tap on the icon to launch the App Store.
Once the App Store is open, you will be greeted with various tabs at the bottom of the screen, such as “Today”, “Games”, “Apps”, “Arcade”, and “Search”. These tabs allow you to navigate through the different sections of the App Store to explore and discover new apps.
In order to find a GIF keyboard app, we will be using the “Search” tab. Tap on the “Search” tab located at the bottom-right corner of the screen. This will take you to a search bar where you can type in the name of the app you’re looking for.
Now that you are on the search page, you can proceed to the next step to search for the GIF keyboard app that you want to download.
Step 2: Search for “Giphy” or “Tenor”
Once you have accessed the search bar in the App Store, it’s time to search for the GIF keyboard app that you want to add to your iPhone. Two popular options are “Giphy” and “Tenor”.
To begin the search, type in either “Giphy” or “Tenor” in the search bar. As you type, the App Store will display a list of search results that closely match the keywords you entered. Look for the official app with the corresponding name, such as “Giphy – Animated GIFs Search Engine” or “Tenor – Find GIFs for iMessage”.
Make sure to select the app that is relevant to your search. Both “Giphy” and “Tenor” are well-known providers of GIFs and offer their own respective GIF keyboard apps.
While both options are great, you can choose the one that suits your preferences or explore both apps to see which one offers the GIFs that resonate with you the most. Both apps have an extensive library of GIFs on various topics, so you’re bound to find the perfect animations to enhance your conversations.
Once you have found the desired app, tap on it to access the app’s page in the App Store. Here, you can find more information about the app, including its features, user ratings, and reviews. Take a moment to read the app’s description and reviews to get a better sense of what it has to offer.
When you’re ready to proceed, it’s time to download and install the app on your iPhone. We’ll cover this step in detail in the next section.
Step 3: Download and Install the App
Once you have selected the desired GIF keyboard app in the App Store, it’s time to download and install it on your iPhone. Follow these simple steps to get the app up and running:
1. On the app’s page in the App Store, you will see an “Install” or “Get” button. Tap on this button to begin the download process.
2. Your iPhone will prompt you to verify your identity using either Face ID, Touch ID, or your Apple ID password. Follow the instructions on your screen to complete the verification process.
3. The app will begin downloading and installing on your iPhone. The duration of this process may vary depending on the size of the app and your internet connection speed. You may need to wait for a few moments until the app is fully downloaded.
4. Once the download is complete, the app’s icon will appear on your home screen, indicating that it has been successfully installed.
5. At this point, you can either open the app directly by tapping on its icon or proceed to the next steps to grant necessary permissions and add the GIF keyboard to your iPhone’s system settings.
Now that you have successfully downloaded and installed the GIF keyboard app on your iPhone, it’s time to move on to the next steps to set it up and enable it as a keyboard option. We will guide you through this process in the upcoming sections.
Step 4: Launch the App and Grant Permissions
After you have downloaded and installed the GIF keyboard app on your iPhone, it’s time to launch the app and grant the necessary permissions for it to function properly. Follow these steps to get started:
1. Locate the app’s icon on your iPhone’s home screen and tap on it to launch the app.
2. Upon launching the app for the first time, you may be prompted to grant certain permissions. These permissions are necessary for the app to access your keyboard and allow you to use GIFs in your messages.
3. Read the permissions carefully and tap on “Grant” or “Allow” when prompted. It is important to note that granting these permissions will not compromise the security or privacy of your device.
4. Depending on the app, you may be asked to grant permissions such as “Full Access”, which allows the keyboard app to transmit what you type, including GIFs, to the intended recipient. This permission is required for the GIF keyboard to function properly.
5. Follow the on-screen instructions to complete the permission granting process. If any additional settings or options need to be configured within the app, take a moment to explore and customize them according to your preferences.
By granting the necessary permissions, you are ensuring that the GIF keyboard app can integrate seamlessly with your iPhone’s messaging system and provide you with a wide range of GIF options to enhance your conversations.
Now that you have launched the app and granted the required permissions, it’s time to proceed to the next steps to add the GIF keyboard to your iPhone’s system settings and enable it as a keyboard option. We will cover this process in detail in the upcoming sections.
Step 5: Open the “Settings” App
Now that you have launched the GIF keyboard app and granted the necessary permissions, it’s time to open the “Settings” app on your iPhone. The “Settings” app is where you can manage various aspects of your device, including your keyboard settings.
To open the “Settings” app, locate the icon on your iPhone’s home screen. The icon resembles a gray gear or cogwheel. Tap on the icon to launch the “Settings” app.
Once the “Settings” app is open, you will find a list of different options and categories. These categories allow you to customize various settings on your iPhone, such as Wi-Fi, Display & Brightness, and Sounds & Haptics.
To proceed with adding the GIF keyboard to your iPhone, you need to access the “General” settings. Scroll down the list of options until you see “General” and tap on it to continue.
Inside the “General” settings, you will find a wide range of configuration options for your iPhone. From here, you can adjust settings related to accessibility, software updates, and more. We’re specifically interested in accessing the “Keyboard” settings, which we will cover in the next step.
By opening the “Settings” app and accessing the “General” settings, you are one step closer to adding and enabling the GIF keyboard on your iPhone. Let’s move on to the next step to ensure that the necessary keyboard settings are configured correctly!
Step 6: Go to “General”
After opening the “Settings” app on your iPhone, it’s time to navigate to the “General” settings. The “General” settings allow you to configure various aspects of your device, including language, date & time, and keyboard settings.
To proceed to the “General” settings, follow these steps:
1. On the main screen of the “Settings” app, scroll down until you see the option labeled “General.” It is usually located towards the top of the list of settings categories.
2. Once you locate “General,” tap on it to access the general settings of your iPhone.
The “General” settings provide a wide range of options to customize your device’s functionality. From here, you can adjust settings related to your device’s accessibility, software updates, storage, and more.
By accessing the “General” settings, you are one step closer to enabling the GIF keyboard on your iPhone. In the next step, we will specifically focus on navigating to the “Keyboard” settings, where you can add and manage keyboards on your device.
Now that you have successfully reached the “General” settings, let’s move on to the next step to configure the “Keyboard” settings and add the GIF keyboard to your iPhone!
Step 7: Tap on “Keyboard”
After accessing the “General” settings on your iPhone, it’s time to navigate to the “Keyboard” settings. The “Keyboard” settings allow you to manage and customize the keyboards available on your device, including the option to add the GIF keyboard.
To proceed with this step, follow these simple instructions:
1. On the “General” settings page, scroll down until you find the option labeled “Keyboard.” This option is usually located towards the middle of the list of settings categories.
2. Once you locate the “Keyboard” option, tap on it to access the keyboard settings.
Inside the “Keyboard” settings, you will find various options to manage your keyboards, including language settings, autocorrection, and text replacement. This is where you will add and enable the GIF keyboard on your iPhone.
By tapping on the “Keyboard” option, you are one step closer to adding the GIF keyboard to your iPhone. In the next step, we will cover how to select the “Keyboards” setting, which will allow you to manage and add new keyboards to your device.
Now that you have successfully reached the “Keyboard” settings, let’s move on to the next step and add the exciting GIF keyboard to your iPhone!
Step 8: Select “Keyboards”
After accessing the “Keyboard” settings, it’s time to select the “Keyboards” option. This allows you to manage your keyboards and add new ones to your iPhone, including the GIF keyboard.
To proceed with this step, follow these instructions:
1. On the “Keyboard” settings page, you will see a list of options related to your keyboard settings, such as “Keyboards,” “Text Replacement,” and “One-Handed Keyboard.” Tap on the option labeled “Keyboards.”
2. By selecting “Keyboards,” you will be taken to a new page where you can manage your keyboards and add new ones.
On this page, you will see a list of currently enabled keyboards on your iPhone. These may include the default keyboard, any additional language keyboards you have added in the past, and third-party keyboards you have downloaded.
Now that you have reached the “Keyboards” settings, you are ready to proceed to the next step and add the GIF keyboard to your iPhone.
But before we move on, it’s important to note that the exact layout and options on this page may vary slightly depending on your iPhone model and software version. However, the overall process of adding a keyboard should remain the same.
Now that you have successfully selected the “Keyboards” option, let’s move on to the next step and add the exciting GIF keyboard to your iPhone!
Step 9: Tap on “Add New Keyboard”
After accessing the “Keyboards” settings on your iPhone, it’s time to tap on the “Add New Keyboard” option. This will allow you to add the GIF keyboard to your device and enable it for use in your messages.
Follow these steps to proceed:
1. On the “Keyboards” settings page, scroll down until you see the section labeled “Third-Party Keyboards.” This is where you can add keyboards from third-party apps, such as the GIF keyboard app you downloaded earlier.
2. Within the “Third-Party Keyboards” section, tap on the “Add New Keyboard” option. This will open a list of available keyboards that you can add to your iPhone.
3. Look for the name of the GIF keyboard app you downloaded, such as “Giphy” or “Tenor”. Tap on the app’s name to add it as a new keyboard on your device.
Once you have successfully tapped on “Add New Keyboard” and selected the desired GIF keyboard app, it will be added to your list of enabled keyboards on your iPhone.
Now that you have added the GIF keyboard to your device, it’s time to proceed to the next step and grant “Full Access” to the keyboard app in order to unlock its full functionality.
Remember, the GIF keyboard app you added may have specific instructions or settings to configure within the app itself. Feel free to explore the app and adjust any settings to personalize your GIF experience.
With the GIF keyboard now added to your iPhone, you’re one step closer to expressing yourself with animated GIFs in your messages!
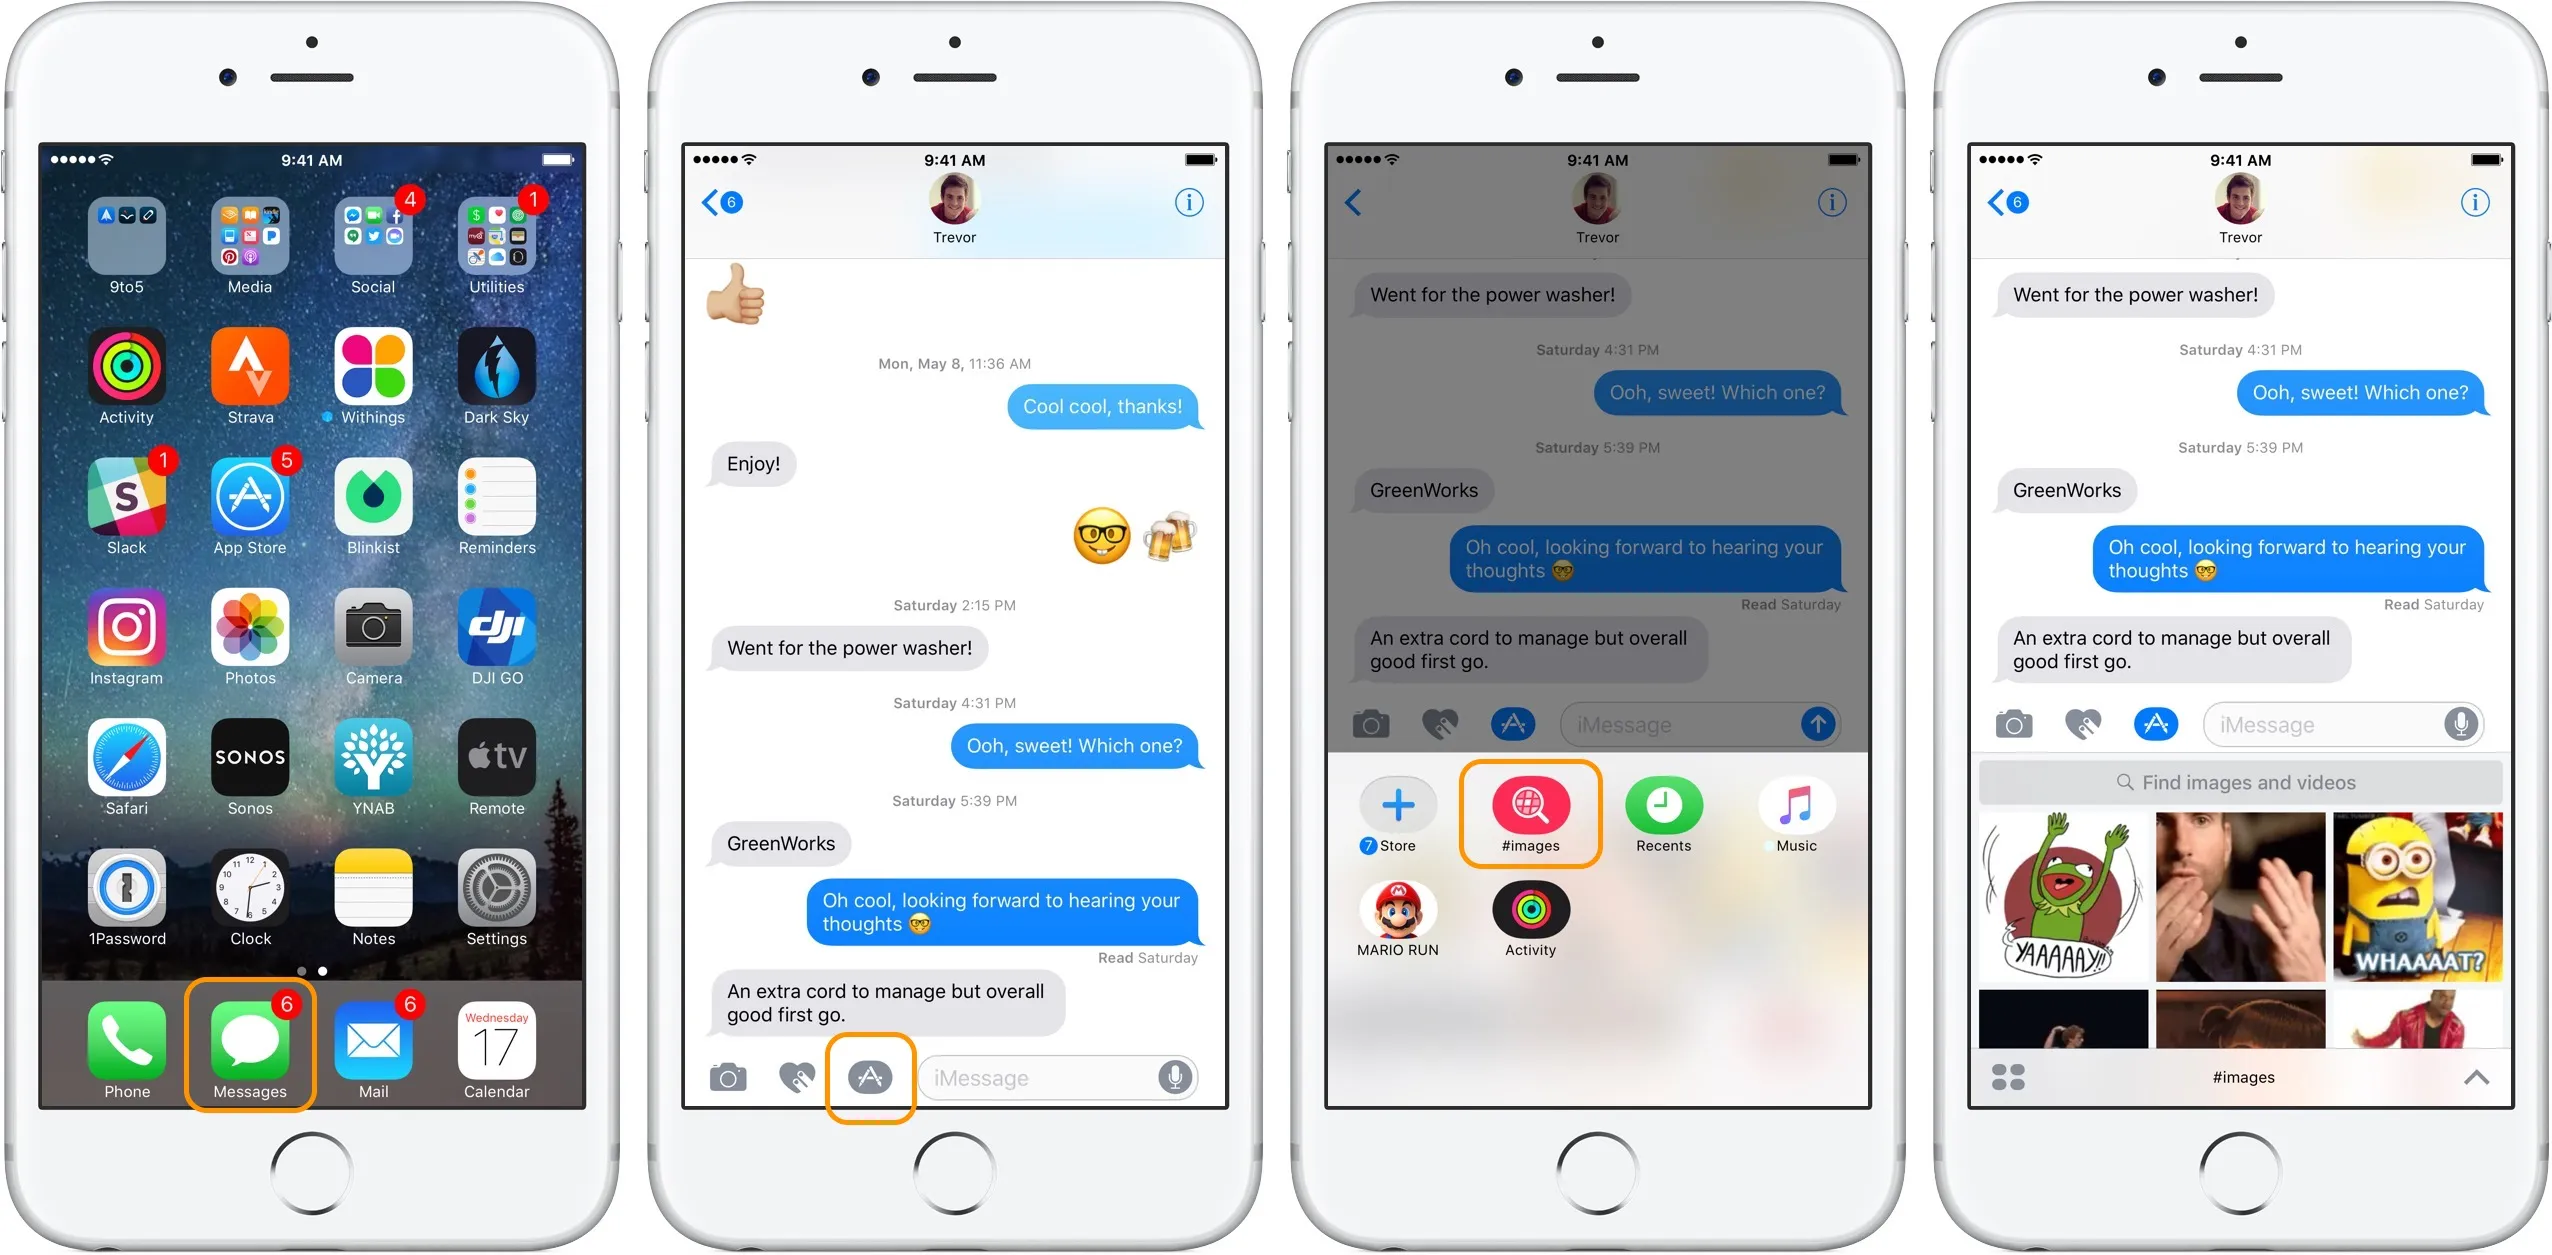
Step 10: Choose “Gif Keyboard”
Now that you have added the GIF keyboard app to your iPhone, it’s time to choose the specific keyboard option within the app to enable it for use in your messages. Follow these steps to proceed:
1. Open a messaging app, such as Messages or any other app where you can enter text on your iPhone.
2. Tap on the text input field to bring up the keyboard.
3. Once the keyboard is visible, you will notice a small globe or emoji icon next to the space bar. This icon allows you to switch between keyboards.
4. Tap and hold the globe or emoji icon until a menu appears, displaying all the available keyboards on your device.
5. From the list of keyboards, scroll and select the name of the GIF keyboard app you added. It will likely be labeled as “Gif Keyboard” or the name of the specific app you downloaded.
6. After selecting the GIF keyboard, the keyboard on your screen will switch to the GIF interface, showing a collection of animated images to choose from.
Now, you can start browsing through the vast collection of GIFs offered by the GIF keyboard app. Search for specific categories, browse popular GIFs, or even use keywords to find the perfect animation to express yourself.
With the GIF keyboard now chosen as your active keyboard, you can easily add animated GIFs to your messages and bring your conversations to life with a touch of creativity and fun!
Remember to explore the additional features and options within the GIF keyboard app itself to enhance your GIF browsing experience and make the most out of this exciting addition to your iPhone.
Now that you have successfully chosen the GIF keyboard as your active keyboard, let’s move on to the final step and ensure that full access is granted to the keyboard app.
Step 11: Allow Full Access
After selecting the GIF keyboard as your active keyboard, it’s important to allow “Full Access” to the keyboard app. This will ensure that the GIF keyboard functions properly and you have access to its complete range of features and options. Follow these steps to grant Full Access:
1. Open the messaging app or any other app where you can enter text and access the GIF keyboard on your iPhone.
2. Tap on the text input field to bring up the keyboard, and then tap on the globe or emoji icon next to the space bar to switch to the GIF keyboard.
3. Once the GIF keyboard is visible, tap on the globe or emoji icon and hold it until a menu appears, displaying the available keyboards on your device.
4. Locate and tap on the “Keyboard Settings” option. This will open the settings for the active keyboard.
5. On the keyboard settings page, look for the option that says “Allow Full Access” or something similar.
6. Tap on the toggle switch next to “Allow Full Access” to enable it. You may receive a notification confirming that enabling full access will allow the keyboard app to transmit what you type, including GIFs, to the intended recipient.
7. Read the notification carefully and tap on “Allow” or “Continue” to grant full access to the GIF keyboard app.
By allowing full access to the GIF keyboard, you ensure that it can function seamlessly and provide you with the complete range of features, including the ability to search for specific GIFs and browse through different categories.
Keep in mind that granting full access does not compromise your privacy or security. The keyboard app needs this permission in order to communicate the GIFs you select to the messaging app or other applications you are using.
Now that you have successfully allowed full access to the GIF keyboard, you are ready to enjoy a wide selection of animated GIFs to enhance your conversations and express yourself in a fun and engaging way!
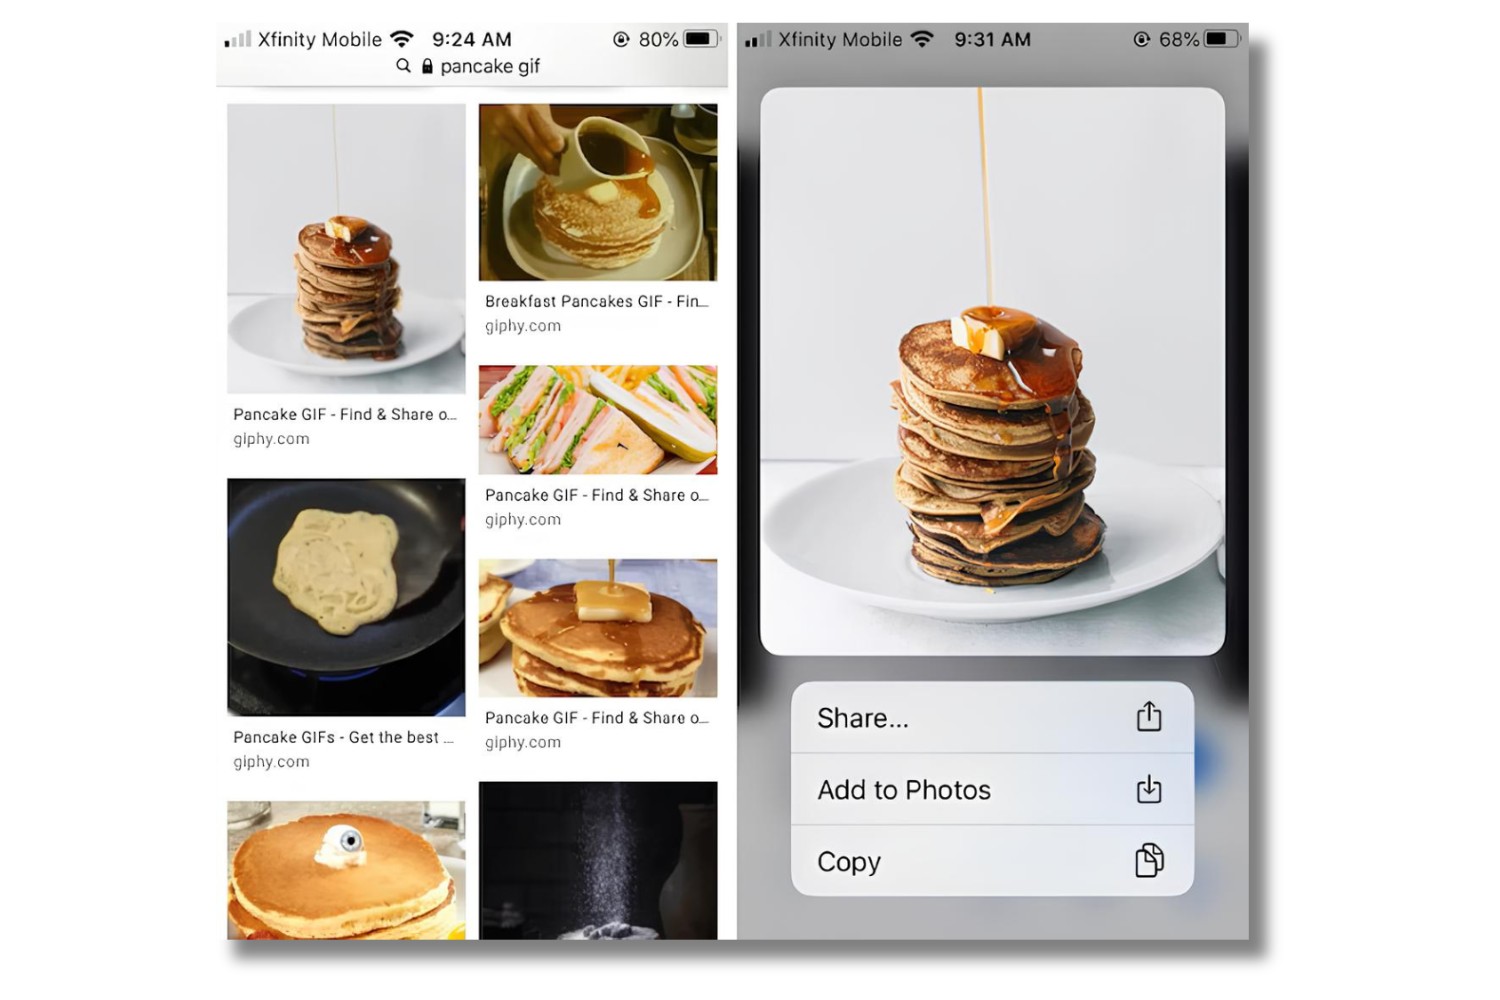
Step 12: Test the GIF Keyboard
After you have enabled full access to the GIF keyboard, it’s time to put it to the test! Follow these steps to ensure that the GIF keyboard is working properly:
1. Open a messaging app or any other app where you can enter text on your iPhone.
2. Tap on the text input field to bring up the keyboard.
3. Toggle the globe or emoji icon next to the space bar to switch to the GIF keyboard.
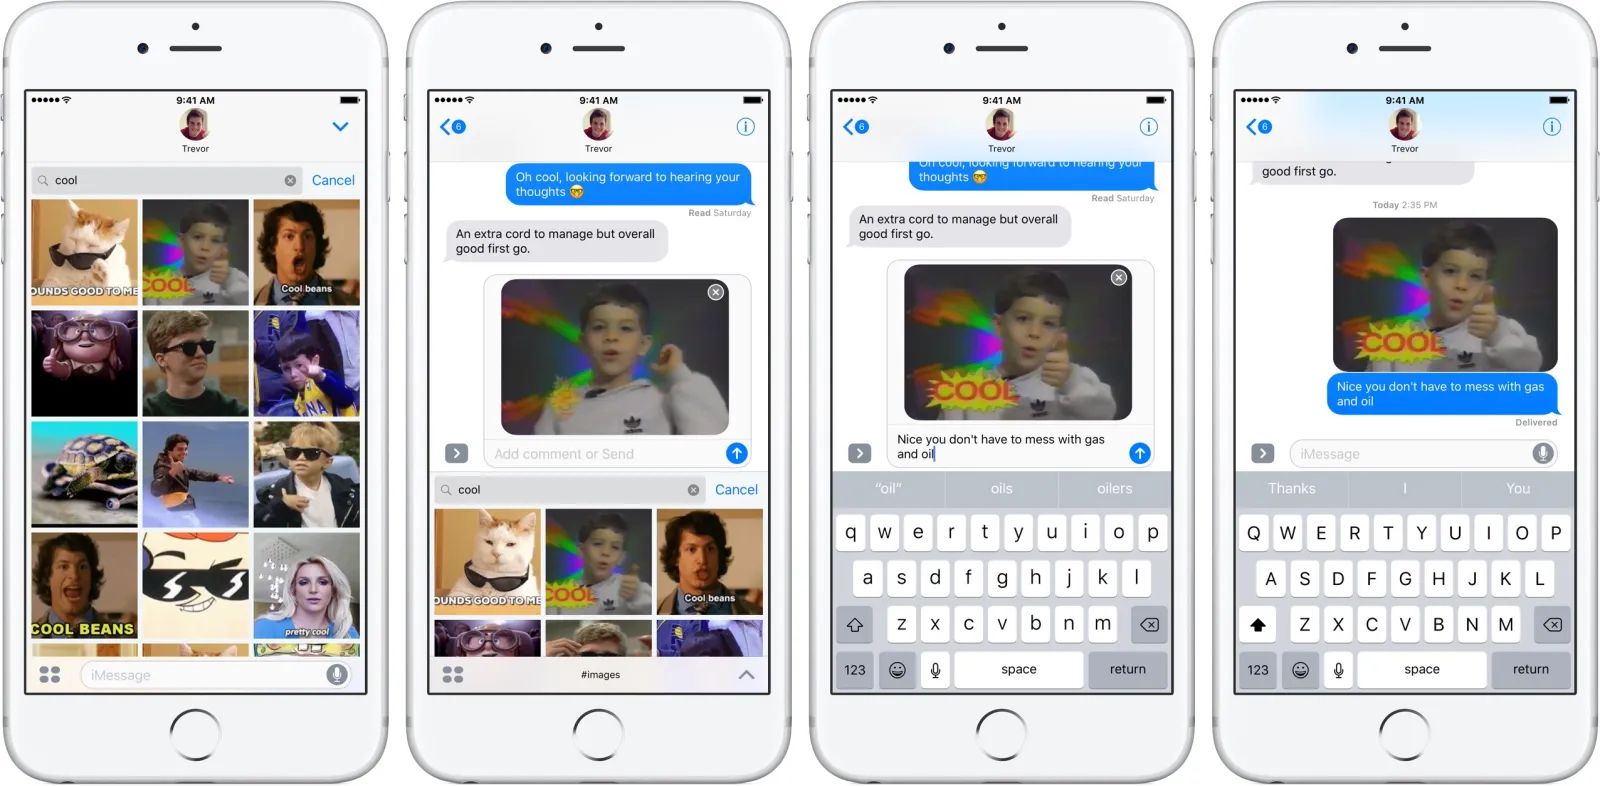
4. Once the GIF keyboard is visible, you can start browsing through the collection of animated GIFs. Explore different categories, use keywords to search for specific GIFs, or check out the popular GIFs section.
5. Select a GIF by tapping on it, and it will instantly be inserted into your message or text input field.
6. Take a moment to preview the GIF in your message and make any necessary adjustments, such as resizing or repositioning it, if the messaging app allows for such customization.
7. Send the message or continue typing your text, and see how the GIF enhances your conversation.
8. Repeat this process in different apps or messaging threads to ensure that the GIF keyboard is universally accessible and functions correctly across various platforms.
Testing the GIF keyboard allows you to familiarize yourself with its features and the process of selecting and inserting GIFs into your messages. It also gives you the opportunity to explore different styles of GIFs and find the ones that best suit your communication style.
If, for any reason, you encounter any issues or have trouble using the GIF keyboard, you can double-check the keyboard’s settings, make sure you have granted full access, or reach out to the app’s support team for further assistance.
Congratulations! You have successfully tested the GIF keyboard and are now ready to express yourself with a wide range of animated GIFs in your messages.
Now that you have mastered the use of the GIF keyboard, you can add a touch of creativity and humor to your conversations with friends, family, and colleagues!
Conclusion
Adding a GIF keyboard to your iPhone is a great way to bring your messages to life with animated images. With just a few simple steps, you can enhance your conversations and express yourself in a fun and engaging manner.
In this article, we walked you through the step-by-step process of adding a GIF keyboard to your iPhone. From opening the App Store and searching for GIF keyboard apps like “Giphy” or “Tenor,” to downloading and installing the app, granting permissions, and configuring the keyboard settings, we provided detailed instructions to help you every step of the way.
By following the steps outlined in this guide, you can successfully add and activate the GIF keyboard on your iPhone, giving you access to a vast library of animated GIFs for every occasion. Whether you want to convey your emotions, add humor, or simply spice up your messages, the GIF keyboard is a versatile tool that allows you to easily find and share the perfect GIF.
Remember to explore the features and settings within the GIF keyboard app itself to personalize your GIF browsing experience. Additionally, it’s important to grant full access to the keyboard app to ensure its seamless integration with your messaging apps and maximize its functionality.
Now that you have learned how to add a GIF keyboard to your iPhone, you can unleash your creativity, entertain your friends, and make your conversations more expressive than ever before. Enjoy the process of finding and sharing animated GIFs, and have fun exploring the vast world of visual communication!
So go ahead and start adding a GIF keyboard to your iPhone today. Get ready to have a blast expressing yourself with animated GIFs and making your messages truly unforgettable!