Introduction
Android tablets have become increasingly popular, offering convenience and versatility for both work and entertainment. One of the key functionalities of an Android tablet is the ability to manage contacts. Whether you’re looking to store important business connections or keep track of your friends and family, adding contacts to your Android tablet is a straightforward process. In this article, we will explore various methods to help you efficiently add contacts to your Android tablet.
Having your contacts readily available on your Android tablet not only saves you time by eliminating the need to manually input contact information but also ensures that your contacts are synced across your other devices. Whether you’re adding contacts from your Google account, SIM card, email accounts, or even syncing them via Bluetooth, Android provides multiple options to meet your needs.
This article will guide you through each method step-by-step, ensuring that you are fully equipped to add contacts to your Android tablet and manage your contacts seamlessly. Whether you’re a new Android user or simply in need of a refresher, the following methods will help you get started and stay organized.
So, whether you want to import contacts from your Google account, add them manually, import from your SIM card, sync from another device, or even add contacts from your email accounts, we’ve got you covered. Let’s dive right in and explore the various methods to add contacts to your Android tablet!
Method 1: Importing contacts from Google account
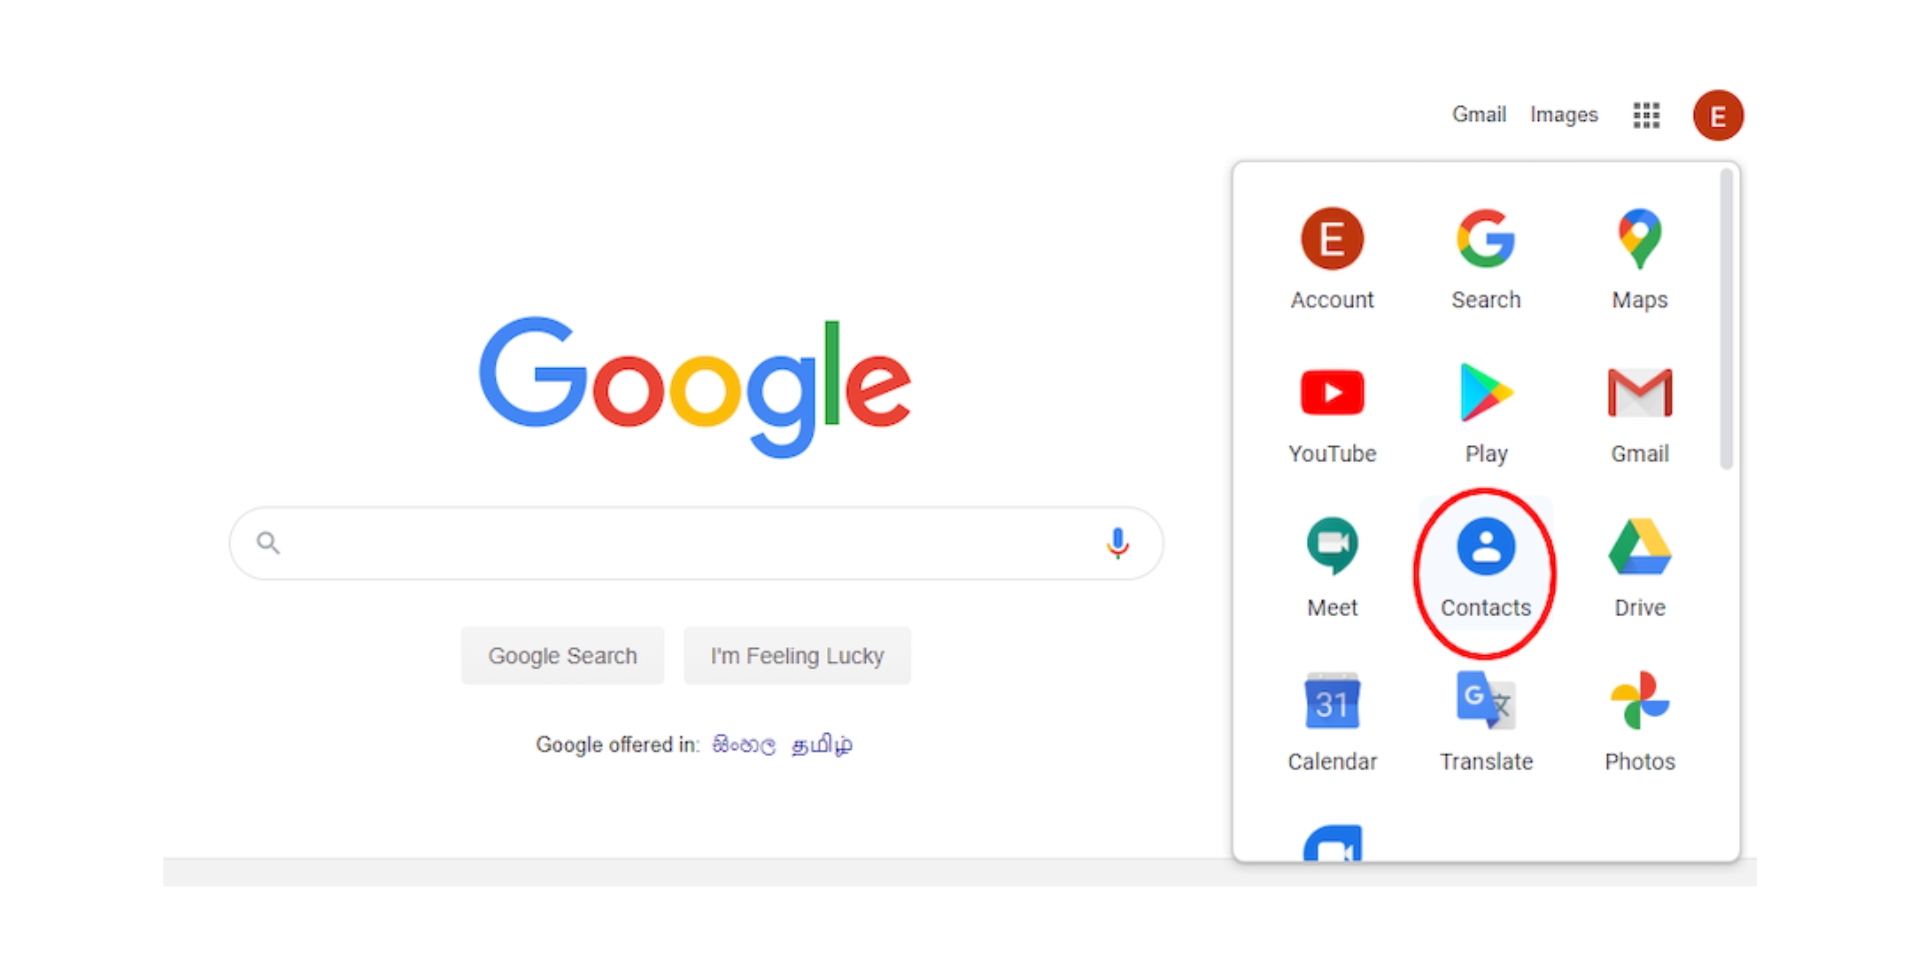
One of the easiest ways to add contacts to your Android tablet is by importing them from your Google account. If you have been using Gmail or any other Google services, chances are that you already have a list of contacts saved in your Google account. Here’s how you can import those contacts to your Android tablet:
- On your Android tablet, open the “Contacts” app.
- In the Contacts app, tap on the menu icon (usually three lines or dots) to access the settings.
- Select “Settings” from the menu.
- In the Settings menu, tap on “Import/Export” or similar options.
- Choose “Import” or “Import from Google Account” from the available options.
- Select your Google account from the list if prompted.
- Choose the contacts you want to import, or select “Import all” to import all your Google contacts.
- Tap on “Done” or “Import” to complete the process.
Once the import process is complete, your contacts from your Google account will now be available in the Contacts app on your Android tablet. You can now access and manage these contacts as needed.
Importing contacts from your Google account is a convenient way to ensure that your contacts are always up-to-date. Any changes you make to your Google contacts, such as adding or editing contact information, will automatically be synced to your Android tablet. This eliminates the need to manually update contact details on multiple devices.
Keep in mind that this method requires an active internet connection and that you have signed in to your Google account on your Android tablet. Additionally, make sure that your Google account is set up to sync contacts. You can check this by going to “Settings” > “Accounts” > “Google” and ensuring that the “Contacts” toggle is turned on.
Importing contacts from your Google account is a hassle-free way to populate your Android tablet with all your important contacts. With just a few taps, you can have all your contacts readily available, saving you time and effort.
Method 2: Adding contacts manually
If you prefer to add contacts to your Android tablet manually, you have the option to do so directly through the Contacts app. This method allows you to input contact information one by one, ensuring that your contacts are accurate and personalized. Here’s how you can manually add contacts to your Android tablet:
- Open the “Contacts” app on your Android tablet.
- Tap on the “+” or “Add contact” button to create a new contact.
- Enter the contact’s name in the designated field.
- Add additional details such as phone number, email address, and other relevant information.
- Tap on “Save” or the checkmark icon to save the contact.
You can repeat these steps for each contact you want to add manually to your Android tablet. This method allows you to personalize each contact with specific details such as their address, birthday, organization, and more. By manually entering contacts, you have full control over the information stored and can ensure its accuracy.
In addition to basic contact information, the Contacts app also allows you to add custom fields for additional details. This can be useful for adding specific notes or unique details about each contact. Simply tap on the “Add field” option to include custom fields.
Manually adding contacts to your Android tablet gives you the flexibility to include all the necessary details you require. Whether it’s a personal contact or a business connection, having this information readily available on your tablet ensures that you can easily reach out and stay connected.
It’s important to note that when manually adding contacts, you can choose to save them to your Google account or your device’s local storage. Saving contacts to your Google account ensures that they are synced across devices, while saving them only to your device may limit their accessibility. Consider your preferences and syncing needs before selecting the save location.
Method 3: Importing contacts from SIM card
If you have contacts stored on your SIM card, you can easily import them to your Android tablet. This method is useful if you are switching devices or have contacts saved on your SIM card from a previous phone. Here’s how you can import contacts from your SIM card to your Android tablet:
- Insert the SIM card containing your contacts into your Android tablet.
- Open the “Contacts” app on your tablet.
- In the Contacts app, tap on the menu icon (usually three lines or dots) to access the settings.
- Select “Settings” from the menu.
- In the Settings menu, tap on “Import/Export” or a similar option.
- Choose “Import from SIM card” from the available options.
- Select the contacts you want to import from the SIM card, or choose “Import all” for all contacts.
- Tap on “Done” or “Import” to complete the process.
Once the import is complete, the contacts from your SIM card will be available in the Contacts app on your Android tablet. From there, you can view, edit, and manage these contacts as needed. It’s worth noting that this method will not delete the contacts from your SIM card, allowing you to retain a backup of your contacts if desired.
Importing contacts from your SIM card provides a convenient way to transfer your contacts between devices without the need for manual input. It ensures that your important contacts are easily accessible on your Android tablet, saving you time and effort.
Keep in mind that the specific steps to import contacts from a SIM card may vary slightly depending on the Android device and version of the operating system. However, the general process outlined here should be similar across most Android tablets.
If you encounter any issues importing contacts from your SIM card, ensure that the SIM card is inserted correctly and that it is compatible with your Android tablet. If the problem persists, you may need to contact your service provider or refer to your device’s user manual for further guidance.
Method 4: Syncing contacts from another device via Bluetooth
Another method to add contacts to your Android tablet is by syncing them from another device using Bluetooth. This method is particularly useful if you have contacts stored on a different phone or tablet and want to transfer them to your Android device seamlessly. Here’s how you can sync contacts from another device via Bluetooth:
- Enable Bluetooth on both devices – your Android tablet and the device you wish to sync contacts from.
- Pair the two devices by navigating to the Bluetooth settings on each device and following the pairing instructions.
- On the device with the contacts you want to transfer, go to the Contacts app or the settings that handle contacts.
- Select the contacts you want to transfer or choose the option to transfer all contacts.
- Look for a Share or Send option and select the Bluetooth option.
- Choose your Android tablet from the list of available devices to send the contacts.
- Accept the incoming Bluetooth transfer request on your Android tablet.
- Wait for the transfer process to complete. Once finished, the contacts will be imported to your Android tablet’s Contacts app.
After completing these steps, your contacts will be successfully synced from the other device to your Android tablet. You can now access and manage them with ease. It’s important to note that Bluetooth transfer speeds may vary depending on the devices and the number of contacts being transferred, so be patient during the transfer process.
Syncing contacts via Bluetooth is a convenient method to transfer contacts between devices without the need for internet connectivity or additional apps. It ensures that your important contacts are quickly available on your Android tablet, ready for you to connect and communicate.
Keep in mind that both devices need Bluetooth capabilities, and the pairing process may require you to enter a passcode or PIN. Additionally, ensure that the contacts you want to transfer are allowed to be shared via Bluetooth on the other device. Some devices may have restrictions on sharing certain contact details.
Using Bluetooth to sync contacts between devices provides a wireless and straightforward way to transfer important contact information. It eliminates the need for manual input and ensures that your contacts stay consistent across devices.
Method 5: Adding contacts from email accounts
Adding contacts to your Android tablet from your email accounts is a convenient way to quickly import contact information. Whether you use Gmail, Yahoo Mail, Outlook, or any other email service, Android provides seamless integration to easily add contacts. Here’s how you can add contacts from email accounts to your Android tablet:
- Open the “Contacts” app on your Android tablet.
- Tap on the menu icon (usually three lines or dots) to access the settings.
- Select “Settings” from the menu.
- In the Settings menu, tap on “Accounts” or a similar option.
- Choose the email account from which you want to import contacts.
- Toggle the “Sync Contacts” option to enable contact synchronization with that email account.
- Wait for the contacts to sync, and they will automatically appear in your Android tablet’s Contacts app.
After completing these steps, your contacts from the selected email account will be imported to your Android tablet. You can now access, manage, and utilize these contacts seamlessly.
When using this method, keep in mind that contacts will only be imported if they exist in the selected email account’s contacts. Make sure that your email account contains the desired contacts before initiating the synchronization process.
Another advantage of adding contacts from email accounts is that any changes made to the contacts in the email account will be automatically synced with your Android tablet. This ensures that your contacts remain up-to-date across all devices and platforms.
It’s important to note that this method requires a stable internet connection and that you have added and set up your email accounts on your Android tablet. Additionally, ensure that the respective email account’s contact synchronization is enabled in your device’s settings.
Adding contacts from email accounts removes the need for manual input and ensures that you have all your important contacts readily available on your Android tablet. By utilizing the seamless integration offered by Android, you can effortlessly sync and manage your contacts across devices.
Conclusion
Adding contacts to your Android tablet is a simple and efficient process that allows you to stay connected with your friends, family, and business contacts. By exploring the methods outlined in this article, you can choose the approach that best suits your needs and preferences.
Importing contacts from your Google account ensures seamless syncing and accessibility across multiple devices. This method is great if you already have a list of contacts saved in your Google account.
Manually adding contacts gives you full control over the information you store, allowing you to customize and personalize each contact entry to your preference.
Importing contacts from your SIM card provides a convenient way to transfer contacts from your previous device, ensuring that important contact information is readily available on your Android tablet.
Syncing contacts via Bluetooth allows you to effortlessly transfer contacts from another device without the need for an active internet connection.
Adding contacts from your email accounts offers easy integration and syncing, ensuring that your contact information remains up-to-date across devices.
No matter which method you choose, adding contacts to your Android tablet enhances your ability to communicate and stay organized. Whether for personal or professional use, having all your contacts in one place saves you time and effort in searching for contact information.
So, whether you’re importing contacts from your Google account, adding them manually, importing from your SIM card, syncing from another device via Bluetooth, or adding contacts from your email accounts, you now have the knowledge and tools to easily manage your contacts on your Android tablet. Stay connected and enjoy the convenience that comes with effortlessly accessing your contacts on-the-go.