Introduction
Adding an additional hard disk drive to your computer can provide a significant boost in storage capacity and improve overall performance. Whether you need more space for storing files, installing applications, or running resource-intensive programs, having an extra hard disk drive can be a valuable addition to your system.
In this guide, we will walk you through the step-by-step process of adding another hard disk drive to your computer. By following these instructions, you will be able to seamlessly expand your storage capabilities and enhance the functionality of your machine.
Before we dive into the installation process, it’s important to note that different computers may have varying requirements and configurations, so it’s crucial to consult your computer’s documentation or manufacturer’s website for specific instructions tailored to your system.
Additionally, keep in mind that opening your computer and performing hardware installations can void your warranty, so if you are unsure or uncomfortable with these procedures, it’s best to seek professional assistance.
Now, let’s get started on adding another hard disk drive to your computer!
Step 1: Determine the type of hard disk drive needed
Before purchasing a new hard disk drive, it’s crucial to determine the type and specifications that are compatible with your computer. There are a few key factors you should consider:
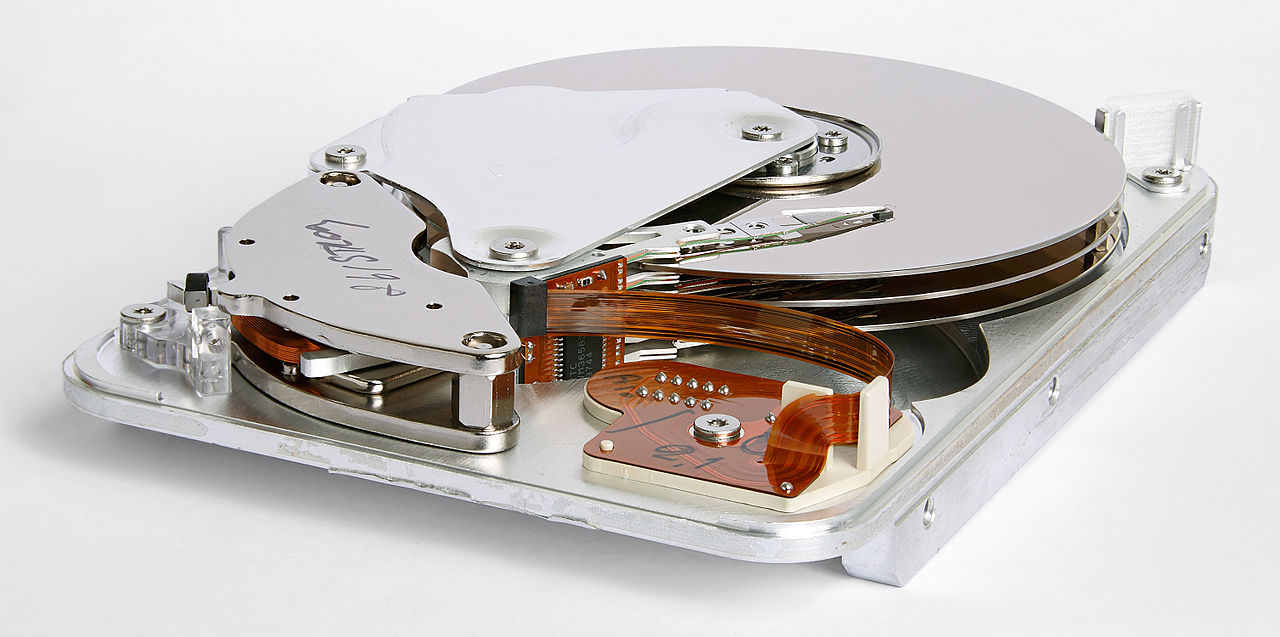
1. Form factor: Hard disk drives come in different form factors, with the most common being 3.5-inch and 2.5-inch. The form factor you need will depend on the available drive bay in your computer. Desktop computers typically accommodate 3.5-inch drives, while laptops and smaller form factor systems generally require 2.5-inch drives.
2. Storage capacity: Assess your storage needs and decide on the desired capacity for the new hard disk drive. Consider the types of files you will be storing, such as documents, photos, videos, or games, and estimate the amount of space they will require. It’s advisable to choose a drive with ample capacity as it’s better to have more storage than you initially think you need.
3. Interface: Identify the interface supported by your computer’s motherboard. The most common interface types for hard disk drives are SATA (Serial ATA) and IDE (Integrated Drive Electronics). SATA is the newer and faster interface, while IDE is older and slower. Check your computer’s documentation or manufacturer’s website to determine which interface is compatible with your system.
4. Speed: Hard disk drives come with different rotational speeds, measured in RPM (rotations per minute). Higher RPM generally implies faster performance, so if you require faster data access and retrieval, opt for a hard disk drive with a higher RPM.
Once you have gathered this information, you can start searching for the appropriate hard disk drive that meets your requirements. Online retailers, electronics stores, and computer hardware websites are all good sources for purchasing hard disk drives.
Keep in mind that if you are replacing an existing hard disk drive, it’s important to back up your data beforehand to prevent any loss or corruption of files. Now that you have determined the type of hard disk drive you need, let’s proceed to the next step.
Step 2: Check if your computer supports an additional hard disk drive
Before diving into the installation process, it’s essential to verify if your computer has the necessary capabilities to support an additional hard disk drive. Here’s how you can check:
1. Consult the documentation: Start by referring to your computer’s documentation or user manual. Look for information on the maximum number of hard disk drives that can be installed in your specific model. The documentation should also provide details on the available drive bays and any limitations or restrictions.
2. Check the motherboard: Open your computer and locate the motherboard. Search for additional SATA or IDE connectors. The number of connectors available will determine the number of hard disk drives you can support. If there are extra connectors, you can proceed with adding another hard disk drive.
3. Power supply: Ensure that your computer’s power supply has sufficient connectors to supply power to the new hard disk drive. You may need to check if there are spare SATA power connectors or use adapters if needed. Insufficient power supply can lead to compatibility issues or irregularities in the performance of your system.
4. Physical space: Assess the available physical space inside your computer. Look for empty drive bays where you can mount the new hard disk drive. It’s important to ensure that the desired drive bay has adequate space and proper mounting mechanisms to securely hold the new drive.
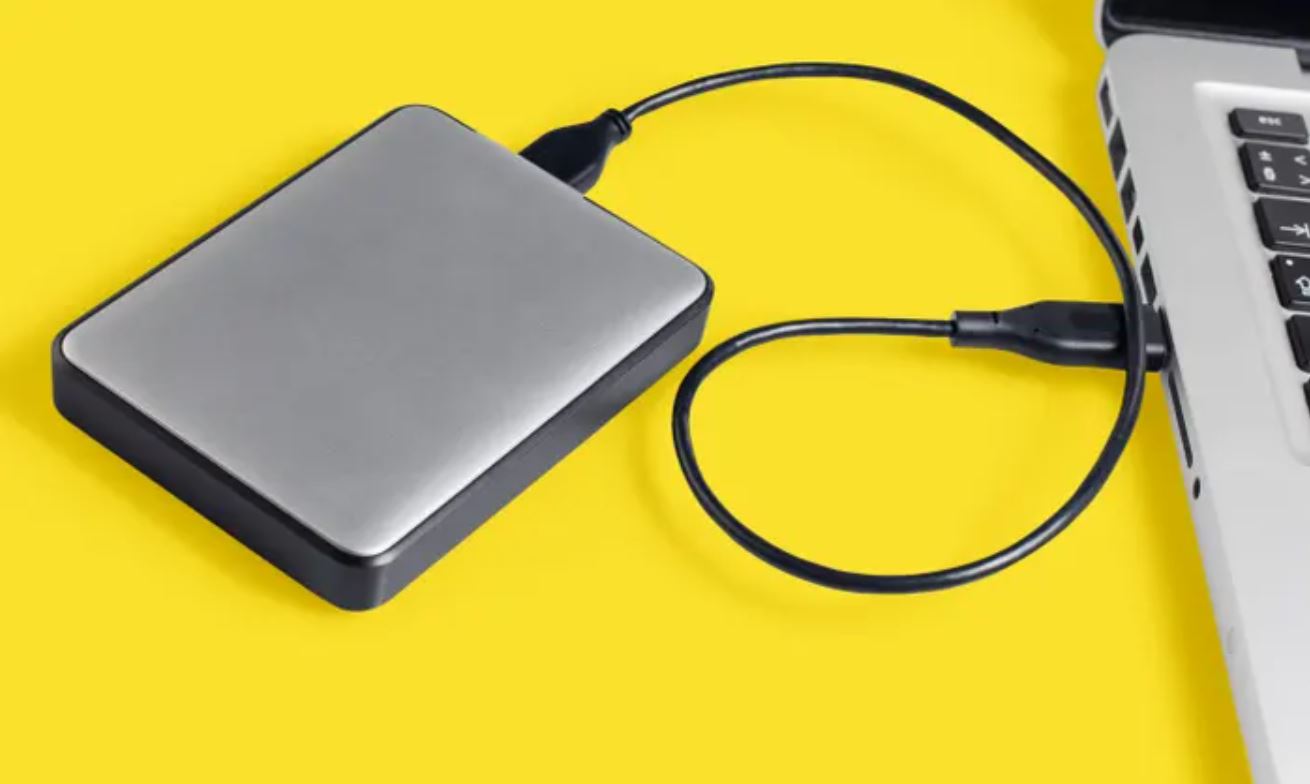
If, after conducting these checks, you determine that your computer supports an additional hard disk drive, you are ready to proceed with the installation. However, if your system does not support the addition of another hard disk drive, you may need to consider alternative storage solutions such as external hard drives or network-attached storage (NAS) devices.
Remember, if you are unsure about any aspect or require further clarification, consulting the manufacturer’s website or seeking professional assistance can help ensure a smooth installation process. Once you have verified that your computer can support an additional hard disk drive, let’s move on to the next step.
Step 3: Purchase the new hard disk drive
Now that you have determined the type of hard disk drive you need and confirmed that your computer can support an additional drive, it’s time to purchase the new hard disk drive. Here are some guidelines to help you make the right selection:
1. Research: Take some time to research different brands, models, and customer reviews to find a reliable and suitable hard disk drive. Look for features that align with your storage needs, such as capacity, speed, and reliability.
2. Consider your budget: Set a budget for your new hard disk drive. Prices can vary depending on the brand, capacity, and performance of the drive. Consider your storage requirements and decide how much you are willing to invest in the new drive.
3. Shop from reputable sources: Purchase your hard disk drive from reputable and trusted retailers. Whether you choose to buy from physical electronics stores or online marketplaces, ensure that the seller has a good reputation and offers reliable warranties or return policies.
4. Check for compatibility: Double-check that the hard disk drive you intend to purchase is compatible with your computer’s interface (SATA or IDE) and form factor (3.5-inch or 2.5-inch) as determined in the previous steps.
5. Consider future needs: If you anticipate needing more storage in the future, it’s wise to choose a hard disk drive with a larger capacity than your current needs. This allows room for expansion and helps avoid the need for frequent upgrades.
Once you have chosen the appropriate hard disk drive, proceed with the purchase. Make sure to keep the necessary receipts and warranty information, as this will be important should you encounter any issues with the drive in the future. Now that you have acquired the new hard disk drive, it’s time to move on to the next step of the installation process.
Step 4: Gather necessary tools and equipment
Before you begin the installation process, it’s essential to gather the necessary tools and equipment. Here’s what you’ll need:
1. Screwdriver: Depending on your computer’s design, you may need a Phillips or a flat-head screwdriver to remove the side panel and secure the hard disk drive in place. Check your computer’s documentation or observe the screws on the case to determine the type of screwdriver required.
2. Anti-static wrist strap: It’s recommended to use an anti-static wrist strap to prevent electrostatic discharge (ESD) and protect sensitive computer components from damage. This strap should be properly grounded by attaching it to a metal object or using an anti-static mat.
3. Hard disk screws: Most hard disk drives do not come with screws for installation, so you may need to acquire screws specifically designed for mounting the drive in your computer. These screws are usually included with your computer’s accessories or can be purchased separately.
4. Cables: Ensure that you have the necessary SATA or IDE cables to connect the hard disk drive to your motherboard. If your computer already has spare cables available, you may not need to purchase additional ones. However, if you require extra cables, you can find them at computer hardware stores.
5. Documentation and manuals: Keep your computer’s documentation handy throughout the installation process. You may need to refer to it for specific instructions or diagrams that pertain to your computer’s internal layout and connectivity.
By gathering these tools and equipment beforehand, you will be well-prepared for the installation process and minimize the risk of any delays or complications. Ensure that you have a suitable workspace with adequate lighting and a clean, clutter-free surface to work on. Now that you have everything you need, let’s proceed to the next step and start adding the new hard disk drive to your computer.
Step 5: Power down your computer and remove the side panel
Before diving into the installation process, it’s important to ensure your computer is powered off and safely disconnecting it from any power sources. Follow these steps to power down your computer and remove the side panel:
1. Save and close all applications: Save any open files and close all running applications to prevent data loss or corruption. It’s important to shut down your computer properly before proceeding with the hardware installation.
2. Shut down your computer: Click on the “Start” menu, then select “Shut Down” or “Power Off.” Allow your computer to fully shut down before proceeding to the next step.
3. Unplug the power cord: Locate the power cord connected to your computer and unplug it from the power outlet. This step ensures that your computer is completely disconnected from any electrical source.
4. Ground yourself: To prevent any static electricity discharge that could potentially damage your computer’s components, wear an anti-static wrist strap and attach it to a grounded metal object. Alternatively, touch the metal part of your computer case to discharge any static buildup.
5. Remove the side panel: Identify the side panel of your computer case, which is usually secured with screws or latches. Use a screwdriver to carefully remove the screws or unlatch the panel, depending on the design of your case.
6. Set aside the side panel: Once the screws or latches are removed, gently slide or lift off the side panel from the case. Be cautious of any cables or wires that may be connected to the panel, and set it aside in a safe place.
By following these steps, you will have successfully powered down your computer and removed the side panel, providing you with access to the internal components. Take note of the orientation of the side panel as you will need to reattach it later in the installation process. Now that your computer is prepared, we can move on to the next step of adding the new hard disk drive.
Step 6: Identify an available drive bay for the new hard disk drive
Now that you have removed the side panel of your computer, it’s time to identify an available drive bay where you can install the new hard disk drive. Follow these steps to locate a suitable drive bay:
1. Inspect the internal layout: Take a look inside your computer case and observe the existing hard disk drives and any other components. Look for empty slots or drive bays designed to hold additional storage devices.
2. Consider the type of drive bay: Depending on the form factor of your hard disk drive (3.5-inch or 2.5-inch), you need to find a matching drive bay. Desktop computers usually have multiple 3.5-inch drive bays, while laptops and smaller form factor systems may have 2.5-inch bays or use adapters for compatibility.
3. Check for mounting mechanisms: While observing the drive bays, look for any mounting mechanisms or brackets that are designed to secure the hard disk drive in place. These mechanisms may include screws, trays, or tool-less designs. Ensure that the chosen drive bay has the necessary mounting features to properly secure the new hard disk drive.
4. Consider airflow and cable management: Take into account the airflow and cable management within your computer case. It’s preferable to install the new hard disk drive in a location that allows for proper airflow and minimizes cable clutter. Avoid placing the new drive near cables that may obstruct airflow or interfere with other components.
5. Plan for future expansion: If you anticipate adding more storage devices in the future, it’s wise to choose a drive bay that allows room for expansion. This way, you can easily install additional hard disk drives as your storage needs grow.
By carefully inspecting the internal layout of your computer and identifying an available drive bay, you are now ready to proceed with mounting the new hard disk drive. Remember to keep in mind the compatibility of the drive bay with the form factor of your hard disk drive and consider factors such as airflow and cable management. In the next step, we will guide you through the process of mounting the hard disk drive in the chosen drive bay.
Step 7: Mount the hard disk drive in the drive bay
With the available drive bay identified, it’s time to mount the new hard disk drive securely. Follow these steps to mount the drive in the drive bay:
1. Prepare the hard disk drive: Ensure the new hard disk drive is in a static-free environment and handle it with care. Remove any protective coverings or packaging materials from the drive.
2. Align the drive with the drive bay: Carefully align the screw holes on the sides or bottom of the hard disk drive with the corresponding screw holes in the drive bay. The interface ports (SATA or IDE) should face towards the back of the case for easy cable connections later on.
3. Secure the drive with screws: Use the appropriate screws or mounting mechanisms to secure the hard disk drive in place. Insert the screws through the screw holes on the sides or bottom of the drive and tighten them gently, ensuring that the drive is aligned properly and snugly held in the drive bay. Avoid over-tightening the screws, as it may damage the drive or the drive bay.
4. Ensure stability: Check that the hard disk drive is securely mounted and doesn’t move or shift within the drive bay. Wiggle the drive slightly to verify that it is firmly in place.
5. Consider using rubber grommets: While not necessary, using rubber grommets between the hard disk drive and the drive bay can help reduce vibrations and noise. Some computer cases come with these grommets, or you can purchase them separately.
With the hard disk drive securely mounted in the drive bay, you have completed this step of the installation process. Take a moment to double-check that the drive is properly aligned and tightened. In the next step, we will guide you through connecting the necessary cables to the newly installed hard disk drive.
Step 8: Connect necessary cables to the hard disk drive
With the hard disk drive securely mounted in the drive bay, it’s time to connect the necessary cables to ensure proper functionality. Follow these steps to connect the cables to the newly installed hard disk drive:
1. SATA cables: If your hard disk drive uses a SATA interface, locate the SATA data cable and connect one end to the SATA data port on the back of the hard disk drive. The other end of the SATA data cable should be connected to an available SATA port on the motherboard. Ensure the connection is secure and tight.
2. SATA power cable: Locate an available SATA power connector from your power supply unit. Connect the SATA power cable to the corresponding power port on the back of the hard disk drive. Ensure that the connection is secure and fully inserted.
3. IDE cables (if applicable): If your hard disk drive uses the older IDE interface, locate the IDE ribbon cable. Connect one end of the IDE cable to the IDE port on the back of the hard disk drive. The other end of the IDE cable should be connected to an available IDE port on the motherboard. Ensure the connection is properly aligned and secure.
4. Power on the computer: Once the cables are connected, double-check that all connections are secure and properly inserted. Reattach the side panel of the computer case and fasten any screws or latches to secure it back into position. It’s now time to power on your computer and configure the new hard disk drive.
With the necessary cables connected, you have completed this step of the installation process. It’s important to ensure that all connections are secure and tight to avoid any issues with data transfer or power supply to the hard disk drive. In the next step, we will guide you through the process of securing the hard disk drive and closing the computer case.
Step 9: Secure the hard disk drive and close the computer
Now that the necessary cables are connected to the hard disk drive, it’s time to secure the drive in place and close the computer. Follow these steps to ensure everything is properly secured:
1. Secure the drive: Check that the hard disk drive is tightly secured within the drive bay. Make sure all screws or mounting mechanisms are properly tightened to prevent any movement or vibrations during computer operation.
2. Double-check cable connections: Verify that all cables connected to the hard disk drive are secure and firmly attached. Ensure that the SATA data cable and power cable are properly connected at both ends, both on the hard disk drive side and the motherboard/power supply side.
3. Cable management: Organize and route the cables in a tidy manner to ensure proper airflow without any obstructions. Use cable ties or clips to neatly bundle and secure the cables, keeping them away from fans or other components that generate heat.
4. Inspect the surroundings: Look around the hard disk drive and ensure that there are no loose screws or stray cables that could come into contact with the drive or other components. Check that no wires or cables are obstructing the cooling components or fans in the computer case.
5. Close the computer case: Align the side panel with the case and slide or latch it back into place. Ensure that the side panel is fully secured and tightened with screws or latches so that it doesn’t accidentally open during normal computer use.
6. Power on the computer and test: Plug in the power cord, connect any peripherals, and power on the computer. Listen for any unusual sounds or vibrations that may indicate incorrect installation. Once the computer boots up, check if the new hard disk drive is detected in the operating system.
By following these steps, you have securely installed the new hard disk drive and closed the computer case. Take a moment to double-check everything before powering on the computer. In the final step, we will guide you through configuring the new hard disk drive in your operating system.
Step 10: Power on your computer and configure the new hard disk drive
With the hard disk drive secured and the computer case closed, it’s time to power on your computer and configure the new hard disk drive. Follow these steps to ensure proper configuration:
1. Power on the computer: Plug in the power cord and any other necessary peripherals. Press the power button to turn on your computer. Allow it to boot up and load the operating system.
2. Access the operating system: Once your computer has booted up, log in to the operating system using your credentials. You may need to enter a password or PIN to access your user account.
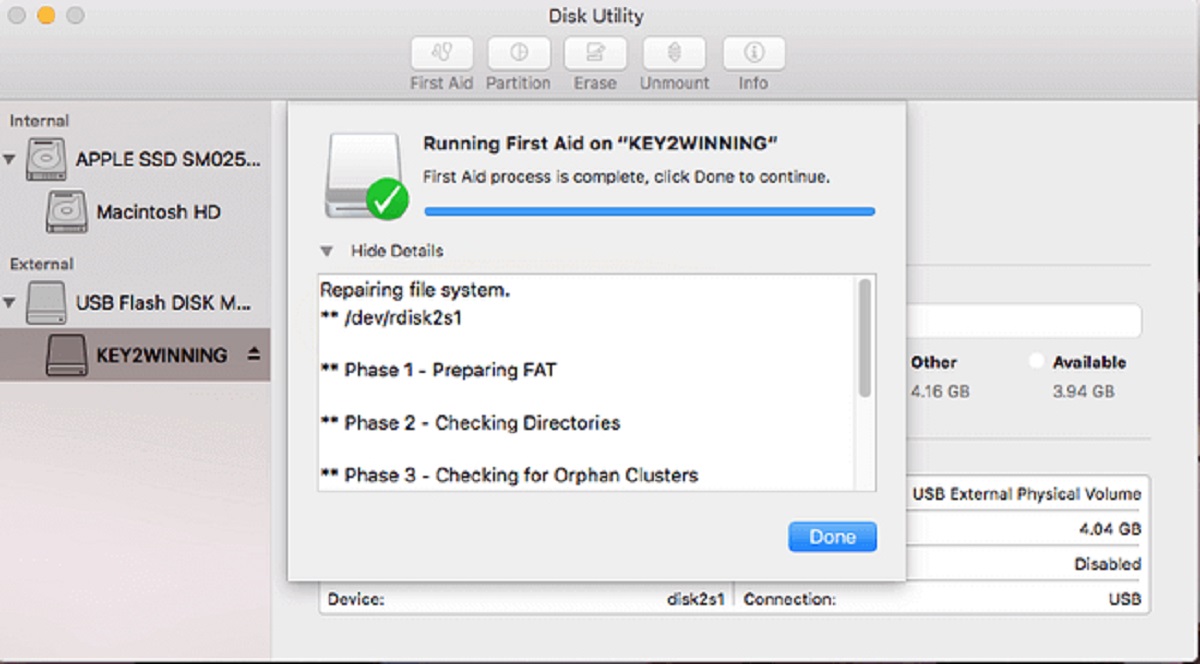
3. Initialize the new hard disk drive: Open the Disk Management utility in your operating system. On Windows, you can access it by right-clicking on the Start menu, selecting “Disk Management.” On macOS, go to “Applications,” then “Utilities,” and open “Disk Utility.”
4. Format and partition the new drive: In the Disk Management or Disk Utility window, locate the new hard disk drive. Right-click on it (Windows) or click on the “Erase” or “Partition” button (macOS). Follow the prompts to format and partition the drive according to your preferences.
5. Assign a drive letter or mount point: After formatting and partitioning the drive, assign a drive letter (Windows) or a mount point (macOS) to the new hard disk drive. This will allow you to easily access and use the drive.
6. Verify drive functionality: Once the new hard disk drive is configured, verify its functionality by copying some files to and from the drive. Check for any error messages or unusual behavior that may indicate a problem with the drive.
7. Backup and restore data (optional): If you are replacing an existing hard disk drive and need to transfer data, use a backup or migration software to move your files, applications, and settings from the old drive to the new one. Follow the instructions provided by the software or consult the documentation for more information.
By following these steps, you have successfully powered on your computer and configured the new hard disk drive in your operating system. Take a moment to ensure the drive is accessible and functioning correctly. Congratulations on adding the new hard disk drive to your computer and expanding your storage capacity!
Conclusion
Adding another hard disk drive to your computer can greatly expand your storage capacity and enhance overall performance. By following the step-by-step guide outlined above, you can successfully install a new hard disk drive and reap the benefits of increased storage space for your files, applications, and media.
Throughout this process, it’s important to ensure compatibility with your computer’s specifications, such as form factor, interface, and available drive bays. Taking the time to research and choose the right hard disk drive for your needs is crucial for a seamless installation experience. Additionally, gathering the necessary tools, power down your computer, removing the side panel, and identifying an available drive bay are all important preparatory steps to ensure a successful installation.
Once the new hard disk drive is securely mounted, connecting the necessary cables, and ensuring proper cable management, you are ready to power on your computer and configure the new drive in your operating system. Formatting, partitioning, and assigning drive letters or mount points will enable you to make full use of the additional storage space.
Whether you need more room for storing important documents, media files, or resource-intensive programs, adding another hard disk drive is an effective solution that can extend the lifespan and functionality of your computer.
Remember, if you encounter any difficulties or have concerns about the installation process, it’s always advisable to consult your computer’s documentation or seek professional assistance.
With the new hard disk drive successfully installed and configured, you can now enjoy the benefits of increased storage capacity, improved performance, and optimized functionality in your computer.
We hope this guide has been informative and helpful, and we wish you the best of luck in your journey to expand and enhance your computer’s storage capabilities!