Introduction
Welcome to this step-by-step guide on how to add another account in Google Authenticator. If you are concerned about the security of your online accounts, Google Authenticator is a powerful tool that allows you to add an extra layer of protection through two-factor authentication (2FA). With 2FA, you will not only need your password but also a unique verification code generated by the Google Authenticator app.
While setting up Google Authenticator for the first time is fairly straightforward, adding another account might seem a bit more complicated. Fortunately, with this guide, we will walk you through the process, ensuring that you can easily add multiple accounts to your Google Authenticator app and enjoy enhanced security for all your online platforms.
Whether you need to add another social media account, email service, or any other online platform that supports 2FA, the steps provided in this guide will help you seamlessly navigate the process. So, let’s get started!
Step 1: Install Google Authenticator
The first step towards adding another account in Google Authenticator is to ensure that you have the app installed on your device. Google Authenticator is available for both Android and iOS devices, and you can easily find it in the app stores. Follow these steps to install the app:
- Open the Google Play Store (Android) or the App Store (iOS) on your device.
- Search for “Google Authenticator” in the search bar.
- Tap on the app from the search results to open its page.
- Click on the “Install” (Android) or “Get” (iOS) button to begin the installation process.
- Wait for the app to download and install on your device. This should only take a few moments.
Once the installation is complete, you will have the Google Authenticator app ready to use on your device. Proceed to the next step to open the app and begin the process of adding another account.
Step 2: Open Google Authenticator
Now that you have installed the Google Authenticator app on your device, it’s time to open it and prepare for adding another account. Follow these steps to open the app:
- Locate the Google Authenticator app icon on your device’s home screen or app drawer.
- Tap on the icon to launch the app.
- Once the app is open, you will be greeted with a blank screen with a plus “+” sign or an “Add” button, indicating that you can add a new account.
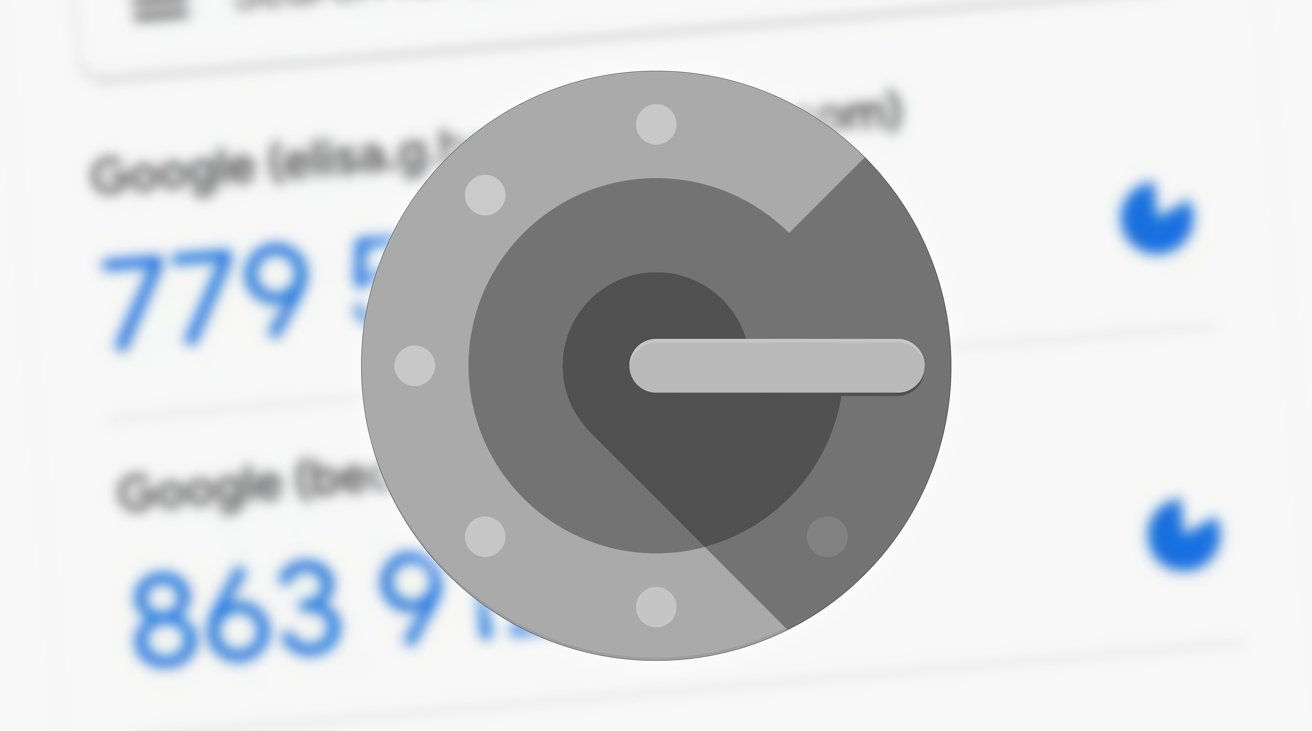
If you are using Google Authenticator for the first time, you may notice that the app does not have any accounts listed yet. This is because you have not added any accounts to the app. However, if you have already added an account, it will be displayed on the main screen along with the corresponding verification codes.
With the Google Authenticator app open and ready, let’s move on to the next step where we will add another account to the app.
Step 3: Add an Account
Now that you have the Google Authenticator app open, it’s time to add another account to it. Follow these steps to add an account:
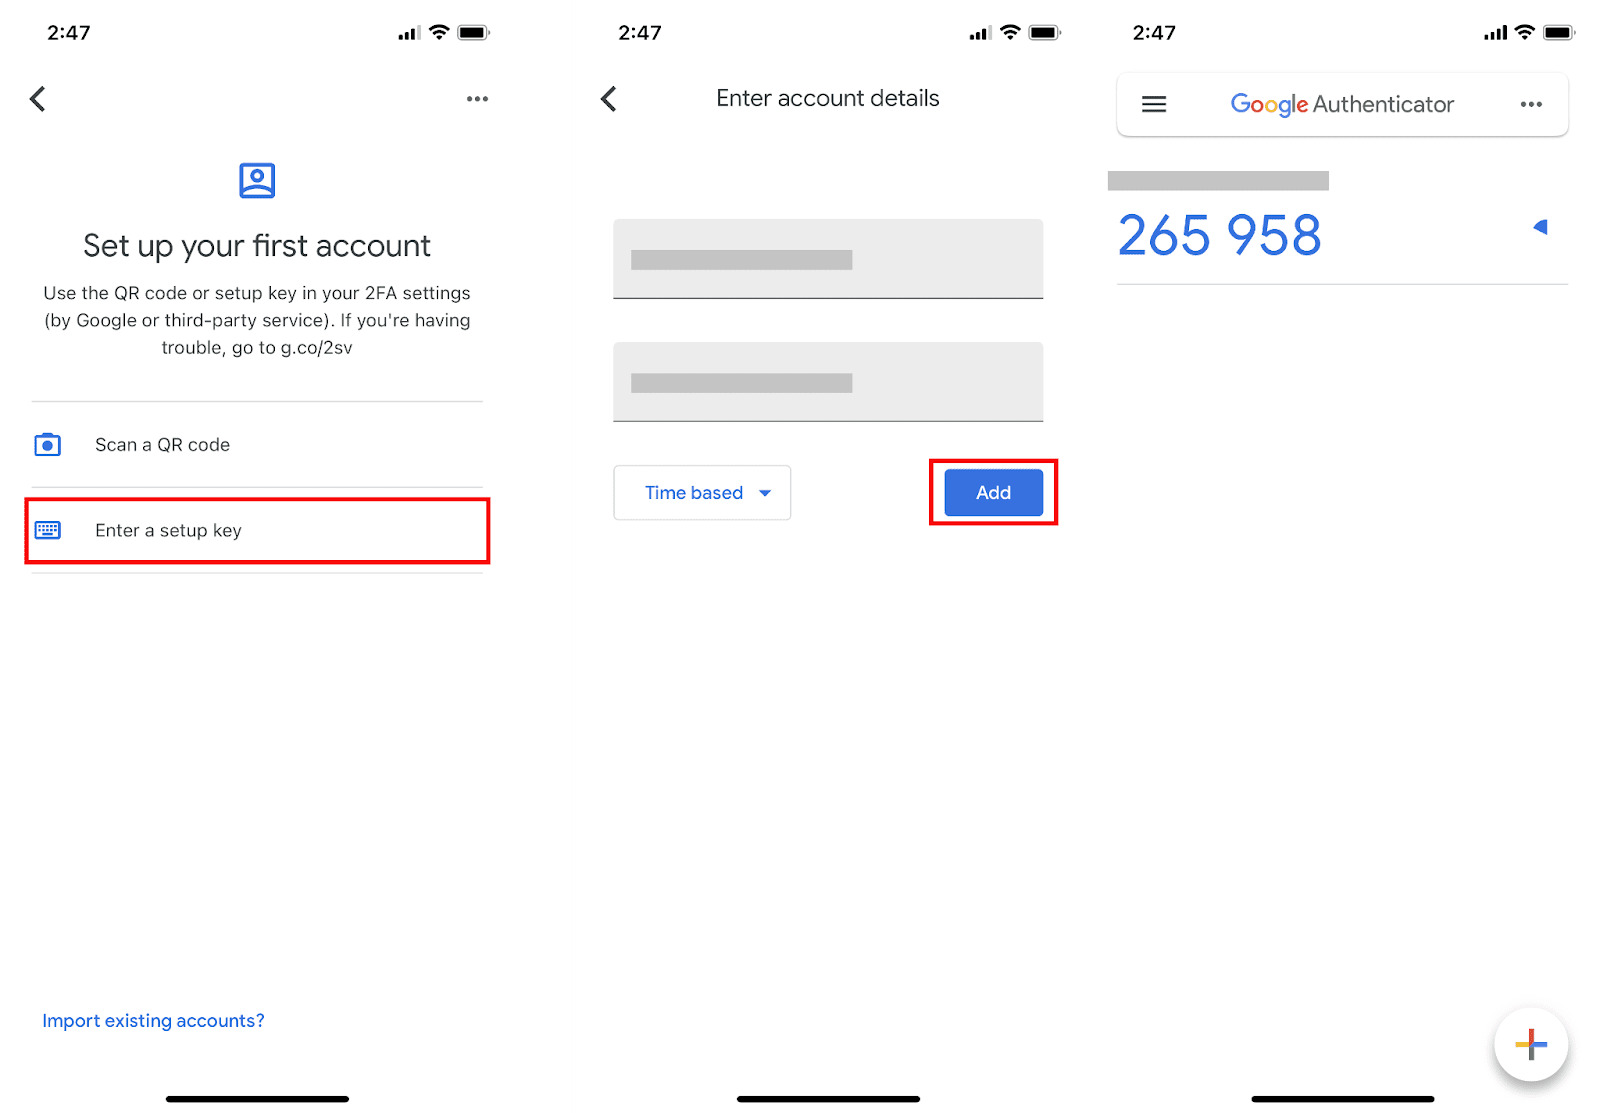
- On the main screen of the Google Authenticator app, look for the plus “+” sign or the “Add” button. Tap on it.
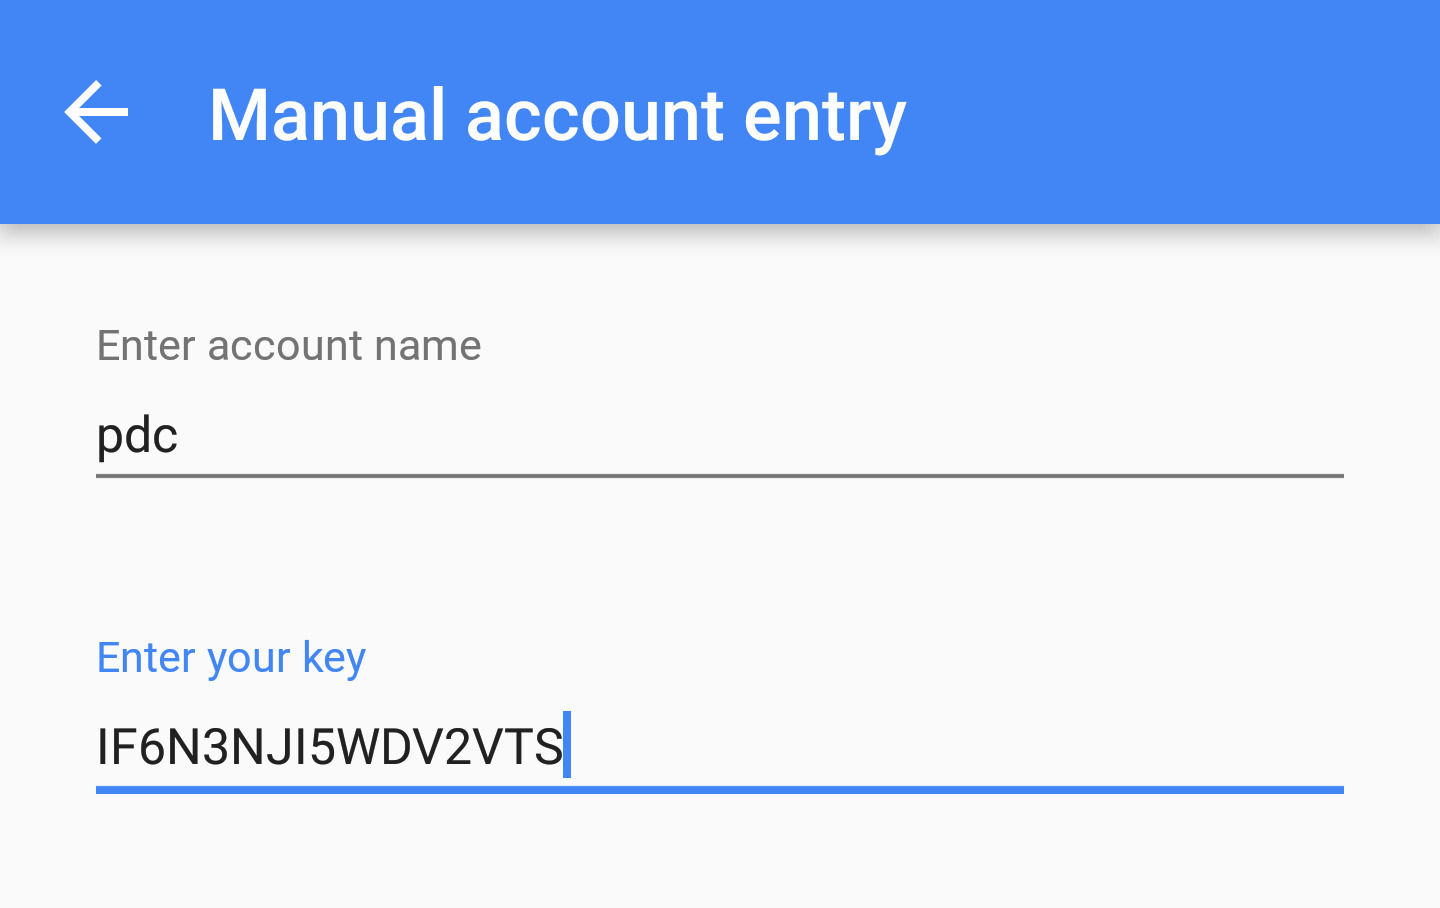
- You will be presented with two options: “Scan a barcode” or “Enter a provided key.” Select the appropriate option based on the account setup method provided by the platform you are adding.
- If you choose to scan a barcode, you will need to allow the app to access your device’s camera. Once granted, align the barcode within the camera’s viewfinder. The app will automatically scan the barcode and extract the necessary information.
- If you choose to enter a provided key, you will need to manually enter the account information. The key is usually provided in the form of a text string or a QR code. Type in the key or use the camera to capture the QR code, and the app will extract the required details.
- After scanning the barcode or entering the key, the app will retrieve the necessary information, including the account name and the secret key.
Once you have completed these steps, the account will be added to your Google Authenticator app. You will now have a new entry on the main screen of the app displaying the account name and showing the verification codes associated with it.
Congratulations! You have successfully added another account to your Google Authenticator app. Continue reading to learn how to complete the setup process and start using the app for secure two-factor authentication.
Step 4: Scan the QR Code
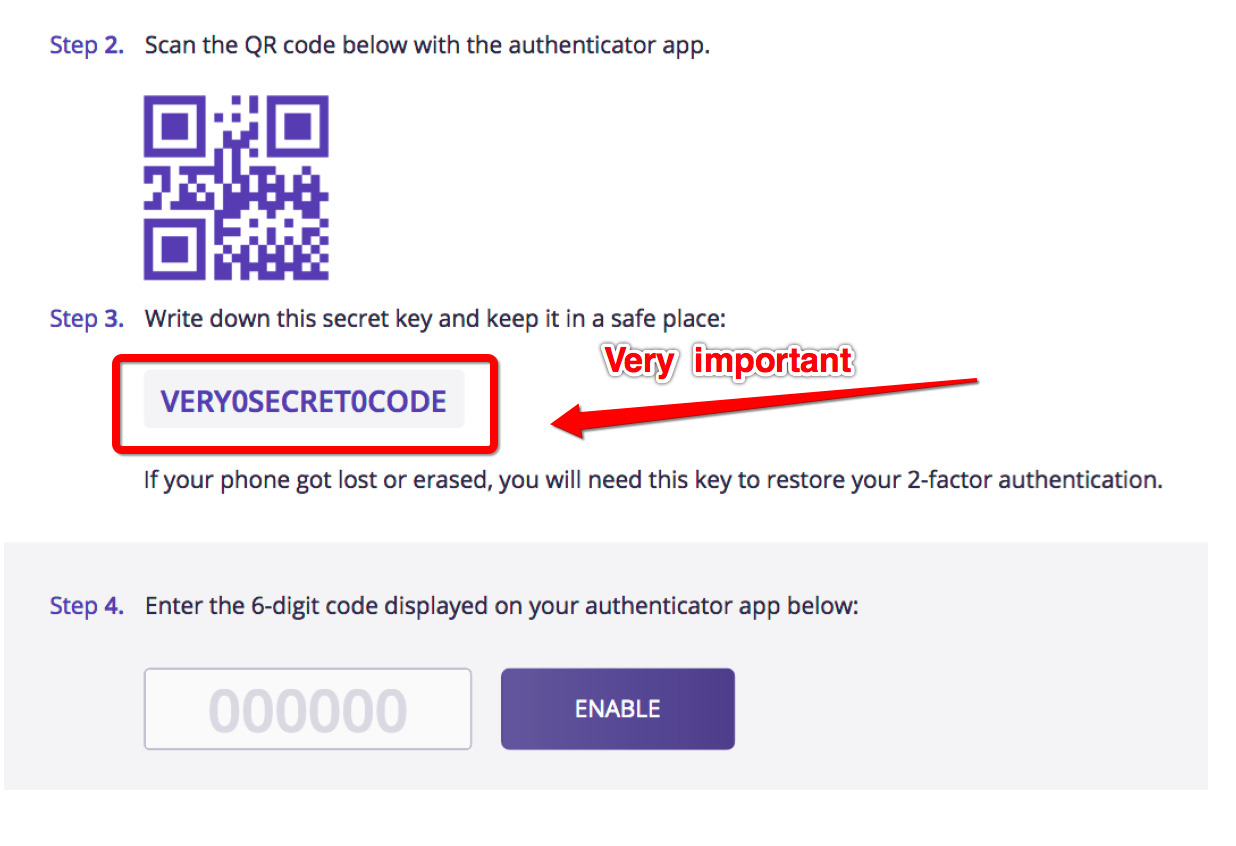
Now that you have reached this step, you are almost done setting up your new account in Google Authenticator. The next step involves scanning the QR code provided by the platform you are adding. Follow these steps to scan the QR code:
- On the account setup page of the platform, locate the QR code that represents the account.
- Open the Google Authenticator app on your device.
- Tap on the plus “+” sign or the “Add” button.
- Select the “Scan a barcode” option.
- The app will ask for permission to access your device’s camera. Grant the permission to proceed.
- Align the QR code within the camera’s viewfinder. The app will automatically scan the QR code and extract the necessary information.
Once the QR code is successfully scanned, the Google Authenticator app will display the account name and the verification codes associated with it. This indicates that the account has been added successfully to the app.
Please note that not all platforms provide a QR code for account setup. In some cases, you may need to manually enter the account information into the app. If this is the case, refer to the instructions provided by the platform and follow the steps accordingly.
Now that you have scanned the QR code and added the account to the Google Authenticator app, let’s move on to the next step where you will need to enter the verification code.
Step 5: Enter the Verification Code
After successfully scanning the QR code in the previous step, you will now need to enter the verification code provided by the Google Authenticator app. This code is continuously changing, typically every 30 seconds, and acts as an additional layer of security for your account. Follow these steps to enter the verification code:
- Open the Google Authenticator app on your device.
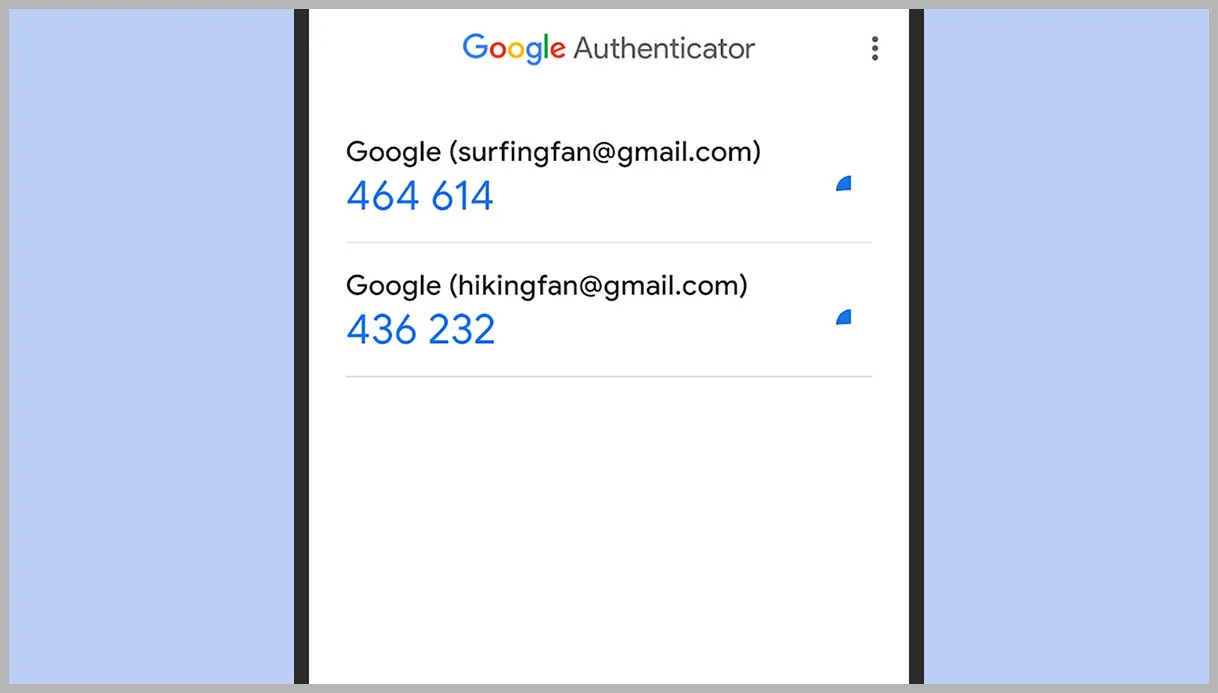
- Locate the account that you added in the previous steps. It should be listed on the main screen of the app.
- Next to the account name, you will see a six-digit verification code. This is the current code generated by the app.
- On the account setup page of the platform you are adding, look for the field where you need to enter the verification code.
- Type in the current verification code displayed by the Google Authenticator app.
It is important to note that the verification codes are time-sensitive and will change periodically. Ensure that you enter the code within the given timeframe to successfully authenticate your account setup.
After entering the verification code, the platform will verify its authenticity and confirm the setup of your account in Google Authenticator. Once verified, you can proceed to complete the setup process and start using the app for two-factor authentication.
Congratulations! You have successfully entered the verification code and completed the necessary steps to set up your account in Google Authenticator. Now, let’s move on to the final step where we will wrap up the setup process.
Step 6: Complete the Setup
With the verification code entered, you are just a few steps away from completing the setup process for your account in Google Authenticator. Follow these steps to complete the setup:
- On the platform’s setup page, look for a button or option that allows you to confirm the setup process.
- Click or tap on the “Confirm,” “Finish,” or similar action to finalize the setup.
- The platform will validate the verification code and the setup details provided by the Google Authenticator app.
- Once the setup is successfully confirmed, you will receive a message or notification indicating that the account is now protected with two-factor authentication.
Once the setup process is complete, you can start using Google Authenticator to generate verification codes for secure access to your account. To log in to the platform, you will now need to enter your password followed by the six-digit verification code generated by the app.
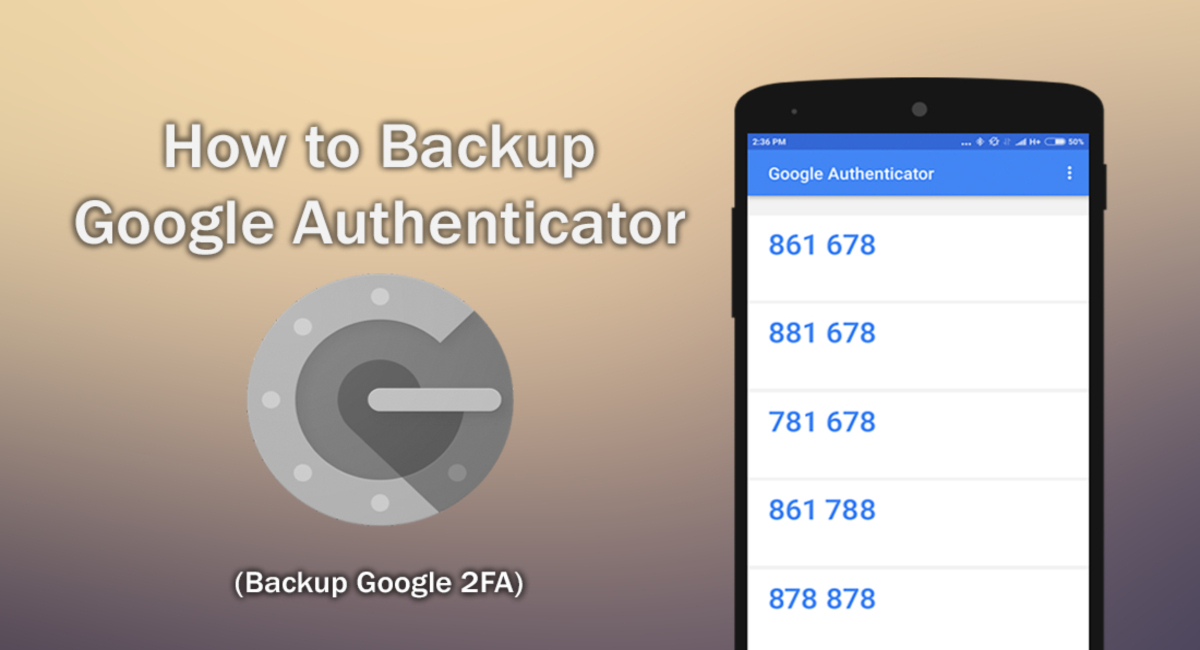
It is important to note that losing access to the Google Authenticator app may result in being locked out of your account. To avoid such situations, it is strongly recommended to enable backup options provided by the platform, such as backup codes or account recovery options.
Congratulations! You have successfully completed the setup process for your account in Google Authenticator. By utilizing two-factor authentication, you have taken a significant step in securing your online accounts and protecting your sensitive information.
Remember to keep your device secure and regularly back up your account details to ensure uninterrupted access even if you change or lose your device.
Now that you have finished the setup process, you can enjoy the added security and peace of mind that Google Authenticator provides. Stay safe online!
Additional Tips and Troubleshooting
In this section, we will provide you with some additional tips and troubleshooting steps to help you make the most out of Google Authenticator. Take a look at the following suggestions:
1. Enable Cloud Backup: To prevent the loss of your account information in case of device failure or loss, enable cloud backup options if available. This will allow you to easily restore your accounts on a new device.
2. Use Secure Authentication: Always ensure that you are adding accounts to Google Authenticator from trusted sources. Be cautious of phishing attempts or unauthorized apps that might try to mimic the authenticator app.
3. Keep Your Device Secure: Protect your device with a strong password or biometric authentication to ensure that unauthorized users cannot access the Google Authenticator app or your accounts.
4. Keep Backup Codes: Some platforms provide backup codes that can be used to access your account in case you lose access to the Google Authenticator app. Make sure to note down and store these codes securely.
5. Time Sync Issues: Occasionally, you may encounter time sync issues that result in verification code discrepancies. Make sure the date and time settings on your device are set correctly and that it is synchronized with network time.
6. Set Up Multiple Devices: If you have more than one device, consider setting up Google Authenticator on multiple devices to ensure that you have access to your accounts even if one device is unavailable.
7. Contact Platform Support: If you encounter any issues with adding or using Google Authenticator for a particular platform, reach out to the platform’s support team for assistance. They should be able to provide specific guidance and troubleshooting steps.
By following these tips and troubleshooting suggestions, you can enhance the security and usability of your Google Authenticator experience. Remember to stay vigilant and prioritize the protection of your accounts and personal information.
Now that you are equipped with these additional tips and troubleshooting steps, you can confidently use Google Authenticator to safeguard your online accounts.
Conclusion
Congratulations! You have successfully learned how to add another account in Google Authenticator. By following the step-by-step guide provided in this article, you can enhance the security of your online accounts and protect your sensitive information.
We started by installing the Google Authenticator app and then proceeded to open it and add a new account. We covered how to scan the QR code, enter the verification code, and complete the setup process. Additionally, we provided additional tips and troubleshooting steps to help you make the most out of Google Authenticator.
With Google Authenticator, you now have an extra layer of security through two-factor authentication. By using the verification codes generated by the app, you can significantly reduce the risk of unauthorized access to your accounts.
Remember to keep your device secure, enable cloud backup options, and store backup codes securely. In case of any issues or concerns, reach out to the platform’s support team for assistance.
Thank you for following this guide on how to add another account in Google Authenticator. Now, go ahead and begin securing your accounts with this powerful authentication tool. Stay safe and enjoy the peace of mind that comes with enhanced security!