Why Would You Want to Silence Your Apple Watch?
As much as we love our Apple Watches for their convenience and functionality, there are times when you may want to silence them. Whether you’re in a meeting, attending a lecture, or simply need some peace and quiet, muting your Apple Watch can be a quick and effective solution. Silencing your Apple Watch not only prevents it from making intrusive sounds and vibrating, but it also helps maintain your focus and prevents unnecessary interruptions.
Another reason you might want to silence your Apple Watch is to avoid disturbing others. The constant beeping, buzzing, and ringing can be disruptive in public places like theaters, libraries, or crowded spaces. By silencing your Apple Watch, you show consideration for those around you and ensure a more peaceful environment.
Furthermore, silencing your Apple Watch can be helpful when you’re trying to conserve battery life. Constant notifications and haptic feedback can drain your battery quickly, so muting your device can help extend its usage throughout the day. It allows you to prioritize important notifications and reduce the overall distractions.
Lastly, silencing your Apple Watch can be beneficial when you’re engaging in activities where noise and vibration could be a hindrance. Whether you’re exercising, meditating, or participating in a quiet event, muting your device allows you to fully immerse yourself without any unnecessary distractions.
Ultimately, the choice to silence your Apple Watch is a personal preference based on your specific needs and circumstances. Fortunately, Apple provides several methods for easily muting your device to suit your preferences. In the following sections, we will explore various methods to silence your Apple Watch effectively.
Methods to Silence Your Apple Watch
Apple has provided a range of methods to help you silence your Apple Watch and customize your notification settings according to your preferences. Here are some effective methods to silence your Apple Watch:
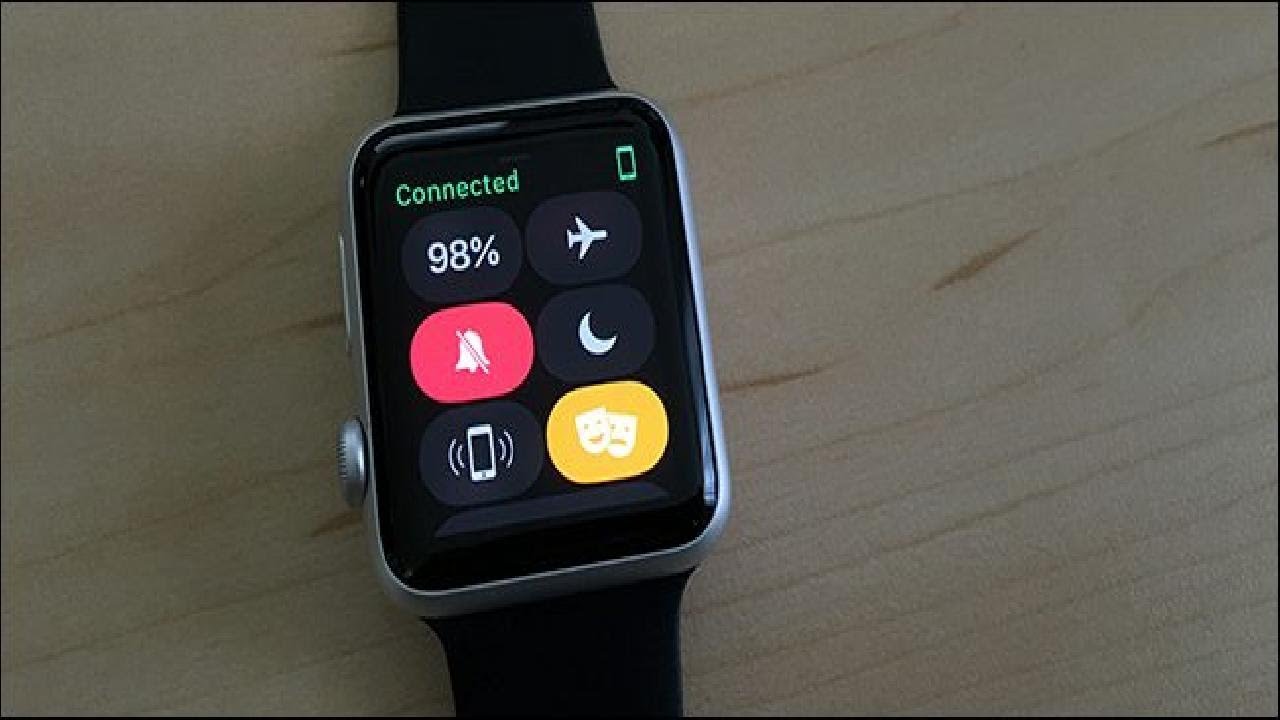
- Silent Mode: The easiest and quickest way to silence your Apple Watch is by enabling Silent Mode. Simply swipe up on the watch face, tap on the bell icon, or open the Control Center and tap the Silent Mode button. This will mute all sounds and vibrations on your device.
- Theater Mode: Theater Mode is another convenient option. It not only silences your Apple Watch but also prevents the screen from lighting up when you raise your wrist. To activate Theater Mode, swipe up on the watch face and tap on the theater masks icon. This is particularly useful when you’re in a dark environment or a movie theater.
- Do Not Disturb: Enabling Do Not Disturb mode on your Apple Watch will silence all alerts and notifications. To activate it, swipe up on the watch face and tap on the crescent moon icon. You can customize Do Not Disturb settings to allow calls from certain contacts or enable it for specific time periods.
- Cover to Mute: If you receive an incoming call or notification, you can cover your Apple Watch with your palm to mute the sound. This gesture-based feature is useful when you need to quickly silence your device without accessing the settings.
- Optimize Notifications: You can optimize your notifications on your paired iPhone to control which ones are sent to your Apple Watch. By going to the Watch app on your iPhone and selecting Notifications, you can choose to mirror iPhone alerts, customize them individually, or disable them altogether.
- Adjust Volume Settings: You can adjust the volume settings on your Apple Watch to control the loudness of the alert sounds or haptic feedback. Open the Settings app on your watch, navigate to Sounds & Haptics, and use the slider to adjust the volume to your desired level.
- Customize App Notifications: To further manage your notifications, you can customize them on an app-by-app basis. In the Watch app on your iPhone, select Notifications, choose the desired app, and configure the notification settings according to your preferences.
- Adjust Haptic Feedback: Haptic feedback refers to the vibrations or taps your Apple Watch uses to notify you. You can customize the intensity of haptic feedback by opening the Settings app on your watch, selecting Sounds & Haptics, and adjusting the Haptic Strength slider.
- Turn Off Prominent Haptic: If you find the Prominent Haptic feature too strong or overpowering, you can turn it off. This will reduce the intensity of haptic notifications. In the Watch app on your iPhone, go to Sounds & Haptics and toggle off the Prominent Haptic switch.
- Restrict App Notifications: If certain apps on your Apple Watch are causing excessive notifications or distractions, you can restrict their notifications or disable them altogether. Go to the Watch app on your iPhone, select Notifications, choose the app, and adjust the notification settings as desired.
- Use Airplane Mode: Enabling Airplane Mode on your Apple Watch will not only silence it but also disable its connectivity. This is useful when you’re in an environment where wireless signals are not allowed or when you want to conserve battery life.
By utilizing these methods, you can easily silence your Apple Watch and tailor its notification settings to create a more personalized and immersive experience. Experiment with different options to find the combination that works best for your needs and lifestyle.
Method 1: Silent Mode
Silent Mode is the simplest and quickest way to silence your Apple Watch. It allows you to mute all sounds and vibrations, ensuring a quiet and undisturbed experience. Follow these steps to activate Silent Mode:
- On your Apple Watch, swipe up on the watch face to access the Control Center.
- Tap on the bell icon, which represents Silent Mode. The icon will turn orange to indicate that Silent Mode is enabled.
Once Silent Mode is activated, your Apple Watch will no longer make any notification sounds or vibrate when you receive alerts, messages, or calls. However, it’s important to note that Silent Mode does not disable haptic feedback, which means you may still feel gentle taps or vibrations on your wrist.
This method is particularly useful in situations where you need complete silence, such as during meetings, presentations, or in quiet environments. It allows you to remain discreet and avoid any interruptions without having to manually adjust individual settings or modes.
Keep in mind that Silent Mode is a temporary setting and will automatically disable itself after 12 hours. If you want to keep your Apple Watch in silent mode for an extended period, you will need to enable it again after the 12-hour limit.
It’s also worth mentioning that enabling Silent Mode on your Apple Watch will not affect the sound settings on your iPhone. If you want to silence both devices simultaneously, you will need to enable Silent Mode on each device individually.
Overall, Silent Mode is an efficient and convenient method to quickly silence your Apple Watch and enjoy a distraction-free experience. Whether you’re in a professional setting, social event, or simply need some peace and quiet, activating Silent Mode ensures that your Apple Watch remains discreet and unobtrusive.
Method 2: Theater Mode
Theater Mode is an excellent option on your Apple Watch that not only silences all sounds and vibrations but also prevents the screen from lighting up when you raise your wrist. This feature is particularly useful in dark environments or when you want to avoid any distractions from your Apple Watch. Here’s how to activate Theater Mode:
- Swipe up on the watch face to access the Control Center on your Apple Watch.
- Tap on the theater masks icon, which represents Theater Mode. The icon will turn orange to indicate that it is enabled.
With Theater Mode activated, your Apple Watch will not make any sounds or vibrate when you receive notifications, calls, or alerts. Additionally, the screen will remain off unless you tap it or press the Digital Crown or side button. This prevents any accidental illumination in movie theaters, theaters, or other low-light environments.
Theater Mode is particularly beneficial when you’re in settings where distractions should be minimized, such as during a movie, play, or in a meeting. It allows you to discreetly check the time or view notifications by tapping the screen when needed, without illuminating the entire watch face.
It’s important to note that enabling Theater Mode doesn’t impact the functionality of your Apple Watch. You can still receive notifications and use all the features as you normally would, but with the added benefit of complete silence and a dimmed screen.
If you prefer, you can also enable Theater Mode directly from your Apple Watch settings:
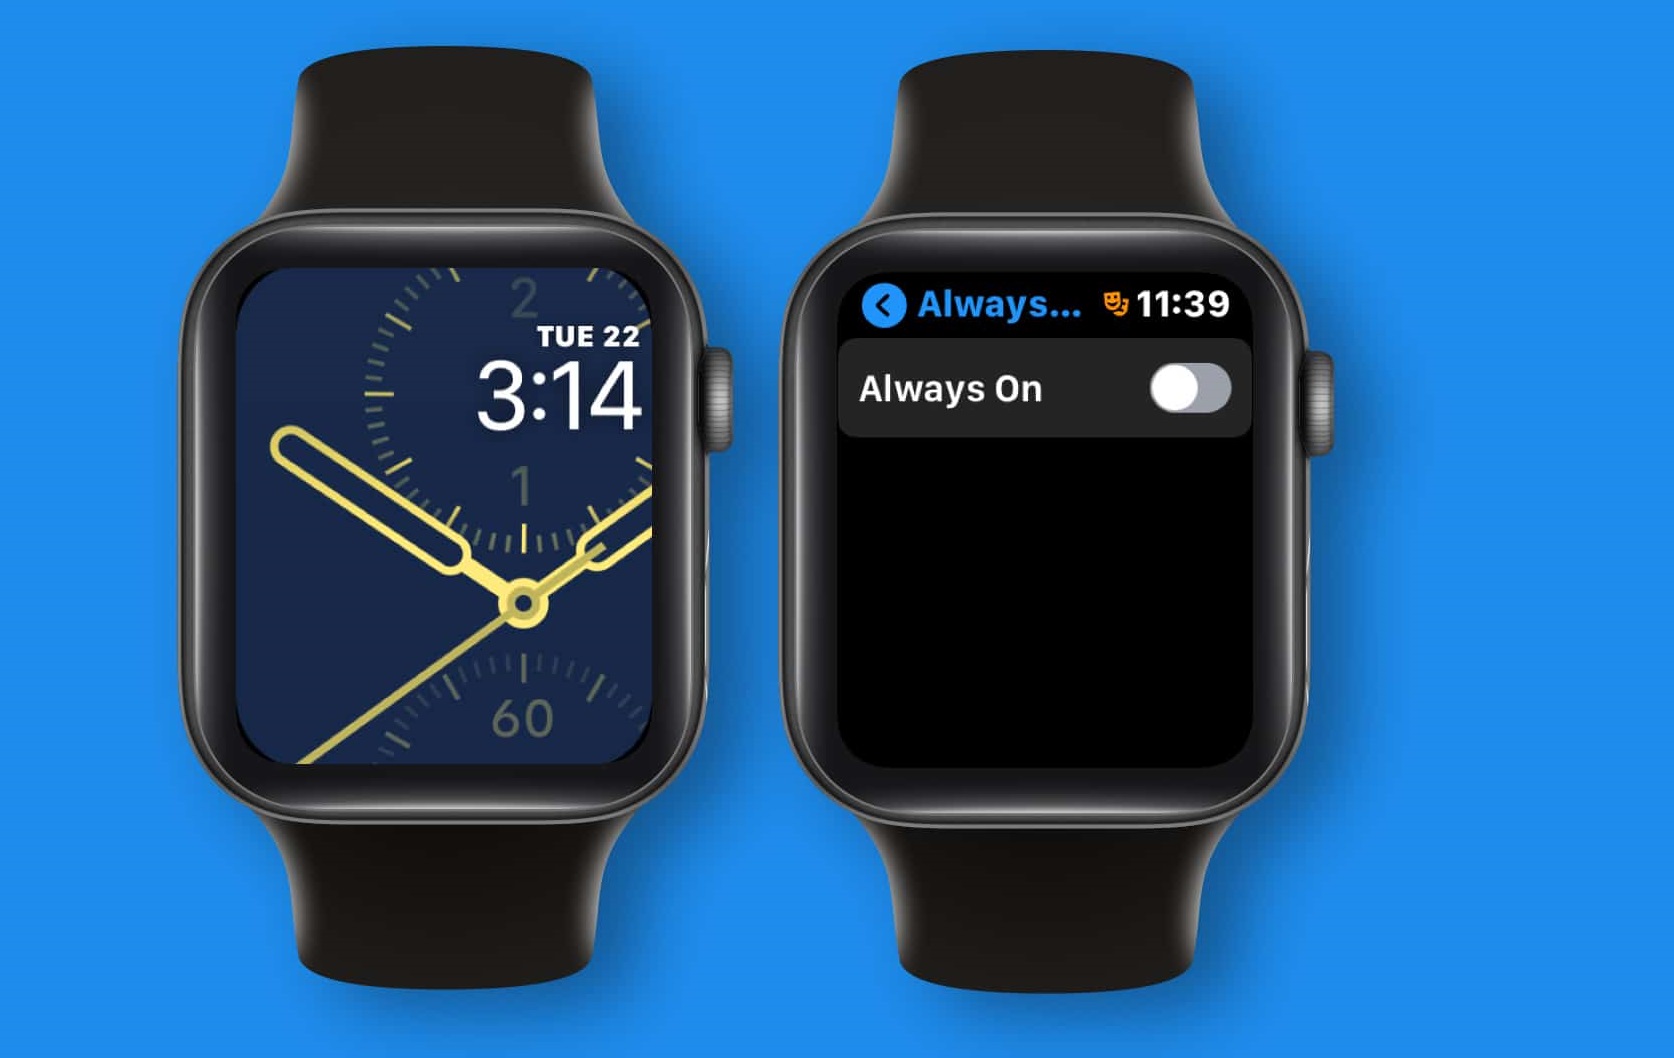
- Open the Settings app on your Apple Watch.
- Scroll down and tap on “Theater Mode”.
- Toggle the switch to on, and Theater Mode will be activated.
To exit Theater Mode, simply tap the screen, press the Digital Crown, or side button. This will bring back the normal functionality of your Apple Watch.
By using Theater Mode, you can ensure that your Apple Watch remains silent and unobtrusive, allowing you to fully engage in your surroundings without interruptions. Whether you’re watching a movie, attending a performance, or simply in a low-light setting, Theater Mode provides a convenient way to enjoy a distraction-free experience with your Apple Watch.
Method 3: Do Not Disturb
Do Not Disturb mode on your Apple Watch is a versatile feature that allows you to silence all alerts and notifications. It gives you complete control over when and how you receive notifications, ensuring uninterrupted moments when needed. Here’s how to enable Do Not Disturb on your Apple Watch:
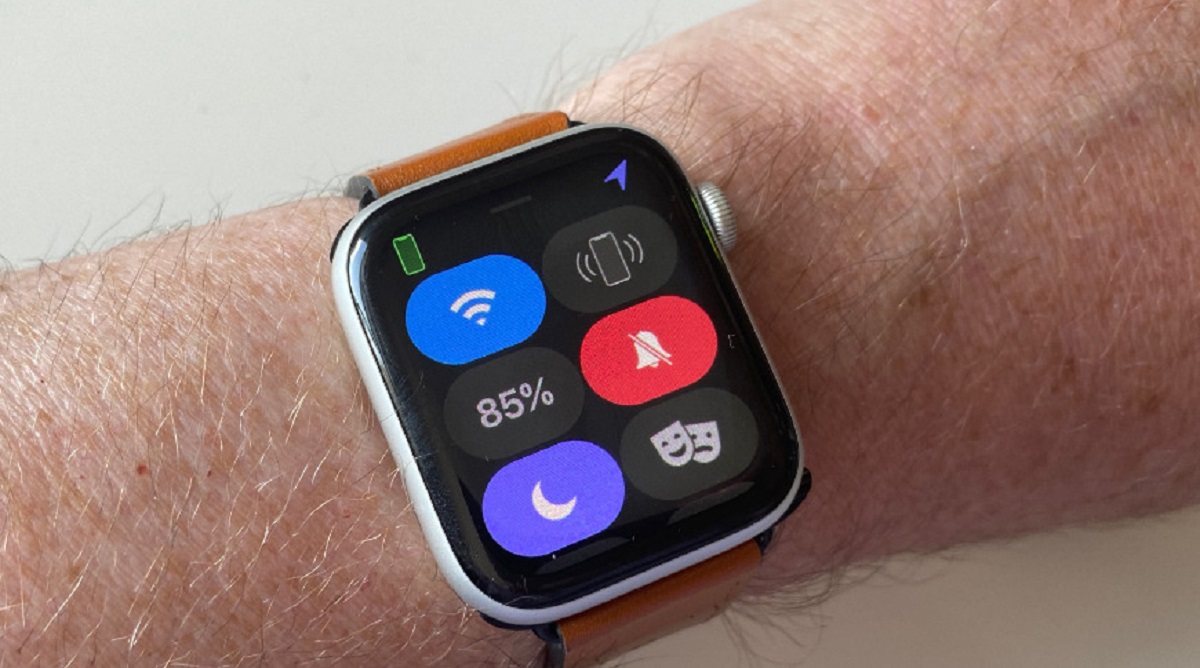
- Swipe up on the watch face to access the Control Center.
- Tap on the crescent moon icon, which represents Do Not Disturb mode. The icon will turn orange to indicate that it is activated.
When Do Not Disturb is enabled, your Apple Watch will not play any sounds or vibrate when you receive notifications, messages, or calls. However, these alerts will still be delivered silently and can be viewed by tapping on the screen or checking the notification center. It’s a great way to stay informed without the constant audible interruptions.
You can customize the settings for Do Not Disturb on your Apple Watch. Here’s how:
- Open the Settings app on your Apple Watch.
- Scroll down and tap on “Do Not Disturb”.
- From here, you can customize the following options:
- Silence: Choose whether you want your Apple Watch to stay silent or vibrate when in Do Not Disturb mode.
- Mirror iPhone: If enabled, Do Not Disturb settings on your iPhone will also be applied to your Apple Watch.
- Scheduled: Set specific times when you want Do Not Disturb to automatically activate.
- Notifications: Choose whether you want to receive any notifications, or allow them only from specific contacts.
By configuring these settings, you can tailor Do Not Disturb mode to suit your preferences and needs. Whether you want complete silence or only want to receive notifications from important contacts, Do Not Disturb mode gives you the flexibility to manage your wearable’s alerts.
In addition to manual activation, you can also enable Do Not Disturb using Siri, your voice assistant. Simply raise your wrist and say “Hey Siri, enable Do Not Disturb” to activate the mode hands-free.
To disable Do Not Disturb, swipe up on the watch face and tap on the crescent moon icon in the Control Center. You can also open the Settings app and toggle off the Do Not Disturb switch.
Do Not Disturb mode is a powerful tool that allows you to take control of your Apple Watch’s notifications. By utilizing this feature, you can enjoy uninterrupted moments of focus, relaxation, or serenity, ensuring that your device remains silent and unobtrusive when needed.
Method 4: Cover to Mute
The “Cover to Mute” gesture is a convenient method to quickly silence your Apple Watch when you receive an incoming call or notification. This gesture-based feature allows you to mute the sound without having to access the settings. Here’s how to use Cover to Mute on your Apple Watch:
- When your Apple Watch receives a call or notification, simply cover the watch face with your palm or any flat surface.
- After a moment, the sound will automatically mute, and the call or notification will continue to appear on the screen without any audible interruption.
This feature is useful in situations where you want to quickly silence your Apple Watch without having to navigate through menus or control settings manually. It provides a discreet and effortless way to mute incoming calls or notifications, allowing you to maintain focus or avoid disturbing others around you.
It’s important to note that the Cover to Mute feature works for individual calls or notifications as they arrive. Once the call or notification has passed, subsequent alerts will not be muted automatically. You will need to use this gesture for each new incoming call or notification.
The Cover to Mute gesture is designed to be sensitive to touch, so you don’t need to apply excessive force when covering the watch face. A gentle touch or a light covering with your palm or other flat surface should be sufficient to activate the mute function.
If you find that Cover to Mute is not working as expected, you can check the settings to ensure it is enabled on your Apple Watch:
- Open the Settings app on your Apple Watch.
- Scroll down and tap on “Sounds & Haptics”.
- Toggle on the “Cover to Mute” switch if it is not already enabled.
Enabling this setting will ensure that the Cover to Mute gesture is active and ready to use.
The Cover to Mute gesture is a convenient and efficient way to quickly silence your Apple Watch without disruption. Whether you’re in a meeting, attending an event, or simply want a moment of tranquility, using this gesture allows you to effortlessly mute incoming calls or notifications with a simple motion.
Method 5: Optimize Notifications
Optimizing your notifications on your Apple Watch allows you to have better control over which alerts and messages are sent to your device. By customizing your notification settings, you can ensure that only the most important notifications reach your Apple Watch, reducing unnecessary distractions. Here’s how to optimize your notifications:
- Open the Watch app on your paired iPhone.
- Scroll down and tap on “Notifications”.
From here, you have several options to manage your notifications:
- Mirror iPhone: Enabling this option will sync your Apple Watch notifications with the ones on your iPhone. This means that if you have already configured your notification settings on your iPhone, the same settings will apply to your Apple Watch.
- Customize Individually: If you want more control over specific apps, you can customize each one individually. Tap on an app from the list, and you can choose how the app’s notifications are delivered, whether it makes a sound, shows a banner, appears in the Notification Center, or sends haptic feedback.
- Disable Notifications: If there are certain apps that you don’t want to receive notifications from on your Apple Watch, you can simply toggle off the switch next to the app’s name. This will prevent any alert or message from appearing on your watch.
By taking the time to optimize your notifications, you can minimize unnecessary interruptions and ensure that only the most important alerts reach your Apple Watch. This not only helps enhance your focus and productivity but also conserves your watch’s battery life by reducing the number of notifications it receives.
It’s important to note that optimizing your notifications on your Apple Watch doesn’t affect the notification settings on your iPhone. Each device has its own independent settings. So, customizing the notifications on your Apple Watch won’t impact the way your iPhone receives alerts and messages, and vice versa.
Remember to strike a balance between receiving essential notifications and minimizing distractions. Choose the apps and alerts that are most important to you, and disable or customize the ones that aren’t as crucial. By doing so, you can ensure that your Apple Watch delivers the right notifications at the right time, keeping you informed while maintaining a peaceful and productive experience.
Method 6: Adjust Volume Settings
Adjusting the volume settings on your Apple Watch is a straightforward way to control the loudness of alert sounds and haptic feedback. By customizing the volume level, you can ensure that the notifications on your Apple Watch are audible enough for your needs without being overly loud or disruptive. Here’s how to adjust the volume settings on your Apple Watch:
- On your Apple Watch, press the Digital Crown to access the apps menu.
- Scroll and tap on the Settings app.
- Tap on “Sounds & Haptics”.
Within the Sounds & Haptics settings, you will find the volume slider that allows you to adjust the overall volume of your Apple Watch. Dragging the slider to the left decreases the volume, while dragging it to the right increases the volume. As you adjust the volume, you will hear a sample sound to help you gauge the level of loudness.
By adjusting the volume settings according to your preferences, you can ensure that notifications on your Apple Watch are audible without being overly intrusive or too faint to notice. This allows you to stay informed without causing unnecessary disturbances in public settings or disrupting your focus.
Keep in mind that adjusting the volume on your Apple Watch affects the alert sounds and haptic feedback generated from the device. It does not impact the volume of media playback or phone calls, as those are separate settings controlled by your iPhone.
Additionally, you can also enable or disable the Prominent Haptic feature within the Sounds & Haptics settings. When Prominent Haptic is enabled, it enhances the strength of haptic feedback for notifications. If you find the haptic feedback too strong or overpowering, you can disable the Prominent Haptic feature to have a more subtle vibration experience.
Experiment with different volume levels and test the sounds and haptic feedback to find the optimal setting that suits your needs. Whether you prefer a gentler notification tone or a more distinct haptic feedback, customizing the volume settings allows you to personalize your Apple Watch experience.
Remember, while adjusting the volume settings can enhance your overall user experience, it’s important to be mindful of your surroundings and considerate of others. Striking the right balance between audible notifications and respectful noise levels ensures that you can stay informed while maintaining a harmonious environment.
Method 7: Customize App Notifications
Customizing app notifications on your Apple Watch allows you to have more control over the alerts and messages you receive. By tailoring the notification settings for each individual app, you can ensure that you only receive important and relevant notifications on your watch. Here’s how to customize app notifications on your Apple Watch:
- Open the Watch app on your paired iPhone.
- Scroll down and tap on “Notifications”.
- From the list of apps, choose the app you want to customize the notifications for.
Once you’ve selected the app, you have a variety of options to configure how its notifications are delivered to your Apple Watch. These options include:
- Show Alerts: Enable or disable this option to determine if the app’s notifications will appear as alerts on your Apple Watch.
- Notification Center: Toggle this option on to allow the app’s notifications to appear in the Notification Center on your Apple Watch.
- Sound: Choose whether you want the app’s notifications to make a sound on your Apple Watch when they arrive.
- Haptic Alerts: Enable or disable haptic feedback for the app’s notifications. Haptic feedback provides vibrations on your Apple Watch to notify you of incoming alerts.
By customizing each app’s notification settings, you can fine-tune your Apple Watch to deliver only the most essential and relevant notifications to your wrist. This helps minimize distractions and ensures that you stay informed about the notifications that matter most to you.
Keep in mind that customizing app notifications on your Apple Watch does not affect the notification settings on your iPhone. Each device has its own separate settings. So, configuring the settings for an app on your Apple Watch won’t impact how the app’s notifications are delivered to your iPhone and vice versa.
Take some time to carefully review the notification settings for each app and choose the options that align with your preferences. By customizing app notifications, you can tailor your Apple Watch experience to suit your needs, allowing you to stay connected without being overwhelmed by unnecessary alerts and messages.
Remember to periodically review and adjust your app notification settings as your preferences and priorities may change over time. This way, you can ensure that your Apple Watch continues to provide you with the most relevant and important alerts, enhancing both your productivity and peace of mind.
Method 8: Adjust Haptic Feedback
Haptic feedback on your Apple Watch refers to the vibrations or taps your device uses to notify you. Adjusting the haptic feedback settings allows you to customize the intensity of these vibrations, ensuring that they suit your personal preferences. Here’s how to adjust the haptic feedback settings on your Apple Watch:
- Press the Digital Crown on your Apple Watch to access the apps menu.
- Tap on the Settings app.
- Scroll down and tap on “Sounds & Haptics”.
Within the Sounds & Haptics settings, you will find the “Haptic Strength” slider. By moving the slider to the left or right, you can increase or decrease the intensity of the haptic feedback on your Apple Watch. As you adjust the haptic strength, you will feel a sample vibration to help you gauge the level of intensity.
Customizing the haptic feedback intensity allows you to find the right balance between receiving discreet notifications and ensuring that you can notice them. It offers a personalized touch to your Apple Watch experience, tailoring it to your specific sensitivity and comfort levels.
It’s essential to note that adjusting the haptic feedback settings on your Apple Watch only affects the vibration strength of notifications and feedback, not the actual sounds. If you wish to adjust the volume of alert sounds, refer back to the Adjust Volume Settings method.
Additionally, within the Sounds & Haptics settings, you have the option to enable or disable the “Prominent Haptic” feature. When Prominent Haptic is enabled, it enhances the strength of haptic feedback for notifications, making them more noticeable. However, if you find the haptic feedback too strong or overpowering, you can disable the Prominent Haptic feature, providing a more subtle vibration experience.
Experiment with different haptic strength levels to find the setting that suits your preferences. Everyone has a different sensitivity to vibrations, so it’s important to customize your Apple Watch’s haptic feedback to a level that feels comfortable and noticeable without being overly distracting.
The ability to adjust haptic feedback allows you to fine-tune your Apple Watch experience and make it even more personalized. By finding the right level of haptic strength, you can ensure that you receive notifications in a way that suits your preferences, whether you prefer subtle vibrations or more pronounced haptic alerts.
Remember to periodically review and adjust the haptic feedback settings as your preferences may change over time. This way, you can continue enjoying a tailored and immersive experience with your Apple Watch’s haptic feedback.
Method 9: Turn Off Prominent Haptic
The Prominent Haptic feature on your Apple Watch enhances the strength of haptic feedback for incoming notifications. While it can be helpful for some users, others may find it too strong or overpowering. If you prefer a more subtle vibration experience, you can turn off the Prominent Haptic feature. Here’s how to do it:
- Press the Digital Crown on your Apple Watch to access the apps menu.
- Tap on the Settings app.
- Scroll down and tap on “Sounds & Haptics”.
Within the Sounds & Haptics settings, you will find the toggle switch for “Prominent Haptic”. By tapping on the switch to turn it off, you can disable the Prominent Haptic feature on your Apple Watch.
When Prominent Haptic is turned off, the strength of haptic feedback for notifications will be more subtle and less pronounced. It provides a milder vibration experience that may be preferable for users who find the enhanced haptic feedback too strong or disruptive.
Disabling Prominent Haptic does not disable haptic feedback altogether. You will still receive notifications and be alerted through vibrations on your Apple Watch, but the intensity will be reduced without the added enhancement.
If you find that you prefer the enhanced haptic feedback, you can easily re-enable the Prominent Haptic feature by following the same steps and toggling the switch to turn it back on.
Taking advantage of the ability to turn off Prominent Haptic allows you to fine-tune your Apple Watch’s vibration experience to your liking. By personalizing the haptic feedback settings, you can enjoy a more customized and comfortable user experience that aligns with your preferences and sensitivities.
Remember to periodically review and adjust your haptic feedback settings based on your evolving preferences. This way, you can continue to enjoy a tailored and immersive experience with your Apple Watch’s notifications and haptic feedback.
Method 10: Restrict App Notifications
If certain apps on your Apple Watch are sending too many notifications or causing unnecessary distractions, you can restrict their notifications or even disable them altogether. By managing app notifications, you can optimize your Apple Watch experience and reduce interruptions. Here’s how to restrict app notifications on your Apple Watch:
- Open the Watch app on your paired iPhone.
- Scroll down and tap on “Notifications”.
- Scroll down to the “App Notifications” section and select the app you want to manage.
Within the app’s notification settings, you have several options to control how its notifications are delivered to your Apple Watch:
- Show Alerts: Toggle this option on if you want to receive alerts from this app on your Apple Watch. Toggle it off if you want to disable alerts for that specific app.
- Banner: You can choose to show or hide the app’s notifications as banners on your Apple Watch. Banners appear momentarily at the top of your screen and then disappear.
- Notification Center: Toggle this option on if you want the app’s notifications to appear in the Notification Center on your Apple Watch.
- Sound: You can choose whether the app’s notifications should produce a sound on your Apple Watch.
- Haptic Alerts: Enable or disable haptic feedback for the app’s notifications. Haptic alerts provide vibrations on your Apple Watch to notify you of incoming alerts.
By customizing the notification settings for each app, you can ensure that the notifications delivered to your Apple Watch are only from the apps that are most important to you. This helps to minimize distractions and allows you to focus on what’s truly relevant.
Keep in mind that managing app notifications on your Apple Watch does not impact the notification settings on your iPhone. Each device has its own separate settings. So, customizing the app’s notification settings on your Apple Watch won’t affect how the app’s notifications are delivered to your iPhone, and vice versa.
Review the notification settings for each app on your Apple Watch and adjust them according to your preferences. You can disable notifications from certain apps that tend to be less critical or use the customization options to tailor the delivery of notifications from specific apps.
Regularly reviewing and managing your app notifications ensures that your Apple Watch remains a valuable companion, keeping you informed without unnecessary disruptions. This way, you can enjoy a more focused and personalized experience with your wearable device.
Method 11: Use Airplane Mode
Using Airplane Mode on your Apple Watch is a useful method to silence your device and temporarily disable its connectivity. When you enable Airplane Mode, your Apple Watch will disconnect from Wi-Fi and any cellular networks, ensuring complete silence and conserving battery life. Here’s how to activate Airplane Mode on your Apple Watch:
- Swipe up on the watch face to access the Control Center.
- Tap on the airplane icon, which represents Airplane Mode. The icon will turn orange to indicate that it is enabled.
When Airplane Mode is enabled, your Apple Watch will no longer receive calls, messages, or notifications. It will also disconnect from any Wi-Fi networks, preventing any background activity that could cause distractions. However, you can still use your Apple Watch to track workouts, listen to stored music, check the time, and perform offline tasks.
Using Airplane Mode on your Apple Watch is particularly helpful in situations where you need uninterrupted focus or when you want to conserve battery life. It can be beneficial during flights, important meetings, or when you simply want to disconnect from digital distractions.
To disable Airplane Mode and restore connectivity, you can follow the same steps and tap the airplane icon in the Control Center again. This will bring your Apple Watch back online and allow it to connect to available networks.
It’s important to remember that enabling Airplane Mode on your Apple Watch also activates it on your paired iPhone if they are both connected. This ensures that both devices remain in sync and disconnected from any networks.
Using Airplane Mode on your Apple Watch provides a convenient solution to silence your device and disconnect from connectivity when necessary. It allows you to create a distraction-free environment and conserve battery life, all with a simple tap on your device.
Consider utilizing Airplane Mode strategically in situations where you want to focus, disconnect, or conserve battery. The ability to control your device’s connectivity brings you the flexibility you need while using your Apple Watch.
Final Thoughts
Silencing your Apple Watch can greatly enhance your overall user experience, allowing you to have control over when and how you receive notifications. By utilizing the methods outlined in this article, you can ensure that your Apple Watch remains discreet, unobtrusive, and tailored to your preferences.
Whether you choose to activate Silent Mode, Theater Mode, or enable Do Not Disturb, these methods provide quick and easy ways to temporarily mute your device and avoid unnecessary interruptions. Moreover, by adjusting volume settings, customizing app notifications, and managing haptic feedback, you can further personalize your Apple Watch and create an environment that aligns with your needs and lifestyle.
It’s important to keep in mind that while silencing your Apple Watch can be beneficial in many situations, you must strike a balance between staying connected and minimizing distractions. It’s essential to stay attuned to your surroundings and be considerate of others’ needs, adjusting your settings accordingly.
Regularly evaluating and optimizing your notification settings allows you to stay informed while minimizing interruptions. As your needs and preferences change over time, feel free to revisit these methods and adjust your Apple Watch settings to align with your current priorities.
Remember, the goal is to strike a balance between staying connected and maintaining tranquility, ensuring that your Apple Watch enhances your daily activities rather than distracts from them.
By employing these methods and customizing your notification settings, you can harness the full potential of your Apple Watch while seamlessly integrating it into your daily routine. Embrace the convenience, functionality, and personalization that your Apple Watch provides, knowing that you have the power to optimize it to suit your unique needs and preferences.