Introduction
Having a graphics card is essential for any computer user who wants to experience optimal graphics performance, whether for gaming, graphic design, or video editing. However, sometimes computers fail to recognize the graphics card, which can be a frustrating issue to deal with. This article will guide you through the steps to get your computer to recognize your graphics card, helping you resolve the problem and unleash the full potential of your system.
When your computer fails to recognize the graphics card, it can be due to various reasons. It could be a physical connection issue, outdated drivers, improper installation, BIOS settings, or even conflicting integrated graphics. By following the troubleshooting steps outlined in this article, you can identify and fix the problem with ease.
This guide will take you through a series of steps to help you diagnose and resolve the issue. Whether you are a beginner or an experienced user, the instructions provided will be clear and easy to follow. So, let’s dive in and get your computer recognizing your graphics card in no time.
Checking the Physical Connection
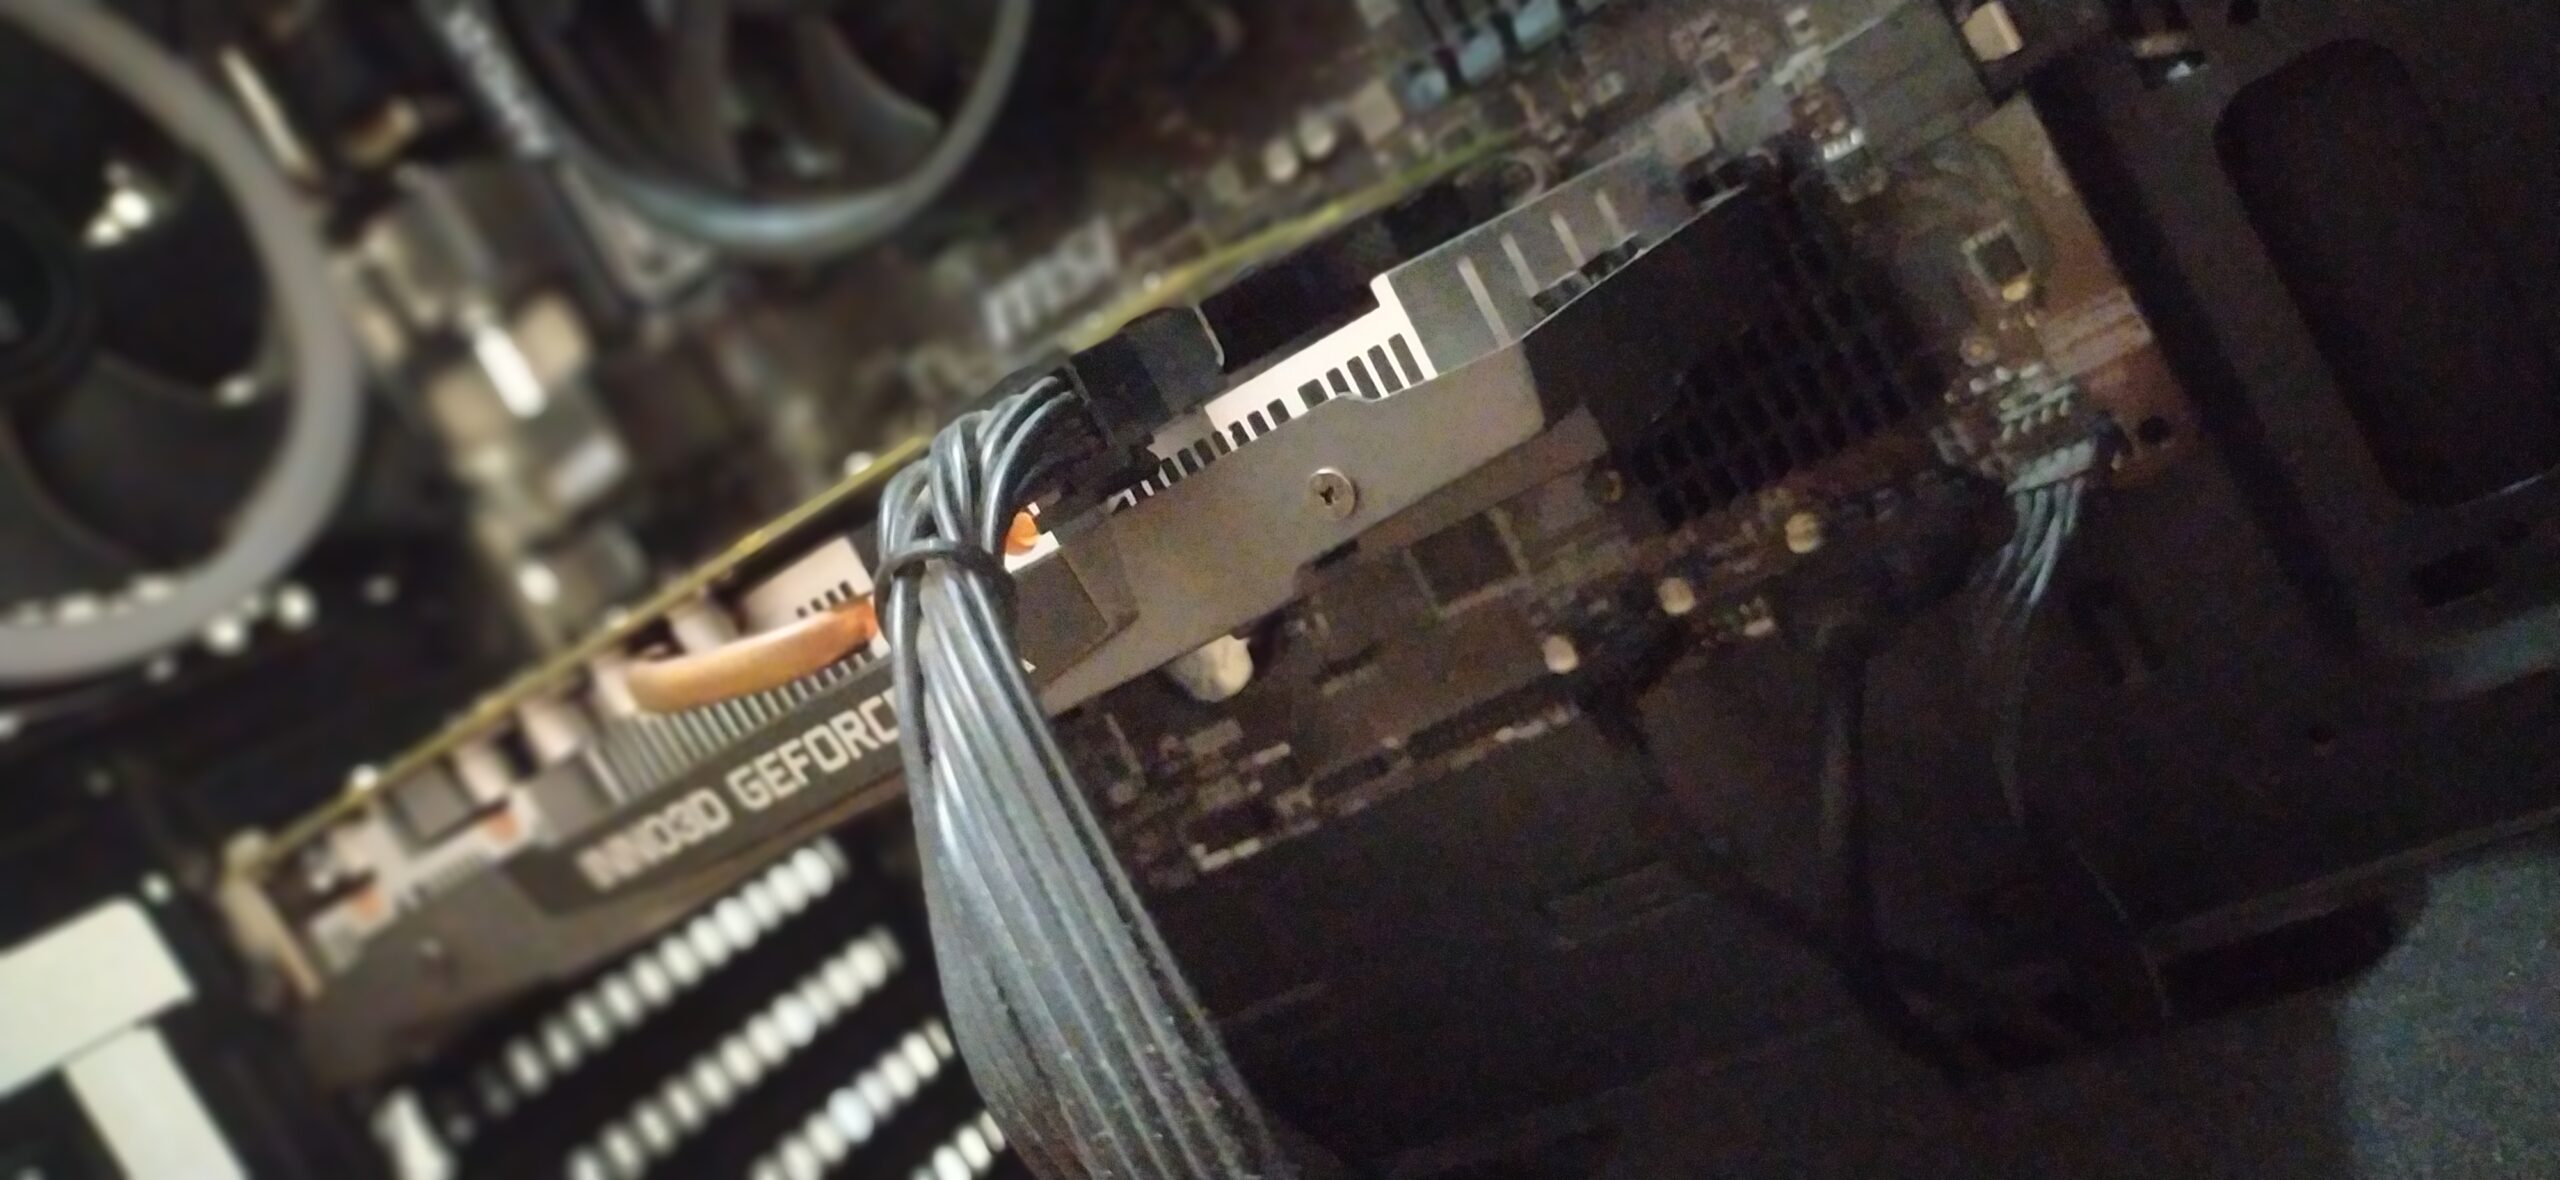
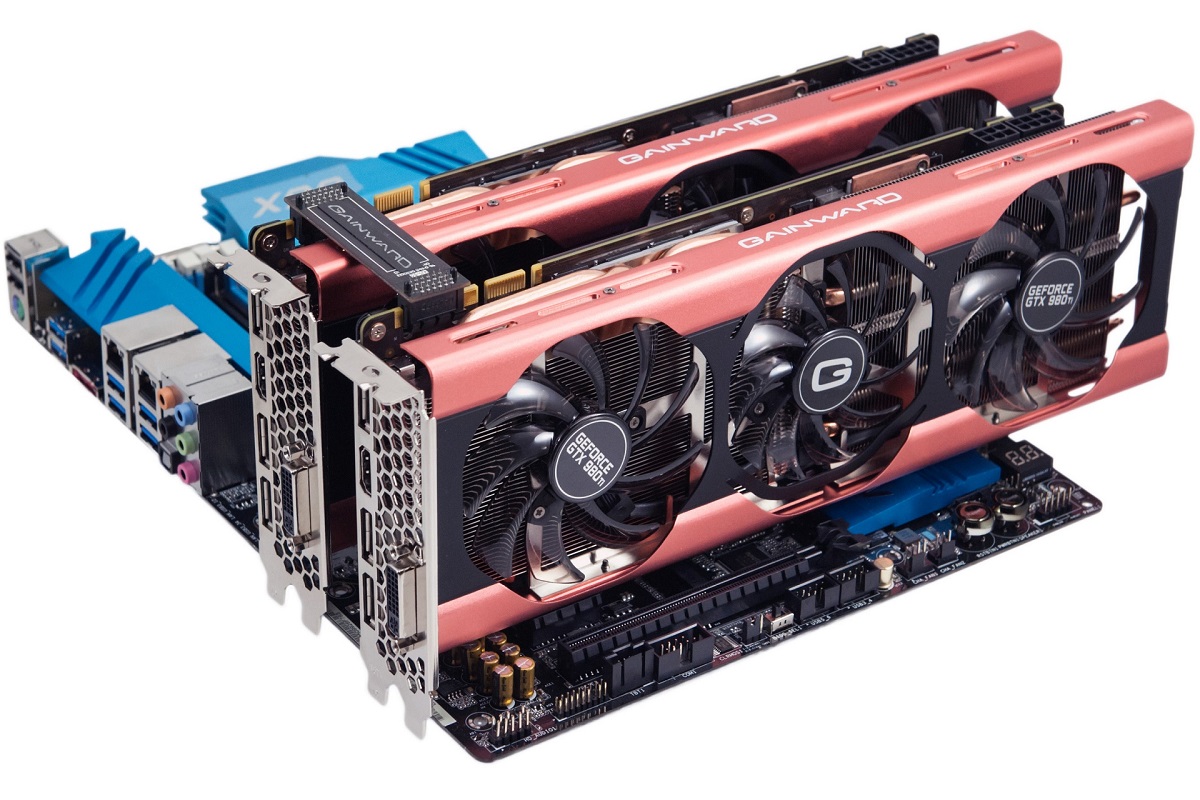
One of the first things you should do when your computer fails to recognize your graphics card is to check the physical connection. Ensure that the graphics card is properly seated in the PCI-E slot of your motherboard. Sometimes, due to vibrations or mishandling, the card can become loose, resulting in connection issues. Shut down your computer and unplug it from the power source before proceeding.
Start by opening the computer case and locate the graphics card. Gently press it down to ensure it is securely seated in the slot. It should fit snugly and align properly with the slot. Check for any visible signs of damage or dirt in the slot or on the contacts of the graphics card. If you notice any debris, use a can of compressed air or a soft brush to clean it. Do not use excessive force or liquid cleaners.
Once you have checked the physical connection, reconnect all the cables and power on your computer. Ideally, you should be able to see the graphics card being detected during the boot process. If the issue persists, proceed to the next troubleshooting step.
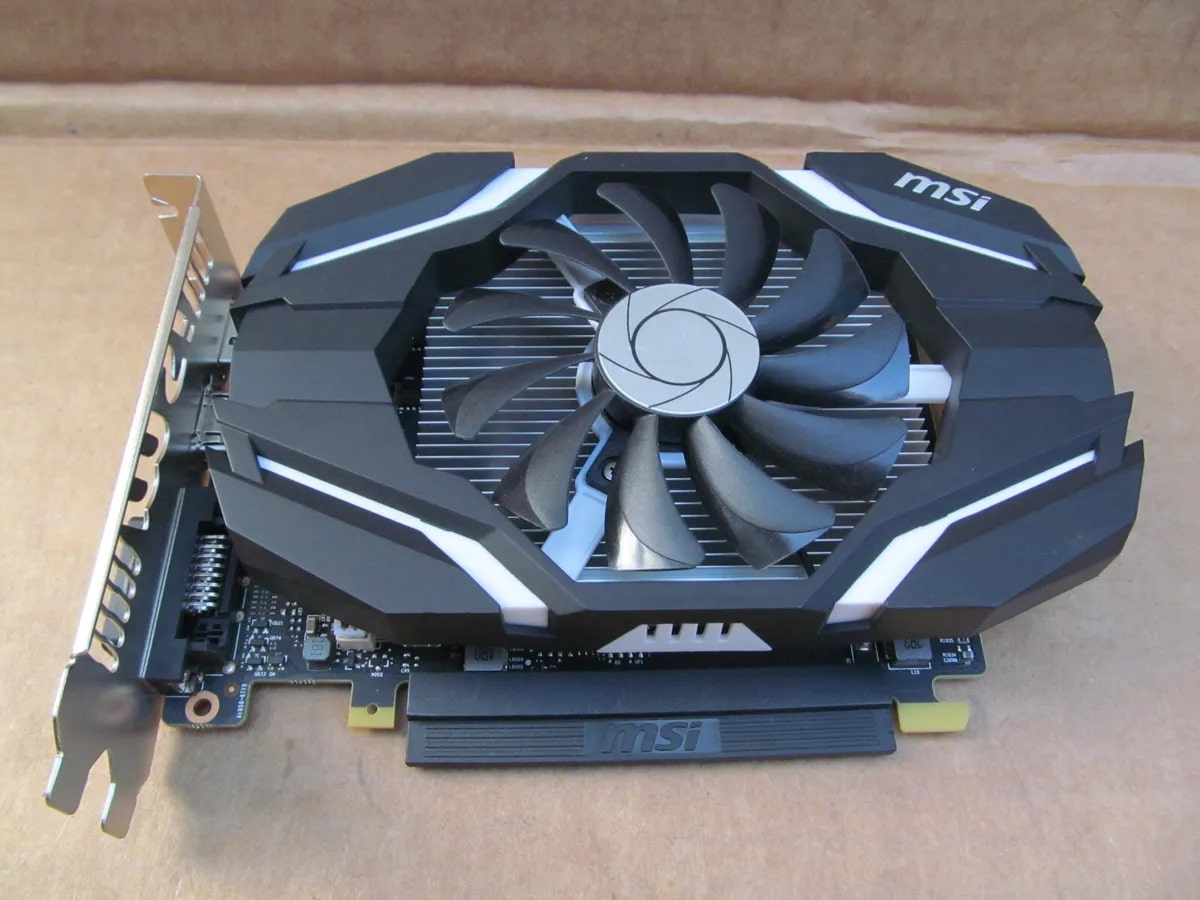
It’s also worth mentioning that if you recently installed a new graphics card and are experiencing this issue, double-check that the card is compatible with your motherboard. Some older motherboards may not support newer graphics cards, so it’s important to verify compatibility before making a purchase.
Checking the physical connection is a crucial step in resolving the issue of your computer not recognizing the graphics card. By ensuring that the card is securely seated and free from any debris, you can eliminate one potential cause of the problem. However, if the issue persists, there may be other factors at play that need to be addressed.
Verifying the Power Connection
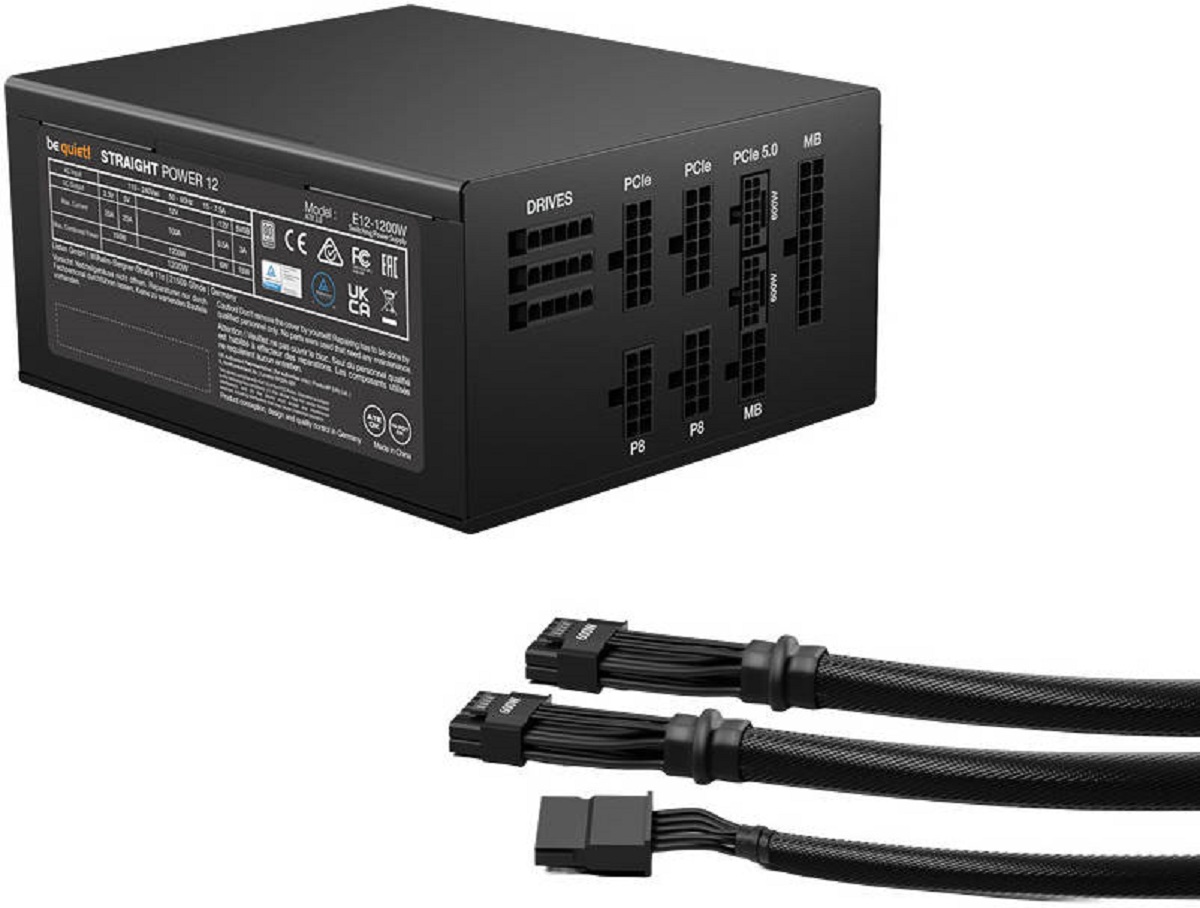
In addition to checking the physical connection, another important step in troubleshooting your computer’s failure to recognize the graphics card is to verify the power connection. Graphics cards require a dedicated power supply to function properly, especially if you have a high-performance card that demands more power.
Begin by ensuring that the power supply unit (PSU) in your computer is sufficient to support the power requirements of your graphics card. Check the specifications of your graphics card and compare them to the maximum power output of your PSU. If your PSU falls short, you may need to upgrade it to a higher wattage to provide enough power to the card.
Next, examine the power connectors on the graphics card itself. Depending on the model, there may be one or more power connectors, such as 6-pin or 8-pin connectors. Ensure that these connectors are securely plugged into the corresponding connectors on the card. If they appear loose or disconnected, firmly push them in until they are snugly connected.
In case your graphics card requires multiple power connectors, make sure that you are using separate cables from the PSU for each connector. Some PSUs come with daisy-chained cables that split into multiple connectors. While this may work for less power-hungry components, it is recommended to use separate cables directly from the PSU for the graphics card to ensure it receives sufficient power.
After verifying the power connection, power on your computer and check if the graphics card is now recognized. If the issue persists, proceed to the next troubleshooting step.
Verifying the power connection is essential in troubleshooting the problem of your computer not recognizing the graphics card. Without adequate power, the card may fail to function properly or be detected by the system. By ensuring proper power supply and secure connections, you eliminate a potential cause of the issue. However, if the problem persists, further investigation is required.
Updating Drivers
Outdated graphics card drivers can often prevent your computer from recognizing the graphics card. Updating the drivers to the latest version can resolve compatibility issues and improve overall performance. Here’s how you can update your graphics card drivers:
- Identify the make and model of your graphics card. You can do this by opening the Device Manager and navigating to the Display Adapters section. It should list the name of your graphics card.
- Visit the official website of the graphics card manufacturer. Look for the support or download section of the website.
- Search for the latest drivers for your specific graphics card model. Make sure to select the correct operating system version as well.
- Download the driver installation file onto your computer.
- Run the downloaded file and follow the on-screen instructions to install the latest drivers.
- Once the installation is complete, restart your computer to apply the changes.
After updating the drivers, check if your computer now recognizes the graphics card. If the issue still persists, try uninstalling the drivers completely and performing a clean installation. Follow the same steps mentioned earlier but choose the option to uninstall the drivers before installing the new ones.
In some cases, you may also find dedicated driver update software that can automatically scan your system and install the latest drivers for your graphics card. These tools can simplify the process and ensure that you have the most up-to-date drivers.
Updating drivers is an important troubleshooting step to ensure that your computer recognizes the graphics card. By installing the latest drivers, you can eliminate any compatibility issues or bugs that may be causing the problem. However, if the issue persists, continue troubleshooting to identify other possible causes.
Checking for Proper Installation
When your computer fails to recognize the graphics card, it’s essential to check if the card has been properly installed. Improper installation can lead to various issues, including a failure to detect the graphics card. Here are the steps to check for proper installation:
- Shut down your computer and unplug it from the power source. Ensure that you follow proper safety precautions when handling computer components.
- Open the computer case and locate the graphics card. Inspect it for any visible signs of damage, such as bent pins or broken components.
- Check if the graphics card is securely inserted into the PCI-E slot on the motherboard. Gently press it down to ensure a proper connection.
- Ensure that any additional power connectors required by the graphics card are properly connected.
- Inspect the surrounding area to ensure that there are no loose cables or obstructions that may be interfering with the graphics card.
- Double-check that the monitor cable is connected to the graphics card’s video output connectors, not the motherboard’s integrated graphics.
Once you have verified the installation, close the computer case and reconnect all cables. Power on your computer and check if the graphics card is now recognized. If the issue persists, move on to the next troubleshooting step.
If you recently installed the graphics card yourself and are unsure if it was installed correctly, refer to the manufacturer’s installation instructions or consult a professional for assistance. Improper installation can cause a range of issues, so it’s crucial to ensure everything is properly connected.
Checking for proper installation is a crucial step in resolving the issue of your computer not recognizing the graphics card. By verifying the physical installation and connections, you can eliminate any issues stemming from an incorrectly installed card. However, if the problem persists, further investigation is needed.
Enabling the Graphics Card in Device Manager
If your computer fails to recognize the graphics card, it is possible that it may be disabled in the Device Manager. The Device Manager is a Windows utility that allows you to view and manage the hardware devices installed on your computer. Follow these steps to enable the graphics card in Device Manager:
- Press the Windows key + X on your keyboard and select “Device Manager” from the menu that appears.
- In the Device Manager window, expand the “Display adapters” category to view the graphics card.
- Right-click on the graphics card and select “Enable” from the context menu.
- If there is an option to “Disable” instead of “Enable,” it means that the graphics card is already enabled. In this case, proceed to the next troubleshooting step.
- Once you have enabled the graphics card, close the Device Manager and restart your computer.
After the restart, check if your computer now recognizes the graphics card. If the issue persists, move on to the next troubleshooting step.
Occasionally, the graphics card may be disabled in the Device Manager due to driver conflicts or other system issues. Enabling it in the Device Manager can often resolve this problem and allow your computer to detect and utilize the graphics card properly.
If the graphics card is still not recognized after enabling it in the Device Manager, try updating the drivers for the card as mentioned in a previous section. Outdated drivers can sometimes cause conflicts and prevent proper detection.
Enabling the graphics card in the Device Manager is a crucial troubleshooting step to ensure that your computer recognizes and utilizes the graphics card. By enabling the card, you allow the system to communicate with and utilize the card’s capabilities. However, if the problem persists, there may be other underlying issues that need to be addressed.
Disabling Integrated Graphics
If your computer has integrated graphics (built-in graphics processing unit), it might be conflicting with the dedicated graphics card, causing your computer not to recognize the graphics card. In such cases, disabling the integrated graphics can help resolve the issue. Follow these steps to disable integrated graphics:
- Press the Windows key + X on your keyboard and select “Device Manager” from the menu that appears.
- In the Device Manager window, expand the “Display adapters” category to view the graphics devices.
- Look for any entries that indicate integrated graphics, such as Intel HD Graphics or AMD Radeon Vega Graphics.
- Right-click on the integrated graphics device and select “Disable” from the context menu.
- If prompted, confirm your selection to disable the device.
- Close the Device Manager and restart your computer.
After the restart, check if your computer now recognizes the dedicated graphics card. Disabling the integrated graphics can help prevent conflicts and ensure that the system prioritizes the dedicated graphics card for graphics processing.
It’s important to note that disabling the integrated graphics may cause your display to go blank temporarily. This is normal during the transition, and once your computer restarts, it should detect and utilize the dedicated graphics card properly.
If disabling the integrated graphics does not resolve the issue or if you rely on the integrated graphics for certain functions, you can try adjusting the primary display settings in the BIOS. Accessing the BIOS setup may vary depending on your computer’s manufacturer, so refer to your motherboard or computer manual for guidance.
Disabling integrated graphics is a troubleshooting step that can help resolve the problem of your computer not recognizing the graphics card. By ensuring that the dedicated graphics card takes precedence, you can eliminate potential conflicts and ensure optimal performance. However, if the issue persists, further investigation is necessary.
Adjusting BIOS Settings
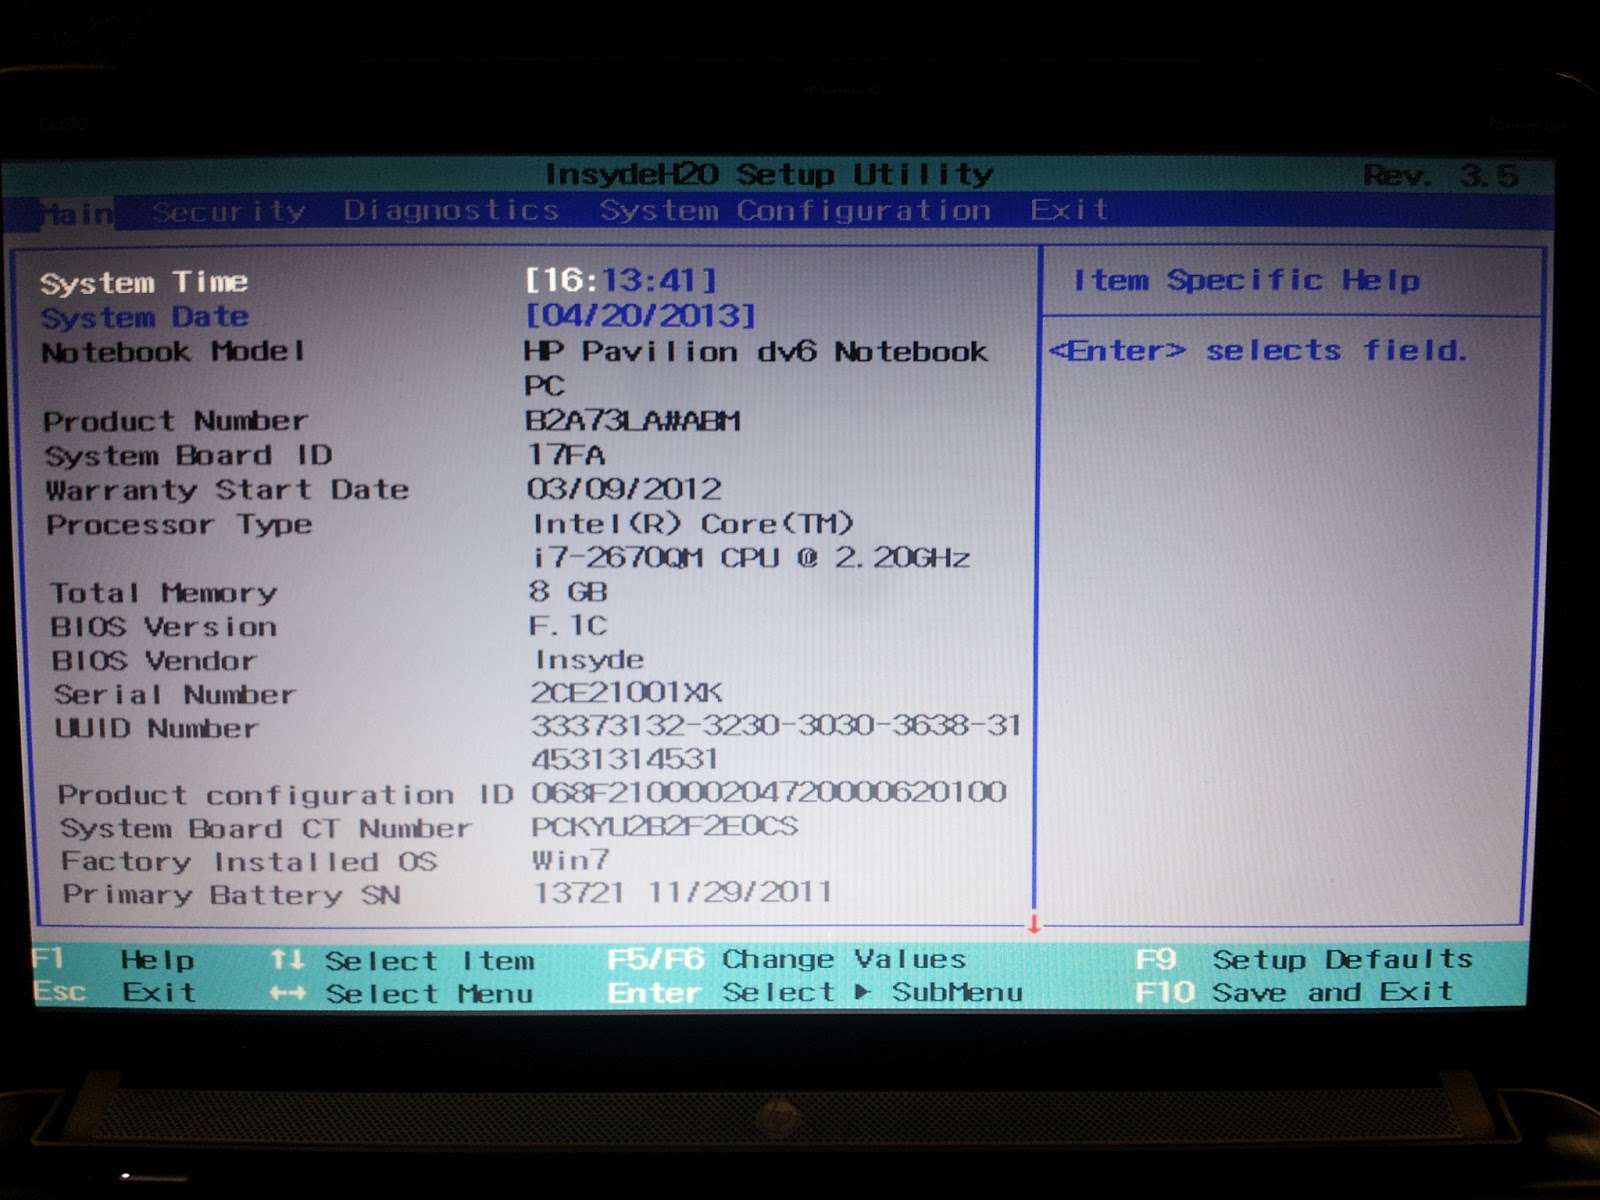
If your computer is not recognizing the graphics card, adjusting the BIOS settings may help resolve the issue. The BIOS (Basic Input/Output System) is firmware that controls the hardware initialization and configuration of your computer. Here’s how you can adjust the BIOS settings:
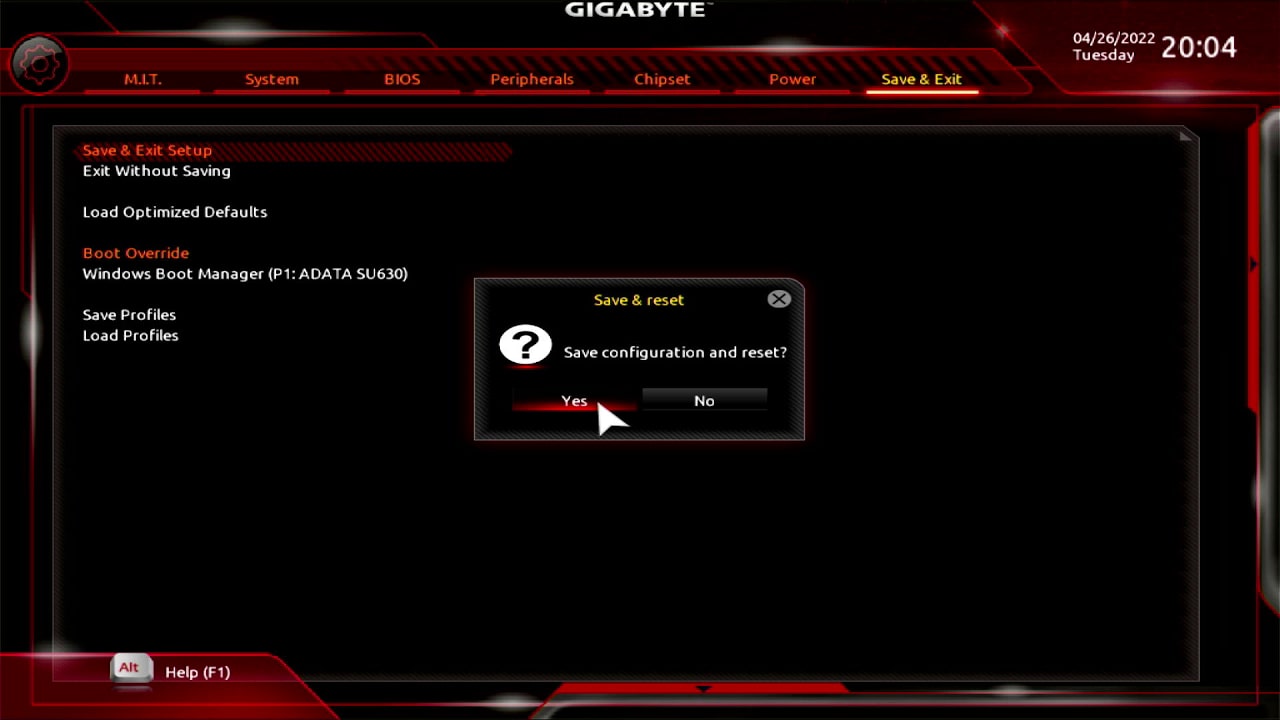
- Restart your computer and enter the BIOS setup by pressing the designated key during the boot process. The key to access the BIOS setup may vary depending on the manufacturer, but commonly used keys include Delete, F2, or F10.
- Navigate through the BIOS menus using the arrow keys on your keyboard. Look for an option related to the graphics card or the PCI-E slot configuration.
- Ensure that the graphics card is set as the primary display device. This option may be named “Primary Display,” “Graphics Configuration,” or something similar. Select the graphics card as the primary display device and save the changes.
- Exit the BIOS setup and restart your computer for the changes to take effect.
After the restart, check if your computer now recognizes the graphics card. Adjusting the BIOS settings can help ensure that the system properly detects and utilizes the graphics card.
It’s worth noting that the exact steps and options in the BIOS may differ based on the motherboard manufacturer and BIOS version. Refer to the motherboard manual or manufacturer’s website for specific instructions on accessing and modifying the BIOS settings.
Additionally, if your computer has an option for “Auto” or “Automatic” settings related to graphics, you can try enabling this feature. It allows the system to automatically detect and configure the graphics card for optimal performance.
Adjusting the BIOS settings is an important troubleshooting step to resolve the issue of your computer not recognizing the graphics card. By ensuring the correct settings for the graphics card, you can eliminate any configuration-related problems. However, if the issue persists, further investigation may be necessary.
Testing the Graphics Card on a Different System
If your computer is still not recognizing the graphics card after trying the previous troubleshooting steps, it may be helpful to test the card on a different system. This will help determine if the issue lies with the graphics card itself or with your computer’s configuration. Here’s how you can test the graphics card on a different system:
- Locate another computer that is compatible with your graphics card.
- Power off both the computer with the problematic graphics card and the other system.
- Disconnect the graphics card from your computer and carefully remove it.
- Install the graphics card into the other system’s vacant PCI-E slot. Refer to the computer’s manual or manufacturer’s instructions for guidance.
- Connect all necessary power cables to the graphics card.
- Power on the other system and wait for it to boot up.
- Check if the graphics card is recognized and functions properly in the other system. Test its performance by running graphic-intensive tasks or games.
- If the graphics card works fine on the other system, it indicates that the card itself is not the issue. In this case, the problem may lie with your computer’s configuration or other software-related factors.
Testing the graphics card on a different system allows you to isolate and identify any issues specific to your computer. If the card is recognized and functions correctly on another system, it indicates that the problem lies elsewhere.
If the graphics card is still not recognized or exhibits issues on the other system, it suggests a potential problem with the card itself. In such cases, contacting the manufacturer’s technical support or considering replacing the graphics card may be necessary.
Testing the graphics card on a different system is a crucial step in troubleshooting the issue of your computer not recognizing the graphics card. By ruling out the card as the source of the problem, you can focus on other potential causes and explore alternative solutions. However, if the issue persists, further investigation is required.
Contacting Technical Support
If you have tried all the previous troubleshooting steps and your computer still fails to recognize the graphics card, it may be time to reach out to technical support for further assistance. The manufacturer’s technical support team is equipped with the knowledge and expertise to help you resolve the issue. Here’s what you can do:
- Collect all relevant information about your graphics card, including the make, model, and any serial numbers or product codes.
- Visit the manufacturer’s website and navigate to the support or contact page.
- Look for the contact details to reach their technical support team. This may include a phone number, email address, or a live chat option.
- Prepare a detailed description of the issue you are facing, including all the troubleshooting steps you have already performed.
- Provide the technical support team with the necessary information and explain the steps you have taken to troubleshoot the issue.
- Follow any instructions or guidance provided by the technical support team to further diagnose and resolve the problem.
- Keep a record of your communications with technical support, including case numbers or reference IDs.
Technical support is there to assist you in resolving complex issues with your hardware. Their expertise and resources can uncover underlying problems that may not be apparent through standard troubleshooting steps.
Be patient and cooperative during your interactions with technical support, as they may require additional information or ask you to perform specific tasks to understand and address the issue. Remember to follow their guidance and provide accurate information to expedite the resolution process.
If your graphics card is still under warranty, technical support may also guide you through the process of obtaining a replacement card if necessary.
Contacting technical support is an important step when all other troubleshooting efforts have been exhausted. Their expertise and guidance can help identify and resolve any underlying issues causing your computer to not recognize the graphics card. Don’t hesitate to reach out for assistance, as it may prove crucial in resolving the problem.
Conclusion
The failure of a computer to recognize a graphics card can be a frustrating issue, but through systematic troubleshooting, most problems can be resolved. In this article, we have covered several steps to help you get your computer to recognize your graphics card.
We started by checking the physical connection and ensuring that the card is properly seated in the PCI-E slot. Then, we verified the power connection and confirmed that the graphics card was receiving adequate power.
Updating the graphics card drivers and checking for proper installation were crucial steps in ensuring that the card is compatible with your system and functioning correctly. We also explored how enabling the graphics card in the Device Manager and disabling any conflicting integrated graphics could resolve the issue.
Adjusting the BIOS settings allowed us to properly configure the graphics card within the system. In cases where the issue persisted, testing the graphics card on a different system provided insight into whether the problem was with the card itself or the configuration of your computer.
If the troubleshooting steps proved unsuccessful, contacting technical support was recommended to explore further options and seek expert guidance.
By following these steps and being persistent in your approach, you can increase your chances of getting your computer to recognize your graphics card. Remember that every computer system is unique, and the specific solutions may vary depending on your hardware and software configuration.
Should you encounter any other issues or challenges, don’t hesitate to seek assistance from the appropriate resources, whether it’s the manufacturer’s support team or a knowledgeable professional.
We hope this article has provided you with valuable insights and guidance to overcome the obstacle of your computer not recognizing the graphics card. Enjoy the improved graphics performance and the full potential of your system!