Introduction
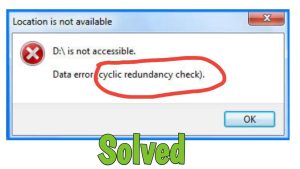
Welcome to the world of external hard drives, where we can store massive amounts of data and conveniently carry it with us wherever we go. These portable devices have become an integral part of our lives, allowing us to store important files, photos, videos, and more. However, like any electronic storage device, external hard drives are not immune to errors and issues. One common problem that users may encounter is the “Cyclic Redundancy Check” (CRC) error.
The CRC error is an indication that something has gone wrong with the data on your external hard drive. It refers to a mathematical algorithm used to verify the data integrity and detect any errors during data transmission or storage. When the CRC error occurs, it means that the data on your drive has become corrupted or cannot be read properly, potentially resulting in data loss.
In this article, we will explore the causes of the CRC error on external hard drives and provide troubleshooting steps to help you fix it. We will guide you through a series of methods, from checking physical connections to utilizing data recovery software and repairing bad sectors, to ultimately resolving the CRC error and restoring your valuable data.
Before we delve into the troubleshooting steps, it is essential to note that some situations may be more complex and require professional assistance. Therefore, it’s always a good idea to consult with a professional data recovery service if you are uncertain or unable to resolve the CRC error on your own.
Now, let’s roll up our sleeves and dive into the world of CRC errors on external hard drives to get your data back on track!
Understanding the Cyclic Redundancy Check (CRC) Error
Before we proceed with troubleshooting the CRC error on your external hard drive, let’s take a moment to understand what CRC is and how it works.
The Cyclic Redundancy Check (CRC) is a mathematical algorithm used to detect errors in data during transmission or storage. It works by dividing the data into blocks and generating a unique checksum for each block. The checksum is a fixed-length sequence of bits calculated using complex mathematical calculations. This checksum is then appended to the data block as a means of error detection.
When data is transmitted or stored, the receiving device or software recalculates the checksum based on the received data. If the recalculated checksum doesn’t match the appended checksum, the receiver knows that an error has occurred during transmission or storage, and the data may be corrupted.
The CRC error occurs when the recalculated checksum doesn’t match the original checksum, indicating that the data has been altered, damaged, or corrupted. This can happen due to various reasons, such as a faulty cable connection, power fluctuations, physical damage to the hard drive, or even software-related issues.
It’s important to note that the CRC error doesn’t necessarily mean that your data is irrecoverable. In some cases, the error can be fixed by following the appropriate troubleshooting steps. However, it’s always crucial to have a backup of your data to prevent any potential loss.
Now that we have a basic understanding of what the CRC error is and how it works, let’s explore the potential causes of this error on external hard drives and discuss the steps to troubleshoot and fix it.
Causes of the CRC Error on External Hard Drives
There are several factors that can contribute to the occurrence of the CRC error on external hard drives. Understanding these causes can help us effectively troubleshoot and fix the issue. Here are some common reasons for the CRC error:
- Physical Damage: External hard drives are susceptible to physical damage, such as drops, bumps, or exposure to extreme temperatures. Any physical damage to the hard drive can disrupt the data stored on it and lead to CRC errors.
- Faulty Cable or Connection: The cable connecting your external hard drive to your computer may be defective or loose. A faulty cable or connection can result in data transmission errors, leading to CRC errors.
- Power Issues: Inconsistent power supply or sudden power surges can corrupt the data on your external hard drive, causing CRC errors. It is important to use a stable power source and protect your device from power fluctuations.
- Software Issues: Problems with the file system, outdated drivers, or incompatible software can also contribute to CRC errors on external hard drives. These issues can introduce errors during file transfers or data access, resulting in CRC errors.
- Bad Sectors: Over time, hard drives can develop bad sectors, which are areas on the disk that are unable to store data reliably. When files are stored on these bad sectors, it can lead to CRC errors when trying to access or transfer those files.
- Virus or Malware Infection: Malicious software can corrupt the data on your external hard drive, leading to CRC errors. It is essential to keep your antivirus software up to date and regularly scan your system to prevent infections.
By considering these potential causes, we can narrow down our troubleshooting efforts and address the specific issue causing the CRC error. In the next section, we will delve into the step-by-step troubleshooting process to help you fix the CRC error on your external hard drive.
Troubleshooting Steps for CRC Error on External Hard Drives
When encountering a CRC error on your external hard drive, it’s important to follow a systematic approach to diagnose and resolve the issue. Here are several troubleshooting steps you can take to fix the CRC error:
- Check the Physical Connections: Ensure that the cable connecting your external hard drive to your computer is securely plugged in at both ends. Try using a different USB port or cable to rule out any potential issues with the connection.
- Run Built-in Windows Error Checking Tool: On Windows, you can use the built-in Error Checking tool to scan and repair errors on your external hard drive. Right-click on the drive, select “Properties,” go to the “Tools” tab, and click on “Check.” Follow the on-screen instructions to perform a thorough scan and fix any detected errors.
- Use Third-Party Data Recovery Software: If the built-in Windows tools fail to fix the CRC error, you can consider using third-party data recovery software. These software solutions often come with advanced features to repair and recover data from corrupted drives.
- Repair Bad Sectors on the External Hard Drive: If your external hard drive has developed bad sectors, you can attempt to repair them using specialized software. These tools can mark the bad sectors, preventing data from being stored on them and reducing the likelihood of CRC errors.
- Format the External Hard Drive: If all else fails, and you have already backed up your data, you can try formatting the external hard drive. Formatting will erase all data on the drive, including any corrupted files, potentially resolving the CRC error. Remember to only do this as a last resort and ensure you have a backup of your important files beforehand.
- Contact Professional Data Recovery Service: If none of the above steps work or if you are uncomfortable performing them yourself, it is advisable to contact a professional data recovery service. These experts have the necessary tools and expertise to diagnose and recover data from complex cases of CRC errors.
Remember that the success of these troubleshooting steps highly depends on the specific circumstances and severity of the CRC error. It’s always recommended to have a backup of your important data to avoid permanent loss.
Now that we have explored the troubleshooting steps, let’s move on to some tips to help you avoid CRC errors on your external hard drives in the future.
Step 1: Check the Physical Connections
When faced with a CRC error on your external hard drive, it’s crucial to start the troubleshooting process by checking the physical connections. Often, a loose or faulty cable connection can be the culprit behind the error. Follow these steps to ensure your physical connections are secure:
- Inspect the USB Cable: Examine the USB cable connecting your external hard drive to your computer. Look for any visible signs of damage, such as fraying or bent connectors. If you notice any damage, replace the cable with a new one.
- Try Different USB Ports: Unplug the USB cable from your computer and plug it into a different USB port. Sometimes, the port itself may be causing the issue. If the CRC error persists, move on to the next step.
- Test with a Different Cable: If you have access to another USB cable, try connecting your external hard drive using that cable. This step can help determine whether the issue lies with the cable itself. If the CRC error is resolved with a different cable, it’s recommended to replace your current cable.
- Use a Powered USB Hub: If your external hard drive is not receiving enough power, it may result in data transmission errors. In such cases, connecting your drive to a powered USB hub can provide a stable power supply and potentially resolve the CRC error.
- Restart Your Computer: Sometimes, a simple restart of your computer can resolve connectivity issues. Shut down your computer, unplug the power cable, wait for a few seconds, and then plug it back in. Turn on your computer and reconnect the external hard drive to check if the CRC error persists.
By checking the physical connections and ensuring everything is secure and properly connected, you can eliminate any external factors that might be contributing to the CRC error. If the issue persists after performing these steps, proceed to the next step in the troubleshooting process.
Now that we have covered the first step, let’s move on to the next step for addressing the CRC error on your external hard drive.
Step 2: Run Built-in Windows Error Checking Tool
If you’re experiencing a CRC error on your external hard drive, the next step in troubleshooting is to utilize the built-in Windows Error Checking tool. This tool allows you to scan and repair any errors on your drive that may be causing the CRC error. Follow these steps to run the Error Checking tool:
- Open File Explorer: Open the File Explorer on your Windows computer by pressing the Windows key + E or by clicking on the File Explorer icon in the taskbar.
- Select the External Hard Drive: In the File Explorer, locate and select the external hard drive that is experiencing the CRC error. It will be listed under the “This PC” section or labeled with the drive letter assigned to it.
- Access Drive Properties: Right-click on the selected external hard drive and choose the “Properties” option from the context menu.
- Navigate to the Tools Tab: In the Properties window, navigate to the “Tools” tab at the top of the window. Here you will find various options to manage and check your drive.
- Click on Error Checking: Under the “Error Checking” section, click on the “Check” button. This will initiate the Error Checking process.
- Select Scanning Options: The Error Checking tool will prompt you to choose between two scanning options:
- Scan for and attempt recovery of bad sectors: This option will scan the external hard drive for any bad sectors and attempt to recover the data stored on them.
- Automatically fix file system errors: This option will automatically fix any file system errors found during the scan.
Check both options to perform a thorough scan and repair any detected errors.
- Initiate the Scan: Once you have selected the preferred scanning options, click on the “Scan drive” button to initiate the scanning process. During the scan, your computer will check for errors and repair them if possible.
- Wait for the Process to Complete: The scanning process may take some time depending on the size and condition of your external hard drive. Be patient and let the Error Checking tool complete the scan.
- Review the Scan Results: Once the scan is complete, you will see a summary of the scan results. If any errors were found and fixed, the tool will display the details. If no errors were found, you may proceed to the next troubleshooting step.
The Error Checking tool is a useful built-in feature of Windows that can help diagnose and fix errors on your external hard drive. If the CRC error persists after running the Error Checking tool, proceed to the next step to explore further troubleshooting options.
Now that we have completed the second step, let’s move on to the next step in resolving the CRC error on your external hard drive.
Step 3: Use Third-Party Data Recovery Software
If you have encountered a CRC error on your external hard drive and the built-in Windows Error Checking tool was unable to fix it, the next step is to consider using third-party data recovery software. These software solutions are designed to handle more complex data recovery scenarios, including CRC errors. Follow these steps to utilize third-party data recovery software:
- Research and Select a Reliable Data Recovery Software: Start by researching and selecting a reputable and reliable data recovery software. Look for software that specifically mentions its ability to recover data from external hard drives or handle CRC errors.
- Download and Install the Software: Once you have chosen the software, download it from the official website and install it on your computer. Follow the installation instructions provided by the software’s manufacturer.
- Connect the External Hard Drive: Connect your external hard drive to your computer using the appropriate cable. Ensure that the drive is recognized and accessible by your computer before proceeding.
- Launch the Data Recovery Software: Open the data recovery software that you installed in the previous step. Most software will have a user-friendly interface that guides you through the recovery process.
- Select the External Hard Drive: In the software interface, locate and select the external hard drive that is experiencing the CRC error. The software should provide a list of available drives for selection.
- Start the Data Recovery Process: Look for a “Scan” or “Start” button to initiate the data recovery process. The software will now scan your external hard drive for any recoverable files, including those affected by the CRC error.
- Wait for the Scan to Complete: The scanning process may take some time, depending on the size of the drive and the extent of the data corruption. Allow the software to complete the scan and analyze the files.
- Preview and Recover the Data: Once the scan is complete, the software will present you with a list of recoverable files. Take your time to preview and select the files you wish to recover. Ensure that you have enough storage space on your computer or another external drive to store the recovered data.
- Initiate the Recovery: Finally, click on the “Recover” or “Restore” button to initiate the file recovery process. The software will attempt to recover the selected files and save them to the designated location on your computer.
Using third-party data recovery software can be a powerful solution to recover data from an external hard drive experiencing a CRC error. However, it’s important to note that the success of the recovery process may vary depending on the severity of the CRC error and the condition of the drive.
If the CRC error persists or the data recovery software is unable to recover your files, proceed to the next troubleshooting step to address any potential bad sectors on the external hard drive.
Now that we have covered the third step, let’s move on to the next step in resolving the CRC error on your external hard drive.
Step 4: Repair Bad Sectors on the External Hard Drive
If you are facing a CRC error on your external hard drive and have attempted the previous steps without success, it’s time to address any potential bad sectors on the drive. Bad sectors are areas on the hard drive that cannot reliably store data and may contribute to CRC errors. Here’s how to repair bad sectors on an external hard drive:
- Ensure a Backup of Important Data: Before proceeding with any repairs, make sure you have a backup of your important data on the external hard drive. Repairing bad sectors can involve data loss, so it’s better to be safe than sorry.
- Download and Install a Disk Repair Utility: Look for a reliable disk repair utility that supports the repair of bad sectors on external hard drives. Many reputable software options are available online; choose one that suits your needs and download it.
- Connect the External Hard Drive: Connect your external hard drive to your computer using the appropriate cable and ensure that it is recognized by your computer.
- Launch the Disk Repair Utility: Open the disk repair utility that you downloaded and installed. Follow any on-screen instructions or prompts to ensure proper configuration and detection of your external hard drive.
- Select the External Hard Drive for Repair: In the disk repair utility’s interface, select the connected external hard drive that is experiencing the CRC error. Ensure that you have selected the correct drive to avoid potential data loss on other drives.
- Start the Bad Sector Scan and Repair Process: Look for an option to scan for and repair bad sectors on the external hard drive. The tool will scan the drive and attempt to repair any detected bad sectors.
- Let the Repair Process Complete: The repair process may take some time, depending on the size of the drive and the number of bad sectors found. Allow the tool to complete the repair process before proceeding.
- Confirm the Repair Results: Once the repair process is complete, the disk repair utility will provide a summary of the repair results. Take note of any successfully repaired bad sectors or any remaining issues.
- Test the External Hard Drive: After repairing the bad sectors, disconnect and reconnect the external hard drive from your computer. Run a test to ensure that the CRC error is no longer present and that your data can be accessed without issues.
Repairing bad sectors on an external hard drive offers a chance to resolve CRC errors by preventing corrupted data storage. However, it’s important to note that severe damage or a high number of bad sectors may make it difficult to repair the drive fully.
If the CRC error persists or the repair process does not resolve the issue, proceed to the next step, which involves formatting the external hard drive.
Now that we have covered the fourth step, let’s move on to the next step in resolving the CRC error on your external hard drive.
Step 5: Format the External Hard Drive
If previous steps have failed to resolve the CRC error on your external hard drive, formatting the drive may be the next course of action. Formatting erases all data on the drive and rebuilds the file system, potentially eliminating any corrupted data causing the CRC error. Follow these steps to format your external hard drive:
- Backup Important Data: Before proceeding with the formatting process, ensure that you have backed up any important data stored on the external hard drive. Formatting erases all data, so it’s vital to have a copy of anything you don’t want to lose.
- Open File Explorer: Open the File Explorer on your Windows computer by pressing the Windows key + E or by clicking on the File Explorer icon in the taskbar.
- Select the External Hard Drive: Locate and select the external hard drive that you want to format. Be cautious to select the correct drive to avoid accidental formatting of the wrong drive.
- Right-Click and Choose Format: Right-click on the selected external hard drive and choose the ‘Format’ option from the contextual menu. This will open the formatting options window.
- Select File System and Allocation Unit Size: In the formatting options window, choose the desired file system for the external hard drive. NTFS is recommended for Windows users, while exFAT offers better compatibility between different operating systems. You can also select the allocation unit size, but the default setting is usually suitable for most scenarios.
- Choose Quick Format (Optional): If you are in a hurry and want to perform a quick format, check the ‘Quick Format’ option. However, keep in mind that a quick format only deletes the file system information, not the actual data, which might not fully resolve the CRC error.
- Start the Formatting Process: Click on the ‘Start’ button to begin the formatting process. A warning prompt will appear, reminding you that all data on the drive will be erased. Confirm your selection and let the formatting process begin.
- Wait for the Formatting to Complete: The formatting process may take some time to complete, depending on the size and speed of the external hard drive. Avoid interrupting the process, as it could lead to data corruption or other issues.
- Verify the CRC Error Resolution: Once the formatting process is complete, reconnect the external hard drive to your computer and check whether the CRC error is resolved. If the error persists, it might indicate a hardware issue that requires professional assistance.
Formatting your external hard drive can sometimes be a last resort to resolve persistent CRC errors. Remember to exercise caution and ensure you have a backup of any important data before proceeding with the format.
If the CRC error still persists after formatting, or if you do not want to risk losing any data, it is recommended to seek professional assistance or contact the customer support for your external hard drive manufacturer.
With the completion of the fifth step, we now move on to the final step for troubleshooting the CRC error on your external hard drive.
Step 6: Contact Professional Data Recovery Service
If you have reached this step and the previous troubleshooting methods failed to fix the CRC error on your external hard drive, it is time to consider seeking professional assistance. A professional data recovery service specializes in recovering data from damaged or inaccessible storage devices, including external hard drives with CRC errors. Follow these guidelines to proceed with contacting a professional data recovery service:
- Research Reliable Data Recovery Services: Spend some time researching and identifying reputable data recovery services. Look for providers that have a proven track record, positive customer reviews, and expertise in handling CRC errors on external hard drives.
- Gather Drive Information: Collect essential details about your external hard drive, such as the make, model, capacity, and any relevant error messages or symptoms you have encountered. This information will assist the data recovery service in assessing your situation accurately.
- Contact the Data Recovery Service: Reach out to the data recovery service you have selected. Call their customer support or visit their website to initiate the contact process. Provide them with the necessary information about your external hard drive and explain the CRC error situation you are facing.
- Consultation and Evaluation: The data recovery service will likely provide a free consultation or evaluation to assess the situation and determine the best course of action. They may ask for details about the CRC error, the files affected, and any previous troubleshooting steps you have attempted.
- Receive a Quote: Based on the evaluation of your external hard drive and the complexity of the CRC error, the data recovery service will provide you with a quote for their services. This quote will outline the cost, the estimated recovery success rate, and any applicable terms and conditions.
- Decide and Proceed: Review the quote provided by the data recovery service and consider the options. If the data on your external hard drive is of significant importance or value, and the quoted price is acceptable to you, decide to proceed with the professional data recovery service.
- Send the Drive for Recovery: Follow the instructions provided by the data recovery service to safely package and ship your external hard drive to their facility. Ensure you comply with any specified shipping instructions and package the drive securely to prevent any further damage during transit.
- Recovery Process and Retrieval: Once the data recovery service receives your external hard drive, their team of experts will commence the recovery process. They will utilize specialized tools and techniques to retrieve data from the drive, including addressing the underlying CRC error.
- Receive Recovered Data: Once the data recovery process is completed, the service will provide you with the recovered data. Depending on the service and the amount of data recovered, it may be delivered via a secure online portal, on a replacement storage device, or through a physical medium.
By contacting a professional data recovery service, you can increase your chances of recovering your data from an external hard drive with a CRC error. These experts have the knowledge, experience, and resources to handle complex data recovery scenarios and provide the best possible outcome.
Although professional data recovery services may come at a higher cost, they are often the best solution when all other troubleshooting methods fail or when valuable data is at stake.
With the completion of the final step, we have explored all the possible troubleshooting solutions for the CRC error on your external hard drive. Your next course of action depends on your decision to proceed with a professional data recovery service or to explore alternative options based on the severity of the issue and the value of the data involved.
Tips to Avoid CRC Errors on External Hard Drives
Experiencing a CRC error on your external hard drive can be a frustrating experience, especially if it leads to data loss or data corruption. While some factors causing CRC errors may be beyond your control, there are several tips you can follow to minimize the risk of encountering CRC errors on your external hard drives. Here are some essential tips to avoid CRC errors:
- Handle the Hard Drive with Care: Physical damage to the external hard drive can contribute to CRC errors. Treat your external hard drive gently, avoiding drops, impacts, and exposure to extreme temperatures.
- Ensure Stable Power Supply: Power fluctuations or sudden power loss can disrupt data transfers and corrupt the files on your external hard drive. Connect your drive to a stable power source and consider using a surge protector or uninterruptible power supply (UPS) to protect against power surges or outages.
- Use Reliable Cables and Connections: Always use high-quality USB cables and ensure a secure connection between your external hard drive and the computer. Loose or faulty cables can cause data transmission errors, leading to CRC errors.
- Periodically Check for Drive Errors: Regularly scan your external hard drive for errors using built-in tools like Windows Error Checking (chkdsk) or third-party disk utility software. This can help identify and fix any potential issues before they escalate into CRC errors.
- Keep Your System and Drivers Updated: Outdated operating systems, file systems, or device drivers can introduce compatibility issues and file system errors, leading to CRC errors. Stay up to date with software and driver updates to ensure optimal performance.
- Use Reliable and Updated Antivirus Software: Viruses and malware can corrupt the data on your external hard drive, potentially causing CRC errors. Install reputable antivirus software and keep it up to date to protect your system and external drives from possible infections.
- Perform Regular Data Backups: Creating regular backups of your important data is crucial to protect against data loss from CRC errors or other unforeseen circumstances. Back up your files to separate storage devices or cloud-based backup solutions to ensure redundancy.
- Avoid Abrupt Ejections: Always safely eject or safely remove your external hard drive before physically disconnecting it. Abruptly removing the drive while it is in use can lead to data corruption and increase the risk of CRC errors.
- Monitor Drive Health: Utilize software tools that monitor the health of your external hard drive, such as S.M.A.R.T. (Self-Monitoring, Analysis, and Reporting Technology). These tools can help detect early signs of drive deterioration or issues that could lead to CRC errors.
- Consider Redundancy and Data Recovery Plans: Implement redundancy measures, such as maintaining multiple copies of critical data or utilizing RAID configurations, to protect against data loss. Additionally, have a data recovery plan in place to address potential CRC errors or other data loss scenarios.
By following these tips, you can significantly reduce the chances of encountering CRC errors on your external hard drives. Prevention and proactive measures can go a long way in ensuring the safety and integrity of your data.
Remember to remain vigilant and proactive in maintaining the health and reliability of your external hard drives to minimize the risk of CRC errors and potential data loss.
Conclusion
The CRC error on external hard drives can be a challenging issue to tackle, but with the right troubleshooting steps and precautions, it is possible to resolve and prevent such errors. By understanding the nature of CRC errors, identifying their causes, and following the outlined troubleshooting steps, you can increase the chances of restoring your data and getting your external hard drive back in working condition.
Remember to start by checking the physical connections and running the built-in Windows Error Checking tool. If the CRC error persists, consider using third-party data recovery software or addressing any potential bad sectors on the drive. If all else fails, contacting a professional data recovery service may be the best option to recover your data.
To avoid CRC errors on your external hard drives in the future, practice proper handling and maintenance, ensure a stable power supply, use reliable cables and connections, and keep your system and antivirus software up to date. Regularly check for drive errors, perform data backups, and consider monitoring drive health to catch potential issues early.
While encountering a CRC error on your external hard drive can be a frustrating experience, it doesn’t necessarily mean that your data is lost forever. With the appropriate troubleshooting steps and a proactive approach to data protection, you can successfully recover your data and minimize the chances of CRC errors occurring in the future.
Remember, if you are unsure of your technical capabilities or the severity of the CRC error, it is always advisable to seek professional assistance. They have the expertise and tools necessary to handle complex situations and recover your valuable data.