Introduction
Setting up a wireless router is an essential step for connecting your devices to the internet wirelessly. To ensure the security of your connection, most routers come equipped with a feature called a PIN (Personal Identification Number). The PIN serves as an additional layer of security, preventing unauthorized access to your network.
In this article, we will explore the purpose of a PIN in wireless routers and guide you through the process of entering the PIN on different router brands. Whether you’re a beginner or an experienced user, this article will provide you with the knowledge and troubleshooting tips to effectively enter a PIN on your wireless router.
Understanding how to enter a PIN in your wireless router is crucial for maintaining a secure and reliable home network. By following the steps and guidelines provided, you can ensure that only authorized devices are able to access your network, protecting your personal information and safeguarding your online activities.
So, if you’re ready to take control of your wireless router’s security settings and learn how to enter a PIN, let’s dive in and explore the world of PIN authentication!
Understanding the Purpose of a PIN in Wireless Routers
Wireless routers play a crucial role in providing internet connectivity to our devices, be it laptops, smartphones, or smart home devices. However, with the growing number of connected devices and the increasing presence of hackers and unauthorized users, ensuring the security of our home networks has become more important than ever.
This is where the PIN (Personal Identification Number) feature in wireless routers comes into play. The PIN serves as a unique identifier that allows authorized devices to communicate securely with the router and gain access to the network. It acts as a first line of defense against potential intruders, preventing unauthorized access and protecting your data.
By setting up a PIN for your wireless router, you can ensure that only devices with the correct PIN can connect to your network. This adds an extra layer of security on top of the standard Wi-Fi password. While the Wi-Fi password is used to authenticate the router, the PIN provides an additional verification step for each connecting device.
One of the key advantages of using a PIN is that it is device-specific. Each device connecting to the wireless router needs to enter the correct PIN assigned by the router itself. This prevents unauthorized devices from accessing your network, even if they somehow manage to obtain your Wi-Fi password.
Furthermore, the PIN authentication process is usually more secure than relying solely on the Wi-Fi password. While a password can be easily guessed or cracked through various hacking techniques, the PIN adds an extra layer of complexity, increasing the overall security of your network.
Understanding the purpose of a PIN in wireless routers is crucial for maintaining a secure home network. By utilizing this additional layer of security, you can significantly reduce the risk of unauthorized access, potential data breaches, and ensure that only trusted devices connect to your network.
In the following sections, we will guide you through the steps of entering the PIN on different router brands, troubleshoot common issues that may arise, and provide some best practices for PIN setup and maintenance.
Identifying the Location of the PIN on Your Router
Now that you understand the importance of a PIN in securing your wireless router, the next step is to locate where the PIN is on your specific router. The location of the PIN can vary depending on the brand and model of your router, but we will provide you with general guidelines to help you find it.
Start by examining your wireless router’s physical design. Look for any labels, stickers, or markings on the device itself. These labels often contain important information about your router, including the default PIN. Some routers may have a dedicated area on the back or bottom where the PIN is printed.
If you don’t see the PIN directly on the router, you can try checking the router’s user manual or documentation provided by the manufacturer. The manual will typically contain detailed information about the router’s features, including the location and purpose of the PIN.
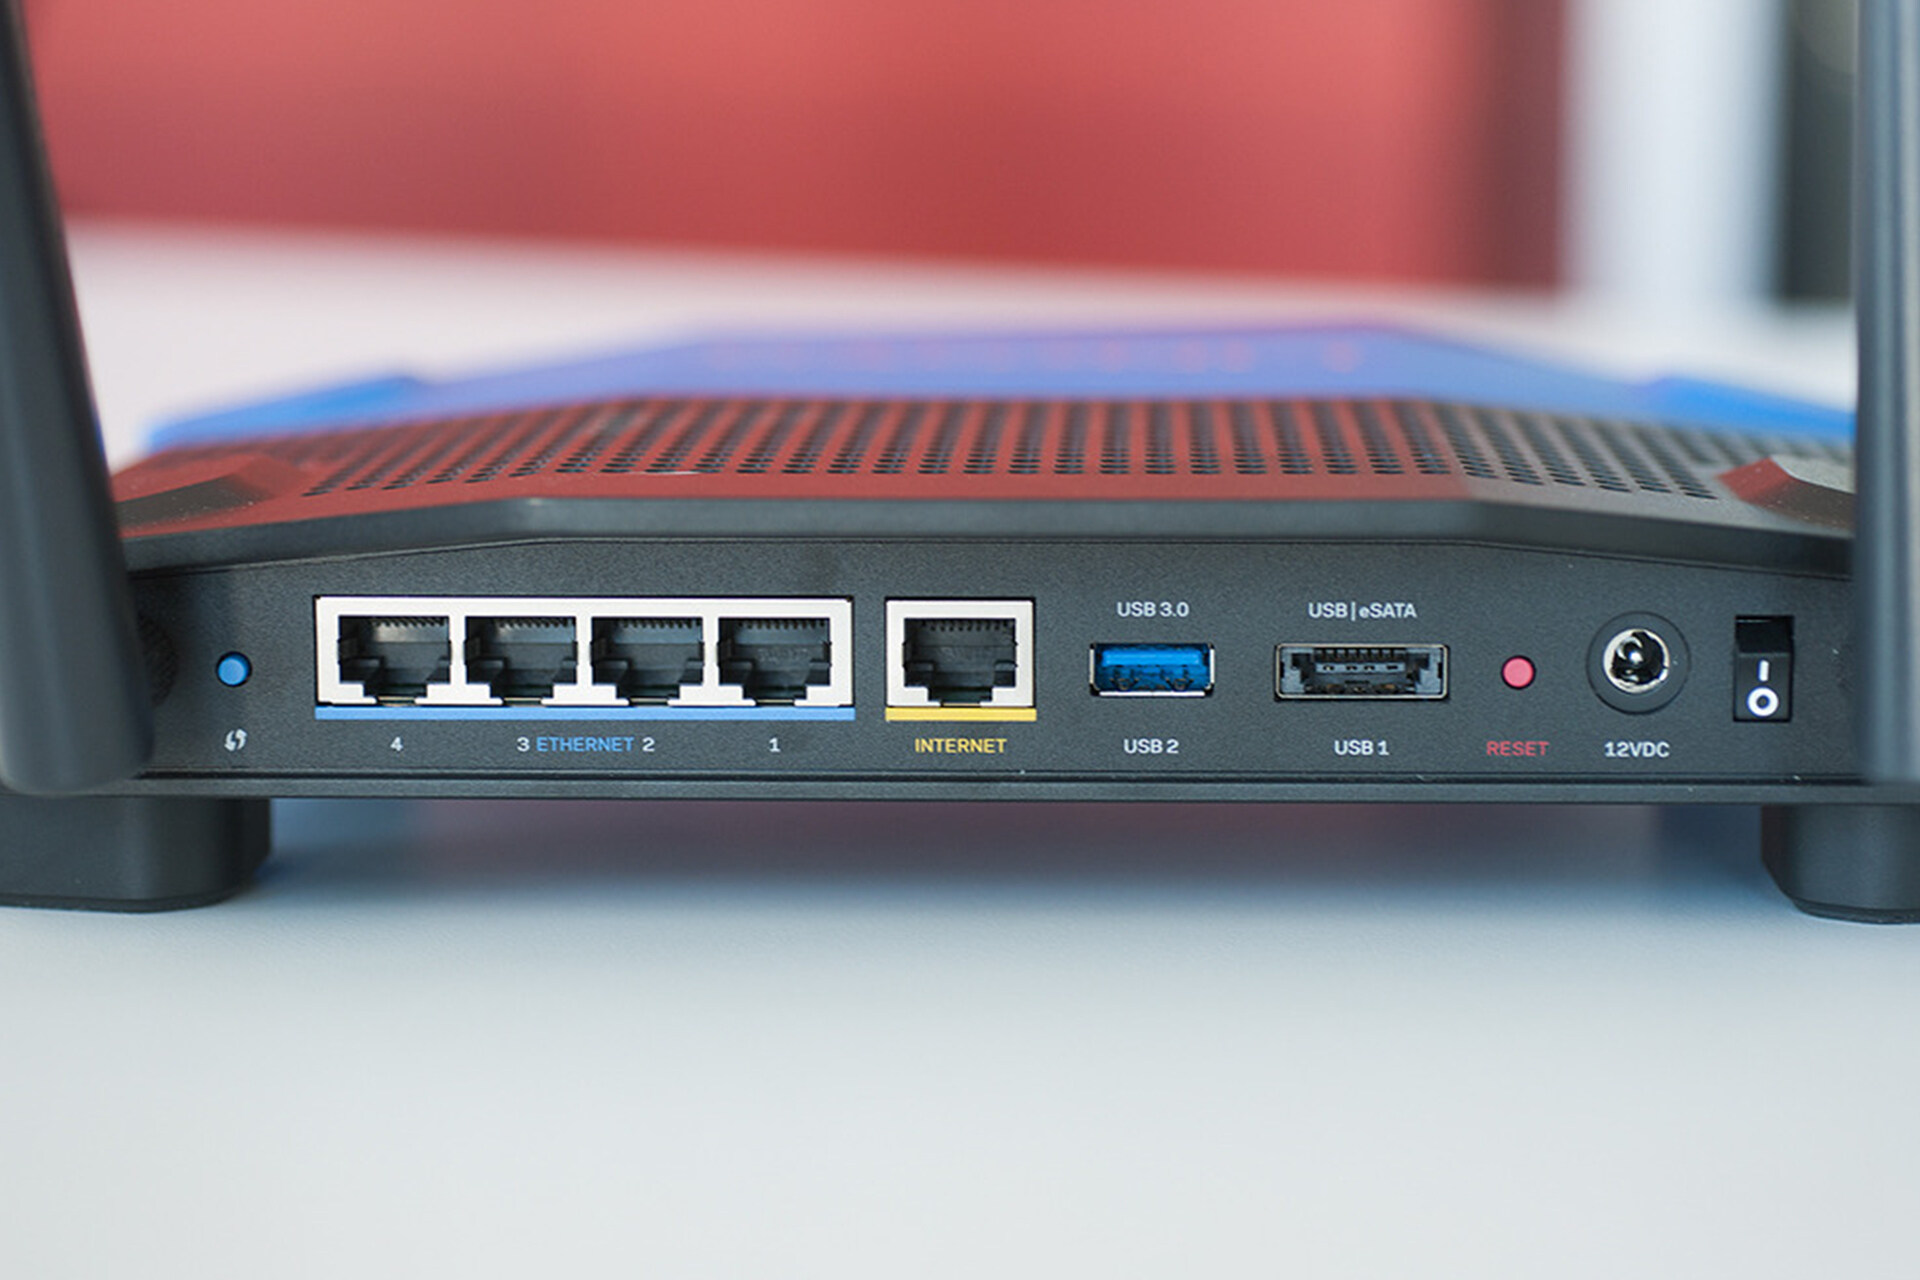
In cases where the PIN is not printed on the router or mentioned in the user manual, you may need to access the router’s web interface to retrieve the PIN. To do this, you will need to connect your computer or device directly to the router using an Ethernet cable. Once connected, open a web browser and enter the router’s IP address in the address bar. This will take you to the router’s configuration page where you can log in.
After logging in, navigate through the router’s settings and look for the section labeled “Wireless” or “Wireless Security.” Within this section, you should find the option to view or edit the PIN. Make note of the PIN or consider changing it if necessary.
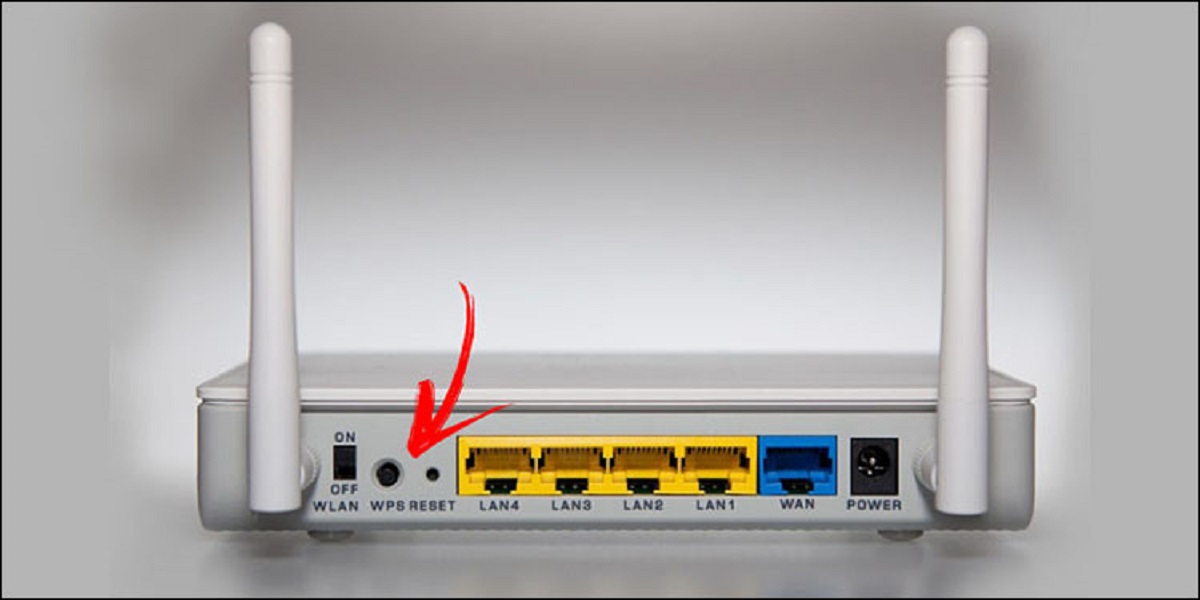
It’s worth noting that some newer routers may use a different method, such as a WPS (Wi-Fi Protected Setup) PIN or a QR code, for connecting devices securely. If your router utilizes these methods, refer to the manufacturer’s documentation or online resources for guidance on locating and using these features.
Identifying the location of the PIN on your router is essential for successfully entering it when connecting devices to your network. Take the time to carefully locate the PIN, whether it’s printed on the router, mentioned in the user manual, or accessed through the router’s web interface. By doing so, you’ll be ready to proceed with entering the PIN and strengthening the security of your wireless network.
Steps to Enter the PIN on Different Router Brands
Entering the PIN on your wireless router can vary depending on the brand and model you are using. In this section, we will provide you with general steps to enter the PIN on different router brands. While the specific instructions may vary slightly, these guidelines will help you navigate the process.
1. TP-Link: To enter the PIN on a TP-Link router, you need to access the router’s web interface. Connect your computer to the router via an Ethernet cable and open a web browser. Enter the router’s IP address in the address bar and log in. Navigate to the Wireless Settings section and look for the WPS or Wi-Fi Protected Setup option. Select the PIN option and enter the PIN when prompted.
2. D-Link: For D-Link routers, launch a web browser and enter the router’s IP address in the address bar. Log in to the router’s web interface, usually with the default credentials provided in the user manual. Locate the WPS or Wi-Fi Protected Setup section and select the PIN option. Enter the PIN when prompted and save the settings.
3. Netgear: To enter the PIN on a Netgear router, connect your computer to the router using an Ethernet cable. Open a web browser and enter “http://www.routerlogin.net” in the address bar. Log in to the router’s web interface with your username and password. Navigate to the Advanced tab and look for the WPS Wizard or Wi-Fi Protected Setup section. Select the PIN option and enter the PIN when prompted.
4. Linksys: Launch a web browser and enter “http://192.168.1.1” or “http://myrouter.local” in the address bar. Log in to the router’s web interface with your credentials. Click on the Wi-Fi Protected Setup option and select the PIN method. Enter the PIN when prompted and save the settings.
5. Asus: Connect your computer to the Asus router via an Ethernet cable and open a web browser. Enter “http://192.168.1.1” or “http://router.asus.com” in the address bar. Log in to the router’s web interface with your username and password. Go to the Wi-Fi Protected Setup section and select the PIN option. Enter the PIN when prompted and apply the settings.
These are just general steps for entering the PIN on popular router brands. It’s worth noting that the exact steps may vary depending on the specific model and firmware version of your router. Refer to the manufacturer’s documentation or online resources for detailed instructions tailored to your router.
By following these steps, you can easily enter the PIN on your wireless router and establish a secure connection with your devices. Remember to take note of any on-screen prompts or instructions during the process to ensure successful completion.
Troubleshooting Common Issues When Entering a PIN
While entering a PIN on your wireless router is usually a straightforward process, you may encounter some common issues along the way. Understanding and troubleshooting these issues will help you overcome any hurdles and successfully enter the PIN. Let’s explore some of the common issues and their solutions:
1. Incorrect PIN: One of the primary issues that users encounter is entering an incorrect PIN. Make sure to double-check the PIN and ensure that it is entered accurately. If you’re not sure about the PIN, refer to the router’s user manual, physical label, or web interface for the correct information.
2. PIN not recognized: If the PIN is not recognized or rejected by the router, try restarting both the router and the device attempting to connect. This can help resolve any temporary glitches that may be causing the issue. If the problem persists, verify that your device is compatible with the router’s PIN authentication system.
3. WPS or PIN option not available: Some routers may not have the WPS or PIN option in their settings. In such cases, check if there are alternative methods for connecting devices securely, such as using a QR code or manually entering the Wi-Fi password.
4. PIN timeout: In certain instances, routers have a limited time window for entering the PIN. If you exceed the time limit, the PIN may expire, and you will need to restart the process. Ensure that you enter the PIN within the specified time frame to avoid any timeout issues.
5. Firmware or software updates: Outdated firmware or device software can sometimes cause compatibility issues when entering the PIN. Check for any available firmware updates for your router and device, as these updates often include bug fixes and security enhancements that can resolve such issues.
6. Wi-Fi interference: Wi-Fi interference from other nearby devices or networks can impact the PIN authentication process. Try moving closer to the router or reducing the distance between the router and the device attempting to connect. Additionally, avoid placing the router near other electronic devices or objects that may cause interference.
By troubleshooting these common issues, you can overcome any obstacles that may arise when entering the PIN on your wireless router. Remember to refer to the manufacturer’s documentation or online resources for specific troubleshooting steps tailored to your router model.
It’s important to note that if you continue to experience difficulties despite troubleshooting, contacting the router manufacturer’s support team can provide you with more advanced assistance to resolve the problem and ensure a successful PIN entry on your router.
Recommended Best Practices for PIN Setup and Maintenance
Setting up and maintaining a strong PIN for your wireless router is essential for protecting your network from unauthorized access. To help you establish a secure PIN and ensure its ongoing effectiveness, we have compiled some recommended best practices:
1. Change the default PIN: When you first set up your router, it may come with a default PIN. It’s crucial to change this default PIN immediately to minimize the risk of unauthorized access. Choose a strong, unique PIN that is not easily guessable or related to personal information.
2. Use a complex combination: Create a PIN that is at least eight characters long and includes a mix of uppercase and lowercase letters, numbers, and special symbols. The more complex and random your PIN, the harder it will be for hackers to guess or crack it.
3. Regularly update your PIN: Just as you update your passwords regularly, it’s important to update your router’s PIN periodically. This will help maintain the security of your network and minimize the risk of unauthorized access. Consider changing your PIN every six to twelve months.
4. Securely store your PIN: It’s essential to keep your PIN stored in a secure and confidential location. Avoid writing it down or storing it in easily accessible places, such as on your computer or in your smartphone. Instead, use a password manager or a physical location that only you can access.
5. Enable PIN lockout: Many routers offer the option to lockout a device from attempting to enter the PIN after a certain number of failed attempts. Enable this feature to prevent brute-force attacks and unauthorized access attempts. Configure the lockout settings according to your preferences and security needs.
6. Regularly update router firmware: Keeping your router’s firmware up to date is crucial for security. Firmware updates often include important security patches and bug fixes that can protect your router from vulnerabilities. Regularly check for firmware updates and install them as soon as they are available.
7. Disable WPS if not in use: If you are not actively using the WPS (Wi-Fi Protected Setup) feature, consider disabling it. WPS can introduce potential security risks, and it is often recommended to disable it unless you specifically require its functionality.
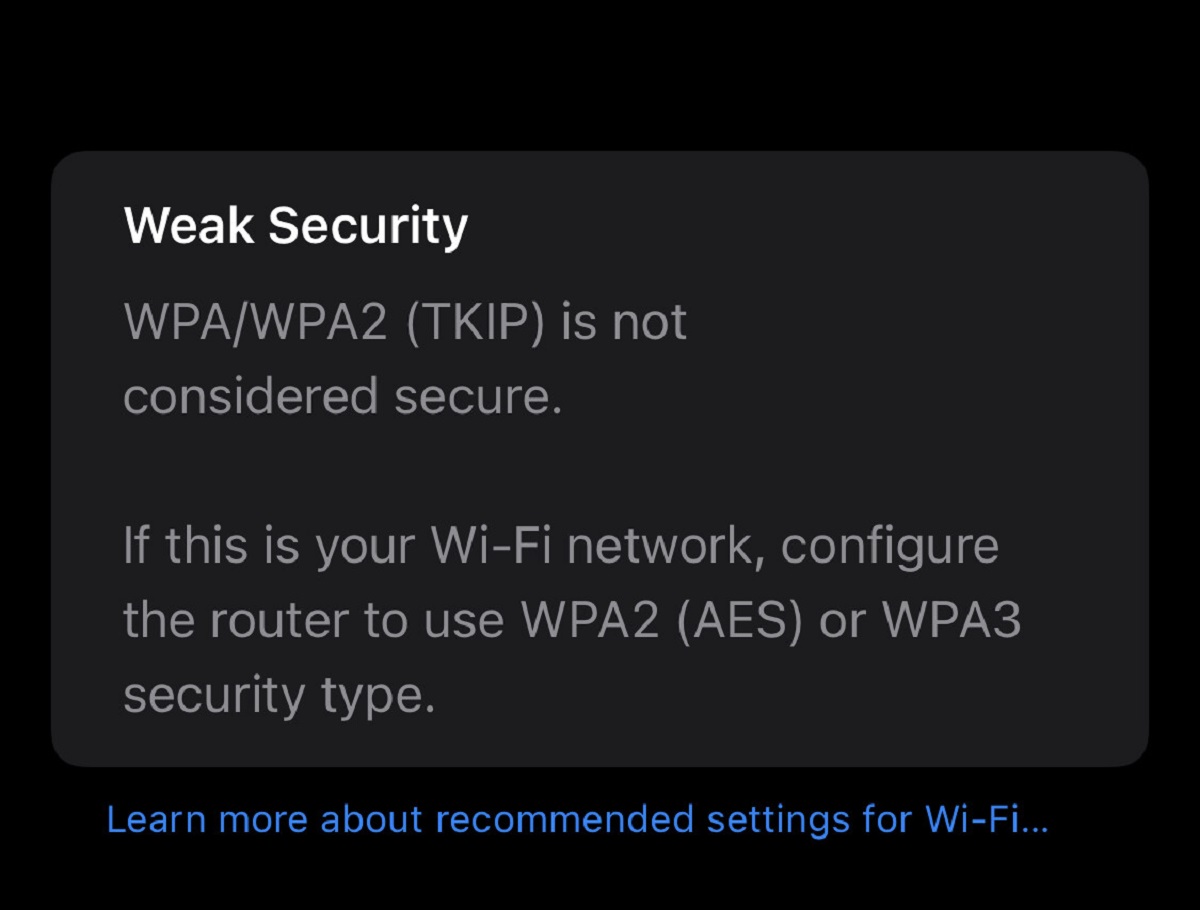
8. Implement additional security measures: In addition to a strong PIN, consider implementing other security measures such as enabling network encryption (WPA2 or WPA3), using a secure Wi-Fi password, and enabling firewall protection. These extra layers of security will further strengthen your network’s defenses.
By following these recommended best practices for PIN setup and maintenance, you can ensure a secure and protected wireless network. Remember that strong security measures are vital for safeguarding your sensitive data and maintaining the privacy of your online activities.
Conclusion
Entering a PIN in your wireless router is an important step in securing your home network from unauthorized access. Understanding the purpose of a PIN and how to effectively enter it on different router brands is crucial for maintaining a secure and reliable connection.
In this article, we explored the significance of a PIN in wireless routers, highlighting its role in providing an additional layer of security to prevent unauthorized access to your network. We also discussed how to identify the location of the PIN on your router, ensuring that you can easily locate it when needed.
Furthermore, we provided step-by-step instructions for entering the PIN on popular router brands, guiding you through the process to establish a secure connection between your devices and the router.
In addition, we addressed common issues that may arise when entering a PIN and provided troubleshooting tips to overcome these challenges. By being aware of these issues and implementing the recommended solutions, you can successfully navigate any obstacles that may occur.
To maintain the security of your wireless network, we emphasized the importance of following recommended best practices for PIN setup and maintenance. By changing the default PIN, using a complex combination, regularly updating your PIN, and enabling additional security measures, you can significantly strengthen the security of your network.
In conclusion, understanding how to enter a PIN in your wireless router and following best practices for security will help ensure the integrity and privacy of your network. By implementing these measures, you can enjoy a secure and reliable connection, protecting your data and minimizing the risk of unauthorized access to your network.