Introduction
Google Chrome is a popular web browser known for its user-friendly interface and extensive range of extensions. However, some users may encounter an issue where unwanted boxes, such as pop-ups or notifications, disrupt their browsing experience. These boxes can be intrusive and distracting, leading to frustration and a less enjoyable online experience. Fortunately, there are several methods to address this issue and restore a seamless browsing environment.
In this article, we will explore effective techniques to remove unwanted boxes from Google Chrome. Whether you are dealing with persistent pop-ups, notifications, or other intrusive elements, the following methods will help you regain control over your browsing experience. By implementing these solutions, you can enjoy a clutter-free and uninterrupted online journey, allowing you to focus on the content that matters most to you.
Let's delve into the step-by-step processes to eliminate these unwanted boxes and reclaim a clean, distraction-free browsing environment. Whether you are a seasoned Chrome user or new to the browser, these methods are designed to be accessible and straightforward, empowering you to take charge of your browsing experience.
Method 1: Removing Boxes from Google Chrome
Unwanted boxes, such as pop-ups and notifications, can disrupt the browsing experience, causing frustration and distraction. Fortunately, there are effective methods to remove these intrusive elements from Google Chrome. Follow these steps to regain control over your browsing environment:
Step 1: Check for Malware
The presence of malware on your system can lead to the appearance of unwanted boxes in your browser. To address this, run a thorough malware scan using reputable antivirus software. Ensure that the software is up to date and perform a comprehensive scan of your system to detect and remove any malicious programs that may be causing the issue.
Step 2: Reset Chrome Settings
Resetting Chrome to its default settings can help eliminate unwanted boxes and restore the browser to its original state. To do this, open Chrome and go to the Settings menu. Scroll down and click on "Advanced" to access additional options. Under the "Reset and clean up" section, select "Restore settings to their original defaults." Follow the prompts to reset Chrome, which can help remove any unwanted boxes and restore the browser's functionality.
Step 3: Update Chrome and Extensions
Outdated versions of Chrome and its extensions can sometimes lead to the appearance of unwanted boxes. Ensure that both Chrome and its extensions are up to date. To update Chrome, click on the three-dot menu in the top-right corner, go to "Help," and select "About Google Chrome." Chrome will automatically check for updates and install them if available. Additionally, review and update your extensions by navigating to the Extensions menu in Chrome's settings and selecting the "Update" option for each extension.
Step 4: Use Chrome Cleanup Tool
Google offers a Chrome Cleanup Tool designed to identify and remove software that may cause problems with Chrome. Download and run the Chrome Cleanup Tool to scan for potentially unwanted software. Follow the tool's prompts to remove any identified threats, which can help eliminate unwanted boxes from your browsing experience.
By following these steps, you can effectively remove unwanted boxes from Google Chrome, restoring a clutter-free and seamless browsing environment. These methods are designed to address various factors that may contribute to the appearance of intrusive elements, empowering you to take control of your browsing experience and enjoy a distraction-free journey on the web.
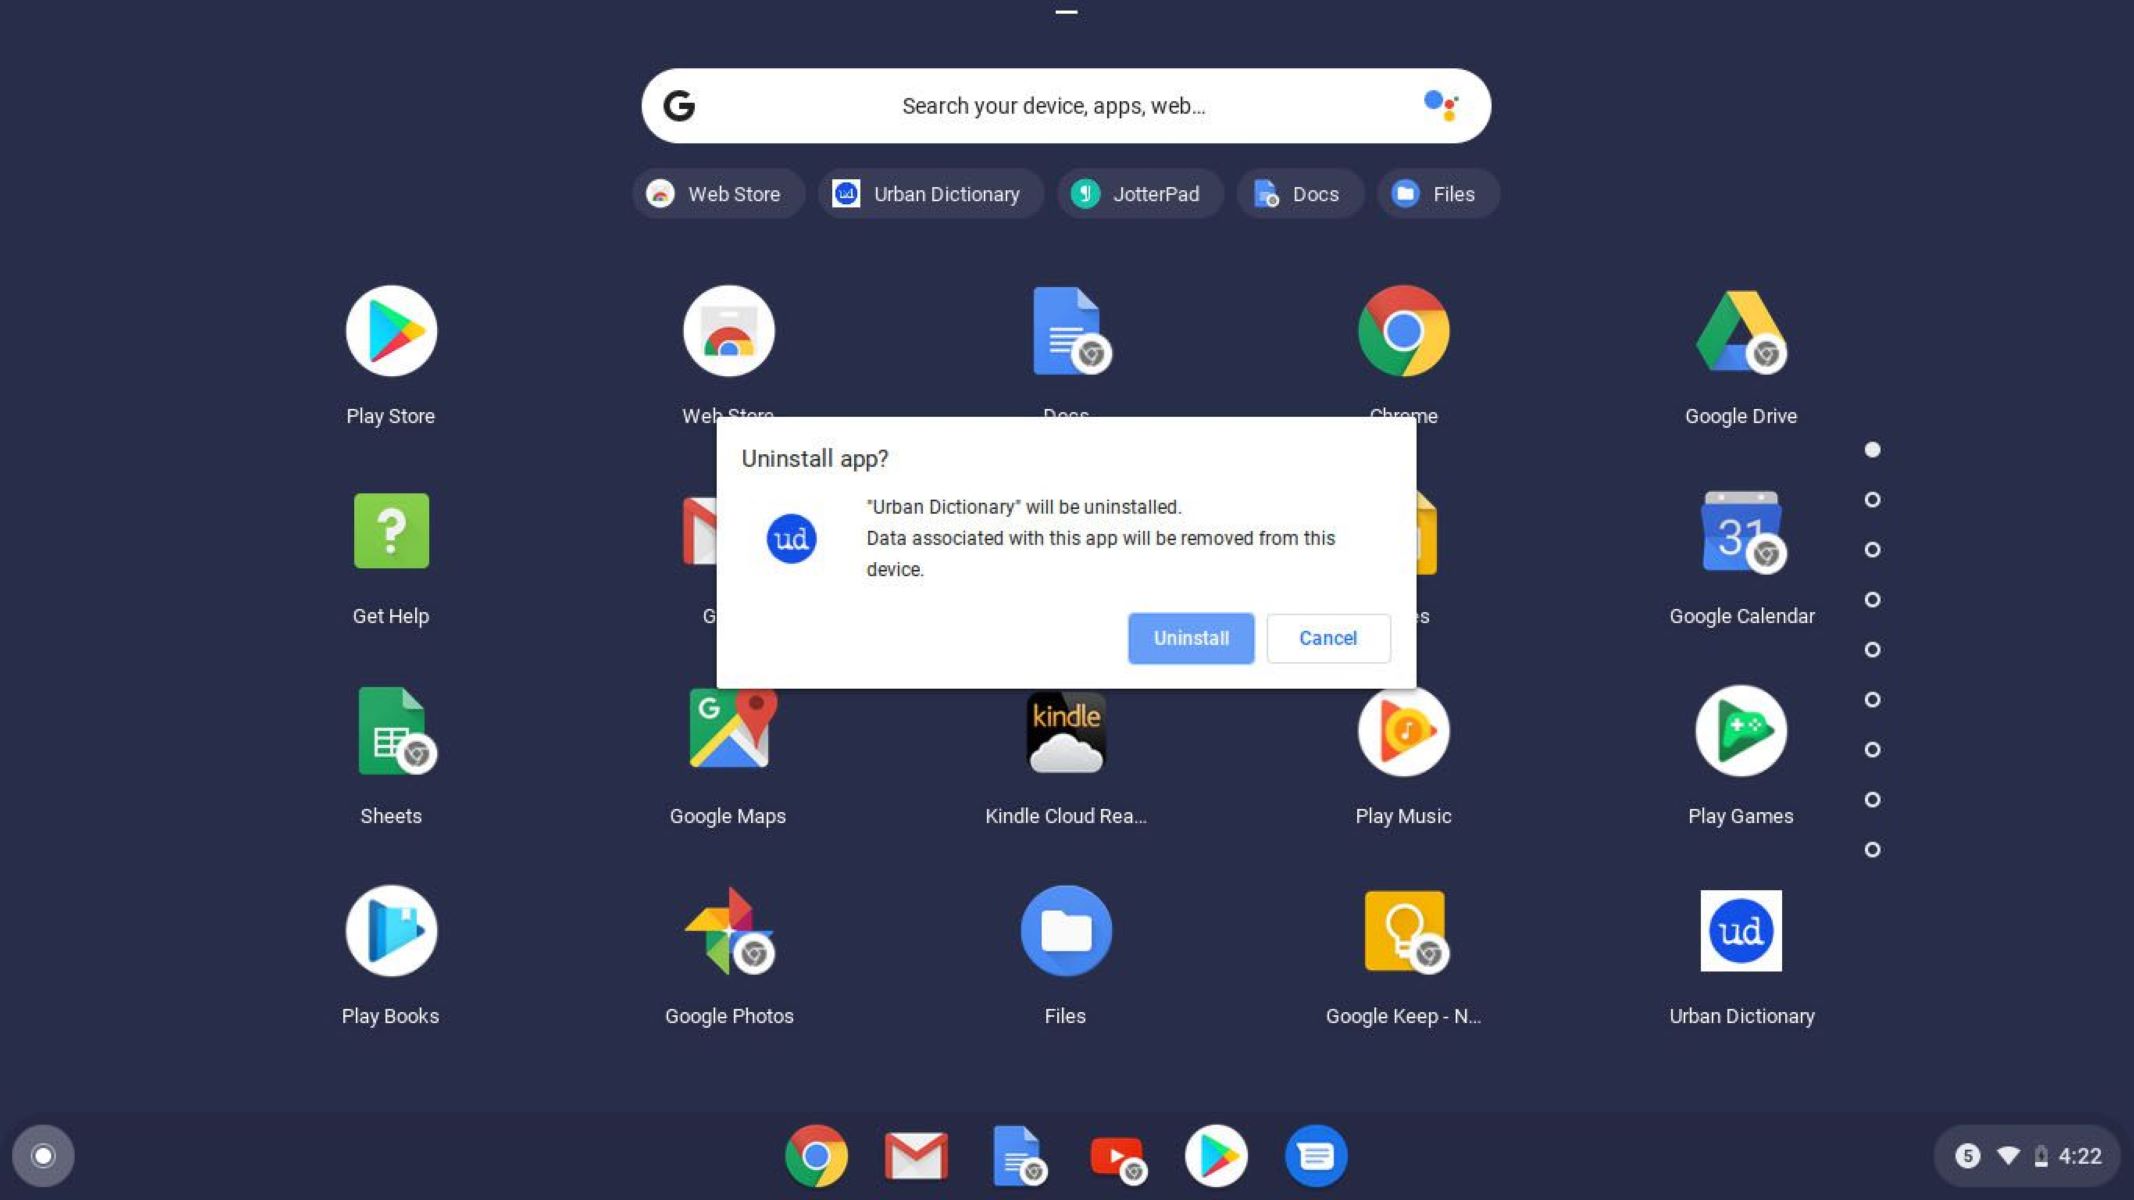
Method 2: Disabling Extensions
Google Chrome's extensive range of extensions offers users a diverse array of functionalities, enhancing their browsing experience. However, certain extensions may inadvertently contribute to the appearance of unwanted boxes, such as pop-ups and notifications, disrupting the seamless flow of web exploration. In such instances, disabling extensions can serve as an effective strategy to regain control over the browsing environment.
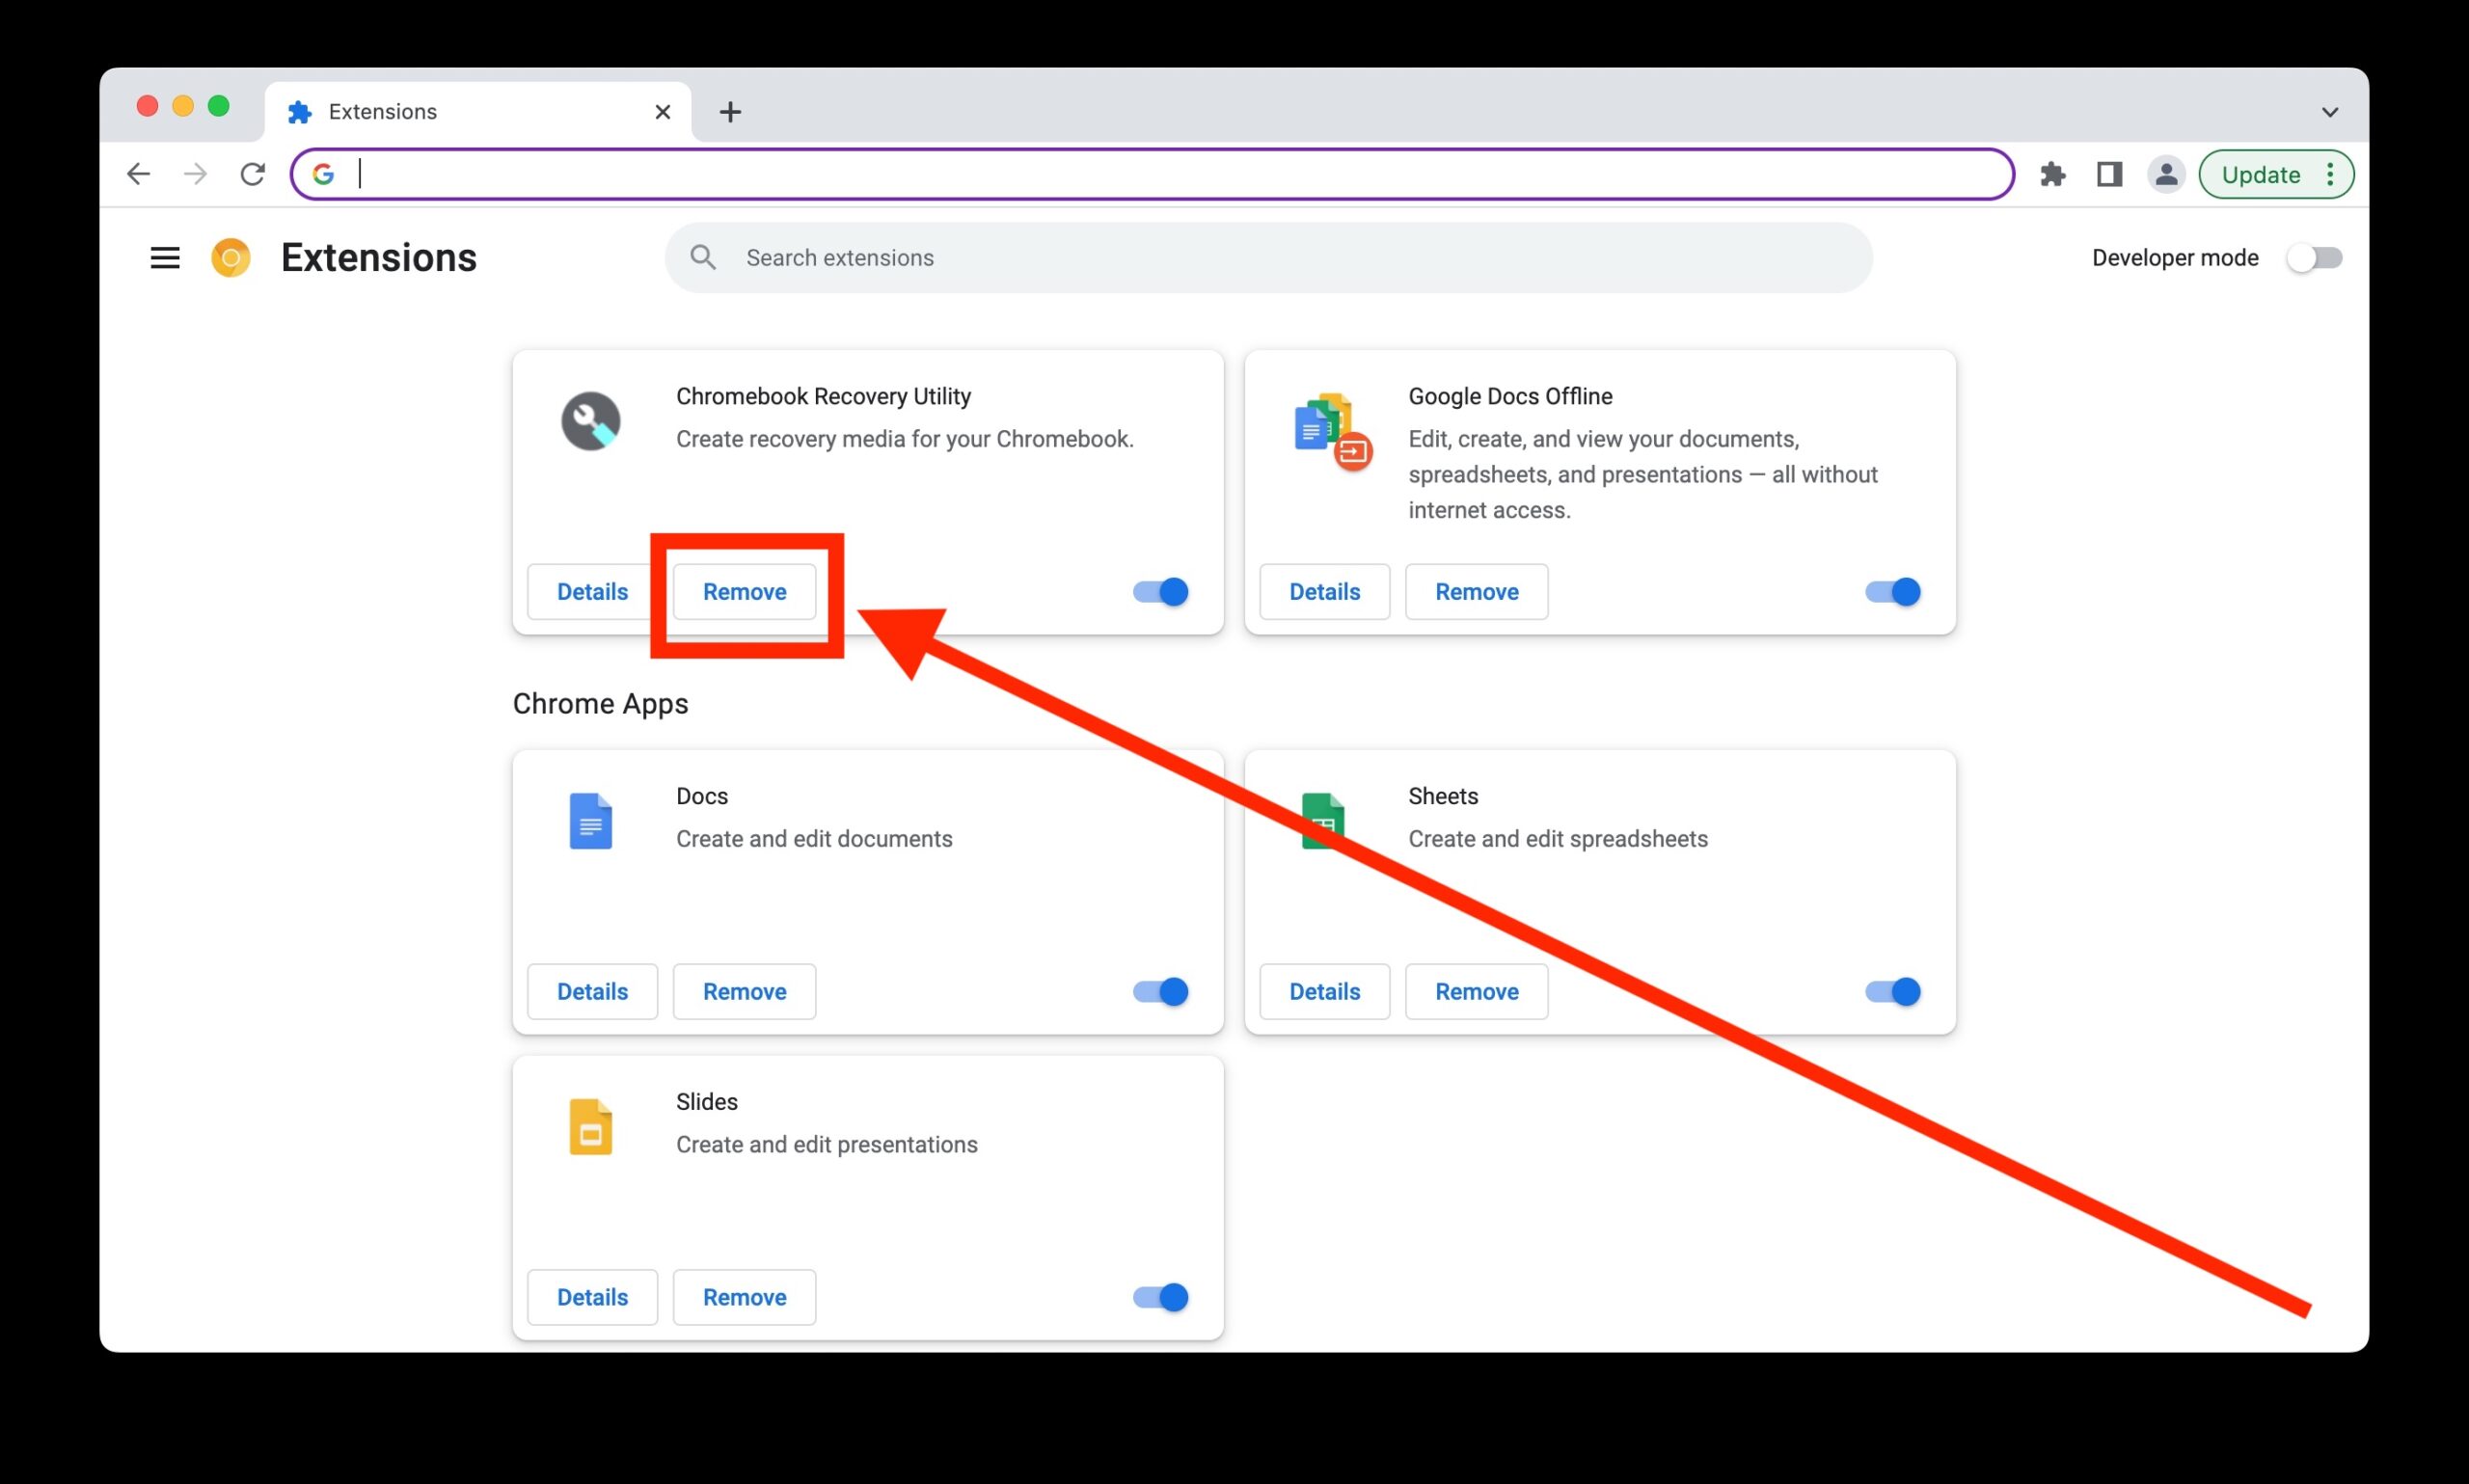
Step 1: Accessing Chrome Extensions
To begin the process of disabling extensions, access the Extensions menu within Google Chrome. This can be achieved by clicking on the three-dot menu in the top-right corner of the browser window and selecting "More tools" followed by "Extensions." Alternatively, you can enter "chrome://extensions/" in the address bar to directly access the Extensions page.
Step 2: Reviewing Installed Extensions
Upon accessing the Extensions page, you will be presented with a list of all installed extensions, each accompanied by a toggle switch to enable or disable the extension. Take a moment to review the list and identify any extensions that may be associated with the appearance of unwanted boxes. Look for extensions that are unfamiliar or those that have recently been installed, as they may be contributing to the issue.
Step 3: Disabling Problematic Extensions
Once you have identified extensions that may be causing the unwanted boxes, proceed to disable them by toggling the switch next to each extension. By disabling the extensions one by one, you can observe the impact on your browsing experience, allowing you to pinpoint the specific extension responsible for the intrusive elements. It is important to note that disabling an extension does not uninstall it, providing the flexibility to re-enable it at a later time if needed.
Step 4: Testing Browsing Experience
After disabling the identified extensions, navigate through various websites and observe the browsing experience. Pay close attention to the absence of unwanted boxes, such as pop-ups and notifications, to determine the effectiveness of the disabled extensions in addressing the issue. By systematically testing the browsing environment, you can gain valuable insights into the impact of individual extensions on your overall experience.
Step 5: Enabling Essential Extensions
While addressing the issue of unwanted boxes, it is essential to differentiate between beneficial and problematic extensions. Once you have identified and disabled the extensions contributing to the intrusive elements, ensure that essential and trusted extensions are re-enabled to restore their functionalities. This step allows you to maintain the benefits of valuable extensions while eliminating the disruptions caused by problematic ones.
By following these steps to disable extensions in Google Chrome, users can effectively address the issue of unwanted boxes, restoring a clutter-free and seamless browsing environment. This method empowers users to take control of their browsing experience, allowing them to enjoy a distraction-free journey on the web.
Method 3: Clearing Browsing Data
Clearing browsing data in Google Chrome can effectively address the presence of unwanted boxes, such as pop-ups and notifications, that may disrupt the browsing experience. Over time, accumulated browsing data, including cookies, cached images and files, and site settings, can contribute to the appearance of intrusive elements. By clearing this data, users can restore their browsing environment to a clean and optimized state, free from unwanted disruptions.
Step 1: Accessing Chrome Settings
To initiate the process of clearing browsing data, access the Settings menu in Google Chrome. This can be accomplished by clicking on the three-dot menu in the top-right corner of the browser window and selecting "Settings." Alternatively, you can enter "chrome://settings/" in the address bar to directly access the Settings page.
Step 2: Navigating to Browsing Data Settings
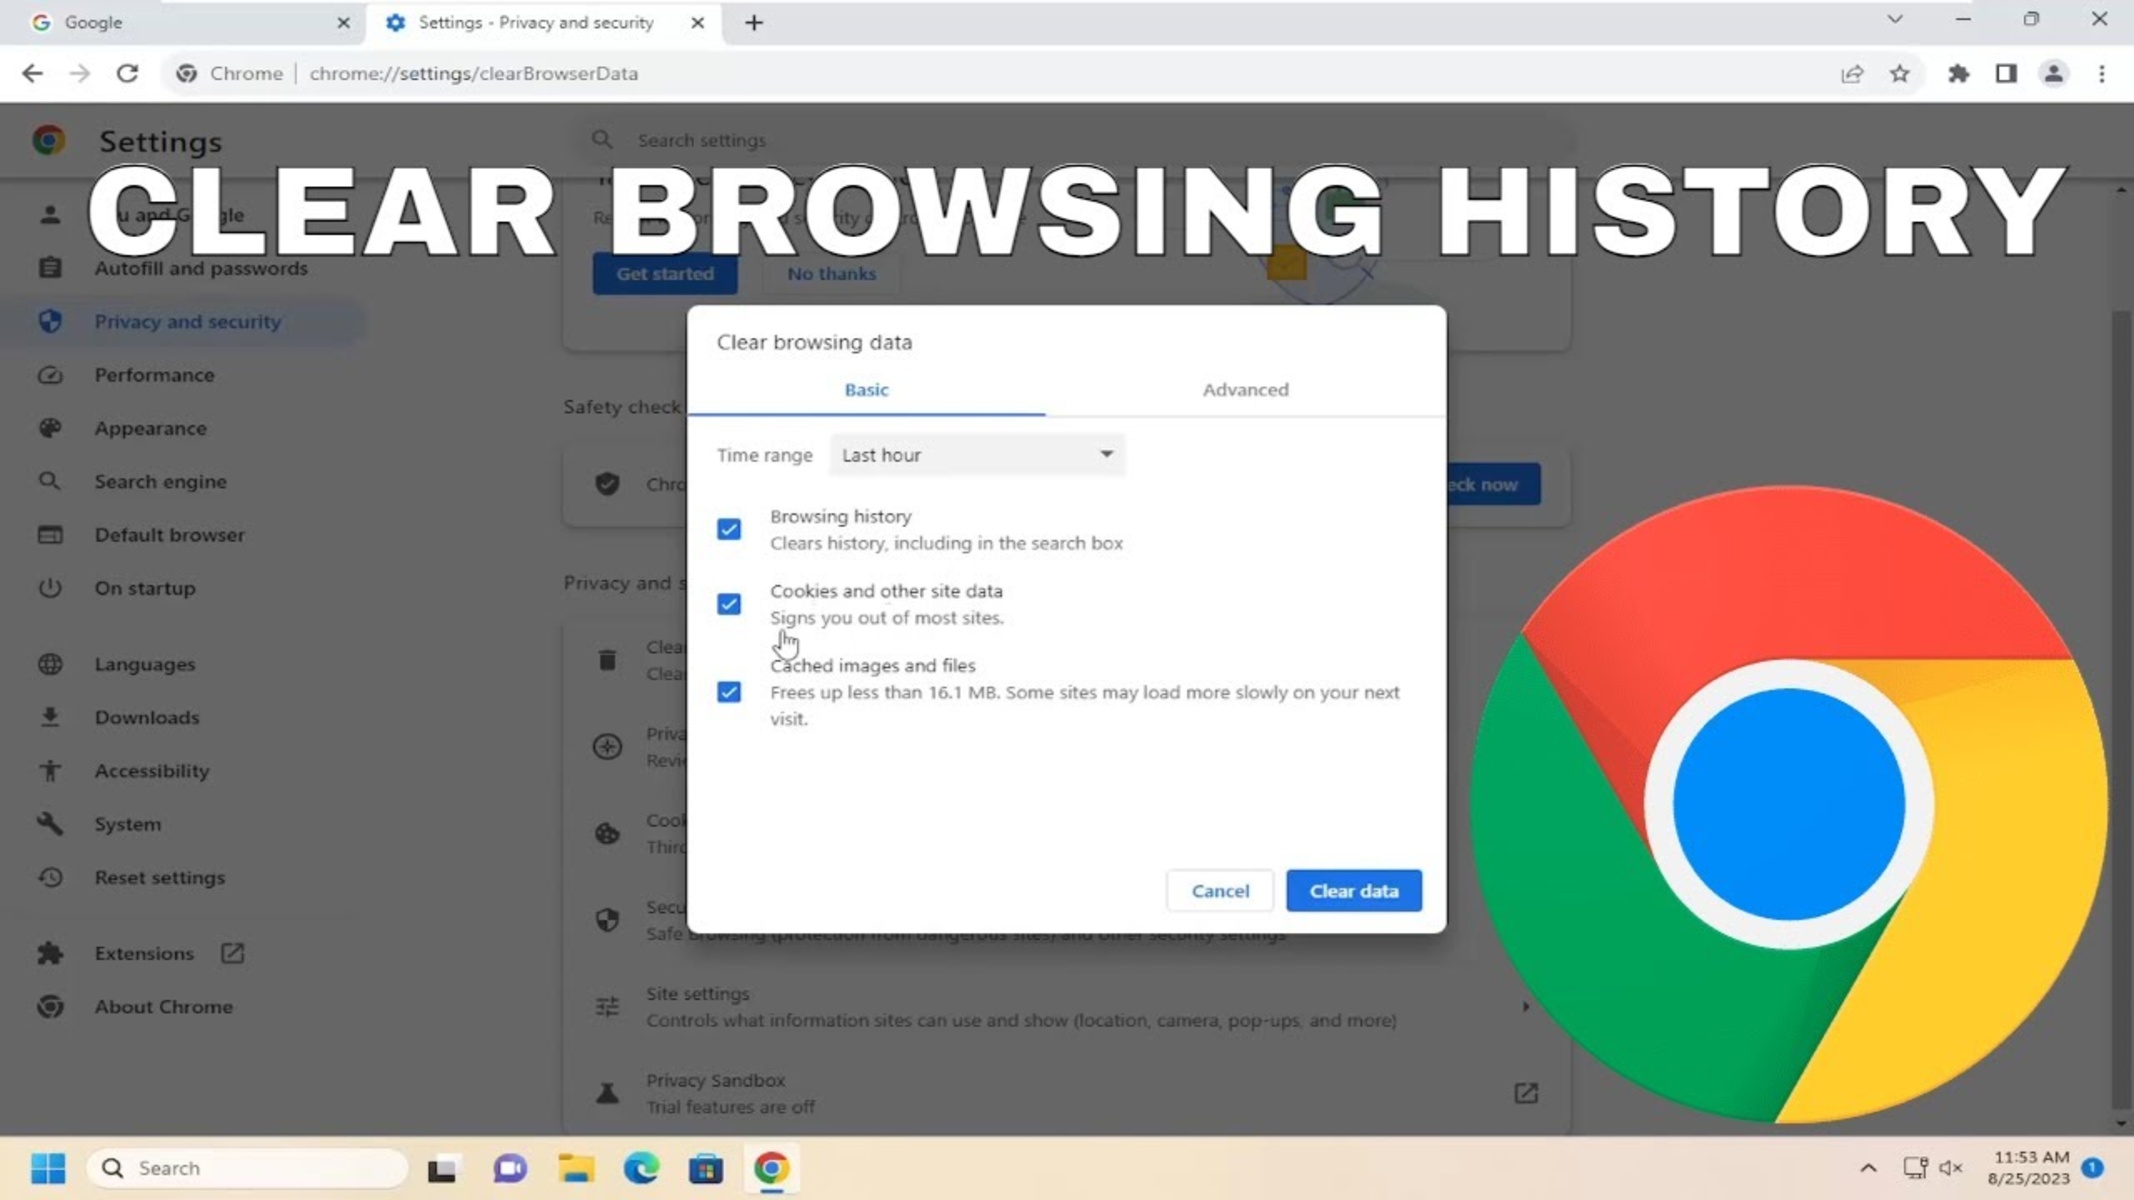
Within the Settings menu, scroll down and click on "Privacy and security" to access additional options related to browsing data. Under the "Privacy and security" section, select "Clear browsing data." This action will direct you to the "Clear browsing data" page, where you can customize the data clearing process according to your preferences.
Step 3: Customizing Data Clearing Options
Upon reaching the "Clear browsing data" page, you will be presented with a range of data clearing options, including browsing history, cookies and other site data, cached images and files, and more. Customize the data clearing process by selecting the specific types of data you wish to remove. For addressing the issue of unwanted boxes, it is recommended to focus on clearing cookies, cached images and files, and site settings.
Step 4: Selecting Time Range
Chrome provides the flexibility to choose the time range for which the browsing data will be cleared. Users can select options such as "Last hour," "Last 24 hours," "Last 7 days," "Last 4 weeks," and "All time." Depending on the frequency and duration of encountering unwanted boxes, users can choose an appropriate time range to ensure comprehensive data clearing.
Step 5: Initiating Data Clearing Process
After customizing the data clearing options and selecting the desired time range, proceed to initiate the data clearing process by clicking on the "Clear data" button. Chrome will then proceed to remove the selected browsing data, optimizing the browser's performance and addressing the presence of unwanted boxes.
By following these steps to clear browsing data in Google Chrome, users can effectively eliminate the factors contributing to the appearance of unwanted boxes, restoring a clutter-free and seamless browsing environment. This method empowers users to take proactive measures in optimizing their browsing experience, ensuring a distraction-free journey on the web.
Conclusion
In conclusion, addressing the presence of unwanted boxes in Google Chrome is essential for restoring a seamless and distraction-free browsing experience. By implementing the methods outlined in this article, users can effectively regain control over their browsing environment and eliminate the disruptions caused by intrusive elements such as pop-ups and notifications.
The first method focused on removing unwanted boxes from Google Chrome by addressing potential factors contributing to their appearance. By checking for malware, resetting Chrome settings, updating the browser and its extensions, and utilizing the Chrome Cleanup Tool, users can systematically address various underlying causes and restore the browser to its optimal state.
Disabling extensions emerged as a practical strategy for addressing the issue of unwanted boxes. By carefully reviewing and disabling problematic extensions while ensuring the retention of essential ones, users can customize their browsing environment to align with their preferences and eliminate disruptions caused by intrusive elements.
Clearing browsing data in Google Chrome was highlighted as a proactive measure to address the presence of unwanted boxes. By customizing the data clearing process and removing accumulated browsing data, users can optimize the browser's performance and eliminate factors contributing to the appearance of intrusive elements, ensuring a clutter-free browsing experience.
Incorporating these methods into one's browsing routine empowers users to take proactive measures in maintaining a clean and distraction-free browsing environment. Whether encountering persistent pop-ups, notifications, or other intrusive elements, the outlined methods provide accessible and effective solutions for addressing these disruptions in Google Chrome.
By following the step-by-step processes outlined in this article, users can navigate through their online journeys with enhanced control and a renewed focus on the content that matters most to them. These methods are designed to be accessible to users of all levels of experience, empowering them to take charge of their browsing environment and enjoy a seamless and uninterrupted web exploration.
In conclusion, the methods presented in this article offer practical and effective solutions for removing unwanted boxes from Google Chrome, ultimately enabling users to reclaim a clutter-free and optimized browsing experience.