Introduction
Google Chrome is one of the most popular web browsers, known for its speed, simplicity, and user-friendly interface. It offers a wide range of features and functionalities, including the ability to enhance browsing experiences through the use of plugins. Chrome plugins, also known as extensions, are small software programs that can modify and enhance the functionality of the Chrome browser. These plugins can add new features, improve productivity, and customize the browsing experience to suit individual preferences.
Enabling Chrome plugins allows users to access a plethora of tools and resources that can significantly improve their online activities. Whether it's for productivity, entertainment, security, or utility, Chrome plugins offer a diverse array of options to cater to various needs. From ad blockers and password managers to language translators and productivity tools, the Chrome Web Store is brimming with a wide selection of plugins to explore.
In this guide, we will walk you through the process of enabling Chrome plugins, providing you with the necessary steps to unlock the full potential of your browsing experience. By following these simple instructions, you will be able to harness the power of Chrome plugins and tailor your browsing experience to align with your specific requirements and interests. So, let's dive in and discover how to enable Chrome plugins to unlock a world of possibilities within your browser.
Step 1: Open Chrome Settings
To begin the process of enabling Chrome plugins, the first step is to open the Chrome browser settings. This simple yet crucial step sets the stage for accessing the configuration options necessary to manage and enable plugins. Here's how to navigate to the Chrome settings:
-
Launch Google Chrome: Start by opening the Chrome browser on your computer. You can do this by clicking on the Chrome icon located on your desktop or by searching for "Chrome" in the Start menu or application launcher.
-
Access the Menu: Once Chrome is open, look for the three vertical dots, also known as the "More" icon, located in the top-right corner of the browser window. Click on this icon to reveal a dropdown menu.
-
Open Settings: Within the dropdown menu, navigate to and click on the "Settings" option. This will open a new tab in the Chrome browser, displaying the various settings and customization options available.
By following these simple steps, you will successfully access the Chrome settings, laying the groundwork for the subsequent actions required to enable plugins. With the Chrome settings now accessible, you are ready to proceed to the next step in the process of enabling Chrome plugins.
Opening the Chrome settings is a fundamental aspect of customizing and optimizing the browsing experience. It serves as the gateway to a wide range of configuration options, allowing users to personalize their browser preferences, manage extensions, and access additional features. Whether it's adjusting privacy settings, managing passwords, or enabling plugins, the Chrome settings provide a centralized hub for tailoring the browser to suit individual needs and preferences.
Now that you have successfully opened the Chrome settings, you are one step closer to unlocking the full potential of your browsing experience by enabling and managing Chrome plugins. With the groundwork laid, it's time to proceed to the next step and continue the journey toward harnessing the power of Chrome plugins to enhance your browsing activities.
Step 2: Click on Advanced Settings
After successfully accessing the Chrome settings, the next crucial step in enabling Chrome plugins is to navigate to the advanced settings. This pivotal stage in the process provides access to additional configuration options, including those related to plugins and extensions. Here's a detailed guide on how to click on advanced settings and unlock the next phase of enabling Chrome plugins:
-
Locate the Advanced Settings: Within the Chrome settings tab, scroll down to the bottom of the page to reveal the "Advanced" option. Click on "Advanced" to expand the settings menu and unveil a wealth of additional customization options.
-
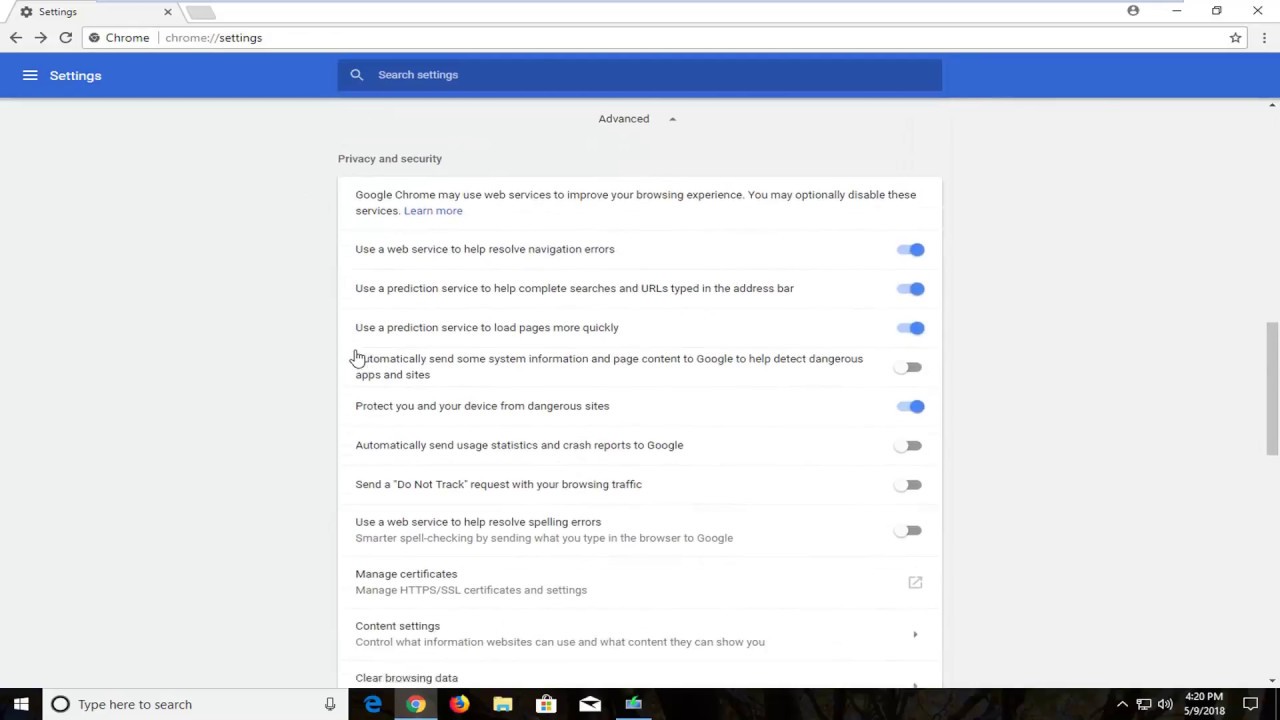
Explore Advanced Settings: Upon clicking on "Advanced," a range of advanced settings and configurations will be displayed. These settings encompass various aspects of the Chrome browser, including privacy and security, accessibility, system configurations, and more. It is within this section that users can delve into the finer details of browser customization and access the specific settings related to enabling and managing plugins.
-
Navigate to Content Settings: Within the advanced settings menu, locate and click on "Privacy and security" to reveal a submenu of options. From the submenu, select "Site settings" to access a comprehensive array of controls related to website permissions, content settings, and plugins.
-
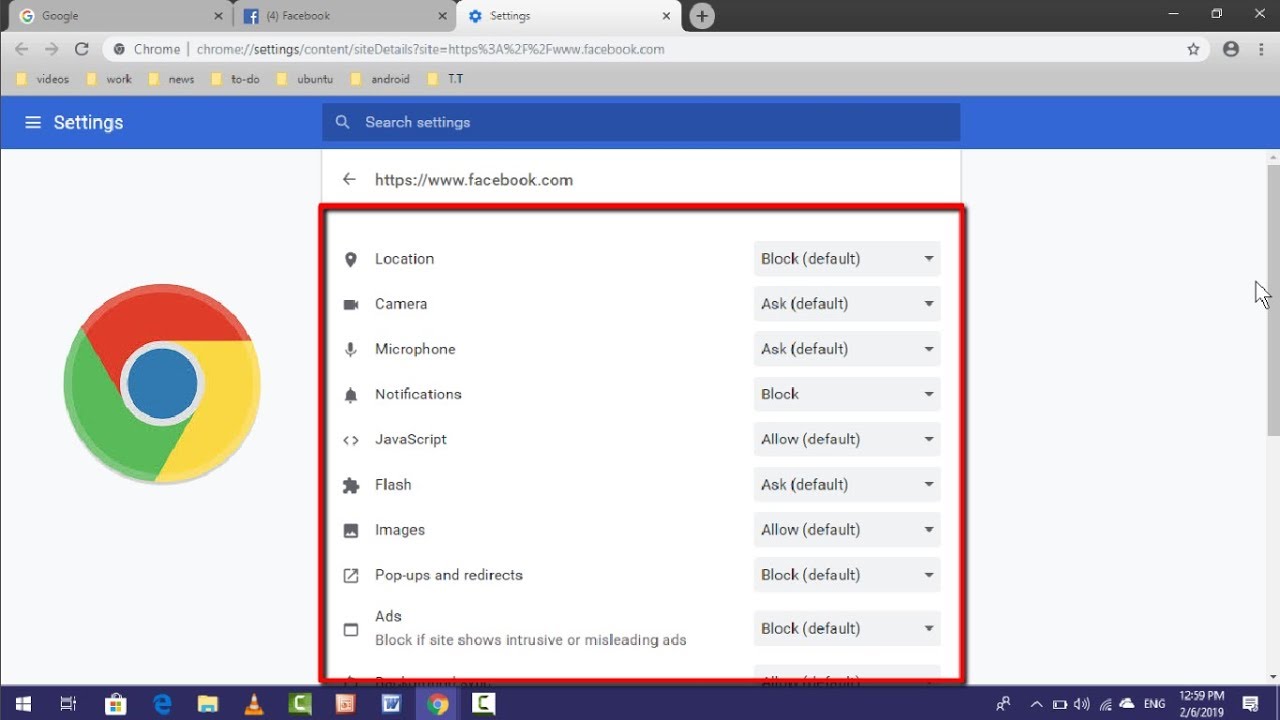
Access Plugins Settings: Within the "Site settings" menu, locate the "Plugins" option. Clicking on "Plugins" will lead you to the dedicated settings page where you can manage and customize the behavior of plugins within the Chrome browser.
By following these steps, you will successfully navigate to the advanced settings within the Chrome browser, gaining access to a wealth of customization options, including those related to enabling and managing plugins. This pivotal stage sets the stage for the subsequent actions required to enable specific plugins and tailor their behavior to align with your browsing preferences and requirements.
Accessing the advanced settings in Chrome empowers users to delve deeper into the intricacies of browser customization, privacy management, and plugin control. It serves as a gateway to a myriad of options, allowing users to fine-tune their browsing experience and optimize the behavior of plugins to suit their individual needs.
With the advanced settings now within reach, you are poised to embark on the next phase of enabling Chrome plugins, where you will have the opportunity to customize and manage the behavior of plugins to enhance your browsing activities.
Step 3: Enable Plugins
Enabling plugins in the Chrome browser is a pivotal step that empowers users to harness the full potential of these versatile software add-ons. By enabling plugins, users can access a myriad of tools and functionalities that can enhance their browsing experience, improve productivity, bolster security, and cater to a diverse range of needs. Here's a comprehensive guide on how to enable plugins in Chrome, unlocking a world of possibilities within your browser.
-
Access Plugins Settings: After navigating to the advanced settings as outlined in the previous step, the next crucial action is to access the plugins settings within the Chrome browser. Once within the advanced settings menu, locate and click on "Privacy and security," followed by "Site settings." Within the "Site settings" menu, select "Plugins" to access the dedicated settings page where you can manage and customize the behavior of plugins within the Chrome browser.
-
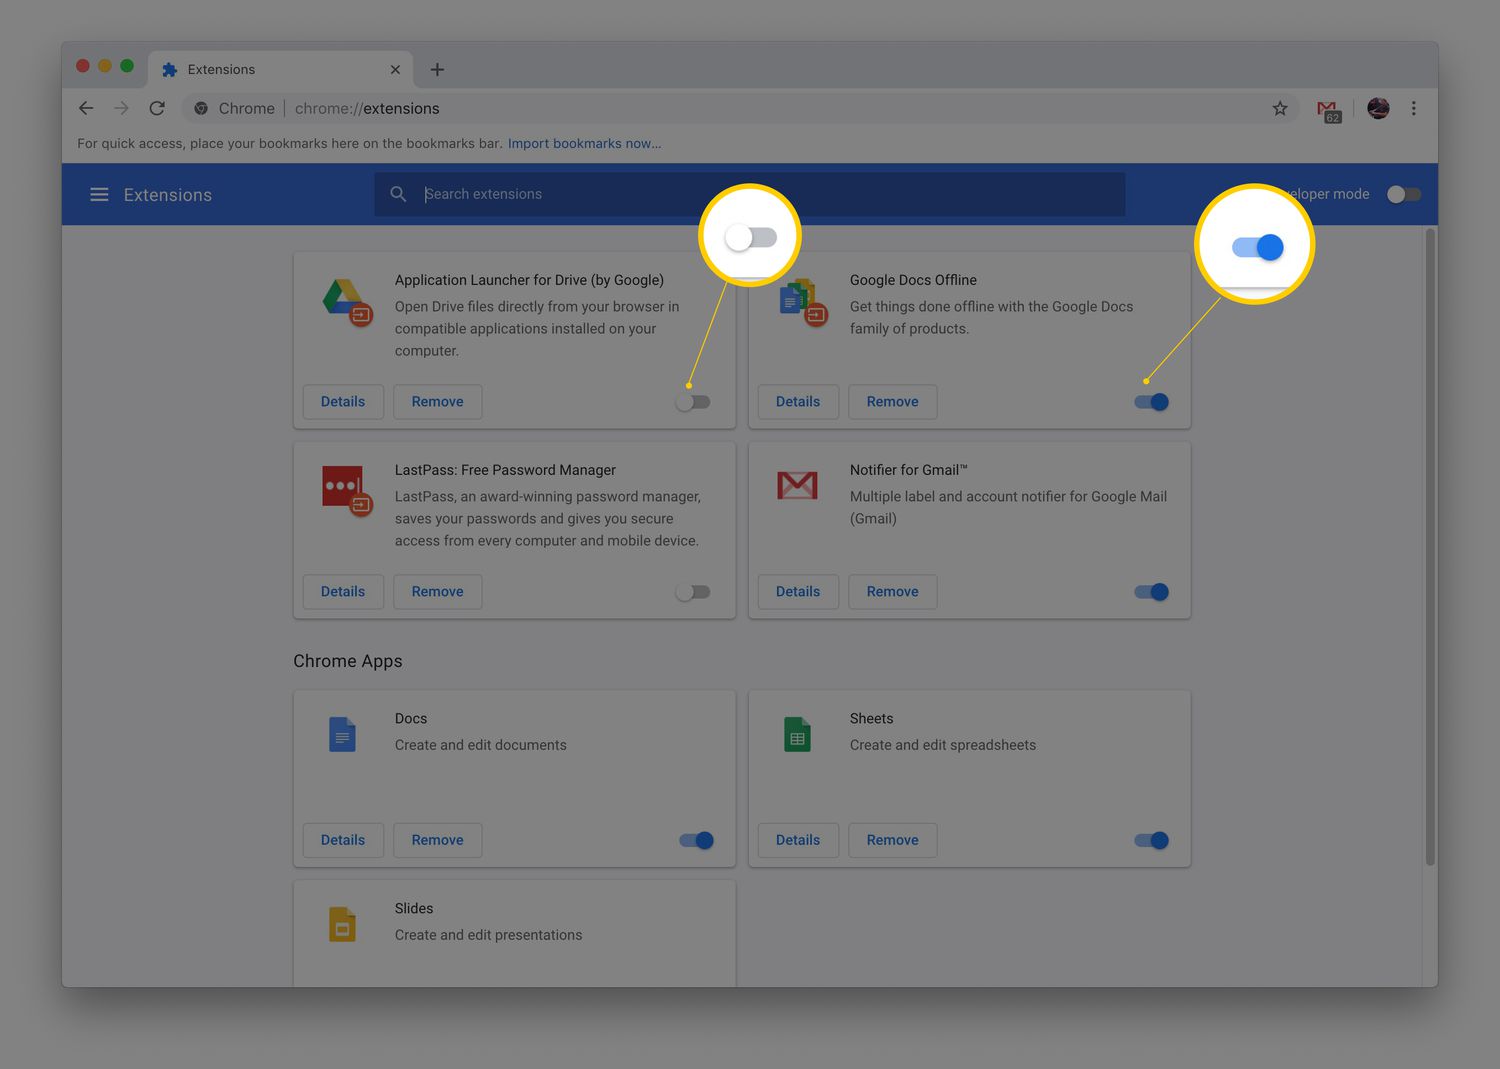
Enable Plugins: Within the plugins settings page, you will find the option to enable or disable plugins. Toggle the switch to enable plugins, granting them the ability to run and interact with the content on websites. Enabling plugins allows you to leverage their functionalities and access the diverse array of tools and resources they offer.
-
Customize Plugin Behavior: In addition to enabling plugins, the settings page provides the flexibility to customize the behavior of individual plugins. Users can choose to allow specific plugins to run automatically, block certain plugins, or set preferences for how plugins interact with different websites. This level of customization empowers users to tailor their browsing experience and optimize the behavior of plugins to align with their preferences and requirements.
By following these steps, you will successfully enable plugins within the Chrome browser, unlocking a wealth of possibilities to enhance your browsing activities. Whether it's accessing productivity tools, ad blockers, language translators, or security enhancements, enabling plugins opens the door to a diverse ecosystem of software add-ons designed to enrich and personalize the browsing experience.
Enabling plugins in Chrome is a pivotal step that empowers users to tailor their browsing experience, access valuable tools and resources, and optimize the functionality of the browser to suit their individual needs. With plugins enabled, users can explore a vast selection of options to enhance productivity, bolster security, and customize their browsing activities, ultimately transforming their Chrome browser into a personalized and powerful tool for navigating the digital landscape.
Step 4: Manage Individual Plugins
Managing individual plugins within the Chrome browser provides users with a high degree of control and customization over the behavior and functionality of specific plugins. This granular level of management empowers users to tailor their browsing experience, optimize performance, and ensure that plugins align with their preferences and requirements. Here's a detailed exploration of how to manage individual plugins in Chrome, unlocking the ability to fine-tune the behavior of each plugin to suit your specific needs.
-
Access Plugin Management: After enabling plugins as outlined in the previous steps, managing individual plugins involves accessing the dedicated plugin management interface within the Chrome browser. To do this, navigate back to the Chrome settings and locate the "Extensions" or "Plugins" section. Clicking on this section will lead you to a comprehensive list of all installed plugins, each accompanied by a set of customizable options and controls.
-
Review Installed Plugins: Upon accessing the plugin management interface, you will be presented with a list of all installed plugins, each accompanied by relevant details such as the plugin name, description, and current status. This overview allows users to gain insights into the installed plugins and their respective functionalities, providing a clear understanding of the plugins present within the browser environment.
-
Customize Plugin Settings: Within the plugin management interface, users have the ability to customize the settings and behavior of individual plugins. This includes options to enable or disable specific plugins, configure automatic activation on certain websites, adjust permissions, and explore additional settings offered by each plugin. By customizing these settings, users can ensure that plugins operate in alignment with their browsing preferences and requirements.
-
Update and Remove Plugins: In addition to customizing settings, the plugin management interface provides the ability to update and remove plugins as needed. Users can check for updates to ensure that plugins are running the latest versions, benefiting from enhanced features and security patches. Furthermore, the option to remove unwanted or obsolete plugins is available, allowing users to declutter their browser environment and optimize performance.
-
Explore Additional Plugin Options: The plugin management interface may also offer additional options and features specific to certain plugins. This could include advanced settings, customization tools, or access to plugin-specific resources. Exploring these additional options allows users to delve deeper into the capabilities of individual plugins and leverage their full potential to enhance the browsing experience.
By effectively managing individual plugins within the Chrome browser, users can fine-tune their browsing experience, optimize performance, and ensure that plugins align with their specific needs and preferences. This level of control empowers users to curate a personalized browsing environment, leveraging the diverse functionalities offered by plugins to enhance productivity, bolster security, and tailor the browsing experience to suit individual requirements.
Conclusion
In conclusion, the process of enabling and managing Chrome plugins is a pivotal aspect of customizing and optimizing the browsing experience. By following the steps outlined in this guide, users can unlock a world of possibilities within their Chrome browser, harnessing the power of plugins to enhance productivity, bolster security, and personalize their online activities.
Enabling Chrome plugins opens the door to a diverse ecosystem of software add-ons, offering a wide array of tools and resources to cater to various needs. From ad blockers and password managers to language translators and productivity tools, the Chrome Web Store is brimming with options to enrich the browsing experience. By enabling plugins, users can access these valuable resources, tailoring their browsing environment to align with their specific requirements and interests.
Furthermore, the ability to manage individual plugins provides users with a high degree of control and customization over the behavior and functionality of specific plugins. This granular level of management empowers users to fine-tune their browsing experience, optimize performance, and ensure that plugins operate in alignment with their preferences and requirements. By customizing plugin settings, updating and removing plugins as needed, and exploring additional plugin options, users can curate a personalized browsing environment that reflects their unique needs and preferences.
The Chrome browser, renowned for its speed, simplicity, and user-friendly interface, becomes even more powerful and versatile with the integration of plugins. Whether it's streamlining workflows, enhancing security, or accessing specialized tools, enabling and managing Chrome plugins empowers users to tailor their browsing experience to suit their individual needs.
In essence, the process of enabling and managing Chrome plugins is a gateway to a world of customization, productivity, and personalization within the browser environment. By leveraging the diverse functionalities offered by plugins, users can transform their Chrome browser into a personalized and powerful tool for navigating the digital landscape. With the knowledge and understanding gained from this guide, users are well-equipped to embark on a journey of exploration and customization, harnessing the full potential of Chrome plugins to enhance their online activities.