Introduction
When browsing the web, your browser history accumulates a record of the websites you've visited, the searches you've conducted, and the cookies stored by various websites. While this history can be a convenient way to revisit previously viewed pages or retrieve important information, there are times when you may want to clear this data for privacy or security reasons. Whether you're using Google Chrome on your computer or mobile device, the process of deleting your browsing history is straightforward and can be completed in just a few simple steps.
In this guide, we'll walk you through the process of deleting your browsing history in Google Chrome, providing clear and easy-to-follow instructions for both desktop and mobile users. By the end of this tutorial, you'll have a clear understanding of how to remove your browsing history, cookies, and other site data from your Chrome browser, allowing you to maintain your privacy and keep your browsing experience fresh and clutter-free.
Now, let's dive into the step-by-step process of clearing your browsing data in Google Chrome, ensuring that you can confidently manage your online footprint and maintain control over your digital privacy. Whether you're looking to clear your entire browsing history or selectively remove specific data, this guide will equip you with the knowledge and tools to effectively manage your browsing history in Chrome.
Step 1: Open Chrome Browser
To begin the process of deleting your browsing history in Google Chrome, the first step is to open the Chrome browser on your device. Whether you're using a desktop computer, laptop, or mobile device, accessing the Chrome browser is the initial action required to initiate the clearing of your browsing data.
If you're using a desktop or laptop, you can launch the Chrome browser by locating its icon on your desktop, taskbar, or in the applications folder of your operating system. Simply double-click on the Chrome icon to open the browser window.
For mobile users, accessing the Chrome browser may involve navigating to your device's home screen or app drawer, locating the Chrome app icon, and tapping on it to launch the browser.
Once the Chrome browser is open, you'll be greeted by the familiar interface, featuring the address bar, tabs for your open web pages, and the Chrome menu located in the top-right corner of the window. This menu, represented by three vertical dots, provides access to a range of browser functions and settings, including the option to manage your browsing history and clear your data.
By successfully opening the Chrome browser, you've completed the first step in the process of deleting your browsing history. With the browser now accessible, you're ready to proceed to the next step and navigate to the history section, where you can manage and clear your browsing data.
Now that you've successfully opened the Chrome browser, let's move on to the next step and delve into the process of accessing your browsing history within the browser interface.
Step 2: Access History
Once you have successfully opened the Chrome browser, the next step is to access your browsing history. This allows you to view the list of websites you've visited and enables you to proceed with the process of clearing your browsing data.
To access your browsing history in Google Chrome, you can follow these simple steps:
Desktop and Laptop Users:
-
Using the Address Bar: Click on the address bar at the top of the Chrome window. You can do this by left-clicking on the address bar, or by pressing "Ctrl + H" on your keyboard. This keyboard shortcut is a quick way to access your browsing history directly.
-
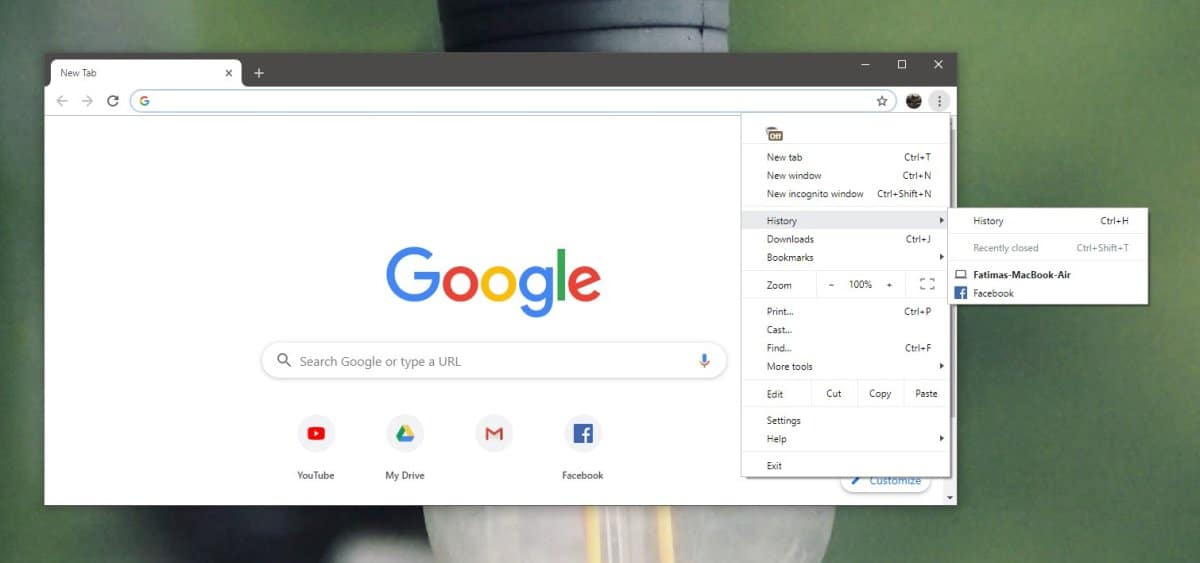
Navigating the Menu: Alternatively, you can access your browsing history by clicking on the Chrome menu, represented by three vertical dots in the top-right corner of the window. From the menu, select "History." This will open a new tab displaying your complete browsing history, organized by date and time.
-
Direct Link: You can also directly access your browsing history by entering "chrome://history/" in the address bar and pressing "Enter." This will take you directly to the history page, where you can view and manage your browsing history.
Mobile Users:
-
Opening the Menu: Tap on the three-dot menu icon located in the top-right corner of the Chrome app to open the browser menu.
-
Selecting History: From the menu, tap on "History." This will navigate you to a new page displaying your browsing history, allowing you to proceed with managing your browsing data.
By following these steps, you can easily access your browsing history within the Chrome browser interface, regardless of whether you're using a desktop, laptop, or mobile device. Once you've successfully accessed your browsing history, you're ready to move on to the next step and begin the process of clearing your browsing data.
Now that you've learned how to access your browsing history in Google Chrome, let's proceed to the next step and explore the process of clearing your browsing data to maintain your privacy and optimize your browsing experience.
Step 3: Clear Browsing Data
Once you have accessed your browsing history in Google Chrome, the next crucial step is to clear your browsing data. This process allows you to remove specific elements from your browsing history, including cookies, cached images and files, and other site data. By clearing this data, you can enhance your privacy, free up storage space, and ensure a streamlined browsing experience.
To clear your browsing data in Google Chrome, follow these simple steps:
Desktop and Laptop Users:
- Accessing the Menu: Click on the Chrome menu, represented by three vertical dots in the top-right corner of the window.
- Selecting More Tools: From the menu, hover over "More tools" to reveal additional options.
- Choosing Clear Browsing Data: Click on "Clear browsing data" from the expanded menu. This action will open a new tab or window dedicated to managing your browsing data.
Mobile Users:
- Opening the Menu: Tap on the three-dot menu icon located in the top-right corner of the Chrome app to open the browser menu.
- Navigating to Settings: From the menu, tap on "Settings" to access the browser settings.
- Selecting Privacy: Tap on "Privacy" to reveal privacy-related options.
- Choosing Clear Browsing Data: Tap on "Clear browsing data" to initiate the process of managing your browsing data.
Upon reaching the "Clear browsing data" section, you will be presented with a range of options to customize the data you wish to remove. These options typically include the ability to clear browsing history, cookies, cached images and files, download history, and more. You can also specify the time range for which you want to clear the data, providing flexibility in managing your browsing history.
After customizing your preferences, click on the "Clear data" or "Clear browsing data" button to initiate the deletion process. Chrome will then proceed to remove the selected browsing data based on your preferences, effectively clearing your browsing history and associated site data.
By following these straightforward steps, you can efficiently clear your browsing data in Google Chrome, empowering you to maintain your privacy and optimize your browsing experience. Whether you're using a desktop, laptop, or mobile device, the process of clearing your browsing data remains consistent, allowing you to take control of your digital footprint with ease.
Step 4: Choose Time Range
After accessing the "Clear browsing data" section in Google Chrome, you are presented with the option to choose the time range for which you want to clear your browsing data. This feature provides you with flexibility and control over the data removal process, allowing you to target specific periods of your browsing history.
When selecting the time range, you have several options to consider:
-
Last Hour: Choosing this option will clear the browsing data accumulated within the past hour. This is useful if you only want to remove recent browsing activity while retaining older history.
-
Last 24 Hours: Selecting this time range will clear the browsing data from the last 24 hours, providing a slightly broader scope than the "Last Hour" option.
-
Last 7 Days: Opting for this time range will remove browsing data accumulated over the past week, offering a more comprehensive clearance of recent history.
-
Last 4 Weeks: This option allows you to clear browsing data from the last four weeks, providing a month-long perspective on your browsing history.
-
All Time: Choosing this time range will clear all browsing data accumulated since the inception of your Chrome browser, offering a complete reset of your browsing history.
By offering these distinct time range options, Google Chrome empowers users to tailor their data clearance based on their specific needs. Whether you're looking to remove recent browsing activity or perform a comprehensive cleanup of your entire browsing history, the time range feature ensures that you can customize the data removal process according to your preferences.
Once you have selected the desired time range, you can proceed to the next step of choosing the specific data elements you wish to clear, such as browsing history, cookies, cached images and files, and more. This granular control over data clearance allows you to maintain privacy while retaining essential browsing data, striking a balance between data management and personalized browsing preferences.
By understanding and utilizing the time range feature in the data clearance process, you can effectively manage your browsing history in Google Chrome, ensuring that your digital footprint remains under your control. Whether you're a desktop, laptop, or mobile user, the ability to choose a specific time range for data clearance enhances your browsing experience and privacy management within the Chrome browser.
Step 5: Select Data to Delete
After choosing the time range for data clearance in Google Chrome, the next crucial step is to select the specific data elements that you wish to delete. This step provides you with granular control over the management of your browsing history, allowing you to tailor the data clearance process to your individual preferences and privacy requirements.
When selecting the data to delete, you are presented with a range of options, each representing a distinct element of your browsing data. These options typically include:
-
Browsing History: This encompasses the list of websites you have visited, providing a comprehensive record of your online activity within the Chrome browser.
-
Cookies and Other Site Data: Cookies are small pieces of data stored by websites on your browser, often used for tracking, authentication, and personalization. Clearing this data can enhance privacy and security while removing personalized site preferences.
-
Cached Images and Files: Cached files are temporary data stored by websites to improve page loading times. Clearing this data can free up storage space and ensure that you access the latest versions of web content.
-
Download History: This includes a record of files that you have downloaded through the Chrome browser. Clearing this history can help declutter your browsing experience.
-
Passwords: If you choose to clear this data, it will remove saved passwords and autofill information from your Chrome browser.
-
Autofill Form Data: This includes saved form entries such as addresses, payment information, and other autofill data. Clearing this data can enhance privacy and security.
By carefully considering these options, you can customize the data clearance process to align with your specific privacy and browsing preferences. Whether you prioritize clearing your complete browsing history or selectively removing certain data elements, the ability to choose specific data for deletion empowers you to maintain control over your digital footprint.
Furthermore, Google Chrome provides the flexibility to toggle individual data elements on or off, allowing you to fine-tune your data clearance preferences. This level of customization ensures that you can strike a balance between privacy management and retaining essential browsing data, creating a tailored browsing experience that aligns with your individual needs.
By selecting the data elements to delete, you can effectively manage your browsing history in Google Chrome, ensuring that your privacy and security remain at the forefront of your digital experience. Whether you're using a desktop, laptop, or mobile device, the ability to selectively remove specific data elements empowers you to maintain control over your online footprint within the Chrome browser.
Step 6: Clear Data
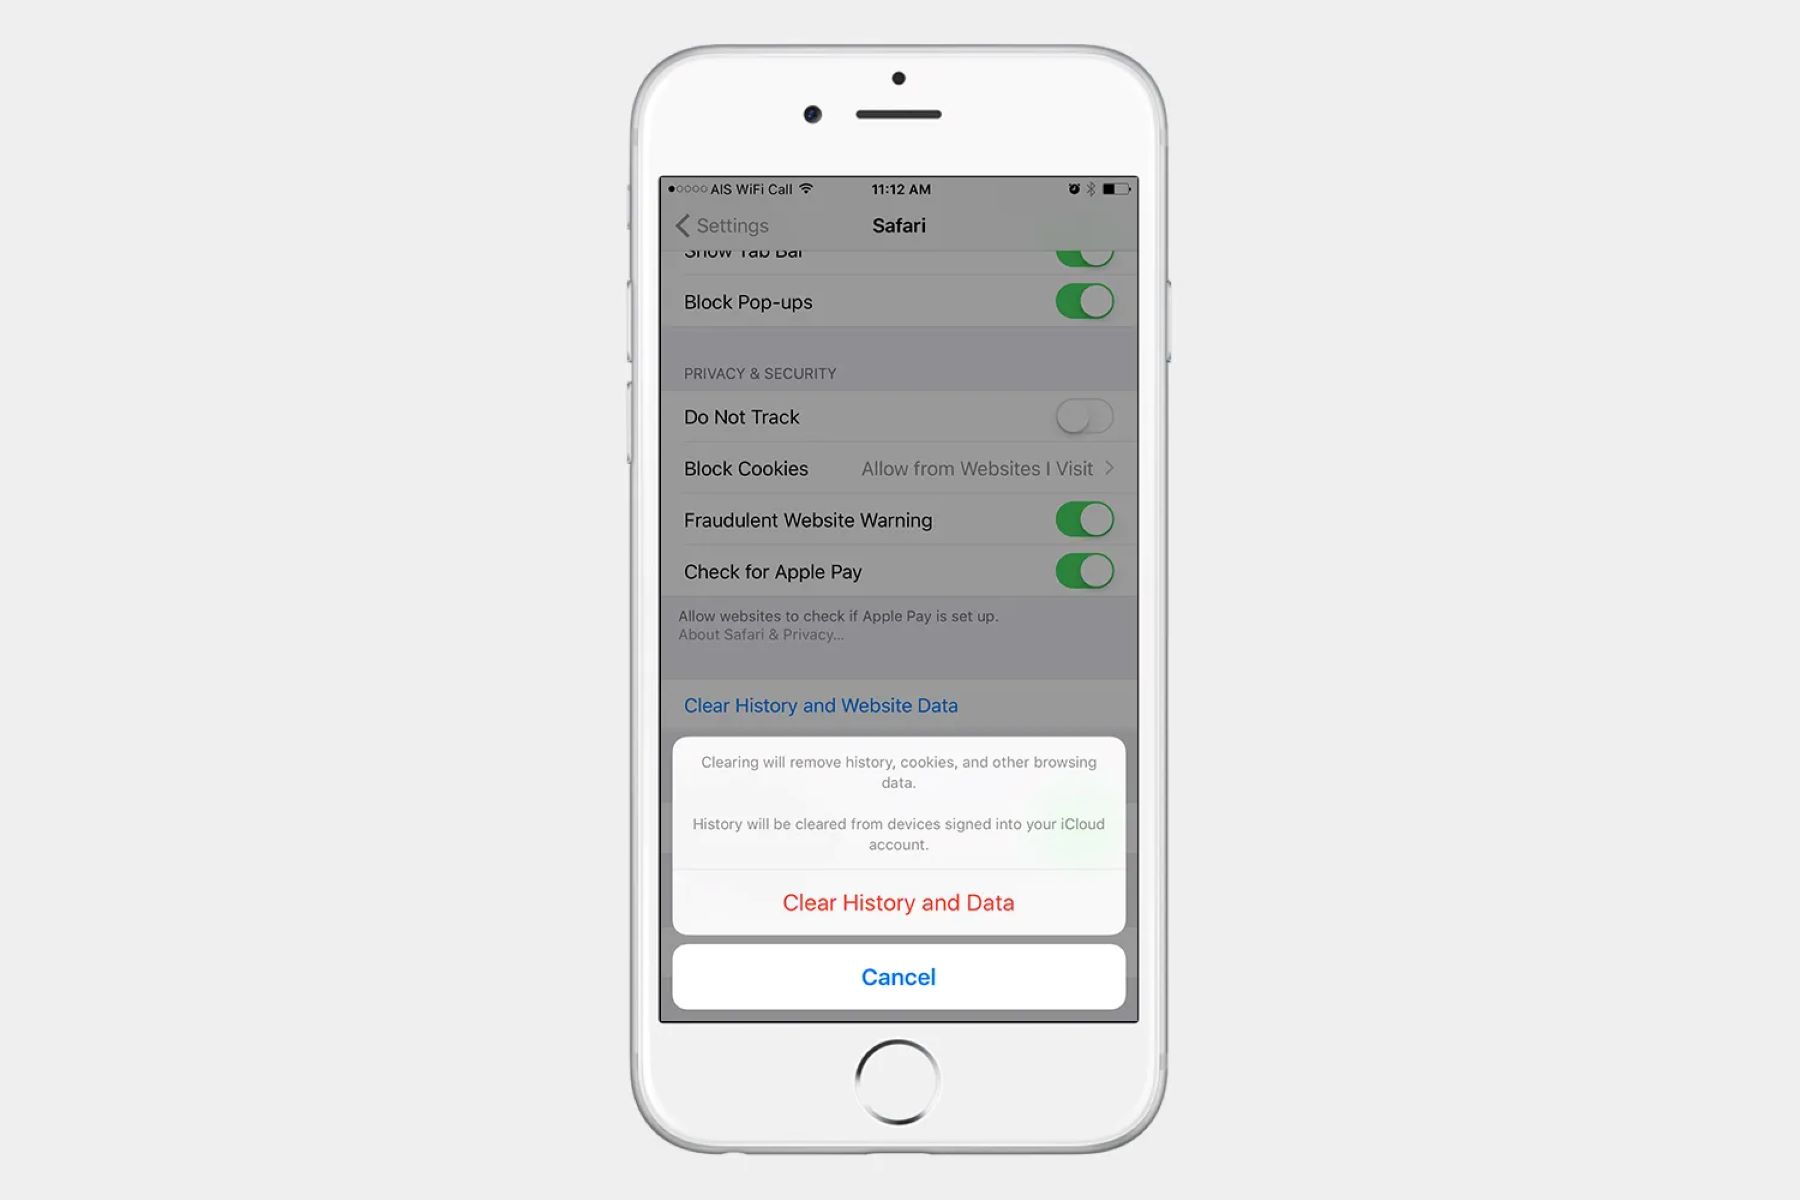
After customizing your preferences and selecting the specific data elements you wish to delete, the final step in the process of managing your browsing history in Google Chrome is to clear the data. This action initiates the removal of the selected browsing history, cookies, cached images and files, download history, and other site data based on your preferences, effectively decluttering your browsing experience and enhancing your privacy.
Once you have made your selections, you can proceed to the "Clear data" or "Clear browsing data" button, depending on your device. Clicking this button serves as the definitive action to commence the data clearance process, signaling to Chrome that you are ready to remove the selected browsing data from your browser.
Upon clicking the "Clear data" button, Chrome will begin processing your request, systematically removing the chosen data elements from your browsing history. The duration of this process may vary depending on the volume of data being cleared and the performance of your device. However, Chrome typically completes the data clearance swiftly, ensuring that your browsing history is efficiently managed according to your specified preferences.
As the data clearance process unfolds, you may observe temporary changes in your browsing experience, such as the removal of saved passwords, the disappearance of certain autofill suggestions, and the refreshing of web content due to the clearing of cached images and files. These transient adjustments signify the active management of your browsing data, reflecting the successful execution of your privacy and data clearance preferences within the Chrome browser.
Upon completion of the data clearance process, you can expect a streamlined and refreshed browsing experience, free from the clutter of accumulated history and site data. By effectively clearing your browsing data, you have taken proactive steps to maintain your privacy, optimize your browsing performance, and ensure that your digital footprint aligns with your preferences and security considerations.
With the data clearance process concluded, you can confidently navigate the web knowing that your browsing history is managed in accordance with your privacy requirements. Whether you've chosen to clear recent history, remove specific data elements, or perform a comprehensive clearance of your entire browsing history, the completion of the data clearance process signifies your proactive approach to maintaining control over your digital presence within the Chrome browser.


