Introduction
Welcome to the digital age, where web browsers have become indispensable tools for both work and leisure. Among the myriad of features they offer, the ability to access your device's camera directly from the browser has revolutionized the way we communicate, collaborate, and create content online. Google Chrome, one of the most popular web browsers globally, provides a seamless interface for utilizing your camera for video calls, virtual meetings, live streaming, and more. However, ensuring that Chrome has the necessary permissions to access your camera is crucial for a smooth and secure browsing experience.
In this comprehensive guide, we will delve into the intricacies of allowing Chrome access to your camera. Whether you're a seasoned Chrome user or just getting started, understanding the nuances of managing camera access can significantly enhance your browsing experience. We will explore the step-by-step process of checking camera access in Chrome settings, allowing camera access for specific websites, and troubleshooting common camera access issues. By the end of this guide, you will be equipped with the knowledge and tools to effortlessly manage your camera access in Chrome, empowering you to make the most of this powerful feature.
So, grab your favorite beverage, settle into a comfortable spot, and let's embark on this journey to unlock the full potential of your camera within the Chrome browser. Whether you're connecting with loved ones, attending virtual events, or collaborating with colleagues, having a clear understanding of Chrome's camera access will undoubtedly enrich your online interactions. Let's dive in and discover the seamless integration of your camera with Chrome, opening up a world of possibilities at your fingertips.
Checking Camera Access in Chrome Settings
To ensure that Chrome has the necessary permissions to access your camera, it's essential to navigate through the browser settings and verify the current camera access status. Here's a step-by-step guide to checking camera access in Chrome settings:
-
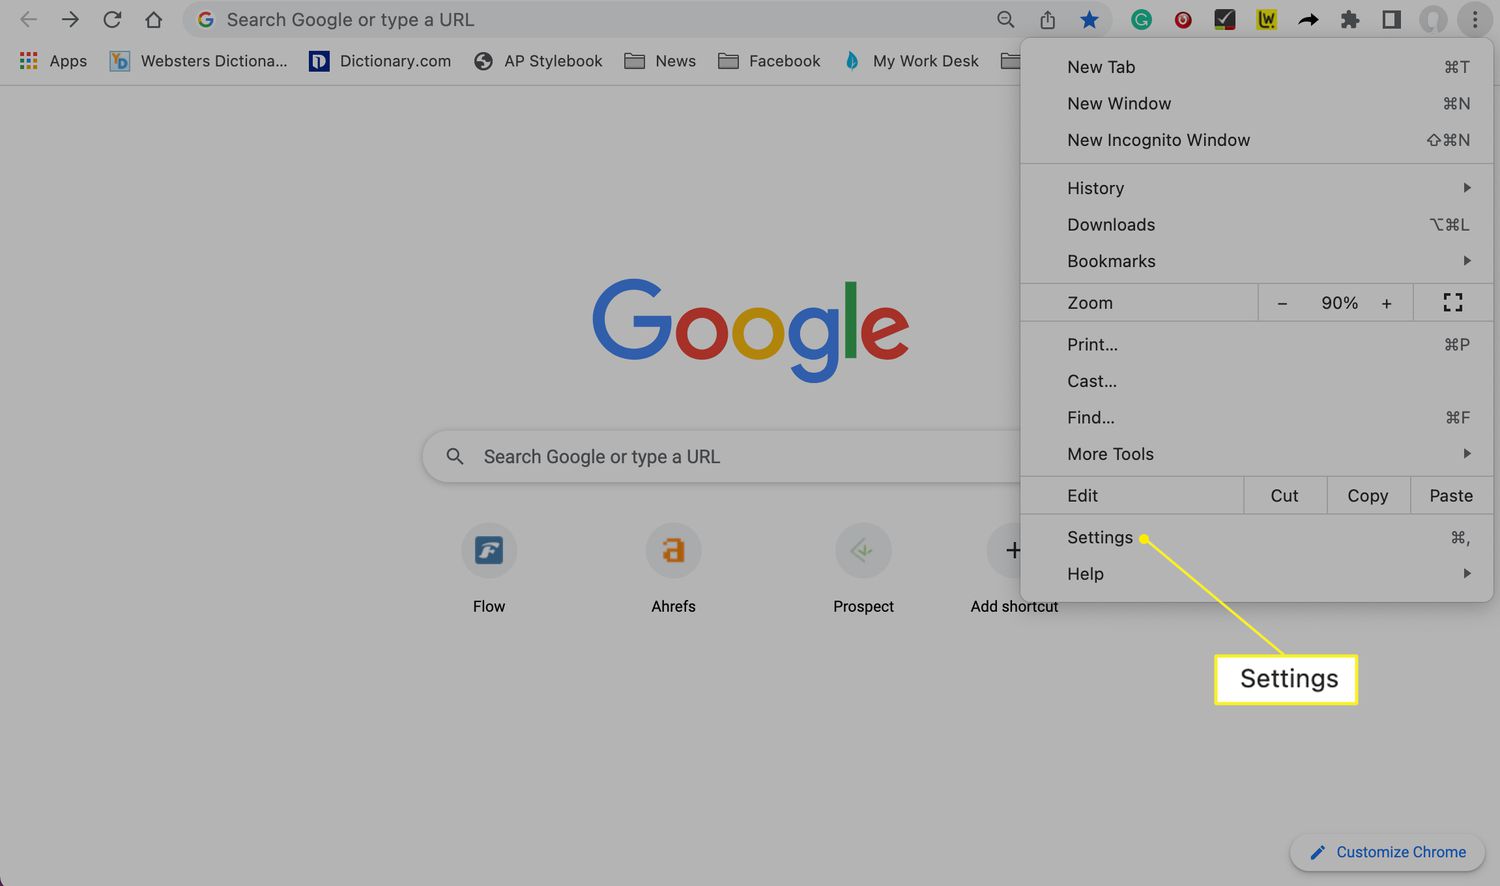
Open Chrome Settings: Begin by launching the Chrome browser on your device. In the top-right corner, click on the three-dot menu icon to access the Chrome menu. From the dropdown menu, select "Settings" to open the browser's settings interface.
-
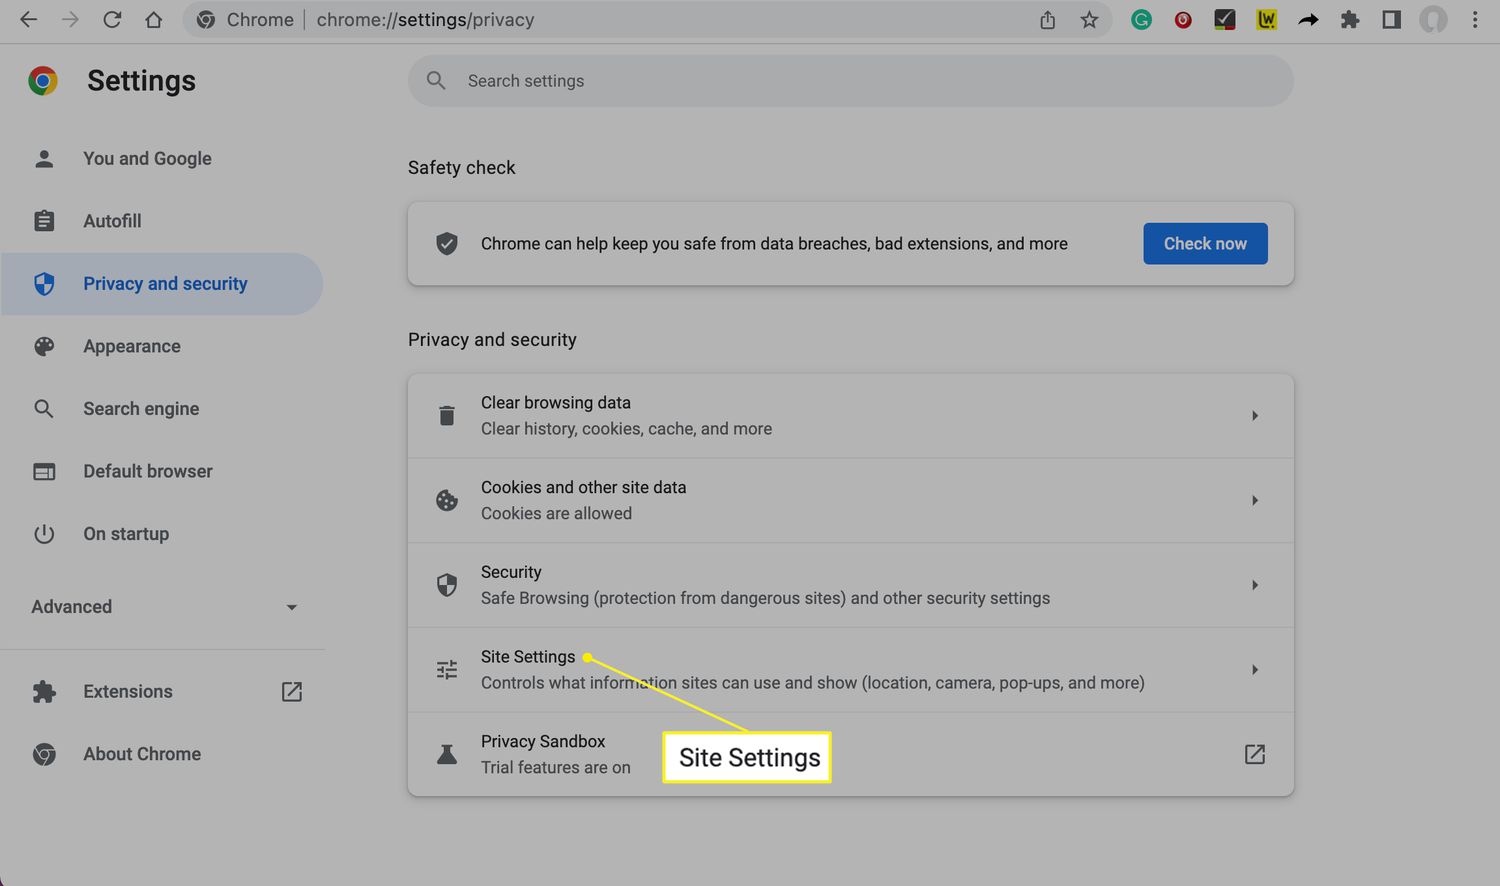
Navigate to Privacy and Security: Within the Settings menu, locate and click on the "Privacy and security" option in the left-hand sidebar. This section houses various privacy and security-related settings, including permissions for accessing your camera and other devices.
-
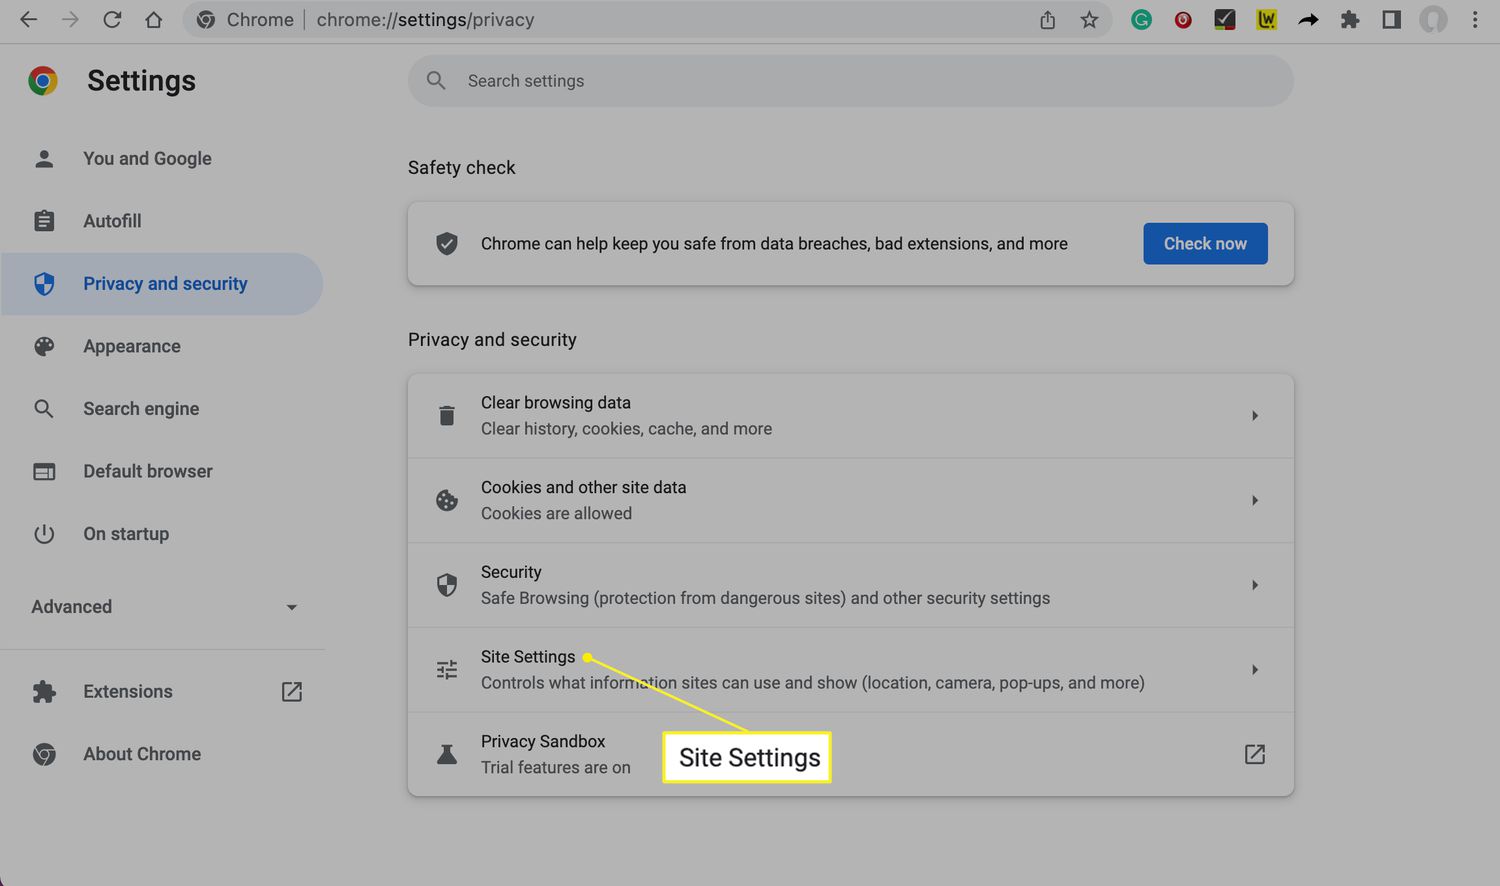
Access Site Settings: Under the "Privacy and security" section, click on "Site settings" to delve into the specific permissions granted to websites by Chrome. This is where you can manage and customize the camera access settings for individual websites.
-
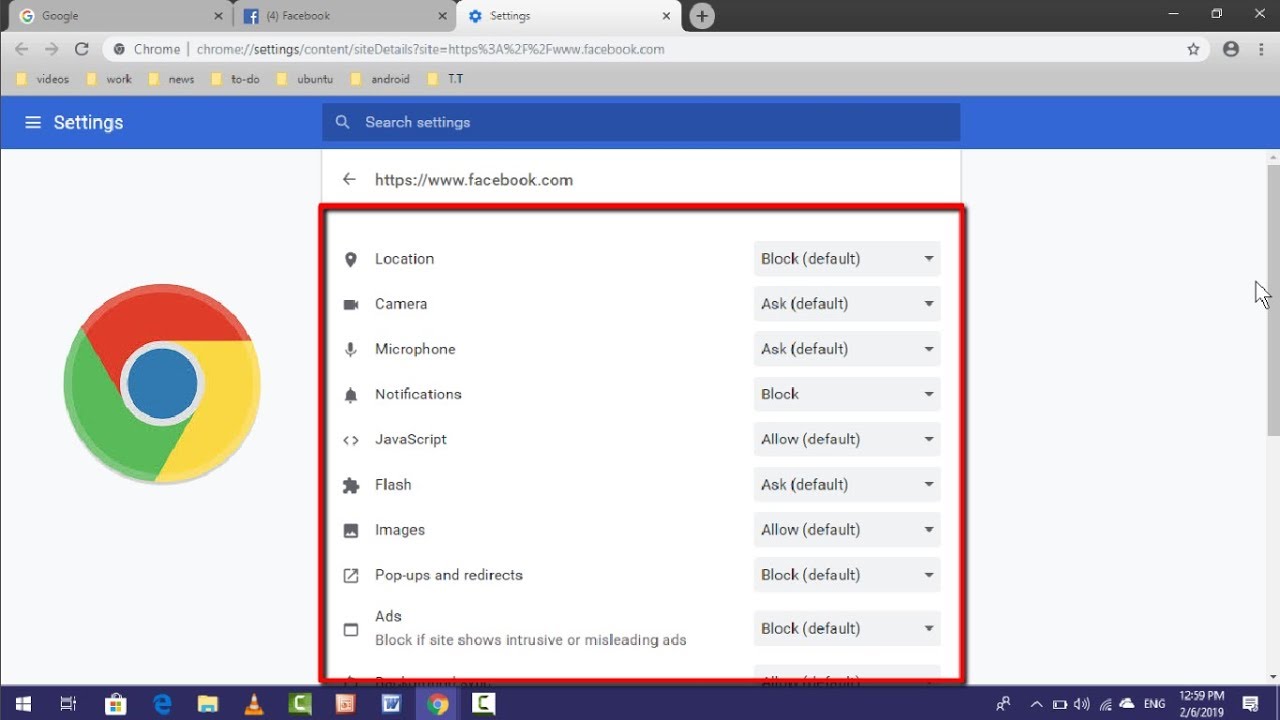
Check Camera Permissions: Within the Site settings, scroll down to find the "Camera" option. Click on it to reveal the current camera access permissions granted to websites. Here, you can review the list of websites that have been granted or denied access to your camera.
-
Adjust Camera Permissions: If you need to modify the camera access permissions for specific websites, you can do so by clicking on the respective entry and toggling the permission settings. This allows you to grant or revoke camera access on a per-site basis, giving you full control over which websites can utilize your camera.
-
Verify Global Camera Access: Additionally, you can verify the global camera access settings by clicking on the "Camera" option within the Site settings. This provides an overview of the default camera access permissions for all websites, allowing you to make adjustments as needed.
By following these steps, you can easily navigate through Chrome's settings to check and customize camera access permissions. This ensures that your camera is ready to be utilized seamlessly within the browser, empowering you to engage in video calls, capture moments, and interact with various online platforms without any hindrances.
Now that you have a clear understanding of how to check camera access in Chrome settings, let's explore the next crucial aspect: allowing camera access for specific websites.
Allowing Camera Access for Specific Websites
Granting camera access to specific websites in Chrome empowers you to personalize your browsing experience while maintaining control over your privacy and security. Whether you want to enable video calls on a trusted communication platform or engage in live streaming on a preferred website, Chrome offers a straightforward process for managing camera access on a per-site basis. Here's a detailed exploration of how to allow camera access for specific websites:
-
Access Site Settings: After navigating to the "Site settings" section within Chrome's settings, locate and click on the "Camera" option. This will display the list of websites that have requested camera access, along with their current permission status.
-
Grant Camera Access: To allow camera access for a specific website, simply click on the website's entry within the "Camera" settings. This will reveal the current camera access permission status for that website, along with the option to modify the permission settings.
-
Modify Permission Settings: Upon clicking on a website's entry, you can toggle the permission settings to grant camera access. Chrome provides the flexibility to choose between allowing the website to access your camera, blocking camera access, or setting the permission to ask for your approval each time the website attempts to use the camera.
-
Customize Camera Permissions: Additionally, Chrome allows you to customize camera permissions for websites based on your preferences. You can grant camera access to trusted websites that you frequently use for video calls, virtual meetings, or multimedia content creation, while exercising caution with lesser-known or untrusted websites.
-
Verify Permission Changes: After modifying the camera access permissions for specific websites, it's essential to verify the changes by visiting the respective websites and initiating camera-related activities. This ensures that the updated permissions are seamlessly applied, allowing you to engage in camera-enabled interactions without any interruptions.
By following these steps, you can effectively manage camera access for specific websites within Chrome, tailoring your browsing environment to align with your preferences and security considerations. This granular control over camera permissions empowers you to navigate the online landscape with confidence, knowing that your camera access is tailored to your trusted online destinations.
With a clear understanding of how to allow camera access for specific websites in Chrome, you are well-equipped to personalize your browsing experience while leveraging the full potential of your camera within the browser. Now, let's delve into the next crucial aspect: troubleshooting camera access issues in Chrome.
Troubleshooting Camera Access Issues in Chrome
Encountering camera access issues while using Chrome can be a frustrating experience, especially when you're eager to engage in video calls, capture moments, or participate in virtual events. However, Chrome provides a range of troubleshooting methods to address and resolve camera access issues effectively. By following these steps, you can navigate through potential obstacles and ensure seamless camera functionality within the browser.
-
Check Camera Permissions: Begin by revisiting the camera permissions within Chrome's settings. Navigate to the "Site settings" section and verify the camera access permissions granted to specific websites. Ensure that the intended websites have been granted the necessary camera access permissions, and no inadvertent denials or restrictions are in place.
-
Review Browser Extensions: Certain browser extensions or add-ons may interfere with camera functionality in Chrome. Disable any recently installed extensions or those known to impact camera access. This can help identify and isolate potential conflicts that hinder the proper utilization of the camera within the browser.
-
Update Chrome and Device Drivers: Ensure that you are using the latest version of Chrome, as outdated browser versions may exhibit compatibility issues with camera access. Additionally, check for updates to your device's camera drivers, as outdated or malfunctioning drivers can impede the seamless operation of the camera within Chrome.
-
Clear Browsing Data: Accumulated browsing data, such as cookies and cached files, can occasionally disrupt camera functionality. Clearing the browsing data within Chrome's settings can help eliminate potential conflicts and refresh the browser's state, potentially resolving camera access issues.
-
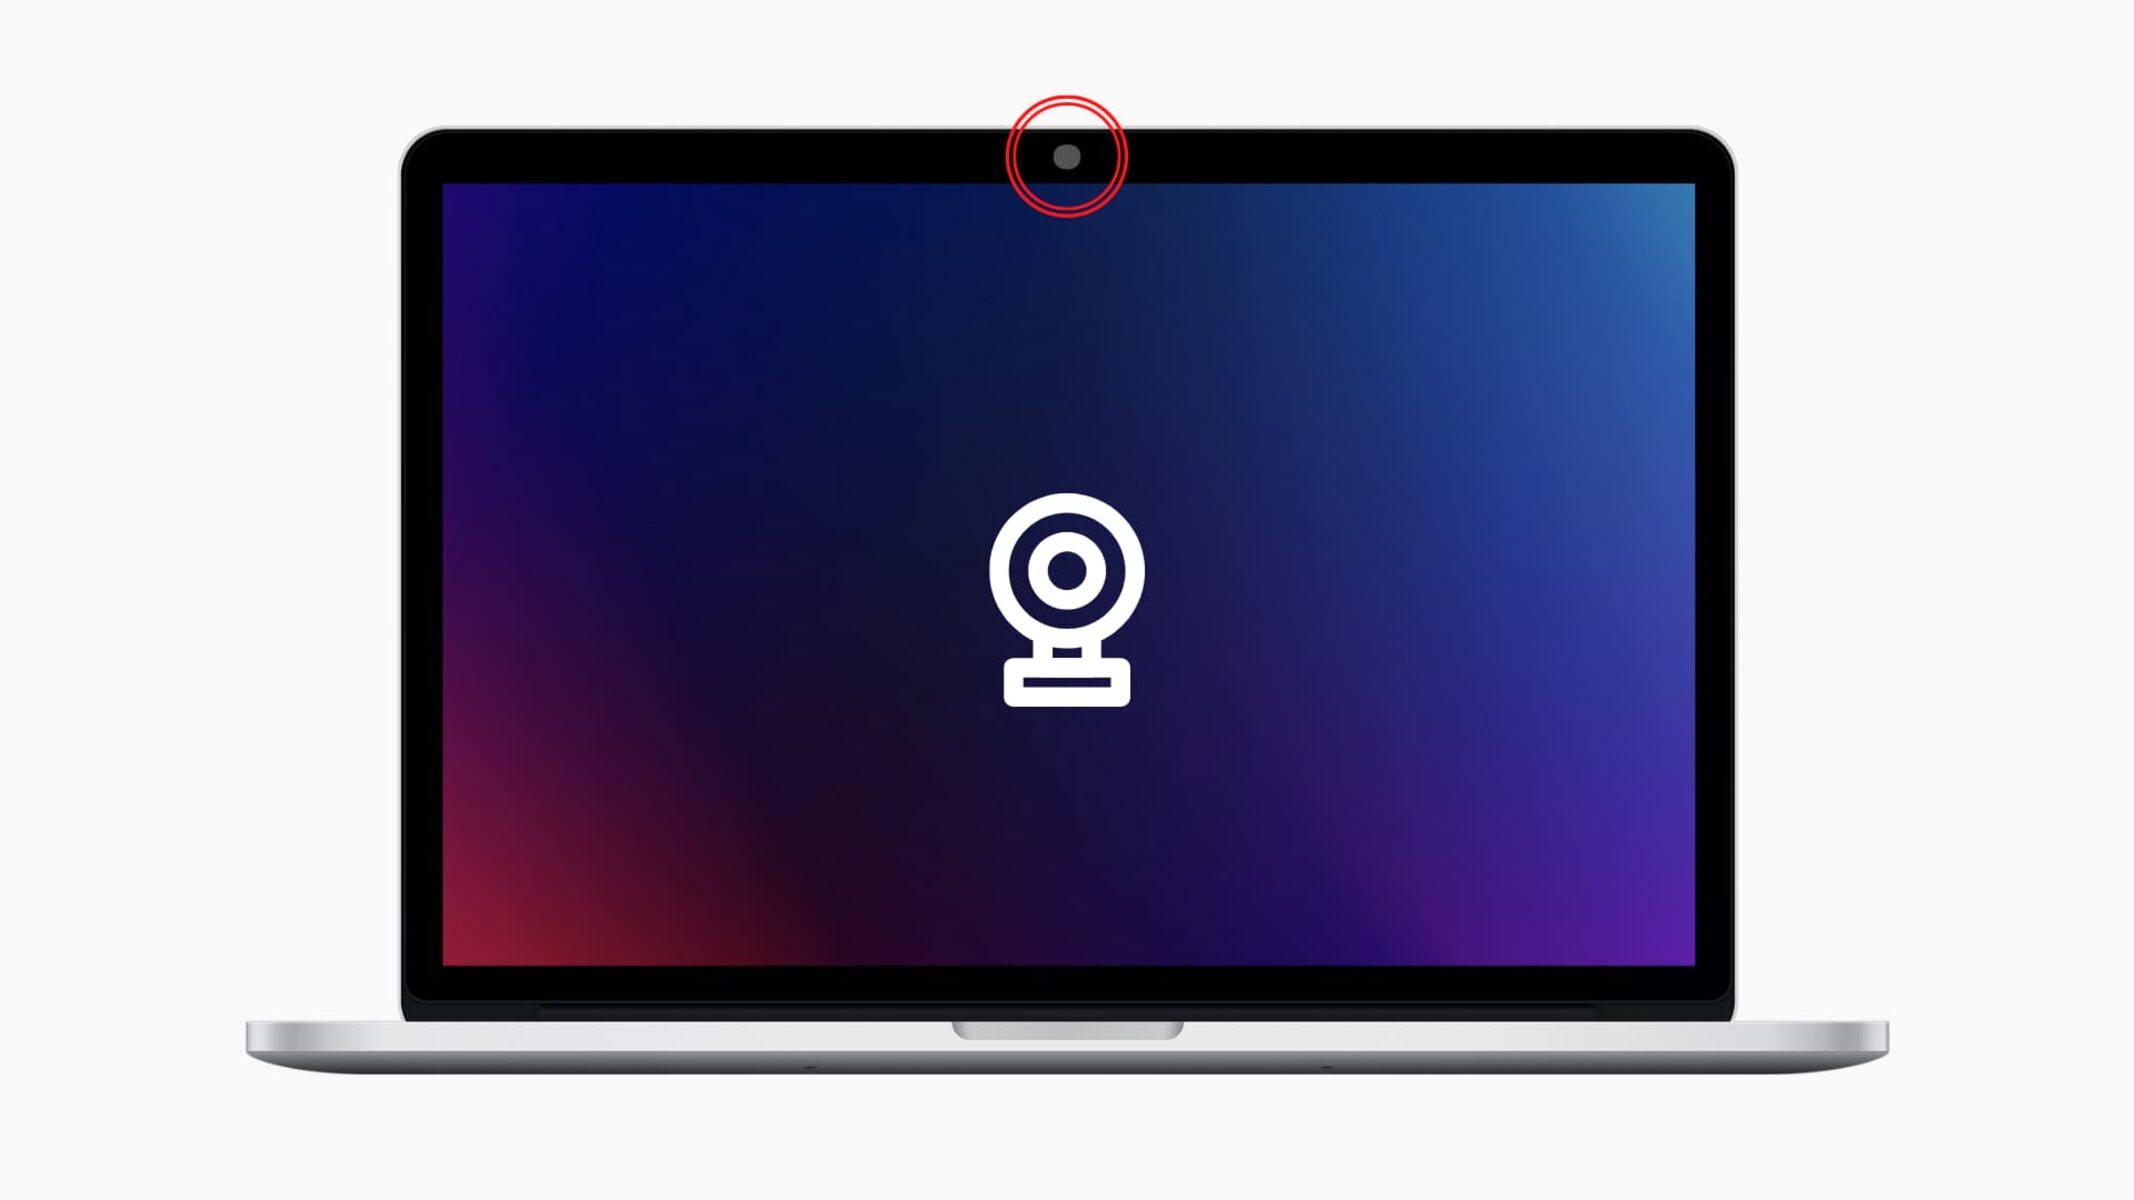
Verify Camera Settings: If you are using an external camera or webcam, ensure that it is properly connected to your device and functioning correctly. Access the device settings to verify that the camera is recognized and operational. Additionally, check for any physical obstructions or hardware issues that may affect the camera's functionality.
-
Restart the Browser and Device: Sometimes, a simple restart can resolve underlying issues affecting camera access in Chrome. Close the browser, restart your device, and relaunch Chrome to see if the camera functionality is restored.
By systematically troubleshooting camera access issues in Chrome, you can identify and address potential obstacles that hinder the seamless utilization of your camera within the browser. These proactive measures empower you to overcome technical challenges and ensure that your camera is readily accessible for a wide range of online activities.
With these troubleshooting strategies at your disposal, you can navigate through potential camera access issues in Chrome with confidence, ensuring that your browsing experience remains enriched by the seamless integration of your camera within the browser.


