To add trusted sites in Safari, you adjust individual website permissions rather than maintaining a single global list. Safari doesn't have a one-click "trusted sites" feature; instead, you grant specific sites permission to bypass restrictions like pop-up blocking, auto-play prevention, or camera and microphone access.
Does Safari have a trusted sites list?
Safari does not offer a global "trusted sites" list like some other browsers. Instead, it uses per-website permission settings. This means you can decide, for each site you visit, whether it can show pop-ups, play media automatically, or access your hardware. This approach gives you finer control: a banking portal might get camera access, while a news site only gets auto-play enabled. You manage these settings through Safari's "Websites" preferences on Mac, or through the Settings app on iPhone and iPad, where you can also stop Google from asking to sign in on Safari by adjusting that site's stored data.
How to customize permissions for a website on Mac
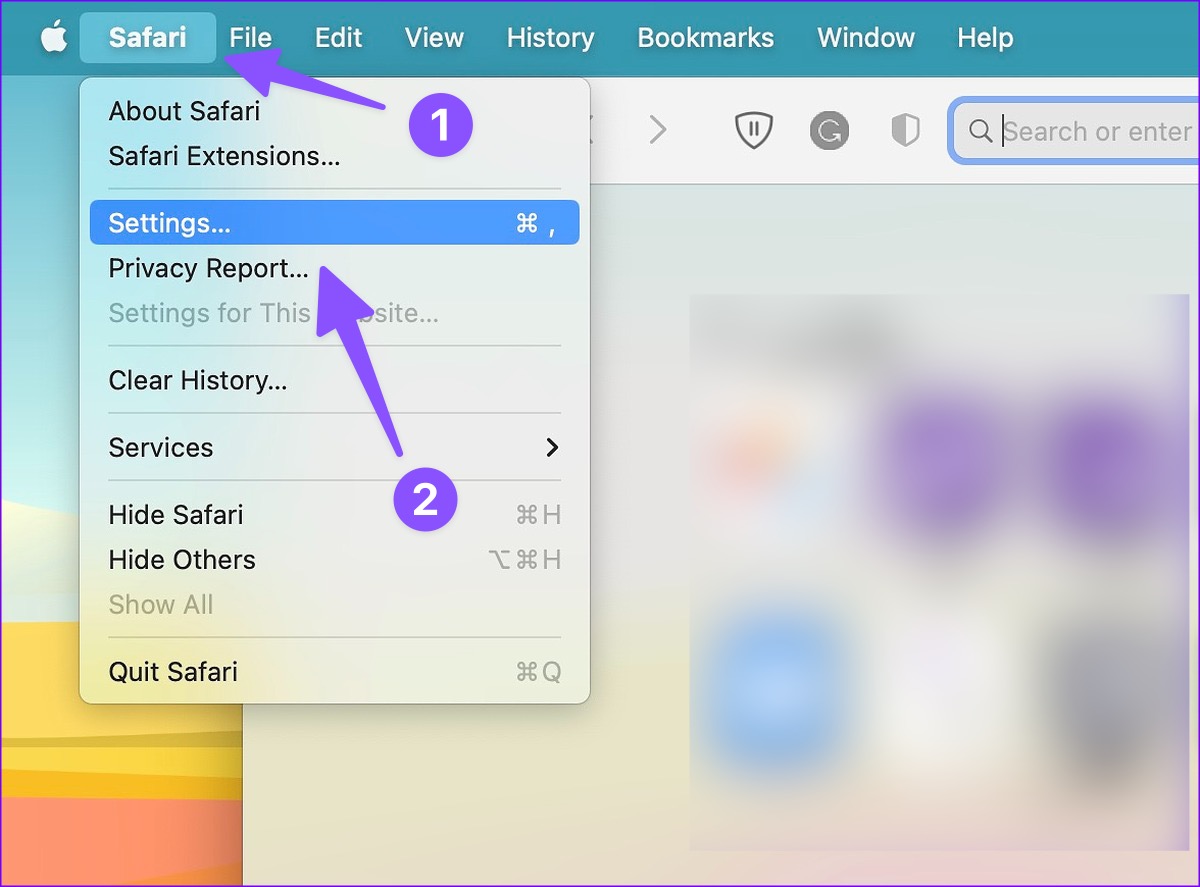
On a Mac, the main control center for website permissions lives in Safari's Settings. Here's how to reach it and adjust what each site can do:
- Open the Safari app.
- From the menu bar at the top of the screen, choose "Safari" > "Settings."
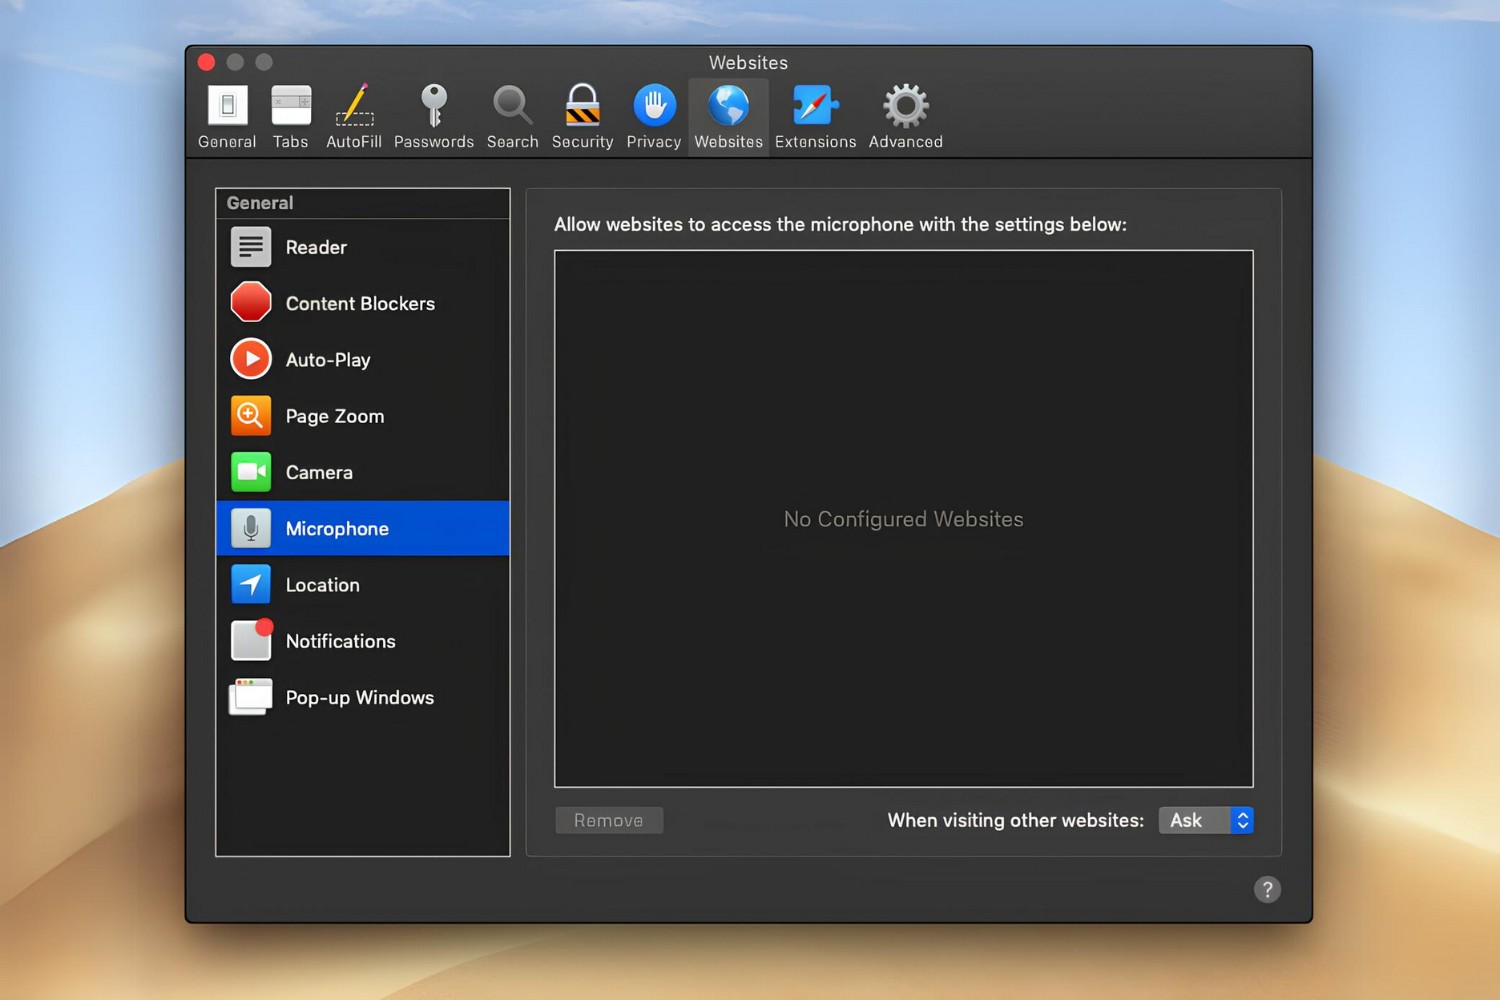
- Click the "Websites" tab at the top of the Settings window.
You'll see a sidebar on the left with categories such as Reader, Content Blockers, Auto-Play, Pop-up Windows, Camera, Microphone, Screen Sharing, and Location. Select a category, then look at the list of websites on the right. For each site, you can choose an option like "Ask," "Allow," or "Deny" from a dropdown menu. For example, to stop pop-ups on a specific site, choose "Pop-up Windows" in the sidebar, find that site in the list, and set it to "Deny."
For any category, you can also set a default behavior for all other sites using the "When visiting other websites" dropdown at the bottom of the window. This lets you establish a baseline, say, always ask before using the camera, while granting exceptions to sites you trust.
How to quickly change settings for the current website
If you're already on a page and want to tweak its permissions without digging through Settings, use the Page menu button. This button appears on the left side of the Smart Search field (the address bar) whenever you're viewing a website. Click it, then choose "Website Settings" from the dropdown. A small panel opens showing the current site's permissions, such as camera, microphone, location, and auto-play. Change any option here, and Safari applies it immediately to that site only. This is the fastest way to grant a one-off trust level, like allowing your work portal to use your microphone, without leaving the page. If you later need to relax content restrictions for a trusted site, you can also turn off safe search on Safari to stop it from filtering your results.
How to manage permissions on iPhone and iPad
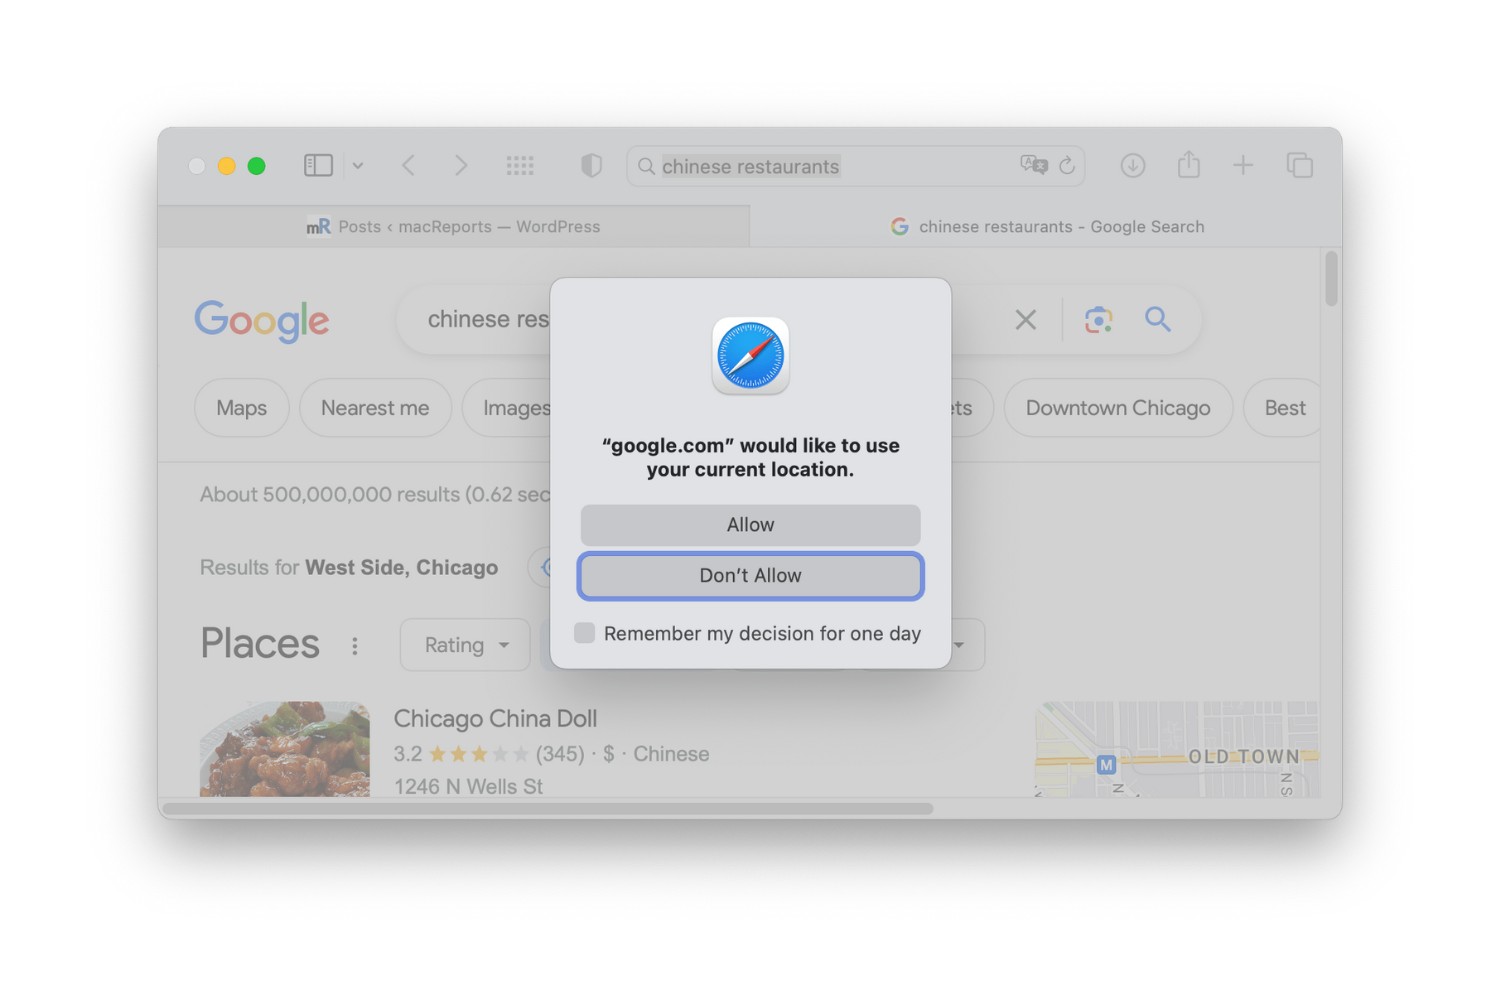
On iOS and iPadOS, website permissions are handled separately from the Mac. To control them, open the Settings app, scroll down, and tap "Safari." Then scroll to the "Permissions" section near the bottom. Here, you'll find toggles for Camera, Microphone, and Location. Each toggle has a submenu listing websites that have requested access. This is useful if you want a particular banking app or video conferencing site to always have camera or microphone access while keeping others blocked. Note that this section only covers hardware permissions; pop-up and auto-play controls on iPhone and iPad are not exposed per-site in the same way as on Mac.
How to manage privacy and security for all websites
Beyond per-site permissions, Safari includes global security and privacy settings that affect every website you visit. These are found in Safari's Settings on Mac under the "Security" and "Privacy" tabs. In the Security tab, you can enable "Fraudulent Website Warning," which alerts you if you land on a suspected phishing site. This is a good baseline for all browsing, not just trusted sites. In the Privacy tab, you can prevent cross-site tracking, which stops advertisers from following you across the web. You can also manage stored cookies and website data by clicking "Manage Website Data." From there, you can remove data for individual sites or clear everything with "Remove All." Just be aware that removing website data may log you out of sites or change how they behave, so only clear data for sites you no longer use or trust. These global settings complement your per-site permissions, giving you both broad protection and granular control. If you ever need to use Safari on Android, note that Android devices don't run Safari; you'd use a different browser, but the same principle of per-site permission management applies in Chrome or Firefox on that platform.