Introduction
In today's fast-paced digital age, staying connected is more crucial than ever. Whether you're traveling, working remotely, or simply in need of a backup internet connection, turning your Android device into a hotspot can be a game-changer. By leveraging your phone's cellular data connection, you can effortlessly create a Wi-Fi hotspot to connect other devices, such as laptops, tablets, or other smartphones, to the internet.
With the widespread availability of unlimited or high-capacity data plans, transforming your Android device into a hotspot has become an increasingly popular and convenient option for ensuring seamless connectivity on the go. This functionality essentially allows you to share your mobile data connection with other devices, enabling them to access the internet as if they were connected to a traditional Wi-Fi network.
In this comprehensive guide, we will walk you through the process of setting up a hotspot on your Android device, providing step-by-step instructions to ensure a smooth and hassle-free experience. Whether you're a seasoned tech enthusiast or a novice user, you'll find this guide invaluable for harnessing the full potential of your Android device and staying connected wherever you are.
Stay tuned as we delve into the nitty-gritty details of checking compatibility, enabling the hotspot feature, configuring hotspot settings, and seamlessly connecting your devices to the hotspot. By the end of this guide, you'll be well-equipped to harness the power of your Android device and transform it into a reliable and efficient hotspot for all your connectivity needs. Let's dive in and unlock the full potential of your Android device!
Step 1: Check compatibility
Before diving into the process of turning your Android device into a hotspot, it's essential to ensure that your device supports this functionality. While most modern Android smartphones offer the hotspot feature, it's always prudent to double-check to avoid any potential compatibility issues.
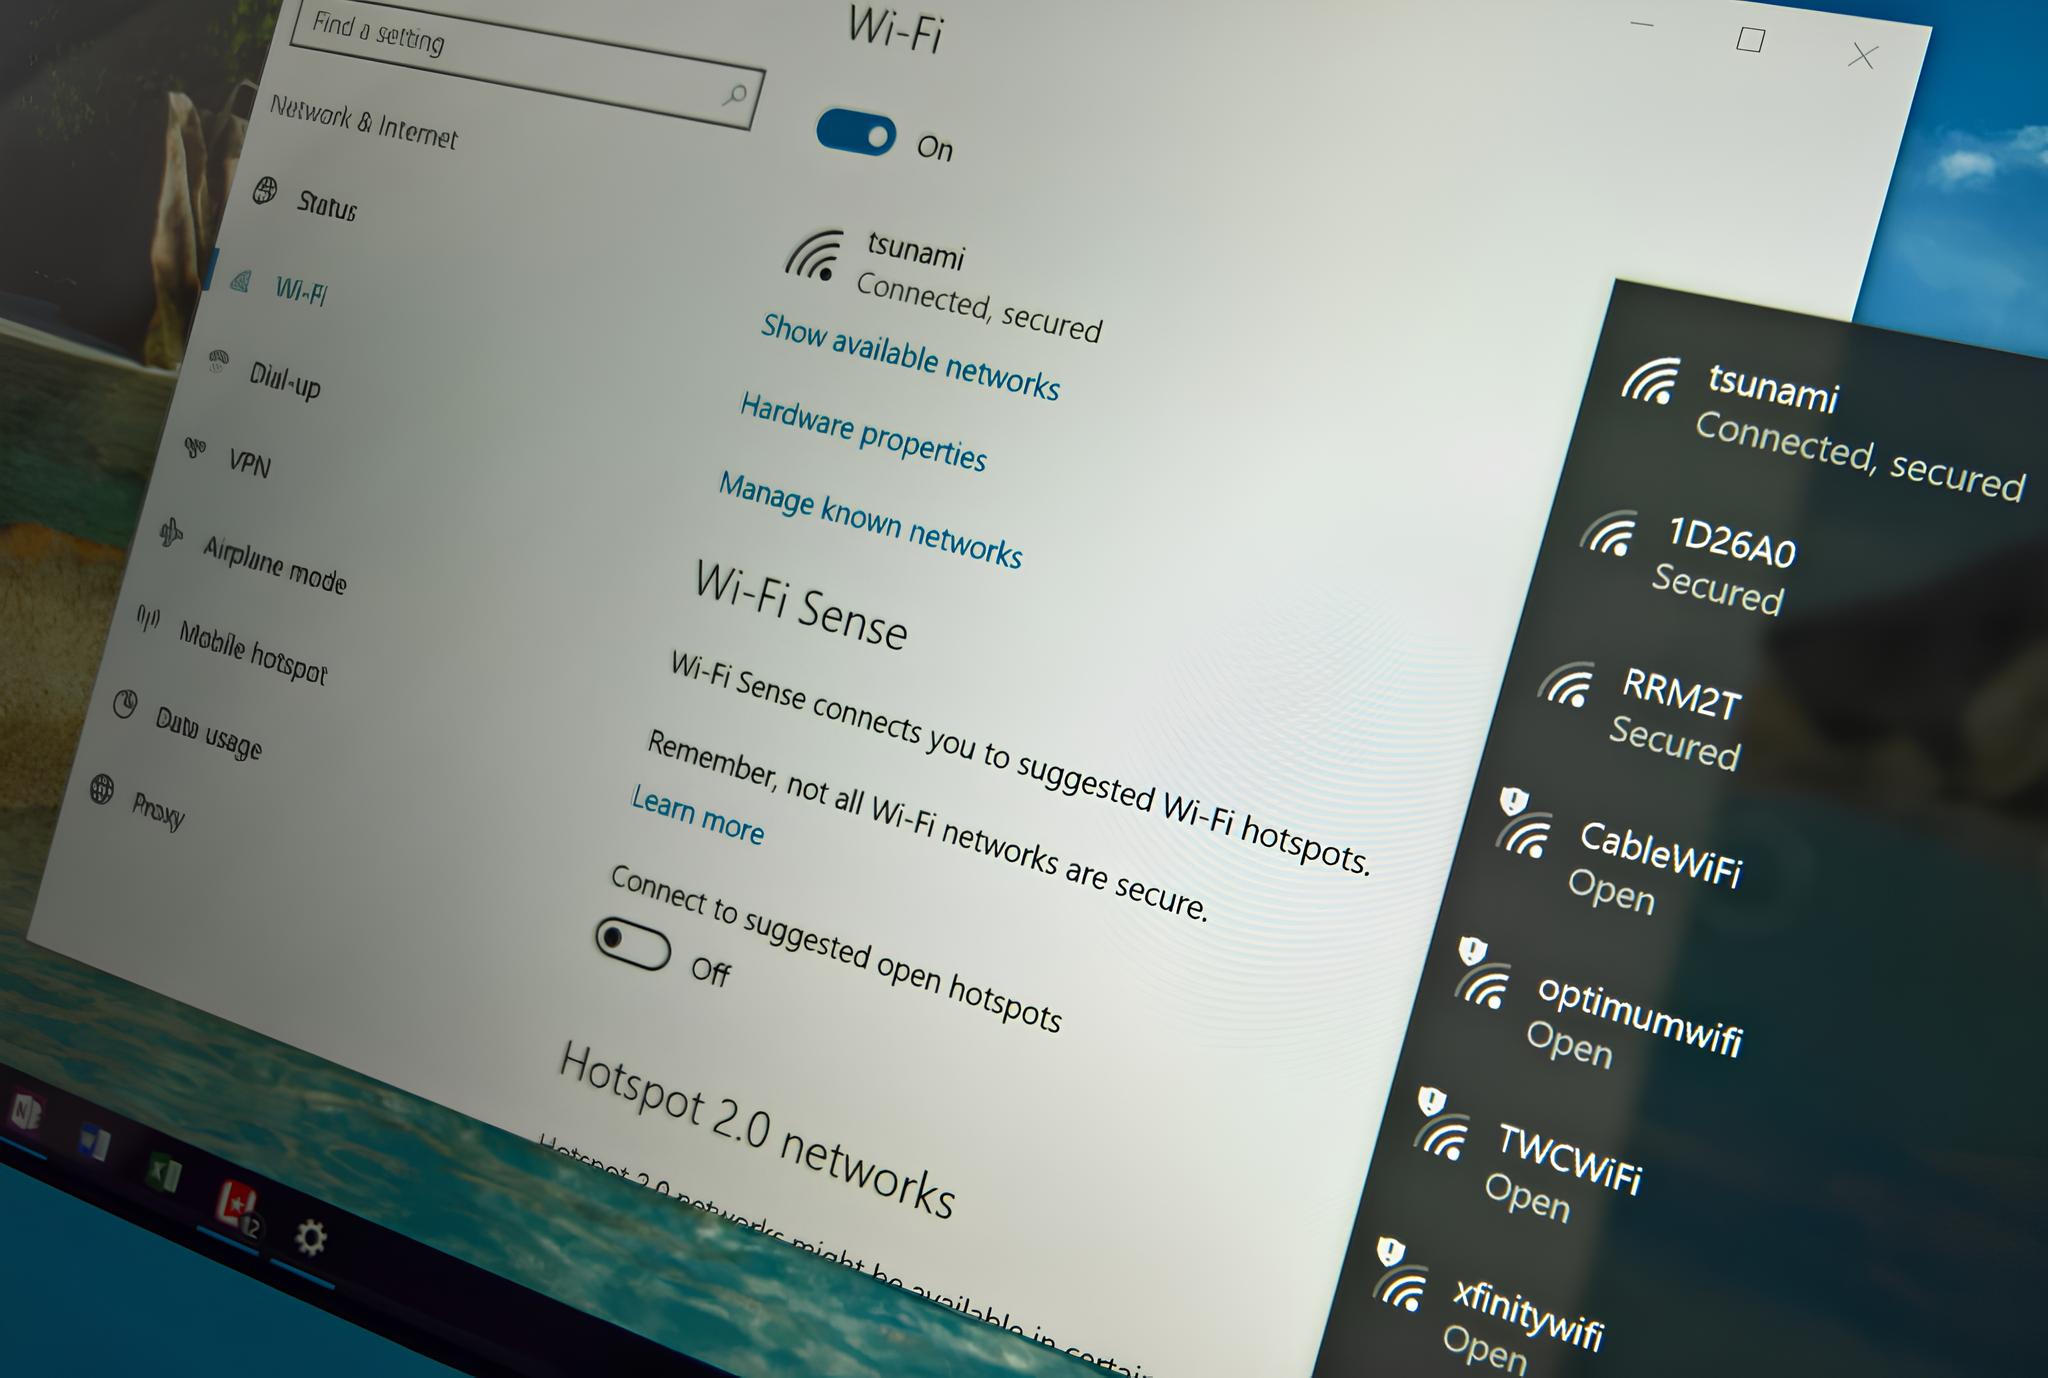
To begin, navigate to the "Settings" app on your Android device. Once there, look for the "Network & internet" or "Connections" section, where you'll typically find the "Hotspot & tethering" option. Selecting this option will lead you to the hotspot settings, where you can verify the availability of the hotspot feature on your device.
Upon accessing the hotspot settings, you should see an option to enable or configure the hotspot, indicating that your device is indeed compatible with this functionality. Additionally, some devices may display a "Portable Wi-Fi hotspot" or "Tethering" option, which serves the same purpose of creating a Wi-Fi hotspot using your cellular data connection.
It's worth noting that while the vast majority of Android devices support the hotspot feature, there may be rare instances where certain carrier-locked or older devices lack this capability. In such cases, it's advisable to reach out to your device manufacturer or carrier for further assistance or explore alternative connectivity options.
Furthermore, it's important to consider your data plan and any associated limitations, as enabling the hotspot feature may consume additional data from your cellular plan. If you're unsure about your plan's hotspot capabilities or data usage, contacting your carrier's customer support can provide clarity and prevent any unexpected charges.
By verifying the compatibility of your Android device for hotspot functionality and understanding any potential data usage implications, you can proceed with confidence to the next steps of enabling and configuring the hotspot feature. This initial check ensures a seamless and frustration-free experience as you harness the full potential of your Android device for connectivity on the go.
Step 2: Enable the hotspot feature
Enabling the hotspot feature on your Android device is a straightforward process that empowers you to share your cellular data connection with other devices. By activating this functionality, you effectively transform your smartphone into a portable Wi-Fi hotspot, providing seamless internet access to nearby devices. Here's a detailed guide on how to enable the hotspot feature and kick-start your connectivity experience.
-
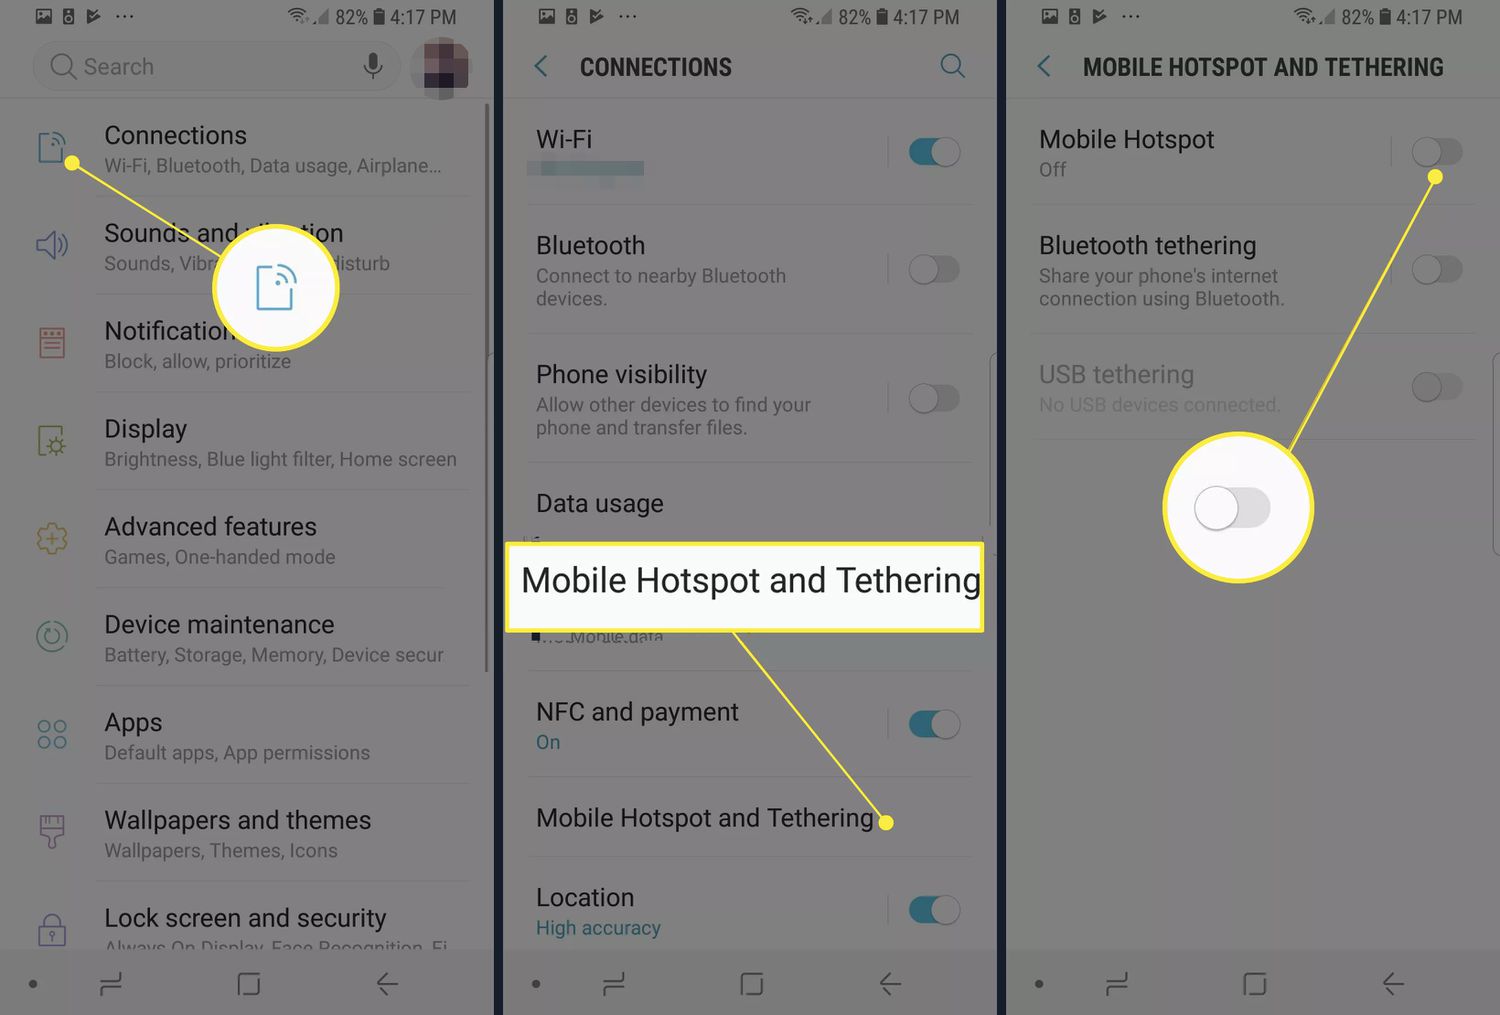
Accessing the Hotspot Settings: Begin by navigating to the "Settings" app on your Android device. Once there, locate the "Network & internet" or "Connections" section, which houses the hotspot and tethering settings. Depending on your device's interface, you may find the hotspot feature directly under the main settings menu or within submenus such as "Wireless & networks" or "Mobile network."
-
Enabling the Hotspot: Upon accessing the hotspot settings, you should see an option labeled "Portable Wi-Fi hotspot," "Wi-Fi hotspot," or "Tethering." Tap on this option to proceed with enabling the hotspot feature. Some devices may require you to toggle a switch to activate the hotspot, while others may prompt you to configure the hotspot settings before activation.
-
Customizing Hotspot Settings: After enabling the hotspot, you may have the option to customize the hotspot settings to suit your preferences. This typically includes setting a network name (SSID) and a password for the hotspot. Creating a unique network name and a strong, secure password is essential for safeguarding your hotspot and preventing unauthorized access.
-
Activating the Hotspot: Once you've configured the hotspot settings, proceed to activate the hotspot. Upon activation, your Android device will begin broadcasting a Wi-Fi signal, allowing other devices to detect and connect to the hotspot. You may also notice a notification or status indicator confirming that the hotspot is active and ready for connections.
-
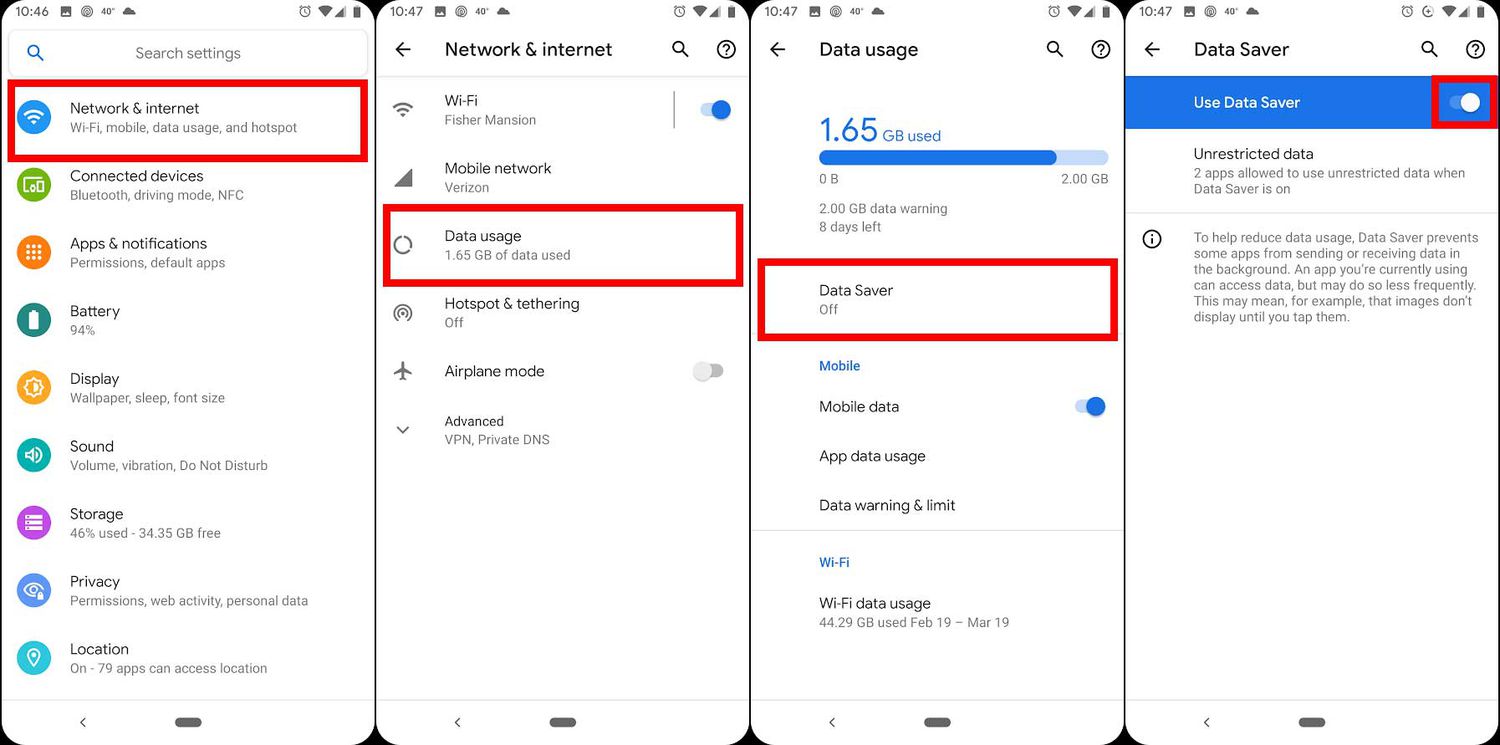
Monitoring Hotspot Usage: As the hotspot feature consumes data from your cellular plan, it's advisable to monitor your data usage periodically. Most Android devices provide built-in tools to track data usage, allowing you to stay informed about the amount of data consumed by the hotspot. This proactive approach can help you manage your data allocation effectively and avoid any potential overages.
By following these steps, you can seamlessly enable the hotspot feature on your Android device and unleash its full potential for sharing internet connectivity with other devices. Whether you're working on the go, traveling, or simply in need of a reliable backup internet source, the hotspot feature empowers you to stay connected effortlessly. With the hotspot activated, you're now ready to proceed to the next crucial step of configuring the hotspot settings for an optimized and secure connectivity experience.
Step 3: Configure hotspot settings
Configuring the hotspot settings on your Android device is a pivotal step in ensuring a seamless and secure connectivity experience for both you and the devices connecting to your hotspot. By customizing the hotspot settings, you can personalize the network name, set a strong password, and fine-tune additional options to optimize the hotspot for your specific needs. Let's delve into the detailed process of configuring the hotspot settings to create a reliable and tailored connectivity environment.
-
Customizing the Network Name (SSID): When configuring the hotspot settings, you'll have the opportunity to set a unique network name, also known as the Service Set Identifier (SSID), for your hotspot. This name is what other devices will see when searching for available Wi-Fi networks. Choosing a distinct and recognizable network name is essential for easily identifying and connecting to your hotspot. Whether it's a playful moniker or a more formal designation, the network name adds a personal touch to your hotspot and simplifies the connection process for your devices.
-
Setting a Strong Password: In addition to customizing the network name, it's crucial to set a robust password for your hotspot to prevent unauthorized access. A strong password typically consists of a combination of uppercase and lowercase letters, numbers, and special characters. By creating a secure password, you ensure that only authorized users can connect to your hotspot, safeguarding your data and maintaining the integrity of your network. This proactive security measure is fundamental in today's interconnected world, where privacy and data protection are paramount.
-
Selecting Security Protocols: Depending on your device and Android version, you may have the option to select the security protocol for your hotspot. Common security protocols include WPA2 (Wi-Fi Protected Access 2) and WPA3, both of which offer robust encryption to secure your hotspot. Opting for the latest and most secure protocol supported by your device enhances the overall protection of your hotspot, mitigating potential security risks and fortifying your connectivity environment.
-
Adjusting Additional Settings: Some Android devices provide advanced hotspot settings that allow you to adjust additional parameters, such as the maximum number of devices that can connect to the hotspot simultaneously and the frequency band used for broadcasting the Wi-Fi signal. These settings enable you to tailor the hotspot to your specific usage scenarios, whether you need to accommodate multiple connections or optimize the signal strength for enhanced coverage.
By meticulously configuring the hotspot settings, you establish a tailored and secure connectivity environment that aligns with your preferences and security requirements. This personalized approach not only enhances the usability of your hotspot but also fosters a reliable and efficient connection experience for all devices that rely on your Android device for internet access. With the hotspot settings finely tuned, you're now equipped to seamlessly connect your devices to the hotspot and harness the power of your Android device for on-the-go connectivity.
Step 4: Connect devices to the hotspot
Connecting devices to the hotspot created by your Android device is a simple and seamless process that empowers you to extend internet access to a wide range of devices, including laptops, tablets, and other smartphones. By establishing a connection to your Android hotspot, these devices can leverage your cellular data connection to access the internet, enabling productivity, entertainment, and communication on the go. Here's a detailed walkthrough of the steps to connect devices to your Android hotspot and make the most of its connectivity capabilities.
-
Device Discovery: Begin by accessing the Wi-Fi settings on the device you wish to connect to the hotspot. This is typically found in the device's settings menu under the "Wi-Fi" or "Network" section. Once there, the device will scan for available Wi-Fi networks, including your Android hotspot.
-
Locate and Select the Hotspot: In the list of available Wi-Fi networks, you should see your Android hotspot's network name (SSID) that you previously configured. The network name you chose during the hotspot setup will be displayed, allowing you to easily identify and select your hotspot from the list.
-
Enter the Hotspot Password: Upon selecting your Android hotspot, the device will prompt you to enter the password you set during the hotspot configuration. Input the secure password to authenticate and establish the connection to the hotspot.
-
Connection Confirmation: Once the correct password is entered, the device will proceed to connect to your Android hotspot. You may see a confirmation message or an indicator in the device's status bar, signaling that the connection to the hotspot has been successfully established.
-
Verification and Usage: To ensure that the connection is active, open a web browser or any internet-dependent app on the connected device. If the connection is successful, you should be able to browse the web and access online services using the internet provided by your Android hotspot.
-
Managing Connected Devices: As the administrator of the hotspot, you have the ability to manage connected devices from your Android device's settings. This includes viewing the list of connected devices, controlling access, and adjusting settings as needed.
By following these steps, you can effortlessly connect devices to your Android hotspot, enabling seamless internet access for a multitude of devices. Whether you're collaborating on a project with colleagues, streaming media on a tablet, or staying connected while traveling, the hotspot feature empowers you to create a versatile and reliable connectivity environment. With devices successfully connected to your hotspot, you can harness the full potential of your Android device and enjoy uninterrupted connectivity wherever you go.
Conclusion
In conclusion, harnessing the power of your Android device to create a portable Wi-Fi hotspot is a transformative capability that enhances your connectivity, productivity, and convenience in various scenarios. By following the comprehensive steps outlined in this guide, you've gained the knowledge and confidence to seamlessly enable the hotspot feature, configure its settings, and connect multiple devices to leverage your cellular data connection.
Turning your Android device into a hotspot not only provides a practical solution for staying connected while on the move but also serves as a valuable backup internet source in situations where traditional Wi-Fi networks may be unavailable or unreliable. Whether you're working remotely, traveling, or simply seeking a reliable connectivity option, the hotspot feature empowers you to maintain seamless internet access for all your devices.
Furthermore, the ability to customize the hotspot settings, including the network name (SSID), password, and security protocols, ensures that you can create a personalized and secure connectivity environment tailored to your preferences. This level of customization not only enhances the usability of the hotspot but also reinforces the protection of your network, safeguarding your data and privacy.
As you connect devices to your Android hotspot, you extend the benefits of your cellular data connection to a diverse range of devices, including laptops, tablets, and other smartphones. This versatility enables you to collaborate, communicate, and access online resources effortlessly, regardless of your location or the availability of traditional Wi-Fi networks.
Moreover, managing the connected devices from your Android device's settings provides you with the flexibility to monitor usage, control access, and optimize the connectivity experience for all users. This administrative capability adds an extra layer of convenience and security, allowing you to maintain a well-managed and efficient hotspot environment.
In essence, by transforming your Android device into a hotspot, you've unlocked a powerful tool for seamless connectivity, productivity, and flexibility. Whether it's for work, leisure, or staying connected while on the go, the hotspot feature empowers you to stay effortlessly connected, ensuring that you're always within reach of the digital world.
With the knowledge and skills acquired from this guide, you're well-prepared to harness the full potential of your Android device and elevate your connectivity experience to new heights. Embrace the convenience, versatility, and reliability of your Android hotspot as you navigate the dynamic landscape of today's interconnected world.