Introduction
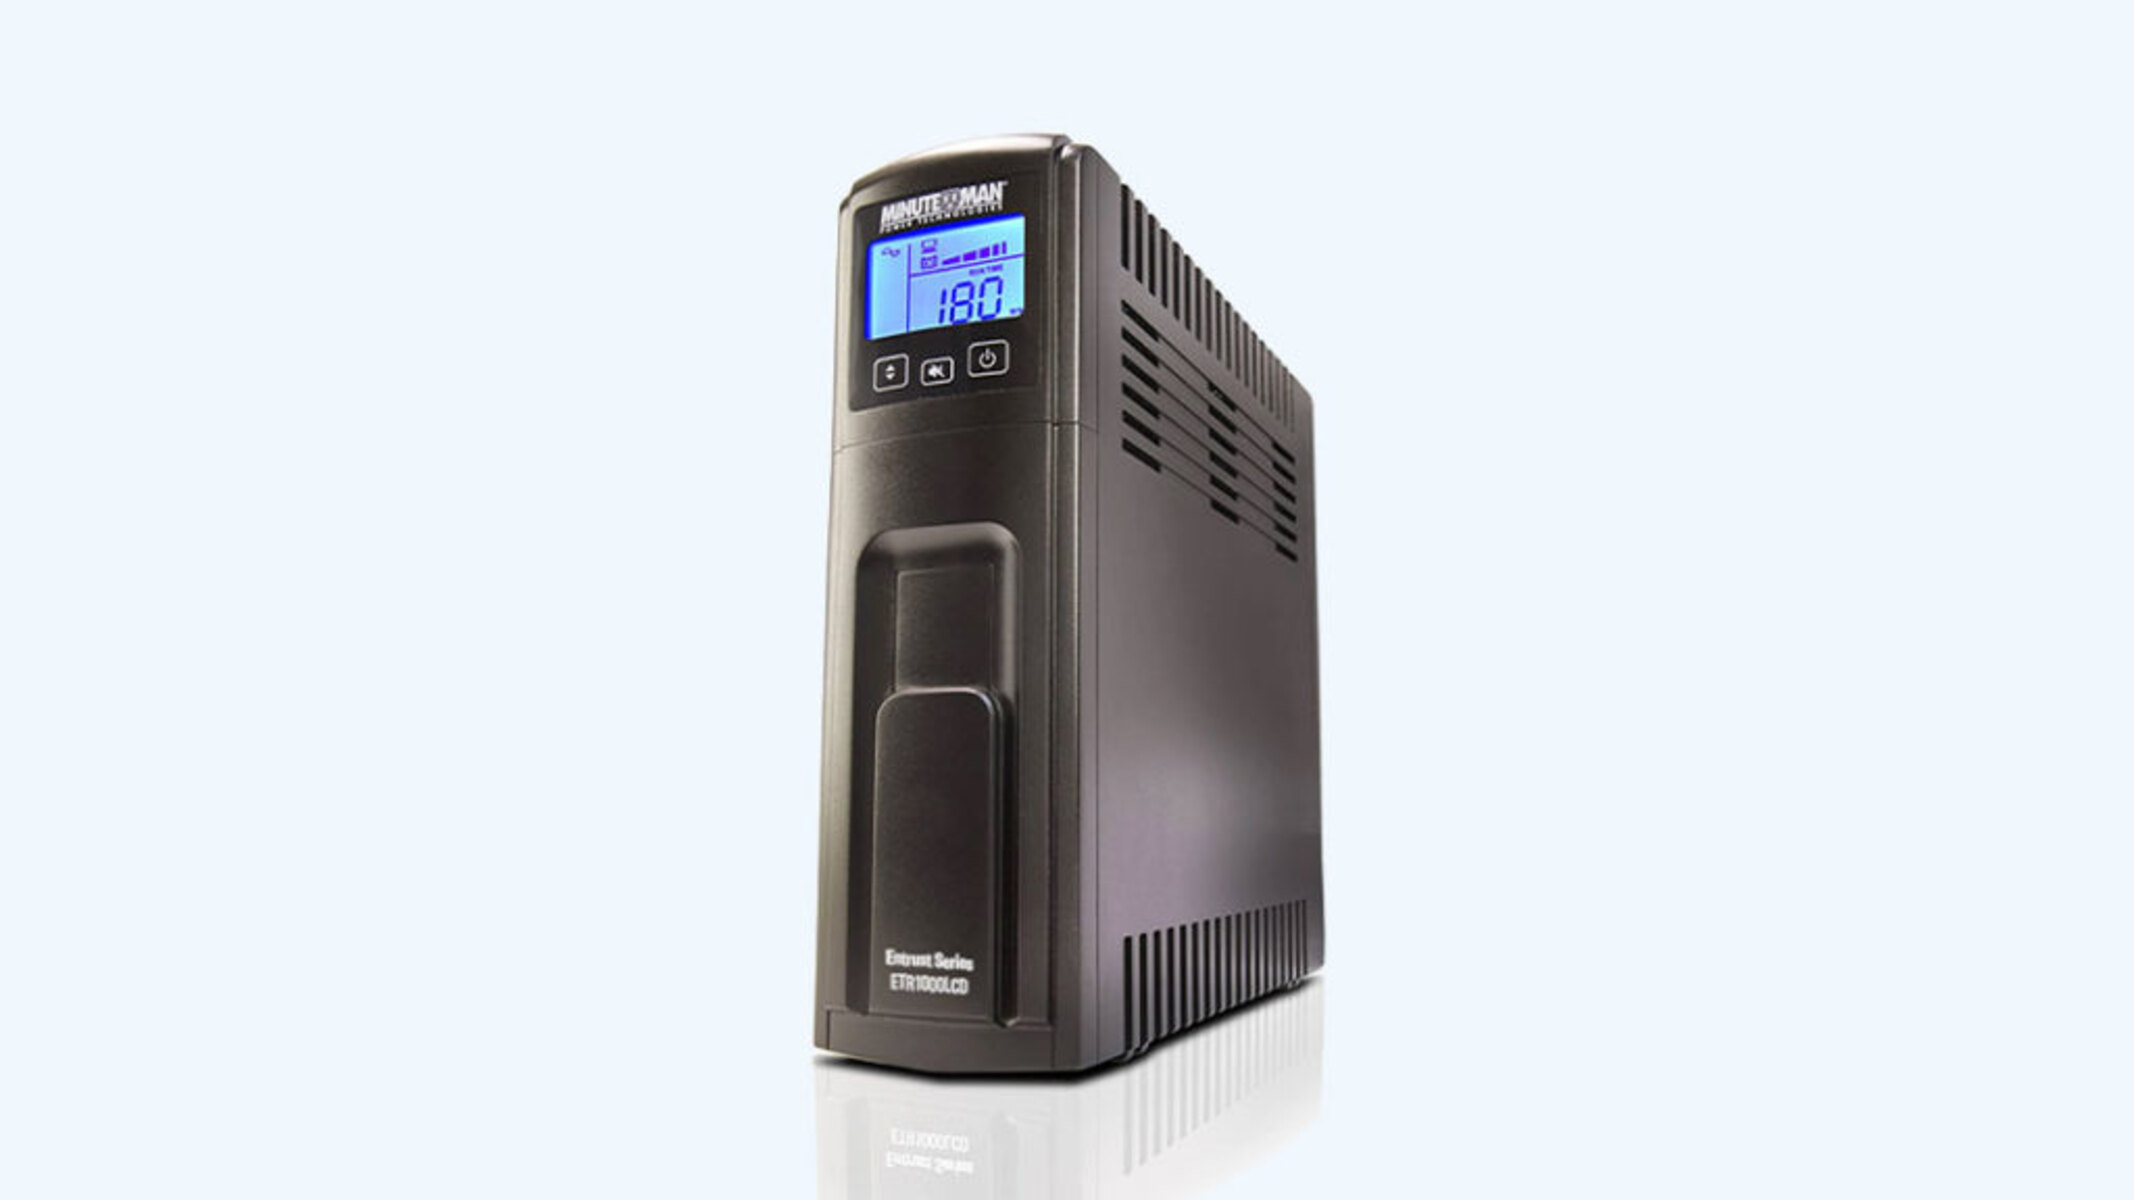
A Minuteman UPS (Uninterruptible Power Supply) is a device that provides backup power to critical electronic equipment in the event of a power outage or fluctuation. While UPS units are designed to provide reliable power protection, the batteries that power them will eventually need to be replaced. In this guide, we will walk you through the step-by-step process of replacing the battery in a Minuteman UPS.
Before we dive into the specifics, it’s important to understand the importance of regular battery replacement. Over time, UPS batteries can lose their ability to hold a charge, which can significantly reduce the backup power provided. By replacing the battery when necessary, you can ensure that your Minuteman UPS continues to provide reliable power protection for your valuable electronic equipment.
In this guide, we will provide a detailed overview of the steps involved in replacing the battery in a Minuteman UPS. From gathering the necessary tools to properly disposing of the old battery, we’ll cover everything you need to know to successfully complete the battery replacement process.
Whether you’re a home user looking to protect your computer and peripherals or a business owner safeguarding critical equipment, knowing how to replace a Minuteman UPS battery is a valuable skill. So, let’s get started with gathering the necessary tools and equipment!
Step 1: Gather the necessary tools and equipment
Before you begin the process of replacing the battery in your Minuteman UPS, it is important to gather all the necessary tools and equipment. Having everything you need at hand will ensure a smooth and efficient battery replacement process. Here’s a list of items you will need:
- Replacement battery: Make sure you purchase a compatible battery that is specifically designed for your Minuteman UPS model. Check the specifications of your UPS or consult the manufacturer’s website to find the appropriate replacement battery.
- Protective gloves: Batteries can contain corrosive materials, so it is important to wear protective gloves to avoid skin contact and potential injuries.
- Safety glasses: To protect your eyes from any potential hazards or battery acid splashes, it is recommended to wear safety glasses throughout the battery replacement process.
- Screwdriver set: Depending on your UPS model, you might need a screwdriver to open the battery compartment and remove the old battery. Check the type and size of screws used in your UPS and have the appropriate screwdriver handy.
- Cleaning materials: It’s a good idea to have some clean, lint-free cloths or paper towels on hand to wipe down the battery compartment and clean any dust or debris that may have accumulated.
- Battery terminal cleaner: Over time, battery terminals can accumulate corrosion. Having a battery terminal cleaner brush or solution can help you remove any corrosion and ensure good electrical contact with the new battery.
- Battery replacement guide: While this guide will provide you with step-by-step instructions, it’s always helpful to have the manufacturer’s battery replacement guide or manual readily available for reference.
Once you have gathered all the necessary tools and equipment, you’ll be well-prepared to proceed with the battery replacement process. In the next step, we will guide you through safely powering down your UPS and disconnecting it from the power source.
Step 2: Power down the UPS and disconnect it from the power source
Before you start replacing the battery in your Minuteman UPS, it is crucial to power down the unit and disconnect it from the power source. This ensures your safety and prevents any potential damage to the equipment. Here’s how you can complete this step:
- Turn off the UPS: Locate the power button on your UPS and switch it off. This will initiate the shutdown process, allowing the UPS to safely transition from battery power to the main power source.
- Unplug the UPS: Once the UPS is powered off, unplug it from the wall outlet or the power strip. This ensures that there is no electric current flowing through the unit, making it safe to proceed with the battery replacement.
- Disconnect any connected devices: If you have any electronic devices connected to the UPS, such as a computer or a network server, make sure to power them down and disconnect them from the UPS as well. This prevents any power surges or disturbances during the battery replacement process.
It is important to note that some UPS models may have a detachable power cord, while others may have a built-in power cord. Make sure to follow the specific instructions provided by the manufacturer for disconnecting the power source.
By following these steps, you have successfully powered down your Minuteman UPS and disconnected it from the power source. This ensures a safe and stable environment for replacing the battery. In the next step, we will guide you on how to locate the battery compartment within the UPS.
Step 3: Locate the battery compartment
Once you have powered down your Minuteman UPS and disconnected it from the power source, the next step is to locate the battery compartment. The battery compartment houses the old battery that needs to be replaced. Here’s how you can find the battery compartment:
- Refer to the user manual: If you have the user manual for your Minuteman UPS, it will typically have detailed instructions on how to locate the battery compartment. Refer to the manual and follow the specified steps to easily find the battery compartment.
- Examine the UPS exterior: Take a close look at the UPS unit itself. In many cases, the battery compartment is located on the back or bottom of the UPS. Look for any latches, screws, or release buttons that may be securing the battery compartment cover.
- Check for labels or markings: The battery compartment cover may have labels or markings indicating its location. Look for words such as “Battery,” “Batt,” or a battery symbol on the UPS unit. The labels may also provide additional information such as the type of battery required or the orientation for installing the battery.
If you are having trouble locating the battery compartment, it’s always a good idea to consult the manufacturer’s website or reach out to their customer support for guidance. They can provide specific instructions or diagrams related to your particular UPS model.
Once you have successfully located the battery compartment, you are now ready to proceed with removing the old battery. In the next step, we will guide you through the process of removing the old battery from your Minuteman UPS.
Step 4: Remove the old battery
Now that you have located the battery compartment in your Minuteman UPS, it’s time to remove the old battery. Follow the steps below to safely and effectively remove the old battery:
- Wear protective gloves: Before handling the old battery, make sure to put on your protective gloves. This will protect your hands from any potential exposure to battery acid or other hazardous materials.
- Open the battery compartment: Depending on your UPS model, the battery compartment may have a cover secured by screws, latches, or release buttons. Use the appropriate tools, such as a screwdriver, to carefully remove any necessary fasteners and open the battery compartment.
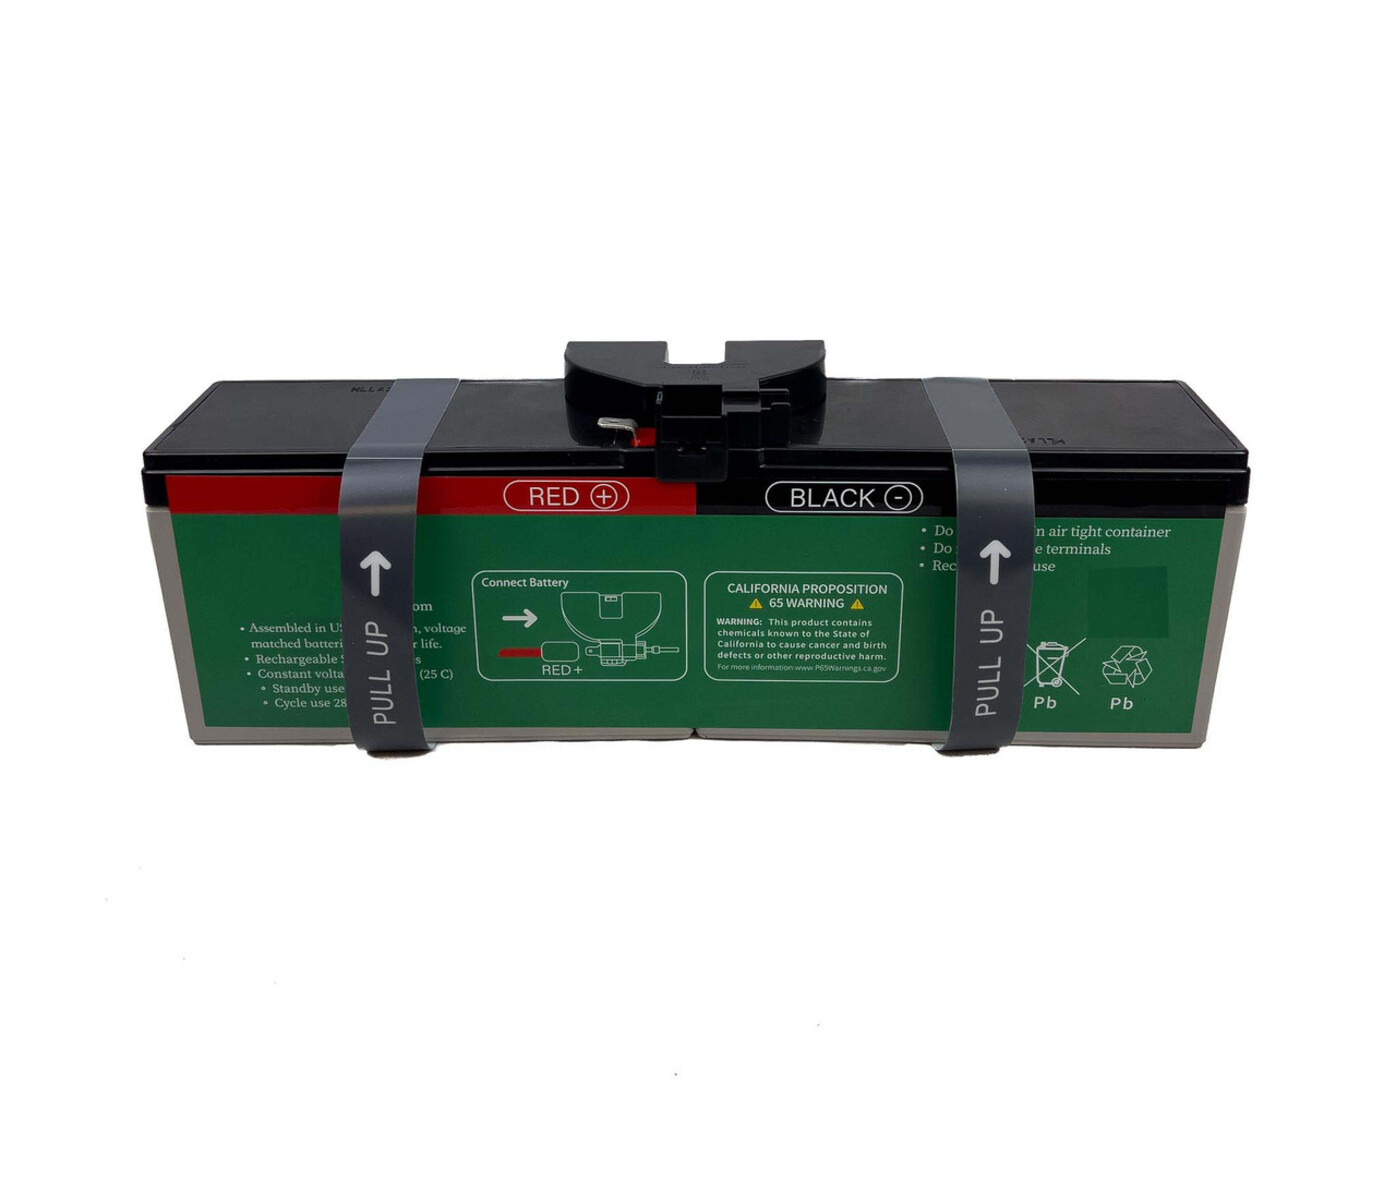
- Inspect the battery connections: Take a close look at how the old battery is connected to the UPS. Identify the positive (+) and negative (-) terminals on the battery, as well as the corresponding terminals within the UPS. Take note of how the cables are attached, ensuring that you can properly reconnect the new battery later.
- Disconnect the battery cables: Using caution, disconnect the battery cables from the terminals. Start with the negative (-) cable first, followed by the positive (+) cable. Some batteries may have connectors that can be easily detached, while others may have screws that need to be loosened. Be sure to observe any safety precautions specified in the user manual.
- Remove the old battery: Once the cables are disconnected, carefully lift out the old battery from the compartment. Be mindful of the weight and the potential for spills or leaks. Place the old battery in a safe and secure location, away from children and pets, until you can properly dispose of it.
By following these steps, you have successfully removed the old battery from your Minuteman UPS. Now, it’s time to prepare the new battery for installation, which we will cover in the next step.
Step 5: Prepare the new battery for installation
After safely removing the old battery from your Minuteman UPS, it’s important to properly prepare the new battery for installation. Taking the time to prepare the new battery will ensure its longevity and optimal performance. Follow the steps below to prepare the new battery:
- Read the manufacturer’s instructions: Before proceeding, carefully read the instructions that come with the new battery. Manufacturers often provide specific guidelines and recommendations for preparing and handling the battery.
- Inspect the new battery: Thoroughly examine the new battery for any visible damage or defects. Check for signs of leakage or bulging. If you notice any issues, contact the manufacturer for assistance or request a replacement battery if necessary.
- Check the battery terminals: Take a look at the terminals on the new battery. Ensure they are clean and free from dirt, dust, or corrosion. If needed, use a cloth or a terminal cleaner to gently remove any debris or corrosion buildup.
- Verify compatibility: Double-check that the new battery is the correct model and size for your Minuteman UPS. Compare the specifications on the battery with the information provided by the UPS manufacturer to ensure a proper fit.
- Follow any battery activation instructions: Some batteries may come partially or fully discharged. If the manufacturer’s instructions indicate battery activation steps, such as charging the battery before installation, follow the prescribed process to maximize the battery’s performance.
It’s crucial to handle the new battery with care during this process and avoid exposing it to extreme temperatures or physical stress. By properly preparing the new battery, you are ensuring its readiness for installation. In the next step, we will guide you through the process of installing the new battery into the compartment of your Minuteman UPS.
Step 6: Install the new battery in the compartment
With the new battery prepared, it’s time to install it into the battery compartment of your Minuteman UPS. Follow the steps below to ensure a proper and secure installation:
- Position the new battery: Carefully position the new battery in the compartment, aligning it with the terminals and ensuring a snug fit. Take note of any orientation markers or labels on the battery compartment that indicate the proper alignment.
- Connect the battery cables: Connect the battery cables to the appropriate terminals on the new battery. Start by attaching the positive (+) cable and then the negative (-) cable. Ensure a secure and tight connection by tightening any fasteners or screws as required.
- Double-check the connections: Once the cables are connected, double-check that the positive and negative terminals are correctly aligned. Avoid crossing or touching the terminals together, as this can cause a short circuit and potentially damage the UPS or the battery.
- Secure the battery: If there are any brackets, holders, or straps provided with the UPS or the battery, use them to securely fasten the battery in place. This ensures that the battery remains in position and minimizes movement during operation or transportation.
- Close the battery compartment: Carefully close the battery compartment cover, ensuring that it is securely fastened. Replace any screws, latches, or release buttons that were removed earlier. A proper closure will protect the battery and maintain the integrity of the UPS enclosure.
Once the new battery is properly installed and secured, you have successfully completed this step. In the next section, we will guide you through the process of reconnecting your Minuteman UPS to the power source.
Step 7: Reconnect the UPS to the power source
After installing the new battery in your Minuteman UPS, the next step is to reconnect the UPS to the power source. Reconnecting the UPS ensures that it receives the necessary power and can provide backup power in case of an outage. Follow the steps below to properly reconnect the UPS:
- Position the UPS: Place the Minuteman UPS in its desired location, ensuring that it is easily accessible and has proper ventilation for heat dissipation.
- Plug in the power cord: Take the power cord that was previously disconnected and plug it back into the wall outlet or power strip. Ensure a secure connection to avoid any power interruptions.
- Check the power indicator: Look for a power indicator light or display on the UPS. The light or display should indicate that the UPS is receiving power from the source.
- Verify correct voltage: Check that the UPS is set to the correct voltage for your electrical system. Most UPS units have a switch or setting that allows you to select the appropriate voltage level.
- Turn on the UPS: Locate the power button on your Minuteman UPS and switch it on. The UPS should power up and go through its startup sequence.
- Check UPS functionality: Test the UPS by plugging in a device or load that you want to protect. Ensure that the UPS is providing power to the connected device and that it is functioning as expected.
By following these steps, you have successfully reconnected your Minuteman UPS to the power source. This ensures that the UPS is ready to provide backup power in case of a power outage or fluctuation. In the next step, we will guide you through testing the battery to ensure its functionality.
Step 8: Power on the UPS and test the battery
After reconnecting your Minuteman UPS to the power source, the next step is to power on the UPS and test the battery to ensure it is functioning properly. Testing the battery is crucial to ensure that it can provide backup power when needed. Follow the steps below to power on the UPS and test the battery:
- Flip the power switch: Locate the power switch on your Minuteman UPS and turn it on. The UPS will start its initialization process.
- Check the battery status: Observe the battery status indicator on your UPS. It should indicate that the battery is in good condition and fully charged. Some UPS models may have a display that provides more detailed information about the battery’s status.
- Perform a runtime test: Perform a runtime test by disconnecting the UPS from the power source. This will simulate a power outage and allow you to assess how long the UPS can provide backup power to your connected devices. Monitor the UPS and connected devices to ensure they continue to receive power without any interruptions.
- Keep an eye on the battery level: During the runtime test, monitor the battery level indicator on your UPS. It should gradually decrease as the UPS provides backup power. Take note of how long the UPS can sustain power to your devices before the battery is depleted.
- Reconnect the UPS to the power source: Once the runtime test is complete, reconnect the UPS to the power source. The UPS will begin charging the battery to restore its full capacity.
- Verify proper charging: Check the battery status indicator to ensure that the UPS is properly charging the battery. It should indicate that the battery is being charged and gradually increasing in capacity.
By following these steps and testing the battery, you can ensure that your Minuteman UPS is functioning correctly and can provide reliable backup power when needed. It is recommended to periodically test the battery to ensure its continued performance. Finally, in the next step, we will guide you through the proper disposal of the old battery.
Step 9: Dispose of the old battery properly
Once you have successfully replaced the battery in your Minuteman UPS, it is important to dispose of the old battery in an environmentally responsible manner. Improper disposal of batteries can harm the environment and pose a potential risk to human health. Follow the steps below to dispose of the old battery safely:
- Check local regulations: Research and familiarize yourself with the local regulations regarding the disposal of batteries. Different areas may have specific guidelines or recycling programs in place.
- Locate recycling centers: Look for authorized recycling centers or facilities in your area that accept used batteries for recycling. These facilities are equipped to handle the proper disposal and recycling of batteries to minimize their environmental impact.
- Prepare the battery for recycling: Ensure that the old battery is properly packaged and labeled for recycling. Follow any specific instructions provided by the recycling center. This might include placing the battery in a plastic bag or taping the terminals to prevent any accidental electrical discharge.
- Transport the battery safely: When transporting the old battery to the recycling center, take precautions to prevent any potential leaks or spills. Place the battery in a durable container and secure it to avoid any damage during transport.
- Drop off the battery at the recycling center: Deliver the old battery to the designated recycling center or follow the instructions provided by the center for drop-off or collection. Ensure that you comply with any requirements or guidelines they have in place.
- Follow additional disposal options: In some cases, your local municipality may offer additional disposal options, such as battery disposal events or scheduled pickups. Stay informed about these options and take advantage of them when available.
Remember, proper disposal of the old battery is essential for protecting the environment and ensuring the responsible recycling of its materials. By following these steps, you can contribute to the overall efforts of reducing electronic waste and promoting sustainability.
Conclusion
Replacing the battery in your Minuteman UPS is a critical maintenance task that ensures the continuous and reliable operation of your backup power system. Throughout this guide, we have provided you with a step-by-step process to successfully replace the battery in your Minuteman UPS.
We started by gathering the necessary tools and equipment, including a replacement battery, protective gloves, safety glasses, and cleaning materials. We then guided you through the process of powering down the UPS, locating the battery compartment, and removing the old battery. From there, we walked you through preparing the new battery for installation, installing it securely in the compartment, and reconnecting the UPS to the power source.
Afterward, we covered the important step of testing the battery to ensure its functionality and performance during power outages. Finally, we emphasized the importance of properly disposing of the old battery by following local regulations and delivering it to authorized recycling centers.
By following these steps and taking the necessary precautions, you can confidently replace the battery in your Minuteman UPS, ensuring it continues to provide reliable backup power protection for your valuable electronic equipment.
Remember, regular battery replacement is essential to maintaining the optimal performance and longevity of your UPS. It is recommended to refer to the user manual or consult the manufacturer’s guidelines for any specific instructions or recommendations related to your Minuteman UPS model.
Thank you for following this guide, and we hope it has been helpful in successfully replacing the battery in your Minuteman UPS.