Introduction
Are you tired of constantly worrying about your phone getting damaged by water? Whether you're heading to the beach, going on a hike, or simply want to protect your phone from unexpected spills, creating your own waterproof phone case can provide the peace of mind you need. With a few simple materials and a DIY mindset, you can craft a reliable waterproof case that safeguards your device from water damage without breaking the bank.
By embarking on this DIY project, you'll not only protect your phone but also gain a sense of accomplishment and creativity. This guide will walk you through the step-by-step process of creating a custom waterproof phone case, allowing you to tailor the design to your preferences and ensure a perfect fit for your specific phone model.
Whether you're an outdoor enthusiast, a beach lover, or someone who simply wants to safeguard their phone from life's unpredictable moments, this DIY waterproof phone case project is an excellent way to take control of your device's protection. So, gather your materials, roll up your sleeves, and get ready to embark on a fun and practical DIY adventure. Let's dive into the step-by-step process of creating your very own waterproof phone case.
Step 1: Gather Materials
To embark on the journey of creating your own waterproof phone case, you'll need to gather a few essential materials. These items are readily available and can be easily acquired from local stores or online retailers. Here's a comprehensive list of the materials you'll need:
-
Ziplock Bags: Opt for high-quality, durable ziplock bags that are appropriately sized to accommodate your phone. Look for bags that are labeled as waterproof or specifically designed for underwater use to ensure maximum protection.
-
Transparent Sealant: Choose a transparent sealant that is compatible with both plastic and electronic devices. Silicone-based sealants are a popular choice due to their waterproof properties and flexibility, which allows for easy application and a secure seal.
-
Scissors or Craft Knife: You'll need a pair of scissors or a craft knife to carefully cut the ziplock bag to the appropriate size for your phone. Precision is key to ensure a snug fit for your device within the case.
-
Desiccant Packets: These small packets are designed to absorb moisture and can be found in various products, such as shoeboxes and electronics packaging. Including a desiccant packet within your DIY waterproof case can help prevent moisture buildup and protect your phone from humidity.
-
Optional: Decorative Elements: If you want to personalize your waterproof phone case, consider adding decorative elements such as stickers, waterproof decals, or colorful duct tape. These elements can add a touch of personality to your case while also making it easily identifiable.
By gathering these materials, you'll be well-prepared to move on to the next step of the DIY process, allowing you to craft a custom waterproof phone case that meets your specific needs and preferences. Now that you have all the necessary materials at your disposal, it's time to dive into the next step: preparing your phone for the waterproof transformation.
Step 2: Prepare Your Phone
Before diving into the process of creating the waterproof seal, it's crucial to prepare your phone to ensure a seamless and effective transformation. By following these preparatory steps, you'll set the stage for a secure and well-fitted DIY waterproof phone case.
Clean Your Phone
Begin by thoroughly cleaning your phone to remove any dust, dirt, or residue that could affect the adhesion of the sealant. Use a gentle, non-abrasive cleaning solution and a microfiber cloth to wipe the surfaces of your phone, paying close attention to the edges and corners where the sealant will make contact.
Remove Any Existing Case or Cover
If your phone is currently housed in a protective case or cover, carefully remove it to allow direct access to the device. This step is essential to ensure that the DIY waterproof case fits snugly around your phone without any additional layers or obstructions.
Position the Ziplock Bag
Next, place the ziplock bag over your phone to gauge the amount of material required for a precise fit. Carefully align the bag with the edges of your phone, ensuring that it fully encases the device without leaving excess material that could interfere with the sealing process.
Trim the Excess Material
Using a pair of scissors or a craft knife, trim any excess material from the ziplock bag to achieve a tailored fit around your phone. Take your time with this step to achieve a clean and precise cut, as the accuracy of the bag's dimensions will directly impact the effectiveness of the waterproof seal.
Check for Compatibility
Once the ziplock bag is trimmed to the appropriate size, perform a final check to ensure that it aligns perfectly with your phone's dimensions. Verify that the camera lens, ports, and buttons are easily accessible and unobstructed by the bag, as these components should remain fully functional within the DIY waterproof case.
By meticulously preparing your phone for the waterproof transformation, you'll lay the groundwork for a successful DIY project. With your phone now primed for the next phase, you're ready to move on to the exciting process of creating the waterproof seal that will safeguard your device from water damage.
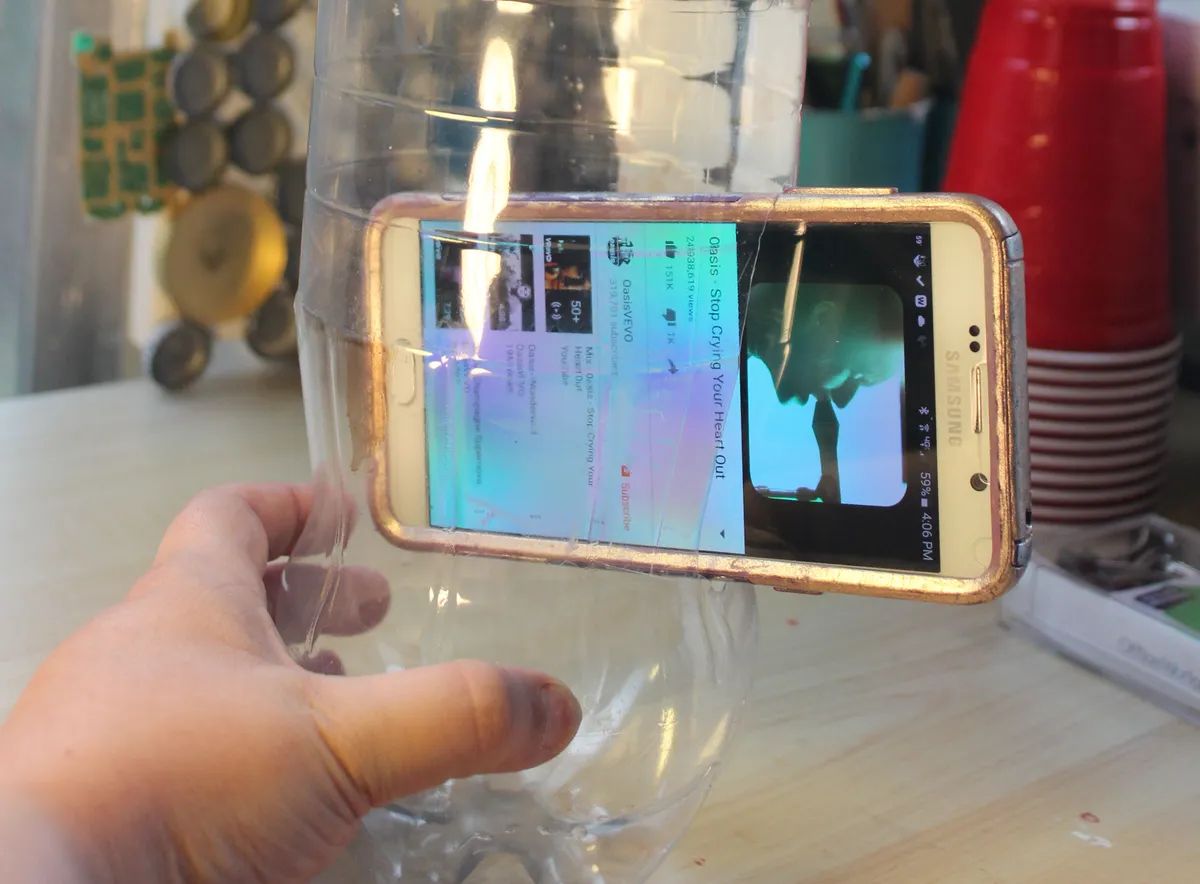
Step 3: Create the Waterproof Seal
With your phone meticulously prepared, it's time to embark on the pivotal step of creating the waterproof seal that will safeguard your device from water damage. This process involves applying a transparent sealant to the ziplock bag, effectively transforming it into a reliable and custom-fit waterproof case.
-
Apply the Sealant: Begin by carefully applying the transparent sealant along the edges of the trimmed ziplock bag. Ensure that the sealant is evenly distributed and forms a continuous line around the perimeter of the bag. Take care to avoid excessive buildup, as a thin and uniform application will facilitate a secure seal without adding unnecessary bulk to the case.
-
Seal the Edges: Once the sealant is applied, firmly press the edges of the bag together to initiate the sealing process. Apply gentle pressure to ensure that the sealant adheres to the plastic surface, creating a tight bond that prevents water from penetrating the case. Pay close attention to the corners and seams, as these areas require thorough sealing to guarantee comprehensive protection.
-
Allow for Drying Time: After sealing the edges, allow the case to dry according to the manufacturer's instructions for the specific sealant you've chosen. This drying period is essential for the sealant to cure and form a resilient barrier against water intrusion. Patience during this phase will ensure that the sealant effectively fortifies the ziplock bag, transforming it into a durable and waterproof enclosure for your phone.
-
Inspect for Imperfections: Once the sealant has dried, carefully inspect the case for any imperfections or areas that may require additional sealing. Address any potential weak points by applying a supplementary layer of sealant to reinforce the waterproof barrier. Thoroughly examining the case at this stage will help preemptively address any vulnerabilities and ensure the overall integrity of the waterproof seal.
-
Test the Seal: Before proceeding to the final step, it's crucial to conduct a preliminary test of the waterproof seal. Fill a sink or basin with water and gently submerge the sealed phone case, observing it for any signs of water infiltration. If the case remains dry after a brief immersion, it indicates a successful seal. However, if water penetrates the case, reevaluate the sealing and address any identified deficiencies before proceeding.
By meticulously following these steps, you'll transform a simple ziplock bag into a custom waterproof phone case that offers reliable protection against water damage. With the sealant effectively fortifying the edges, your DIY waterproof case is now ready for the crucial test to ensure its efficacy in safeguarding your phone from water-related mishaps.
Step 4: Test Your Case
With the DIY waterproof phone case meticulously crafted, it's time to validate its efficacy through a comprehensive testing process. This crucial step ensures that your device will be reliably protected from water damage in real-life scenarios, providing the peace of mind you need when venturing into aquatic environments or navigating through daily activities. The testing phase involves subjecting the case to various water-related simulations to assess its ability to safeguard your phone from moisture and potential water intrusion.
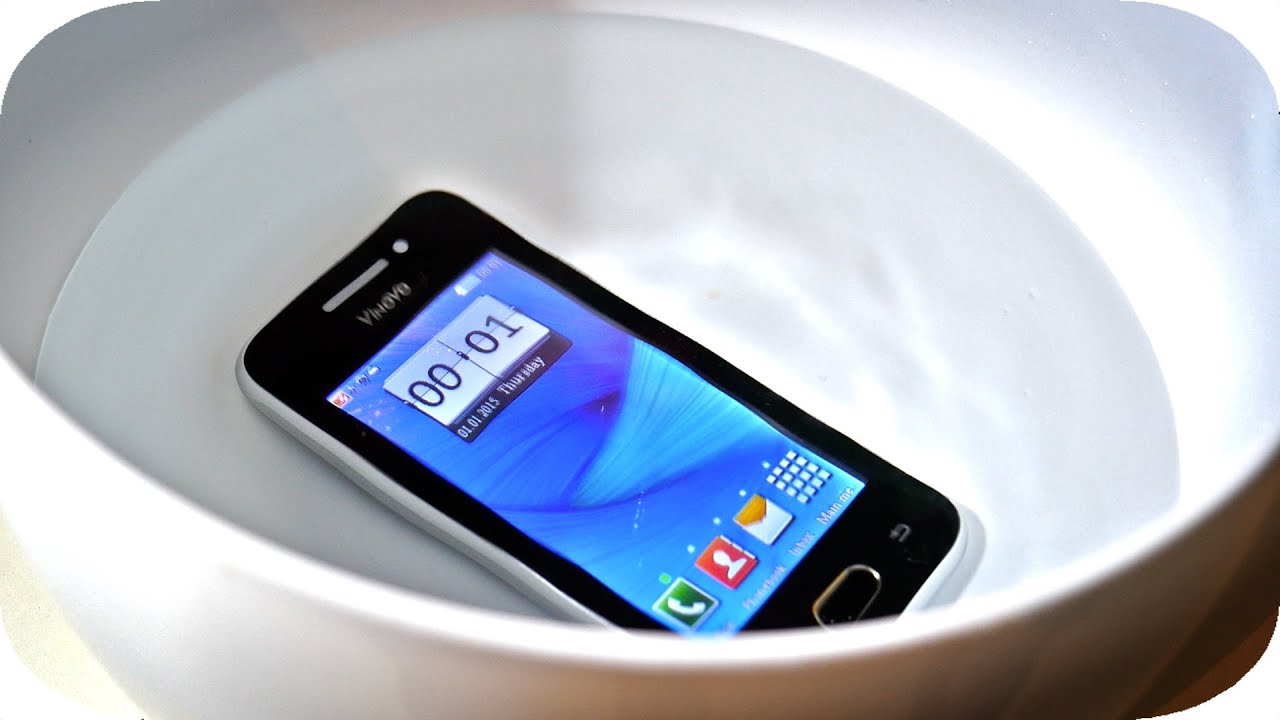
Submerge Test
Begin the testing process by immersing the sealed phone case in a basin of water, ensuring that it is fully submerged for a brief duration. Observe the case closely for any signs of water infiltration, paying particular attention to the sealed edges and seams. The submerge test simulates scenarios such as accidental drops in water bodies or exposure to rain, allowing you to gauge the case's resilience in preventing water from reaching your phone.
Splash and Spray Test
Next, subject the phone case to a simulated splash and spray test by gently splashing water onto its surface and spraying it with a fine mist. This test replicates scenarios where your phone may be exposed to splashes from water activities or encounters with inclement weather. Observe the case's reaction to the water exposure, ensuring that it effectively repels moisture and maintains a dry interior to protect your phone.
Duration Test
To further assess the case's waterproof capabilities, extend the testing duration by leaving the sealed phone case submerged in water for an extended period. This prolonged immersion test mimics scenarios such as accidental submersion in water bodies or prolonged exposure to wet environments. Monitor the case closely to verify its ability to uphold a waterproof barrier over time, ensuring that it remains impervious to water ingress throughout the extended duration of the test.
Functional Test
During the testing process, periodically interact with your phone while it is enclosed in the waterproof case to assess its functional integrity. Test the responsiveness of the touchscreen, accessibility of buttons, and clarity of camera lenses to ensure that the case does not impede the device's usability. This functional test is crucial in confirming that the DIY waterproof case not only protects your phone from water damage but also maintains its usability and functionality in diverse environments.
Post-Test Inspection
Following the completion of the testing phase, carefully inspect the phone and its enclosed case for any signs of water intrusion or moisture accumulation. Thoroughly examine the interior of the case and the phone itself to ensure that both remain dry and free from water-related damage. Any indications of water penetration during the testing process may necessitate resealing or reinforcing the case to enhance its waterproof integrity.
By subjecting your DIY waterproof phone case to these comprehensive tests, you can confidently ascertain its ability to safeguard your device from water damage in various real-life scenarios. The testing process not only validates the effectiveness of the case but also provides valuable insights into its performance, allowing you to make any necessary adjustments to enhance its waterproofing capabilities. With the successful completion of the testing phase, you can embark on your adventures or daily activities with the assurance that your phone is well-protected within your custom-crafted waterproof case.
Conclusion
Congratulations on successfully crafting your very own DIY waterproof phone case! By embarking on this creative and practical endeavor, you've not only safeguarded your phone from water-related mishaps but also demonstrated your resourcefulness and ingenuity. As you reflect on the journey from gathering materials to conducting comprehensive tests, it's evident that this DIY project has empowered you to take control of your device's protection while adding a personal touch to its design.
Your commitment to creating a custom waterproof case tailored to your phone's dimensions and your unique preferences has resulted in a reliable and cost-effective solution for safeguarding your device. The meticulous preparation of your phone, precise application of the waterproof sealant, and thorough testing process have culminated in a protective enclosure that offers peace of mind in various aquatic and wet environments.
As you embrace the benefits of your DIY waterproof phone case, you can confidently explore outdoor adventures, engage in water-related activities, and navigate through daily life without the worry of water damage compromising your device. The sense of accomplishment derived from crafting a practical solution with your own hands is a testament to your creativity and ability to address everyday challenges with innovation.
Moreover, the personalized touch you've added to your DIY waterproof case, whether through decorative elements or custom modifications, reflects your unique style and individuality. This bespoke approach not only enhances the visual appeal of the case but also ensures that it aligns with your personal preferences, making it a distinct and identifiable accessory for your phone.
As you embark on future endeavors and share your experiences with others, consider the impact of this DIY project in empowering you to proactively address the need for device protection. Your journey from gathering materials to conducting tests serves as a testament to the practicality and fulfillment derived from engaging in DIY projects that cater to everyday needs.
In conclusion, your DIY waterproof phone case stands as a testament to your resourcefulness, creativity, and commitment to safeguarding your device. By embracing the spirit of DIY innovation, you've not only protected your phone but also gained a sense of accomplishment and ownership over your device's well-being. As you carry your phone within the custom-crafted waterproof case, may it serve as a reminder of your ability to tackle challenges with creativity and practicality, adding a touch of personal flair to everyday solutions.