Introduction
Welcome to the world of diabetes management and data tracking with the Libre 2 glucose monitoring system. As a diabetic, keeping track of your glucose levels is crucial for maintaining your health and well-being. The Libre 2 system allows you to easily monitor and track your glucose levels throughout the day, providing you with valuable insights into your condition.
With the advancement of technology, you no longer have to rely solely on manual record-keeping. The Libre 2 system integrates with a smartphone or compatible device, making it effortless to collect and analyze your data. In this article, we will guide you through the process of downloading your Libre 2 data, so you can gain a deeper understanding of your glucose patterns and make informed decisions about your diabetes management.
Tracking your glucose levels using the Libre 2 system offers several benefits. By having access to your data, you can identify trends and patterns, such as how your glucose levels fluctuate throughout the day or how they are affected by certain activities or meals. This information empowers you to make necessary adjustments to your lifestyle, medication, or diet to maintain optimal glucose control.
Furthermore, by downloading and analyzing your Libre 2 data, you can have more meaningful discussions with your healthcare provider. Your healthcare provider can help you interpret the data and offer personalized recommendations based on your unique glucose patterns. This partnership between you and your healthcare provider can lead to more effective diabetes management and improved overall health.
In the following sections, we will take you step-by-step through the process of downloading and interpreting your Libre 2 data. Whether you are a new Libre 2 user or looking to refine your data tracking skills, this article will equip you with the knowledge and tools to take charge of your diabetes management.
Background information on Libre 2 and data tracking
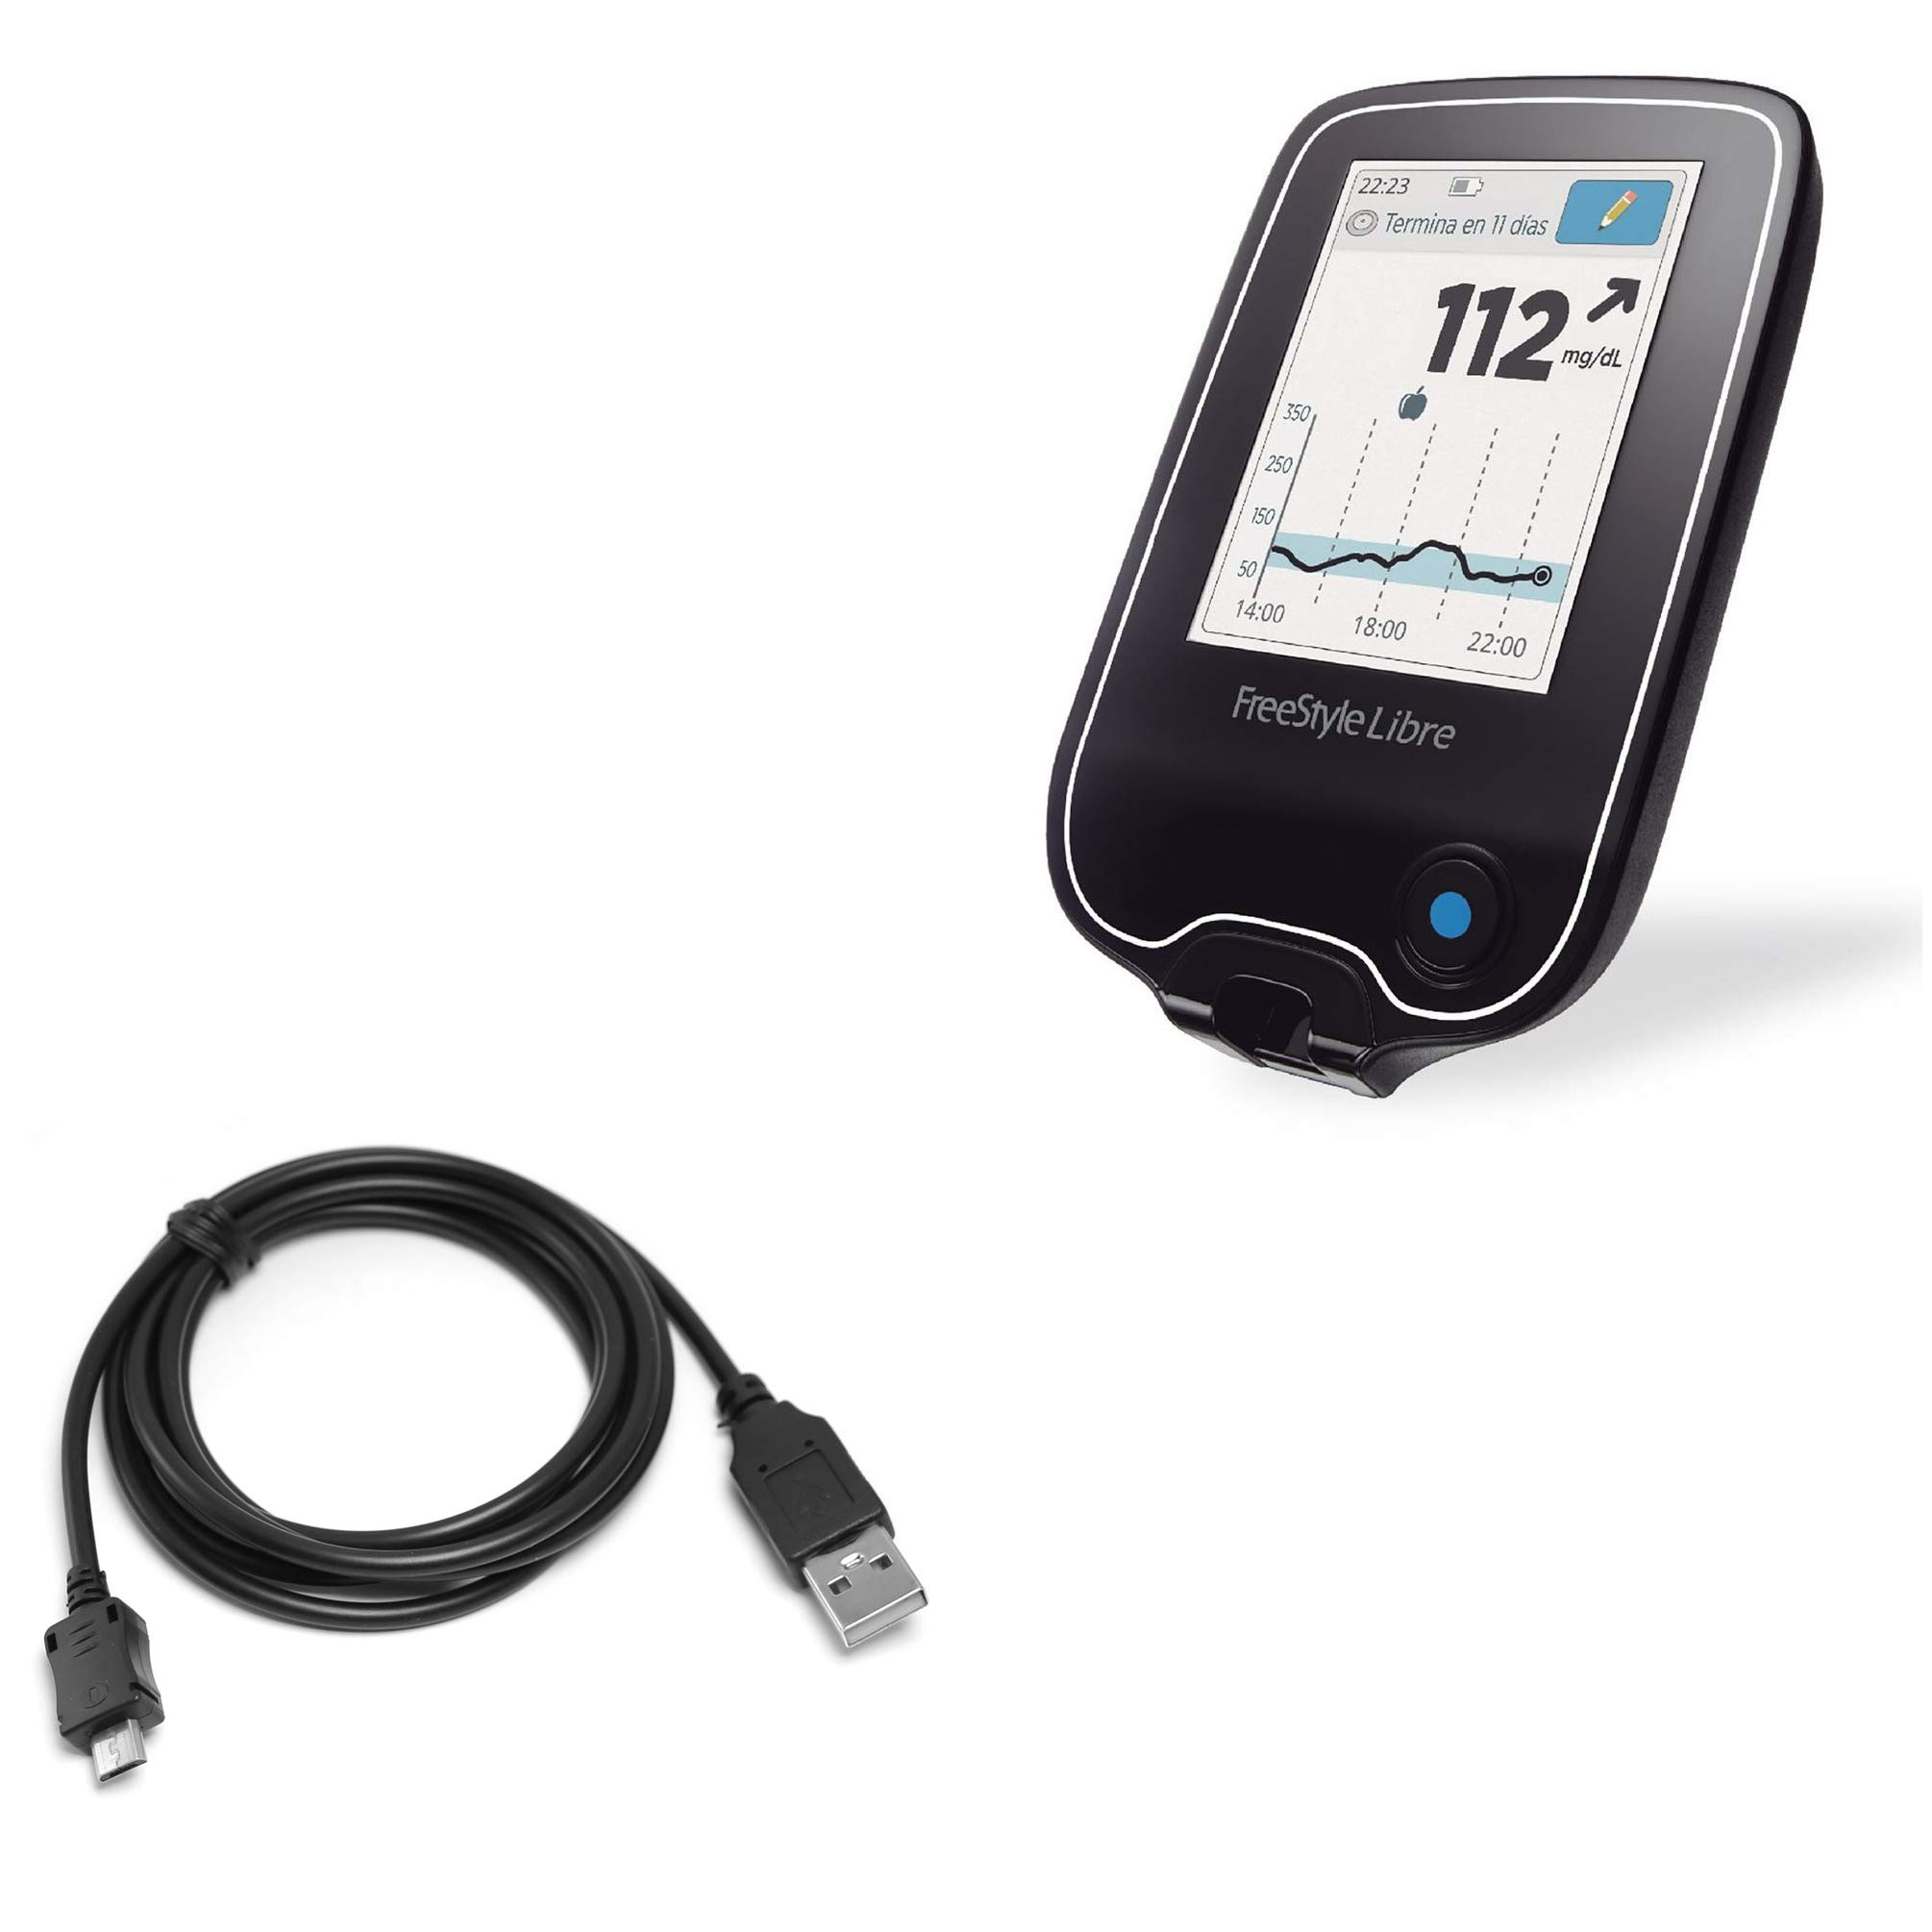
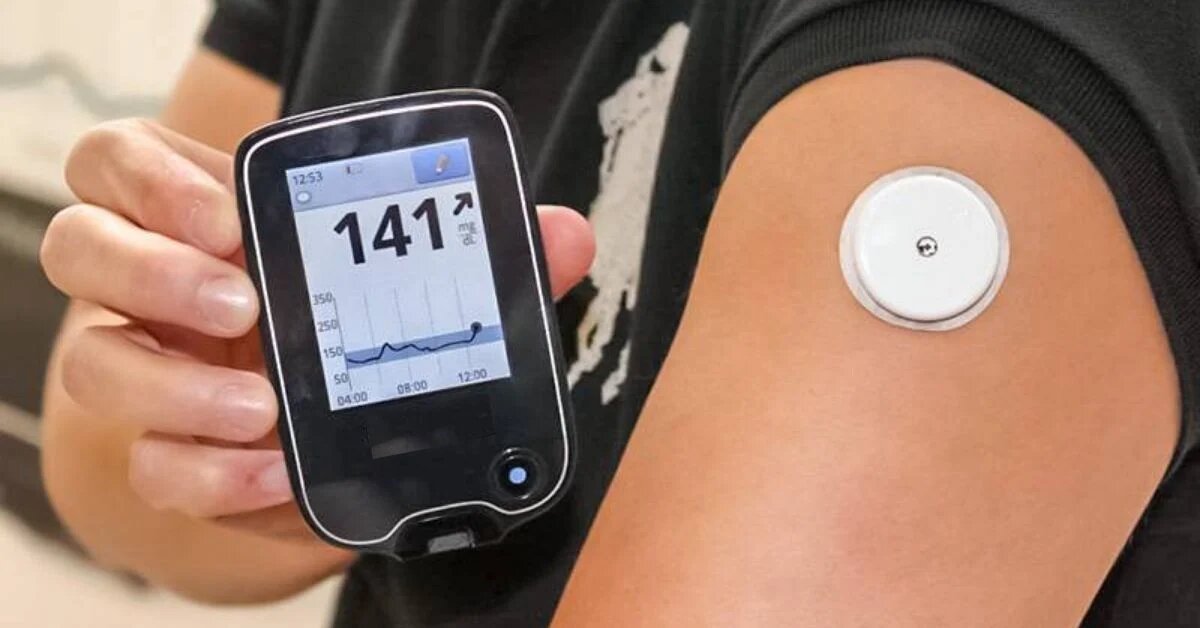
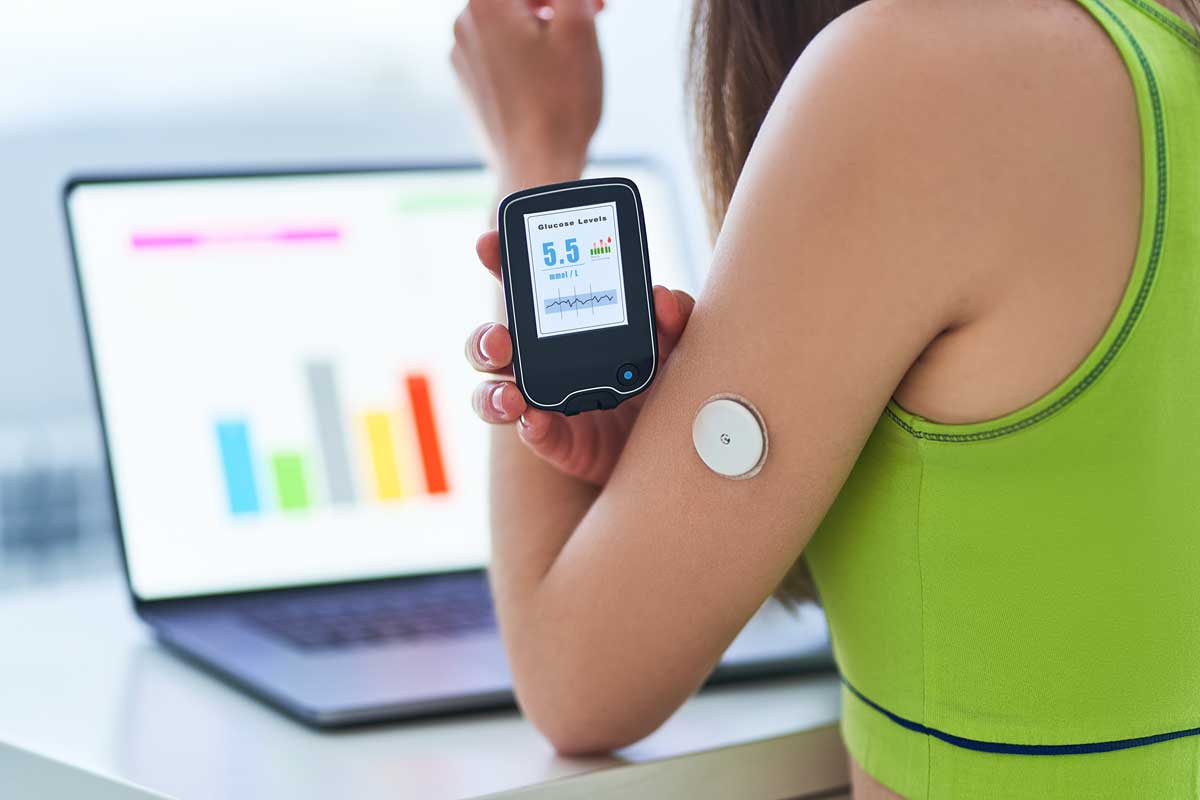
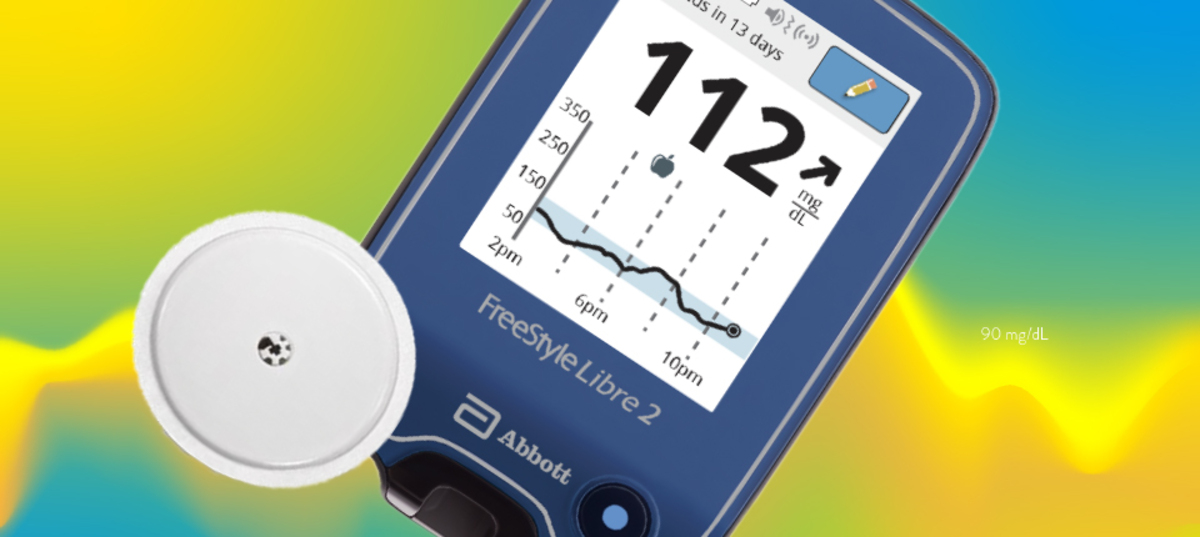
The Libre 2 glucose monitoring system is a revolutionary tool for individuals with diabetes. Developed by Abbott, this system enables you to track your glucose levels continuously and conveniently. Unlike traditional fingerstick blood glucose testing, the Libre 2 system uses a small sensor that is worn on the back of the upper arm.
The sensor continuously measures glucose levels in the interstitial fluid throughout the day. You can easily scan the sensor using the LibreLink app on your smartphone or compatible device, eliminating the need for routine fingerstick tests. The app displays your current glucose reading, trend arrows to indicate how your glucose is changing, and a graphical representation of your glucose history.
One of the standout features of the Libre 2 system is its ability to store and track your glucose data. With data tracking, you can gain insights into your glucose patterns, allowing you to make more informed decisions about your diabetes management. It’s a powerful tool that helps you understand how factors like diet, exercise, medication, and stress impact your glucose levels.
By tracking your glucose data over time, you can identify trends and patterns that may otherwise go unnoticed. For example, you may discover that your glucose tends to spike after consuming certain types of food, or that your levels consistently drop after a rigorous exercise session. Armed with this information, you can adjust your lifestyle and treatment plan accordingly to achieve better glucose control.
Moreover, tracking your glucose data can also provide valuable information to your healthcare provider. By sharing your data with your provider, they can gain a comprehensive view of your glucose patterns and trends. This allows them to make more accurate assessments of your diabetes management and provide tailored recommendations to optimize your health.
With the Libre 2 system, you have the ability to easily download and export your glucose data for further analysis. This opens up a world of possibilities, as you can leverage various software tools or online platforms to dive deeper into your data. When armed with this knowledge, you become an active participant in managing your diabetes and can work collaboratively with your healthcare team.
In the next section, we will guide you through the process of setting up your smartphone or compatible device for use with the Libre 2 system.
Step 1: Set up a compatible smartphone or device
Before you can start downloading and tracking your Libre 2 data, you’ll need a compatible smartphone or device. The LibreLink app, which is essential for accessing and managing your glucose data, is compatible with both Android and iOS devices, including smartphones and tablets.
To ensure that your smartphone or device is compatible, check the system requirements specified by the manufacturer. You can typically find this information on the official website or in the app store listing for the LibreLink app. Make sure that your smartphone or device meets the minimum requirements, such as the operating system version and available memory.
If you’re unsure whether your device is compatible, you can also consult your healthcare provider or reach out to the customer support provided by Abbott for further assistance. They will be able to guide you and provide the necessary information to ensure a smooth setup process.
Once you have confirmed compatibility, it’s time to proceed with the setup process. Start by downloading the LibreLink app from the Google Play Store (for Android users) or the App Store (for iOS users). Search for “LibreLink” in the respective app store, and select the official app developed by Abbott Diabetes Care.
After the app has finished downloading and installing on your device, launch it to begin the setup process. You will be prompted to create an account or log in if you already have one. Having an account allows you to securely store and access your glucose data across multiple devices.
Follow the on-screen prompts to complete the account creation or login process. Ensure that you provide accurate and up-to-date information during this step, as it helps to personalize your experience and ensure the seamless integration of your Libre 2 data with the app.
Once you have successfully created an account or logged in, the app will guide you through any additional setup steps required, such as accepting terms and conditions or granting necessary permissions for the app to access certain features or functions on your device.
Once the setup process is complete, you are now ready to connect your Libre 2 sensor to the app and start tracking your glucose levels. In the next section, we’ll walk you through the process of downloading and installing the app if you don’t have a compatible smartphone or device.
Step 2: Download the LibreLink app
In order to track and download your Libre 2 data, you will need to download the LibreLink app onto your compatible smartphone or device. The LibreLink app is available for both Android and iOS devices and can be easily downloaded from the respective app stores.
If you have an Android device, follow these steps to download the LibreLink app:
- Open the Google Play Store on your Android device.
- In the search bar, type “LibreLink” and press enter.
- Select the official LibreLink app developed by Abbott Diabetes Care.
- Click on the “Install” button to begin the download and installation process.
- Wait for the app to download and install on your device.
- Once the installation is complete, you can find the LibreLink app in your list of installed apps or on your home screen.
If you have an iOS device such as an iPhone or iPad, follow these steps to download the LibreLink app:
- Open the App Store on your iOS device.
- In the search tab, type “LibreLink” and press enter.
- Select the official LibreLink app developed by Abbott Diabetes Care.
- Tap on the “Get” button to start the download and installation process.
- Enter your Apple ID password or use Touch ID/Face ID to authenticate the download.
- Wait for the app to download and install on your device.
- Once the installation is complete, you can find the LibreLink app on your home screen or in the app library.
After successfully downloading and installing the LibreLink app, you will be able to access a wide range of features and functionalities related to your Libre 2 glucose monitoring system. The app serves as the platform for viewing your glucose data, setting alerts and reminders, and managing your diabetes on the go.
It’s important to keep the app updated to the latest version provided by Abbott Diabetes Care. Regular app updates often include bug fixes, performance improvements, and added features, ensuring that you have the best possible experience when using the LibreLink app to track and download your Libre 2 data.
In the next section, we’ll guide you through the process of creating an account or logging in to the LibreLink app so that you can start utilizing its features and functions.
Step 3: Create an account or log in to the app
Now that you have downloaded the LibreLink app, it’s time to create an account or log in so that you can fully utilize its features and functions. By creating an account, you can securely store and access your glucose data across multiple devices, ensuring that you have a seamless experience with the app.
When you launch the LibreLink app for the first time, you will be presented with the option to create a new account or log in if you already have one. Follow the prompts on the screen to proceed with the account creation or login process.
If you are creating a new account, you will typically be asked to provide some personal information such as your name, email address, date of birth, and password. Make sure to provide accurate and up-to-date information to ensure the smooth integration of your Libre 2 data with the app.
After providing the required information, you will need to set up security measures such as a passphrase or a PIN code to protect your account. This serves as an added layer of security to safeguard your sensitive glucose data from unauthorized access.
If you already have an account, you can simply log in using the credentials associated with your account. This will grant you access to your previously stored glucose data and allow you to continue tracking and downloading your data seamlessly.
It’s important to remember your account credentials and keep them secure. If you forget your account password, most apps have a password reset option that will guide you through the process of resetting your password and gaining access to your account again.
Once you have successfully created an account or logged in to the app, you will have access to a wide range of features and functions to help you manage your glucose data effectively. This includes viewing your current glucose readings, accessing your glucose history, setting up reminders and alerts, and much more.
Remember to keep the app updated to the latest version provided by Abbott Diabetes Care. Regular updates often include bug fixes, new features, and improvements, ensuring that you have the best possible experience with the LibreLink app.
In the next section, we will guide you through the process of connecting your Libre 2 sensor to the app so that you can start tracking your glucose levels and downloading your data.
Step 4: Connect the app to your Libre 2 sensor
After creating an account or logging in to the LibreLink app, the next step is to connect the app to your Libre 2 sensor. This connection allows the app to receive and display your real-time glucose readings, as well as store and track your glucose data over time.
To connect the app to your Libre 2 sensor, follow these steps:
- Make sure that your Libre 2 sensor is properly applied to the back of your upper arm, as instructed by the manufacturer.
- Launch the LibreLink app on your smartphone or device.
- On the app’s home screen, you will see an option to “Add a new sensor” or “Scan sensor”. Tap on this option.
- Position your smartphone or device close to the Libre 2 sensor, within the recommended range specified by the manufacturer.
- Within the app, aim the camera at the sensor and follow the on-screen instructions to scan the sensor.
- Wait for the scan to complete. Once the scan is successful, the app will display your current glucose reading, trend arrows, and other relevant information.
- Congratulations! Your Libre 2 sensor is now connected to the app, and you can start tracking your glucose levels in real-time.
It’s important to note that the Libre 2 sensor needs to be replaced according to the manufacturer’s recommended duration, usually every 14 days. When it’s time to replace the sensor, you’ll need to follow the same steps to connect the new sensor to the app.
The connection between the app and your Libre 2 sensor is vital for accurate glucose tracking and data storage. It provides you with real-time insights into your glucose levels, trend information, and historical data, allowing you to make informed decisions about your diabetes management.
Throughout the day, you can continue to scan your sensor using the app to keep track of your glucose readings. The app will automatically update your glucose data and provide you with comprehensive information about your glucose patterns.
In the next section, we’ll explore how to start tracking your glucose levels and the process of exporting and downloading your Libre 2 data.
Step 5: Start tracking your glucose levels and data
Now that your Libre 2 sensor is connected to the app, it’s time to start tracking your glucose levels and collecting valuable data. The LibreLink app provides you with a range of tools and features to help you monitor and understand your glucose patterns.
To track your glucose levels using the LibreLink app, follow these steps:
- Open the LibreLink app on your smartphone or device.
- Ensure that your Libre 2 sensor is securely attached to the back of your upper arm.
- Open the app’s home screen, which will display your current glucose reading, trend arrows, and other relevant information.
- Scan your Libre 2 sensor using the app by positioning your smartphone or device close to the sensor and following the on-screen instructions.
- Wait for the scan to complete. The app will update your glucose reading and provide you with real-time information about your levels.
- Throughout the day, continue scanning your sensor using the app at regular intervals to track your glucose levels.
- The app will keep a record of your glucose readings and display them in a graph or chart format, allowing you to visualize your glucose patterns over time.
Tracking your glucose levels with the LibreLink app empowers you to better understand how your lifestyle choices, medications, and other factors impact your glucose levels. By regularly monitoring and tracking your glucose data, you can identify patterns, trends, and potential triggers that may affect your blood sugar levels.
The app also allows you to set up customizable alerts and reminders to notify you of specific glucose thresholds or other important events. This feature can help you stay proactive in managing your diabetes and take immediate action when necessary.
In addition to tracking your glucose levels, the LibreLink app offers various data visualization tools and summaries that provide insights into your glucose management. You can access historical glucose data, review trends, and generate reports that can be shared with your healthcare provider for more informed discussions and treatment adjustments.
Remember that the information provided by the LibreLink app is for informational purposes only and should not replace regular medical check-ups or advice from your healthcare team. It serves as a valuable tool to complement your diabetes management but should not be used as the sole basis for treatment decisions.
In the next section, we will guide you through the process of exporting and downloading your Libre 2 data so that you can further analyze and interpret your glucose patterns.
Step 6: Exporting and downloading your Libre 2 data
Once you have tracked your glucose levels using the LibreLink app, you have the option to export and download your data for further analysis or to share it with your healthcare provider. Exporting and downloading your Libre 2 data enables you to gain deeper insights into your glucose patterns and make more informed decisions about your diabetes management.
To export and download your Libre 2 data, follow these steps:
- Open the LibreLink app on your smartphone or device.
- Access the glucose history section, where your past glucose readings are displayed.
- Look for an option or menu that allows you to export or download your data. The specific location of this option may vary depending on the app version and device.
- Select the desired time range or period for which you want to export your data. You may choose to export a day, week, month, or a custom range according to your needs.
- Choose the format in which you want to export your data. The app may offer options such as CSV (comma-separated values) or PDF.
- Tap on the export or download button to initiate the process.
- Wait for the export or download to complete. The app may generate a file that contains your glucose data.
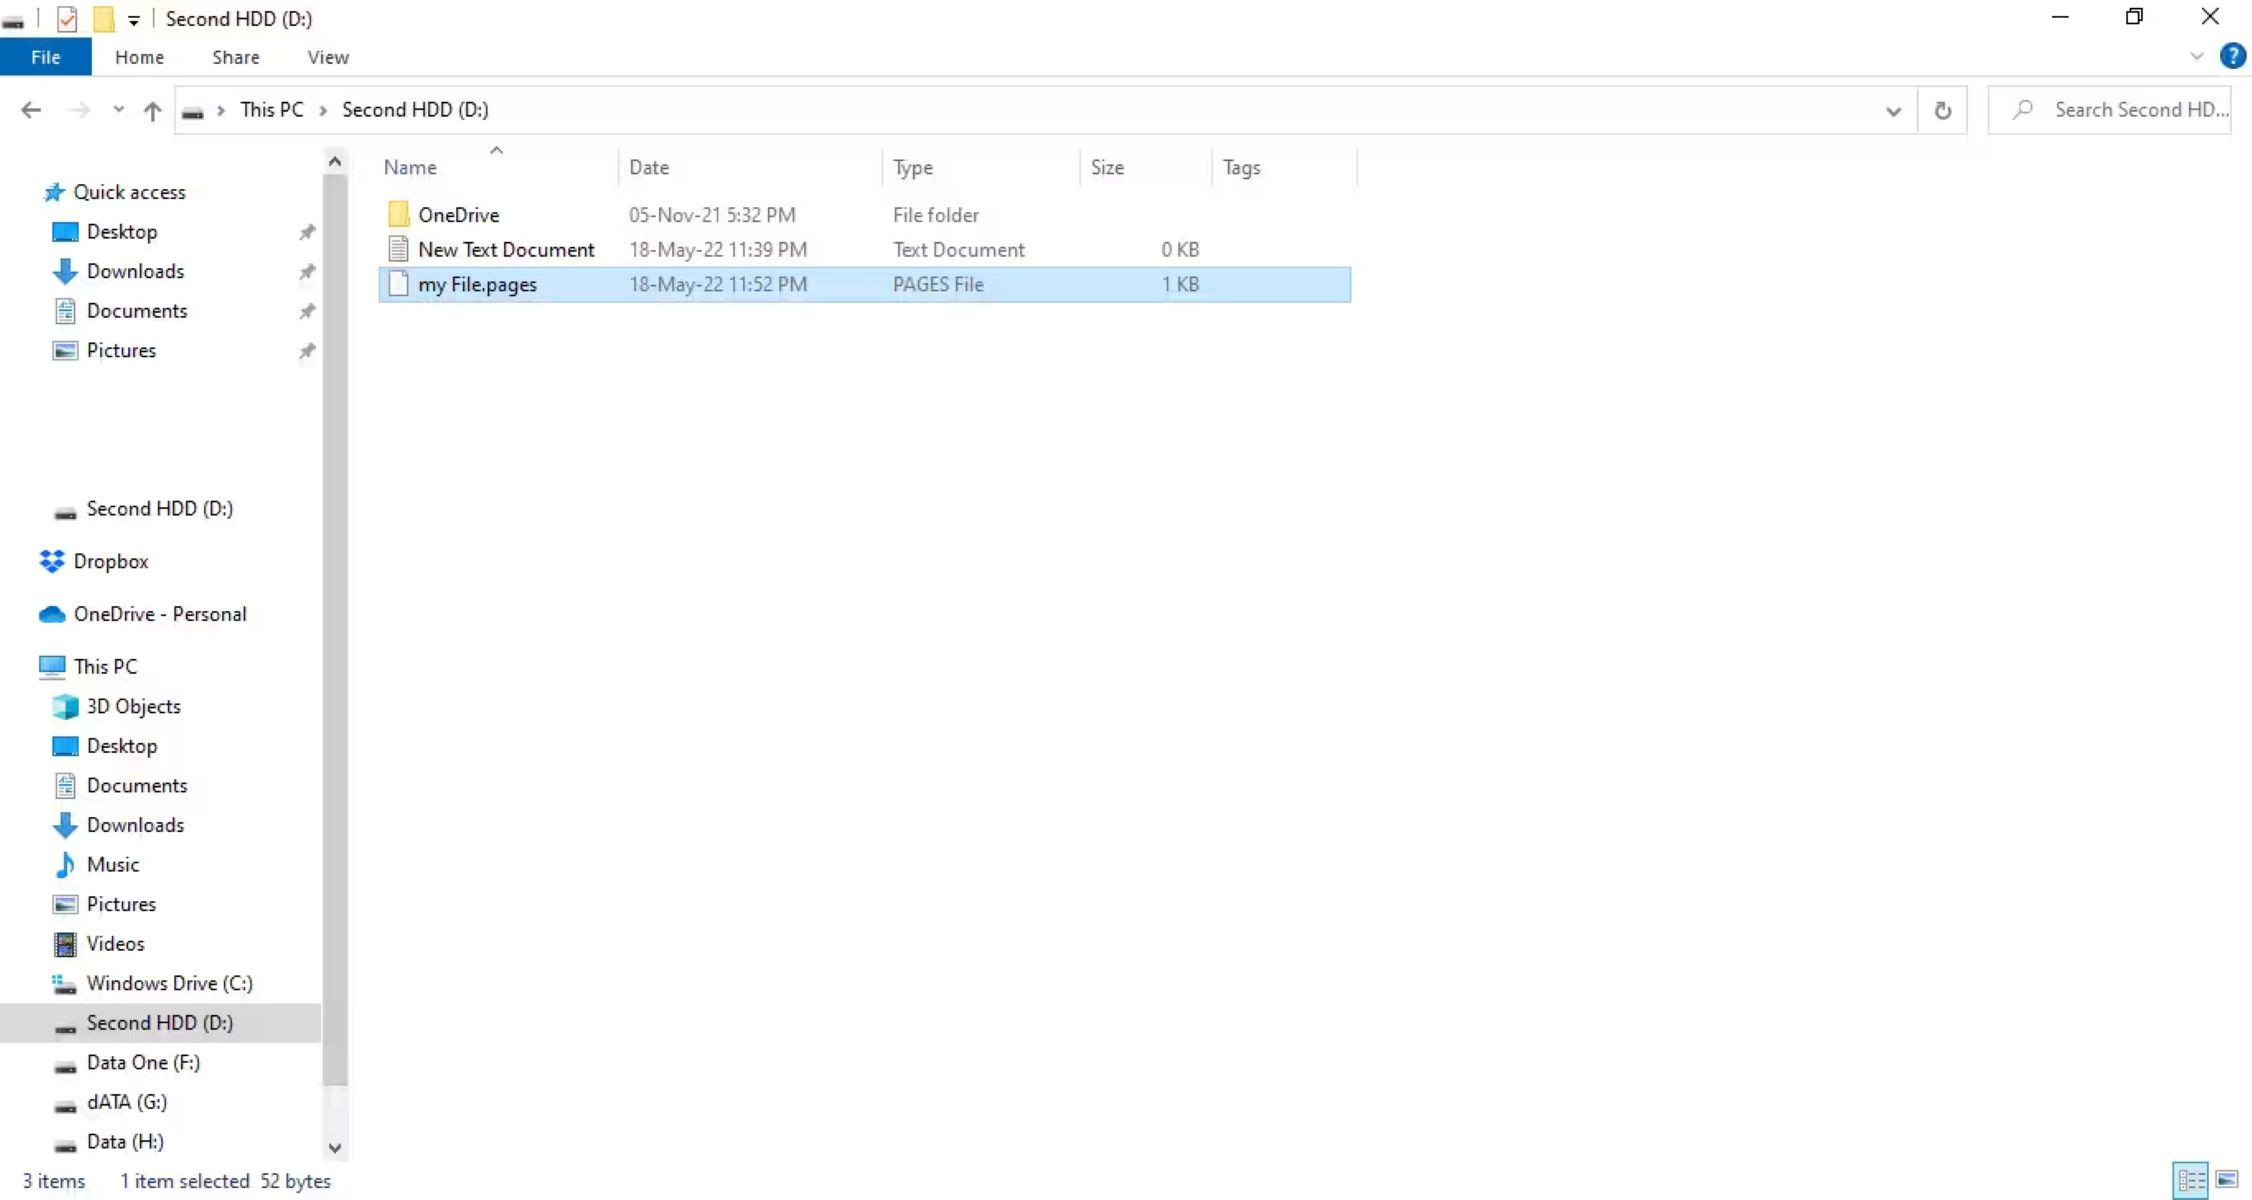
- Once the export or download is complete, you can find the file in the designated location on your device or in a specified folder within the app.
After downloading the file containing your Libre 2 data, you can further analyze it using various software tools or online platforms. These tools can help you identify trends, patterns, and correlations in your glucose levels, supporting your overall diabetes management.
When sharing your downloaded data with your healthcare provider, make sure to follow their preferred method of communication. You may be asked to email the file, upload it to a secure online portal, or bring it with you on a storage device during your appointments.
Remember to keep your downloaded data secure and protect it from unauthorized access. If you have any concerns or questions about the security and privacy of your data, consult the app provider or your healthcare provider for guidance.
Exporting and downloading your Libre 2 data adds an extra layer of flexibility and versatility to your diabetes management. It allows you to gather evidence-based insights into your glucose patterns, make informed decisions, and actively collaborate with your healthcare team to optimize your treatment plan.
In the next section, we will explore different data formats for download and how to choose the most suitable format for your needs.
Step 7: Choose a data format for download
When exporting and downloading your Libre 2 data, it’s important to choose the most suitable data format that aligns with your needs and preferences. The LibreLink app typically offers different options for data format, each with its own advantages and uses.
Here are a few commonly available data formats and their potential applications:
- CSV (Comma-Separated Values): This format stores data in a simple, text-based format where each value is separated by a comma. CSV files can be opened and manipulated using various spreadsheet software such as Microsoft Excel or Google Sheets. You can use CSV files to perform detailed analysis, create customized charts or graphs, and import your data into other applications for further processing.
- PDF (Portable Document Format): PDF files are widely supported and can be easily viewed on most devices and operating systems. They provide a convenient way to share your glucose data in a readable and printable format. PDF files are ideal for sharing data with your healthcare provider, as they preserve the formatting and ensure the information is presented consistently.
- XML (Extensible Markup Language): XML is a structured data format that allows for the storage and exchange of information. It is commonly used for data integration and interoperability purposes. XML files can be processed by various software applications, making it a suitable choice if you want to import your data into other systems or databases.
- JSON (JavaScript Object Notation): JSON is a lightweight data interchange format commonly used in web-based applications. It offers a human-readable format that is easily interpreted by computer programs. JSON files are particularly useful if you want to integrate your data with other web services or APIs.
When selecting a data format, consider the intended use of your downloaded data. If you want to perform in-depth analysis or create advanced visualizations, CSV format may be the most suitable choice. On the other hand, if you simply need to share your data with your healthcare provider, PDF format provides a convenient and standardized option.
It’s also worth noting that the LibreLink app may offer additional data formats or customization options depending on its features and updates. Be sure to explore the available options within the app and choose the format that best meets your requirements.
Keep in mind that the choice of data format should not compromise the security and privacy of your information. Ensure that you handle and store your downloaded data securely, especially if it contains sensitive healthcare information.
In the next section, we will guide you through the process of downloading and saving your Libre 2 data to your device or computer, regardless of the chosen format.
Step 8: Download and save the data to your device or computer
Once you have chosen the data format that suits your needs, the next step is to download and save your Libre 2 data to your device or computer. Saving the data allows you to access it offline, perform further analysis, or share it with your healthcare provider.
To download and save your Libre 2 data, follow these steps:
- Open the LibreLink app on your smartphone or device.
- Access the data export or download feature within the app. This may be located in the settings, history, or data management section.
- Select the desired time range or period for which you want to download your data.
- Choose the data format that you previously selected, such as CSV, PDF, XML, or JSON.
- Initiate the download process by tapping on the download or export button.
- Wait for the app to generate the file containing your data. The time required may depend on the size of the data and the processing power of your device.
- Once the download is complete, the app may prompt you to choose a location to save the file. Select a convenient and secure location on your device or computer, such as a designated folder or your desktop.
- Confirm the file saved successfully and make a note of the file location for future reference.
By saving the downloaded data to your device or computer, you have the ability to access it offline and perform further analysis using compatible software applications. You can open the file with programs such as Microsoft Excel, Google Sheets, Adobe Acrobat Reader, or any other software that supports the chosen data format.
It’s recommended to establish a proper file management system to keep your downloaded data organized and easily accessible. Consider creating folders or directories specific to your Libre 2 data to maintain a well-structured and manageable record of your glucose readings.
Remember to regularly back up your downloaded data to prevent any potential loss due to device malfunction, theft, or accidental deletion. Backing up your data ensures that you have a secure copy of your glucose records, providing peace of mind and continuity in your diabetes management.
In the next section, we will explore how to interpret and analyze your downloaded Libre 2 data using software or online tools.
Step 9: Interpret and analyze your data using software or online tools
After downloading and saving your Libre 2 data, you can now move on to the exciting step of interpreting and analyzing your glucose data. This process allows you to gain valuable insights into your glucose patterns, trends, and correlations, empowering you to make informed decisions about your diabetes management.
To interpret and analyze your Libre 2 data, consider the following options:
- Spreadsheet Software: Open your downloaded CSV file in spreadsheet software such as Microsoft Excel or Google Sheets. These programs offer a range of tools and functions for data analysis, including creating charts and graphs, applying formulas, and performing statistical calculations. Use these features to identify patterns, track changes over time, and visualize your glucose data.
- Data Visualization Tools: Explore data visualization tools that are specifically designed for diabetes management. These tools can import your downloaded data files (in formats like CSV) and generate interactive visualizations, allowing you to explore your glucose patterns in a user-friendly and intuitive manner. Look for tools that provide customizable dashboards, trend analysis, and the ability to overlay other data points like meals or exercise sessions.
- Online Platforms: Consider utilizing online platforms or applications that specialize in diabetes management and data analysis. These platforms often offer sophisticated analysis capabilities, including trend analysis, data comparison, and personalized insights. Some platforms may also provide integration with wearable devices, allowing you to track a comprehensive range of health metrics alongside your glucose data.
- Consulting a Healthcare Provider: Your healthcare provider is an invaluable resource for interpreting and analyzing your glucose data. Schedule an appointment to share your downloaded data and discuss your glucose patterns and trends. Your healthcare provider can offer expert insights, identify potential areas for improvement, and provide personalized recommendations based on your specific data.
When analyzing your Libre 2 data, pay attention to trends and patterns such as elevated glucose levels after meals, overnight dips, or recurring spikes at specific times of the day. Look for correlations between your glucose readings and factors like medication changes, exercise routines, or specific meals to better understand how they impact your glucose levels.
It’s important to remember that interpreting and analyzing your glucose data is an ongoing process. Regularly track your glucose levels and periodically analyze your data to identify long-term trends and make adjustments to your diabetes management plan. By closely monitoring your glucose patterns, you can take proactive steps towards achieving optimal glucose control.
In the next section, we will provide you with some tips for effectively utilizing your downloaded Libre 2 data to enhance your diabetes management.
Tips for effectively utilizing your downloaded Libre 2 data
Now that you have downloaded and analyzed your Libre 2 data, it’s important to effectively utilize this information to enhance your diabetes management. Here are some tips to help you make the most of your downloaded data:
- Review trends and patterns: Look for recurring patterns and trends in your glucose data. Identify specific times or situations when your glucose levels tend to be higher or lower. This can help you pinpoint potential triggers and make targeted adjustments to your medication, diet, or lifestyle.
- Track the impact of interventions: If you’ve made changes to your diabetes management plan, track the impact of these interventions using your recorded data. Observe how adjustments in medication, meal planning, exercise routines, or stress management affect your glucose levels over time. This feedback loop can guide you in fine-tuning your diabetes management strategies.
- Set personalized goals: Utilize your data to set personalized goals for glucose control. Whether it’s achieving target glucose ranges, reducing the frequency of hyperglycemic or hypoglycemic events, or managing post-meal spikes, having clear goals can help you stay motivated and focused on achieving optimal glucose control.
- Share data with your healthcare provider: Regularly share your downloaded data with your healthcare provider during your appointments. This provides them with firsthand insights into your glucose patterns and empowers them to provide personalized recommendations for your diabetes management. Collaborating with your healthcare provider brings you one step closer to achieving your glucose control goals.
- Explore other health metrics: Consider tracking additional health metrics alongside your glucose data. This might include factors like blood pressure, weight, physical activity, or sleep patterns. Correlating these metrics with your glucose data can provide a more comprehensive view of your overall health and help you identify further areas for improvement.
- Educate yourself: Use your downloaded data as an opportunity to educate yourself about diabetes management. Read reputable sources, attend educational programs, and engage with online diabetes communities to deepen your understanding of diabetes-related topics. The more knowledge you acquire, the better equipped you’ll be to interpret and utilize your glucose data effectively.
- Stay consistent: Maintain a consistent tracking routine to gather reliable data. Regularly scan your Libre 2 sensor, record your glucose readings, and download your data at consistent intervals. Consistency ensures accurate and comprehensive data, enabling you to make informed decisions based on a complete picture of your glucose patterns.
Above all, remember that your Libre 2 data should be used as a tool to guide your diabetes management, but it’s not a substitute for professional medical advice. Always consult with your healthcare provider for personalized recommendations based on your specific health needs and glucose data.
By effectively utilizing your downloaded Libre 2 data, you can gain valuable insights into your glucose patterns, identify areas for improvement, and proactively manage your diabetes to achieve optimal glucose control.
As you continue to track and analyze your Libre 2 data, you’ll develop a deeper understanding of your unique glucose patterns, helping you make informed decisions and progress on your journey towards optimal diabetes management.
Conclusion
Tracking and downloading your Libre 2 data opens up a world of possibilities in managing your diabetes. By utilizing the LibreLink app, you can easily track your glucose levels, gain insights into your patterns, and make informed decisions about your diabetes management.
In this article, we walked you through the step-by-step process of setting up a compatible smartphone or device, downloading the LibreLink app, creating an account or logging in, connecting the app to your Libre 2 sensor, and tracking your glucose levels. We also discussed the importance of exporting and downloading your data, choosing the right data format, and interpreting and analyzing your data using software or online tools.
Remember, your downloaded Libre 2 data is a powerful tool that helps you understand how factors like diet, exercise, medication, and stress impact your glucose levels. By reviewing trends, setting personalized goals, and collaborating with your healthcare provider, you can optimize your diabetes management and achieve optimal glucose control.
Utilize your downloaded data to fine-tune your diabetes management strategies, identify areas for improvement, and take proactive steps towards a healthier and balanced life. Regularly track your glucose levels, share your data with your healthcare provider, and stay proactive in managing your diabetes.
Continue to educate yourself, stay consistent in your data tracking routines, and leverage the available technologies and tools. Remember, your diabetes management journey is unique to you, and by effectively utilizing your downloaded Libre 2 data, you can take charge of your health and make informed decisions that will positively impact your quality of life.