Are you ready to face the ultimate challenge? FromSoftware’s latest game, Elden Ring, boasts some of the toughest boss battles in the gaming industry. With a vast world to explore and a plethora of bosses to defeat, players are sure to be tested. But, which bosses reign supreme as the hardest? In this blog, we’ll delve into this fantastic world and rank the top 16 hardest bosses in Elden Ring. But before we begin, let’s first define what Elden Ring bosses are exactly.
What Are Elden Ring Bosses?
Elden Ring Bosses are powerful enemies that impede the player’s path to completing the game. They’re encountered all around The Lands Between and can be found in a lot of places. From dungeon-style levels to the game’s open world. Some of these bosses are optional, some are mandatory. All are difficult and will beat the player if they’re not careful.
What Are the Differences Between Great Enemies, Shardbearers, etc.?
There are 3, well technically 4 types of Elden Ring Bosses. Field Bosses, Greater Enemies, and lastly, Legends/Demigods. Field Bosses are enemies you find as you go around The Lands Between. They’re also optional and are the lowest tier in terms of boss hierarchy.
Greater Enemies are bosses that players can find blocking story progression. However, there are also cases where they protect valuable and powerful items and optional areas.
Last but not least are the Demigods and Legends, the game’s main bosses. These are the bosses that give players Remembrances to obtain a particular weapon or ability that they have. A subset of these are the Shardbearers, which also drop the 7 Great Runes, which are the shards of the Elden Ring.
16 Hardest Bosses in Elden Ring
Now that we know the differences between the various bosses, let’s go over the 16 hardest bosses of Elden Ring. We’ll go over where they’re found, and add tips on how to beat them. Also, we’ll discuss the rewards when you beat them.
We’ll go over the first 6 bosses on this list with some extra information due to how hard they can be. The last 10 wouldn’t have this, but we’ll still go over where they’re located as well as their strengths and weaknesses. Enjoy.
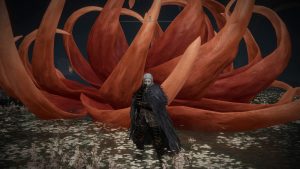
1. Malenia, Blade of Miquella/Malenia, Goddess of Rot
The #1 hardest boss on the list is no question, Malenia, Blade of Miquella. There’s no contest. Malenia is an absolute dervish of demigod steel, and no matter what you’ll do, you will die on that first encounter.
Anyhow, you can find Malenia on the bottom of Elphael, Brace of the Haligtree. If you find the Site of Grace that’s near her boss arena congratulations. Because you’ll be intimately familiar with that Site of Grace for a few hundred hours. Malenia is unforgivingly hard, and even the smallest mistake can and will destroy your progress in defeating her. Her attacks are blindingly fast, quick to execute, and very hard-hitting. In addition to that monstrosity, every hit, even when using your shield to blunt blows, restores her lost HP. This makes Malenia a boss where not getting hit is an absolute necessity.
But wait, there’s more.
Waterfowl Dance is a 3-phase AoE attack where she rapidly cuts the enemy to small slices of Tarnished sushi. All in all, she’s difficult to beat in phase 1. Phase 2? Well, she inflicts Scarlet Rot with every attack and sends afterimages to beat you dead. She also gains Scarlet Aeonia, an AoE explosion that gives Scarlet Rot to the player and leaves a mist that also gives Scarlet Rot.
Our advice? Practice your dodging game. That’s it. Dodging Malenia’s attacks is doable, but very difficult due to her speed. In addition to this, using Rivers of Blood is a good idea, as the Blood Loss it inflicts can stagger her off of attacks. In Phase 2, Scarlet Aeonia will leave Malenia vulnerable for around 5 to 7 seconds after casting it. Use this window to do ranged attacks through spells or other ranged alternatives.
2. Radagon of the Golden Order/Elden Beast
Following Malenia in terms of difficulty are Radagon of the Golden Order and the Elden Beast. You find these 2 after you make your return to Lyndell, the Royal Capital. Remember that wall of thorns? Well, if you used the Frenzied Flame or allowed Melina to immolate herself in the Mountaintop of the Giants, this wall will be burned, allowing access.
The reason why they’re the same entry is due to the Elden Beast being the 2nd phase of the entire boss fight. This… is one of the reasons why they’re #2 on the list. However, the main reason for this is the fact that both bosses have distinct movesets that are very difficult to get used to. Thus, making the player adjust accordingly to stay alive and conquer the boss.
Anyhow, Radagon and the Elden Beast have different movesets, and can be an annoying fight if you’re not properly giving them respect. Radagon is strong. His hammer can 3 or even 2 shot even with a full soft or hard cap in Vigor. He can also teleport, and a lot of his attacks have big AoEs. Not as much as Malenia and some other examples on this list but it’s up there.
The Elden Beast is different in that it has a lot of attacks that can bring you from full to 0 HP instantly. However, it’s not difficult to dodge and fight. What makes the Elden Beast hard is the fact that you’re low on resources after defeating Radagon. Ergo, you’re low on flasks, items, FP, and HP. The only advice we can give is similar to Malenia’s boss fight: learn boss patterns, and dodge accordingly. You’ll have to go several hours to do so, but it’s part of the Souls Formula.
3. Beast Clergyman/Maliketh, the Black Blade
Next on this list is the Beast Clergyman/Maliketh, the Black Blade. This fella can be found at the end of Crumbling Farum Azula alongside another boss but we’ll talk about that one later. Anyhow, this is another of Elden Ring’s 2 part bosses with different names. You may have noticed that 4 of the Top 5 have bosses with 2 names and this is deliberate. After all, these bosses are incredibly difficult and very powerful.
Anyhow, Beast Clergyman isn’t that bad. He’s fast, yes, and he throws Rock Sling constantly. However, with enough dodges and a bit of good old-fashioned elbow grease, he can be defeated. The real battle happens when you get the Beast Clergyman to half HP. When that happens, he sheds his current form to reveal Maliketh, the Black Blade. This boss is Marika the Eternal’s shadow, and his moves are an absolute killer.
Keep a close eye on his sword, as each swing will debuff you with Destined Death. A debuff that temporarily reduces your current max HP by a certain amount. Also, keep a close eye on where you are in the arena. If you’ve played Dark Souls 2, you may think that it’s a larger version of the 1st Dragonrider boss fight in Heide’s Tower of Flame. Ergo, keep out of the arena’s edge to not fall to your death.
Last but not least, there are some pillars on the circular arena that can be used for cover. Make use of them to heal, dodge attacks, and get some distance off him. Overall, this boss fight is hard, but it’s good practice to ensure you’re not caught flat-footed on the later bosses Elden Ring throws at you.
4. Dragonlord Placidusax
Next on this list is Dragonlord Placidusax, which is one of Elden Ring’s secret bosses. He’s found at the same place as Maliketh, the Crumbling Farum Azula, but the method of reaching him is a bit contrived.
Start by teleporting to the Beside the Great Bridge Site of Grace. After that, take the elevator down the church and run past the beastmen. Head straight out, look for a cluster of trees, and search the edges of the path. Eventually, you’ll find a platform that you can go down to. Follow the platform’s path until the end, then go around until you find a Lie Down prompt. Lie down, then fight the Dragonlord Placidusax.
Before that though, if you’ve used the Frenzied Flame to destroy the thorn wall but don’t want to do the Frenzied Flame ending? Use the Miquella’s Needle the moment after you enter Dragonlord Placidusax’s boss arena. This will undo the Frenzied Flame ending and allow you to get the other endings.
Anyhow, Dragonlord Placidusax is a tough boss, and his attacks are quick and dangerously powerful. However, there are places of downtime where he stops and just stands there. This is where the player can get their licks in or take a breather and heal. Go to the hind legs, around the base of his tail, it’s the safest place to hit him until he dies. Immediately get close when the fight starts to stop him from using his hard-to-dodge breath attack. Other than that, have fun.
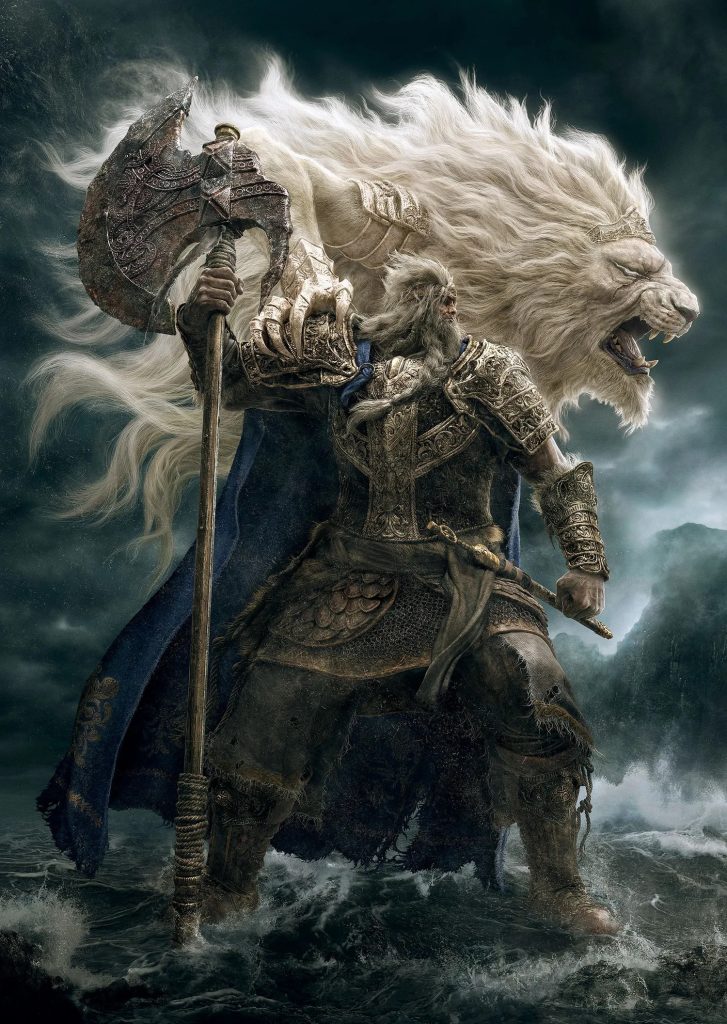
5. Godfrey, 1st Elden Lord/Hoarah Loux, Warrior
#5 of the list is Godfrey, the 1st Elden Lord, who’s located at the same place you fight Morgott. The Erdtree’s base, the Elden Throne. After you’ve found a way to destroy the thorn wall, Elden Lord Godfrey reappears. His Grace then points towards you in a blink and you miss it thing, then he challenges the Tarnished to a fight. 1st Phase Godfrey is a noble warrior, his greataxe can and will cut you down to size if you’re not careful. And every swing is devastating and dangerous. However, it’s easily dodged, and it doesn’t take long to get him to half HP.
The real challenge is when he reaches that threshold. Serrosh, his lion spirit animal, will try to manifest itself but Godfrey refuses and kills it. It’s then revealed that Serrosh is Godrey’s natural savagery, and through its death, he’s returned to the Warrior Hoarah Loux. His original name before turning into an Elden Lord, and the start of the fight’s phase 2.
Hoarah Loux is tough. He’s incredibly aggressive and will piledrive the Tarnished to the ground if given the chance with wrestling moves. He’s fast, quick, and very dangerous. However, dodging is your best friend here, and keeping an eye on his attack patterns is the key to victory. After every attack chain, Hoarah Loux will stop to wind down, this is your chance to get a few hits. Rinse and repeat until his phase 2 HP bar dips down to 0.
Oh, and don’t bother with shields in phase 2. His attacks are known to go through shields and stamina like butter. In addition, his piledriver attack won’t care if you’re using a shield. It bypasses the shield and hits you with the piledriver directly with no mercy.
6. Margit, the Fell Omen/Morgott, the Omen King
After Godfrey is Margit the Fell Omen, or more accurately, Morgott the Omen King. You fight Margit at the start of the game as your first main story boss and is a potent roadblock. Morgott on the other hand is fought on Lyndell, the Royal Capital after the Tarnished player reaches the Elden Throne. Both have some differing movesets but there are some similar attack patterns to Morgott’s first incarnation.
Margit is fast and uses his cane like a sword to kill the player. He mixes up with occasional dagger swipes and throws to keep players guessing. When he reaches his 2nd phase, he manifests a hammer that deals massive damage at this point of Elden Ring. As per usual, keeping a close eye on his attack patterns and dodging accordingly is the way to go. Don’t bother with a shield since the dagger swipes pass right through them to deal damage.
Meanwhile, Morgott is Margit with additional bells and whistles. Your main advantage is the bigger arena, and the fact you wouldn’t fall to your death. He is, however, not holding back anymore, and has faster attack patterns that are hard to dodge. He’s also very agile, and can sometimes weave through a player’s attacks. In his 2nd phase, he’ll do some area denial by spreading a goo that damages the player while also firing spectral blades ala Vergil from Devil May Cry.
The lesson that Margit teaches the player at the start of Elden Ring applies to his 2nd fight. Keep an eye on his patterns, watch for breaks in attacks, then shank him until he dies. However, make sure to have Margit’s Shackle on quickslot. You can buy it from Patches and it immobilizes Margit/Morgott for a few seconds. A must-have if you’re struggling against him.
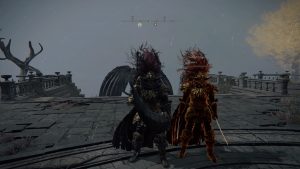
7. Starscourge Radahn
Starscourge Radahn is next and the only reason why he’s not higher on this list is that he’s been nerfed. If we’re talking base version, he would be around #3 or #4. Alas, he got hit with the hammer so he’s now at around #7. He’s found in Caelid’s Redmane Castle, but you can only fight him during the Radahn Festival.
Still, he’s a force to be reckoned with. Gravity magic, his 2 giant greatswords, a surprisingly quick attack pattern, and unfaltering aggression. Radahn’s epithet of the Conqueror of the Stars is an understatement. And the fact that you’re facing an empty, berserk husk only adds to the tragedy and the awe of this fight. After all, if he’s this strong as a maddened berserker, how strong could he have been in his prime.
Anyhow, tactics. Radahn’s boss fight is unique in that the player can summon NPCs to help take him down. After that, make use of Torrent’s maneuverability to keep track of his attacks. Once he gets chipped to half HP, he’ll jump up the air and divebombs the player. Keep an eye on the sky and immediately dodge to the side to keep yourself safe. Follow those things and you can get past Radahn’s fight with few deaths.
8. Godskin Duo
The Godskin bosses are a very common Field Enemy that players can fight in Elden Ring. However, the main reason why this particular Godskin fight is here is because it’s a 2v1. There will be another fight that’s a 2v1 double team on this list but we’ll get to them later.
Found in Crumbling Farum Azula, the Godskin Duo boss can be a very annoying boss fight to deal with. Especially for melee players. This is because the variants you’re fighting are the Godskin Noble and Apostle variants, and they’re not a fun duo to fight against.
Word of advice? Focus on the Apostle and leave the Noble alone. Make sure to use the pillars to keep yourself away from the Noble while you fight the Apostle. Both bosses share the same HP bar, and until said HP bar is depleted, they’ll resurrect. So just focus on the Apostle with ranged attacks. You’ll keep yourself sane that way.
9. Mohg, Lord of Blood
Next, we have Mohg, Lord of Blood, who can be encountered in Mohgwyn Palace keeping watch on his brother Miquella. Who he has a very inappropriate obsession with. Anyhow, the main reason for his entry on this list is because of 2 things: the really small arena akin to Margit’s 1st encounter, and his abuse of Blood Magic. The former doesn’t give you much room to dodge his shenanigans, the latter shreds your HP like butter with a hot knife.
Anyhow, make sure to get the Mohg’s Shackle found on the Subterranean Shunning-Grounds before fighting this guy. It has the same effect as Margit’s Shackle, only it’s for Mohg. Other than this, make sure your Wondrous Physick Flask has the Purifying Crystal Tear in it to mitigate his damage.
10. Lichdragon Fortissax
Next, we have Lichdragon Fortissax, which can only be encountered on Deeproot Depths. If you’re following Fia’s questline, killing this dragon is necessary, and particularly difficult. Not due to anything that he does personally, his attacks can be dodged easily with the right timings. However, you don’t have Torrent with you in this fight, which adds to the dragon’s difficulty.
The Lichdragon also has access to both Lightning and Death Blight abilities and this combination can slay you in moments. Keep in mind your positioning on the map, and make sure that you have ample stamina to dodge. Stand in front of his head constantly, it helps you time his attacks and when to dodge. Last but not least, don’t do the usual “Stand underneath his legs and hack at ‘em”, as it’ll just make the fight difficult if you do.
11. Astel, Naturalborn of the Void
Next, we have a very Lovecraftian creature in Astel, Naturalborn of the Void, who can be encountered in the Lake of Rot. This one is another hard boss for the unprepared due to its teleportation abilities and grab attacks. However, for the canny Tarnished, this can be surmounted, which is why it’s lower on the list compared to other late-game bosses.
There are multiple ways to deal with Astel, but for those in a hurry, you may want to go for a full tank build. High Vigor, Endurance, a shield, et cetera, maybe some magic or a high Strength weapon. Then, use Spirit Ashes to summon a Spirit Ash like Latenna or the Ancestral Follower that’s been maxed out and buffed to help in killing Astel. Make sure to keep Astel’s aggression squarely toward you though. You don’t want your Spirit Ash to die after all.
12. Godrick the Grafted
Then we have Godrick the Grafted, who got his position in this list due to the time you encounter him. Godrick is found on Stormveil Castle and is the first Demigod of Queen Marika you face (Margit doesn’t count here due to him not having a shard of the Elden Ring). Anyhow, he’s surprisingly fast for a giant guy and uses his massive axe to take chunks off of the player’s HP.
However, dodging towards him tends to be a pretty good idea when he swings his axe. However, keep well away when he whirls it around as it’s an AoE attack centered around him. Once he finishes that, go back in and kick his ass. Watch out for phase 2 though, as he now has a dragon hand that belches flames towards you.
13. Fire Giant
After Godrick we have the Fire Giant, which can be found on, surprise, surprise, the Mountaintop of the Giants. In this case, though, the main reason for this placement is due to him being a bit uneven of a fight. He’s incredibly tall, and players can only hit his legs on any given day. He hurls fire-based attacks as if they’re candy, and it’s not a good idea to lock on to him.
The last part is due to the camera quite literally acting like a Frisbee or a ragdoll trying to zero in on his body. This… can lead to some pretty untimely deaths. Combine that with some wonky hitboxes and you have one of the most annoying fights in the game.
Luckily, you can find the Fire Giant in the game’s main world, so we have one piece of advice to give: Use Torrent. Dance around the guy, and whack him with attacks until he’s dead.
14. Crucible Knight Ordovis
Crucible Knight Ordovis’ boss fight is another boss fight that’s a 2v1 affair. Located in Auriza Hero’s Grave, the usual strategy of killing Crucible Knights applies to these 2 bosses. Attacks are slow to hit, but hard-hitting when they land. Don’t panic dodge, they’ll punish you for it, and make sure to kill the 2nd Crucible Knight first. After he’s dead, Ordovis can be easily and safely killed by dodging his attacks and getting your licks in.
15. Commander Niall
Commander Niall isn’t a hard fight, usually. However, the fact that his boss arena is infuriatingly small, and his ability to summon 2 additional enemies makes him very annoying. It also doesn’t help that he summons more the moment the ones he previously summoned were killed. Not only that, but the Commander is frighteningly quick and very prone to beating the player’s hide for trying to enter Miquella’s Haligtree.
However, keeping a close eye on the enemies in addition to whacking Niall when possible will be enough to beat him. Nothing fancy here and all that. You fight one in a place with tons of Scarlet Rot, after all, this fight should be easier in comparison to that.
16. Loretta, Knight of the Haligtree
Last but not least is Loretta, Knight of the Haligtree, which is also in the Miquella’s Haligtree area. Specifically, the Haligtree Town. In her case, she’s a more powerful version of the Caria Castle Loretta and has bigger attacks that deal more damage. However, compared to that boss, the Knight of the Haligtree is stronger in terms of damage and tricks.
However, she can be trivialized through the use of Redmane Knight Ogha. His greatarrows can stagger her, and if you can tank her for just a bit in addition to dealing extra damage, Loretta can be beaten pretty easily.
Benefits of Beating the Hardest Bosses
Anyhow, now that we know what bosses are the hardest in Elden Ring, the question now is, why should you beat them? Well, there are 3 reasons:
- They might be hindering the player from beating the game.
- They might be guarding something. Whether it be a new area, useful item, weapon, spell, et cetera.
- The rewards are really good.
The third point is relevant when it comes to the Demigods and Legendary bosses. Each of the Legendary Bosses in Elden Ring leaves behind a Remembrance, which can be given to Enia in the Roundtable Hold. Once it’s given, the player can choose between 2 items related to the boss in question. An example of this would be the Hand of Malenia, a boss weapon obtainable by defeating Malenia and giving the remembrance to Enia.
Some of the bosses on this list don’t give rewards as dramatic as a Demigod’s weapon though. For example, Commander Niall just gives a simple fist weapon called Veteran’s Prosthesis. However, there’s always some sort of reward in fighting these bosses, whether it be access to new areas, good items, or even just runes.


![Elden Ring PS5 Review: Was It Worth the Wait [A Gamer’s Review]](https://robots.net/wp-content/uploads/2022/02/Elden-Ring-PS5-Review-Was-It-Worth-the-Wait-featured-image-300x169.jpg)