Introduction
Introduction
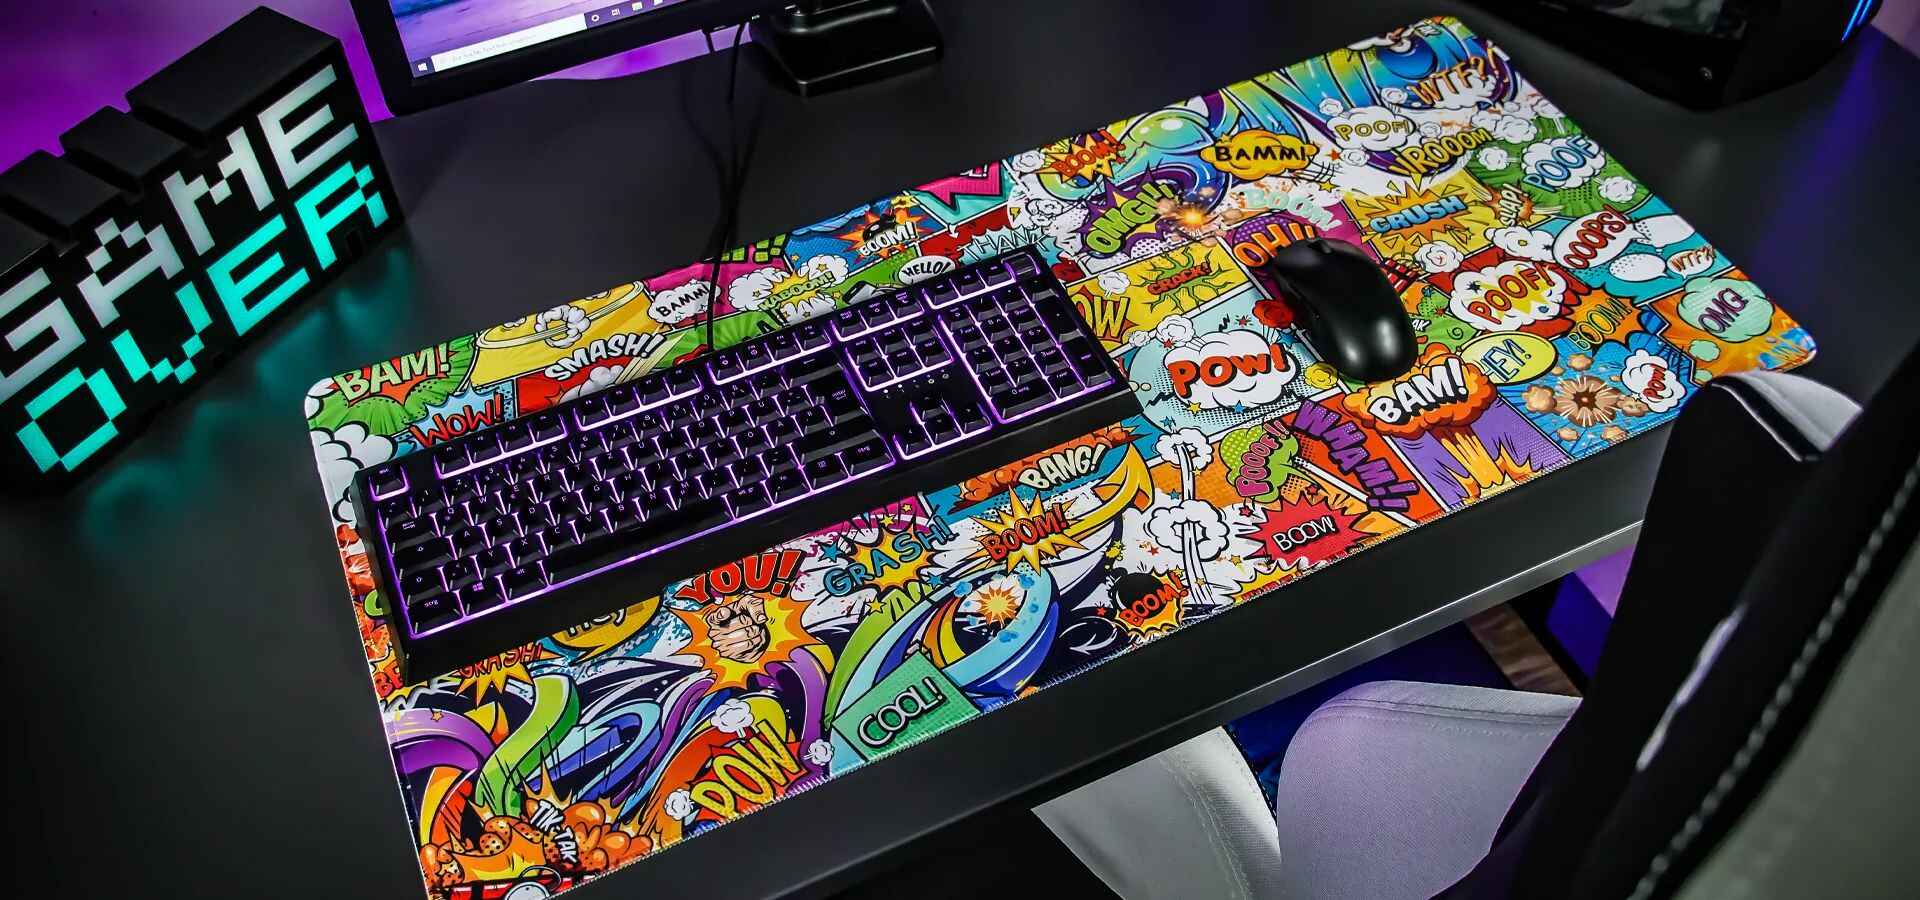
Sublimating a mouse pad is a creative and personalized way to add a unique touch to your workspace or create custom gifts for friends and family. This process uses sublimation, a method of transferring ink to a surface using heat, resulting in vibrant and long-lasting designs. Whether you're a business looking to offer custom mouse pads to clients or an individual wanting to add a personal flair to your desk, sublimation provides endless possibilities for customization.
By following the steps outlined in this guide, you can learn how to sublimate on a mouse pad and unleash your creativity. With the right materials and a dash of inspiration, you can transform plain mouse pads into eye-catching accessories that reflect your style and personality.
In the following sections, we will explore the materials needed for sublimating a mouse pad, the process of preparing the design, printing the design, sublimating the mouse pad, and adding the finishing touches to ensure a professional and polished result. Let's dive into the exciting world of sublimation and discover how you can elevate the humble mouse pad into a personalized work of art.
Materials Needed
Materials Needed
Before embarking on the sublimation process, it’s essential to gather the necessary materials to ensure a successful outcome. Here’s a list of items you’ll need:
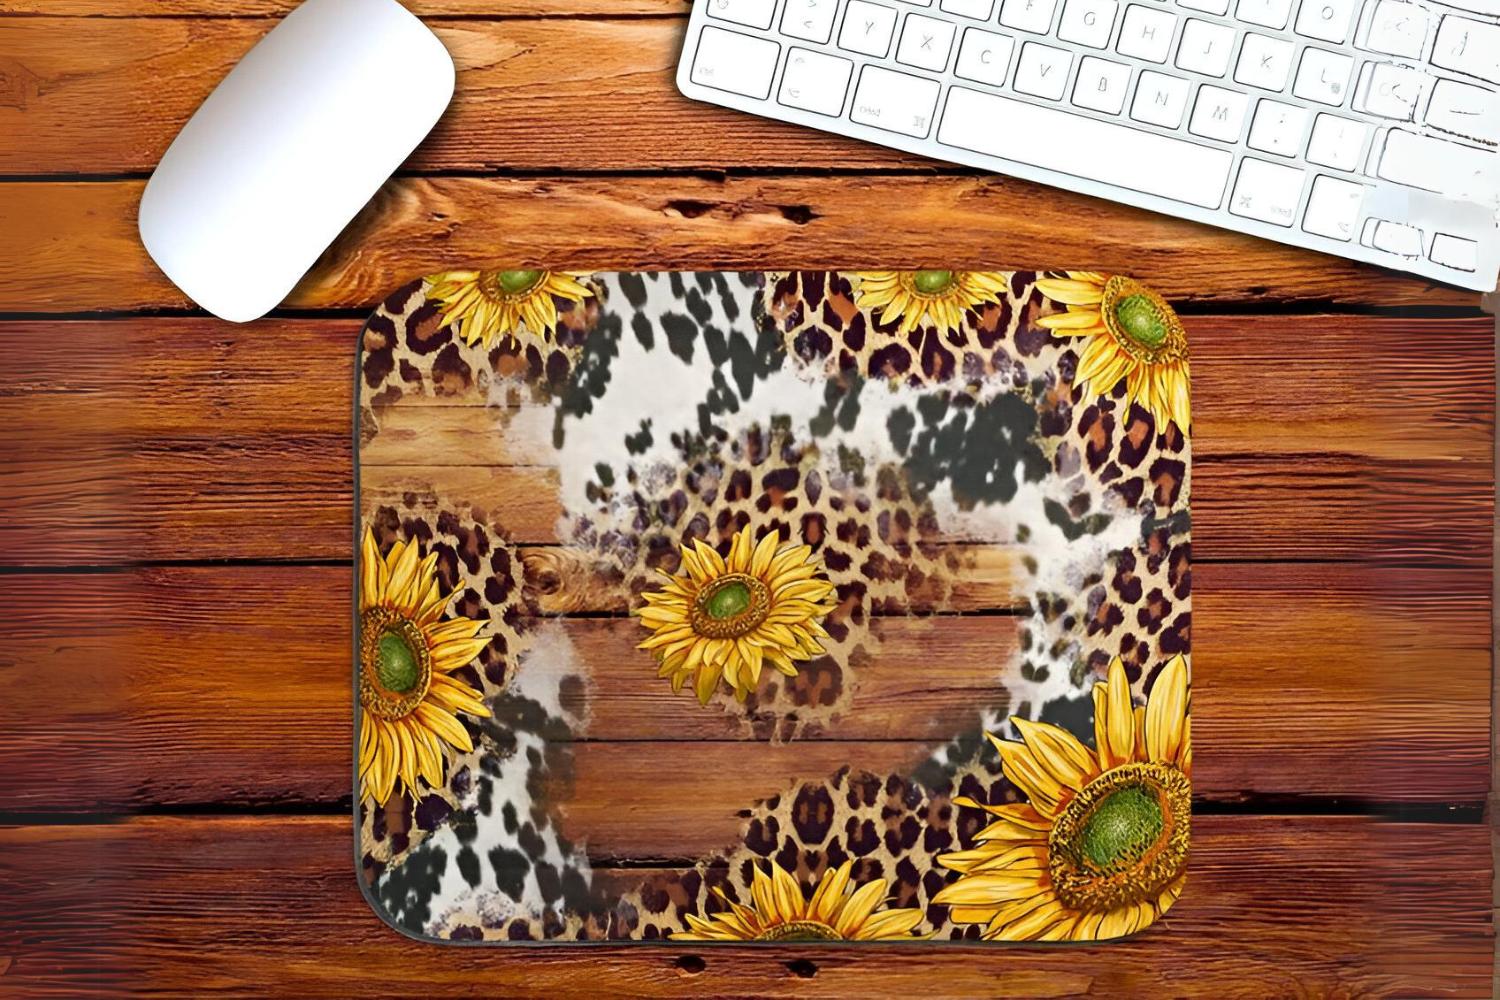
- Mouse Pad: Select a high-quality, blank mouse pad made of polyester fabric with a rubber backing. The polyester surface is ideal for sublimation, allowing the ink to bond seamlessly with the material.
- Sublimation Ink: Use sublimation-specific ink in vibrant colors that will withstand the heat transfer process, resulting in durable and vivid designs.
- Sublimation Printer: A sublimation printer is designed to accommodate sublimation ink and paper, ensuring accurate and detailed image reproduction.
- Heat-Resistant Tape: This tape is used to secure the design in place on the mouse pad during the sublimation process, preventing any movement that could affect the final result.
- Heat Press: An essential tool for sublimation, the heat press applies the precise amount of heat and pressure needed to transfer the ink from the paper to the mouse pad, resulting in a permanent and vibrant design.
- Protective Paper: Also known as butcher paper, this heat-resistant paper is placed over the design and mouse pad during the sublimation process, protecting the equipment and ensuring even heat distribution.
- Graphics Software: Utilize graphic design software to create and customize your designs before printing. Popular options include Adobe Photoshop, CorelDRAW, or GIMP.
- Lint Roller: Keep a lint roller on hand to ensure the mouse pad’s surface is free of any dust or debris that could affect the sublimation process.
- Protective Gear: When working with a heat press, it’s crucial to prioritize safety by wearing heat-resistant gloves and using a heat-resistant pad to handle the hot equipment.
By gathering these materials, you’ll be well-prepared to embark on the sublimation journey and create stunning, personalized mouse pads that showcase your unique designs and creativity.
Preparing the Design
Before diving into the sublimation process, it’s crucial to prepare your design with precision and attention to detail. Follow these steps to ensure your design is ready for seamless transfer onto the mouse pad:
Choose or Create Your Design: Whether you’re selecting an existing image or creating a custom design, ensure that the dimensions match the size of the mouse pad for a perfect fit. Consider vibrant colors and high-resolution graphics to achieve a striking final product.
Reverse the Image: When using sublimation, it’s essential to reverse the image before printing. This reversal ensures that the design appears correctly when transferred onto the mouse pad, preventing any unintended mirror effects.
Adjust Colors and Contrast: Fine-tune the colors and contrast of your design using graphic design software to achieve the desired vibrancy and visual impact. Pay close attention to details, as the sublimation process will faithfully replicate the colors and tones of your design onto the mouse pad.
Print a Test Copy: Before proceeding with the final sublimation, print a test copy of your design on regular paper to assess the colors, size, and overall appearance. This step allows you to make any necessary adjustments before transferring the design onto the mouse pad.
Trim the Design: Once satisfied with the test print, carefully trim the excess paper around the design, ensuring that it aligns perfectly with the dimensions of the mouse pad. Precise trimming is essential for a professional and polished result.
By meticulously preparing your design, you set the stage for a successful sublimation process, ensuring that your chosen imagery is ready to come to life on the surface of the mouse pad with stunning clarity and detail.
Printing the Design
Once your design is meticulously prepared, the next step in the sublimation process is to print it onto sublimation paper using a compatible printer. Follow these essential steps to ensure a flawless transfer of your design onto the mouse pad:
Use Sublimation Paper: Select high-quality sublimation paper designed to absorb the sublimation ink effectively and provide optimal transfer onto the mouse pad. Ensure that the paper size matches the dimensions of your design to avoid any cropping or resizing issues.
Load the Sublimation Printer: Carefully load the sublimation paper into your sublimation printer, making sure that it aligns correctly to prevent any misalignment during the printing process. Check the printer settings to select the highest quality and resolution for optimal image reproduction.
Print the Reversed Design: Ensure that your design is printed in reverse onto the sublimation paper. This crucial step guarantees that the final image appears correctly when transferred onto the mouse pad, avoiding any unintended mirroring or distortion.
Inspect the Print Quality: Once the design is printed, carefully inspect the sublimation paper for any imperfections, smudges, or color inconsistencies. Address any issues promptly by reprinting the design to maintain the integrity of the final product.
Handle with Care: After printing, handle the sublimation paper with caution to prevent smudging or damage to the ink. Ensure that the printed design remains pristine and free from any blemishes as you proceed to the next phase of the sublimation process.
By following these steps, you can ensure that your design is faithfully reproduced onto the sublimation paper, setting the stage for the precise and vibrant transfer of the image onto the surface of the mouse pad.
Sublimating the Mouse Pad
With your design expertly printed onto sublimation paper, it’s time to embark on the exhilarating process of transferring the image onto the mouse pad using a heat press. Follow these essential steps to achieve a flawless sublimation result:
Prepare the Heat Press: Ensure that the heat press is set to the appropriate temperature and pressure for sublimating mouse pads. Refer to the manufacturer’s guidelines to determine the optimal settings for your specific heat press model.
Position the Mouse Pad: Place the blank mouse pad onto the heat press, ensuring that it lies flat and free from any wrinkles or creases. The surface should be smooth and taut to facilitate an even transfer of the design.
Secure the Design: Position the printed sublimation paper with the design facing down onto the surface of the mouse pad. Use heat-resistant tape to secure the paper in place, preventing any movement during the sublimation process.
Protective Layering: Cover the secured design and mouse pad with a sheet of protective paper, also known as butcher paper, to shield the equipment from any ink transfer and ensure even heat distribution during the sublimation process.
Sublimate with Precision: Carefully lower the heat press to apply the precise amount of heat and pressure needed for the sublimation process. The heat press will activate the sublimation ink on the paper, causing it to transform into a gas and permeate the polyester fibers of the mouse pad.
Monitor the Sublimation Process: Maintain consistent pressure and heat for the recommended duration, as specified by the sublimation paper and ink manufacturer. Vigilantly monitor the process to ensure that the design fully and accurately transfers onto the mouse pad.
Complete the Sublimation: Once the sublimation process is complete, carefully lift the heat press and remove the protective paper and sublimation paper from the mouse pad. Revel in the vibrant and permanent transfer of your design, now beautifully adorning the surface of the mouse pad.
By following these meticulous steps, you can achieve impeccable sublimation results, transforming a plain mouse pad into a captivating canvas for your personalized designs.
Finishing Touches
After the sublimation process, adding the finishing touches ensures that your custom mouse pad is pristine and ready for use or gifting. Follow these essential steps to perfect your personalized creation:
Cooling and Setting: Allow the sublimated mouse pad to cool completely after the sublimation process. This cooling period is crucial for setting the design and ensuring its longevity and resistance to wear and tear.
Remove Residual Ink: Gently remove any residual sublimation ink or heat-resistant tape from the surface of the mouse pad. A lint roller can be used to eliminate any loose particles or debris, leaving the design clean and vibrant.
Quality Inspection: Thoroughly inspect the sublimated design for any imperfections, smudges, or inconsistencies. Address any issues promptly to maintain the professional quality of the finished mouse pad.
Package with Care: If the custom mouse pad is intended as a gift or for retail purposes, package it with care to preserve the design and prevent any damage during storage or transit. Consider using protective sleeves or packaging to safeguard the mouse pad’s surface.
Personalized Additions: Consider adding personalized touches, such as a custom label or tag, to further enhance the uniqueness of the mouse pad. Whether it’s adding a name, logo, or special message, these additions can elevate the personal significance of the custom creation.
Share and Enjoy: Display your custom mouse pad proudly on your workspace or present it as a thoughtful and personalized gift to friends, family, or clients. Embrace the joy of showcasing your unique designs and creativity through this functional and visually appealing accessory.
By attending to these finishing touches, you can ensure that your sublimated mouse pad is a testament to your attention to detail and dedication to creating a personalized and professional-quality product.
Conclusion
Embarking on the journey of sublimating a mouse pad opens the door to a world of creativity and personalization. From selecting or creating a design to witnessing it come to life on the surface of a plain mouse pad, the process is a testament to the power of customization and self-expression. By following the meticulous steps outlined in this guide, you have learned how to transform a humble mouse pad into a vibrant canvas for your unique designs.
The materials needed, including sublimation ink, a compatible printer, and a heat press, form the foundation for achieving stunning sublimation results. Preparing the design with precision, printing it onto sublimation paper, and then sublimating the mouse pad with care and attention to detail are essential steps that culminate in a professional and personalized end product.
Adding the finishing touches, such as inspecting the design, removing any residual ink, and packaging the custom mouse pad with care, ensures that your creation is ready to be showcased or shared with others. Whether it’s adorning your own workspace with a personalized accessory or delighting someone with a thoughtful and custom gift, the sublimated mouse pad embodies the fusion of practicality and artistry.
As you share and enjoy the fruits of your sublimation endeavors, remember the limitless potential for creativity that this process offers. From creating branded mouse pads for businesses to crafting one-of-a-kind gifts for special occasions, sublimation empowers you to infuse everyday items with your personal touch.
Embrace the art of sublimation, and let your imagination soar as you explore the myriad possibilities for customizing and transforming ordinary objects into extraordinary expressions of creativity.