Introduction
Welcome to the world of Bitcoin! As the most well-known and widely used cryptocurrency, Bitcoin has captured the attention of individuals, businesses, and governments around the globe. If you’re interested in diving deeper into the inner workings of the Bitcoin network and actively participating in its maintenance, you may consider running a Bitcoin node.
A Bitcoin node, in simple terms, is a computer that connects to the Bitcoin network, relays transactions and blocks, and helps maintain the decentralized nature of the network. By running a node, you become a part of the infrastructure that powers the Bitcoin ecosystem, contributing to its stability, security, and efficiency.
Running a Bitcoin node has several benefits and allows you to have a direct impact on the Bitcoin network. In this guide, we will explore the reasons why running a Bitcoin node is valuable, the available software options to run a node, and the step-by-step process of setting up and managing your own Bitcoin node.
Before diving into the technical details, it’s important to understand the importance of running a Bitcoin node. By running a node, you are actively participating in the decentralization of the Bitcoin network and contributing to its overall security and reliability. Instead of relying on a centralized entity to validate transactions and secure the network, nodes distribute the workload across a network of computers, ensuring that no single entity has control over the system.
Running a Bitcoin node allows you to verify your own transactions without relying on a third party. You can independently validate the history and authenticity of every Bitcoin transaction, giving you peace of mind and ensuring that your financial transactions are truly secure.
Another benefit of running a Bitcoin node is that it increases your privacy and security. When you connect to the Bitcoin network through your own node, you don’t have to rely on a third-party service provider. This allows you to maintain full control over your own data and eliminates the risk of your transaction information being stored or analyzed by centralized entities.
In the following sections, we will explore the different software options available for running a Bitcoin node, the step-by-step process of setting up a node, and how to effectively manage and monitor your node. By the end of this guide, you will have all the knowledge you need to become an active participant in the Bitcoin network and play your part in shaping the future of digital finance.
What is a Bitcoin Node?
Before diving into the process of running a Bitcoin node, it is essential to have a solid understanding of what a Bitcoin node actually is and how it functions within the Bitcoin network.
A Bitcoin node can be thought of as a computer program that connects to the Bitcoin network and participates in the validation, propagation, and storage of Bitcoin transactions and blocks. It acts as a crucial building block of the decentralized network, helping to maintain the integrity and security of the entire system.
Each Bitcoin node performs several key functions:
- Transaction Verification: Nodes verify the authenticity and validity of every Bitcoin transaction that is relayed through the network. By validating transactions, nodes ensure that no double-spending occurs and that the transaction adheres to the rules of the Bitcoin protocol.
- Block Validation: Nodes also play a vital role in validating and storing blocks on the Bitcoin blockchain. Each block contains a set of verified transactions, and nodes ensure that these blocks are in accordance with the consensus rules of the network.
- Network Propagation: Nodes help propagate transactions and blocks across the Bitcoin network, ensuring that the information is distributed to other nodes in a timely manner. This helps to maintain the overall efficiency and robustness of the network.
- Wallet Functionality: By running a Bitcoin node, you can also use it as your personal Bitcoin wallet. This allows you to store your Bitcoin securely and have full control over your funds without relying on a third-party service.
It is important to distinguish between full nodes and lightweight clients. While both can interact with the Bitcoin network, full nodes have a complete copy of the blockchain and independently validate transactions and blocks. On the other hand, lightweight clients rely on full nodes for the validation process, which sacrifices some level of security and decentralization.
By running a full Bitcoin node, you contribute to the decentralization of the network and can independently verify and validate the entire Bitcoin blockchain. This level of autonomy and trustlessness is a key philosophy behind Bitcoin and ensures that the network remains robust and secure.
Now that we have a clear understanding of what a Bitcoin node is and its importance within the network, let’s explore the reasons why running a Bitcoin node is beneficial and why you should consider becoming a node operator.
Why Run a Bitcoin Node?
If you’re passionate about Bitcoin and want to actively contribute to the network’s maintenance, running a Bitcoin node offers several compelling reasons to do so.
1. Increased Privacy and Security: When you connect to the Bitcoin network through your own node, you eliminate the need to rely on third-party service providers. This reduces the risk of your transaction information being stored or analyzed by centralized entities, providing you with greater privacy and security.
2. Independent Transaction Verification: By running a Bitcoin node, you can independently validate the authenticity and validity of every transaction on the network. This removes the need to trust external sources and allows you to have full confidence in the integrity of your own transactions.
3. Active Participation in the Bitcoin Network: Running a node means actively participating in the decentralized Bitcoin network. By relaying transactions, verifying blocks, and maintaining a copy of the blockchain, you become an integral part of the network’s infrastructure, contributing to its resilience and security.
4. Supporting the Bitcoin Ecosystem: The more nodes that are operated, the stronger and more robust the Bitcoin network becomes. By running a node, you contribute to the overall decentralization of the network and help to ensure its long-term viability.
5. Learning Opportunities: Running a Bitcoin node provides a valuable learning experience. It allows you to deepen your understanding of how the Bitcoin protocol works, gain insights into Bitcoin’s consensus mechanism, and develop technical skills related to network management and security.
6. Wallet Functionality: Running a Bitcoin node also enables you to use it as your personal Bitcoin wallet. This gives you full control over your funds, eliminates reliance on third-party wallets, and allows you to transact directly on the network.
7. Strengthening the Bitcoin Community: By running a node, you contribute to the overall strength and resilience of the Bitcoin community. Your node helps to ensure a diversified and decentralized network, reinforcing the principles of decentralization and censorship resistance that underlie the Bitcoin movement.
8. Trust in the Bitcoin Network: Running a node allows you to verify and validate all Bitcoin transactions independently. By doing so, you contribute to the security and trustworthiness of the Bitcoin network, ultimately strengthening the trust that people place in the system as a whole.
While running a Bitcoin node may require some technical knowledge and resources, the benefits it provides make it a worthwhile endeavor. The next section will explore the available Bitcoin node software options and guide you through the process of setting up your own Bitcoin node.
Avaliable Bitcoin Node Software
When it comes to running a Bitcoin node, there are several software options available, each with its own unique features and characteristics. Let’s explore some of the most popular Bitcoin node software choices:
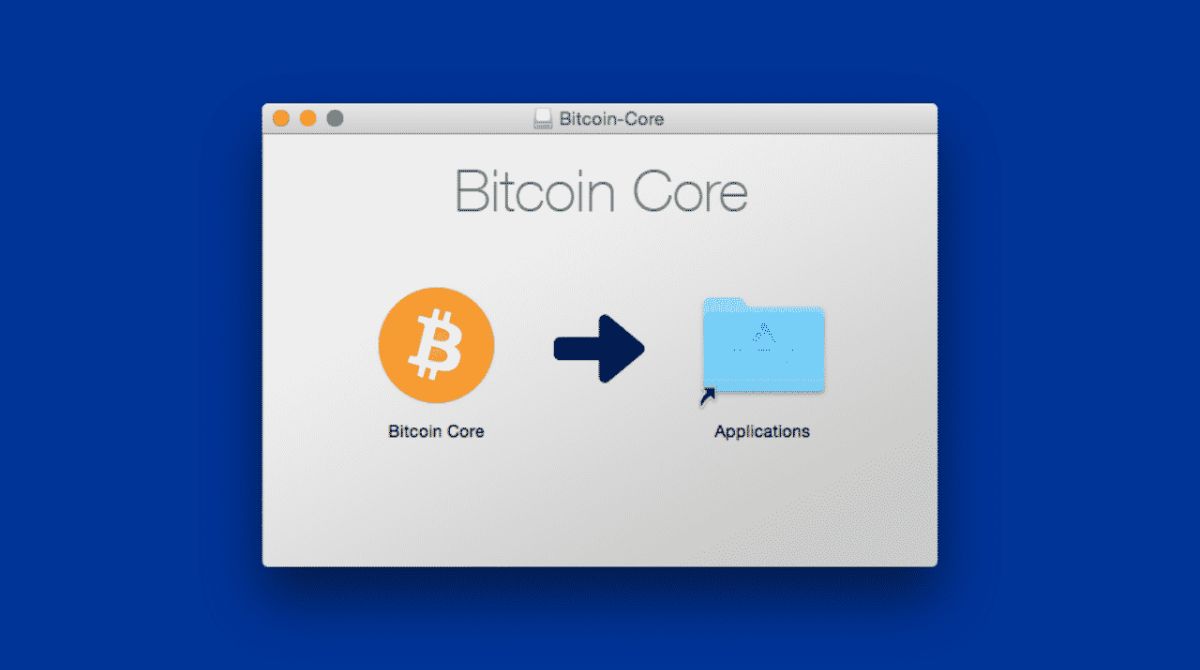
1. Bitcoin Core: Bitcoin Core is the original and reference implementation of the Bitcoin protocol. It is a full node software that provides the highest level of security, privacy, and decentralization. Bitcoin Core is open-source, actively maintained by the Bitcoin Core development team, and is widely regarded as the most reliable and trustworthy option for running a Bitcoin node.
2. Bitcoind: Bitcoind is a command-line interface (CLI) implementation of the Bitcoin protocol. It is a lightweight version of Bitcoin Core and is suitable for advanced users who prefer a more customizable approach. Bitcoind provides a similar level of security and functionality as Bitcoin Core but requires more technical knowledge to set up and manage.
3. Electrum: Electrum is a popular lightweight Bitcoin wallet that also supports running a Bitcoin node. It offers a user-friendly interface and is suitable for users who want a simplified experience without sacrificing security and privacy. Electrum connects to the Bitcoin network through Electrum servers, which relays transactions and blocks on behalf of the user.
4. BTCPay Server: BTCPay Server is an open-source, self-hosted payment processor that allows merchants and businesses to accept Bitcoin payments. It includes a built-in Bitcoin node, making it a great option for those who want to run a node while also providing a payment processing solution.
5. Other Alternatives: Besides the options listed above, there are various other Bitcoin node software available, such as Bitcoin Knots, Bitcoin Unlimited, and Bitcoin XT. These software choices offer alternative features and functionalities, catering to specific user preferences and requirements.
Whichever Bitcoin node software you choose, ensure that you download it from a trusted source and verify the cryptographic signatures to ensure that you are getting the authentic software. It is also recommended to regularly update your software to benefit from the latest security enhancements and bug fixes.
Setting up and configuring your Bitcoin node software will be covered in the following section. Make sure to choose the software that aligns with your technical expertise, desired level of customization, and overall objectives for running a Bitcoin node.
Setting Up a Bitcoin Node
Setting up a Bitcoin node may seem like a daunting task, but with the right guidance, it can be a straightforward process. In this section, we will walk you through the step-by-step process of setting up your own Bitcoin node.
1. Choose the Software: The first step is to select the Bitcoin node software that best fits your needs. Consider factors such as security, ease of use, and customization options when making your decision. Bitcoin Core is recommended for its robustness and reliability, but there are alternative options available if you have specific preferences or requirements.
2. Download the Software: Once you’ve chosen your Bitcoin node software, visit the official website or a trusted source to download the latest version. Ensure that you download the software that is compatible with your operating system.
3. Install the Software: Follow the installation instructions provided by the software developer to install the Bitcoin node software on your computer. Pay attention to any additional dependencies or requirements specified in the installation guide.
4. Configure the Node: After installing the software, you will need to configure your Bitcoin node. This involves specifying various settings, including network preferences, storage options, and security features. Consult the software’s documentation or online resources for detailed instructions on how to configure your node.
5. Synchronize the Blockchain: Once your node is configured, it will begin synchronizing with the Bitcoin blockchain. This process involves downloading and verifying each block of the blockchain, which can take several hours or even days depending on your internet connection and hardware specifications. Be patient and allow your node to complete the synchronization process.
6. Open Port 8333: To allow other nodes to connect to your Bitcoin node, you will need to open port 8333 on your router or firewall. This step is crucial for the proper functioning of your node and its participation in the Bitcoin network. Consult your router or firewall documentation for instructions on how to open a port.
7. Connect to Peers: To fully participate in the Bitcoin network and receive new transactions and blocks, you need to connect to other Bitcoin nodes as peers. Your node will automatically search for and connect to other nodes, but you can also manually add specific peers to enhance your node’s connectivity and network engagement.
8. Regularly Update the Software: It is essential to stay up to date with the latest software releases to benefit from security patches and performance improvements. Check the software developer’s website or official resources for updates, and make sure to follow the update process provided.
By following these steps, you will successfully set up and configure your Bitcoin node. Now you can actively participate in the Bitcoin network, propagate transactions, validate blocks, and contribute to the decentralization and security of the network.
Installing the Software
Installing the Bitcoin node software is one of the key steps in setting up your own Bitcoin node. This section will guide you through the installation process, ensuring that you have the necessary software up and running on your computer.
1. Choose the Right Version: Visit the official website or a trusted source for the Bitcoin node software you have selected. Make sure to choose the version that is compatible with your operating system. Bitcoin Core, for example, provides versions for Windows, macOS, and Linux.
2. Download the Software: Locate the download link for the appropriate version of the software. Click on the link to start the download process. Depending on your internet connection speed, it may take a few moments to complete the download.
3. Verify the Download: Verifying the authenticity of the downloaded software is a crucial security step. Check for cryptographic signatures or checksums provided by the software developer. These signatures ensure that the software has not been tampered with and comes from a trusted source. Compare the signatures to the ones provided on the official website.
4. Run the Installer: Once the download is complete and verified, locate the installer file in your downloads folder. Double-click on the installer file to start the installation process. Follow the on-screen instructions provided by the installer to proceed.
5. Choose Installation Location: During the installation process, you will be prompted to choose the location where the Bitcoin node software will be installed. The default location is typically within the program files or applications directory on your computer. You can choose to keep the default location or specify a different folder if desired.
6. Start the Installation: After choosing the installation location, click on the “Install” or “Next” button to initiate the installation process. The installer will copy the necessary files to the designated location and create shortcuts or menu entries for easy access to the Bitcoin node software.
7. Configure the Software: Once the installation is complete, you may be prompted to configure the Bitcoin node software. Follow the provided instructions to set up network preferences, storage options, and other relevant settings. Refer to the software’s documentation or online resources for detailed guidance on configuring your node.
8. Launch the Software: After completing the configuration process, you can launch the Bitcoin node software. Locate the shortcut or menu entry created during the installation and double-click on it to start the software. It may take a few moments for the software to launch and initialize.
With the software successfully installed on your computer, you have taken a significant step towards running your own Bitcoin node. In the upcoming section, we will cover the essential process of configuring the node to ensure optimal performance and network connectivity.
Configuring the Node
Configuring your Bitcoin node is a critical step to ensure that it functions properly and aligns with your preferences. In this section, we will guide you through the essential configuration settings that you should consider when setting up your node.
1. Network Configuration: Determine whether you want your Bitcoin node to connect to the Bitcoin network using the default settings or if you prefer to customize its behavior. You can specify the protocol version, maximum connections, and other network-related parameters in the configuration file. Consult the documentation of your Bitcoin node software for details on available configuration options.
2. Storage Configuration: Configure the location and size of the storage used by your node. By default, the software will create a data directory to store the blockchain, transaction and block indexes, and other relevant data. You can specify a different location or adjust the size of the storage allocation based on your available disk space and requirements.
3. Security Configuration: Strengthen the security of your node by enabling features such as RPC (Remote Procedure Call) authentication, which requires a username and password to access the Bitcoin node remotely. You can also enable additional security measures, such as using Tor to protect your node’s IP address and implementing firewall rules to control incoming and outgoing connections. Refer to the software documentation for instructions on how to configure security settings.
4. Logging and Debugging: Specify the level of logging and verbosity you want for your Bitcoin node. You can enable detailed logging to keep track of network activity, errors, and other events. This can be helpful for troubleshooting or monitoring the health and performance of your node. Adjust the logging settings according to your needs and the available resources on your computer.
5. Wallet Configuration: If you want to use your node as a Bitcoin wallet, configure the wallet options according to your preferences. Specify the encryption method, passphrase requirements, and other wallet-related settings. Ensure to choose a strong passphrase and consider enabling wallet backups to protect your funds in case of computer failure or data corruption.
6. Peer Configuration: Customize the list of peers your Bitcoin node connects to for syncing and propagating transactions and blocks. You can manually add specific peers to enhance network connectivity or choose to rely on the automatic peer discovery mechanism of the software. Be cautious when adding peers and ensure they are trusted nodes that contribute to the reliability and security of the network.
7. Test and Validate: After making the necessary configuration changes, restart your Bitcoin node software to apply the new settings. Monitor the logs and check for any error messages or warnings that may indicate misconfiguration. Verify that your node is connecting to the network, relaying transactions, and syncing with the blockchain properly.
By appropriately configuring your Bitcoin node, you can optimize its performance, enhance its security, and tailor it to your specific needs and preferences. In the next section, we will explore the process of opening port 8333 on your router or firewall, a crucial step for enabling network connectivity and participation in the Bitcoin network.
Opening Port 8333
Opening port 8333 on your router or firewall is a crucial step to enable network connectivity for your Bitcoin node. Port 8333 is the default port used by the Bitcoin network for communication between nodes. By opening this port, you allow other nodes to connect to your node and facilitate the exchange of transactions and blocks.
1. Access Your Router Settings: To open a port, you need to access your router’s settings. Open a web browser and enter your router’s IP address in the address bar. You can typically find the default gateway or router IP address in your computer’s network settings or on the router itself.
2. Login to the Router: Once you have accessed your router’s settings, you will need to log in with the appropriate credentials. If you’ve never changed the login details, refer to the router’s documentation or the manufacturer’s website for the default username and password.
3. Navigate to Port Forwarding Settings: Look for a tab or section in your router settings labeled “Port Forwarding” or “Virtual Servers”. This is where you can configure port forwarding rules for your Bitcoin node.
4. Add a Port Forwarding Rule: In the port forwarding settings, you will typically find an option to add a new port forwarding rule. Provide a descriptive name for the rule, such as “Bitcoin Node”, and specify port 8333 as the external (WAN) and internal (LAN) port.
5. Specify the Internal IP Address: Enter the internal IP address of the computer where your Bitcoin node is running. You can find the IP address by checking your computer’s network settings, or you can use the command prompt and enter “ipconfig” (Windows) or “ifconfig” (Linux/Mac) to view the IP address information.
6. Save the Port Forwarding Rule: Once you’ve filled in the necessary details, save the port forwarding rule. The router will apply the changes and start forwarding incoming connections on port 8333 to your Bitcoin node.
7. Test the Port Forwarding: To ensure that the port forwarding is correctly set up, you can use an online port checking tool or a port scanner utility. These tools will verify if the port is open and accessible from the internet. Enter port 8333 and initiate the test to confirm that the port is open and properly forwarded to your Bitcoin node.
8. Maintain Security: It’s crucial to prioritize security when opening ports. Regularly update your router’s firmware to patch any vulnerabilities. Additionally, consider enabling firewall settings on your router to restrict access to port 8333 from untrusted sources.
By opening port 8333 on your router or firewall and correctly configuring the port forwarding settings, you enable network connectivity for your Bitcoin node. This allows it to communicate with other nodes on the Bitcoin network, participate in transaction and block relaying, and contribute to the overall strength and decentralization of the network.
Adding Peers
Adding peers to your Bitcoin node is an important step to enhance its connectivity and participation in the Bitcoin network. Peers are other Bitcoin nodes that your node can connect to, allowing the exchange of transactions, blocks, and network information. Adding trusted and reliable peers can improve the efficiency and reliability of your node. Here’s how you can add peers to your Bitcoin node:
1. Obtain Peer Addresses: Start by gathering a list of peer addresses that you want to add to your node. These can be addresses of well-known and reputable Bitcoin nodes, recommended by the Bitcoin community or developers. Peer addresses typically consist of an IP address and a port number, such as 123.45.67.89:8333.
2. Edit the Configuration File: Locate the configuration file for your Bitcoin node software. This file usually has a .conf extension, and its location may vary depending on your operating system. Open the file using a text editor.
3. Add Peer Addresses: In the configuration file, look for a section where you can specify the list of peer addresses. It is usually denoted by lines such as “addnode=IP:PORT” or “connect=IP:PORT”. Add a new line for each peer address you want to add, using the correct syntax. For example, “addnode=123.45.67.89:8333”.
4. Save the Configuration File: After adding the peer addresses, save the configuration file and close the text editor. Ensure that you have properly formatted the new lines and that the configuration file remains valid.
5. Restart the Bitcoin Node: To apply the changes and start connecting to the added peers, restart your Bitcoin node software. It will read the updated configuration file, establish connections with the specified peers, and begin exchanging data with the network.
6. Monitor Peer Connectivity: After restarting your node, monitor the logs or user interface of your Bitcoin node software to check the connectivity status with the added peers. Your node should establish connections with the peers and start receiving transactions and blocks from them. Be patient as the connections may take some time to establish.
7. Adjust and Update Peer List: Over time, you may want to adjust the list of peers based on their reliability, performance, or changes in the network. Remove any non-responsive or problematic peers and add new ones as necessary. Regularly updating the list of peers can help maintain a healthy and well-connected Bitcoin node.
By adding trusted and reliable peers to your Bitcoin node, you enhance its connectivity and network engagement. Your node will actively participate in the Bitcoin network, exchanging data with other nodes, and contributing to the overall strength and decentralization of the network.
Connecting to the Bitcoin Network
Once you have set up your Bitcoin node, configured its settings, and added peers, it’s time to connect it to the Bitcoin network. Connecting to the network allows your node to actively participate in the validation and propagation of transactions and blocks. Here’s how you can connect your Bitcoin node to the Bitcoin network:
1. Start Your Bitcoin Node: Ensure that your Bitcoin node software is running on your computer. Launch the software and give it a few moments to initialize and establish network connections.
2. Monitor the Connection Status: Monitor the logs or user interface of your Bitcoin node software to check the status of its network connectivity. Look for indications that your node is connecting to peers, syncing with the blockchain, and receiving transactions and blocks from the network.
3. Verify External IP Address: Ensure that your node has a valid external IP address assigned to it. You can check this by using external IP checker websites or referencing your router’s settings or network configuration. It’s important to have a publicly reachable IP address for other nodes to connect to your node.
4. Validate Inbound Connections: Check if your Bitcoin node is successfully receiving inbound connections from other nodes in the network. The number of inbound connections may vary, but having multiple connections helps enhance the robustness and reliability of your node.
5. Confirm Outbound Connections: Your Bitcoin node software should also establish outbound connections to other nodes in the network. These connections allow your node to actively send transactions and blocks to other nodes, contributing to the propagation of data across the network.
6. Monitor Network Traffic: Keep an eye on the network traffic generated by your Bitcoin node. Verify that your node is actively sending and receiving data, indicating its active involvement in the Bitcoin network. You can monitor network traffic using tools or features provided by your operating system or specialized network monitoring software.
7. Troubleshoot Connection Issues: In case your node is experiencing connection problems or is not able to establish connections with peers, refer to the software’s documentation or online resources for troubleshooting steps. Common issues include incorrect port forwarding, firewall settings, or problems with peer addresses.
8. Stay Up to Date: Regularly update your Bitcoin node software to the latest version. This ensures that you have the latest bug fixes, enhancements, and security patches implemented. Staying up to date helps maintain compatibility with the Bitcoin network and ensures optimal performance of your node.
By successfully connecting your Bitcoin node to the Bitcoin network, you become an active participant in the validation and propagation of Bitcoin transactions and blockchain data. Your node contributes to the overall strength, security, and decentralization of the network, helping to ensure the trustworthiness and reliability of the Bitcoin ecosystem.
Managing the Node
Managing your Bitcoin node involves actively monitoring its performance, ensuring its security and reliability, and taking necessary actions to optimize its operation. Here are some key aspects of managing your Bitcoin node:
1. Monitoring Node Performance: Regularly monitor the performance of your Bitcoin node to ensure it is running smoothly. Check CPU and memory usage, network connectivity, and disk space utilization. By monitoring performance metrics, you can identify any potential issues or bottlenecks and take appropriate actions to optimize your node’s performance.
2. Updating the Software: Keep your Bitcoin node software up to date by installing the latest updates and patches. Regular updates ensure that your node has the most recent improvements, bug fixes, and enhanced security measures implemented by the software developers. Stay informed about new releases and follow the recommended update process provided by your Bitcoin node software.
3. Backing Up Your Wallet: If you are using your Bitcoin node as a wallet, it is important to regularly back up your wallet.dat file or export the private keys. Wallet backups help protect your funds in case of hardware failure, data corruption, or accidental deletion. Store your backups in secure offline storage such as encrypted external drives or hardware wallets.
4. Implementing Security Measures: Ensure the security of your Bitcoin node by taking necessary precautions. Enable authentication for remote access to your node through RPC (Remote Procedure Call) and use strong usernames and passwords. Consider implementing firewall rules to restrict access only to trusted IP addresses. Regularly review security best practices and stay informed about any vulnerabilities or exploits that may affect your node.
5. Monitoring Network Connectivity: Continuously monitor the network connectivity of your Bitcoin node to ensure it is maintaining connections with peers and actively participating in the Bitcoin network. If you observe a drop in connectivity or a decrease in the number of peer connections, investigate the cause and take action if necessary to restore connectivity.
6. Contributing to the Network: As a Bitcoin node operator, you can contribute to the network’s resilience and decentralization. Consider contributing resources to the network, such as bandwidth or disk space, by participating in initiatives like the Bitcoin network backbone or the Running Light Initiative. Participating in such initiatives helps strengthen the overall network and supports the Bitcoin ecosystem.
7. Engaging with the Bitcoin Community: Stay engaged with the Bitcoin community through online forums, social media, and developer channels. Participate in discussions, share knowledge, and seek help if needed. The Bitcoin community is a valuable resource for staying updated on the latest developments, best practices, and troubleshooting techniques related to running a Bitcoin node.
By effectively managing your Bitcoin node, you can ensure its optimal performance, security, and contribution to the Bitcoin network. Regular monitoring, updating, and engagement with the community help maintain the strength and integrity of your node, reaffirming your role as an active participant in the decentralized Bitcoin ecosystem.
Monitoring the Node
Monitoring your Bitcoin node is crucial to ensure its optimal performance, stability, and security. By actively monitoring your node, you can identify and address any potential issues promptly, ensuring the smooth operation of your node. Here are some key aspects to consider when monitoring your Bitcoin node:
1. Node Performance Metrics: Keep an eye on various performance metrics of your Bitcoin node, including CPU and memory usage, network bandwidth, disk space utilization, and synchronization status. Monitoring these metrics allows you to detect any anomalies or bottlenecks that may impact your node’s performance.
2. Logs and Error Messages: Regularly check the logs and error messages generated by your Bitcoin node software. Logs provide valuable information about network connectivity, transaction processing, and potential issues. Keep an eye out for any recurring errors or warnings and take appropriate actions to resolve them.
3. Network Connectivity: Monitor the network connectivity of your Bitcoin node to ensure it maintains connections with other nodes. Check the number of inbound and outbound connections, as well as their quality and stability. A well-connected node is important for efficient propagation of transactions and blocks across the network.
4. Blockchain Synchronization: Monitor the progress of blockchain synchronization to ensure your node is up to date with the latest blocks. It is crucial for your node to be synchronized with the network for accurate transaction validation and participation in the Bitcoin ecosystem. Keep an eye on the synchronization process and address any issues that may impede progress.
5. Peer Connectivity: Regularly check the connectivity status with the peers to which your node is connected. Verify that connections are active and stable, as frequent disconnections may indicate network issues or unresponsive peers. If connections drop or fail, take necessary actions to restore connectivity or add new peers to improve network engagement.
6. Resource Utilization: Stay aware of the resource utilization of your Bitcoin node, such as CPU, memory, and disk space. High resource usage may impact the performance of your node and other applications running on your machine. If necessary, consider allocating more resources or optimizing your node’s configuration settings to ensure smooth operation.
7. Security Auditing: Regularly perform security audits of your Bitcoin node to identify any potential vulnerabilities or risks. Stay informed about the latest security updates and patches for your node software and promptly apply them. Monitor firewall and authentication logs to detect any suspicious activities or unauthorized access attempts.
8. Utilize Monitoring Tools: Consider using dedicated monitoring tools or software specifically designed for Bitcoin node monitoring. These tools provide detailed insights into the performance and health of your node, making it easier to identify and resolve any potential issues. Popular monitoring tools include Bitnodes, NodeStats, and Bitcoin Node Manager.
By actively monitoring your Bitcoin node, you can ensure its optimal performance, security, and contribution to the Bitcoin network. Regularly check performance metrics, connection status, and logs to promptly address any issues that may arise and maintain the reliability and stability of your node.
Troubleshooting
Troubleshooting is an essential part of managing a Bitcoin node, as it helps identify and resolve issues that may arise during operation. Here are some common troubleshooting steps to help you diagnose and solve problems with your Bitcoin node:
1. Check Network Connectivity: Verify that your node has a stable internet connection and is able to communicate with other nodes on the Bitcoin network. Ensure that your router’s port forwarding settings are correctly configured and that your node’s port 8333 is accessible.
2. Restart the Node: Sometimes, a simple restart of your Bitcoin node software can resolve minor issues. Restarting the software refreshes its state and may help address connectivity or synchronization problems.
3. Verify Firewall and Antivirus Settings: Check your firewall or antivirus software to ensure that it is not blocking incoming or outgoing connections for your Bitcoin node. Add exceptions or rules to allow traffic through port 8333 if necessary.
4. Review Log Files and Error Messages: Examine the log files and error messages generated by your Bitcoin node software. These can provide valuable insights into the root cause of any issues you may be experiencing. Look for recurring errors or warnings and search for solutions or further guidance online.
5. Upgrade Node Software: Ensure that you are running the latest version of your Bitcoin node software. Developers frequently release updates and patches to address bugs, security vulnerabilities, or performance issues. Upgrading to the latest version may resolve the problem you are encountering.
6. Check System Requirements: Verify that your computer meets the minimum system requirements specified by the Bitcoin node software. Insufficient hardware resources, such as low memory or a slow CPU, can lead to performance issues or synchronization problems. Upgrade your hardware if necessary.
7. Analyze Resource Usage: Monitor the resource utilization of your Bitcoin node, such as CPU and memory usage. Excessive resource consumption may cause your node to lag or become unresponsive. Adjust the configuration settings, reduce the number of connected peers, or allocate more resources to your node if needed.
8. Seek Help from the Community: If you have taken the above steps and are still experiencing issues, reach out to the Bitcoin community for assistance. Online forums, developer communities, and dedicated Bitcoin support channels can provide guidance and solutions for more complex problems. Explain your issue clearly, provide relevant details, and be open to suggestions and troubleshooting tips from experienced community members.
Troubleshooting can be a trial-and-error process, but perseverance and patience will lead to identifying and resolving the underlying issues with your Bitcoin node. By actively addressing and resolving problems, you can ensure the smooth operation of your node and actively participate in the Bitcoin network.
Conclusion
Congratulations! You have now gained a comprehensive understanding of running and managing a Bitcoin node. By running your own node, you actively contribute to the decentralization, security, and reliability of the Bitcoin network. Let’s recap the key points covered:
We began by exploring the concept of a Bitcoin node and its vital role in validating transactions, verifying blocks, and maintaining the decentralized nature of the network. We discussed the benefits of running a Bitcoin node, such as increased privacy, independent transaction verification, and active participation in the Bitcoin ecosystem.
We then delved into the available Bitcoin node software, including options like Bitcoin Core, Bitcoind, Electrum, and BTCPay Server. Each software choice offers unique features and customization options, allowing you to select the one that best aligns with your needs and technical expertise.
Next, we provided a step-by-step guide on setting up, configuring, and connecting your Bitcoin node to the network. We covered tasks such as installing the software, configuring the node, opening port 8333 on your router or firewall, and adding peers to enhance network connectivity.
Managing and monitoring the node were discussed, highlighting the importance of performance monitoring, updating the software, implementing security measures, and actively engaging with the Bitcoin community. Regularly taking these management actions ensures the smooth operation and contribution of your Bitcoin node to the network.
Inevitably, there may be challenges that arise while running a Bitcoin node, which is why we provided troubleshooting steps to help you identify and resolve common issues. By following these troubleshooting techniques and seeking assistance from the Bitcoin community, you can overcome any hurdles you encounter.
Running a Bitcoin node goes beyond personal gain—it supports the principles of decentralization, privacy, and security that are fundamental to the Bitcoin ethos. By validating transactions, verifying blocks, and contributing to the strength of the Bitcoin network, you become an integral part of shaping the future of digital finance.
Continue to stay informed about the latest developments in Bitcoin technology, security best practices, and software updates. As the Bitcoin ecosystem evolves, keeping your node up to date ensures its continued compatibility with the network and enhances its functionality.
Now, armed with the knowledge and guidance provided in this guide, you are ready to embark on your Bitcoin node journey. Enjoy the experience of actively participating in the decentralized revolution that is shaping the future of finance!