Introduction
With the increasing popularity of digital payments, it’s no wonder that many people are looking for convenient ways to link their PayPal account to Google Pay. The integration of these two platforms offers users a seamless and efficient way to make online purchases, send money, and manage their finances. By connecting your PayPal account to Google Pay, you can enjoy the benefits of both services, providing you with a wider range of options and greater flexibility.
In this article, we will guide you through the step-by-step process of linking your PayPal account to Google Pay. Whether you’re an avid online shopper, a small business owner, or someone who frequently sends money to friends and family, this integration can simplify your financial transactions and streamline your payment methods.
By linking PayPal to Google Pay, you’ll have the ability to make secure payments with just a few taps on your smartphone. No longer will you have to input your credit card information or log into your PayPal account separately. Instead, you can enjoy the convenience of using Google Pay as a digital wallet, incorporating your PayPal account for quick and hassle-free transactions.
Before we dive into the process, it’s important to note that both PayPal and Google Pay prioritize user security. Your financial information is protected through advanced encryption and secure authentication measures. As such, you can confidently link your PayPal account to Google Pay knowing that your data will be safeguarded.
Now, without further ado, let’s get started on the journey to link your PayPal account to Google Pay!
Step 1: Download and Install the Google Pay App
The first step in linking your PayPal account to Google Pay is to download and install the Google Pay app on your mobile device. The Google Pay app is available for both Android and iOS devices, making it accessible to a wide range of users.
To download the app on your Android device, simply open the Google Play Store and search for “Google Pay”. Once you find the app, tap on the “Install” button to begin the download. Once the installation is complete, you can find the Google Pay app icon on your home screen or in your app drawer.
If you’re using an iPhone, you can download the Google Pay app from the App Store. Open the App Store and search for “Google Pay”. Tap on the “Get” button to download and install the app. Once the installation is complete, you can find the Google Pay app on your home screen.
It’s important to ensure that you download the official Google Pay app from a trusted source to avoid any security risks. Be cautious of third-party apps or websites claiming to offer Google Pay downloads, as these may be malicious or unreliable.
Once you have successfully downloaded the Google Pay app, you can proceed to the next step to set up your Google Pay account and prepare for the integration with PayPal.
Step 2: Open the Google Pay App
After you have downloaded and installed the Google Pay app, it’s time to open the app and initiate the setup process. Locate the Google Pay app icon on your device’s home screen or in your app drawer, and tap on it to launch the application.
Upon opening the Google Pay app, you will be greeted with a welcome screen that provides an overview of the app’s features and functionalities. Take a moment to familiarize yourself with the interface and the various options available.
If you are using Google Pay for the first time, you will need to grant certain permissions to enable the app to function properly. These permissions may include accessing your device’s location, contacts, and notifications. It’s important to review the permissions requested by the app and approve them if you are comfortable with granting access.
Once you have granted the necessary permissions, you will be prompted to sign in to your Google account. If you already have a Google account, enter your email address and password to proceed. If you do not have a Google account, you can create one by tapping on the “Create account” option and following the on-screen instructions.
Signing in to your Google account is crucial for the successful integration of PayPal with Google Pay. It allows for the synchronization of your payment information and ensures a seamless and secure experience when making transactions with your PayPal account.
Once you have signed in to your Google account, you will be ready to move on to the next step – setting up a Google Pay account. This step is essential for linking PayPal to your Google Pay account and unlocking the full range of features and benefits that the integration offers.
Step 3: Set up a Google Pay Account
After opening the Google Pay app and signing in to your Google account, the next step is to set up a Google Pay account. This account will serve as your digital wallet and provide the foundation for integrating PayPal into the Google Pay ecosystem.
To set up your Google Pay account, you will need to enter some basic information and link a valid payment method. Follow the on-screen prompts and provide the requested details, such as your name, email address, and phone number. Ensure that the information you provide is accurate and up-to-date.
Once you have entered your personal information, you will be asked to add a payment method to your Google Pay account. This payment method will be used for transactions and to seamlessly link your PayPal account to Google Pay. You have the option to add a credit or debit card, or you can choose to link a bank account.
If you prefer to link a credit or debit card, simply enter the card details, including the card number, expiration date, and security code. Alternatively, if you wish to link a bank account, you will need to provide your bank’s name, routing number, and account number.
It’s important to note that adding a payment method to your Google Pay account does not directly link your PayPal account. However, having a valid payment method associated with your Google Pay account is a prerequisite for successfully integrating PayPal.
After you have added a payment method, review the terms and conditions and privacy policy and then tap on the “Accept” button to proceed. Congratulations! You have now set up your Google Pay account and are ready to move on to the next step – linking your PayPal account to Google Pay.
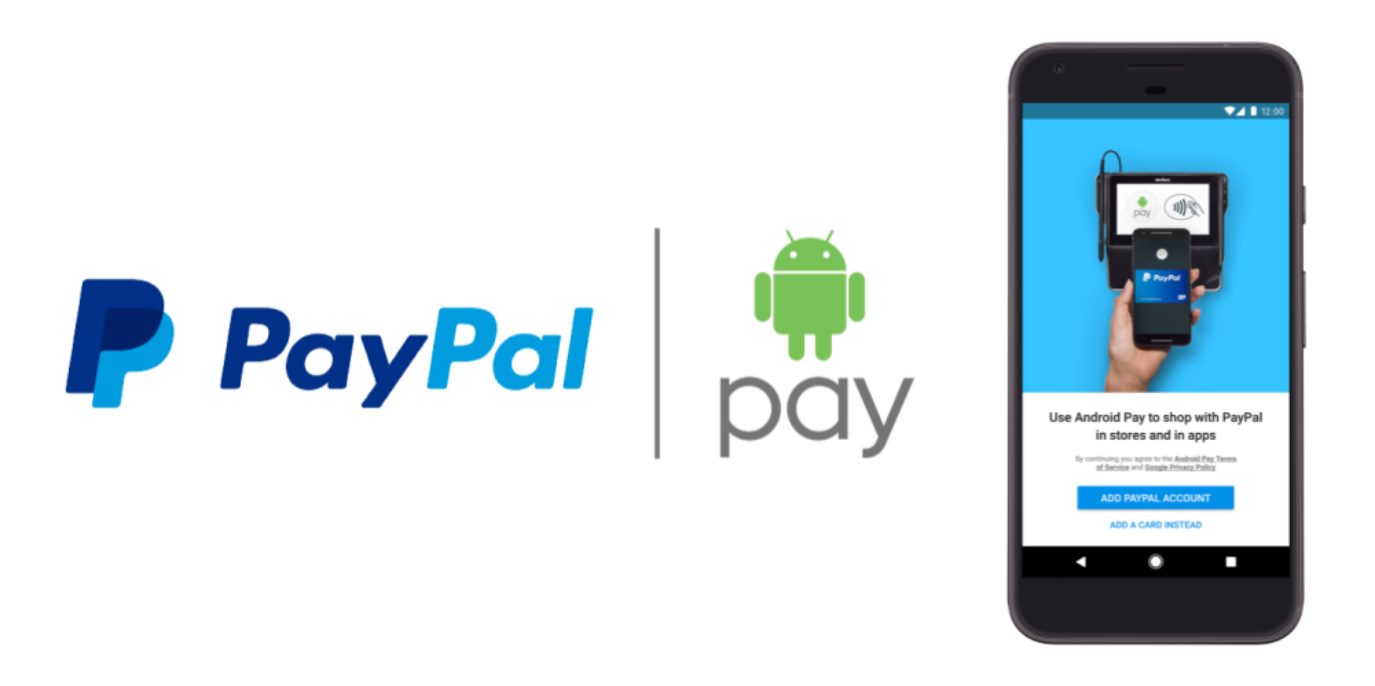
Step 4: Link PayPal to Your Google Pay Account
Now that you have a Google Pay account set up and a payment method added, it’s time to link your PayPal account to Google Pay. This integration will allow you to seamlessly use your PayPal balance or linked bank account for payments and transactions through Google Pay.
To link PayPal to your Google Pay account, follow these steps:
- Open the Google Pay app on your device.
- Navigate to the “Settings” or “Profile” section of the app. The exact location may vary depending on your device and app version.
- Select the option to “Add PayPal Account” or “Link PayPal Account”.
- You will be prompted to log in to your PayPal account. Enter your PayPal email address and password, then tap on the “Log In” or “Continue” button.
- Once logged in, you may be required to grant permission for Google Pay to access your PayPal account. Review the information and permissions requested, then tap on the “Agree” or “Authorize” button to proceed.
- After granting permission, your PayPal account will be successfully linked to Google Pay. You will receive a confirmation message indicating the successful integration.
It’s important to note that to link your PayPal account to Google Pay, you must have a valid PayPal account. If you do not have a PayPal account, you can easily create one by visiting the PayPal website or by downloading the PayPal app from your device’s app store.
Once PayPal is linked to your Google Pay account, you can enjoy the convenience of using your PayPal balance or linked bank account for transactions. Whether you’re making purchases online or sending money to family and friends, you can now use your PayPal funds directly through Google Pay.
By integrating PayPal with Google Pay, you’re combining the security and convenience of two trusted platforms, making your financial transactions smoother and easier than ever before.
Step 5: Confirm and Confirm Again
Once you have successfully linked your PayPal account to Google Pay, it’s essential to confirm and double-check the integration to ensure that everything is set up correctly. This step is crucial to avoid any potential issues or discrepancies when using PayPal through Google Pay.
To confirm the integration and check your PayPal settings within Google Pay, follow these steps:
- Open the Google Pay app on your device.
- Navigate to the “Settings” or “Profile” section of the app.
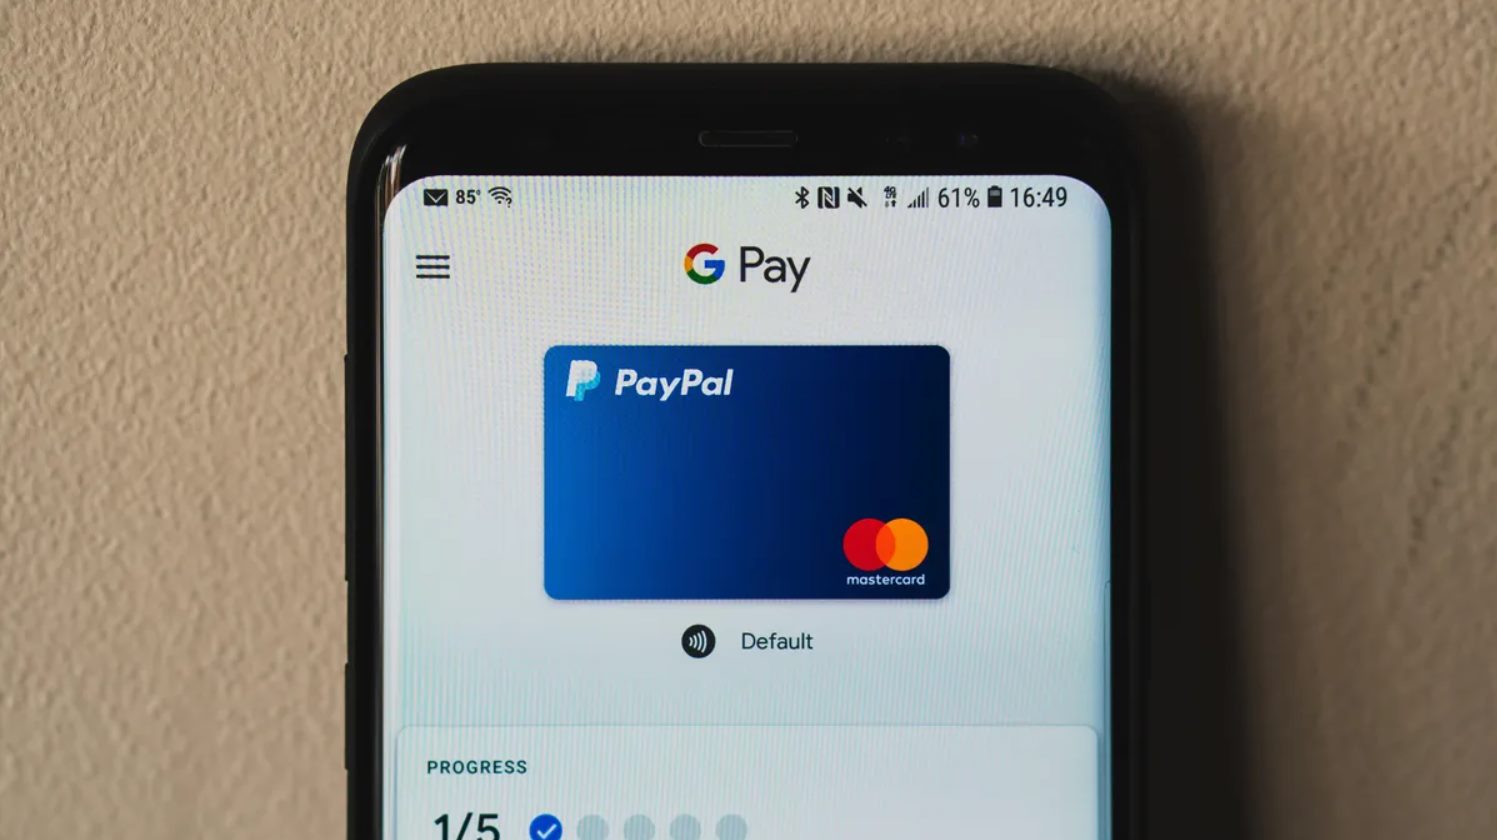
- Locate the “Payment Methods” or “Wallet” option.
- In the payment methods section, you should see your linked PayPal account listed. Tap on it to access the settings.
- Review the information associated with your PayPal account, including the linked email address and payment method.
- Ensure that your PayPal balance or linked bank account is selected as the default payment option.
- Double-check any additional settings or preferences related to your PayPal account within Google Pay.
By confirming the integration and reviewing the settings, you can have peace of mind knowing that your PayPal account is properly linked to Google Pay and set up according to your preferences.
It’s also a good idea to test the integration by making a small transaction using your PayPal funds through Google Pay. This will help verify that the payment process runs smoothly and that there are no issues with the connection between the two accounts.
If you encounter any problems during the confirmation process or while conducting transactions, you can reach out to PayPal or Google Pay customer support for assistance. They can provide guidance and troubleshooting steps to help resolve any issues you may encounter.
Remember, it’s always better to be proactive and ensure that the integration between PayPal and Google Pay is working as intended, as this will save you time and potential frustrations when making future payments.
Step 6: Start Using PayPal with Google Pay
Congratulations! You have successfully linked your PayPal account to Google Pay. Now, it’s time to take advantage of the convenience and flexibility that this integration offers. You can start using your PayPal account seamlessly through Google Pay for a variety of transactions, both online and in-store.
Here are some ways to make the most out of PayPal with Google Pay:
- Online Shopping: When making online purchases, look for the Google Pay option at checkout. Select Google Pay as your preferred payment method, and you’ll have the option to choose PayPal during the payment process. Simply select your PayPal account, review the transaction details, and confirm the payment.
- In-Store Payments: Many retail stores and restaurants now accept contactless payments via Google Pay. To make a payment, open the Google Pay app on your device and select the linked PayPal account as the payment source. Hold your device near the contactless payment terminal to complete the transaction.
- Send Money: The integration of PayPal with Google Pay allows you to send money to friends, family, or businesses directly from your PayPal account. Open the Google Pay app, go to the “Send” section, select your PayPal account as the payment source, enter the recipient details, and confirm the transfer.
- Request Money: If you need to request funds from someone, you can utilize Google Pay’s request money feature. Open the app, navigate to the “Request” section, select your PayPal account, enter the requested amount and recipient details, and send the request.
- Access Transaction History: With your PayPal account linked to Google Pay, you can easily access and view your transaction history within the app. Keep track of your payments, receipts, and details to stay organized and manage your finances effectively.
When using PayPal with Google Pay, it’s important to ensure that you have sufficient funds in your PayPal balance or linked bank account before making any transactions. Regularly monitor your PayPal account and keep it topped up to avoid any payment delays or issues.
Remember, both PayPal and Google Pay prioritize user security and employ advanced encryption and authentication measures to protect your financial information. However, it’s always a good practice to stay vigilant and monitor your accounts for any suspicious activity.
By utilizing PayPal with Google Pay, you’re taking advantage of two robust platforms to enhance your payment experience. Enjoy the convenience, flexibility, and peace of mind that comes with this integration.
Conclusion
Linking your PayPal account to Google Pay opens up a world of convenience and flexibility for your digital transactions. By integrating these two platforms, you can seamlessly use your PayPal balance or linked bank account to make online purchases, send money, and manage your finances.
In this article, we provided a step-by-step guide to help you through the process of linking your PayPal account to Google Pay. We started with downloading and installing the Google Pay app, then proceeded to open the app, set up a Google Pay account, and link your PayPal account. We emphasized the importance of confirming and double-checking the integration to ensure a smooth experience.
Now that you have successfully linked your PayPal account to Google Pay, you can start using PayPal seamlessly through the app. Whether it’s online shopping, in-store payments, sending or requesting money, or accessing your transaction history, you have the power to manage your finances with ease.
While using PayPal with Google Pay, it’s important to maintain sufficient funds in your PayPal account or linked bank account to avoid any payment delays. Additionally, stay vigilant and monitor your accounts for any suspicious activity to ensure the security of your financial information.
Enjoy the convenience, security, and flexibility that comes with linking your PayPal account to Google Pay. Simplify your financial transactions and experience a new level of convenience in managing your finances.