Introduction
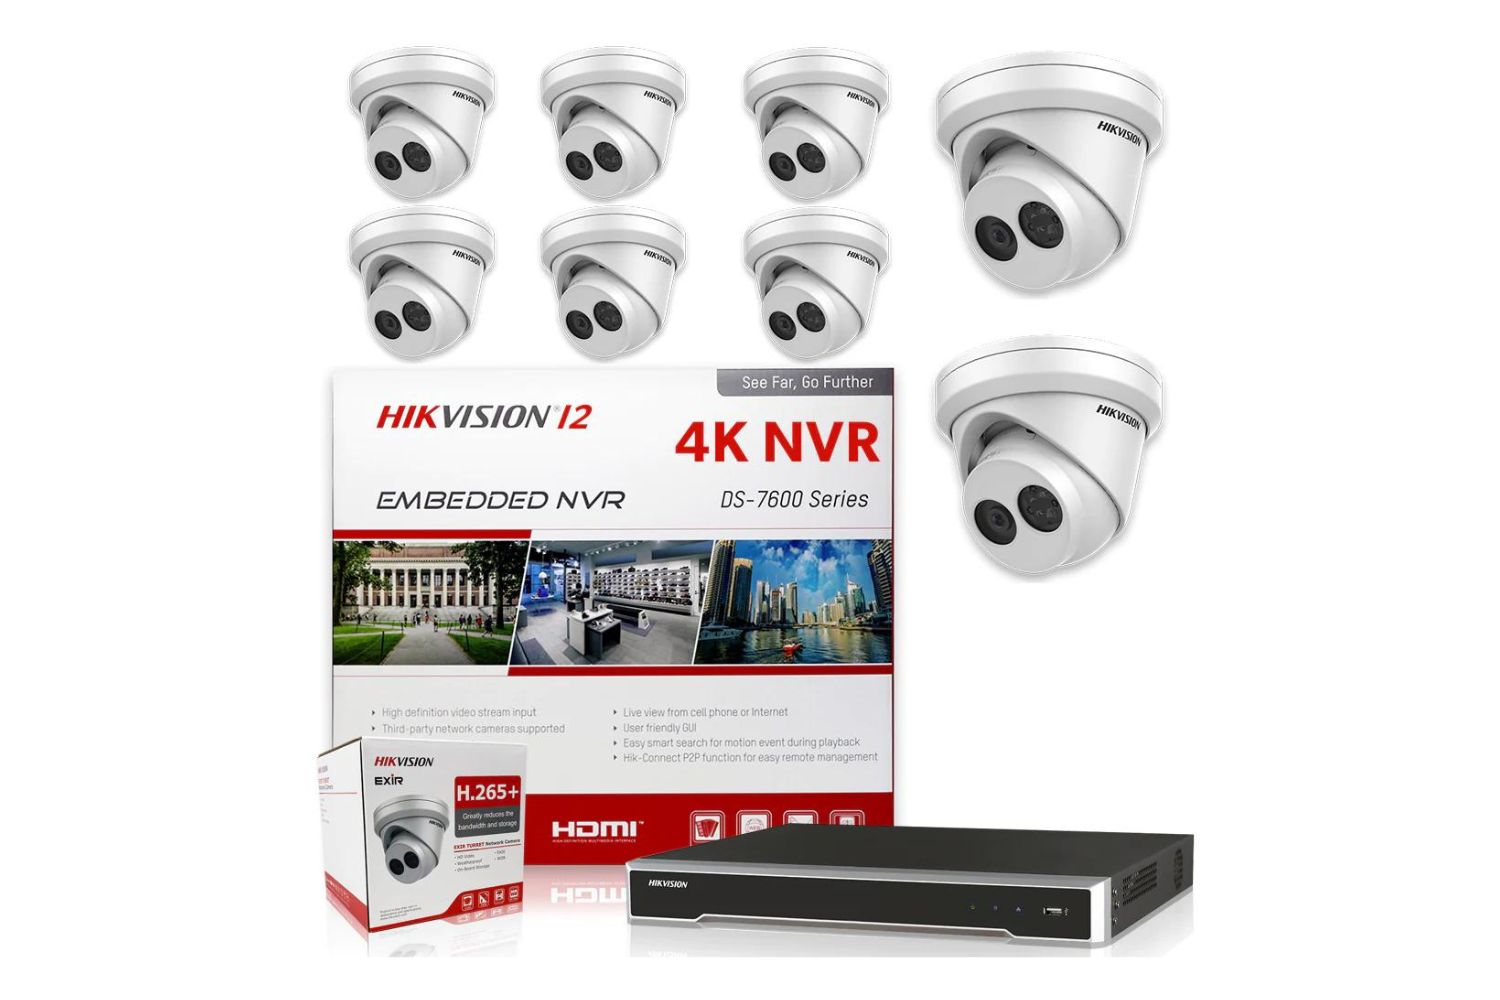
Welcome to this guide on how to set up P2P (Peer-to-Peer) for Hikvision NVR (Network Video Recorder). If you own a Hikvision NVR and want to access your surveillance cameras remotely, P2P is an excellent option to consider. This convenient feature allows you to easily connect your NVR to the internet and view the live footage from your cameras using a smartphone or a computer.
But what exactly is P2P? How does it work, and why should you use it for your Hikvision NVR? In this article, we will explore all this and more, providing you with a step-by-step guide on setting up P2P for your Hikvision NVR.
P2P, or Peer-to-Peer, is a technology that enables devices to communicate with each other directly, without the need for intermediaries such as servers. In the context of a Hikvision NVR, P2P allows you to bypass the complicated process of setting up port forwarding or configuring dynamic DNS (Domain Name System) settings. Instead, it establishes a direct connection between your NVR and the viewing device over the internet.
There are several advantages to using P2P for your Hikvision NVR. Firstly, it simplifies the remote access process by eliminating the need for complex network configurations. This means that even users with limited technical knowledge can easily set up and access their NVR remotely.
Secondly, P2P provides a secure connection for accessing your surveillance cameras. With proper security measures in place, P2P ensures that your data is encrypted and protected from unauthorized access. This is particularly important when remotely accessing your NVR over public or unsecured networks.
Moreover, P2P allows for reliable and stable remote access to your NVR. Since the connection is direct, it eliminates the reliance on external factors such as network settings, firewalls, or router configurations. This ensures a smooth and seamless viewing experience, with minimal delays or interruptions.
Now that you understand the benefits of using P2P for your Hikvision NVR, let’s move on to the step-by-step process of setting it up. Whether you are a homeowner looking to monitor your property or a business owner keeping an eye on your premises, this guide will help you get started with P2P on your Hikvision NVR.
What is P2P?
P2P, or Peer-to-Peer, is a networking technology that allows devices to communicate and share resources directly with each other, without the need for intermediate servers or centralized control. In traditional client-server architectures, devices rely on a central server to facilitate communication and data exchange. However, P2P eliminates the reliance on a central server and enables a decentralized network where devices can interact directly.
So how does P2P work? In a P2P network, each device functions as both a client and a server. This means that devices can both request and provide resources, creating a more efficient and scalable network. Unlike traditional client-server networks, where a single server can become a bottleneck if there are many client requests, P2P distributes the workload across multiple devices, enhancing performance and reliability.
One common use of P2P technology is file sharing. Platforms like BitTorrent utilize P2P to allow users to download and distribute files without relying on a central server. Instead, users download files directly from other users who have already downloaded the same file. This distributed approach significantly reduces the strain on servers and speeds up the transfer process.
In the context of security systems, P2P enables remote access to devices such as Hikvision NVRs. With P2P enabled, you can connect to your NVR and view live camera feeds from anywhere using a smartphone, tablet, or computer. P2P eliminates the need for complex network configurations such as port forwarding or dynamic DNS, making remote access more accessible to users with limited technical expertise.
When it comes to security, P2P can provide a secure connection for remote access. By encrypting data and implementing authentication mechanisms, P2P ensures that communication between devices remains private and protected from unauthorized access. However, it is crucial to implement proper security measures, such as using strong passwords and keeping firmware up to date, to ensure the integrity of the P2P connection.
P2P technology offers several benefits for remote access to Hikvision NVRs and other devices. It simplifies the setup process, enhances network performance, and provides a secure means of accessing your surveillance cameras. By understanding the principles and advantages of P2P, you can make the most of this technology and enjoy convenient remote access to your Hikvision NVR.
Why Use P2P for Hikvision NVR?
There are several compelling reasons to utilize P2P technology for your Hikvision NVR and take advantage of its remote access capabilities. Let’s explore some of the key benefits:
1. Simplified Setup: Setting up traditional remote access methods like port forwarding or dynamic DNS can be complex and time-consuming, especially for users with limited technical knowledge. P2P eliminates the need for these configurations, making the setup process much simpler and more accessible to a wider range of users.
2. Convenience and Flexibility: With P2P enabled on your Hikvision NVR, you can access your surveillance cameras from anywhere in the world using a smartphone, tablet, or computer. This level of convenience and flexibility allows you to keep an eye on your property, loved ones, or business operations no matter where you are.
3. Secure Connection: Implementing proper security measures, such as strong passwords and firmware updates, along with P2P technology, ensures that your remote access connection remains secure. P2P encrypts the data transmitted between your devices, protecting it from unauthorized access or interception.
4. Reliable Access: P2P establishes a direct connection between your viewing device and the Hikvision NVR, eliminating the need to rely on external factors such as network settings or router configurations. This ensures a more stable and reliable remote access experience with minimal interruptions or delays.
5. Scalability: P2P allows you to add multiple devices and users to your Hikvision NVR without additional complex configurations. Whether you need to grant access to family members, coworkers, or security personnel, P2P provides a scalable solution that can accommodate your needs.
6. Cost-Effectiveness: Compared to other remote access methods, P2P offers a cost-effective solution. By eliminating the need for additional hardware or professional assistance, P2P saves you both time and money while still providing efficient and secure remote access to your Hikvision NVR.
By leveraging P2P technology for your Hikvision NVR, you can enjoy the benefits of simplified setup, convenient remote access, secure connections, reliability, scalability, and cost-effectiveness. The combination of these advantages makes P2P an excellent choice for anyone looking to monitor their surveillance cameras remotely and stay connected to their property or business operations.
Setting up P2P on Hikvision NVR
Now that you understand the benefits of using P2P for your Hikvision NVR, let’s walk through the step-by-step process of setting it up:
Step 1: Enabling P2P Function: Begin by accessing the configuration settings of your Hikvision NVR. Navigate to the “Network” section and locate the P2P settings. Enable the P2P function by toggling the switch or checking the corresponding box.
Step 2: Registering Your Device for P2P: After enabling the P2P function, you will need to register your Hikvision NVR for P2P access. This typically involves creating an account with Hikvision or using an existing account if you already have one. Follow the registration process, providing the necessary information, such as your device’s serial number and verification code.
Step 3: Adding Your Device to the Hik-Connect App: Once your NVR is registered, you can proceed to add your device to the Hik-Connect app. Download and install the app on your smartphone or tablet from the respective app store. Launch the app and log in using the account credentials you created during the registration process. Follow the instructions in the app to add your NVR by scanning the QR code or entering the device information manually.
Step 4: Testing the P2P Connection: Once your NVR is added to the Hik-Connect app, you can test the P2P connection by accessing your cameras remotely. Open the app on your smartphone or tablet and navigate to the live view section. You should be able to see the live feeds from your surveillance cameras, indicating that the P2P connection is successfully established.
During the setup process, it’s essential to ensure that your NVR firmware is up to date. Check the Hikvision website for any available firmware updates for your specific NVR model. Keeping your firmware updated ensures the compatibility and security of your device.
If you encounter any difficulties during the setup or testing phase, refer to the user manual or the Hikvision support resources for troubleshooting assistance. Common issues may include network connectivity problems, incorrect configuration settings, or firewall restrictions.
By following these steps, you can easily set up P2P on your Hikvision NVR and enjoy the benefits of remote access to your surveillance cameras. Remember to prioritize the security of your NVR by using strong passwords, regularly updating firmware, and adhering to best practices for network security.
Step 1: Enabling P2P Function
The first step in setting up P2P on your Hikvision NVR is to enable the P2P function. This allows your NVR to establish a direct connection with your viewing device, eliminating the need for complex network configurations. Here’s how to enable P2P on your Hikvision NVR:
1. Accessing the Configuration Settings: Begin by opening a web browser on a computer connected to the same network as your Hikvision NVR. Enter the IP address of your NVR into the address bar to access the login page of the device. By default, the IP address is often 192.168.1.64. If you’re unsure about the NVR’s IP address, you can use the Hikvision SADP (Search Active Devices Protocol) tool to find it.
2. Logging in to the NVR: On the login page, enter the username and password for your Hikvision NVR. If you haven’t changed the login credentials, the default username is usually “admin,” and the default password is often blank (no password). However, for security reasons, it is advisable to change the default password.
3. Navigating to the P2P Settings: After logging in, you will be presented with the NVR’s home screen. Look for the “Configuration” or “Settings” option and click on it. This will open a menu with various settings categories. Locate and select the “Network” category to access the network configuration settings.
4. Enabling the P2P Function: Within the network settings, you should find the option to enable the P2P function. The exact wording may vary depending on your NVR model, but it is usually labeled as “P2P Enable” or “Enable EZVIZ Cloud P2P.” Toggle the switch or check the box next to the P2P function to enable it. Some models may require you to save the settings before the changes take effect.
5. Confirming P2P Activation: Once you have enabled the P2P function, the NVR should display a confirmation message indicating that P2P is now active. This means that your NVR is ready to establish a direct connection with your viewing device using the P2P technology.
Enabling the P2P function on your Hikvision NVR is a crucial step in setting up remote access to your surveillance cameras. It simplifies the process by eliminating the need for complex network configurations, making it more accessible to users with limited technical knowledge. In the next steps, we will explore how to register your device for P2P access and add it to the Hik-Connect app, allowing you to view your camera feeds remotely.
Step 2: Registering Your Device for P2P
After enabling the P2P function on your Hikvision NVR, the next step is to register your device for P2P access. This registration process enables your NVR to connect securely with the Hik-Connect app and allows you to remotely access your surveillance cameras. Here’s how to register your device for P2P:
1. Creating an Account: Start by visiting the Hik-Connect website (www.hik-connect.com) or downloading the Hik-Connect app on your smartphone or tablet from the app store. If you already have an account, sign in with your credentials. Otherwise, select the option to create a new account.
2. Providing Device Information: During the registration process, you will need to provide the necessary information about your Hikvision NVR. This typically includes the device’s serial number and verification code. You can find this information on the NVR itself or in the device’s packaging.
3. Verifying Your Device: Once you have entered the required information, submit the registration form. The Hik-Connect system will verify the provided details to ensure the authenticity of your device. This verification process is necessary to maintain the security and integrity of the P2P connection.
4. Activating Your Device: After successful verification, you will receive a confirmation message or email notifying you that your device is now activated for P2P access. This means that your NVR is registered with the Hik-Connect service, ready to establish a secure connection with the Hik-Connect app.
It is crucial to keep your account credentials secure and choose a strong password to protect your device and data. Regularly updating your password and ensuring that it is unique and complex adds an additional layer of security to your P2P-connected Hikvision NVR.
Once you have registered your device for P2P access, you can proceed to the next step: adding your device to the Hik-Connect app. This will allow you to remotely view your surveillance cameras and manage your NVR from anywhere using your smartphone or tablet.
Step 3: Adding Your Device to the Hik-Connect App
After registering your Hikvision NVR for P2P access, the next step is to add your device to the Hik-Connect app. This allows you to remotely view your surveillance cameras and manage your NVR using a smartphone or tablet. Here’s how you can add your device to the Hik-Connect app:
1. Download and Install the App: Start by downloading and installing the Hik-Connect app on your smartphone or tablet. You can find the app on the Google Play Store for Android devices or the Apple App Store for iOS devices. Make sure to download the official Hik-Connect app developed by Hikvision.
2. Create an Account or Log In: Open the Hik-Connect app and either create a new account or log in with your existing account credentials. If you already created an account during the P2P registration process, use the same account information to log in.
3. Add Device: Once you are logged in, tap on the “Device” or “Add Device” option in the app. You will be prompted to enter the device details or scan the QR code on the NVR. If you choose to enter the details manually, ensure that you provide the correct information, including the device’s serial number and verification code.
4. Connect to Your NVR: After entering the device information or scanning the QR code, the Hik-Connect app will attempt to connect to your NVR. Ensure that your NVR and viewing device are on the same network during this step. Once the app successfully establishes a connection, you should see your NVR listed in the app’s device list.
5. Customize Settings (Optional): If desired, you can customize various settings for your NVR within the Hik-Connect app. This includes configuring motion detection, setting recording schedules, and adjusting camera properties. Explore the app’s settings to tailor them to your specific preferences and requirements.
It is important to note that during the setup process, your NVR needs to be connected to the internet. Ensure that your NVR is connected to your home or office network via an Ethernet cable or a stable Wi-Fi connection. This allows the Hik-Connect app to establish a secure remote connection to your NVR for live viewing and management.
By successfully adding your device to the Hik-Connect app, you can now remotely access and manage your surveillance cameras. The app provides a user-friendly interface to view live camera feeds, play back recorded footage, and configure various settings of your Hikvision NVR.
Step 4: Testing the P2P Connection
Once you have added your Hikvision NVR to the Hik-Connect app, the next step is to test the P2P connection to ensure that you can remotely access your surveillance cameras. Testing the P2P connection confirms that your NVR and the app are communicating properly and that you can view the live camera feeds. Here’s how to test the P2P connection:
1. Launch the Hik-Connect App: Open the Hik-Connect app on your smartphone or tablet. Ensure that you’re connected to the internet either via Wi-Fi or cellular data.
2. Navigate to Live View: Once inside the app, navigate to the live view section. This is where you can access the live feeds from your Hikvision cameras.
3. Select Your NVR: If you have multiple devices added to the app, select your Hikvision NVR from the device list. This will display the camera feeds associated with your NVR on the screen.
4. View the Live Camera Feeds: The app should now display the live camera feeds from your Hikvision NVR. Check each camera feed individually to ensure that you can see the live footage without any issues.
5. Test Remote Viewing: To test the remote viewing capability, try accessing the live camera feeds from a location outside your home or office network. Turn off Wi-Fi on your smartphone or tablet and switch to cellular data. Open the Hik-Connect app and attempt to view the live camera feeds. If everything is set up correctly, you should still be able to access the feeds remotely.
If you encounter any issues during the testing phase, ensure that your NVR is connected to the internet and that your viewing device has a stable internet connection. Additionally, verify that the P2P function is enabled on your NVR and that you have completed the previous steps correctly, including device registration and adding your NVR to the app.
By successfully testing the P2P connection, you can be confident that your Hikvision NVR is set up for remote access. You can now conveniently view your surveillance cameras anytime, anywhere using the Hik-Connect app, ensuring the safety and security of your premises.
Troubleshooting Common P2P Issues
While setting up P2P for your Hikvision NVR, you may encounter some common issues that can affect the functionality of your remote access. Here are some troubleshooting tips to help you resolve these problems:
1. Check Network Connectivity: Ensure that both your NVR and viewing device are connected to the internet. Verify that your internet connection is stable and working properly. If there are any issues with your network, such as slow speeds or intermittent connectivity, it can affect the P2P connection.
2. Verify P2P Functionality: Double-check that the P2P function is enabled on your Hikvision NVR. Access the network settings on your NVR and confirm that the P2P function is enabled. If it is disabled, enable it and save the settings before testing the connection again.
3. Ensure Proper Device Registration: Make sure that you have registered your Hikvision NVR properly for P2P access. Verify that you have provided the correct device information during the registration process, including the serial number and verification code. If there are any discrepancies, re-register your device and ensure accurate information is entered.
4. Check Firewall and Router Settings: Firewalls and router configurations can sometimes interfere with the P2P connection. Ensure that your network’s firewall settings are not blocking the P2P traffic. If required, configure your router’s port forwarding settings to allow the P2P connection to establish properly.
5. Update Firmware: Outdated firmware on your Hikvision NVR can cause compatibility issues and impact the P2P functionality. Check the Hikvision website for any available firmware updates for your specific NVR model. Update the firmware to the latest version to ensure optimal performance and compatibility.
6. Verify Account Credentials: Double-check that you are using the correct account credentials when logging into the Hik-Connect app. Ensure that your username and password are entered accurately and that there are no typos or errors. If you are unsure of your credentials, reset your password or create a new account if necessary.
7. Restart Devices: Sometimes, a simple restart can resolve temporary connectivity issues. Try restarting both your Hikvision NVR and the viewing device (smartphone, tablet, or computer) to refresh the network connections and establish a clean connection between the devices.
If you have followed these troubleshooting steps and still encounter issues with your P2P connection, it may be helpful to consult the user manual of your Hikvision NVR or seek technical support from Hikvision’s customer service. They can provide further guidance tailored to your specific situation and help resolve any persistent problems.
By addressing and troubleshooting these common P2P issues, you can ensure a stable and reliable remote access experience for your Hikvision NVR. Following these steps will help you overcome any obstacles and enjoy the convenience of remotely monitoring your surveillance cameras.
Conclusion
Setting up P2P for your Hikvision NVR can greatly enhance your ability to remotely access and monitor your surveillance cameras. With the P2P technology enabled, you eliminate the need for complex network configurations, making it more accessible to users of all technical levels. By following the step-by-step process outlined in this guide, you can successfully enable and utilize P2P on your Hikvision NVR.
P2P offers several advantages, including simplified setup, convenient remote access, secure connections, reliability, scalability, and cost-effectiveness. It allows you to easily view live camera feeds, play back recording footage, and manage your NVR from anywhere using the Hik-Connect app on your smartphone or tablet.
Throughout the setup process, it is important to prioritize the security of your devices and data. Utilize strong passwords, keep firmware updated, and adhere to best practices for network security. Regularly check for firmware updates and enhancements to ensure the optimal performance and security of your Hikvision NVR.
If you encounter any issues during the setup or face challenges in establishing the P2P connection, make use of the troubleshooting tips provided in this guide. By addressing common issues related to network connectivity, device registration, firewall settings, firmware updates, and account credentials, you can overcome obstacles and enjoy a seamless remote access experience.
By successfully setting up P2P for your Hikvision NVR, you gain the convenience, flexibility, and peace of mind that comes with remote access to your surveillance cameras. Whether you are monitoring your home, office, or any other property, P2P technology ensures that you can stay connected and in control no matter where you are.
We hope this guide has provided you with the necessary knowledge and guidance to set up P2P successfully on your Hikvision NVR. Enjoy the benefits of remote access and make the most out of your security system for a safer and more convenient surveillance experience.


