Introduction
So, you've captured some amazing moments on your camcorder and want to share them with friends and family on your iPad. Fortunately, transferring videos from your camcorder to your iPad is a straightforward process, and with the right tools and steps, you'll be able to enjoy and edit your footage on your iPad in no time. Whether you're a travel enthusiast, a budding filmmaker, or simply want to preserve precious memories, the ability to transfer camcorder videos to your iPad opens up a world of possibilities.
In this guide, we'll walk you through the process of connecting your camcorder to your iPad, transferring your videos, and organizing and editing them on your iPad. By following these steps, you'll be able to seamlessly integrate your camcorder footage into your iPad's media library, allowing for easy access and sharing. So, grab your camcorder, dust off your iPad, and let's get started on this exciting journey of transferring and enjoying your videos on your iPad!
Step 1: Connect Camcorder to iPad
Before you can transfer videos from your camcorder to your iPad, you’ll need to establish a physical connection between the two devices. Depending on the type of camcorder you have, there are several methods for achieving this connection.
If you have a newer camcorder with built-in Wi-Fi or Bluetooth capabilities, you may be able to transfer videos wirelessly to your iPad. Check your camcorder’s manual for instructions on how to set up a wireless connection with your iPad. This method can be convenient and eliminates the need for physical cables.
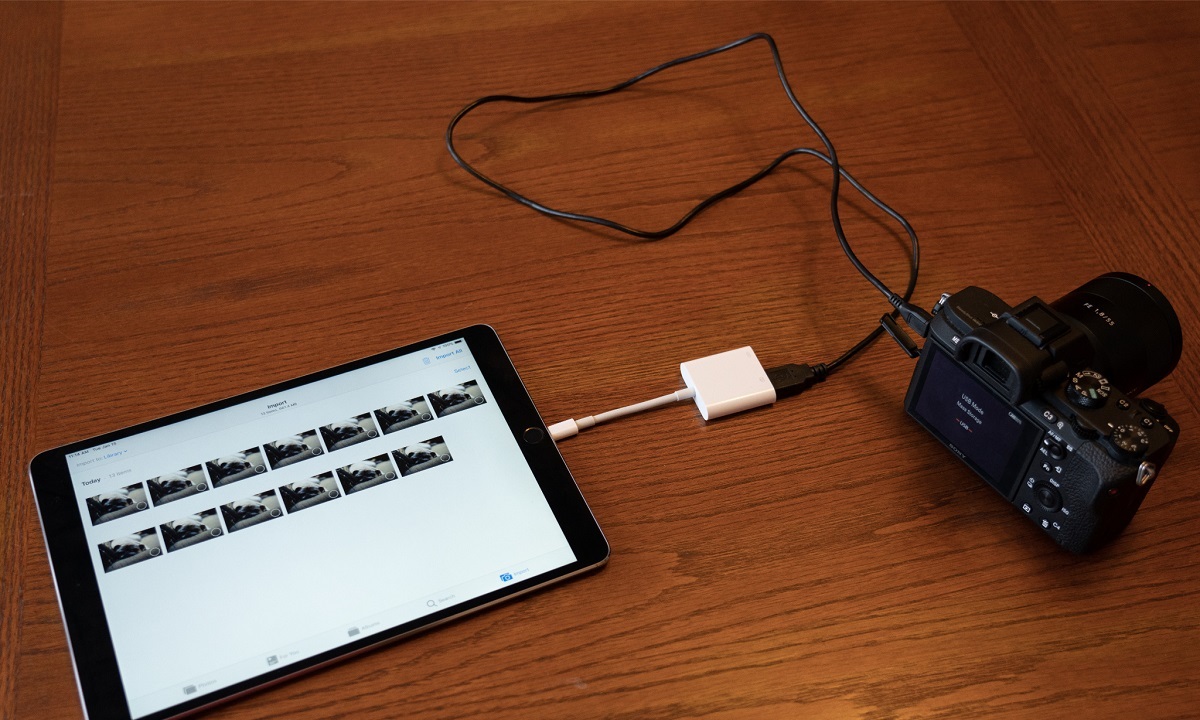
For camcorders without wireless capabilities, the most common way to connect to an iPad is by using a USB cable and an adapter. If your camcorder has a USB port, you can use a USB-to-Lightning adapter to connect the camcorder directly to your iPad. Once connected, your iPad should recognize the camcorder as a media device, allowing you to access and transfer your videos.
Another option for connecting your camcorder to your iPad is to use an SD card reader. Many camcorders store videos on SD cards, which can be removed from the camcorder and inserted into an SD card reader that is compatible with your iPad. Once the SD card is inserted into the reader and connected to your iPad, you can easily transfer the videos to your device.
Regardless of the method you choose, it’s important to ensure that your iPad is charged and has sufficient storage space to accommodate the videos you plan to transfer. Additionally, familiarize yourself with the specific connectivity options available for your camcorder and iPad to ensure a smooth and successful connection process.
Step 2: Transfer Videos to iPad
Once you’ve established a connection between your camcorder and iPad, it’s time to transfer the videos from your camcorder to your iPad’s storage. The method of transferring videos may vary based on the type of connection you’ve established and the specific capabilities of your camcorder and iPad.
If you’re using a USB cable and adapter to connect your camcorder to your iPad, you can typically transfer videos using the native Files app on your iPad. After connecting the devices, navigate to the Files app and locate the camcorder’s storage or media folder. From there, you can select the videos you want to transfer and copy them to your iPad’s storage.
For wireless connections, some camcorders come with dedicated mobile apps that allow for seamless video transfer to your iPad. These apps often provide a user-friendly interface for selecting and transferring videos directly to your iPad over a Wi-Fi or Bluetooth connection. Check your camcorder’s manual or manufacturer’s website for information on compatible apps and instructions for transferring videos wirelessly.
If you’re using an SD card reader to transfer videos, simply insert the SD card into the reader, connect it to your iPad, and access the videos through the Files app or a dedicated media import feature. From there, you can copy the videos to your iPad’s storage for easy access and viewing.
It’s important to consider the file formats supported by your iPad and ensure that the videos you’re transferring are compatible. In some cases, you may need to use third-party apps or software to convert video formats before transferring them to your iPad.
As you transfer the videos, consider organizing them into specific folders or albums on your iPad to keep your media library tidy and easy to navigate. This can be especially helpful if you have a large collection of videos from different events or occasions.
By following these steps, you’ll be able to transfer your camcorder videos to your iPad with ease, making them readily accessible for viewing and sharing on your device.
Step 3: Organize and Edit Videos on iPad
After successfully transferring your camcorder videos to your iPad, you can take advantage of the device’s built-in video editing and organization features to enhance and manage your footage.
The Photos app on your iPad offers basic video editing tools that allow you to trim, crop, and apply filters to your videos. To access these editing features, open the Photos app, select the video you want to edit, and tap the “Edit” button. From there, you can make adjustments to the video’s duration, orientation, and visual appearance to refine your footage.
If you require more advanced editing capabilities, consider exploring third-party video editing apps available on the App Store. These apps provide a wide range of features, including transitions, text overlays, audio enhancements, and special effects, empowering you to create professional-looking videos directly on your iPad.
Organizing your videos on the iPad is crucial for easy access and efficient management. The Photos app allows you to create albums and folders to categorize your videos based on events, dates, or themes. By organizing your videos into distinct albums, you can streamline the process of locating and sharing specific footage with friends and family.
Furthermore, consider leveraging the power of cloud storage services, such as iCloud or third-party providers like Google Drive or Dropbox, to back up and sync your camcorder videos across multiple devices. Cloud storage not only provides an additional layer of security for your videos but also facilitates seamless access to your footage from any compatible device, including other iPads, iPhones, and computers.
As you organize and edit your camcorder videos on your iPad, take advantage of the device’s intuitive interface and touch controls to fine-tune your footage with precision. Whether you’re creating a montage of travel adventures or compiling memorable family moments, the iPad’s versatile video editing and organization capabilities empower you to craft compelling and personalized video content.
Conclusion
Transferring camcorder videos to your iPad opens up a world of creative possibilities, allowing you to seamlessly integrate your captured moments into your iPad’s media ecosystem. By following the steps outlined in this guide, you can effortlessly connect your camcorder to your iPad, transfer your videos, and organize and edit them with ease.
With the advancements in technology and the versatility of the iPad, sharing and enjoying your camcorder footage has never been more convenient. Whether you’re a videography enthusiast, a travel vlogger, or simply someone who cherishes preserving precious memories, the ability to transfer and edit videos on your iPad empowers you to unleash your creativity and share your stories with the world.
As you embark on this journey of transferring and editing your camcorder videos on your iPad, remember to explore the diverse editing tools and organization features available on the device. From basic trimming and cropping to sophisticated transitions and effects, the iPad offers a comprehensive suite of tools to elevate your video content.
Furthermore, consider leveraging the seamless integration of cloud storage services to safeguard your videos and access them across multiple devices. Cloud storage not only provides a secure backup for your footage but also facilitates effortless sharing and collaboration, ensuring that your videos are always within reach, no matter where you are.
Ultimately, the process of transferring and editing camcorder videos on your iPad is a gateway to preserving memories, expressing creativity, and sharing impactful stories. Embrace the capabilities of your iPad and unleash the full potential of your camcorder footage, knowing that each transfer and edit brings you closer to creating compelling and unforgettable visual narratives.