Unleash Your Adventure: How to Activate Your Action Camera
Introduction
Welcome to the world of action cameras, where every moment can be captured in stunning detail, no matter how extreme the adventure. Whether you're shredding down mountain trails, surfing the waves, or simply enjoying a leisurely bike ride, an action camera is your perfect companion for preserving those adrenaline-fueled memories. In this comprehensive guide, we'll walk you through the essential steps to activate your action camera and start documenting your escapades in high-definition glory.
Action cameras have revolutionized the way we relive and share our most exhilarating experiences. These compact, rugged devices are designed to withstand the rigors of outdoor activities while delivering breathtaking footage. With their wide-angle lenses and advanced stabilization features, action cameras excel at capturing the essence of adventure, allowing you to revisit those heart-pounding moments time and time again.
Whether you're a seasoned adrenaline junkie or a casual outdoor enthusiast, activating your action camera is the first step towards preserving your adventures for posterity. From unboxing and assembly to mastering the intricacies of capturing and transferring footage, this guide will equip you with the knowledge and confidence to make the most of your action camera. So, gear up, grab your camera, and let's embark on this exhilarating journey together.
Unboxing and Assembly
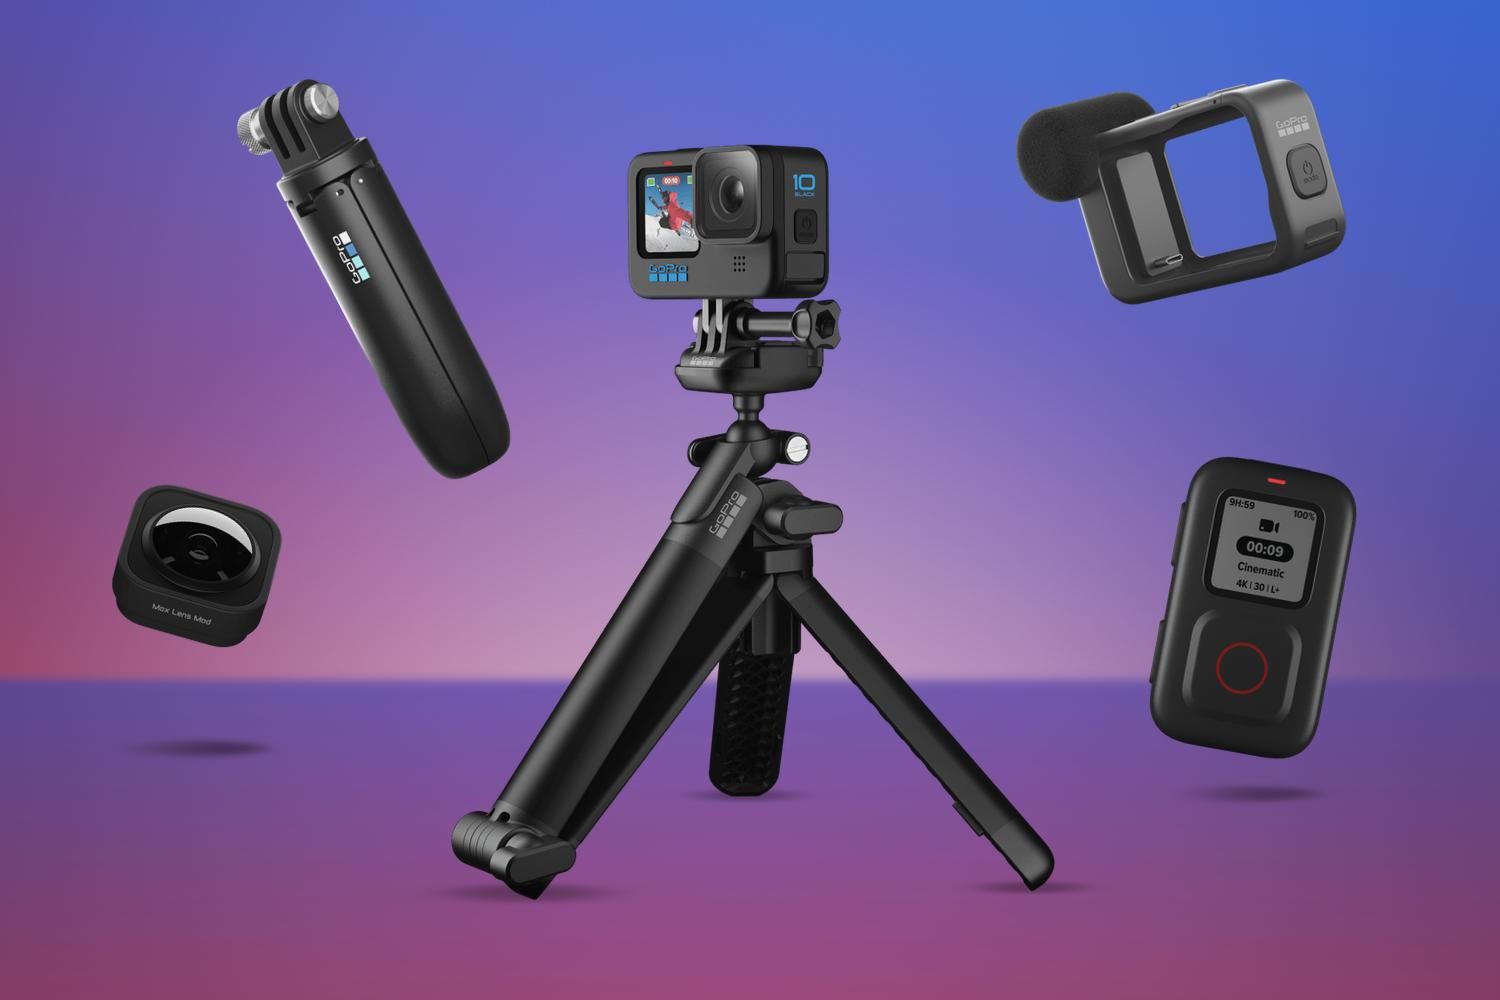
As you eagerly unbox your new action camera, you’re met with a compact yet robust device that exudes adventure from the moment you lay eyes on it. The contents typically include the action camera itself, a waterproof housing, mounting accessories, a rechargeable battery, a USB cable, and an assortment of brackets and adapters. Each component is meticulously designed to withstand the demands of your outdoor pursuits while ensuring seamless integration with your gear.
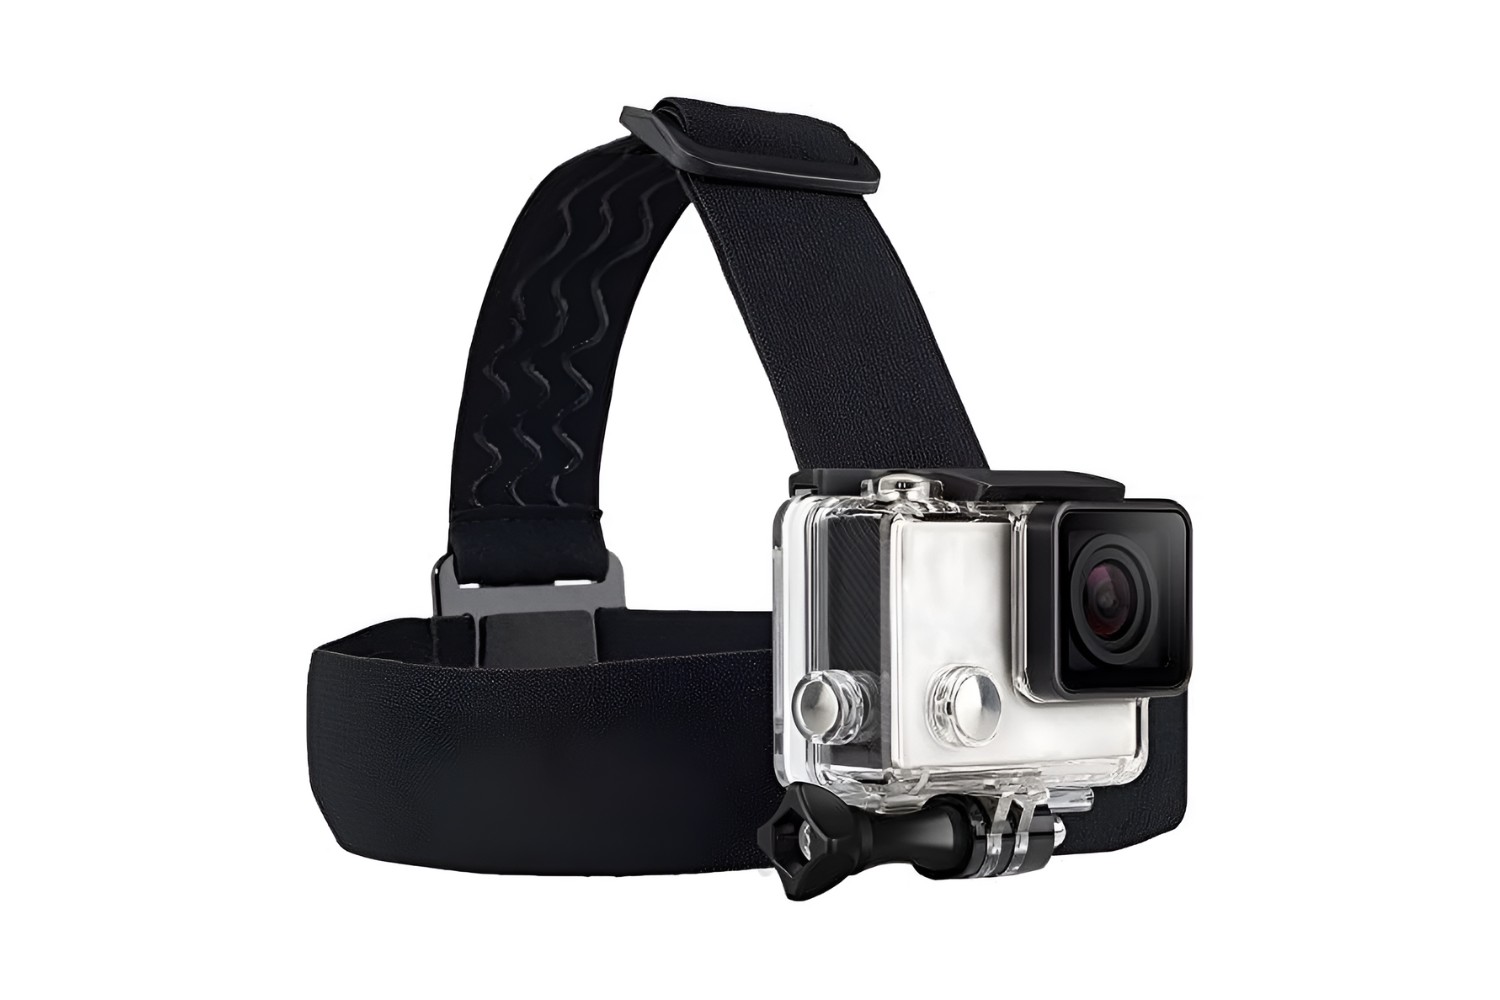
Begin by familiarizing yourself with the various accessories and components, taking care to identify the mounting options that best suit your intended activities. Most action cameras feature a versatile mounting system that allows you to affix the camera to helmets, handlebars, chest harnesses, and other gear, providing you with unparalleled flexibility in capturing your adventures from unique perspectives.
Once you’ve identified the mounting solution that aligns with your preferences, proceed to assemble the camera and its accessories according to the provided instructions. This typically involves securing the camera within its waterproof housing, attaching the desired mounts or brackets, and ensuring a secure and stable connection. Pay close attention to the assembly process, as a properly mounted camera is essential for capturing steady and immersive footage without compromising your safety or the integrity of your equipment.
As you complete the assembly, take a moment to appreciate the rugged yet sleek design of your action camera, embodying the spirit of exploration and resilience. The seamless integration of the camera and its accessories sets the stage for the exhilarating moments that lie ahead, promising to encapsulate your adventures with unparalleled clarity and vibrancy.
With your action camera assembled and ready for action, you’ve laid the foundation for a thrilling journey into the world of adventure documentation. The next steps will guide you through the process of charging the camera, ensuring that it’s powered up and primed for the unforgettable experiences that await.
Charging the Camera
Before embarking on your escapades, it’s crucial to ensure that your action camera is powered up and ready to capture every exhilarating moment. Begin by locating the rechargeable battery that accompanies your camera, and insert it into the designated compartment with care, following the instructions provided in the user manual. Once the battery is securely in place, connect the provided USB cable to the camera and a power source, such as a computer or a USB wall adapter.
As the camera begins to charge, take a moment to appreciate the anticipation of the adventures that lie ahead, knowing that your camera is steadily gaining the power to document every twist, turn, and triumph. Most action cameras feature an LED indicator that illuminates during the charging process, providing a visual cue to indicate the status of the battery. This allows you to monitor the charging progress and plan your upcoming activities accordingly.
While the camera charges, consider taking the opportunity to explore the various settings and features that your action camera offers. Familiarizing yourself with the camera’s interface and capabilities will empower you to make the most of your device once it’s fully charged and ready for action. Additionally, some action cameras offer the flexibility to operate while connected to a power source, allowing you to continue capturing footage during extended adventures without the concern of battery depletion.
As the charging process nears completion, envision the breathtaking scenes and adrenaline-pumping exploits that your action camera will soon immortalize. The anticipation builds as the camera’s battery reaches full capacity, signaling that it’s primed to accompany you on your upcoming adventures. With a fully charged camera at your disposal, you’re poised to embark on a journey of unparalleled excitement, knowing that every moment will be preserved in stunning detail.
With your action camera charged and brimming with energy, the stage is set for the next crucial step: inserting a memory card to ensure that your camera is equipped to store the captivating footage you’re about to capture.
Inserting the Memory Card
As you prepare to unleash the full potential of your action camera, the next step involves equipping it with the means to store the captivating footage you’re about to capture. This is achieved by inserting a compatible memory card into the designated slot on the camera, providing ample storage capacity to accommodate your adventures. Begin by locating the memory card slot, typically situated near the camera’s battery compartment or in a dedicated slot on the camera’s exterior.
Select a high-quality microSD card with a storage capacity that aligns with your recording needs, ensuring that it meets the specifications recommended by the camera’s manufacturer. Carefully insert the memory card into the designated slot, taking care to orient it correctly to avoid potential damage. Once inserted, the memory card should fit snugly into place, ready to serve as the repository for the breathtaking footage that awaits capture.
Before commencing your adventures, it’s advisable to format the memory card using the camera’s built-in formatting function. This ensures that the card is optimized for use with your action camera, minimizing the risk of data corruption and maximizing its performance. The formatting process can typically be initiated through the camera’s settings menu, allowing you to swiftly prepare the memory card for seamless integration with your device.
With the memory card securely inserted and formatted, your action camera is now fully equipped to document the thrill and beauty of your outdoor pursuits. The combined capabilities of the camera and the memory card lay the groundwork for preserving your adventures in stunning detail, ready to be revisited and shared with friends and fellow enthusiasts.
Armed with a properly inserted and formatted memory card, your action camera is poised to capture the moments that define your spirit of adventure. The next phase of activation involves powering on the camera and navigating through the initial setup process, setting the stage for the immersive experiences that await.
Powering On and Setting Up
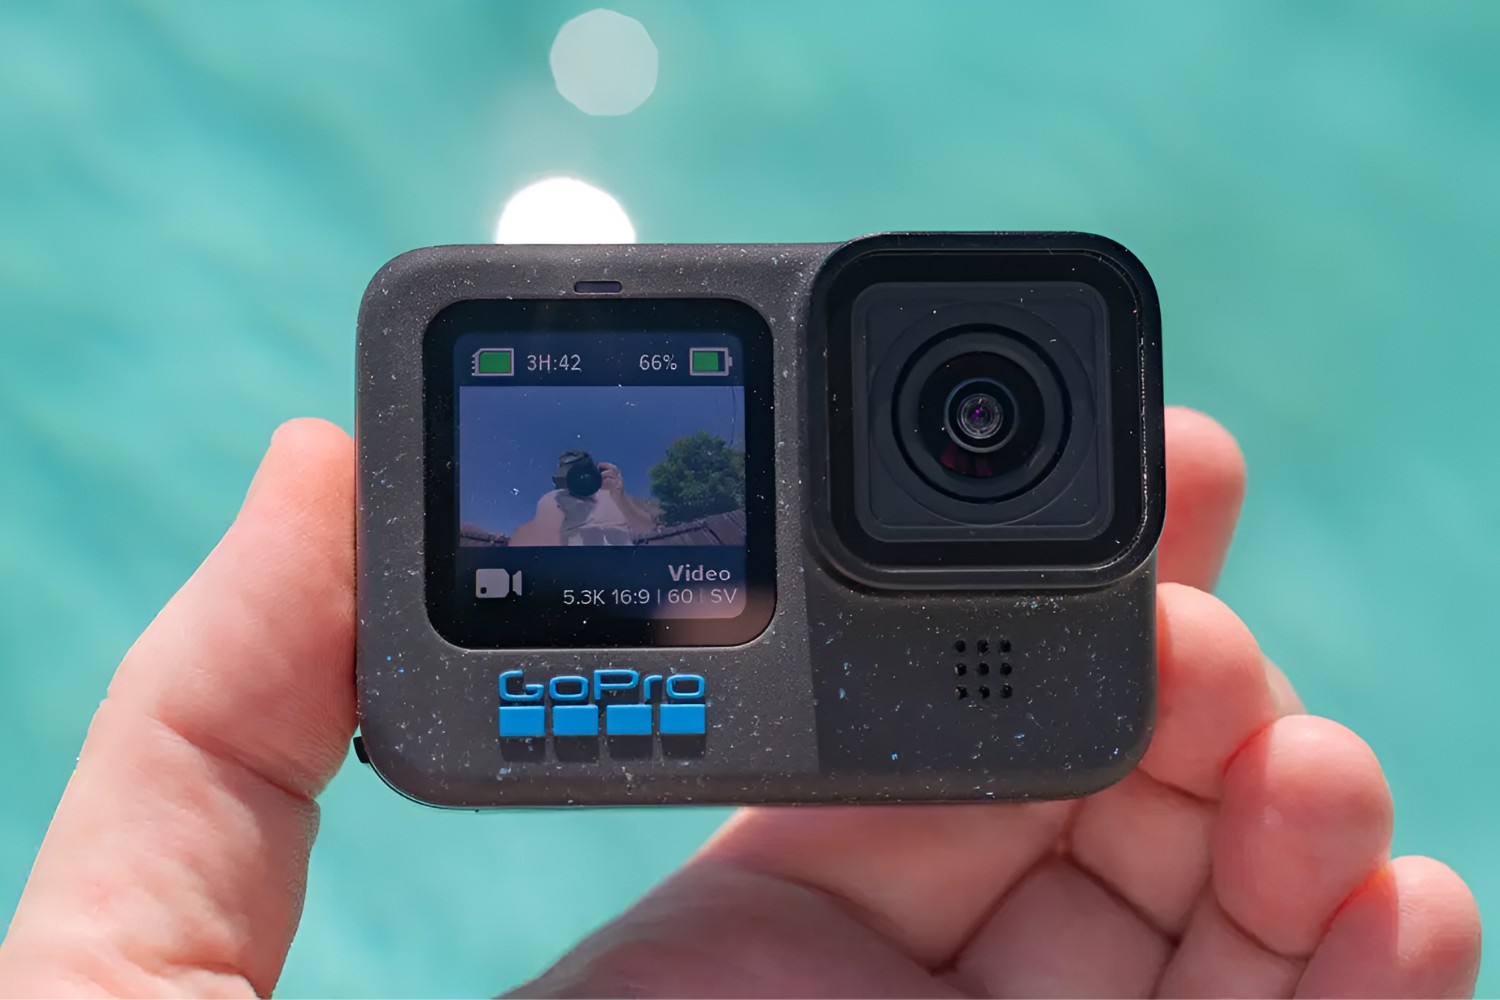
With the memory card securely in place, it’s time to power on your action camera and embark on the initial setup process. Begin by locating the power button, typically positioned on the camera’s exterior for easy access. Press and hold the power button for a few seconds until the camera’s indicator lights illuminate, signaling that the device is springing to life, ready to capture the forthcoming thrills and triumphs.
Upon powering on the camera, you’ll be greeted by the device’s startup screen or indicator lights, indicating that it’s primed and awaiting your input. Depending on the model of your action camera, you may be prompted to configure basic settings such as language, date, time, and display preferences. Navigate through the initial setup options using the camera’s intuitive interface, ensuring that your preferences are tailored to enhance your user experience.
As you progress through the setup process, take the opportunity to explore the camera’s menu and settings, acquainting yourself with the array of options and features at your disposal. Familiarizing yourself with the camera’s capabilities will empower you to optimize its performance and tailor its settings to suit your specific recording requirements. From resolution and frame rate settings to exposure and white balance adjustments, the camera’s settings offer a wealth of customization to elevate the quality of your footage.
Some action cameras may require the installation of companion mobile apps or desktop software to unlock additional features and functionalities. If applicable, take the time to download and install the recommended software, ensuring seamless connectivity between your camera and compatible devices for effortless footage transfer and remote control capabilities.
As you complete the initial setup and acquaint yourself with the camera’s interface, the stage is set for the pivotal moment when your action camera is ready to be mounted and unleashed upon the landscapes and activities that beckon. The next phase of activation involves mounting the camera onto your gear, ensuring that it’s securely positioned to capture the essence of your adventures from exhilarating perspectives.
Mounting the Camera
As you prepare to capture the essence of your adventures, the process of mounting your action camera is a pivotal step that determines the perspectives from which your experiences will be documented. Whether you’re gearing up for a mountain biking excursion, a surfing escapade, or a skydiving adventure, the versatility of action camera mounts empowers you to capture immersive footage from unique vantage points.
Begin by selecting the appropriate mount for your intended activity, ensuring that it aligns with both the nature of the adventure and your desired filming angles. Action cameras often come with a variety of mounting accessories, including adhesive mounts, clamp mounts, and harnesses, each tailored to accommodate different scenarios and equipment. Carefully review the available mounting options and select the one that best suits your needs, taking into account factors such as stability, adjustability, and compatibility with your gear.
Once you’ve chosen the ideal mount, proceed to affix the action camera securely, ensuring that it is positioned to capture the unfolding excitement without obstructing your movements or compromising safety. Whether it’s mounting the camera on a helmet, handlebars, chest harness, or any other suitable surface, meticulous attention to the mounting process is essential to guarantee stable and captivating footage.
As you secure the camera in place, consider conducting a brief test to confirm the stability and positioning of the mount, adjusting as necessary to achieve the desired framing and perspective. This step is crucial in ensuring that the camera is poised to document your adventures with clarity and immersion, allowing you to relive the adrenaline-pumping moments from a first-person viewpoint.
With the camera securely mounted and poised to capture the unfolding action, you’re on the brink of embarking on a visual journey that encapsulates the very essence of your outdoor pursuits. The next phase involves acquainting yourself with the camera’s settings and ensuring that it’s optimized to deliver stunning footage that vividly portrays the thrill and beauty of your adventures.
Adjusting Camera Settings
With your action camera securely mounted and ready to document your adventures, the next crucial step involves fine-tuning the camera’s settings to ensure that it captures every moment with precision and artistry. The ability to adjust a myriad of settings empowers you to tailor the camera’s performance to the specific demands of your activities, enhancing the quality and impact of the footage you’ll capture.
Begin by exploring the camera’s settings menu, which typically offers a range of options for customization. From resolution and frame rate settings to exposure, white balance, and image stabilization adjustments, the settings menu provides a wealth of parameters that can be optimized to elevate the quality of your footage. Familiarize yourself with each setting and its impact on the resulting footage, allowing you to make informed decisions that align with your creative vision.
Consider the environmental conditions and the nature of your activities when adjusting the camera’s settings. For fast-paced action sequences, higher frame rates can enhance the clarity of motion, while lower frame rates may be suitable for capturing cinematic, slow-motion footage. Similarly, exposure and white balance settings can be tailored to accommodate varying lighting conditions, ensuring that your footage maintains visual fidelity and vibrancy across diverse environments.
Some action cameras offer advanced features such as time-lapse and burst modes, providing you with the flexibility to capture unique perspectives and fleeting moments with artistic flair. Familiarize yourself with these features and explore their potential to add depth and dynamism to your footage, enriching the storytelling aspect of your adventures.
As you navigate through the camera’s settings and make adjustments, consider experimenting with different configurations to gauge their impact on the resulting footage. This hands-on approach allows you to refine your understanding of the camera’s capabilities and empowers you to make informed decisions when capturing the defining moments of your outdoor pursuits.
With the camera’s settings meticulously adjusted to align with your creative vision, you’re poised to embark on a visual odyssey that encapsulates the thrill, beauty, and essence of your adventures. The next phase involves capturing and recording the exhilarating moments that define your outdoor escapades, preserving them for posterity with unparalleled clarity and impact.
Capturing and Recording
With your action camera primed and the settings finely tuned, you’re poised to embark on the exhilarating process of capturing and recording the defining moments of your outdoor escapades. Whether you’re hurtling down a mountainside, carving through waves, or exploring rugged terrain, the camera stands ready to immortalize the thrill and beauty of your adventures with stunning clarity and vibrancy.
Prior to commencing your activities, ensure that the camera is powered on and recording functionality is initiated. Most action cameras feature a dedicated button or control to initiate recording, allowing you to seamlessly transition from preparation to documentation without missing a beat. As the camera begins to record, a visual indicator such as an LED light or an on-screen display confirms that the captivating moments are being preserved for posterity.
As you delve into your activities, consider experimenting with different filming angles and perspectives to capture the essence of the adventure from diverse vantage points. Whether it’s a first-person view from your helmet, a dynamic viewpoint from your gear, or a stationary perspective capturing the sweeping vistas, the versatility of action cameras empowers you to craft a visual narrative that encapsulates the spirit of your pursuits.
Embrace the freedom to unleash your creativity as you record your adventures, leveraging the camera’s features and settings to infuse your footage with dynamism and artistry. Experiment with slow-motion sequences, time-lapse captures, and burst mode shots to add depth and impact to your visual storytelling, elevating the documentation of your experiences to a cinematic level.
Throughout your activities, periodically review the footage and settings to ensure that the camera continues to capture the moments with precision and clarity. This proactive approach allows you to make real-time adjustments, ensuring that the footage aligns with your creative vision and encapsulates the essence of your adventures with immersive detail.
As you conclude your activities and the camera ceases recording, take a moment to reflect on the exhilarating moments that have been immortalized, knowing that the footage holds the power to transport you back to the heart-pounding thrills and breathtaking beauty of your outdoor pursuits. The next phase involves transferring and editing the captured footage, refining it into a compelling visual narrative that resonates with the essence of your adventures.
Transferring and Editing Footage
As the dust settles on your exhilarating adventures, the captured footage serves as a treasure trove of memories and visual narratives waiting to be unearthed and refined. The process of transferring and editing the footage is a pivotal phase that breathes life into your recordings, allowing you to craft a compelling visual story that encapsulates the essence of your outdoor pursuits with artistry and impact.
Begin by transferring the recorded footage from your action camera to a computer or mobile device. Most action cameras feature a USB port or wireless connectivity options that facilitate seamless file transfer. Connect the camera to your computer using the provided USB cable or initiate wireless file transfer, allowing the footage to be swiftly imported into your preferred editing software or media library.
With the footage transferred, immerse yourself in the creative realm of video editing, where the raw captures evolve into a polished visual narrative. Leverage the array of editing tools and features offered by your chosen software to refine the footage, enhancing its visual impact and storytelling prowess. Trim and arrange the clips, apply color correction and visual effects, and synchronize the footage with music and sound to elevate the emotional resonance of your visual story.
Consider infusing the footage with contextual information and narrative elements to enrich the storytelling aspect of your visual narrative. Integrate text overlays, location markers, and timestamps to provide insights into the unfolding events and immerse the audience in the experiences as they unfold. The judicious application of these elements can transform the footage into a captivating visual journey that resonates with viewers on a profound level.
Explore the potential to incorporate transitions, overlays, and dynamic visual effects to add depth and dynamism to the footage, enhancing its immersive quality and visual allure. By infusing the footage with creative embellishments, you breathe life into the visual narrative, transforming it into a compelling portrayal of the adventures that define your spirit of exploration.
As you refine the footage into a captivating visual narrative, revel in the transformative power of video editing, knowing that the resulting creation will serve as a testament to the thrill, beauty, and essence of your outdoor pursuits. The culmination of this process marks the emergence of a visual masterpiece that encapsulates the very spirit of your adventures, ready to be shared and cherished for years to come.
Conclusion
As you conclude this comprehensive guide to activating your action camera, you’ve embarked on a journey that transcends the mere operation of a device; you’ve delved into the art of preserving and portraying the essence of your outdoor adventures with unparalleled clarity and artistry. From unboxing and assembly to fine-tuning settings, capturing exhilarating moments, and refining the footage into a compelling visual narrative, you’ve embraced the transformative power of an action camera to encapsulate the thrill, beauty, and spirit of your pursuits.
Armed with the knowledge and confidence gained from this guide, you’re poised to embark on a visual odyssey that immortalizes the heart-pounding thrills, breathtaking landscapes, and triumphant moments that define your outdoor escapades. The activation of your action camera marks the inception of a visual legacy, where every adventure becomes a timeless story waiting to be shared, cherished, and revisited.
As you gear up for your next adventure, envision the countless possibilities that lie ahead, knowing that your action camera stands ready to preserve the moments that define your spirit of exploration. Embrace the freedom to unleash your creativity, experiment with diverse perspectives, and craft visual narratives that resonate with the very essence of your pursuits.
Remember, the activation of your action camera is not merely a technical procedure; it’s the ignition of a visual journey that transcends time and space, allowing you to relive and share the most exhilarating experiences with unparalleled clarity and impact. With each press of the record button, you breathe life into the memories and moments that define your adventurous spirit, ensuring that they endure as vibrant testaments to the thrill of exploration and the beauty of the great outdoors.
So, as you embark on your next escapade, armed with your activated action camera, cherish the knowledge that every twist, turn, and triumph will be immortalized with the immersive clarity and vibrancy that only an action camera can deliver. With each adventure, you add a new chapter to your visual legacy, enriching the tapestry of experiences that define your indomitable spirit and thirst for discovery.