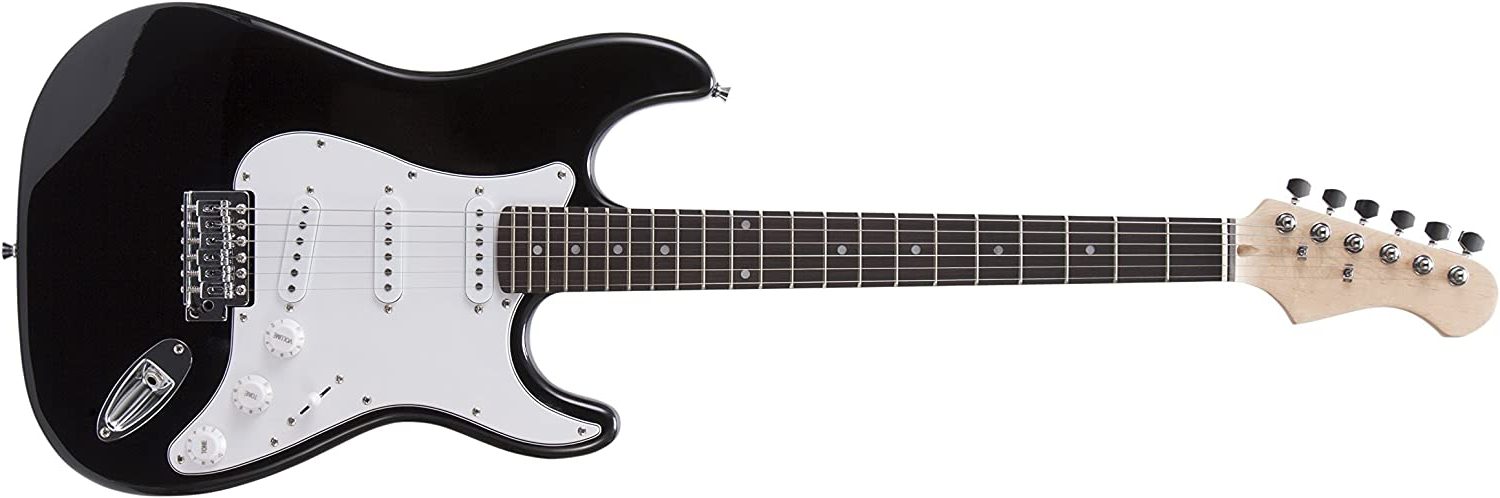
Introduction
When it comes to electric guitars, the setup of the instrument plays a crucial role in achieving optimal playability and sound quality. Among the various aspects of guitar setup, the neck radius is a significant factor that directly impacts the playability and comfort of the instrument. Understanding how to set up an electric guitar with a 12-inch neck radius is essential for any guitarist looking to customize their instrument to suit their playing style and preferences.
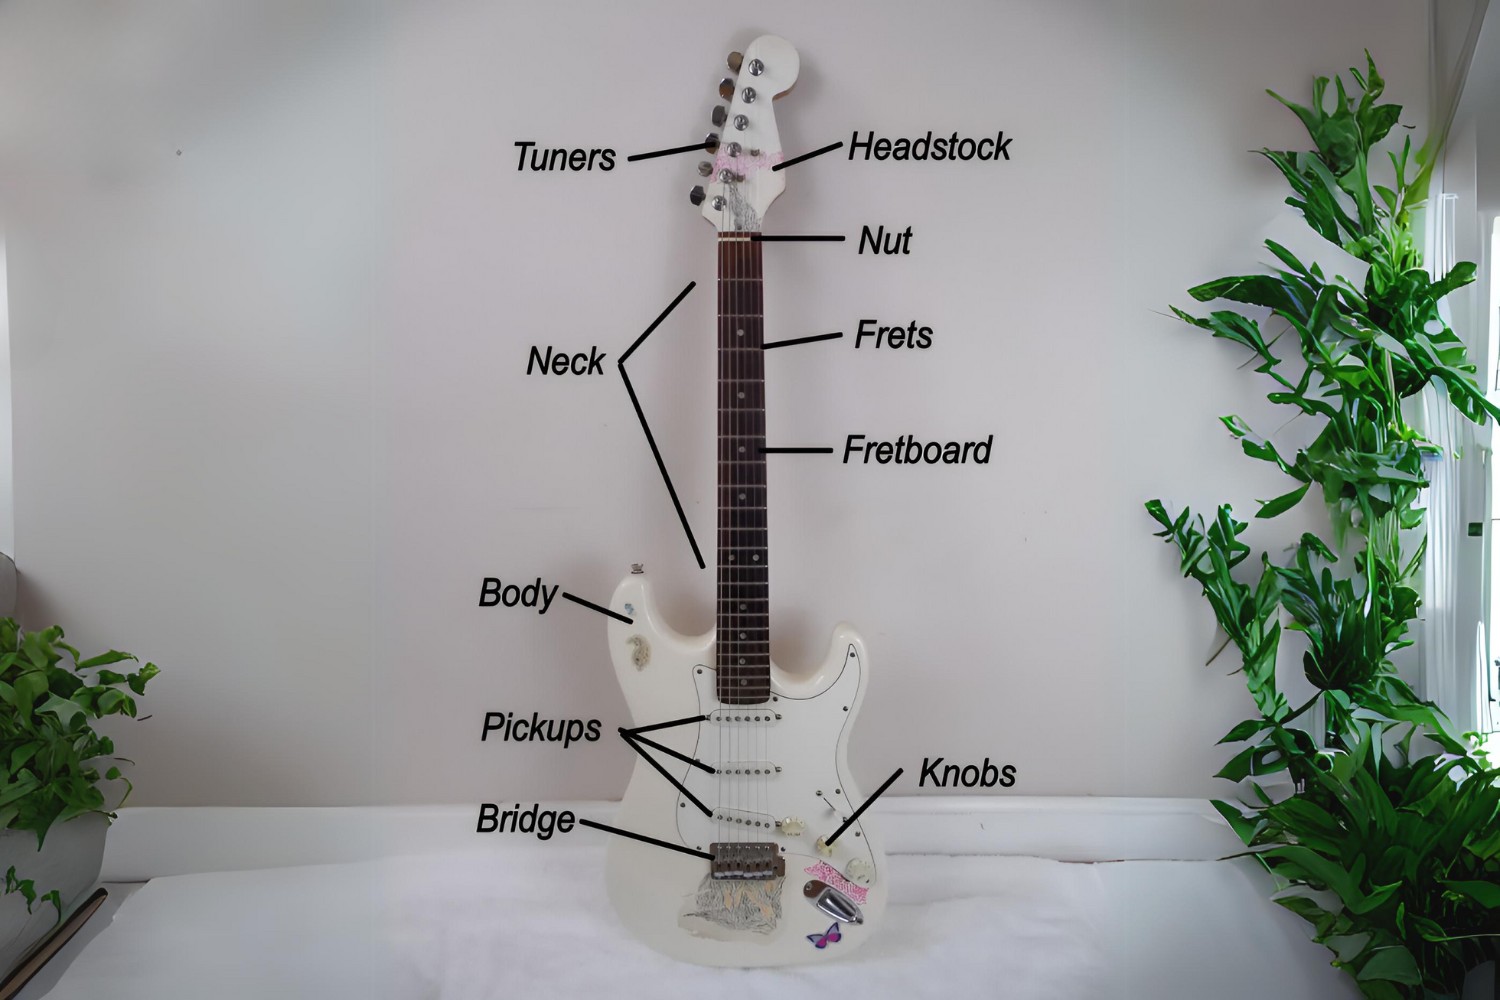
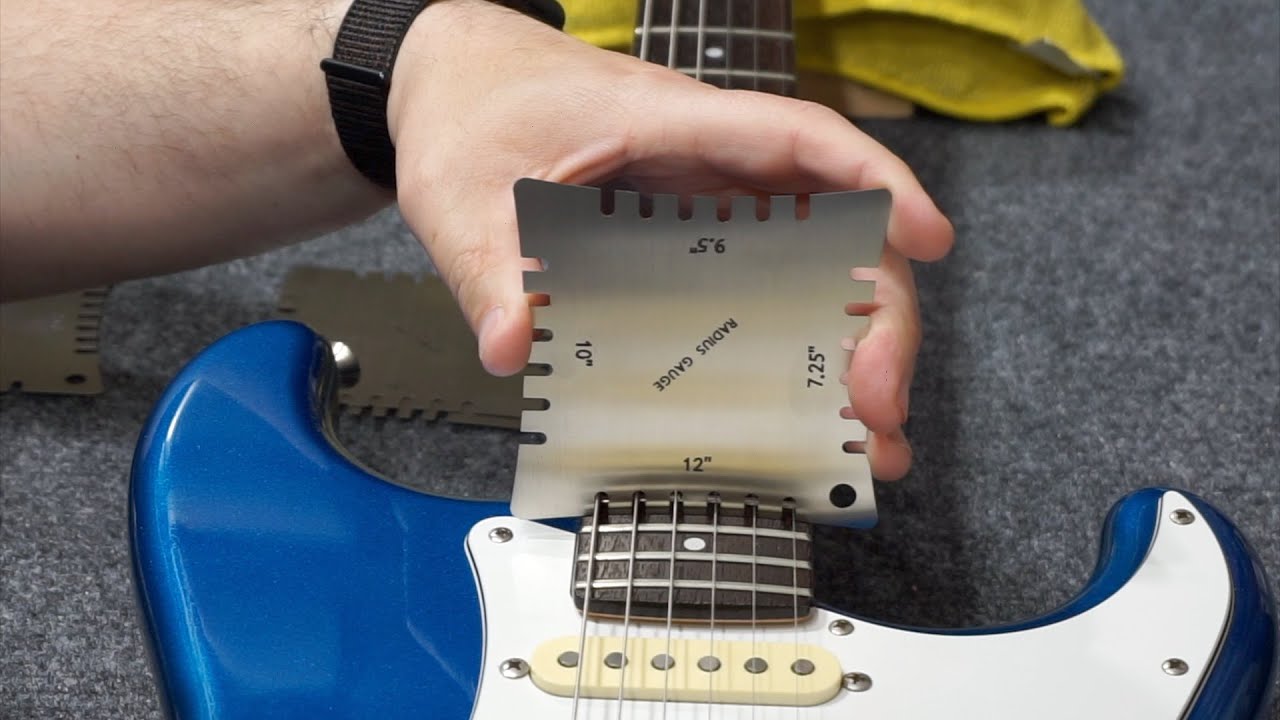
The neck radius refers to the curvature of the fingerboard, determining how flat or rounded it is. A 12-inch neck radius is known for its moderate curvature, offering a balance between comfortable chording and smooth lead playing. Setting up a guitar with this specific neck radius involves adjusting the truss rod, setting the action, and fine-tuning the intonation to ensure that the instrument plays and sounds its best.
In this guide, we will delve into the step-by-step process of setting up an electric guitar with a 12-inch neck radius. From understanding the significance of the neck radius to the practical adjustments required, this comprehensive walkthrough will equip you with the knowledge and skills to optimize your guitar's playability and performance. Whether you are a seasoned guitarist or a beginner looking to learn the ropes of guitar setup, this guide will provide valuable insights and practical tips to help you achieve a finely-tuned instrument that meets your musical needs.
By mastering the art of setting up a guitar with a 12-inch neck radius, you can unlock the full potential of your instrument, allowing for effortless playability and a rich, resonant tone. So, grab your tools and let's embark on this journey to optimize the playability and sonic characteristics of your electric guitar.
Understanding Neck Radius
Before delving into the practical aspects of setting up an electric guitar with a 12-inch neck radius, it’s important to grasp the significance of this specific neck profile and its impact on playability and tone. The neck radius of a guitar refers to the curvature of the fingerboard, which directly influences how the strings respond to fretting and bending, as well as the overall feel of the instrument.
A 12-inch neck radius is characterized by a moderate curvature, offering a blend of comfortable chording and smooth lead playing. This curvature is often favored by guitarists seeking a versatile feel that accommodates different playing styles. The flatter radius allows for lower action without fretting out, making it conducive to techniques such as string bending and vibrato.
Understanding the neck radius is essential for tailoring the guitar’s setup to suit the player’s preferences. A flatter radius, such as the 12-inch profile, provides a more consistent feel across the fretboard, making it easier to execute techniques that require precise string articulation. Additionally, the curvature of the neck radius can influence the resonance and sustain of the instrument, contributing to its overall tonal characteristics.
When setting up a guitar with a 12-inch neck radius, it’s crucial to consider how the curvature affects the action, intonation, and overall playability. By comprehending the nuances of this specific neck profile, guitarists can make informed adjustments to optimize the instrument’s performance to their liking.
Ultimately, understanding the neck radius goes beyond technical specifications; it’s about recognizing how the instrument’s design impacts the player’s interaction with the guitar. Whether you’re strumming chords or unleashing blistering solos, the neck radius plays a pivotal role in shaping the tactile experience and sonic capabilities of the electric guitar.
Tools and Materials Needed
Setting up an electric guitar with a 12-inch neck radius requires a specific set of tools and materials to ensure a precise and effective adjustment process. Before embarking on the setup journey, it’s essential to gather the following items to facilitate the necessary adjustments:
- Truss Rod Wrench: This specialized wrench is used to adjust the truss rod, which is crucial for controlling the neck’s relief and curvature.
- Capo: A capo is essential for isolating specific frets during the intonation adjustment process, allowing for accurate measurements and fine-tuning.
- Feeler Gauge: A feeler gauge is utilized to measure the gap between the frets and the strings, aiding in setting the desired action height.
- Screwdriver Set: A set of screwdrivers, including both flathead and Phillips head varieties, is necessary for adjusting bridge saddles, pickguard screws, and other components.
- Guitar Polish and Cloth: Keeping the guitar clean and polished is important during the setup process, as it allows for better visibility when making adjustments and ensures the instrument remains in top condition.
- String Action Gauge: This tool provides precise measurements for setting the string action at the nut and bridge, contributing to comfortable playability and optimal string response.
- Tuner: A reliable tuner is indispensable for accurately tuning the guitar throughout the setup process, ensuring that the instrument is in tune and ready for testing.
- String Winder and Cutter: These tools facilitate the efficient changing of strings and trimming excess string length, streamlining the setup process.
- Allen Wrench Set: Many electric guitars utilize hex key adjustments for components such as bridge saddles and truss rod covers, making an Allen wrench set a valuable addition to the setup toolkit.
- Notepad and Pen: Keeping track of measurements, adjustments, and observations is essential for maintaining a systematic approach to the setup process and documenting any changes made.
By ensuring that these tools and materials are readily available, guitarists can approach the setup of an electric guitar with a 12-inch neck radius with confidence, knowing that they have the necessary resources to achieve precise and tailored adjustments.
Adjusting the Truss Rod
The truss rod is a vital component of an electric guitar’s neck structure, responsible for controlling its relief or curvature. When setting up a guitar with a 12-inch neck radius, adjusting the truss rod is a fundamental step in ensuring the optimal playability and stability of the instrument.
Assessing the Neck Relief: Before making any truss rod adjustments, it’s essential to evaluate the current state of the neck relief. This can be done by fretting the first and last frets simultaneously and observing the gap between the strings and the frets around the 7th-9th frets. A slight amount of relief is typically desirable, allowing for comfortable string action without fret buzz.
Using the Correct Tool: Most electric guitars are equipped with a truss rod nut at the headstock, requiring a specialized truss rod wrench for adjustments. It’s crucial to use the correct size and type of wrench to avoid damaging the truss rod nut.
Truss Rod Adjustment Technique: To increase or decrease neck relief, the truss rod is turned in small increments, typically in quarter-turns. Clockwise turns tighten the truss rod, reducing neck relief, while counterclockwise turns loosen the truss rod, increasing neck relief. It’s important to make gradual adjustments and periodically check the neck relief to achieve the desired curvature.
Monitoring the Progress: As adjustments are made, it’s essential to monitor the neck relief and playability of the instrument. A balanced approach is crucial, as excessive tightening of the truss rod can lead to backbow, while excessive loosening can result in forward bow, both of which can adversely affect playability and intonation.
Rest Period and Reassessment: After making truss rod adjustments, allowing the guitar to rest for a few hours or overnight is advisable, as this gives the neck time to settle into its new position. Subsequently, reassess the neck relief and make any additional adjustments as necessary to achieve the desired curvature.
By mastering the art of truss rod adjustments, guitarists can tailor the neck relief to complement the 12-inch neck radius, ensuring a comfortable playing experience and optimal string action across the fretboard. This foundational step sets the stage for further refinements in the guitar setup process, paving the way for enhanced playability and sonic performance.
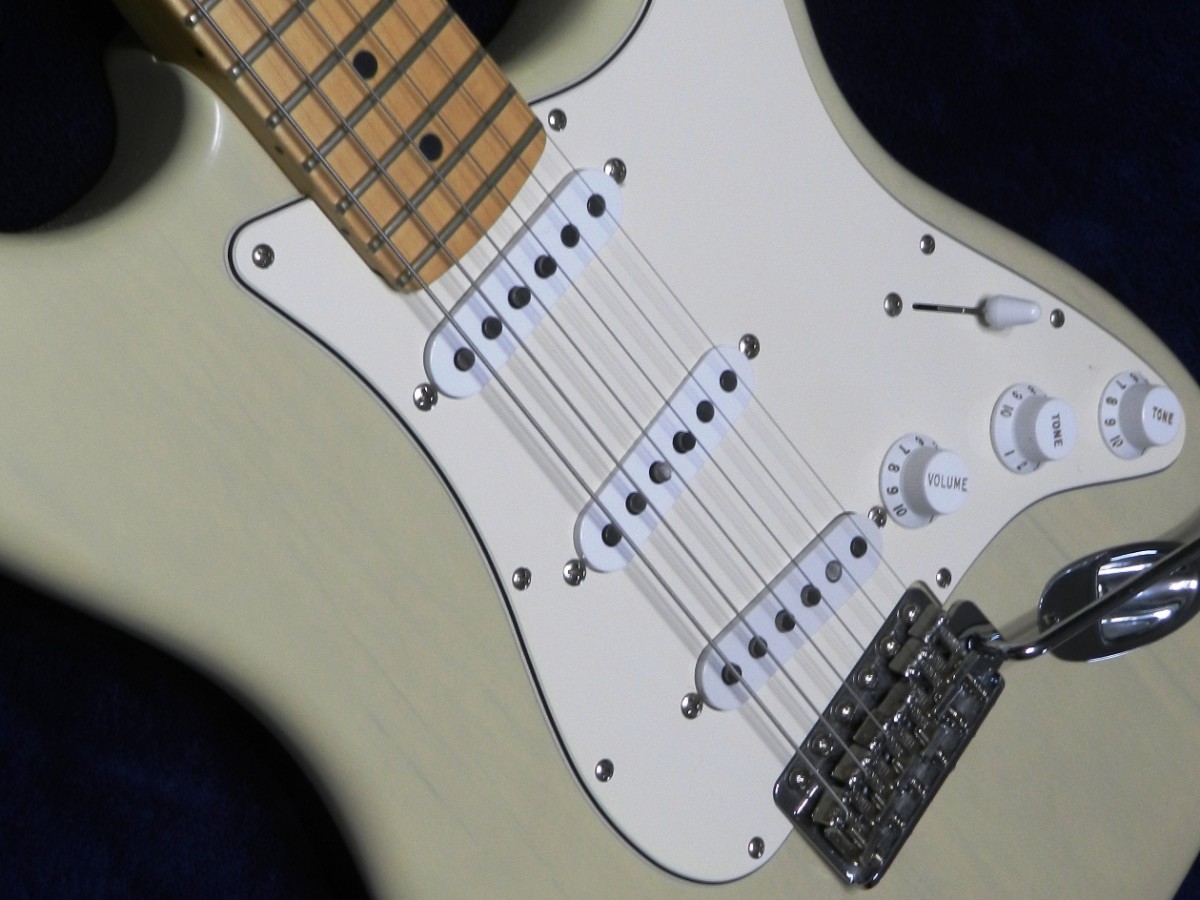
Setting the Action
The action of a guitar, referring to the height of the strings above the frets, significantly influences playability, fretting ease, and overall comfort for the guitarist. When setting up an electric guitar with a 12-inch neck radius, achieving the optimal action height is crucial for ensuring a smooth and responsive playing experience.
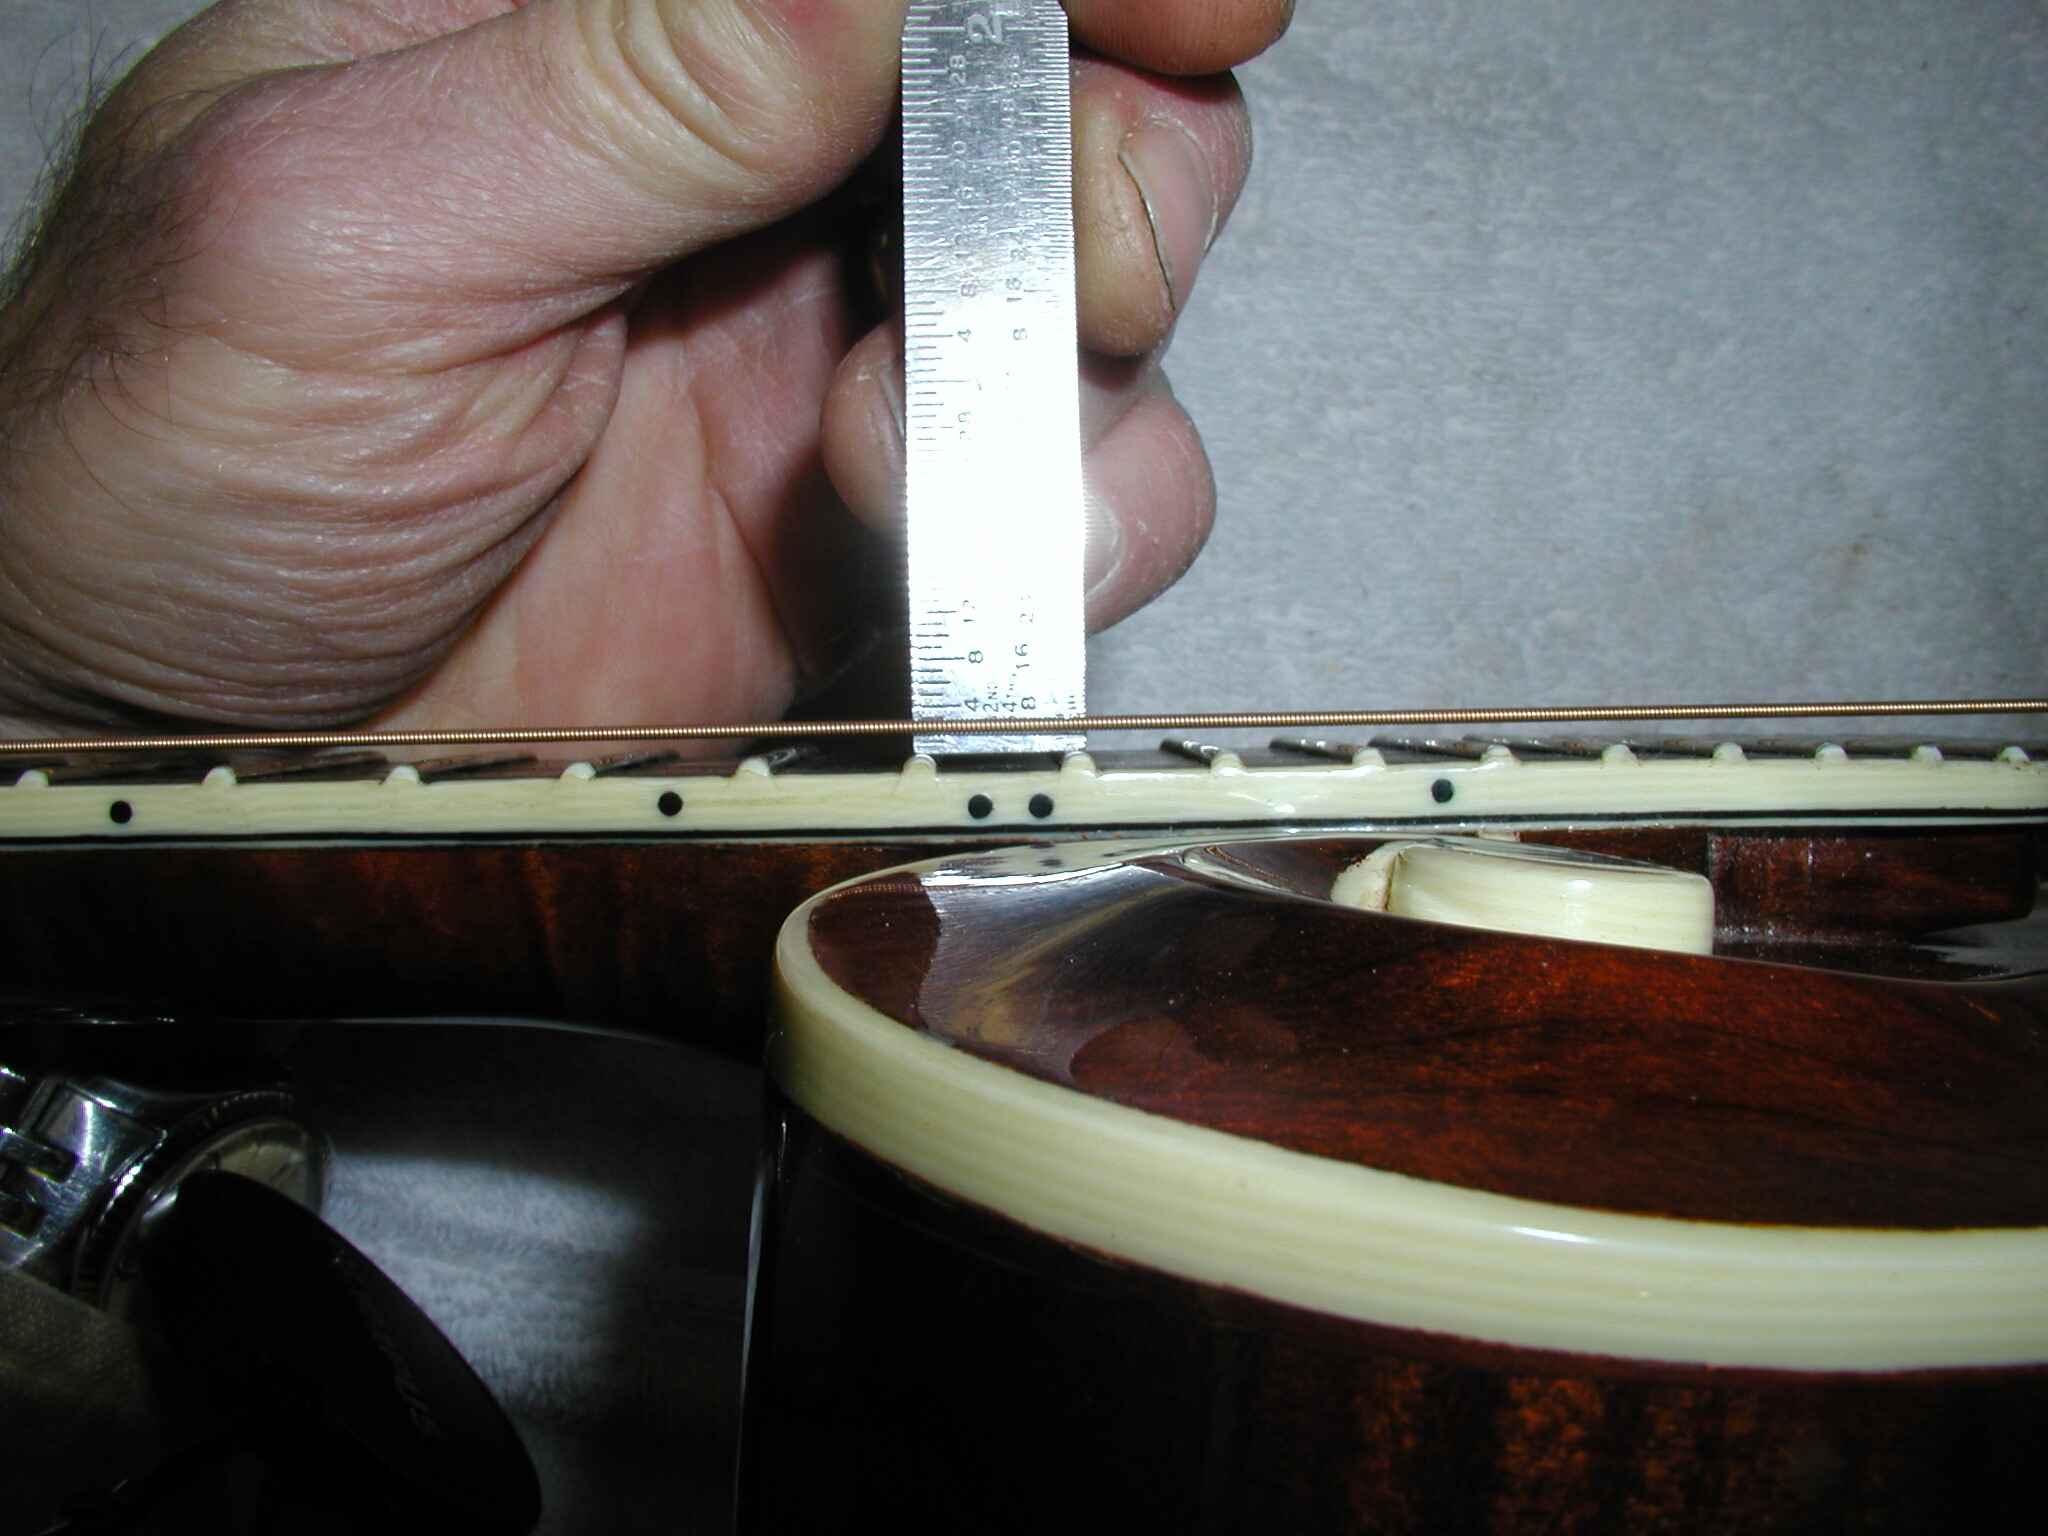
Measuring the Action: Using a feeler gauge, the action height is typically measured at the 12th fret. This measurement provides a reference point for assessing the string height and making necessary adjustments to achieve the desired action.
Bridge and Nut Adjustments: The action height can be adjusted at both the bridge and the nut to ensure uniform string height across the fretboard. Bridge saddles are typically adjustable, allowing for individual string height adjustments, while the nut slots can be carefully filed to achieve the desired string height at the first fret.
Considering Playing Style: When setting the action, it’s important to consider the player’s preferred playing style. Lower action is often favored by lead guitarists, as it facilitates faster playing and string bending, while rhythm guitarists may prefer slightly higher action for enhanced note sustain and chording comfort.
String Gauge and Tension: The choice of string gauge and tension can influence the ideal action height. Lighter gauge strings and lower tension may allow for lower action without fret buzz, while heavier gauge strings and higher tension may require slightly higher action to prevent fretting out.
Testing and Fine-Tuning: After making initial adjustments to the action height, it’s essential to test the playability of the instrument across different fretboard positions. This hands-on approach allows for fine-tuning the action to ensure consistent string response and fretting comfort throughout the entire range of the instrument.
By meticulously setting the action to complement the 12-inch neck radius, guitarists can tailor the playability of the instrument to their specific preferences, whether they favor lightning-fast leads or soulful chord progressions. Achieving the optimal action height is a key element in the setup process, contributing to a personalized and enjoyable playing experience on the electric guitar.
Adjusting the Intonation
Intonation is a critical aspect of guitar setup that directly impacts the instrument’s ability to play in tune across the entire fretboard. When setting up an electric guitar with a 12-inch neck radius, adjusting the intonation is essential for ensuring accurate pitch and harmonic balance, especially when playing chords and melodies at different positions on the neck.
Understanding Intonation: Intonation refers to the accuracy of the guitar’s pitch at various fret positions. Proper intonation ensures that the open strings and fretted notes produce consistent and in-tune pitches, allowing for harmonic clarity and accurate musical expression.
Using a Reliable Tuner: Before adjusting the intonation, it’s crucial to ensure that the guitar is accurately tuned using a reliable electronic tuner. This serves as the reference point for making precise intonation adjustments.
Checking Open String Pitch: By comparing the open string pitch to the 12th fret harmonic or fretted note, any discrepancies in pitch can be identified. If the fretted note is sharp compared to the open string, the saddle position needs to be adjusted to lengthen the vibrating length of the string, and vice versa if the fretted note is flat.
Adjusting Saddle Position: Electric guitars with adjustable bridge saddles allow for individual string intonation adjustments. By moving the saddle forward or backward, the vibrating length of the string is altered, bringing the fretted notes into proper pitch alignment with the open strings.
Fine-Tuning and Rechecking: After making initial saddle adjustments, it’s essential to recheck the open string and fretted note pitches, making further adjustments as needed. This iterative process ensures that the intonation is accurately set across all strings and fret positions.
Playing Test: Once the intonation adjustments are made, testing the guitar’s playability and tonal balance across different fret positions is crucial. Playing chords, scales, and melodies at various locations on the neck allows for assessing the accuracy of the intonation and making any final tweaks if necessary.
By meticulously adjusting the intonation to complement the 12-inch neck radius, guitarists can ensure that their instrument delivers precise and in-tune performance across the entire fretboard. Proper intonation not only enhances the musicality of the guitar but also facilitates expressive playing and harmonic richness, making it a crucial element in the setup process.
Final Check and Test Play
As the setup process for an electric guitar with a 12-inch neck radius nears completion, a comprehensive final check and test play are essential to ensure that the instrument delivers the desired playability, tonal characteristics, and overall performance. This stage serves as a critical quality control measure, allowing guitarists to assess the effectiveness of the adjustments made and make any final refinements before putting the instrument into regular use.
Visual Inspection: A visual examination of the guitar is the first step in the final check. This involves inspecting the overall condition of the instrument, verifying the cleanliness of the fretboard, ensuring the integrity of the hardware, and confirming that all adjustments have been made to the desired specifications.
String Action and Neck Relief: Using a feeler gauge and ruler, the string action and neck relief are measured and verified to ensure that they align with the intended setup parameters. Any deviations from the desired action height or neck curvature are addressed through further adjustments if necessary.
Intonation Verification: The intonation of the guitar is rechecked using a reliable tuner, verifying that the open strings and fretted notes produce accurate and consistent pitches across the entire fretboard. Any discrepancies in intonation are corrected through saddle adjustments to achieve optimal pitch alignment.
Playability Assessment: Test playing the guitar across different musical styles, techniques, and fret positions is crucial for evaluating its playability and responsiveness. This involves playing chords, scales, and melodies to assess the instrument’s comfort, string response, and tonal balance, allowing for the detection of any remaining setup issues.
Tuning Stability: Ensuring that the guitar maintains stable tuning across all strings and fret positions is essential for assessing the effectiveness of the setup. Tuning stability is evaluated through vigorous string bending, tremolo use, and playing techniques that may impact the tuning integrity of the instrument.
Listening Test: Listening to the guitar’s acoustic and amplified sound is an integral part of the final check. This involves evaluating the instrument’s tonal characteristics, sustain, and resonance to ensure that it delivers the desired sonic qualities across different playing styles and musical genres.
By conducting a thorough final check and test play, guitarists can confidently ascertain that their electric guitar with a 12-inch neck radius is set up to meet their specific preferences and performance needs. This meticulous quality assessment ensures that the instrument is primed for musical expression, delivering exceptional playability and tonal versatility.
Conclusion
Setting up an electric guitar with a 12-inch neck radius is a meticulous process that demands attention to detail, technical proficiency, and a keen understanding of the instrument’s mechanics. By comprehensively adjusting the truss rod, setting the action, fine-tuning the intonation, and conducting a thorough final check, guitarists can tailor their instrument to deliver optimal playability, tonal richness, and expressive performance.
Understanding the significance of the 12-inch neck radius and its impact on playability and tonal characteristics is essential for crafting a personalized playing experience that resonates with the guitarist’s musical style and preferences. The moderate curvature of the 12-inch neck radius strikes a balance between comfortable chording and smooth lead playing, offering versatility and adaptability across various musical genres and playing techniques.
Throughout the setup process, the careful selection and use of specialized tools and materials, combined with a systematic approach to adjustments, are crucial for achieving precise and tailored results. From truss rod adjustments to saddle positioning and intonation fine-tuning, each step contributes to the overall playability and sonic performance of the electric guitar.
Ultimately, the goal of setting up an electric guitar with a 12-inch neck radius is to create an instrument that serves as a seamless extension of the guitarist’s musical expression. The optimized playability, tonal balance, and tuning stability achieved through meticulous setup efforts empower guitarists to explore new musical horizons, express their creativity with confidence, and unlock the full potential of their instrument.
By mastering the art of guitar setup and customization, guitarists can forge a deeper connection with their instrument, fostering a symbiotic relationship that enhances their musical journey. Whether strumming soulful chords, unleashing scorching solos, or exploring new sonic landscapes, a well-set-up electric guitar with a 12-inch neck radius becomes an invaluable companion, inspiring and empowering musicians to reach new heights of artistic expression.