Introduction
The Zoom H4N Pro is a versatile and powerful handheld recorder that offers professional-grade audio recording capabilities. However, did you know that you can also use it as a USB microphone? This allows you to utilize the H4N Pro’s exceptional audio quality for computer-based applications such as podcasting, voiceovers, video conferencing, and more.
In this article, we will guide you through the process of using the Zoom H4N Pro as a USB microphone. We will cover everything from connecting the device to your computer, selecting the USB Audio Interface mode, adjusting the audio settings, configuring the recording settings, and troubleshooting common issues.
Whether you’re a content creator, musician, or simply looking to improve your audio quality for online communication, the Zoom H4N Pro can be an excellent choice. By using it as a USB microphone, you can harness its exceptional audio capabilities and enhance your recorded or live sound.
So, if you’re ready to take your audio recording and communication to the next level, let’s dive into the process of using the Zoom H4N Pro as a USB microphone.
Connecting the Zoom H4N Pro to your computer
Before you can start using the Zoom H4N Pro as a USB microphone, you first need to connect it to your computer. Here are the steps to do so:
- Ensure that the Zoom H4N Pro is powered off.
- Locate the USB port on the device. It is typically found on the bottom or side of the recorder.
- Take the included USB cable and connect one end to the USB port on the Zoom H4N Pro.
- Connect the other end of the USB cable to an available USB port on your computer.
- Once the cable is securely connected, power on the Zoom H4N Pro.
After following these steps, your Zoom H4N Pro should be successfully connected to your computer as a USB microphone. The device will be detected by your computer’s operating system, and you can proceed with configuring the audio settings for optimal performance.
It’s worth noting that the Zoom H4N Pro can also be used as a standalone recorder, independent of your computer. This versatility makes it a valuable tool for capturing high-quality audio in various scenarios.
In the next section, we will explore how to select the USB Audio Interface mode on the Zoom H4N Pro, which is crucial for utilizing the device as a USB microphone with your computer.
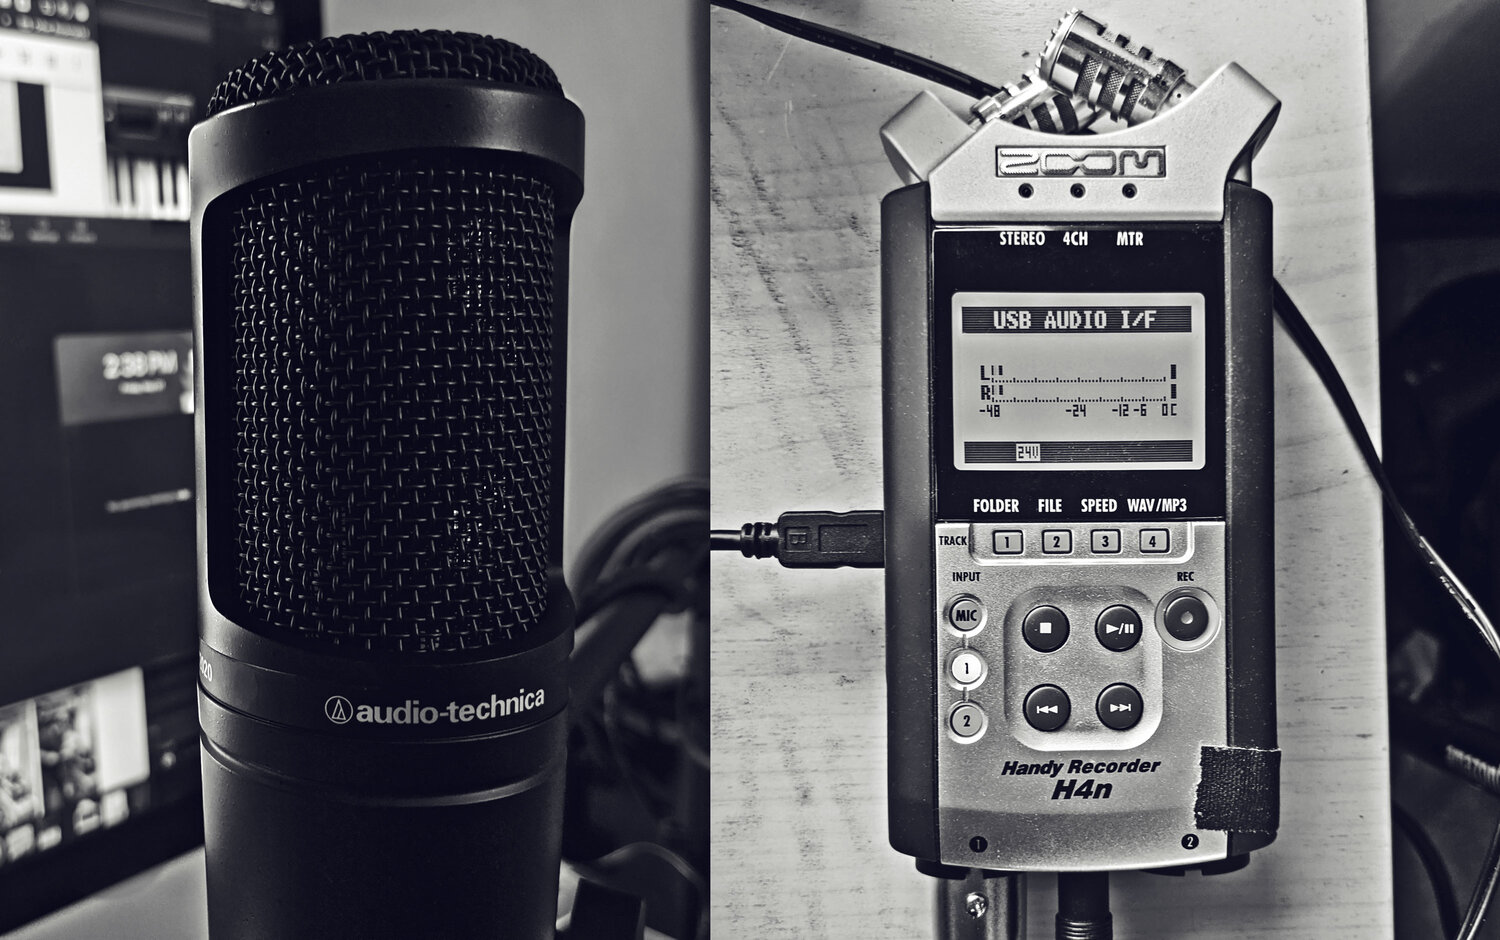
Selecting the USB Audio Interface mode on the Zoom H4N Pro
In order to use the Zoom H4N Pro as a USB microphone, you need to select the USB Audio Interface mode on the device. This mode allows the H4N Pro to function as an audio input/output device for your computer. Follow these steps to select the USB Audio Interface mode:
- Make sure the Zoom H4N Pro is powered on and connected to your computer via the USB cable.
- On the H4N Pro, navigate to the ‘Menu’ by pressing the ‘Menu’ button.
- Using the scroll wheel, select ‘USB’ and press the scroll wheel to confirm.
- Select ‘Audio I/F’ and press the scroll wheel again.
- Choose ‘Audio I/F’ from the available options and press the scroll wheel to confirm.
Once you have selected the USB Audio Interface mode, the Zoom H4N Pro will be recognized as a USB microphone by your computer. You can now proceed to adjust the audio settings on your computer to ensure optimal recording or communication quality.
It’s important to note that the exact steps and menus may vary slightly depending on the firmware version of your Zoom H4N Pro. However, the overall process should remain similar. Consult the device’s user manual or the Zoom website for specific instructions if needed.
In the next section, we will guide you through adjusting the audio settings on your computer to work seamlessly with the Zoom H4N Pro as a USB microphone.
Adjusting the audio settings on your computer
After connecting the Zoom H4N Pro to your computer and selecting the USB Audio Interface mode, it’s time to adjust the audio settings on your computer to ensure optimal recording or communication quality. Follow these steps to adjust the audio settings:
- Open your computer’s sound settings. This can usually be done by right-clicking on the volume icon in the taskbar and selecting “Sound” or by accessing the system settings or control panel.
- Select the input or recording tab in the sound settings menu.
- Locate the Zoom H4N Pro from the list of available audio input devices. It may be labeled as “Zoom H4N Pro” or “USB Audio Device”.
- Select the Zoom H4N Pro as the default audio input device.
- Adjust the input volume or gain settings, if necessary. Start with a moderate level and make adjustments as needed based on your recording environment and desired sound levels.
- Check the audio levels by speaking or making sound into the Zoom H4N Pro. The levels should show activity in the sound settings menu.
- Test the audio input by recording a short snippet or using a communication application such as a voice or video call.
By adjusting the audio settings on your computer, you ensure that the Zoom H4N Pro is properly recognized as the audio input device and that the volume levels are appropriately set. This allows you to capture clean and high-quality audio with the H4N Pro as a USB microphone.
Depending on your specific operating system and audio settings interface, the steps and terminology may vary slightly. Refer to the documentation or online support resources for your operating system if you encounter any difficulties.
In the next section, we will delve into configuring the recording settings on the Zoom H4N Pro for optimal performance as a USB microphone.
Configuring the recording settings on the Zoom H4N Pro
Now that you have successfully adjusted the audio settings on your computer, it’s time to configure the recording settings on the Zoom H4N Pro itself. These settings will ensure that you capture the best possible audio quality when using the device as a USB microphone. Follow these steps to configure the recording settings:
- On the H4N Pro, navigate to the ‘Menu’ by pressing the ‘Menu’ button.
- Using the scroll wheel, select ‘Rec’ and press the scroll wheel to confirm.
- Here, you can adjust various recording settings such as file format, sample rate, bit depth, and input level.
- Select the desired file format. WAV is a lossless format that offers high-quality audio, while MP3 provides compressed audio files.
- Choose the appropriate sample rate and bit depth based on your requirements. Higher values result in better audio quality but may require more storage space.
- Adjust the input level using the scroll wheel or buttons on the Zoom H4N Pro. Aim for a level that ensures your audio signal is loud and clear without clipping or distortion.
- For further customization, you can explore other recording settings such as low-cut filter, limiter, and compressor, depending on your specific needs.
Once you have configured the recording settings to your preference, the Zoom H4N Pro is ready to capture high-quality audio as a USB microphone. These settings provide you with control over the recording parameters and allow you to optimize the audio capture according to your specific requirements.
It’s important to note that the exact options and menus may vary depending on the firmware version of your Zoom H4N Pro. Consult the device’s user manual or the Zoom website for specific instructions if needed.
In the next section, we will explore the process of recording with the Zoom H4N Pro as a USB microphone.
Recording with the Zoom H4N Pro as a USB microphone
Now that you have properly connected, selected the USB Audio Interface mode, adjusted the audio settings, and configured the recording settings on the Zoom H4N Pro, you are ready to start recording as a USB microphone. Follow these steps to begin recording:
- Open your preferred audio recording software on your computer, such as Audacity, GarageBand, or Adobe Audition.
- Create a new audio track or select the existing track you wish to use for recording.
- Ensure that the input source for the track is set to the Zoom H4N Pro or USB Audio Device.
- Arm the track for recording by clicking on the record button or pressing the assigned shortcut key.
- On the Zoom H4N Pro, press the record button to start recording.
- Speak or perform into the microphone and monitor the audio levels on your recording software to ensure a strong and clean signal.
- When you have finished recording, press the record button on the Zoom H4N Pro to stop recording.
- Playback your recording to confirm the audio quality and make any necessary adjustments to the settings if needed.
By following these steps, you can effectively use the Zoom H4N Pro as a USB microphone and capture high-quality audio directly into your recording software. Whether you are recording a podcast, voiceover, or participating in a video conference, the Zoom H4N Pro provides exceptional sound reproduction and precise control over your recordings.
Remember to save your recordings in a secure location for future use and reference.
If you encounter any issues during the recording process or are experiencing audio quality problems, refer to the troubleshooting section in the next segment to address common potential difficulties.
Troubleshooting common issues
While using the Zoom H4N Pro as a USB microphone, you may encounter some common issues. Here are a few troubleshooting steps to help you address those issues:
1. No audio input: Check the audio settings on your computer and ensure that the Zoom H4N Pro is selected as the default audio input device. Also, verify that the input levels are properly set and the microphone is not muted.
2. Distorted or clipping audio: If you notice distorted or clipping audio, reduce the input level on the Zoom H4N Pro. Adjust the input gain settings until the audio signal is clean and within the acceptable range.
3. Low or muffled audio: Increase the input level on the Zoom H4N Pro to boost the audio signal. Also, check if there are any obstructions or obstacles blocking the microphone’s input or if there are any audio filters applied that may be affecting the sound quality.
4. Connectivity issues: Ensure that the USB cable connections are secure and not loose. If the Zoom H4N Pro is not being recognized by your computer, try using a different USB port or a different USB cable to rule out any potential issues.
5. Compatibility issues: Make sure that the Zoom H4N Pro is compatible with your operating system. Check the Zoom website for any firmware or driver updates that may be required for optimal performance.
6. Latency or audio delay: If you’re experiencing latency or audio delay, it might be due to the processing time of your recording software. Try adjusting the buffer size or latency settings in your software’s audio preferences to reduce the delay.
If you’ve tried these troubleshooting steps and are still encountering issues, refer to the Zoom H4N Pro’s user manual or contact their support team for further assistance. They can provide specific guidance tailored to your device and situation.
By addressing these common issues, you can ensure a smooth and trouble-free experience when using the Zoom H4N Pro as a USB microphone for your audio recording or communication needs.
Conclusion
The Zoom H4N Pro offers a seamless and efficient way to use it as a USB microphone for various applications. By following the steps outlined in this article, you can connect the H4N Pro to your computer, select the USB Audio Interface mode, adjust the audio settings, configure the recording settings, and troubleshoot common issues.
Using the Zoom H4N Pro as a USB microphone allows you to tap into its exceptional audio quality and versatility. Whether you’re a podcaster, voiceover artist, musician, or need a reliable microphone for video conferences, the H4N Pro provides professional-grade sound reproduction for your recordings.
Remember to experiment with different recording settings and tailor them to your specific needs and environment. By fine-tuning the audio settings on both the Zoom H4N Pro and your computer, you can achieve optimal sound quality and eliminate any potential issues.
Should you encounter any difficulties or need additional support, consult the Zoom H4N Pro’s user manual or reach out to their customer support team for guidance. They can provide specific solutions based on your device and circumstances.
Now that you have a good understanding of using the Zoom H4N Pro as a USB microphone, you can unleash your creativity and elevate your audio recording and communication capabilities. Enjoy the crystal-clear sound and professional-grade performance that the Zoom H4N Pro offers, and embrace the possibilities it brings to your audio projects.