Introduction
Welcome to the world of acoustic guitar playing! Whether you’re a complete beginner or have some experience with other instruments, learning to play the acoustic guitar is an exciting and rewarding journey. The acoustic guitar is known for its beautiful sound and versatility, making it a popular choice for musicians of all genres.
In this article, we will guide you through the basics of playing an acoustic guitar. From choosing the right instrument to developing proper technique, we’ll provide you with all the information you need to kickstart your guitar-playing adventure.
Playing the acoustic guitar offers endless possibilities for self-expression and creativity. Whether you aspire to strum along to your favorite songs, write your own music, or perform on stage, learning this instrument opens up a world of musical opportunities. With dedication and practice, you’ll be amazed at how quickly you can progress.
While it may seem daunting at first, we assure you that learning to play the acoustic guitar is well within your reach. With the right mindset, patience, and a solid foundation, you’ll be strumming chords and playing melodies in no time.
Remember, the journey of learning the acoustic guitar is meant to be enjoyable. Embrace the process, have fun, and don’t be discouraged by any initial challenges. With consistent effort, you’ll be amazed at your progress and the joy that playing the guitar can bring.
So, let’s dive in and start your acoustic guitar journey with the first step: choosing the right instrument.
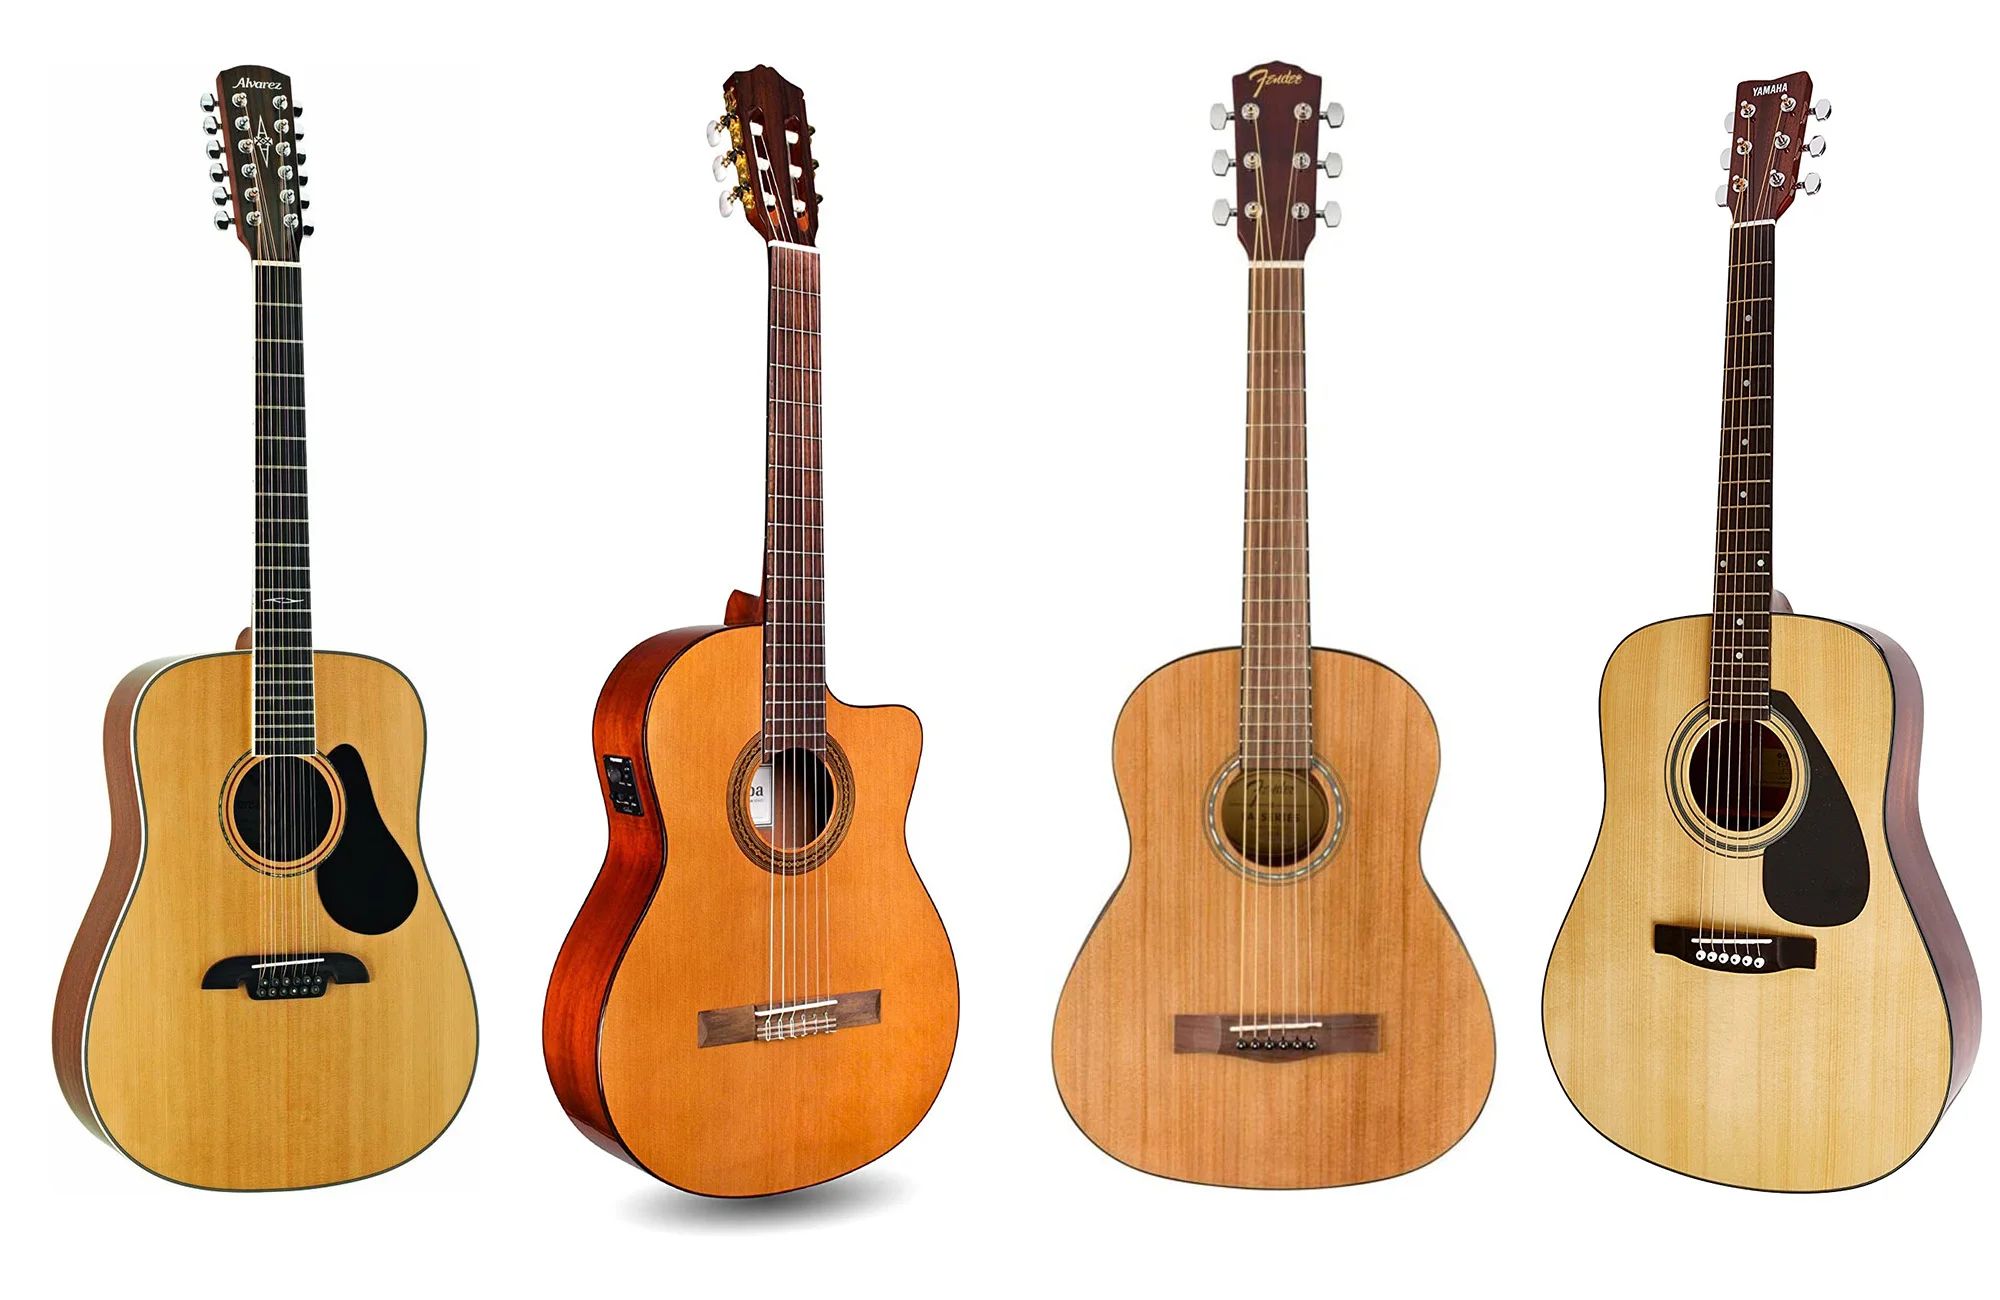
Choosing the Right Acoustic Guitar
When it comes to choosing an acoustic guitar, there are a few factors you should consider to ensure you find the right instrument for your needs and preferences.
Firstly, think about your budget. Acoustic guitars come in a wide range of price points, so it’s essential to determine how much you’re willing to invest. Remember, while a higher price often correlates with better quality, there are plenty of affordable options that still offer excellent sound and playability.
Next, consider the body style. Acoustic guitars come in various shapes and sizes, each with its own unique sound. The most common body styles include dreadnought, concert, and jumbo. Try out different styles to see which one feels most comfortable and resonates with your preferred sound.
Another crucial factor is the tonewood used for the guitar’s top, back, and sides. Different tonewoods produce distinct tones, so it’s worth researching and experimenting to find the sound that appeals to you. Popular tonewoods include spruce, mahogany, and rosewood.
Additionally, pay attention to the neck profile and width. The neck should feel comfortable in your hand, allowing for easy maneuverability across the fretboard. If possible, try out guitars with different neck profiles to find the one that suits you best.
Lastly, don’t forget to consider any additional features or accessories that may be included with the guitar. Some guitars come with built-in pickups, allowing you to plug into an amplifier for live performances or recording. Others may include a case, tuner, or extra strings, which can be convenient for beginners.
Take your time when choosing an acoustic guitar. Visit local music stores to try out different models, or research online to find reviews and recommendations. Remember, finding the right guitar is a personal decision, so trust your instincts and go with the one that feels and sounds right to you.
Now that you have chosen your acoustic guitar, it’s time to familiarize yourself with its basic parts.
Understanding the Basic Parts of an Acoustic Guitar
Before diving into playing the acoustic guitar, it’s essential to familiarize yourself with its basic parts. Knowing the terminology will not only help you communicate with other musicians but also understand how the instrument functions.
The headstock is located at the top of the guitar and houses the tuning pegs. These pegs are used to adjust the tension of the strings, allowing you to tune the guitar to the desired pitch.
Next, we have the nut, a small strip typically made of bone or synthetic material. The nut plays a vital role in establishing the string height and spacing, ensuring proper playability and intonation.
The fretboard, also known as the fingerboard, is a flat surface made of wood, typically rosewood or maple. It is divided into metal strips called frets, which enable the player to change the pitch of the strings by pressing them down onto the fretboard.
The neck is the long, thin piece that extends from the body of the guitar. It provides support for the fretboard and allows you to comfortably reach different positions on the guitar’s neck while playing chords and melodies.
The body of the acoustic guitar is where the sound is produced. It consists of a top, back, and sides. The top, also known as the soundboard, is usually made of spruce or cedar and plays a significant role in determining the guitar’s tone and resonance.
The soundhole is located on the top of the guitar’s body and allows the sound to escape, creating the acoustic guitar’s characteristic rich sound. Some guitars may also have additional soundholes, known as “soundports,” on the side, which enhance the player’s sound experience.
The bridge is a wooden component located on the lower bout of the guitar’s body. It serves as an anchor for the strings and transfers their vibrations to the soundboard, amplifying the sound. The saddle, a small strip on the bridge, helps maintain proper string height and intonation.
Finally, we have the strings, typically made of steel or nylon. Acoustic guitars usually have six strings, although variations with twelve strings or fewer strings do exist. These strings are plucked or strummed to produce different notes and chords.
By understanding the basic parts of an acoustic guitar, you’ll be better equipped to navigate the instrument and make adjustments as needed. Keep these parts in mind as we move on to tuning your acoustic guitar in the next section.
Tuning Your Acoustic Guitar
Tuning your acoustic guitar is a crucial step in ensuring it produces the right notes and sounds in harmony. Even the best guitar will sound off if it’s not properly tuned. Fortunately, tuning your guitar is a relatively straightforward process.
The standard tuning for acoustic guitars is EADGBE, starting from the thickest string to the thinnest. To begin tuning, you have several options:
1. Use an electronic tuner: Electronic tuners are convenient and accurate. Simply clip them onto the headstock or use the built-in microphone to detect the pitch of each string. The tuner will indicate whether you need to tighten or loosen the string until it reaches the correct pitch.
2. Use a smartphone app: There is a wide range of tuning apps available that work similarly to electronic tuners. Just download a reliable app, follow the instructions, and tune your guitar accordingly.
3. Tune by ear: If you have a good musical ear, you can try tuning your guitar by listening to a reference pitch. You can find online resources like pitchforks or other instruments to help you establish the correct pitch for each string.
Once you have chosen your tuning method, follow these steps:
Start with the low E string (thickest string) and match it to the reference pitch or tuner. Adjust the tuning peg until the string is in tune.
Move on to the A string and repeat the process. Match the pitch of the A string to the reference or tuner.
Continue tuning each string, moving from the thickest to the thinnest, making small adjustments until they are all in tune.
After tuning each string individually, it’s essential to check the overall harmony by strumming all the open strings. Listen carefully for any notes that sound out of place or dissonant. If necessary, fine-tune the strings to ensure they sound harmonious together.
Remember, it’s normal for your guitar to go slightly out of tune over time due to factors like temperature and humidity. Regularly check your tuning before playing to ensure the best sound quality.
Now that your guitar is properly tuned, you’re ready to start playing! In the next section, we’ll cover the correct way to hold your acoustic guitar.
Holding the Acoustic Guitar Correctly
Properly holding the acoustic guitar is essential for comfort, control, and overall playing technique. It not only allows you to play more efficiently but also prevents strain and discomfort while playing for extended periods. Let’s explore the correct way to hold your acoustic guitar.
1. Sit in a chair with a straight back or use a guitar strap if you prefer to stand. Whichever position you choose, ensure your posture is relaxed and comfortable.
2. Place the waist of the guitar on your right thigh (for right-handed players) or left thigh (for left-handed players). The back of the body should rest against your torso.
3. Hold the neck of the guitar with your left hand, using your thumb to support the neck at the back. Your fingers should be free and flexible to maneuver on the fretboard.
4. Position your right forearm so that it can comfortably reach over the top of the guitar’s body. Your right hand will be responsible for strumming or picking the strings.
5. Maintain a relaxed grip on the guitar. Your hand should not be too tight or too loose, allowing for a natural range of motion when playing chords or melodies.
6. Keep your shoulders relaxed and avoid tensing up. Tension in your body can affect your playing technique and may lead to discomfort or pain.
7. Experiment with angles and positions that feel most comfortable for you. Everyone’s body is different, so find a position that allows you to access all parts of the guitar comfortably.
Remember to take breaks and stretch if you’re playing for an extended period. Stretching your fingers, wrists, and arms can help prevent any strain caused by repetitive motions.
By holding the acoustic guitar correctly, you will have better control over the instrument and be able to execute chords, melodies, and techniques more effectively. Now that you’re in the right position, let’s move on to learning some basic guitar chords.
Basic Guitar Chords
Learning basic guitar chords is a fundamental step in becoming a proficient acoustic guitar player. Chords are the building blocks of music and allow you to play songs, create melodies, and accompany yourself or others while performing. Here are a few essential chords to get you started:
1. C Major: Place your first finger on the first fret of the B string, second finger on the second fret of the D string, and third finger on the third fret of the A string. Strum from the A string, avoiding the low E string.
2. G Major: Position your third finger on the third fret of the low E string, second finger on the second fret of the A string, and fourth finger on the third fret of the high E string. Strum from the low E string.
3. D Major: Place your first finger on the second fret of the G string, second finger on the second fret of the high E string, and third finger on the third fret of the B string. Strum from the D string, avoiding the low E and A strings.
4. E Minor: With your second finger, press on the second fret of the A string. Strum from the E string, avoiding the low E string.
5. A Major: Put your first finger on the second fret of the D, G, and B strings. Strum from the A string, avoiding the low E string.
Remember to use the tips of your fingers to press down on the strings and ensure they ring out clearly. Practice transitioning between these chords smoothly, starting with simple strumming patterns.
As you gain more confidence and dexterity, explore different chord variations like the D7, Cadd9, and G/B, among others. These variations add depth and color to your playing, allowing you to create more interesting chord progressions.
Additionally, learning barre chords, where one finger presses down across multiple strings, is a great way to expand your chord vocabulary. Barre chords can be challenging at first, but with practice, they open up a whole new range of possibilities on the guitar.
Take your time with each chord, ensuring that each string rings clearly. Practice switching between chords smoothly and gradually increase your speed. Don’t be discouraged if it takes time to master these chords—they are the foundation for many songs and will become easier with practice.
Now that you have a handful of chords under your belt, it’s time to explore different strumming techniques to bring your playing to life.
Strumming Techniques
Strumming is a vital skill for acoustic guitar players, as it adds rhythm and texture to your playing. It involves using your dominant hand (usually your right hand for right-handed players) to brush or strike the strings with a pick or your fingers. Here are some essential strumming techniques to practice:
1. Downstrokes: The most basic strumming technique, downstrokes involve strumming downward across the strings from low to high. Start by placing your hand above the strings near the soundhole and use your wrist to brush downward in a fluid motion. Aim to strum all the strings evenly.
2. Upstrokes: Upstrokes are the reverse of downstrokes. With this technique, you strum upward across the strings from high to low. Position your hand below the strings and use your wrist to brush upward. Focus on maintaining a steady rhythm and hitting all the strings cleanly.
3. Combination Strums: Experiment with combining downstrokes and upstrokes to create different rhythmic patterns. For example, you can try a common pattern called “down, down, up, up, down.” Start by practicing slowly and gradually increase your speed as you become more comfortable.
4. Palm Muting: Palm muting is a technique where you place the edge of your palm lightly against the strings near the bridge to produce a muted, percussive sound. This technique is commonly used in genres like rock, punk, and funk to add a rhythmic punch to the guitar playing.
5. Accented Strums: Accented strums involve emphasizing certain strums within a pattern by strumming with more force or hitting specific strings harder. This technique adds dynamics and can create interesting rhythmic accents in your playing.
Remember to practice each technique slowly and focus on accuracy before increasing your speed. It’s important to develop a consistent and steady rhythm as you strum. Feel free to experiment with different strumming patterns and techniques to create your unique sound and style.
While these strumming techniques are a great starting point, don’t be afraid to explore other techniques and incorporate them into your playing. As you progress, you can also experiment with fingerpicking techniques, which we’ll explore in the next section.
Fingerpicking Techniques
Fingerpicking is the art of playing the acoustic guitar using your fingers instead of a pick. It allows for greater control over individual notes and creates a more intricate and melodic sound. There are several fingerpicking techniques to explore:
1. Thumb-Index: This is a fundamental fingerpicking technique where you use your thumb to pluck the bass strings (E, A, and sometimes D), while your index finger handles the higher strings (G, B, and high E). Start by practicing a simple alternating bass pattern with your thumb while plucking the melody notes with your index finger.
2. Travis Picking: Travis picking is a popular fingerpicking pattern often used in folk and country music. It involves using your thumb to play the bass notes, while your index, middle, and ring fingers pluck the melody and harmony notes simultaneously on the higher strings.
3. Clawhammer: Clawhammer is a fingerpicking technique commonly used in folk and bluegrass music. It primarily involves strumming the strings downward with the back of your fingernails or fingertips, creating a rhythmic and percussive sound. The thumb is used to pluck the bass strings.
4. Fingerstyle: Fingerstyle is a broad term that encompasses various fingerpicking techniques, allowing you to create complex arrangements and melodies. It involves using different combinations of fingers to pluck the strings individually, creating unique patterns and textures.
As you begin to explore fingerpicking, start with simple patterns and gradually increase the complexity. Practice each pattern slowly and focus on accuracy and precision. As you become more comfortable, experiment with creating your fingerpicking patterns and incorporating them into different songs.
Remember to pay attention to your hand position, keeping your fingers relaxed and curved. Take breaks if you feel any tension or discomfort in your fingers or hand.
Fingerpicking opens up a whole new world of possibilities on the acoustic guitar, allowing you to create beautiful melodies, harmonies, and rhythms simultaneously. With time and practice, you’ll develop your unique fingerpicking style and be able to add depth and complexity to your playing.
Now that you have a solid foundation in strumming and fingerpicking, the next step is to learn how to read guitar tabs, a useful tool for learning songs and expanding your repertoire.
Learning to Read Guitar Tabs
If you’ve ever come across guitar tabs online or in guitar magazines, you may have wondered how to decipher them. Guitar tabs are a popular way to notate music specifically for the guitar, making it easier to learn and play songs. Here’s a quick guide on how to read guitar tabs:
Guitar tabs consist of six lines representing each string of the guitar. The top line represents the high E string, and the bottom line represents the low E string. Numbers on these lines indicate which frets to press down.
For example, a “0” on the E string means you play the open string without pressing down any frets. A “1” on the E string means you play the first fret, and so on. Follow the numbers from left to right to play the corresponding notes or chords.
Additionally, some tabs include other symbols and notations to provide more specific instructions:
- Hammers and Pull-Offs: A “h” indicates a hammer-on, where you play a note by hammering your finger onto the fret without plucking the string. A “p” represents a pull-off, where you pull your finger off a higher fret to sound a note on a lower fret.
- Slides: A “/” or “\\” symbol indicates a slide. Play the first note and then slide your finger up or down the fretboard to the next note.
- Bends: An upward arrow “^” indicates a bend, where you bend the string to a higher pitch. The number next to the arrow indicates how far to bend the string.
- Vibrato: A wavy line “~” represents vibrato. Move your finger back and forth on the fret to create a slight pitch variation.
- Palm Muting: A “PM” or “x” symbol indicates palm muting, where you lightly touch the strings with the palm of your hand while picking or strumming.
As you become more familiar with guitar tabs, you’ll discover that they can range from simple single-note melodies to complex chord progressions and solos. It’s essential to practice reading tabs slowly, focusing on accuracy and rhythm.
Keep in mind that guitar tabs may not always provide specific instructions on timing and rhythm, unlike standard sheet music. It’s helpful to listen to the song you’re learning and use the tabs as a guide to understanding the notes and chord positions.
Reading guitar tabs is a valuable skill that allows you to learn songs quickly and expand your repertoire. It’s a great tool for self-learning and exploring new music. With practice, you’ll be able to follow tabs with ease and play your favorite songs on the acoustic guitar.
Now that you’re equipped with the knowledge of reading guitar tabs, let’s focus on developing proper hand and finger technique to improve your playing.
Practicing Proper Hand and Finger Technique
Developing proper hand and finger technique is crucial for playing the acoustic guitar efficiently, comfortably, and without strain. Good technique not only improves your sound but also helps prevent injuries and allows for faster progress. Here are some tips to help you practice proper hand and finger technique:
1. Hand Position: Keep your hand relaxed and natural, avoiding unnecessary tension. Place your thumb behind the neck, opposite your fingers, providing stability and support. Your fingers should arch and lightly touch the strings, allowing for clear notes without muting adjacent strings.
2. Finger Placement: Use the tips of your fingers to press down on the strings, positioning them just behind the fret wires. This minimizes buzzing or muted notes and ensures a clean sound. Avoid pressing too hard to prevent unnecessary strain.
3. Finger Independence: Work on training each finger to move independently. Practice exercises that focus on individual finger strength, dexterity, and coordination. This will improve your ability to play chords, melodies, and complex fingerpicking patterns.
4. Thumb Placement: Be mindful of your thumb placement on the back of the guitar neck. Keep it centered and opposite your fingers, without extending excessively over the top. This allows for better control and agility when fretting chords and playing intricate melodies.
5. Wrist Position: Maintain a relaxed and neutral wrist position. Avoid excessive bending or cramping of the wrist, as it can lead to discomfort and strain. Keeping your wrist in alignment with your forearm will allow for smoother and more fluid movements.
6. Practice Slowly and Accurately: When learning a new technique or piece, start practicing at a slow tempo. Focus on accuracy and correct finger placement before gradually increasing your speed. This will help build muscle memory and ensure proper technique as you progress.
7. Use a Metronome: Incorporate a metronome into your practice routine. It will help you develop a sense of timing, rhythm, and consistency. Start at a comfortable tempo and gradually increase it as you become more comfortable.
Remember, proper technique takes time and patience to develop. Be mindful of any tension or discomfort in your hands and make adjustments as needed. Regular practice with a focus on technique will ultimately lead to smoother, more efficient playing.
By practicing proper hand and finger technique, you’ll improve your overall playing ability and maximize your potential on the acoustic guitar. In the next section, we’ll discuss some common beginner mistakes to avoid to ensure a smooth learning journey.
Common Beginner Mistakes to Avoid
When learning to play the acoustic guitar, it’s common to make mistakes along the way. However, being aware of these common pitfalls can help you avoid them and progress more smoothly on your guitar journey. Here are some common beginner mistakes to steer clear of:
1. Poor Posture: One of the most common mistakes is poor posture while playing. Slouching or hunching over the guitar can lead to discomfort and hinder your playing technique. Sit or stand up straight and maintain a relaxed yet attentive posture while playing.
2. Neglecting Proper Technique: It’s tempting to rush into playing songs without focusing on proper technique. Neglecting to develop correct hand position, finger placement, and posture can limit your progress and even lead to injuries. Take the time to practice and refine your technique from the beginning.
3. Skipping the Basics: Building a strong foundation is crucial. Avoid the temptation to skip over basic concepts such as learning chords, scales, and proper tuning. Mastering the fundamentals will make your learning journey smoother and more enjoyable in the long run.
4. Lack of Consistent Practice: Consistency is key to progress on the guitar. Avoid sporadic or infrequent practice sessions. Dedicate regular time to practice, even if it’s just a few minutes a day. Building a habit of consistent practice will yield better results than occasional lengthy sessions.
5. Overwhelming Yourself with Complex Songs: While it’s exciting to attempt challenging songs, starting with overly complex pieces can lead to frustration and discouragement. Begin with simpler songs and gradually work your way up. This will build your confidence and skills more effectively.
6. Fear of Making Mistakes: Mistakes are a natural part of the learning process. Don’t be afraid to make them. Embrace them as opportunities to grow and learn. Keep practicing and pushing through any difficulties you encounter.
7. Neglecting Ear Training and Music Theory: Developing your ears is just as important as mastering techniques. Train your ears to recognize melodies, chords, and intervals. Additionally, understanding basic music theory concepts will enhance your ability to learn and create music.
Remember, learning the acoustic guitar is a journey that requires patience and persistence. By avoiding these common beginner mistakes and staying committed to practicing and improving, you’ll set yourself up for success and enjoy a fulfilling experience playing the guitar.
In the next section, we’ll provide you with some essential tips to enhance your acoustic guitar playing skills further.
Essential Tips for Playing an Acoustic Guitar
Playing the acoustic guitar is a rewarding experience that requires dedication and practice. Whether you’re a beginner or have some experience, here are some essential tips to enhance your acoustic guitar playing skills:
1. Start Slow and Build a Strong Foundation: Take the time to learn the basics properly. Mastering chords, scales, and techniques at a slow pace will build a solid foundation for your playing and make it easier to progress in the long run.
2. Practice Consistently: Consistency is key to improvement. Set aside dedicated practice time and stick to it. Even short, regular practice sessions are more effective than sporadic, lengthy ones.
3. Focus on Both Technique and Musicality: While it’s important to focus on proper technique and accuracy, don’t forget about the musicality. Experiment with dynamics, expression, and phrasing to make your playing more expressive and enjoyable.
4. Experiment with Different Styles and Genres: Explore different styles and genres of music to expand your knowledge and versatility as a guitarist. This will help you develop a broader understanding and appreciation of the instrument.
5. Learn Songs You Love: Learning songs you enjoy listening to will keep you motivated and engaged. Start with simpler songs and gradually work your way up to more complex ones. Use guitar tabs, sheet music, or online tutorials to guide you.
6. Record Yourself: Recording your practice sessions or performances can provide valuable feedback. It allows you to listen to your playing objectively and identify areas for improvement. It also serves as a great way to track your progress over time.
7. Play with Others: Playing guitar with others, whether it’s jamming with friends or joining a band, can enhance your skills and develop your ability to play in a group setting. It also provides opportunities for collaboration and creative exploration.
8. Stay Patient and Persistent: Mastery of the acoustic guitar takes time and effort. Don’t get discouraged by challenges or setbacks along the way. Stay patient, celebrate small victories, and keep pushing yourself to improve.
9. Take Care of Your Guitar: Properly maintain your acoustic guitar by keeping it clean, changing strings regularly, and storing it in a suitable environment. Regular maintenance ensures optimal sound quality and prolongs the life of your instrument.
10. Enjoy the Journey: Playing the acoustic guitar is a lifelong journey of discovery and self-expression. Enjoy the process, have fun experimenting, and let your passion for music guide you. Embrace the joy that playing the guitar brings.
By incorporating these essential tips into your practice routine, you’ll enhance your acoustic guitar playing skills and make significant progress. Remember, the most important thing is to enjoy the journey and have a love for the instrument. Now, let’s address some common acoustic guitar problems and how to troubleshoot them.
Troubleshooting Common Acoustic Guitar Problems
As you play the acoustic guitar, you may encounter certain issues that can affect the instrument’s sound and playability. Here are some common acoustic guitar problems and how to troubleshoot them:
1. Fret Buzz: Fret buzz occurs when a string vibrates against a fret, producing an unwanted buzzing sound. This can be due to low action (strings too close to the fretboard) or uneven frets. Adjusting the truss rod or consulting a professional guitar technician can help resolve this issue.
2. String Slipping Out of Tuning: If your strings keep slipping out of tune, it could be due to incorrect string winding around the tuning pegs or a problem with the guitar’s nut or bridge. Ensure that the strings are properly wound, and check for any signs of wear or damage on the nut or bridge. Consider replacing these components if necessary.
3. High Action: High action refers to strings being too far from the fretboard, making it difficult to press down on the frets. This can be caused by a variety of factors, including an improperly adjusted bridge or neck. Consult a guitar technician to make the necessary adjustments to lower the action.
4. Intonation Issues: Intonation refers to the accuracy of the guitar’s pitch across all fret positions. If certain fretted notes sound out of tune, you may have intonation problems. Adjusting the bridge saddle can help correct intonation issues. However, this is a more advanced adjustment that may require professional assistance.
5. Cracked or Damaged Body: Acoustic guitars are prone to cracks or damage from changes in humidity or accidental mishandling. Small cracks can be repaired with specialized glue, but significant damage may require the expertise of a guitar repair professional.
6. Electronics Problems: If your acoustic guitar is equipped with electronics, you may encounter issues with the output or controls. Check the battery for active pickups, ensure proper cable connections, and test different settings to identify and address any electronics-related problems.
7. Excessive String Noise: String noise when sliding or transitioning between chords can be caused by improper finger placement or excessive pressure. Focus on improving your finger positioning and applying only the necessary pressure to the strings for clear and clean transitions.
If you are unsure about how to address any of these issues or encounter other problems, it’s best to consult with a professional guitar technician who can offer expert advice and solutions.
Remember, regular maintenance, proper handling, and attentive care will help prevent many of these problems from occurring. Treat your acoustic guitar with care, and it will serve you well as you continue your musical journey.
Now, let’s move on to the next section and discuss building a repertoire of songs to play on your acoustic guitar.
Building a Repertoire of Songs
Building a repertoire of songs is an exciting and essential part of being an acoustic guitar player. It allows you to showcase your skills, entertain others, and further develop your musicality. Here’s how you can start building your own repertoire:
1. Choose Songs You Love: Begin by selecting songs that resonate with you personally. Choose tunes that inspire and excite you, as your enthusiasm will shine through in your performances.
2. Start with Simplified Versions: If a song seems too challenging at first, look for simplified versions or tutorials online. Simplifying the chords or picking patterns can help you learn and enjoy the song as you work towards more intricate arrangements.
3. Learn Songs in Different Styles and Genres: Broaden your horizons by learning songs from various styles and genres. Experiment with different rhythms, chord progressions, and picking patterns to expand your musical versatility.
4. Break Songs into Sections: Break down complex songs into smaller sections – intro, verse, chorus, bridge, and so on. Learn and practice each section separately, then gradually connect them together to play the entire song.
5. Practice Regularly: Consistent practice is vital when learning songs. Dedicate time each day to practice your repertoire, focusing on accuracy, timing, and expression. Regular practice will help you memorize songs and ensure smooth transitions between chords and sections.
6. Strive for Interpretation: Once you’ve mastered the basics of a song, add your own personal touch. Experiment with dynamics, tempo, and alternate chord voicings to interpret the song in your unique style while remaining true to its essence.
7. Incorporate Singing: If you enjoy singing, consider adding vocals to your repertoire of songs. Practice singing while playing to develop your vocal and instrumental coordination. The ability to accompany yourself on the guitar while singing adds an extra dimension to your performances.
8. Performance Practice: Seek opportunities to perform your repertoire in front of others. Whether it’s playing for family and friends or joining open mic nights, performing in front of an audience will enhance your confidence and stage presence.
Remember, building a repertoire takes time and effort, but the rewards are worth it. Keep challenging yourself with new songs and continue to expand your collection. As you learn and play more songs, you’ll gain confidence, improve your skills, and develop your unique musical style.
Now that you have the tools to build your repertoire, it’s time to embark on this exciting journey and showcase your talent on the acoustic guitar.
Conclusion
Congratulations on embarking on your acoustic guitar journey! Learning to play the acoustic guitar is a fulfilling and rewarding experience that offers endless possibilities for creativity and self-expression. By following the tips and techniques outlined in this article, you’ll be well on your way to becoming a skilled acoustic guitar player.
Remember, building a solid foundation is key. Take the time to choose the right guitar, understand its parts, and learn how to tune it accurately. Focus on proper hand and finger technique, both for strumming and fingerpicking, to ensure clean and precise playing. Develop your skills in reading guitar tabs, practice regularly, and be patient with yourself as you progress.
Building a repertoire of songs is an exciting part of the journey. Choose songs you love, start with simplified versions, and gradually challenge yourself with more complex arrangements. Practice consistently, strive for interpretation, and consider incorporating singing to enhance your performances.
Along the way, you may encounter common acoustic guitar problems. Troubleshoot these issues and take proper care of your instrument to ensure its longevity and optimal sound quality.
Remember to enjoy the process, embrace challenges, and celebrate each milestone as you continue to grow and improve. Whether you aspire to play for personal enjoyment, perform on stage, or write your own music, the acoustic guitar offers a versatile and fulfilling musical experience.
So, keep practicing, exploring new techniques, and expanding your repertoire. Your dedication and passion for playing the acoustic guitar will shine through and bring joy to both yourself and others. Best of luck on your musical journey!